
Chapter Objectives After studying this chapter you will be able to Check a cars fluid levels Explain the importance of vehicle maintenance Locate fluid leaks Replace engine oil and filter ID: 481371
Download Presentation The PPT/PDF document "9 Vehicle Maintenance, Fluid Service, an..." is the property of its rightful owner. Permission is granted to download and print the materials on this web site for personal, non-commercial use only, and to display it on your personal computer provided you do not modify the materials and that you retain all copyright notices contained in the materials. By downloading content from our website, you accept the terms of this agreement.


Slide1Slide2
9
Vehicle Maintenance, Fluid Service, and Recycling
ChapterSlide3
ObjectivesAfter studying this chapter, you will be able to:Check a car’s fluid levels.
Explain the importance of vehicle maintenance.Locate fluid leaks.
Replace engine oil and filter.
Change automatic transmission fluid and filter.Slide4
ObjectivesPerform a grease job.Inspect for general problems with hoses, belts, and other components.
Demonstrate safe practices while working with vehicle fluids.Correctly answer ASE certification test questions on fluid service and vehicle maintenance. Slide5
Vehicle FluidsEngine oilCoolant
Brake fluidTransmission fluidOther liquidsSlide6
Lubrication ServiceChecking fluid levels and conditionsAdding fluids as needed
Changing engine oil and filterChanging automatic transmission fluid
Lubricating (greasing) chassis parts constructed with grease fittings
Locating liquid leaks and other obvious problems
Following state regulations for recycling and disposal of waste fluidsSlide7
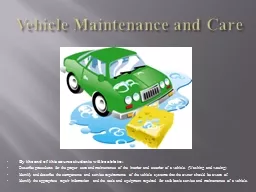
Vehicle MaintenanceIncludes any operation that will keep vehicle in good operating conditionNo proper care
Automobile life may be reducedSlide8
Fluid Service
Check service manual
Location of all fluid checkpoints and fill points
Interval between fluid checks and changes
Correct type and quantity of fluids
(VW)Slide9
Checking Engine OilWarm engineLocate and remove dipstick
Wipe off and replace itPull dipstick back out and hold over shop rag
Oil level
Between ADD (LOW) and FULL marks on dipstickSlide10
Checking Engine Oil (Cont.)Inspect condition of oilNot too thick or thin
Not too dirtyDoes not smell like gasolineOverfilling can cause oil foaming
Oil absorbs air bubbles
Reduces lubricating abilitySlide11
Adding Engine OilObtain correct oilLook for lubrication sticker in engine compartment
Use same oil as last oil change if possibleRemove oil cap
Usually located on valve cover
Install funnel
Pour slowlySlide12
Changing Engine Oil and FilterWarm up enginePut on eye or face protection and gloves
Raise vehicleKeep levelPlace catch pan under oil drain plug
Unscrew drain plug
Allow oil to drain completely
Reinstall drain plugSlide13
Changing Engine Oil and Filter (Cont.)Position catch pan under filterUnscrew filter using filter wrench
Obtain correct replacement filterWipe small amount of oil on O-ring
Tighten by hand
Never use filter wrench during installSlide14
Changing Engine Oil and Filter (Cont.)Lower vehicleAdd correct amount of fresh oil
Start engine and check oil pressure lightLet engine run and check for leaks
Shut off engine and check oil level againSlide15
Automatic Transmission/Transaxle Fluid and Filter ServiceShould be checked at specified intervalsTransmission fluid contamination
MetalDirt
Moisture
Friction materialSlide16
Checking Automatic Transmission/Transaxle Fluid Warm up engineMove gear selector through all positions
Apply parking brakePlace transmission in park and block wheels
With engine running, locate and remove transmission dipstick
Some are sealed and don’t have a dipstickSlide17
Checking Automatic Transmission/Transaxle Fluid (Cont.)Wipe off dipstick and replace itPull dipstick back out and hold over shop rag
Fluid levelBetween ADD (LOW) and FULL marks on dipstickSlide18
Checking Automatic Transmission/Transaxle Fluid (Cont.)Inspect fluid for discoloration and odor
Smells burned or looks dirty, replace it
Easy
to overfill transmission
fluid
Usually requires
fraction
of
quartSlide19
Changing Automatic Transmission/Transaxle Fluid and Filter Warm up engineRaise vehicle
Remove all but one of pan boltsLoosen last pan bolt while holding pan
Allow pan to drop and catch fluid in catch pan
(Subaru)Slide20
Changing Automatic Transmission/Transaxle Fluid and Filter (Cont.)Replace filter
Replace and seal pan gasketReinstall transmission panDrain torque converter (if recommended)
Refill transmission fluid
Shift through gears
Check for leaksSlide21
Manual Transmission Fluid ServiceTo check fluidLocate and remove transmission fill plug
FluidWarmEven with fill hole
Cold
Just below fill hole
(Chrysler)Slide22
Manual Transmission Fluid Service (Cont.)Some manufacturers suggest periodic change of manual transmission, others do notIf fluid change needed
Remove drain plugDrain fluid into catch pan
Replace drain plug
Fill with correct fluid
Lubricate gear shift mechanism and clutch releaseSlide23
Differential Fluid ServiceTo measure fluidLocate and remove differential fill plug
FluidHotEven with fill hole
Cold
Just below fill hole
To change fluid
Remove drain plug on bottom of differential
Use special siphon gun to draw out old fluid
(Subaru)Slide24
Checking Engine CoolantEngine coolantMixture of coolant and water
Must be periodically changedBecomes corrosive and filled with rust over time
Damages water pump, thermostat, and radiator
To check coolant level
Look at side of overflow tank
Between hot and cold marks
Some older cars, remove radiator cap
1
″
down in radiatorSlide25
Checking Power Steering FluidEngine offLocated in clear, plastic reservoir
Check level to side markingsSome vehicles require removal of dipstick from power steering pump
Check dipstick
If fluid is low, check for leaks
Replace as needed with correct fluid
Smells like burned rubber
Flush and replace fluidSlide26
Checking Brake FluidInspect twice yearlyLocate master cylinder
Located in clear, plastic reservoirCheck level to side markings
Some vehicles require removal of reservoir cover
1/4
″
down from top
Replace as needed with correct fluid Slide27
Checking FluidsHydraulic clutch fluidClutch master cylinder similar to brake master cylinder
If low, add brake fluidManual steering fluid
Check by removing fill plug or bolt from box or rack top
Almost even with top
If low, add recommended fluidSlide28
Checking Fluids (Cont.)Windshield washer solutionNormally visible through storage tank
Aids in cleaning and prevents ice formationReplace as needed with correct solutionSlide29
Checking BatteryNew cars use maintenance-free batteriesCheck electrolytes if needed
Clean top and terminalsBaking soda and waterSlide30
Filter serviceVarious filters may need replacing during lubrication serviceAir filters
Fuel filtersCabin filtersSlide31
Chassis LubricationInvolves greasing high-friction points on vehicleMay include lubricating locks, hinges, latches, and other body parts
Grease jobLubrication of high-friction pivot points on suspension, steering, and drive train systems using grease gunSlide32
Grease JobSlide33
Body LubricationEngine oilHard-to-reach high-friction points
GraphiteExcellent for door and trunk locksDry stick (wax) lubricant
For door latches and strikersSlide34
Body Lubrication (Cont.)Chassis greaseGood all-around lubricant
Silicone lubricantWeather stripping and windows
Canned, sprays on drySlide35
Checking TiresInspect tire treadsGrooves at least 1/8
″ deepCheck tire pressureRemove cap and check pressure with tire gauge
Compare pressure to tire specs
Add air if needed
Recheck until correctSlide36
Service IntervalsSlide37
General Inspection and Problem LocationHoseDrive belt
WiringTireSteering system
Exhaust system
BrakesSlide38
Fluid LeaksBad gaskets, seals, or hosesCracks in parts
Become familiar with different fluidsColorSmell
FeelSlide39
Fluid Leaks (Cont.)Tend to flow downward and toward rear of vehicleFix leaks located highest and farthest forward first
Badly soiledClean area to better find source of leak
Most frequent cause of leakage is broken gaskets and worn sealsSlide40
Fluid Leaks (Cont.)Stop-leak productsDesigned to recondition leaking seal
Seal torn or warpedProduct will not workCooling system products use small particles to fill leaking openingSlide41
Noise Detection and LocationAbnormal noises and unwanted soundsKnocks
ClunksRattlesClicks
Hisses
Indicate part wear or mechanical problemsSlide42
Noise Detection and Location (Cont.)To pinpoint noisesListen
Use stethoscope Use long screwdriver
Section of vacuum hoseSlide43
Auto Shop WastesUsed motor oilOther discarded lubricants
Transmission and differential fluidsUsed partsCleaners and degreasersSlide44
Auto Shop Wastes (Cont.)Carburetor and injection system cleanersRust removers
Paint thinnersWorn out batteriesTires and catalytic convertersSlide45
Auto Shop Wastes (Cont.)Facilities that generate over 220 lb. of hazardous waste monthlyFile Uniform Hazardous Waste Manifest before removing waste
No manifest needed for recycled materialsSlide46
RecyclingSome recycling materials considered hazardous waste unless destined to be recycledMotor oil
CoolantsNever mix together
Refrigerants
Never vent into atmosphereSlide47
Other RecyclablesCatalytic convertersContain platinum
Worn tiresRetreadingShredded for road resurfacing
Batteries
Make new batteries
Brake shoes
Make reconditioned brake shoesSlide48
Other Recyclables (Cont.)Small assemblies (alternators, starters, master cylinders, etc.)Rebuilt
Plastic bumpers and body partsVarious recycling options