
5 cm 58 wide White cotton eyelet edging 6 cm 2 wide White organza Cotton fabric Water soluble stabilizer Circular Embroidery Guide part 820246096 Opentoe Appliqu Foot part 8202 5096 6mm or 8202 3096 9mm Opentoe Freemotion Foot part 820544096 or 8 ID: 52097
Download Pdf The PPT/PDF document "Enchanting Blouse with Fabric Flowers pa..." is the property of its rightful owner. Permission is granted to download and print the materials on this web site for personal, non-commercial use only, and to display it on your personal computer provided you do not modify the materials and that you retain all copyright notices contained in the materials. By downloading content from our website, you accept the terms of this agreement.


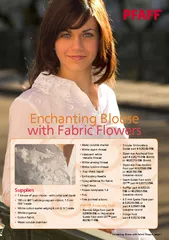
Enchanting Blouse with Fabric Flowers | page 1 Enchanting Blouse with Fabric Flowers • Water soluble marker • White rayon thread • Iridescent white metallic thread Accessory Feet • Narrow Edge Foot part # 820609-096 or Adjustable Guide Foot with IDT™ part #820677-096 Supplies • 1 • 1 (5/8”) wide • White cotton eyelet edging 6 cm (2 ½”) wide • (creative vision) • Seam Guide Foot with IDT™ part # 820772-096 • Ruf er part # 820255- 096 or #820885-096 (creative vision) • 4.5 mm Eyelet Plate part # 820238-096 or part # 82090 (creative vision) • Fringe Foot part # 820232-096 Enchanting Blouse with Fabric Flowers | page Flower 1: • Cut 2 organza squares 1 • Cut 4 water-soluble stabilizer Large ower: • Lay each layer of organza between 2 layers of water soluble stabilizer. Pin the layers together. • Use the water soluble marker to trace the ower (pattern ) onto the top layer of water soluble stabilizer. • Attach the open-toe appliqué foot. Select zigzag • Thread the machine with rayon thread and use bobbin thread in the bobbin. • Stitch along the marked ower outlines. Small ower • Repeat the steps above, but use pattern 2 to create the small ower. Making owers: • Remove the presser foot from the machine. Attach the 4.5 mm Eyelet plate. • Mark the center of each ower. Use pointed scissors to cut a small hole through all layers at the marked center. • Lay down the large ower and then the small ower over the nose of the eyelet plate. Pin the layers together along the edges of the water soluble stabilizer. • Set the presser foot lever to the Free-motion position and lower the feed dogs. • Stitch around the ower centers with a decorative satin stitch of your choice. We used this stitch. During stitching rotate slowly and evenly to make a stitched eyelet. • Place the layers in water to wash away the water soluble stabilizer. • Cut out the owers, outside the zigzag stitching. Paint the edges with fray check liquid. Assembly Instructions: Collar variation: • Remove the collar and collar stand from your blouse. Measure the upper and lower edges of the collar stand. • Attach the ruf er attachment to your machine (see instructions included with the attachment). • Thread with sewing thread in top and bobbin. • Select straight stitch (stitch length 2.5 mm). Set needle of the tucks can be adjusted with the screw. Turn the screw as far to the right as possible. • Lay the cotton eyelet edging which will be used for the ruf e in the feed slit. • Begin stitching. Make sure that the edging always runs evenly along the right side of the guide. • Gather 2 pieces of the cotton eyelet edging, cut one to the measurement of the upper edge of the collar stand and one to the measurement of the lower edge of the collar stand. Remove the ruf er from the machine. • Pin one piece of gathered edging to the outer edge of the collar stand, right sides facing. Have the each curve, as needed. • Attach the Seam Guide foot and stitch the ruf e in place. Trim the seam allowances. • Pin the second piece of gathered edging to the neck edge of the blouse, with wrong side of the edging facing the right side of the blouse. If applicable, open the upper seams on the front edges and hide the ends of the edging. Topstitch the front edges again. • Sew the collar stand to the blouse again. Cuffs: • Cut the grosgrain ribbon into 2 equal pieces. • Attach the Narrow Edge foot or Adjustable Guide Foot. • Lay each piece of grosgrain ribbon along the cuff extending at each edge of the cuff. Edgestitch the long edges of the grosgrain ribbon in place. Turn the side, twice 4 mm (/8”) wide and sew in place. New presser feet make sewing quicker and easier! Presser foot with adjustable guide for IDT™: This presser foot has a “ruler” with guide lines and an adjustable slider. It’s perfect for topstitching close to edges or hems. Seam allowance foot: With the seam allowance foot, you always stitch exactly the same distance from the edge of the fabric. This distance can be adjusted. It’s perfect for stitching the standard 5 mm (5/8”) seam allowances on garments. You can nd all products at your participating PFAFF ® dealer! Enchanting Blouse with Fabric Flowers | page Flower 4: • Cut x • Cut 2 water-soluble cm (4” x 4”) • Lay the layer of organza between the layers of water soluble stabilizer. Pin the layers together. • Use the water soluble marker to trace the ower (pattern 4) onto the top layer of water soluble stabilizer. • Attach the Open-toe appliqué foot and select zigzag stitch (stitch length 0.35 mm, stitch • Thread the machine with rayon thread and use bobbin thread in the bobbin. Flower 5: • Cut organza square 0 x 0 cm (4” x 4”) • Cut 2 water-soluble stabilizer squares 0 x 0 cm (4” x 4”) • Lay the layer of organza between the layers of water soluble stabilizer. Pin the layers together. • Use the water soluble marker to trace the ower (pattern 4) onto the top layer of the water soluble stabilizer. • Attach the Open-toe appliqué foot and select zigzag stitch (stitch length 0.35 mm, stitch width • Thread the machine with rayon thread and bobbin thread in the bobbin. • Stitch along the marked outlines. • Attach the Open-toe free-motion foot. • Set the presser foot lever to Free-motion position and lower the feed dogs. • Fill the center of the ower with small, intersecting, wavy lines. • Attach the fringe foot and raise the feed dogs. • Select zigzag stitch (stitch length 0.4 mm, stitch width 2 mm). • Stitch the ower center along the marked line Tip: Use the automatic tie-off function at the beginning and the end of the work so that the loops don’t get pulled at when the fabric is removed from the machine. • Place the layers in water to wash away the water soluble stabilizer. • Cut out the ower, outside the zigzag stitching. With fray check liquid, paint the edges and the wrong side under the fringe stitching. • Stitch along the marked outlines. • Attach the Fringe foot and select zigzag stitch (stitch length 0.4 mm, stitch width 2 mm). • First stitch the inner ower circle along the marked line, then stitch smaller and smaller circles, to the center, until the circle is completely lled. Tip: Use the automatic tie-off function at the beginning and the end of the work so that the loops don’t get pulled at when the fabric is removed from the machine. • Place the layers in water to wash away the water soluble stabilizer. • Cut out the ower, outside the zigzag stitching. Paint the edges and the wrong side under the fringe stitching with fray check liquid. Flower 6: • Hoop the cotton fabric. • Thread the machine with rayon thread and bobbin thread in the bobbin. • With pointed scissors, cut 2-3 fabric threads in the center. • Attach the 4.5 mm Eyelet plate. Press the center of the fabric (cut threads) over the nose of the eyelet plate. • Remove the presser foot from the machine. • Set the presser foot lever to the Free-motion position and lower the feed dogs. • Stitch around the ower center with a scalloped stitch. We used the following scallop stitch . During stitching rotate slowly and evenly. • Remove the fabric from the hoop. Hide the beginnings and ends of the threads. • Cut out the ower, directly outside the stitching. Paint the edges with fray check liquid. • Make 3 owers. Finishing Instructions: • Once you have completed all the owers arrange them on the blouse and tack in place.