
Apparel I Objective 402 Preparing Fabric for Sewing STEP 1 Straighten Fabric Ends To straighten WOVEN fabric Clip the selvage edge and either tear or pull a crosswise thread thread that runs from selvage to selvage and cut along space left from pulled thread ID: 330566
Download Presentation The PPT/PDF document "Prepare the Pattern and Fabric for Const..." is the property of its rightful owner. Permission is granted to download and print the materials on this web site for personal, non-commercial use only, and to display it on your personal computer provided you do not modify the materials and that you retain all copyright notices contained in the materials. By downloading content from our website, you accept the terms of this agreement.


Slide1
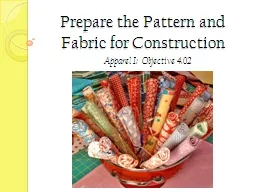
Prepare the Pattern and Fabric for Construction
Apparel I: Objective 4.02Slide2
Preparing Fabric for Sewing
STEP 1: Straighten Fabric EndsTo straighten WOVEN fabric
Clip the selvage edge and either tear or pull a crosswise thread (thread that runs from selvage to selvage) and cut along space left from pulled thread.
To straighten
KNITTED
fabric
Use crosswise row of loops to baste along
(sew with a stitch length of 6)
and cut along basting line
Slide3
Preparing Fabric for Sewing
STEP 2:
Preshrink Fabric
Zig
zag
or serge the raw ends of the fabric to prevent it from fraying when washed.
Launder the fabric just as you would the item you are going to make with the fabric. (Cleaning instructions are located on end of bolt when purchasing)
Dry the fabric just as you would the finished item.
Slide4
Preparing Fabric for Sewing
STEP 3: Straighten Fabric Grain
To
straighten or re-align the fabric grains
pull
fabric along the BIAS
to make
warp and weft threads (grains)
at 90 degree
angles.
Bias:
most stretch
Crosswise:
medium stretch
Lengthwise:
least stretch
also strongest
Warp:
Threads that run lengthwise (up and down)
Weft:
Threads that run crosswise (from selvage to selvage or right to left)Slide5
Preparing Fabric for Sewing
STEP 4: Press Fabric
When you press fabric you need to make sure you can remove the center fold line. If you cannot remove the crease then it will remain in the garment and an alternate cutting layout will be necessary
. Slide6
Preparing Fabric for Sewing
STEP 5: Fold FabricFold your fabric according to your pattern guide sheet.Slide7
Now that your fabric is ready, how do you get your pattern ready?Slide8
Pattern Preparation
The pattern guide sheet will show you which pattern pieces you will need and how to layout your pattern pieces on your fabric depending on:Width of fabricIf the fabric has napIf the fabric is directionalSlide9
Pattern Preparation Circle the pattern layout you will be using on the guide sheet
Find the pattern pieces you will be usingOn a multi-sized pattern, find your size and trace the cutting line for your size with a marker.Cut the pattern pieces out.Make adjustments where necessary. Adjustments make pattern pieces longer, shorter, wider, or more narrow (REMEMBER if you change the front of a garment you must also change the back
!).
Adjustments
are made along adjustment lines. Slide10
Pattern Preparation
Iron the pattern pieces.
Place the pattern pieces on your material EXACTLY like the pattern layout shows you.
When you layout your pattern pieces watch for
place on fold symbols
Make sure all pattern pieces are completely on the fabric
Make sure that pattern pieces are not touching or overlapping.
Make sure that the grain line on your pattern piece is in the same direction as your lengthwise grains.Slide11