
MANUAL Statement Thank you for purchasing this product ZOSI is committed to providing our customers with a high quality reliable security solution ZOSI cannot assume responsibility for any conse ID: 853211
Download Pdf The PPT/PDF document "ZOSI CAMERA USER" is the property of its rightful owner. Permission is granted to download and print the materials on this web site for personal, non-commercial use only, and to display it on your personal computer provided you do not modify the materials and that you retain all copyright notices contained in the materials. By downloading content from our website, you accept the terms of this agreement.


1 ZOSI CAMERA USER MANUAL Statement Than
ZOSI CAMERA USER MANUAL Statement Thank you for purchasing this product. ZOSI is committed to providing our customers with a high quality, reliable security solution. ZOSI cannot assume responsibility for any consequences resulting from the use thereof. Before Installation This product may require cabling. It is strongly recommended to test all the products and components prior to
2 installation. Tips These instructions a
installation. Tips These instructions aim to assist you in installation. For more instructions and details, please feel free to contact us. 1 1 APP Download and Installation 2 Software Operation Scan the QR code or search Zosi Pano (in App store or Google Play) to download the free APP, and install it on your smart phone. 2.1 Login After the Starting page, input the email address/cellp
3 hone number and Google play App store 2
hone number and Google play App store 2 2.2 Register 2.3 Reset Password After the Starting page, click the "Register" button on the next page to enter the register interface. Input the corresponding email address/cellphone number, then click the "Con�rm" button to create a password. Input the veri�cation code and the Please note: Each email can only be registered
4 once. Click "Forget Password" button on
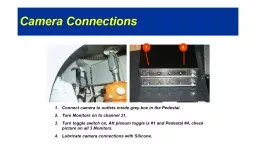
once. Click "Forget Password" button on the Login page, and enter the Reset password page. Input corresponding email address/cellphone number. Click "Confirm" button to receive the veri�cation code (check your mail box or message). Input the veri�cation code and then create a new password for 6-20 characters long. Click 3 3 Add Panoramic Camera Step 1. Connect
5 camera to the power adapter. Press the r
camera to the power adapter. Press the reset button for 5 Step 2. Run the APP. Click to choose the "Bluetooth camera". Step 3. Enter the con�guration mode. Click “Yes” if the indicator light of the camera blinks and then move on to the next step. If the light does not blink, click “No” and enter the reset interface. Reset the camera again according to the above in
6 struction steps until you hear the voice
struction steps until you hear the voice prompt to start the Step 4. APP requests to turn on Bluetooth. Click the “Allow” button and then select the device ID when the ID interface pops up. Enter the wireless con�guration interface and input the WiFi password, waiting for the network connection. During the network connecting process, create a password for the camera wh
7 en a reminding interface pops up. Choose
en a reminding interface pops up. Choose a device name and 4 5 Step 5. After successfully adding the device, click "Play" button on the main screen video. Enter the real-time monitoring screen, then you shall see the live view of the camera. And you can click the "Remote Playback" to view the playback videos. Step 1. Connect camera to the power adapter, waiting for the camera to be c
8 harged. Press the reset button for 5 sec
harged. Press the reset button for 5 seconds until you hear the sound “start 4 Add PIR Camera Step 2. Run the APP. Click Step 3. Enter the con�guration mode. Click “Yes” if the indicator light blinks and move on to next step. If the light does not blink, click “No” and enter the reset interface. Reset the camera again according to the above instruction mode
9 ; then click the "Reset successfully" t
; then click the "Reset successfully" to enter the next step. Step 4. Select device ID to enter the wireless configuration interface. Input WiFi password to connect the internet. When APP prompts “zosipano is trying to turn WLAN on or off”, click “Allow”. While connecting to WiFi, you can set password for the camera. Input the device name after connecting to the WiFi 7 Step 5
10 . After adding the device successfully,
. After adding the device successfully, click "Play" button on the main screen video. Enter the real-time monitoring screen, then you shall see the live view of the camera. And you can click the "remote playback" to view the playback videos. www.zositech.comservice@zositech.comZOSI cannot assume responsibility for any consequences resulting from the use PROFESSIONAL SECURITY MADE EASY