
ROBAslip hubsSizes 0 12B10EN08062015 GCTKGHSUChr Mayr GmbH Co KGEichenstrae 1 D87665 Mauerstetten GermanyTel 49 8341 8040 Fax 49 8341 804421Page 1of 12wwwmayrcom EMail infomayrcomPlease rea ID: 862174
Download Pdf The PPT/PDF document "Installation and Operational Instruction..." is the property of its rightful owner. Permission is granted to download and print the materials on this web site for personal, non-commercial use only, and to display it on your personal computer provided you do not modify the materials and that you retain all copyright notices contained in the materials. By downloading content from our website, you accept the terms of this agreement.


1 Installation and Operational Instruction
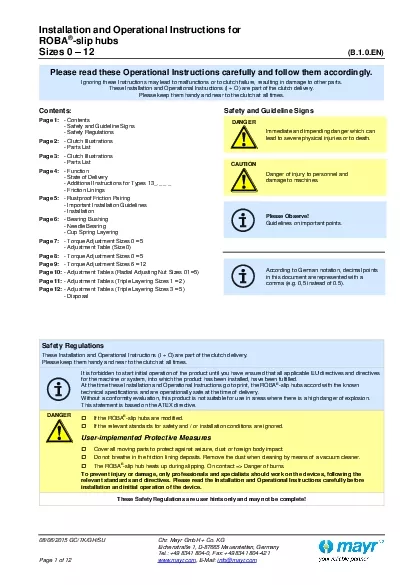
Installation and Operational Instructions for ROBA ® - slip hubs Sizes 0 â 12 (B.1.0.EN) 08/06/2015 GC/TK/GH/SU Chr. Mayr GmbH + Co. KG Eichenstraße 1, D - 87665 Mauerstetten, Germany Tel.: +49 8341 804 - 0, Fax: +49 8341 804 - 421 Page 1 of 12 www.mayr.com , E - Mail: info@mayr.com Please read these Operational Instructions carefully and follow them accordingly. Ignoring these Instructions may lead to malfunctions or to clutch failure, resulting in damage to other parts. These Installation and Operational Instructions (I + O) are part of the clutch delivery. Please keep them handy and near to the clutch at all times. Contents: Page 1: - Contents - Safety and Guideline Signs - Safety Regulations Page 2: - Clutch Illustrations - Parts List Page 3: - Clutch Illustrations - Parts List Page 4: - Fun ction - State of Delivery - Additional Instructions for Types 13_._ _ _ - Friction Linings Page 5: - Rustproof Friction Pairing - Important Installation Guidelines - Installation Page 6: - Bearing Bushing - Needle Bearing - Cup Spring Layering Page 7: - Torque Adjustment Sizes 0 â 5 - Adjustment Table (Size 0) Page 8: - Torque Adjustment Sizes 0 â 5 Page 9: - Torque Adjustment Sizes 6 â 12 Page 10: - â 5) Page 11: - Adjustment Tables (Triple Layering Sizes 1 â 2) Page 12: - Adjustment Tables (Triple Layering Sizes 3 â 5) - Disposal Safety and Guideline Signs DANGER Immediate and impending danger which can lead to severe physical injuries or to death. CAUTION Danger of injury to personnel and damage to machines. Please Observe! Guidelines on important points. According to German notation, decimal points in this document are represented with a comma (e.g. 0,5 instead of 0.5). Safety Regulations These Installation and Operational Instructions (I + O) are part of the clutch delivery. It is forbidden to start initial operation of the product until you have ensured that all ap plicable EU directives and directives for the machine or system, into which the product has been installed, have been fulfilled. At the time these Installation and Operational Instructions go to print, the ROBA ® - slip hubs accord with the known technical s pecifications and are operationally safe at the time of delivery. Without a conformity evaluation, this product is not suitable for use in areas where there is a high danger of explosion. This statement is based on the ATEX directive. DANGER ï² If the ROBA ® - slip hubs are modified. ï² If the relevant standards for safety and / or installation conditions are ignored. User - implemented Protective Measures ï² Cover all moving parts to protect against seizure, dust or foreign body impact. ï² Do not breathe in the friction lining
2 deposits. Remove the dust when cleaning
deposits. Remove the dust when cleaning by means of a vacuum cleaner. ï² The ROBA ® - slip hub heats up during slipping. On contact �= Danger of burns. To prevent injury or damage, only professionals and specialists should work on the devices, following t he relevant standards and directives. Please read the Installation and Operational Instructions carefully before installation and initial operation of the device. These Safety Regulations are user hints only and may not be complete! Installation and Operational Instructions for ROBA ® - slip hubs Sizes 0 â 12 (B.1.0.EN) 08/06/2015 GC/TK/GH/SU Chr. Mayr GmbH + Co. KG Eichenstraße 1, D - 87665 Mauerstetten, Germany Tel.: +49 8341 804 - 0, Fax: +49 8341 804 - 421 Page 2 of 12 www.mayr.com , E - Mail: info@mayr.com ROBA ® - slip hub Type series 100 ROBA ® - max Type series 170 Fig. 1 ROBA ® - min Type series 121 Type series 123 Fig. 2 ROBA ® - slip hub with needle bearing Type series 160 Fig. 3 Parts List (Only use mayr ® original parts) 1 Hub (Type 100) 2 Thrust washer 3 Adjusting nut 0 (Sizes 0 â 5) 4 Locking screw 5 Cup springs 6 Friction lining No. 1 7 Bearing bushing (Type 100) 8 Adjusting screw 9 Cup spring supporting bolt (Sizes 6 â 12) 10 Adjusting nut 2 (S izes 3 â 5) 11 Set screw (for torque adjustment) 12 Sprocket wheel 13 Lock washer 14 Adjusting nut 0 (Sizes 6 â 12) 15 Adjusting nut 1 (Sizes 0 â 5) 16 Friction lining (Type 160) 17* Friction lining No. 2 18* Rustproof disk 19 Friction lining (ROBA ® - min) 20* Friction lining Nos. 4/5 21 Hexagon nut 22 Set screw for positive - locking securement 23 Bearing bushing (ROBA ® - min) 24 Hub (Type 121) 25 Hub (Type 123) 26 Hub (Type 170) 27 Bearing bushing (Type 170) 28 Hub (Type 160) 29 Thrust washer (Type 160) 30 Needle bearing * See pages 4 and 5 When ordering replacement parts, the complete Type designation and the Size must be stated . Order example: ROBA ® - slip hub Type 100.210, Size 1, 1 set (2 pieces) of friction linings Ite m 6. 5 14 9 10 (15) 11 21 22 8 1(26) 7(27) 6 12 6 2 5 13 3 4 5 24(25) 23 19 6 2 5 13 4 5 28 30 16 16 29 5 13 4 Installation and Operational Instructions for ROBA ® - slip hubs Sizes 0 â 12 (B.1.0.EN) 08/06/2015 GC/TK/GH/SU Chr. Mayr GmbH + Co. KG Eichenstraße 1, D - 87665 Mauerstetten, Germany Tel.: +49 8341 804 - 0, Fax: +49 8341 804 - 421 Page 3 of 12 www.mayr.com , E - Mail: info@mayr.com ROBA ® - lastic Type series 135 Fig. 4 ROBA ® - lastic Type series 131 Fig. 5 ROBA ® - lastic Type series 132 Fig. 6 ROBA ® - LD Type series 133, 134 Fig. 7 Parts List
3 (Only use mayr ® original parts) 1
1")
(Only use mayr ® original parts) 1 Hub 2 Thrust washer 3 Adjusting nut 0 4 Locking screw 5 Cup springs 6 Friction lining 8 Adjusting screw 13 Lock washer 31 Claw element (Type 135) 32 Transmission flange (Type 135) 33 Cap screws (Type 135) 34 Pocket element (Type 135) 35 Rubber buffer 36 Bearing bushing 37 Flange (Type 131) 38 Flexible ring (Type 131) 39 Hub for flexible coupling (Type 131) 40 Cap screws (Type 131) 41 Transmission flange (Type 132) 42 Coupling flange (Type 132) 43 Cap screws (Type 132) 44 Flexible intermediate ring (Type 132) 45 Claw ring (Type 132) 46 Flange hub (Type 132) 47 Cap screws (Type 132) 48 Connection flange (ROBA ® - LD) 49 Connection disk (ROBA ® - LD) 50 Hexagon head screws (ROBA ® - LD) 51 Sleeve 0 (Type 133) 52 Sleeve 1 (Type 134) 53 Fitting bolts 54 Hexagon nuts 55 Disk pack 56 Hub (ROBA ® - D) When ordering replacement parts, the complete Type designation and the Size must be stated . Order example: ROBA ® - lastic Type 135.210, Size 1, 1 set (2 pieces) of fri ction linings Item 6. 5 1 36 6 31 34 8 35 33 32 6 2 4 3 13 5 5 8 1 36 6 40 38 39 37 2 6 4 6 42 43 1 46 45 44 36 41 6 9 5 50 49 8 1 36 54 53 56 51/52 55 6 48 6 2 4 3 13 5 Installation and Operational Instructions for ROBA ® - slip hubs Sizes 0 â 12 (B.1.0.EN) 08/06/2015 GC/TK/GH/SU Chr. Mayr GmbH + Co. KG Eichenstraße 1, D - 87665 Mauerstetten, Germany Tel.: +49 8341 804 - 0, Fax: +49 8341 804 - 421 Page 4 of 12 www.mayr.com , E - Mail: info@mayr.com Function (Fig. 1) ROBA ® - slip hubs are used to protect against overload in machine drives with chain sprockets or toothed wheels. The drive element (chain sprocket or similar) is pushed onto the bearing bushin g (7) and clamped between the friction linings (6) using the thrust washer (2), the cup springs (5) and the adjusting nut (3) with the lock washer (13). The more the cup springs (5) are pre - tensioned via the adjusting nut (3), the higher is the torque at which the drive element slips. For an exact description of the torque adjustment, please see pages 7 and 8. The ROBA ï - slip hub is subjected to thermal loads depending on the slipping speed, slip time and the set torque. To make sure that the ROBA ï - slip hub friction linings are not overheated or destroyed, the specified friction parameters must not be exceeded. The values presented in the reference values diagram are reference values, and represent maximum slipping speed limits of the standard fric tion linings in dry running . These speed limits refer to a maximum slip time of 1 second. For longer slip times, the slipping speed must be reduced. If in doubt, please carry out application - related friction work calculations. If the permitted slipping duration is exceeded, the ROBA ï - slip hub will be subjected to
4 overload �= Destruction of th
overload �= Destruction of the friction linings Use a slip monitor (speed monitor) to monitor the slipping speed. Reference Values Diagram (Friction Lining No. 1) Max. slipping speed n in [r pm] with reference to 1 s slip time Sizes State of Delivery ROBA ï - slip hubs are delivered pre - assembled. The cup spring layering or the number of friction linings are dependent on the Type and correspond to the respective order data stipulated by the customer. ROBA ® - slip hubs in standard delivery feature a finish bore (bore tolerance H7) and a keyway acc. DIN 6885 (keyway tolerance JS9). We recommend a k6 shaft tolerance. For other tolerances, please contact the manufacturers. If the order does not contain any information on the installation width of the drive element (sprocket wheel or similar), the bearing bushing (7) is delivered with m aximum width. Additional Instructions for Types 13_._ _ _ For all Types 13_._ _ _ , additional instructions regarding installation, permitted shaft misalignments and further technical data for the shaft coupling are part of the delivery. The following Additional Instructions are included in delivery: for Type 131: B.1.3._ _ for Type 132: B.1.1._ _ for Type 133: B.9.0._ _ for Type 134: B.9.0._ _ for Type 135: B.1.7._ _ Friction Linings As shown in Table 1 below, four different friction linings are avail able. The torque and speed values stated in the slip hubs catalogue refer to standard friction linings in dry running. For all other friction linings, please see Table 1 for the corresponding values, or request the values for the respective application. We recommend that you replace the friction linings at the latest after they have worn down by 0,5 x dimension âsâ (see Table 4 / page 6) per friction lining. Table 1 Friction lining Application A chiev able torque from M max. 1 Standard for dry running 100 % 2 Rustproof friction pairing 100 % 4 Bronze friction lining for oil running 30 % 5 Special low - friction material (only for single cup spring layering and with reduced friction) 50 % Table 2 Size Limit torque for overload [Nm] Type 100.1 - - Type 100.2 - - Type 100.3 - - 0 2 â 10 10 â 20 18 â 30 01 6 â 30 30 â 60 60 â 90 1 14 â 70 70 â 130 130 â 200 2 26 â 130 130 â 250 250 â 400 3 50 â 250 250 â 550 550 â 800 4 110 â 550 550 â 1100 1100 â 1600 5 140 â 700 700 â 1400 1400 â 2100 6 240 â 1200 1200 â 2400 - 7 400 â 2000 2000 â 4000 - 8 680 â 3400 3400 â 6800 - 9 1200 â 6000 6000 â 12000 - 10 2000 â 10000 10000 â 20000 - 11 3400 â 17000 17000 â 34000 - 12 5000
5 â 25000 25000 â 50000 -
â 25000 25000 â 50000 - n [rpm] Single cup spring layering Double cup spring layering Triple cup spring layering Installation and Operational Instructions for ROBA ® - slip hubs Sizes 0 â 12 (B.1.0.EN) 08/06/2015 GC/TK/GH/SU Chr. Mayr GmbH + Co. KG Eichenstraße 1, D - 87665 Mauerstetten, Germany Tel.: +49 8341 804 - 0, Fax: +49 8341 804 - 421 Page 5 of 12 www.mayr.com , E - Mail: info@mayr.com Rustproof Friction Pairing In wet ambient conditions the standard friction lining might form a rust compound with grey iron and steel surfaces. This could increase the slipping torque substantially. Therefore, it is possible to equip ROBA ® - slip hubs with a rustproof friction pairing (friction lini ng No. 2). This pairing consists of two rustproof steel disks (Item 18), which are secur ed in the slip hub, and t wo special friction linings (Item 17), which do not stick (Fig. 8). Fig. 8 Important Installation Guidelines ï² The bores, shafts, friction linings and friction surfaces on the drive element must be grease and oil - free . ï² Shaft surface: finely turned or ground (Ra = 0,8 µm) Shaft material : Yield point at least 350 N/mm 2 . Installation The installation sequence can be seen in the exploded drawings Figs. 1 to 7, or Fig. 9 for needle bearing design. For adjusting nut (Item 3) installation, the adjusting nut thread and the lock washer must be greased lightly. Please make sure that the cup spring layering is correct (see also section Cup Spring Layering)! Make sure that no grease gets onto the friction linings! When installing ROBA ® - lastic Types, please also use the Installation Instructions for the flexible coupling. The slip hub can be secured axially onto the motor shaft end using a set screw (Item 8, Fig. 1) or, as shown in Fig. 11, using a press cover. ROBA ® - slip hubs in standard delivery feature a finish bore (bore tolerance H7) and a keyway acc. DIN 688 5 (keyway tolerance JS9). We recommend a k6 tolerance for the shaft (see Fig. 11). Please make sure that the drive element is plane parallel and has a finely ground surface in the bore area or in the area of the friction surfaces (see Fig. 10 and Table 3). Fig. 9 Fig. 10 Table 3 Size X [mm] Y [mm] 0 â 2 0,05 0,10 3 â 5 0,08 0,15 6 â 8 0,10 0,20 9 â 12 0,12 0,30 Fig. 11 ground ground 17 1 7 18 18 17 2 Ø d A H 7 k 6 28 30 16 12 29 X b A Y A A 0 , 8 1,6 0 , 8 Ø d H 8 Ø d 0 Ø d k Installation and Operational Instructions for ROBA ® - slip hubs Sizes 0 â 12 (B.1.0.EN) 08/06/2015 GC/TK/GH/SU Chr. Mayr GmbH + Co. KG Eichenstraße 1, D - 87665 Mauerstetten, Germany Tel.: +49 8341 804 - 0, Fax: +49 8341 804 - 421
6 Page 6 of 12 www.mayr.com , E -
Page 6 of 12 www.mayr.com , E - Mail: info@mayr.com Bearing Bushing (Items 7, 23, 27) If the order does not contain any information on the installation width of the drive element (chain sprocket or similar), the bearing bushing (7) is delivered for a maximum installation width (b max ). If a smaller installation width is required, the bearing bushing must be s hortened accordingly on the end without the inner chamfer. The bearing bushing must be mounted with the inner chamfer facing forward, as shown in Fig. 12. Fig. 12 Bearing bushing width standard friction pairing = installation width + 1,5 x friction lining thickness + 0,5 mm Bearing bushing width rustproof friction pairing = Installation width + 1,5 x friction lining thickness + 2 x width rustproof disk + 0,5 mm For high radial load and high slipping fr equency, we recommend using a slip hub with needle bearing. Needle Bearing (30) As it is not possible to adjust the needle bearing (30) length to the installation width âbâ, the installation width âbâ on Type 160 is predefined (see Table 4). Please bore t he drive element using a bore tolerance of N7, and press it onto the needle bearing as shown in Fig. 9. Table 4 Size Friction lining thickness âsâ [mm] Width of the drive element âbâ Type 160 [mm] 1 3 7 2 3 10,3 3 4 12,5 4 4 16 5 5 18 Cup Spring Layering Correct cup spring layering is a prerequisite for problem - free clutch function and torque adjustment. In Figs. 13 to 19, the respective cup spring layering arrangements dependent on the size are shown. Rule of thumb: ROBA ï - slip hub Type 1_ _.1_ _ for high friction work and low torque values (cup springs are single - layered, single contact force). ROBA ï - slip hub Type 1_ _.2_ _ for medium friction work and higher torque values (cup springs are double - layered, double contact force). ROBA ï - slip hub T ype 1_ _.3_ _ for low friction work and very high torque values (cup springs are triple - layered, triple contact force). Fig. 13 Sizes 0 â 5 Single layering Fig. 14 Sizes 0 â 5 Double layering Fig. 15 Sizes 0 â 2 Triple layering Sizes 3 â 5 Triple layering Fig. 16 Fig. 17 Size 6 â 12 Fig. 18 Fig. 19 Single layering Double layering Inner chamfer Bearing bushing 9 14 9 14 14 9 14 9 Installation and Operational Instructions for ROBA ® - slip hubs Sizes 0 â 12 (B.1.0.EN) 08/06/2015 GC/TK/GH/SU Chr. Mayr GmbH + Co. KG Eichenstraße 1, D - 87665 Mauerstetten, Germany Tel.: +49 8341 804 - 0, Fax: +49 8341 804 - 421 Page 7 of 12 www.mayr.com , E - Mail: info@mayr.com Torque Adjustment Sizes 0 â 5 Both ambient conditions and longer downtime
7 s can influence the set slipping torqu
s can influence the set slipping torque. On triple layering, more slipping torque scattering might occur specific to the respective load. The values in the Adjustment Table are only reference values. During initial adjustment, please let the ROBA ® - slip hub slip several times at 50 % of the maximum torque in order to achieve a clear friction lining wear pattern. Depending on the slipping frequency, occasional re - adjustment is necessary due to friction lining wear. Due to cup spring tolerances, the torque adjustment values can only be considered reference values. Torque adjustment on standard adjusting nut (3) Cup springs (5) s ingle - layered or double - layer ed There are 12 markings engraved on the thrust washer (2) facing side (Size 0: 24 markings), and 4 markings engraved on the adjusting nut (3) (Fig. 20). 1. Unscrew the locking screw (4) from the adjusting nut (3). 2. The adjusting nut (3) with lock washer (13) is adjusted by hand up to contact on the cup springs (5). The 4 markings and the markings on the thrust washer (2) must align. 3. Turn the adjusting nut (3) further to the number of graduation lines which relates to the required slipping torque. For the number of graduation lines that need to be adjusted, dependent on the torque, please see the Adjustment Table . The Adjustmen t Table is adhered to the clutches Sizes 01 to 5. For Size 0, the Adjustment Table is printed in the Installation and Operational Instructions (Table 5). 4. Secure the adjusting nut (3) by screwing in the locking screw (4). Fig. 20 Example: On a slip hub Size 0 with single - layered cup springs, a torque of 5 Nm must be adjusted. Table 5 shows that 8 graduation lines are required for this. After torque adjustment is completed, the adjusting nut must be secured by screwing in the locking screw (4). Table 5: Adjustment Table for Size 0 / Type 1_ _._10 ROBA ® - RN Size 0 ______________________ Surface - ground chain sprocket for friction lining No. 1 run - in condition Turn the nut up to CS ( cup spring ) contact , then count TS. 24 TS = 1 turn 2 TS Single CS / \ Nm 2 4 5 6 8 10 TS 4 6 8 10 13 16 Double CS // Nm 9 12 15 17 20 T S 4 5 6 7 8 Triple CS /// Nm 18 23 26 30 T S 5 6 7 8 Thread for removing the slip hub from the shaft Equals one graduation line One full turn equals 12 graduation lines or 24 graduation lines on Size 0. 2 3 4 Installation and Operational Instructions for ROBA ® - slip hubs Sizes 0 â 12 (B.1.0.EN) 08/06/2015 GC/TK/GH/SU Chr. Mayr GmbH + Co. KG Eichenstraße 1, D - 87665 Mauerstetten, Germany Tel.: +49 8341 804 - 0, Fax: +49 8341 804 - 421 Page 8 of 12 www.mayr.com , E - Mail: info@mayr.com Torque adju
8 stment on cup springs triple - layered S
stment on cup springs triple - layered Sizes 0 â 5 (Figs. 15 and 16) The ROBA ® - slip hubs with triple cup spring layering do not have an Adjustment Table adhered to them. For these Types, the Adjustment Tables on pages 11 and 12, as well as Table 5 on page 7 for Size 0, are valid. Adjustment Sizes 0 â 2 Type 1_ _.310 adjusting nut 0 There are 12 markings engraved on the thrust washer (2) facing side and 4 markings engrave d on the adjusting nut (3) (Fig. 20). 1. Unscrew the locking screw (4) from the adjusting nut (3). 2. The adjusting nut (3) with lock washer (13) is adjusted by hand up to contact on the cup springs (5). The 4 markings and the markings on the thrust washer (2) must align. 3. Turn the adjusting nut (3) further using a face wrench to the number of graduation lines which relates to the required slipping torque. For the number of graduation lines that need to be adjusted dependent on the torque, please see Tables 5, 1 2 and 13. 4. Secure the adjusting nut (3) by screwing in the locking screw (4). Adjustment Sizes 0 â 2 Type 1_ _.311 adjusting nut 1 (for radial adjustment using hook wrench) The distance dimension âaâ in Fig. 21 indicates the size of the adjusted slipping torque independent of friction lining wear. The clutch delivery includes an Adjustment Diagram, which indicates dimension âaâ dependent on the cup spring layering for a certain slipping torque. 1. Unscrew the set screw (22) from the adjusting nut (15). 2. Turn the adjusting nut (15) using a hook wrench to the required dimension âaâ which relates to the required slipping torque. 3. The adjusting nut (15) must be secured by screwing the radially arranged set screw (22) into one of the 4 hub keyways. Clamping onto the thread as shown in Fig. 22 is not permitted . If necessary, the adjusting nut (15) may have to be turned. Adjustment Sizes 3 â 5 Type 1_ _.312 adjusting nut 2 1. Unscrew the set screw (22) from the adjusting nut (10). 2. Tighten the adjusting nut (10) until dimension âbâ, as stated in the Adjustment Table (Tables 16 â 18) is reached. 3. The adjusting nut (10) must be secured by screwing the radially arranged set screw (22) into one of the 4 hub keyways. Clamping onto the thread as shown in Fig. 22 is no t permitted . If necessary, the adjusting nut (10) may have to be turned. 4. Tighten the individual set screws (11) in the adjusting nut (10) evenly in steps of approx. 1/4 turn until dimension âaâ as stated in the Adjustment Table or the required torque is reached. 5. Counter the set screws (11) using the hexagon nuts (21). The respective keys for torque adjustment on slip hubs are available at the place of manufacture. Torque adjustment on adjusting nut for radial adjustment Sizes 01 â 5 These ROBA ® - slip hubs do not have an Adjustment Table adhered to them. The
9 distance dimension âaâ in Fig. 21 i
distance dimension âaâ in Fig. 21 indicates the size of the adjusted slipping torque independent of friction lining wear. For the respective required dimension âaâ dependent on the cup spring layeri ng for a certain slipping torque, please see the Adjustment Tables on page 9 (Tables 6 â 11). 1. Unscrew the set screw (22) from the adjusting nut (15). 2. Turn the adjusting nut (15) using a hook wrench to the required dimension âaâ which relates to the require d slipping torque. 3. The adjusting nut (15) must be secured by screwing the radially arranged set screw (22) into one of the 4 hub keyways. Clamping onto the thread as shown in Fig. 22 is not permitted . If necessary, the adjusting nut (15) may have to be turned. Fig. 21 Fig. 22 a 1 2 10/14/15 22 Installation and Operational Instructions for ROBA ® - slip hubs Sizes 0 â 12 (B.1.0.EN) 08/06/2015 GC/TK/GH/SU Chr. Mayr GmbH + Co. KG Eichenstraße 1, D - 87665 Mauerstetten, Germany Tel.: +49 8341 804 - 0, Fax: +49 8341 804 - 421 Page 9 of 12 www.mayr.com , E - Mail: info@mayr.com Torque Adjustment Sizes 6 â 12 on S tandard A djusting N ut (14) During initial adjustment, please let the ROBA ® - slip hub slip several times at 50 % of the maximum torque in order to achieve a clear friction lining wear pattern. Depending on the slipping frequency, occasional re - adjustment is necessary due to friction lining wear. On slip hubs Sizes 6 â 12, the distance dimension âaâ indicates the size of the adjusted slipping torque (Figs. 23 and 25). Torque adjustment (Figs. 23 and 24) For Sizes 6 â 8, dimension âaâ is indicated in the Adjustment Table adhered onto the clutch. For Sizes 9 â 12, an Adjustment Diagram must be requested if required. 1. Unscrew the set screw (22) from the adjusting nut (14). 2. Adjust the adjusting nut (14) including the relaxed cup spring supporting bolts (the cup spring supporting bolts (9) protrude from the adjusting nut (14)) to the required dimension âaâ using a face wrench. Here, the face wrench pilots m ust be inserted into two hexagon sockets of the cup spring supporting bolts (9) in order to turn the adjusting nut (14). Do not continue to turn the cup spring supporting bolts (9) against the snap ring resistance (Fig. 23). 3. The adjusting nut (14) must be secured by screwing the radially arranged set screw (22) into one of the 4 hub keyways. Clamping onto the thread as shown in Fig. 22 is not permitted . If necessary, the adjusting nut (14) may have to be turned. 4. Then the cup spring supporting bolts (9) are turned in evenly, in steps of approx. 1/4 turns, until they are flush with the adjusting nut (14) (Fig. 23). Torque adjustment for countered cup spring supporting bolts (Fig. 25) The clutch delive
10 ry includes an Adjustment Diagram, w
ry includes an Adjustment Diagram, which indicates dimensions âaâ and âbâ. 1. Unscrew the set screw (22) from the adjusting nut (14). 2. Adjust the adjusting nut (14) including the relaxed cup spring supporting bolts (the cup spring supporting bolts (9) protrude from the adj usting nut (14)) to the dimension âbâ using a face wrench. Here, the face wrench pilots must be inserted into two hexagon sockets of the cup spring supporting bolts (9) in order to turn the adjusting nut (14). Do not continue to turn the cup spring suppo rting bolts (9) against the snap ring resistance (Fig. 25). 3. The adjusting nut (14) must be secured by screwing the radially arranged set screw (22) into one of the 4 hub keyways. Clamping onto the thread as shown in Fig. 22 is not permitted . If necessary, the adjusting nut (14) may have to be turned. 4. Then the cup spring supporting bolts (9) are turned in evenly, in steps of approx. 1/4 turns until dimension âaâ or the required torque is reached. 5. Counter the cup spring supporting bolts (9) with t he hexagon nuts (9.1). Fig. 23 Fig. 24 Fig. 25 Cup spring supporting bolt (9) with counter nut (9.1) Adjustment Tables / Adjustment Diagrams for the torque adjustment can only be considered reference values, as they can vary substantially due to cup spring tolerances, friction value fluctuations and surface characteristics or the run - in condition of the output element. Exact torque adjustment requires manufacturer - side adjustment on a test stand (preferably using the customer - side provided output element) or direct torque measurement on the installed clutch or system. Snap ring flush Snap ring 9 14 a 9 14 9 14 9.1 b a Installation and Operational Instructions for ROBA ® - slip hubs Sizes 0 â 12 (B.1.0.EN) 08/06/2015 GC/TK/GH/SU Chr. Mayr GmbH + Co. KG Eichenstraße 1, D - 87665 Mauerstetten, Germany Tel.: +49 8341 804 - 0, Fax: +49 8341 804 - 421 Page 10 of 12 www.mayr.com , E - Mail: info@mayr.com Adjustment Tables for Adjusting Nut for Radial Adjustment on Sizes 01 to 5 The values stated in the Adjustment Tables are only reference values. Due to manufacturing tolerances, the actual torque values can in part deviate substantially from the values stated in the Table. Single cup spring layering Double cup spring layering Type 1_ _.111 Type 1_ _.211 Table 6: Adjustment Table for Size 01 with Radial Adjusting Nut (15) Single CS layering Torque [Nm] 6 10 17 21 24,5 27 29 30 Dimension âaâ [mm] 9,8 9,6 9,2 9 8,7 8,5 8,2 8 Double CS layering Torque [Nm] 20 35 46 53 60 Dimension âaâ [mm] 8,2 8,1 8 7,9 7,7 Table 7: Adjustment
11 Table for Size 1 with Radial Adjusting N
Table for Size 1 with Radial Adjusting Nut (15) Single CS layering Torque [Nm] 15 24 32 39 44 48 53 60 70 Dimension âaâ [mm] 11,1 10,7 10,3 10 9,6 9,2 8,8 8,4 8,1 Double CS layering Torque [Nm] 70 85 100 110 120 125 130 Dimension âaâ [mm] 9,1 9 8,8 8,7 8,6 8,5 8,3 Table 8: Adjustment Table for Size 2 with Radial Adjusting Nut (15) Single CS layering Torque [Nm] 25 36 52 70 80 95 110 120 130 Dimension âaâ [mm] 13,4 13,2 13 12,8 12,5 12,1 11,8 11,4 11 Double CS layering Torque [Nm] 120 148 175 200 220 235 250 Dimension âaâ [mm] 10,4 10,3 10,2 10 9,9 9,8 9,7 Table 9: Adjustment Table for Size 3 with Radial Adjusting Nut (15) Single CS layering Torque [Nm] 50 62 80 100 130 150 200 235 250 Dimension âaâ [mm] 13,9 13,8 13,5 13,3 13 12,8 12,5 12,3 12 Double CS layering Torque [Nm] 250 295 340 375 420 450 480 520 550 Dimension âaâ [mm] 10,2 10 9,9 9,8 9,7 9,5 9,4 9,3 9,2 Table 10: Adjustment Table for Size 4 with Radial Adjusting Nut (15) Single CS layering Torque [Nm] 220 255 290 335 365 400 440 480 510 535 550 Dimension âaâ [mm] 16,9 16,8 16,4 16,1 15,8 15,4 14,9 14,4 13,9 13,7 13,3 Double CS layering Torque [Nm] 550 605 630 760 825 860 950 1000 1050 1100 Dimension âaâ [mm] 13,1 12,9 12,7 12,6 12,4 12,2 12,1 11,9 11,7 11,4 Table 11: Adjustment Table for Size 5 with Radial Adjusting Nut (15) Single CS layering Torque [Nm] 120 190 265 330 395 465 530 570 620 660 700 Dimension âaâ [mm] 19,4 19,1 18,7 18,4 18,1 17,7 17,4 17,1 16,7 16,4 15,9 Double CS layering Torque [Nm] 440 600 700 800 900 1000 1100 1200 1300 1400 Dimension âaâ [mm] 14,5 14,3 14,2 14 13,8 13,7 13,5 13,3 13,2 13 a a Installation and Operational Instructions for ROBA ® - slip hubs Sizes 0 â 12 (B.1.0.EN) 08/06/2015 GC/TK/GH/SU Chr. Mayr GmbH + Co. KG Eichenstraße 1, D - 87665 Mauerstetten, Germany Tel.: +49 8341 804 - 0, Fax: +49 8341 804 - 421 Page 11 of 12 www.mayr.com , E - Mail: info@mayr.com Adjustment Tables for Triple Layering on Sizes 1 and 2 and Type 1_ _.310: The values stated in the Adjustment Tables are only reference values. Due to manufacturing tolerances, the actual torque values can in part deviate substantially from the values stated in the Table. Table 12: Adjustment Table for Size 1 / Type 1_ _.310 Torque [Nm] 120 140 155 165 175 185 192 200 Graduation lines 7 8 9 10 11 12 13 14 Table
12 13: Adjustment Table for Size 2 / Typ
13: Adjustment Table for Size 2 / Type 1_ _.310 Torque [Nm] 220 250 285 320 350 380 410 Graduation lines 6 7 8 9 10 11 12 Adjustment Tables for Triple Layering on Sizes 1 and 2 and Type 1_ _.311: The values stated in the Adjustment Tables are only reference values. Due to manufacturing tolerances, the actual torque values can in part deviate substantially from the values stated in the Table. Table 14: Adjustment Table for Size 1 / Type 1_ _.311 Torque [Nm] 100 120 140 160 180 195 205 Dimension âaâ [mm] 11,1 11,0 10,9 10,8 10,7 10,6 10,5 Dimension âbâ [mm] 10,3 Table 15: Adjustment Table for Size 2 / Type 1_ _.311 Torque [Nm] 220 245 270 290 320 350 370 385 400 Dimension âaâ [mm] 12,9 12,8 12,7 12,6 12,5 12,4 12,3 12,2 12,1 Dimension âbâ [mm] 10,7 Equals one graduation line One full turn equals 12 graduation lines. b a Installation and Operational Instructions for ROBA ® - slip hubs Sizes 0 â 12 (B.1.0.EN) 08/06/2015 GC/TK/GH/SU Chr. Mayr GmbH + Co. KG Eichenstraße 1, D - 87665 Mauerstetten, Germany Tel.: +49 8341 804 - 0, Fax: +49 8341 804 - 421 Page 12 of 12 www.mayr.com , E - Mail: info@mayr.com Adjustment Tables for Triple Layering on Sizes 3 to 5: The values stated in the Adjustment Tables are only reference values. Due to manufacturing tolerances, the actual torque values can in part deviate substantially from the values stated in the Table. Size e c d 3 14,5 9 M8 x 20 4 17,5 11 M10 x 25 5 19,8 12 M10 x 25 Table 16: Adjustment Table for Size 3 / Type 1_ _.312 Torque [Nm] 110 225 330 425 505 580 655 710 755 800 Dimension âaâ [mm] 10,5 10,3 10,1 9,9 9,7 9,5 9,3 9,1 8,9 8,7 Dimension âbâ [mm] 14 Table 17: Adjustment Table for Size 4 / Type 1_ _.312 Torque [Nm] 485 600 710 820 930 1050 1150 1250 1330 1410 1505 1600 Dimension âaâ [mm] 13,0 12,9 12,8 12,7 12,6 12,5 12,4 12,3 12,2 12,1 12,0 11,9 Dimension âbâ [mm] 17,5 Table 18: Adjustment Table for Size 5 / Type 1_ _.312 Torque [Nm] 530 660 800 985 1160 1300 1455 1620 1785 1940 2100 Dimension âaâ [mm] 11,9 11,8 11,7 11,6 11,5 11,4 11,3 11,2 11,1 11,0 10,9 Dimension âbâ [mm] 19,5 Disposal Our slip hub components must be disposed of separately as they consist of different materials. All metal components: Steel scrap (Code No. 160117) Friction linings: Brake linings (Code No. 160112) (Compression materials) Friction linings: Plastic (Code No. 160119) (Plastic) Elastomers: Plastic (Code No. 160119) e b c a