

Graphic organizers Maniken Anatomy coloring books Label these bones on your skeletal system graphic organizer o Mandible o Maxilla o Zygomatic Process o Frontal Bone o Temporal Bone ID: 784930
Download The PPT/PDF document "HBS 1.2.1 Get out Binder" is the property of its rightful owner. Permission is granted to download and print the materials on this web site for personal, non-commercial use only, and to display it on your personal computer provided you do not modify the materials and that you retain all copyright notices contained in the materials. By downloading content from our website, you accept the terms of this agreement.


Slide1
HBS 1.2.1
Slide2Get out
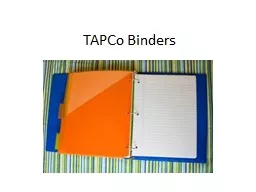
Binder
Graphic organizers
Maniken
Anatomy coloring books
Slide3Label these bones on your skeletal system graphic organizer
o Mandible
o Maxilla
o
Zygomatic
Process
o Frontal Bone
o Temporal Bone
o Occipital Bone
o Parietal Bone
Slide4Label these muscles on your muscular system graphic organizer
o
Orbicularis
Oculi
o
Orbicularis
Oris
o
Temporalis
Next to them, write the basic functions
Slide5#1- Building the
Temporalis
Muscle
Where do you think it goes?
This region is referred to as the temporal
fossa
.
F
ossa
is a term used to describe a flat surface on a bone.
Slide6#1- Building the
Temporalis
Muscle
Muscles will be built using terra cotta clay
.
Take a ball of terra cotta clay the size of a jawbreaker and flatten it into a fan
.
Slip the point of the fan through the
zygomatic
arch and onto the
coronoid
process of the mandible (the superior ridge at the top of the mandible). Flatten the clay until it sits neatly on the side of the head and behind the ear.
Slide7Function of Temporalis
Muscle
Place the fingers on the temples as you clench and unclench your jaws. You should feel the
temporalis
contract and relax.
Slide8This is skeletal muscle
What do we know about skeletal muscle and its appearance?
Slide9#2- Adding the Fat
Take a small portion of yellow clay about the size of a raisin and roll the clay into a ball.
Place this round ball into the cheek of the
maniken
. Fat provides the round look of the cheeks.
Slide10Fat
There are also pads of fat behind the eyes. Take a small portion of yellow clay (a bit smaller than the cheek fat) and roll the clay into a ball.
Flatten the ball on the desk and use the wire tool to divide the circle into two half moons.
Place these fat pads in the eye socket leaving a small amount of space in between the two pads. The pads are oriented in the same direction as your eye lids.
Slide11#3- Building the Eye
Choose a color of clay for the
maniken’s
eye
Roll a raisin-sized ball of clay using the eye color
.
Slightly flatten the ball as you place it in the eye socket over the fat pads. Leave a small portion of the fat extending from the top and the bottom.
Slide12Orbicularis
Oculi
The
sphincter muscle used to open and close the eye.
Where do you think it should go?
Slide13Building the Orbicularis
Oculi
Form a 1 & 1/2” worm of terra cotta clay (about the thickness of a pencil).
Turn the string into a circle.
Flatten the string with your hand. This “O” will form the outer portion of the muscle.
Slide14Inner Eyelid
Place this “O” off to the side.
You
will create the inner eyelids before they place the muscle on the eye
.
Roll a small raisin-sized ball of terra cotta clay. Flatten this piece into a disk. Cut the disc into two equal halves as you did with the fat pad.
Place one half over the top part of the eye and the other half over the bottom part of the eye. This will form the inner eyelid. A good portion of the eye color should be visible.
Slide15Placing the Orbicularis
Oculi
Now take the “O” you created
previously and
place it over the eye.
The
inner eyelid should be centered in the hole of the donut.
Use a pencil to create a pupil.
Slide16Striations
Use the wire loop or a pencil to gently tease eyelashes from the eyelids
.
Show the
function of this muscle.
The
striations are oriented in a ring- the muscle shortens to squeeze the eye shut.
Slide17#4- Building the Mouth
Build the
Orbicularis
Oris
, the sphincter muscle used to purse the lips (often known as the kissing muscle).
Where do you think this goes?
Slide18Form a jawbreaker sized ball of terra cotta clay.
Flatten the ball slightly to form a disc.
Place the disc over the tip of your finger and create a small dome in the disc.
Attach the domed disk over the mouth of the
Maniken
®
and attach the outside edges of the muscle. Curl the excess portion of the disk around to the inside of the midline.
Slide19Cut a slit for the mouth, dividing the disc into upper and lower halves.
With
the fingertips or the wire tool, roll the upper and lower edges of that slit into lips.
Use your finger to smooth the clay around the lips. They may look silly, but keep playing with them!
Slide20Obicularis
Oris
Show me the function!
Slide21Last, but not least
1. Be sure you have the functions and locations on your graphic organizers.
2. Look around, are all the
manikens
alike? Why or why not?