
PProgramEffectiveness Monitoring Sampling Methods for Riparian Vegetation Parameters2016iEffectiveness Monitoring Sampling Methods for Riparian Vegetation ParametersBYPACFISHINFISH Biological Opinion ID: 859928
Download Pdf The PPT/PDF document "acFish InFish Biological Opinion PIBO Mo..." is the property of its rightful owner. Permission is granted to download and print the materials on this web site for personal, non-commercial use only, and to display it on your personal computer provided you do not modify the materials and that you retain all copyright notices contained in the materials. By downloading content from our website, you accept the terms of this agreement.


1 P acFish InFish Biological Opinion (PIBO
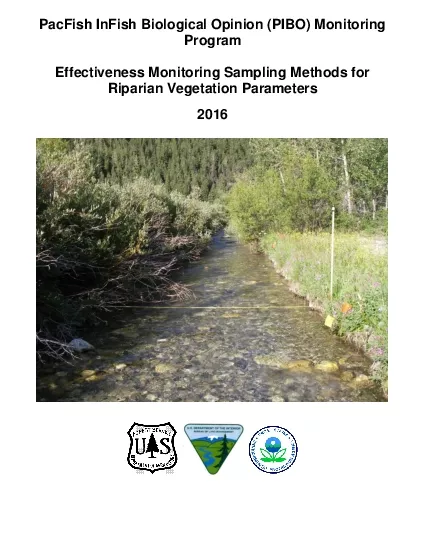
P acFish InFish Biological Opinion (PIBO) Monitoring Program Effectiveness Monitoring Sampling Methods for Riparian Vegetation Parameters 2016 i Effectiveness Monitoring Sampling Methods for Riparian Vegetation Parameters BY PACFISH/INFISH Bi ological Op inion Monitoring Program (PIBO ) Staff â Multi Federal Agency Monitoring Program; Logan, UT Archer, Eric K.; Van Wagenen, Andrew R.; Coles - Ritchie, Mark; Ojala, Jeffrey V.; Roseen, Thomas P. and Gavin, Amanda. 2016. PacFish InFish Biological Op inion (PIBO) Monitoring Program: Effectiveness Monitoring Sampling Methods for Riparian Vegetation Parameters . Unpublished paper on file with PIBO Monitoring Program. For Information about PIBO Monitoring, Contact Eric Archer PIBO Project Leader , telephon e: (435) 755 - 3565. ACKNOWLEDGEMENTS This protocol is built upon the pioneering work of Alma Winward (a retired Forest Service ecologist). A debt of gratitude is owed to Marc Coles - Ritchie for the initial development and testing of this protocol; your wo rk is greatly appreciated. Insight into riparian monitoring has also been provided by employees within the Forest Service, Dave Weixelman, Mary Manning, Kate Dwire, Dave Merritt, Gregg Riegel, and BLM employees Erv Cowley and Tim Burton. PIBO Monitoring Pr ogram employees who have assisted in the development of these methods include Rick Henderson, Eric Archer, Boyd Bouwes and Alison Kelly. Thanks to Lindsey Goss for creation of diagrams. Since 2003, over 100 field technicians have provided valuable feedback about the methods through use of this protocol. Cover Photo: North Fork Dupuyer Creek, Lewis and Clark National Forest, Montana (Site
2 Name: 240 - 12 - I) ii Table of
ii
Table of")
Name: 240 - 12 - I) ii Table of Contents INTRODUCTION ................................ ................................ ................................ ................................ ..... 1 SAMPLING SUMMARY ................................ ................................ ................................ ........................... 2 DATA COLLECTION TASKS ................................ ................................ ................................ ................... 2 ARCHER PDA ................................ ................................ ................................ ................................ ......... 4 DATA ENTRY IN FORMS 5.1 ................................ ................................ ................................ .................. 5 SETTING UP YOUR REACH: GETTING STARTED ................................ ................................ ................ 6 DIFFERENT TYPES OF SITES ................................ ................................ ................................ ............... 6 OLD SITE: Setting Up Your Reach ................................ ................................ ................................ .......... 7 NEW SITE: Setting Up Your Reach ................................ ................................ ................................ ......... 9 UTM COORDINATES ................................ ................................ ................................ ............................ 10 SITE MARKERS ................................ ................................ ................................ ................................ .... 10 ARCHER PDA: GPS INFO PROGRAM ................................ .
3 ............................... ........
............................... ................................ . 12 COLLECTING GPS DATA WITH THE ARCHER PDA ................................ ................................ ........... 13 ESTIMATING COVER IN QUADRATS ................................ ................................ ................................ .. 14 GREENLINE VEGETATION ................................ ................................ ................................ .................. 16 DETERMINING THE GREENLINE ................................ ................................ ................................ ........ 18 RIPARIAN CROSS - SECTIONS ................................ ................................ ................................ ............. 24 Unique Riparian Cross - Section Circumstances ................................ ................................ .................. 25 UNKNOWN S PECIES ................................ ................................ ................................ ........................... 26 COLLECTING SPECIMENS ................................ ................................ ................................ .................. 27 When to Collect Plant Specimens ................................ ................................ ................................ ...... 27 How to Collect Plant Specimens ................................ ................................ ................................ ........ 27 How to Label Plant Specimens ................................ ................................ ................................ .......... 28 Field Notebook ................................ ................................ ...............................
4 . ................................ ...
. ................................ ... 29 REFERENCES ................................ ................................ ................................ ................................ ...... 30 APPENDIX A: Miscellaneous Tips and Notes ................................ ................................ ........................ 30 APPENDIX B: Critical Invasive Plant Species ................................ ................................ ........................ 31 APPENDIX C: Sampling with Two PDAâs at a Reach ................................ ................................ ............. 31 APPENDIX D: Exception to Estimating Cover (�100% for Greenline) ................................ .................... 32 APPENDIX E: Special Cases ................................ ................................ ................................ ................. 33 Dry Sites ................................ ................................ ................................ ................................ ............ 33 Large River (Unwadeable) DMA (K) Sites ................................ ................................ .......................... 33 Sampling Sites with Beaver Activity ................................ ................................ ................................ ... 33 APPENDIX F: Determining Bankfull and Scour Line ................................ ................................ .............. 34 APPENDIX G: Archer PDA Troubleshooting ................................ ................................ .......................... 35 APPENDIX H: Forms Data Backup using Sprite Backup (Archer Handheld) ................................ .......... 36 APPENDIX
5 I: Miscellaneous Stream Surveying Tasks
I: Miscellaneous Stream Surveying Tasks ................................ ................................ ........... 38 Reach Map ................................ ................................ ................................ ................................ ........ 38 Photos ................................ ................................ ................................ ................................ ................ 41 Measuring Change in Reach Elevation (Gradient) ................................ ................................ ............. 46 APPENDIX J: Instrument Placement and Retrieval ................................ ................................ ................ 50 APPENDIX F: Aquatic Invasive Protocol ................................ ................................ ................................ 61 Quick Reference Guide to We stern Freshwater Mussels ................................ ................................ ... 80 APPENDIX K: Gear Decontamination ................................ ................................ ................................ .... 82 APPENDIX L: Equipment List ................................ ................................ ................................ ................ 83 APPENDIX M: Species Not Use d to Determine the Greenline ................................ ............................... 84 APPENDIX N: Data Sheets/Forms ................................ ................................ ................................ ......... 85 APPENDIX O: Synonyms for PDA Species List ................................ ................................ .................... 88 APPENDIX P: Crew inReach Locator Beacon Instructions
6 ................................ .......
................................ ................................ .... 69 APPENDIX Q: PIBO Rules/Guiding Principles ................................ ................................ ....................... 71 1 INTRODUCTION The Pacific Anadromous Fish Strategy (PACFISH) and Inland Fish Strategy (INFISH) Biological Opinion Monitoring Program (PIBO ) for aquatic and riparian resources was developed in 1998 in response to monitoring needs addressed i n the Biological Opinions for bull trout (U.S. Department of the Interior, Fish and Wildlife Service 1998) and steelhead (U.S. Department of Commerce, National Marine Fisheries Service 1995) . An interagency team representing the U.S. Department of Agricult ure, Forest Service, the U.S. Department of Interior, Bureau of Land Management and U.S. Fish and Wildlife Service, and the U.S. Department of Commerce, National Marine Fisheries Service was convened to develop a large - scale monitoring program with the pri mary objective of determining whether PACFISH/INFISH management practices are maintaining, degrading, or improving biological and physical attributes, processes, and functions of riparian and aquatic habitats throughout the upper Columbia River Basin. A l ist of attributes that were thought to be important in defining aquatic habitat conditions and their relationship with listed fish species were identified. The list of attributes was then translated into measurable criteria and compiled to create sampling protocols for stream channel attributes and vegetation parameters (the protocol for stream channel attributes is available through contact information on title page). The team also specifically stated that existing methods be used to measure each a
7 ttribute . Given this direction, PI
ttribute . Given this direction, PIBO uses modifications of several riparian vegetation methods. The greenline and riparian cross - section sampling methods are modifications of methods developed by Jinward (2000). The major change from Jinwardâs methods was to rec ord species cover values in defined quadrats rather than recording community types over an undefined area. This change was driven by the difficulty of consistently and accurately characterizing riparian vegetation using community types. Levels of repeatabi lity for methods that use community types limit their usefulness for many monitoring questions that seek to detect change (Coles - Ritchie et al. 2004). The protocol and the individual methods have been designed, tested, and modified specifically to sample and describe each attribute at the stream reach scale , to increase repeatability among observers, and to monitor the effects of management activities in a specific set of sub - watershe ds. Sample locations for PIBO are stream reaches on U.S. Forest Service or Bureau of Land Management lands which have a gradient less than 3%, and have a wadeable channel with bankfull widths up to 24 m. The vegetation sampling area corresponds to a reach length that is 20 channel bankfull widths, with a minimum reach length o f 160 m and a maximum reach length of 480 m . PIBO feels that the sampling methods used in this protocol should not be used in other stream types without additional review and testing. Data at the reach and basin scale are analyzed to detect the direction and the rate of change over time as well as spatial variability due to environmental or management differences. The data analysis techniques are presented in separate documents
8 ( available through contact information
( available through contact information on title page) 2 SAMPLING SUMMARY For both the greenline and riparian cross - sections, the vegetation is assessed using a Daubenmire (1959) quadrat frame (50 cm x 20 cm) to determine species cover. Figure 1 shows an example of a reach layout with greenline and riparian cross - section quadrats. While in the field, PIBO technicians enter data into hand - held computers referred to as Personal Digital Assistants (PDAs) . There are many advantages to entering data electronically rather than on paper. A P DA allows for required entries or fields that prevents incomplete data and has drop - down menus to avoid spelling errors and illegible handwriting. Data recorded in the PDAs are downloaded to laptop computers at a field office and then sent to the centraliz ed PIBO office at the Rocky Mountain Research Station in Logan, UT where the data are imported to a database. When a PDA malfunctions, paper forms are used for data collection ( see Error! eference source not found. on page Error! Bookmark not defined. ) and the data are later entered into the database. Sampling begins at channel transect 1, which is one width category upstream from the bottom of reach, and continues upstream until the last transect of the reach (usually 21 to 25). The bottom (downstream end) and top (upstream end) of the reach and channel transects are determined and flagged by the stream technicians. D ATA COLLECTION TASKS Reach Location Data Collect data for BR, TR, BR & TR markers, and Photo Overview Location. Greenline Vegetation Data Collect data at all channel transects on both banks, which includes: ï· Species and percent cove
9 r in and over quadrats. Riparian Cro
r in and over quadrats. Riparian Cross - Section Data Collect data at channel transects 1, 5, 10, 15, and 20 (or last transect of the reach if there are fewer than 20 transects), which includes: ï· Species and percent cover in and over quadrats. Specimen Collection Collect specimens for unknown and dominant plant species at every reach. All unkn owns and the four most dominant plant species are collected at every reach. The same data collection tasks and methods are used at every reach (see â Large River (Unwadeable) DMA (K) Sites â in A PPENDIX E : Special Cases on page 33 for one exception ) It will generally take one technician about 6 - 8 hours to complete a reach, which typically includes 42 - 50 greenline quadrats, 30 cross - section quadr ats, and plant specimen collections. At the beginning of sampling it is often necessary to spend extra time identifying the most abundant species. If extra time is taken for quadrats early in the day, then quadrats later in the day will need to be done muc h quicker. If you finish before the stream technicians, then assist them to complete all d ata collection for the reach. Ask the stream technicians how you can help and s ee APPENDIX I : Miscellaneous Stream Surveying Tasks on page 38 . 3 Figure 1 : Layout of greenline and riparian cross - section quadrats at a reach (quadrat size is exaggerated). 4 A RCHER PDA Power Button: The device is turned on by pressing the Power Button (The bottom right of three buttons.) To turn the device off press and hold the power button. Then select Power Off. Pressing the power button will suspend the device , and this is useful
10 when moving through brush or in betwee
when moving through brush or in between quadrats. Start Menu: From the main screen the programs are accessed from the Start Menu (top left on screen.) Battery Life and Batteries: Battery life can be viewed from the battery icon in the top right of the screen. Batteries are changed by removing the back plate, sliding the battery door lock open, and removing the battery cover. At this point the battery can be changed. Note that if your device losses power quickly , some settings may have change d , such as the back light, or you might be suspending the device ins tead of shutting off the device. Keyboard: A Keyboard can be accessed by pressing the blue keyboard icon in the bottom right or center when present. Screen Lock: An optional screen lock is available on the main screen. This also activates automatically when the touch screen senses issues. To unlock the device click unlock in the bottom left of the screen and then okay. Stylus: Only use a plastic tipped mechanical pencil or stylus. Do not use: Pens, Sharpies, sticks, car keys, or metal tipped writing i mplements, these damage the screen. Three Programs are used by PIBO: GPSinfo â This is used to turn on the GPS card in the PDA. Forms 5.1 â This is where collected data is entered. Sprite Backup â This is used to backup data. 5 D ATA E NTRY IN FORMS 5.1 1. To use Forms 5.1: Click the Start Menu in the top left and select Forms 5.1 (If Forms 5.1 is not in the start menu you will have to navigate to it in Start Menu�FileExplore�rMy Dev�iceProgram File�sForms51�Forms5) 2. From the Main Forms 5.1 screen select t he Program to re
11 cord the information you are collecting
cord the information you are collecting. (Note the blue Key board icon which makes the keyboard appear or disappear) The Programs listed in Forms 5.1 : 1) Vegetation â This is the PIBO Vegetation sampling program 2) Hobo Placement â This is the Seasonal Temperature data logger (Hobo) placement program 3) Hobo Retrieval â This is the Seasonal Temperature data logger (Hobo) retrieval program 4) Tidbit Placement â This is the Multi - Year Temperature data logger (Tidbit) placement program 5) Tidbit Retrieval â This is the Multi - Year Temperature data logger (Tidbit) retrieval program 6) Cow Cam Placement â This is the Seasonal Cow Camera placement program 7) IM â This is the PIBO - IM Stream bank alteration sampling program 8) Training â This is used to teach basic data entry for Forms 5.1 (There are a number of other forms below, they run in the above programs.) 3. Data Collection: 1. To collect new data in one of these forms select it and click the ânewâ button. 2. To resume collecting data in a pre vious data set select the program and click review. 6 SETTING UP YOUR REACH : GETTING STARTED Background: The PIBO sampling design consists of a 5 - year rotation of sites; sites sampled in 200 5 were re - sampled in 20 10 , and will be sampled again in 20 15 . It is absolutely vital that you sample the same section of stream that was previously sampled. Your data is not useful if it is not collected from the same location! What is a BR or TR? ï· Bottom of Reach (BR): is the starting point / downstream boundary fo r collecting data ï· Top of Reach (TR): is the ending point / upstream boundary
12 for collecting data ï· NOTE: Your
for collecting data ï· NOTE: Your BR / TR must be in the same precise BR / TR location of previous sample(s) Objectives: ï· Determine the precise location of BR and TR Before setting up your reach, locate the following as a crew: ï· Bankfull elevation ( see A PPENDIX F : Determining Bankfull and Scour Line on page 34 ) ï· Where streambed and streambank meet (see â Determining the Greenlineâ on page 18 ) ï· Scour line ( see A PPENDIX F : Determining Bankfull and Scour Line on page 34 ) DIFFERENT TYPES OF SITES OLD SITES have: ï· Been sa mpled before ï· Photographs from a prior sample ï· âSite Information Sheetâ with UTM coordinates for BR, BR marker, TR, TR marker & reach overview. ï· Site marker information - Scouted OLD SITES: ï· Were visited by a scout earlier in the field season ï· Have orange flaggi ng labeled âPIBO BR / PIBO TRâ at or near the BR and TR (to help crew confirm the BR / TR location) ï· Have a âScoutingâ form with specific information about the site, to help you establish it in the correct location - Unscouted OLD SITES: ï· Donât have orange fl agging at BR / TR (makes it harder to confirm BR / TR location) ï· Have a blank âScouting Formâ form that crew should fill out NEW SITES have: ï· Never been sampled before ï· Flagging and âScouting Formâ ï· No photographs, reach maps, or coordinates from a prior samp le ï· No site markers Note : HOBO (temperature probes) will be found at most scouted âIâ sites 7 OLD SITE: Setting Up Your Reach Remember : it is absolutely vital that you sample the same section of stream that
13 was previously sampled; your data is no
was previously sampled; your data is not useful if it is not collected from the same location! 1. Navigate to the site using all available information: ï· Driving and hiking directions ï· UTM coordinates ï· Photos ï· Topographic map ï· Reach map 2. Determine the precise location of the BR If site was scouted: ï· Caref ully read the âScouting Formâ to determine where the BR is relative to the BR flagging. ï· Be careful not to confuse BR and TR flagging, they will be labeled âPIBO BRâ and âPIBO TRâ respectively. ï· Photos and site markers (which give you a bearing and distance to the BR) will always trump the scouts flagging placement. o Remember, you want the reach to be set up precisely where it was when it was sampled in the past o The scoutâs flagging placement will not always be correct relative to BR ï· Question : the âScouting Fo rmâ indicates that flagging was hung, but I cannot find it. Jhat do I do? ï· Answer : confirm with 100% certainty that you correctly navigated to the BR. Photos and site markers are best for doing this. o Often, animals will munch the flagging, look out for sma ll pieces of flagging to indicate you are in the right place If s ite was not scouted: ï· Take your time and carefully pinpoint the precise BR location; be diligent, careful, and detailed. ï· Photos are the best piece of information ï· Also use: site marker, UTMs, reach map, hiking directions 3. Collect BR UTMs and Validate BR marker with a stream tech ï· Record BR UTMs â see âUTM Coordinatesâ on page 10 ï· Validate BR marker info - see âSite Markersâ on page 10 ï· Record BR marker UTMs o Upda
14 te any âSite Markerâ information T
te any âSite Markerâ information This will require communication with the stream technicians. 4. Determine precise location of TR If site was scouted: ï· Carefully read the âScouting Formâ to determine where the TR is relative to the TR flagging. o Remember: Photos and site markers (which give you a bearing and distance to the TR) will always trump the scouts flagging placement ï· Your last transect is the last one that will fit before you pass upstream of the TR. The distance upstream from your last transect to the TR will be less than the width category. In the rare case the TR falls on the last transect collect data at the TR. 8 If site was not scouted: ï· Take your time and carefully pinpoint the precise TR location; be diligent, caref ul, and detailed. ï· Photos are the best piece of information ï· Also use: site marker, UTMs, reach map, hiking directions ï· Your last transect is the last one that will fit before you pass upstream of the TR. The distance upstream from your last transect to the TR will be less than the width category. In the rare case the TR falls on the last transect collect data at the TR. 5 . Collect TR UTMs and Validate TR marker with a stream tech ï· Record TR UTMs - see âUTM Coordinatesâ on page 10 ï· Validate TR marker info - see âSite Marker s â on page 10 ï· Record TR Marker UTMs - see âSite Marker s â on page 10 o Update any âSite Markerâ information This will require communication with the stre am technicians. 6. Collect UTMs for Reach Overview Photo with a stream tech ï· Collect UTMs of Photo location; perform this with a stream technician when it is conven i en
15 t for both technicians.
t for both technicians. 9 NEW SITE: Setting Up Your Reach 1. Navigate to the site using the following information: ï· Driving directions ï· Hiking directions ï· UTM coordinates (BR, TR, and Temp Probe) 2. Determine the precise location of your BR relative to the scoutâs flagging . ï· Locate the orange flagging hung at the BR . o Question : the âScouting Formâ indicates that flagging was hung, but I cannot find it. What do I do? o Answer : confirm with 100% certainty that you correctly navigated to the BR. Photos and site markers are best for doing this. ï§ Often, animals will munch th e flagging, look out for small pieces of flagging to indicate you are in the right place ï· Carefully read the âSite Information Sheetâ and follow the scoutâs instructions for placing the BR relative to the BR flagging. ï· If the scout did not write specific ins tructions: o BR will be a pool tail within 10m US / DS of flagging o If there isnât a pool tail 10m US / DS of flagging, the BR will be in line with the BR flagging ï· Question : Jhat if the pool tail identified by the scout doesnât meet pool criteria? ï· Answer : Est ablish the BR at a qualifying pool tail 10m US / DS from flagging, if there isnât one, start at flagged location 3. Collect BR UTMs and place BR marker ï· Record BR UTMs â see âUTM Coordinatesâ on page 10 ï· Place a BR marker in a suitable location - see âSite Markersâ on page 10 ï· Record BR marker UTMs and other marker location information This will require communication with the stream technicians 4 . Establish TR (w
16 ith stream tech) , you will have 21 â
,
you will have 21
â")
ith stream tech) , you will have 21 â 25 transects. ï· Your TR will be located at the first pool tail upstream of transect 21; o If the pool tail falls on a transect above 21 then you must collect data at that transect. o If the pool tail does not fall on a transect no data is collected at the TR. ï· If no pool tail is found US of 21 your TR will be at transect 25. In this scenario where no pool tail is found US of 21 you will collect data at the 25 th transect. ï· If the stream is dry, stop at transect 25 and collect data at the 25 st transect. 5 . Collect TR UTMs and place TR marker ï· Record TR UTMs â see âUTM Coordinatesâ on page 10 ï· Place a TR marker in a suitable location â see âSite Markersâ on page 10 ï· Record TR marker UTMs and other marker locati on information This will require communi cation with the stream technicians 6. Collect UTMs for Reach Overview Photo with a stream tech ï· Collect UTMs of Photo location; perform this with a stream technician when it is conven i ent for both technicians. 10 UTM C OORDINATES Objective: Use the global positioning system (GPS) receiver to record the Universal Transverse Mercator (UTM) coordinates. UTMs are used to identify these locations: ï· BR ï· BR marker ï· TR ï· TR marker ï· Reach overview photo ï· Temperature probe ( HOBO or Tidb it; collec t if crew is placing or moving , if not placing, the scout has done this already) ï· If you encounter a situation where there is more than one BR or TR (for example, a channel shift) consult your stream technicians. When to record UTMs? ï· For ever y si te, r ecord UTMs at all loca
17 tions listed above in the Veg PDA S
tions listed above in the Veg PDA S ITE M ARKERS Background: Bottom of reach (BR) and top of reach (TR) markers are used to monument the site location and determine where to start and stop sampling. Nearly all of the sites you s ample will already have BR and TR markers placed. Wilderness: Site markers will not be placed in designated wilderness areas. Rather, a distinctive feature ( large spanner, snag, rock or tree) near the BR and TR will be used to monument the site in wilder ness areas. Some sites have markers, some donât: ï· Old Sites should have BR and TR markers, BUT some may be missing (the tree it was on fell over, the wire attaching it broke, etc. ) ï· New sites have no markers Objective: We want to have 1 marker at the BR an d 1 marker at the TR. Determine if your site has markers at the BR and TR. If marker(s) were placed, validate them, if there isnât a marker at the BR and / or TR, place it. Validate OLD BR / TR Markers 1. Locate OLD marker 2. Have the Veg Tech collect UTM at BR/TR markers in the Veg PDA 3. Validate marker information. We want to maintain the OLDEST marker info, because we always want to go back to the original BR / TR. CORRECT the following information, DO NOT UPDATE IT. a. Description â does it accurately describe marker location, if not update it. b. Bearing â does the old compass bearing seem reasonable, or was the crew off by 180°? c. Distance â was the old distance reasonable? If making changes to these record the changes on Form 1 and have the Veg tech enter the new marker information into the Veg PDA 4. Replace the marker if you donât think it will last another D years. 5. Always take a new
18 photo of the markers . The purpose of t
photo of the markers . The purpose of this photo is to help you quickly locate the marker. Always strive to take a better photo. Ta ke the photo from a new location if the old location is unsuitable (zoomed in too much, poor angle, canât see BR in picture, etc. ). 11 Recording marker data ï· If you update any marker info: o Circle âYâ in the âMarker Info / Info Collectedâ column on the back of Form 1 o Write marker info on the front of Form 1 o U pdate the Marker information in the Archer PDA used by Veg Techs . ï· If you didnât update marker info circle âNâ in the âInfo Collectedâ column on the back of Form 1 and donât recorded anything in the Veg PD A. ï· Question : What if the marker is gone? ï· Answer : Confirm that you are 100% in the correct spot and that the marker is gone, and then follow the âPlacing new BR / TR markerâ procedure. ï· Question : âJhat if a wilderness site has markers? Should I take them out?â ï· Answer : Yes, take them out. Select a distinctive feature to use as a surrogate. Record new marker info on Form 1 and circle âYâ in the âMarker Info / Info Collectedâ column on the back of Form 1. Placing new BR / TR markers: 1. Locate an easily iden tifiable feature near the BR / TR to attach the marker. Try to place the maker parallel to the BR/TR. a. Use something relatively permanent like a tree near the BR / TR. b. Use something distinctive. For example ; a lone cottonwood tree near the BR, or a large stump with a burn mark. 2. Make sure the BR marker has âPIBO BRâ indented into it and the TR marker has âPIBO TRâ indented into it. 3. Attach the marker to your
19 chosen spots with a nail or wire. 4.
chosen spots with a nail or wire. 4. Record the following information on Form 1 a. Brief description of the site marker location (eg. US of BR 5m on RL attached to trunk of large juniper). b. Compass bearing from the BR marker to the BR and from the TR marker to the TR. c. Measure the distance from the marker to the thalweg at BR and TR. 5. Make sure your Veg tech reco rds UTM coordinates of the site markers location in their PDA 6. Give Form 1 to the Veg tech to enter the description, bearing, and distance into the Veg PDA Remember, if you are replacing markers at an OLD site, we want the directions to point of the origin al BR / TR! 12 ARCHER PDA: GPS INFO P ROGRAM It is recommended that after starting the PDA the GPSinfo program is activated so the internal GPS card is functioning before using Forms 5.1 1. To use GPSinfo: Click the Start Menu in the top left and select GPSinfo. (If GPSinfo is not in the start menu you will have to navigate to it in Start Menu�FileExplore�rMy Dev�iceGPS Information�GPSinfo) 2. To activate the GPS Card click the âStart GPSâ Button. Lines of Code begin to fill the screen. Clicking on the âGPS Infoâ tab on the bottom will take you to the information screen. 3. On the information screen a blue bar on the bottom indicates a good connection to a satellite. The HDOP number indicates the accuracy of the measurement we consider below 5 to be acceptable but below 3 is ideal. When you have acquired satellites click the Setup tab to return to the first screen. Click âClose GPSâ and this stops this program â s interactions with the GPS card.
20 4. Your GPS card is now ready to work
4. Your GPS card is now ready to work in Forms 5.1 . Y ou can exit GPS info by clicking the x in the top right corner. 5. This only needs to be performed when the PDA is turned on. If the PDA is turned off these steps will need to be run again before using the GPS card. Suspending the PDA does not turn off the GPS card. 13 C OLLECTING GPS DATA WITH THE A RCHER PDA 1. Use the GPSinfo program to activate the GPS card. You must do this one time when you turn the device on. 2. When a Program in Forms 5.1 asks you to collect UTMs you will receive a screen which has an acquire button. Click the acquire button . A t this point you need to wait a moment for the satellites to be acquired (if this takes more than 30 seconds see the errors section). When the HDOP (in circles) is ideally below 3 and you are in the correct loca tion click the fix button to record that point. If the HDOP is above D or shows â -- . - â you need to collect the point again. 3. If you need to collect a point again or collected a point in the wrong location you need to hit the previous button and the n the next button. This will allow you to write over the incorrect data. Check that the HDoP or UTMs change when you try to do this. 4. When finished continue working through the data form. 5. To record another coordinate follow these same steps. If the PDA wa s shut down you need to restart the GPS card using the GPSinfo program. (You do not have to turn off the GPSinfo program in between collecting UTMs to save battery life. This program has a very minimal power drain.) Error Messages when collecting GPS dat a : 1. Error (0301): This means the GPS is not turned on. - To so
21 lve follow the GPSinfo program instructi
lve follow the GPSinfo program instructions. 2. Error (0302): This means the GPSinfo program is still collecting data from the GPS card. - To solve follow the GPSinfo program instructions starting on step 3. 3. A solid blue screen which stops the PDA from functioning. - Call the hotline and proceed to collect data on paper forms. - Let your Supervisor know when you return to the bunkhouse and flag your PDA with a description of the error. 14 ESTIMATING CO VER IN QUADRATS A 50 cm x 20 cm Daubenmire (1959) quadrat frame ( Figure 2 ) is the area to consider for determining vegetation cover. Cover is considered to be âthe vertical projection of all vegetation partsâ¦onto the groundâ (Bonham 1989). Vegetation that is counted as Cover : 1. Live vascular vegetation (leaves, branches, stems, tree trunks, or exposed roots) in, or over the quadrat (vegetation does NOT need to be rooted in the quadrat to count as cover). 2. Senesced l eaves or plants from the current year. Do not count dead branches or leaves of previous season as cover. They should be moved if they obscure live vegetation. Also, do not count vegetation as cover if it overhangs the quadrat and is rooted on the opposite side of the stream or if it overhangs the quadrat and is rooted in the streambed (applies to both greenline and cross - section quadrats). How t o Determine Cover : Cover data is collected in two different layers: ⤠1 m (lower layer) and� 1 m (upper layer). 1. Lower layer : Look down at a 90 degree angle from the quadrat to determine what species have coverage at or below 1 m over the quadrat. Estimate the percent cover of each species that is visible at the 1 m height (imagine
22 that there is no other vegetation abov
that there is no other vegetation above 1 m). When looking down, do not move live vegetation that is below 1 m to see obscured vegetation: for example, small forbs under sedges or grasses (see â Determining the Greenline â on page 18 for exception). 2. Upper layer : Look straight up (directly overhead of the quadrat, not a 90 degree angle from the quadrat) to determine percent cover of each woody species above 1 m over the quadrat. When looking up, only consider woody species vegetation visible from the quadrat from a height of 1 m; do not move around to see more and do not move live woody vegetation above 1 m to see obscured woody vegetation: for example, trees over shrubs. However, if herbaceous vegetation is obscuring woody vegetation above 1 m then move the herbac eous vegetation to estimate the woody cover. The total percent cover for each layer should be ~100% (the sum of the cover class midpoints may slightly exceed or be below 100%). Record percent cover for each species in a quadrat using the cover classes i n Table 1 . 5% cover is equal to 7 cm X 7cm. Cover of species in the range of 0 to is not recorded. The painted areas on the quadrat frame ( Figure 2 ) are to help in as signing cover classes ( Table 1 ). The painted areas correspond to 5%, 25%, 50%, 75%, and 95% of the quadrat. 15 Figure 2 : The Daubenmire quadrat frame used to define the area where species c over will be estimated. 5% cover is 7 cm x 7cm. Table 1 : Cover classes and range of cover. Cover class Range of cover (%) Cover class midpoints 1 0 to 2.5 2 â¥D to 1D 10 3 â¥1D to 2D 20 4 â¥2D to 38 31.5 5 â¥38 to D0 44 6 â¥D0 to 7D 62.5 7 â¥
23 7D to 9D 85 8 â¥9D to 100 97.5
7D to 9D 85 8 â¥9D to 100 97.5 16 GREENLINE VEGETATION The concept of the âgreenlineâ as a location to sample and monitor streamside vegetation was presented by Jinward (2000) who described it as âthe first perennial vegetation ⦠on or near the waterâs edgeâ. The greenline is a useful location to measure vegetation along streams because it is the dynamic interface of the stream and terrestrial ecosystems. Object ive To describe the vegetation and ground cover adj acent or nearest to the stream. What Data to Collect 1. Species cover: record species cover data for each quadrat associated with a channel transect, on both sides of the stream. 2. When looking from 1 m and below ( do not use these categories when looking� 1 m) record the appropriate ânot vegâ category for a quadrat: a. not veg: bare (paved road, soil, sand, and rock 5 cm) b. not veg: litter/moss = downed organic matter (âcow piesâ, leaves, needles, and bran ches cm). Branches 0 cm connected to a log are litter. c. not veg: log or stump â¥10 cm (measured along the diameter). Log has to be on the ground or on top of other logs that are on the ground. d. not veg: massive rock feature (defined in âDetermining the G reenline â on page 18 ) e. not veg: rock â¥2.D cm If any portion of a quadrat is water then record what the substrate is or what is underneath the water. 3. When looking above 1 m, if any portion of a quadrat is not live vegetation record ânot veg: not live vegâ. This category is reserved for sky and any not living vegetation s uch as dead branches. If dead vegetation from a previous season obscures living vegetatio
24 n, look beyond the dead vegetation and
n, look beyond the dead vegetation and only record the living vegetation. Where to Collect Data 1. Collect data at all channel t ransects (usually 21 to 25 per reach). The channel transects will be 8 â 24 m apart depending on the channel bankfull width category, or 6 m apart at designated monitoring areas/key sites. 2. Each channel transect will have one flag on each bank. Ideally, fla gs are colored or labeled (such as orange or âOâ for odd numbered transects and yellow or âEâ for even numbered transects). Transects 1, 5, 10, 15, and 20 will have red color ed flags to indicate transects where riparian cross - section data is collected. 3. At each channel transect find the two flags (one on each bank) associated with that transect and imagine a line connecting the two flags. Both greenline quadrats will be along that imaginary line ( Figure 3 ) . 4. Place th e quadrat frame with the long sides (50 cm sides) parallel to the stream while keeping the streamside, mid - point of the quadrat on the imaginary line ( Figure 3 Figure 4 ). Th is point is known as the pivot point. 5. The quadrat frame can be rotated, from the pivot point, up to an angle of 45 degrees to capture more rooted vegetation. This is especially useful on cut - banks where part of the quadrat may be hanging over water. 6. Place the quadrat so that the streamside of the frame is at the base of the greenline vegetation, whether herbaceous or woody. a. Most of the time the canopy, especially with sedges, grasses, and forbs, is the same as the base ( left side Figure 4 ). However, the canopy does not always indicate where to place the quadrat, especially for shrubs and trees. If plants are ha
25 nging over the edge of the stream, but
nging over the edge of the stream, but are not the first rooted vegetation, then move away from the 17 stream o n the imaginary line until the first rooted perennial vegetation is encountered (right side of Figure 4 ). 7. Sinuous streams: ï· Transects may not always be placed in numerical order (e.g. 1, 2, 4, 3, Dâ¦). The stream te chs will let you know when this situation occur s . Figure 3 : The relationship of channel transect flags (wavy lines) and greenline quadrats on the imaginary line. Figure 4 : Greenline location at the rooted point of vegetation, not necessarily at the canopy of woody vegetation (right). Unvegetated point b ar Imaginary line 50 x 20 cm quadrat frame 18 D ETERMINING THE GREENLINE The greenline is the location closest to the stream that meets the following criteria: 1. Greenline Lower Limit : where stream be d meets stream bank ( Figure 5 - Figure 11 ) The greenline will never extend below where the streambed meets the streambank (this is especially important on dry streams and w hen vegetation extends into the water). The location where the streambed and streambank meet can be identified by: a. Break in the relatively steep streambank slope to a more gently sloping streambed. b. Associated with a rapid fining of particles from relativel y coarse streambed particles to the finer streambank particles. c. Normally (but not always) below the current water level. d. Vegetative cove�r 50% is an indicator of the streambank. e. The streambank is usually consolidated, the streambed is usually unconsolidate d. f. In a few situations, it can be difficult to determine di
26 fferences between the streambed and str
fferences between the streambed and streambank in reaches with cobble or bedrock substrate. Begin assessing all streambank measurements at the scour line in these situations. Greenline will occur at the first of the two following locations : 2 - a. The first flat, floodplain - like/depositional feature located at or above bankfull OR 2 - b. At least 25% cover of live, perennial, vascular species rooted in the quadrat a. Cover can be from one species or a combination of species. b. Indicators that a plant is perennial: woody tissue (above or below ground), leaves/stems present from previous year, or roots stained brown rather than white. c. Annuals, biennials, and species that are sometimes annuals, are not u sed to define the greenline, but are recorded in a qualifying greenline quadrat. See A PPEND IX M : Species Not Used to Determine the Greenline on page 84 for a partial list of species not used to determ ine the greenline. d. The only situation where vegetation is moved to see obscured vegetation below is when the obscuring vegetation is less than 1 m, not rooted in the quadrat, and a greenline can be obtained by moving the obscuring vegetation. However, if 2 D% âgreenlineâ vegetation can be seen within the quadrat, do not move obscuring vegetation to see vegetation below and record what is seen from 1 m (100% cover for quadrat). See APPENDIX D : Exception to Estimating Cover� (100% for Greenline) on page 32 . e. If a greenline can only be established by moving obscuring vegetation less than 1 m that is not rooted in the quadrat, then record both the cover of rooted vegetation that was used to define the greenl ine and the vegetation that was obscuri
27 ng the greenline. This is the only sit
ng the greenline. This is the only situation where a quadrat could have over 100% cover for a layer. When this situation occurs, make the comment âobscuring vegetationâ in the PDA for the quadrat. See APPENDIX D : Exception to Estimating Cover �(100% for Greenline) on page 32 . 3. Greenline Upper Limit ( Figure 5 - Figure 11 ) 50 cm above bankfull if there is no qualifying greenline location . 4. No Qualifying Greenline within Upper and Lower Limits ( Figure 7 ) a. If there is no qualifying greenline within the lower and upper lim it then data collection takes place at: bankfull, if first flat feature is not present or outside the upper limit (left side of Figure 7 ). ï· Record the appropriate ânot vegâ category and any vegetation cover. See A PPENDIX F : Determining Bankfull and Scour Line on page 34 for determining bankfull. If there are questions regarding bankfull elevations please consult with the stream techn icians . 19 Figure 5 : A condensed guide to greenline placement (refer to âDetermining the G reenline â for more information ) . 20 Figure 6 : Upper and lower limits for greenline placement. Within lower and upper limit is where you lo ok for qualifying greenline. Figure 7 : Upper and lower limits and greenline placement. (Left side): No qualifying greenline within upper and lower limits, greenline quadrat placed at bankfull with no vegetation. Do not record herbaceous cover above 1 m. (Right side): No qualifying greenline, greenline quadrat placed at the first flat floodplain - like/depositional feature at or above bankfull. Red quadrat equals greenline placement with dashed lin
28 e extending 1 m at a 90 degree angle
e extending 1 m at a 90 degree angle from quadrat. Blue quadrat equals looking directly above the red quadrat above 1 m. B 50 cm Upper Limit Lower Limit 21 Figure 8 : Upper and lower limits and greenline placement. Herbaceous cover do es not get recorded above 1 m (right side). Red quadrat equals greenline placement with dashed line extending 1 m at a 90 degree angle from quadrat. Blue quadrat equals looking directly above the red quadrat above 1 m. Fig ure 9 : Upper and lower limits and greenline placement. Red quadrat equals greenline placement with dashed line extending 1 m at a 90 degree angle from quadrat. Blue quadrat equals looking directly above the red quadrat above 1 m. 22 5. Other Greenline Scenarios ï· The greenline may be in the water at high flows or when bank building is occurring (right side Figure 10 ), as sometimes happens with sedges ( Carex spp.), rushes ( Juncus spp.), sp ikerushes ( Eleocharis spp.), bulrushes ( Scirpus spp.), and willows (Salix spp.) . Vegetation in the water can be the greenline if the greenline quadrat is riparian side of where streambed and streambank meet. Do not over - estimate percent cover of vegetation that is bent over by flowing water. Figure 10 : Greenline placement, upper and lower layers and vegetation growing in water. Red quadrat equals greenline placement with dashed line extending 1 m at a 90 degree angle from quadrat. Blue quadrat equals looking directly above the red quadrat above 1 m. ï· Islands in the channel are not the greenline. Islands are defined by having an elevation greater than or equal to bankfull. When there is a question or situat
29 ion as to what is or is not an island a
ion as to what is or is not an island ask the stream technicians for assistance. ï· Aquatic species: 1. Free floating, totally submersed, or bottom rooted and floating aquatic species (middle four plants of Figure 11 ) are NOT us ed to define the greenline. Some common aquatic species that do not define the greenline are: common duckweed ( Lemna minor ), spike water - milfoil ( Myriophyllum spicatum ), American white waterlily ( Nymphaea odorata ), watercress ( Nasturtium officinale ; Roripp a nasturtium - aquaticum) , whitewater crowfoot ( Ranunculus aquatilis ), water speedwell ( Veronica anagallis - aquatica) and water knotweed ( Polygonum amphibium ). If such species are part of a qualifying greenline then their cover should be recorded. (Keep in mi nd streambed vs. streambank) 2. Totally emergent aquatic species are used to define the greenline (left and right side of Figure 11 ). Emergent aquatic species are typically grasses and grass - likes that include: Carex aquatili s, Scirp us microcarpus , Glyceria grandis , Typha latifolia , and Eleocharis palustris . 23 Figure 11 : Example of a quatic plants. ï· Slump blocks are pieces of the bank that are detaching or that have detached from the streambank. Slump blocks a re only considered the greenline if the slump block has re - attached itself to the streambank. Consider the slump block unattached if only gravity / friction is keeping it in place. ï· When a large rock is part of the bank and at the upper limit for greenline placement or there is a massive rock feature record: 1. ânot veg: rock >70 cmâ â for a rock that� is 70 cm along any axis. 2. ânot veg: massive rock featureâ
30 â for a talus slope or a cliff, wh
â for a talus slope or a cliff, which includes: a. talus â a sloping mass of loose rock and/or sediment t hat is part of the hillslope (record any vegetation cover if present); or b. cliff â a high, steep face of rock that is part of the hillslope, and not part of the valley bottom. A cut - bank is not a cliff, because it is within the valley bottom. (Do not recor d any vegetation cover for cliffs) ï· Wood, logs, root wads, or stumps: 1. When wood, logs, root wads, or stumps greater than 70 cm in diameter, or a group of logs that together are 70 cm in diameter are part of the bank or lying on the bank and at the upper lim it for greenline placement record ânot veg: log >70 cmâ. 2. A log with a qualifying greenline suspended over the stream or ground is not the greenline. When a log is on the ground, part of the bank, and has a qualifying greenline on top of the log then it ca n be the greenline. 24 RIPARIAN CROSS - SECTIONS Objective To describe the vegetation and ground cover in the riparian area. What Data to Collect 1. Valley bottom or hillslope/upland: to distinguish valley bottom from hillslope/upland, use landform as the o nly indicator. The valley bottom is the generally flat area constrained by the hillslope/upland, which has been formed by flooding from the stream. Terraces are included within the valley bottom ( see Figure 12 ). Hi llslope/uplands will almost always be on a slope. 2. Species cover: record species cover data for each quadrat. A riparian cross - section quadrat is never moved, even if it has % total cover of live vegetation. 3. When looking from 1m and below ( do not use th ese categories when looking� 1 m)
31 record the appropriate ânot vegâ
record the appropriate ânot vegâ category for a quadrat: a. not veg: bare (paved road, soil, sand, and rock 5 cm) b. not veg: litter/moss = downed organic matter (âcow piesâ, leaves, needles, and branches cm) c. not veg: lo g or stump â¥10 cm (measured along the diameter) Log has to be on the ground or on top of other logs that are on the ground. d. not veg: massive rock feature (defined in determining the greenline) e. not veg: rock â¥2.D cm If any portion of a quadrat is water then record what the substrate is or what is underneath the water (never collect data in the streambed). 4. Jhen looking above 1 m, if any portion of a quadrat is not live vegetation record ânot veg: not live vegâ. This category is reserved for sky and any n ot living vegetation such as dead branches. If dead vegetation from a previous season obscures living vegetation, look beyond the dead vegetation and only record the living vegetation. Figure 12 : Di agram showing changes in topography that correspond to different communities and the distinction between valley bottom (numbers 1, 2, and 3) and hillslope/upland (numbers 4, and 5) (from Crowe and Clausnitzer 1997, used with permission). 25 Where to Col lect Data 1. Channel transect numbers 1, 5, 10, 15, and 20 (or last transect for reach if there are fewer than 20 transects). If no channel transect is placed at any of these locations then sample riparian cross - section data at the next transect. There shoul d always be a total of 30 riparian cross - section quadrats collected at a reach. 2. Riparian cross - sections begin at the greenline quadrat pivot point and extend into the riparian area or hillside p
32 erpendicular to the direction of the val
erpendicular to the direction of the valley bottom, not nece ssarily perpendicular to the stream ( see Figure 1 ). 3. Align a compass to the direction of the valley bottom where the sample reach is located, add 90 degrees to the bearing, and use this new bearing (or 180 degrees f rom that when walking the other direction) for all five riparian cross - sections and record it in the PDA âReachâ form. 4. At each riparian cross - section transect collect data at 3, 6, and 9 m from the greenline quadrat pivot point in the direction of the esta blished compass bearing. When setting up quadrats, measure distance along the ground using a depth rod to determine the 3, 6, and 9 m quadrat placements. 5. Place the quadrat frame: a. with the long side (50 cm) parallel to the riparian cross - section line; b. at th e 3, 6, or 9 m point and continuing to 3.5, 6.5, or 9.5 m; and c. with the short side (20 cm) centered along the riparian cross - section line. Unique Riparian Cross - Section Circumstances ï· Sinuous Streams 1. If a stream is sinuous, a riparian cross - section may in tersect the stream. When measuring the riparian cross - section distance do not measure areas within the streambed or on islands ( Figure 13 ). Never collect data within the streambed or on islands. If there are questi ons, ask the stream techs. 2. Riparian cross - section quadrats can be on the greenline if the stream is parallel to the cross - section bearing ( Figure 13 ). 3. Riparian cross - sections may be close together, or even along th e same line, but should not cross since they use the same bearing and are therefore parallel ( Figure 13 ). 4. If a quadrat is partially over the streambed then slide qu
33 adrat onto streambank. 5. If no chan
adrat onto streambank. 5. If no channel transect is p laced then sample data at next transect. ï· Inaccessible Quadrats 1. When a quadrat is inaccessible because the vegetation is very thick or thorny or the slope is too steep to safely access then estimate the species cover as best as possible from a distance. 2. If an entire riparian cross - section or an individual quadrat cann ot be collected, t hen make the comment âestimatedâ in cross - section quadrats for each quadrat where data could not be collected. Do your best to collect or estimate data. ï· When there is a massiv e rock feature for a transect or quadrat where riparian cross - section data is supposed to be collected do the following: 1. talus â collect data in the talus field, if it can be done safely, using ânot vegâ categories and any species data present; or 2. cliff â use ânot veg: massive rock featureâ and no vegetation data is collected. 26 Figure 13 : Riparian cross - sections that intersect the channel on a sinuous stream. UNKNOWN SPECIES When an unknown species is encountered in a quadrat, d o the following: 1. Key it out using Flora of the Pacific Northwest or another appropriate key. a. In general, do not spend more than 10 minutes keying out any particular species or 20 minutes total at a quadrat. If a certain species looks abundant at the reach then it may be worthwhile to spend some extra time identifying it. 2. Some species cannot be identified in the field because a microscope is necessary, or because flowers are not available. In such cases, collect a specimen (see instr uctions on collecting spe cimens on page 27 ), rather than spending time tryin
34 g to identify it. 3. If a plant spec
g to identify it. 3. If a plant species cannot be identified then collect it. At each reach record the first plant collected as âunknown 0 1 â and number subsequent unknowns sequen tially for that reach. At the next reach start with âunknown 0 1â for the first plant collected at that reach. 4. Record all unknowns in the âSpecimensâ table in the PDA and field notebook: a. Use the exact same name on the plant label, in your field notebook and in the PDA. b. Call each unknown the same thing for the entire reach; do not change the identification of an unknown while at a reach . If the identification of an unknown is determined later in the day, continue entering that plant as âunknown #â and in the âSpecimensâ table record the correct ID in the comment field. 5. Even if the identification of an unknown is later determined for a reach, collect a specimen to send to the office. Lo we 5 0 U p 27 COLLECTING SPECIMENS When to Collect Plant Specimens Unknown Spec imens Collect a specimen of all unknown plants in a quadrat. Collect a specimen only once for that species at a reach. Always collect a species even if it is identified later in the day. Dominant Specimens At the end of sampling each reach, collect speci mens of the four plant species that are the most abundant (total percent cover for sampled quadrats) at the reach. The specimen must be a species that was recorded in the PDA for that reach. If a species has already been collected as an unknown or Species of Interest (see below), then do not collect it as a dominant. All four dominants should be plant species that were identified, not unknowns. Species of Inte
35 rest With some species we have additio
rest With some species we have additional research int e rest s . If you enter a species in the PDA and it is followed by â(collect )â you are required to collect the specimen. Circle Species of Interest on the label and include detailed information as if it was an unknown. These species do not count as dominants. Second Guess Species Always collect sp ecies that you second guess! Write the original species ID (this is what you have been entering in the PDA) on the Plant ID line . Circle Second Guess on the specimen label as reason collected, and the second guess ID on the habit/comment line. Jrite âUnkn ownâ if you believe your initial ID is incorrect but do not know what the plant is. Identified species that you later second guess and are unsure of its correct identification should remain the original name you called the species, even if you know it is incorrect. Threatened and Endangered Species When a threatened or endangered plant species is encountered do not collect any portion of the plant. Fill out a label as if you were to collect the plant and write TES at the start of the comment. Write caref ul notes about all encountered threatened and endangered species (for example: the shape of the inflorescence, rooting type, habitat, etc.). How to Collect Plant Specimens 1. Collect all unknown specimens from a quadrat, while at that quadrat. Do not wait t o collect specimens. If you later see additional plants of a collected species that are better for identification (e.g., more mature flowers), include them in that specimen collection. 2. Follow the 1 in 20 rule; if there are fewer than twenty individuals a t the reach do not collect the plant. If this is the case t
36 hen enter the species in the Specimen fo
hen enter the species in the Specimen form of the PDA, and in the Comment field, say that there werenât enough individuals (not collected). For unknowns, enter the genus, if known, or the life for m (grass, shrub, forb, etc.) if genus is unknown, in the Genus or Comment fields. 3. Collect as much of the plant as can be easily obtained (except for TES species; see above) including: a. Roots: dig 2â down (with trowel) and 2â around the plant to obtain some of the roots. Shake as much dirt and sediment from the roots as possible. b. Flowers and mature fruits, if both are present. 28 c. For woody plants collect branches with leaves and flowers/fruits/cones. A good sample includes older growth, not just the current sea sonâs growth. d. At least two pieces, with one label, so that we can dissect some without destroying everything (for example, multiple stems and inflorescences of a grass or multiple branches of a woody plant). 4. Every specimen must have a plant label. If provi ded labels are not used while in the field, then transfer the information to a correct label at the end of the hitch. Be careful that labels are placed with the correct specimen. 5. Place the specimen and label between newspaper, with the label folded (only once) around the specimen and the writing facing inward, and then between felt blotters in the plant press. 6. Cut folded newspaper to 9 x 12 inches. Try not to use anything smaller than the field press. Fold the newspaper only once, do not gift wrap. 7. Envelop es are provided for small plants and seeds/fruits. 8. Keep plant presses in a dry area with ventilation, ensuring specimens can air out and do not get moldy. Donât keep presses in plasti
37 c tubs because plants will not dry out.
c tubs because plants will not dry out. Also, try to keep presses off the truck bed bottom so that it will not get wet. 9. Record all collected specimens (unknowns and dominants) in the âSpecimenâ table in the PDA and in your field notebook ( see â Field Notebook â on page 29 ) . 10. At the end of the hitch put newspaper around all the specimens for each reach and write on t he outside newspaper the group - order - reach type, reach ID, stream name, and crew. How to Label Plant Specimens For each specimen, fill out and attach one of the provided plant labels (see Figure 14 ) with the following information: 1. Plant ID: record the species or unknown # that is also recorded in the PDA and field notebook. 2. Reason collected: circle all ca tegories that apply. 3. Habit/Comment: record information that will be useful to identify this plant in the lab, which may not be apparent when the specimen is looked at later (for example: inflorescence color, number of petals, sepals, stamens, stigmas, plan t height, root structure, etc.). Be sure to make notes on uncollected parts. 4. Under greenline or cross - section circle bank L or R, fill in transect number, and circle meter 3, 6, or 9 (cross - section only). Greenline or cross - section location information sh ould be filled out as to where the species was first encountered. ï· Specimens that are not well labeled are useless. ï· Some technicians may want to key out an unknown species at a later time. If an unknown species is identified add that information to the la bel, BUT DO NOT ERASE OR CHANGE ANYTHING ON THE LABEL, BECAUSE THAT IS OUR ONLY LINK BETWEEN THE SPECIMEN AND THE DATA IN THE PDA. ï· Species IDâs
38 need to be consistent throughout the re
need to be consistent throughout the reach! Species data in GL and XS quads, information in the specimen table, and specimen labels should always match for each unique species. 29 Figure 14 : Examp le of a Specimen Label filled out with good information Field Notebook In your notebook, record some basic information for each reach: 1. Group, Or der, Reach Type, Reach ID, Stream Name, Date, and Crew 2. List of specimens collected (all unknowns and dominants) a. Note some distinguishing features so that the specimen can be recalled when it is seen again (for example: clumped grass with open panicle, shor t sedge with terminal spike, small forb with yellow petals, etc.) b. Note where the species was first encountered (which GL or XS quadrat.) 3. Comments about reach (e.g. PDA crashed on transect 14) and about missing data or where data could not be collected and explaining why data is missing. 4. Questions about methods and / or difficult species During and after the field season your notebook can help answer questions for database managers. At the end of the field season all technicians will turn in their notebook (s) . S. F. Lone Ranch Creek June - 8 - 2014 MT4 RchID 5723 148 - 12 - I XS°=210 Bankfull= 18 - 23 Andrew Van Wagenen + Andrea Hannan GL 1 RL Unknown 1 Caespitose grass possibly Glyceria spp. Closed sheath, sc abrous culm, 5 florets, lemmas 0.5mm, blades 2 - 3mm, plant 4 - 5 dm, ligule 1 - 2mm, anthers 0.5mm XS 1 RL 9m Unknown 2
39 Figure 15: Example of a N
Figure 15: Example of a Notebook entry filled out with good information 30 RE FERENCES Bonham, C. D. 1989. Measurements for Terrestrial Vegetation. John Wiley and Sons, Inc. New York. Coles - Ritchie, M.C.; Henderson, R.C.; Archer E.A.; Kennedy, C.; Kershner J.L. 2004. The repeatability of riparian vegetation sampling methods: how u seful are these techniques for broad - scale, long - term monitoring? Gen.Tech.Rep.Fort Collins, CO: U.S. Department of Agriculture, Forest Service, Rocky Mountain Research Station. Crowe, E.A. and R.R. Clausnitzer. 1997. Mid - Montane Wetland Plant Association s of the Malheur, Umatilla and Wallowa - Whitman National Forests . USDA Forest Service Pacific Northwest Region. R6 - NR - ECOL - TP - 22 - 97. Daubenmire, R.F. 1959. Plants and environment: a textbook of plant autecology. John Wiley and sons. New York. U.S. Departm ent of Interior, Fish and Wildlife Service, 1998. Endangered and Threatened Wildlife and Plants: Determination of Threatened Status for the Klamath River and Columbia River Distinct Population Segments of Bull Trout Final Rule. Federal Register June 10, 19 98 (Volume 63, Number 11, Pages 31647 - 31674) 50 CFR Part 17, RIN 1018 - AB94. Winward, A.H. 2000. Monitoring the Vegetation Resources in Riparian Areas . USDA Forest Service, Rocky Mountain Research Station. RMRS - GTR - 47. APPENDIX A : Miscellaneous Tips and Notes ï· Communicate with the stream techs to ensure consistency with streambed vs. streambank determinations and bankfull locations. ï· Make comments in the PDA for each quadrat where data is missing or was not collected. Also, make comments in the PDA where transect number or bank is entered i
40 ncorrectly for each individual quadrat.
ncorrectly for each individual quadrat. ï· There should always be an entry in the PDA for 30 cross - section quadrats and twice as many greenline quadrats as transects. ï· If a quadrat is difficul t to reach, an estimate is better than not collecting any data. ï· Collect unknown plant specimens as you sample; do not wait until the end to make collections. ï· If there are questions or problems regarding the PDA or protocol call: o Andrew at 435 - 755 - 35 7 2 ( office) or 435 - 757 - 7415 (cell) o Hotline at 435 - 760 - 5693 o If you do not get an answer make note of the problem and be sure to bring the issue up at the end of a hitch. 31 A PPENDIX B : Critical Invasive Plant Species Invas ive species pose a threat to biological diversity. PIBOâs spatial scale offers an opportunity to detect the spread of invasive species in the Columbia and Missouri river basin. That being said PIBO field crews also pose a potential threat as a vector by which invasive species could be transported. The f ollowing is PIBOâs collection protocol for aquatic invasive speci es and see Appendix S for PIBOâs decontamination protocol. Procedures for Invasive Plant Species There is particular interest in the earl y detection of critical invasive plant species (Table B1 ). If any of these species are found at any location on a reach it is required that a specimen is collected. This includes outside of the normally sampled quadrats. Watch for these species when perf orming you r other sampling tasks. Tabel B 1 : Invasive plant species which must be collected if found at a reach. Critical Invasive Plant Species PDA Name Flora of the Pa
41 cific Northwest Common Name Polygon
cific Northwest Common Name Polygonum cuspidatum Polygonum cuspidatum japanese knotweed Polygonum polystachyum Polygonum polystachyum cultivated knotweed Polygonum sachalinense Polygonum sachalinense giant knotweed Heracleum mantegazzianum Not Included giant hogweed Clematis vitalba Clematis vitalba old man's beard Alliaria petiolata Not Included garlic mustard Rubus discolor Rubus discolor himalayan blackberry Hedera helix Hedera helix english ivy Tamarix ramosissima Not Included saltcedar Iris pseudacorus Iris pseudacorus Yellow Flag Iris Arundo donax N ot Included giant Reed Phragmites australis Phragmites communis common reed Collecting Invasive Plant Species If you identify or suspect you have id entified one of the species ( see Tabel B 1 ) y ou are required to collect and send in a specimen. Specimens will be recorded as Species of Interest on labels and in the PDA. If you find a specimen outside of a quadrat note an approximate location in the comment field of the label. Include detailed information about th e specimen (for example: the color and measurements of the inflorescence, rooting type, habitat, etc.). A PPENDIX C : Sampling with Two PDAâs at a Reach If two vegetation technicians are collecting data at the same reach then indicate it on the âReachâ form. Be sure to enter the same group, order, reach type, and reach ID in each PDA. One PDA will be used to collect all river left greenline and cross - section data and the second PDA will be used to collect all river right greenl ine and cross - section data. Only one technician should collect UTMs. Only one technician should enter specimen data into their
42 PDA. Both technicians must use the
PDA. Both technicians must use the same unknown numbers in both PDAâs for all unknowns. At the start of the reach work through s everal (3 - D) transects together to get a âfeelâ for the vegetation and to ensure that both technicians are identifying unknowns consistently. When any new unknowns are encountered be sure to communicate with the other vegetation technician as to what the u nknown plant looks like and the unknown number associated with that unknown. 32 APPENDIX D : Exception to Estimating Cover �(100% for Greenline) Figure D 1 : This figure assumes all three quadrats (a, b, c) are on top of 100% rooted , live, 1 m vegetation (species A = half stars). The overhanging vegetation is not rooted in the quadrat and is less than 1 m tall (species B = big leaf). In quadrat âbâ, species A is >2D% visible so species B is not moved. Quadrat âcâ has over 100% cover for the greenline since both species A and B are counted as cover. Greenline a) 95 - 100% species A b) 50 - 75% species A and 38 - 50% species B c) 95 - 100% species A and 75 - 95% species B Cross - section a) 95 - 100% species A b) 50 - 75% species A and 38 - 5 0% species B c) 5 - 15% species A and 75 - 95% species B 33 A PPENDIX E : Special Cases Dry Sites At the time of sampling, some reaches may only have water in part of the channel or may have no water at all. All data is collected at these rea ches and normal sampling procedures are followed. Large River (Unwadeable) DMA (K) Sites Although this is a rare occasion, some DMA sites (reach type âKâ) are located along large, unwadeable rivers (for example, the Jo
43 hn Day, Grande Ronde, and Deschutes riv
hn Day, Grande Ronde, and Deschutes rivers) on BLM land in eastern Oregon and are sampled in a different way. Only one side of the river is sampled due to an unw adeable channel . Therefore, ~ 42 transects will be set up with a spacing of 6 m per transect. Sampling methods are the same for larg e river DMA sites except that data is collected from only one side of the river: 1. C ollect greenline data at all 42 transects; 2. Riparian cross - section data is collected at every 5 th transect (1 , 5, 10 , 15, 20, 25, 30, 35, 40 and 42) . Collect data at transect 41 if there a re less than 42 transects. Collect data at transects 39 and 40 if there are only 40 transects. There should always be a total of 30 riparian cross - section quadrats collected at a reach. 3. If sampling these sites with two vegetation technicians, alternate transects. One person will sample the odd numbered transects with riparian cross - sections at 1, 5, 15, 25, and 35. The other technician will sample the even numbered transects with riparian cross - sections at 10, 20, 30, 40 and 42. Sampling S ites with Beaver Activity Safety First!! Please be careful walking around beaver impacted areas!! Why do beaver impacted reaches matter? PIBO is attempting to assess changes in riparian and aquatic habitats due to land management. Beavers also influence riparian and aquatic habitats; therefore we want to sample reaches that have beaver activity. When at a beaver impacted reach follow normal sampling procedures in un - impacted areas and as best as possible in impacted areas. Some beaver situations may be difficult, do the best that you can under these circumstances and make detailed notes as to what specifically wa
44 s difficult, why sampling was difficult
s difficult, why sampling was difficult, and/or why data could not be collected. ï· Issues at Beaver Sites o Use normal procedures when possible! o T here are often âweirdâ side channels beside and downstream from beaver dams. Stream techs should be placing flags on the outside banks where data collection occurs. Communicate with stream techs and ask questions when in doubt about transect placement. o Ar eas flooded over bankfull will be difficult to determine bed vs. bank and bankfull. If bankfull cannot be located, then use waterâs edge as the lower limit for greenline placement and D0 cm from waterâs edge as the upper limit for greenline placement. If n o greenline is present place quadrat at waterâs edge. 34 A PPENDIX F : Determining Bankfull and Scour Line Bankfull Objective: ï· Examine bankfull indicators throughout the reach and determine dominant bankfull height. ï· Do not sample until you are confident o f the bankfull height! ï· Do this as a group (all crew members) Bankfull Indicators : All six indicators may not be present. 1. Examine streambanks for an active floodplain. This is a relatively flat, depositional area that is commonly vegetated and above the c urrent water level unless there is a large amount of spring runoff or there has been a substantial rain event (i.e. stream running at bankfull stage). 2. Examine depositional features such as point bars. The highest elevation of a point bar usually indicates the lowest possible elevation for bankfull stage. However, depositional features can form both above and below the bankfull elevation when unusual flows occur during years preceding the survey. Large floods can form
45 bars that extend above bankfull wherea
bars that extend above bankfull wherea s several years of low flows can result in bars forming below bankfull elevation. 3. A break in slope of the banks and / or change in the particle size distribution from coarser bed load particles to finer particles deposited during bank overflow conditions. 4. Define an elevation where mature key riparian woody vegetation exists . The lowest elevation of birch, alder, and dogwood can be useful, whereas willows are often found below the bankfull elevation. 5. Examine the ceiling of undercut banks. This elevation is normally below the bankfull elevation. 6. Stream channels actively attempt to reform bankfull features such as floodplains after shifts or down cutting in the channel. Be careful not to confuse old floodplains and terraces with the present indicators. Meas uring Bankfull Height ï· After you identify bankfull, measure the vertical distance from the waterâs surface to the dominant bankfull elevation measured throughout the reach. ï· This vertical distance can be used when bankfull indicators are not present at a par ticular point along the streambank. ï· Bankfull height is needed for streambank measurements, bankfull widths, pebble counts, large wood, and cross - sections. Scour Line Use these indicators to identify the lowest consistent scour line within your reach , and measure how far above the waterâs surface it occurs: ï· Lowest consistent limit of sod forming vegetation ï· Lowest consistent limit of perennial vegetation ï· The ceiling of undercut banks in straight sections of stream channel ï· On depositional features such as po int bars, the scour line is often defined by the limit of perennial vegeta
46 tion, or by an indentation in the bar (l
tion, or by an indentation in the bar (locally steep area). Where to look : the best place to identify scour line is in a straight, well - vegetated section of the stream channel. If yo u cannot identify the scour line at a specific location or transect, then use the average scour line elevation measured throughout the reach. If flows are above scour line we generally donât sample. If this is the case, call prior to sampling. 35 APPENDI X G : Archer PDA Troubleshooting ï· If the main Windows screen is displayed, check that the device is not locked. ï· If you are in the middle of an application, hit the Applications Manager (leftmost) button, and try closing all applications. Relaunch the desire d application. (If you were in the middle of entering a record, you may have to return to it and edit or delete it.) ï· If the problem persists, try a soft reset. To do this, hold the power button down until the Power Button screen appears. Select âResetâ. [N o data will be lost with a soft reset, but if you were in the middle of entering a record, you may have to return to it and edit or delete it.] If the touchscreen is not working, you can perform the soft reset using only the power button: hold the power bu tton down (up to 30 seconds) until the screen goes dark and the green LED lights up. ï· If the device wonât turn on, first experiment holding the power button down for up to 30 seconds. If this fails to turn on the PDA, replace the battery to see if the batte ry was too low to power up the device. When it powers up, it will have performed a soft reset, so if you were in the middle of entering a record, you may have to return to it and edit or delete it. HARD RESET AND RESTO
47 RE INSTRUCTIONS: as a last resort, yo u
RE INSTRUCTIONS: as a last resort, yo u can perform a hard reset . Call the Hotline before you begin this process . Before resetting the device, you should perform a backup of the PDA and write in your field notebook information about when you performed the hard reset - date, time, and if you hav e begun a reach, where you are in your sampling (i.e., what youâve sampled so far). To do the hard reset, hold the power button down, and when the power button screen appears, continue holding the power button until the screen goes dark. The green LED to t he right of the buttons should come on. Release the power button, and simultaneously hold down the home , up direction on the central button, and context (far right) buttons until an image appears on the screen. Youâll need to go through the setup steps [if it doesnât ask you to go through a setup, you probably only did a soft reset, so try again], and then use File Explorer (explained below) to open the PIBO_Restore file on the SD card. Launch File Explorer . Youâll need to close/exit any open applications or screens. In the main Windows screen of the PDA, select Start, then Programs, then File Explorer. The main heading for the File Explorer screen is, appropriately, File Explorer. Directly below that is the display of where you are exploring/ navigating. T he main locations are My Device, Storage (in My Device), and SD Card; these are always listed for convenience. The downturned triangle to the right of the name points down to the list of files and folders contained within. Select the SD Card, then select t he PIBO_Restore file. Opening this self - extracting file will launch Sprite Backup. The screen for Sprite Backup should have the heading Restore Da
48 ta Selection. This allows you to select
ta Selection. This allows you to select what you want to restore. A check in the box means selected for resto ration. The check in the Pocket PC box means everything on the handheld (that was backed up in this file) will be restored. This is what you want, so select Next in the lower left part of the screen to continue . When the Device Reset Required screen appear s, Select Next to continue . Now, be patient while the restore proceeds. The handheld will reset. After performing the restore, the handheld will reset a second time. When it is finished, it will allow you to look at a report. The Restore has been completed . To confirm this, find and open the Forms 5.1 application and check that all the forms are listed. Also, check that Sprite Backup is present on either the Start menu or the Programs page of the PDA. At this point, you will need to make checks of the bas ic PDA settings and may need to reenter the name of your handheld as the correct Device ID.: 36 Enter your Device ID/user name (Settings - System - About - Device ID) A1, A2 ... A18 (Correct ID is Important!) Power â turn off if not used (Settings - System - Power - Ad vanced) Battery â 2 min, External â 5 min Backlight â turn off if not used (Settings - System - Backlight) Battery â 1 min Brightness level (Settings - System - Brightness) Battery: Keypad - Off, Screen Backlight â Medium High Date and Time (Settings - System - Cl ock&Alarms or Today/Home screen) Correct Date is Important!!! ERROR MESSAGES: If you get an error message where it asks you if you want to send in a report, you can click âdonât sendâ. If you keep getting the message, you can try a soft reset. If th
49 at d oesnât help, you can disable erro
at d oesnât help, you can disable error reporting. If you get an error message relating to a Forms file, worded something like âError parsing file...â a forms data file has been corrupted, and you will have to perform a hard reset. Do a backup of data (you ma y have to do a soft reset first). Document the problem before doing the hard reset. At the end of the hitch tell your area supervisor that you had to perform a hard reset and note it on the End of Hitch form. If you are able to use the PDA to enter Forms d ata, the data should be secure. APPENDIX H : Forms Data Backup using Sprite Backup (Archer Handheld) Overview: You will use the application Sprite Backup to save a backup file to the SD card. You will name the file with the date and time the backup was do ne, and save it to the correct hitch folder. The handheld will reset twice during the backup process, then report to you that it has finished. Backup Instructions : Launch Sprite Backup . Select the Start menu, (then Programs, if necessary) then Sprite Back up. To get to the Start Menu, you can use the Start button on the handheld, or go to the main screen for Windows. The main screen for Sprite Backup has the Backup, Restore, Schedule, and Options icons ( Figure H 1 ) . Tap on the Backu p Icon [selecting Next is the same as selecting Backup]. The next screen âBackup Data Selectionâ ( Figure H 1 ) allows you to select what you want to back up. A check in the box means selected for backup. The default setting is that everything on the PDA is selected for backup (the box for the Pocket PC is checked gray, and the folders and files on it are checked red.) We will go with this setting, so confirm that the Pocket PC box is checked, and
50 select Next in the lower left part o
select Next in the lower left part o f the screen to continue. On the new screen titled âSave Asâ ( Figure H 1 ) In the Name field, Enter a new name with the correct Date and Time in the following format: 3Jul9AM. The correct date is necessary; the time can be rounded to the hour. Using the Location and Folder fields, you will save the file to a folder for the current hitch on the SD card. Select the following fields, or check that they are correct: The Location should be \ SD Card . The Folder should be the named folder for the current hitch (for example, âH1Jun9 - 16â). In the lower left part of the screen, select Next to continue. If the Device Reset Required screen appears, select Next to continue. Now, relax and let the application do its thing. The handheld will res et. After performing the backup, the handheld will 37 reset a second time. When it is finished it will tell you that the backup is completed and allow you to look at a report. The data backup is complete! Figure H 1 : Backup Icon Backup Data Selection Save As screen You can use File Explorer to confirm that the backup file is on the SD card as you expect. To do this, go to the Start menu (then Pr ograms, if necessary) and select File Explorer. In the File Explorer window, select SD Card to view the files and folders on the card. If you do not see âSD Cardâ listed, select the icon directly below the Jindows Start icon and âSD Cardâ should appear as an option. Select the folder for the current hitch to view its contents. Your new backup data file should be listed for that folder.
51 If it is not, it may have been saved els
If it is not, it may have been saved elsewhere on the SD card, or in âStorageâ or âMy Documentsâ in internal memory. If you find it in any of these places, leave it there, and be sure to save future backup files to the correct location. 38 APPENDIX I : Miscellaneous Stream Surveying Tasks When the vegetation technician has completed all of their surveying tasks, t hey will need to assist the stream technicians with certain tasks to complete all data collection for a reach . The protocol for drawing reach maps, taking photos, and measuring gradient is included in this appendix. Reach Map Drawing the reach map can be a very helpful way to assist the stream technicians. The reach map should be drawn on Form 2; which the stream techs will have. The reach map is drawn to describe the reach and help relocate the site in the future. Draw the reach map to scale (relatively) and strive for clean and simple drawings. Show the stream channel extending at least 10 m above and below the reach boundaries; locations of shrubs and trees, large wood, bars, islands, pools, site markers and beaver ponds; location of hill slopes, roads, fences, side channels, tributaries, etc. In addition, show any distinct feature that will help in relocating the site. Good maps: ï· Clearly show the reach drawn to scale ï· Show the main channel (with flow arrow to show thalwe g) extending at least 10 m above and below the reach boundaries, including site markers, and any distinct feature that will help in relocating the site. ï· Show natural features such as: side channels, tributaries, shrubs and trees, large wood, bars, islands, pools, beaver activity, b urned a
52 reas, hill slopes, etc. ï· Show pre
reas, hill slopes, etc. ï· Show presence of management activities at the site: roads, trails, fences, timber harvest, grazing, camps ites, restoration, etc. ï· Are simple and not overcrowded, but include important features When to draw a reach map: ï· At new sites ï· If instructed to do so on the site information sheet ï· Channel shifts ï· Beaver impacts ï· Stream looks different and has obvious changes ï· Previous map is poorly drawn and/or unclear 39 Figure I 1 : Commonly used symbols for reach maps. 40 Figure I 2 : Example of a well - drawn reach map. 41 Photos Background: Photos are important for relocating sites and detecting change through time. General photo doâs and dontâs: ï· Do not take photos displaying unprof essional behavior. ï· You must be wearing a shirt and boots / shoes (no sandals) if you are in a photo ï· Avoid having personnel in photos when possible ï· Do not zoom - in at all ï· Avoid taking photos looking into the sun, take photos with the sun at your back ï· Try to avoid taking photographs where part of the frame is in the shadows and part in the sun ï· Hold the camera 1.5 meters from the ground (use a depth rod as a guide) ï· Take photos in landscape orientation even if you are repeating photos that are in portrait orient ation ï· A depth rod should be in the following photos: BR, TR, Misc. stream o Try to duplicate rod location from old photos, however, make sure the rod is always visible ï· If your camera is broken or lost, u se a personal camera if one is available, and download photos with supervisor at the
53 end of the hitch Recording details a
end of the hitch Recording details about each photo on Form 4 and in the data logger: NOTE: Donât fill in grayed out boxes on Form 4 or equivalent info in the logger ï· Photo Number : record the number in the display screen on t he back of the camera after you take the photo. ï· Description : select appropriate description on Form 4 and in logger. ï· Rod Location : rod should be in BR, TR, and Misc. stream photos o Streambank â Record whether the rod is on River Right (RR) or River Left (RL ). o Transect Number (Misc. stream only) â List the number of the closest stream transect to the depth rod. o Direction from Transect â Circle whether the depth rod is upstream or downstream of the transect. o Distance â Measure the distance from the rod to th e transect. ï· Camera Location : o Camera Facing â Circle whether the camera is facing upstream (US), downstream (DS). o Distance to Rod â Distance from camera to depth rod in meters. o Bearing to Rod â Use a compass and record the bearing from the photo point to the depth rod. NOTE: Record Reach Overview UTMs in the Veg PDA Reach ID / Date Photo ï· Always take this photo first . Remaining photos can be taken in any order. ï· Include stream name, reach name (group â order â site type â crew code â year), reach ID (fou r digit # given on the site info sheet), and date using the format below. Elk Creek 123 â 07 â I â M2 â 0 7 5144 June 11, 2007 42 BR & TR Marker Photos ï· Take these photos at every site. ï· The purpose is to help you locate the marker. ï· Always strive to take the best photo
54 possible (donât repeat an old phot o u
possible (donât repeat an old phot o unless it is from the best location) ï· The photo should include the marker and the BR (see good examples below) Figure I 3 : Good examples of site marker photos. ï· Donât zoom in too close or be too far away (see bad examples belo w) Figure I 4 : Bad examples of site marker photos. Imagine you are sampling the reach in the photograph on the left. Does this marker photo on the right help you locate which willow the marker is attached to? No, it is zoome d in too closely. There are 2 different scenarios for shooting BR, TR, Misc. Stream, and Reach Overview photos: 1. Duplicating photos from OLD SITES 2. Taking photos at NEW SITES which have not been sampled 43 Photos at OLD SITES: Objective: ï· Dupli cate BR, TR, misc. stream, beaver photos and reach overview photos as closely as possible ï· Take more photos if: o Stream changed o Old photos do not depict the entire reach o You think you can take a better photo that will be easier to repeat in 5 years. o If you c annot locate a misc. photo, take a new misc. photo and label it with a different misc. photo number Repeating BR, TR, Misc. Stream, and Reach Overview Photos ï· Your primary goal is to duplicate old photos as closely as possible ï· Examples of good repeat photo s are on the cover of the stream protocol ï· Old photos will be provided when you sample an old site ï· Use an old photoâs description to help locate where it was taken. o Beware that many old photo descriptions have errors. o Your transects wonât necessarily be in the same location as past samples ï· After relocating where the old photo wa
55 s taken from, visually compare the old p
s taken from, visually compare the old photo with what you are seeing through the cameraâs viewfinder. ï· Pay particular attention to the corners of the old photo, does your photo have the same features in each corner? ï· Does your photo look like it is too close or too far away? If so move. ï· Is the horizon the same? For example, is the meadow behind the stream towards the top of the old photo, but near the middle of yours? If so make the necessary adjustments. ï· Once you take the new photo, compare it to the old version. If they donât match, shoot it again. Repeating Photos, Special Circumstances ï· NOTE about 2001 - 2002 photos: You may be given BR / TR from 2001 or 2002; these photos were us ually taken standing on the BR / TR, not standing back looking at the BR / TR. Do not repeat these BR / TR photos. Take new photos standing at least 5 meters back from BR / TR (as far back as necessary to include both banks) ï· Channel shifts (read â Recording Disturbanceâ in the Stream protocol for more details) o Repeat any photos in old main channel, even if it is dry o Take new Misc. stream photos in the new main channel o Take new Misc. stream photos of where new and old main channels meet (starred location in F igure 5 of the Stream protoc ol ). o Take new Misc. stream photos showing the change o If BR / TR are no longer in main channel: ï§ Repeat photos of BR / TR and label them âOLD BR/TRâ ï§ Take new BR / TR photos ï· Beaver sites â read Stream protocol âSampling Sites with Beaver â appendix. 44 Figure I 5 : Poor repeat photos. When repeating photos use both foreg
56 round and background indicators to match
round and background indicators to match the original. The horizon matches in these photos, but the left photo was taken from the middle of the stream while the right photo was taken near the RR bank. Notice how the large conifer is not framed in the photo on the right and that the mountain is not in the same position. Take a new photo, rather than repeating the old one if: ï· You are instructed not to repeat it ï· Old photo is missing Repeat the old photo and take an extra better one if: ï· Old photo is horribly out of focus ï· Old photo was taken from incorrect / unsuitable location (i.e. canât see both banks, doesnât depi ct the stream channel) ï· There should be a minimum of 5 Misc. stream photos per reach. Take additional Misc. stream photos if there are less than 5, make sure the new ph otos are of the stream channel and are: o Representative of the site o Areas that you think m ay show change through time o Areas of the reach that are not included in other photos Taking additional photos if: ï· Stream changed dramatically, or something âweirdâ is going on (burned, partial flow, much more / less LW, heavily grazed, etc.) ï· If your site is really brushy, attempt to take additional photos in less brushy locations. Note: If you take extra BR or TR photos because you think the repeat photo is bad quality, label them as, for example, âTop of Reach DS 2â and âBottom of Reach US 2â. 45 Phot os at NEW SITES: Take photos of the following at each reach. ï· Reach ID / Date: Take this photo first. Write the stream name, group/order, reach type, date, and crew on the back of Form 2 using a marker. ï· Site marker l
57 ocation (BR and TR): Take the photog:
Take the photog")
ocation (BR and TR): Take the photog raphs looking towards the reach with the marker in the foreground. Have a second person pointing at the marker. If in a wilderness area do not place a marker, instead choose a good distinctive feature to use as the marker and take a photo of it with someo ne pointing at it. ï· Reach overview: o Should be taken from a location where the greatest extent of the reach can be observed. o A hillside overlooking the reach is ideal. o Sometimes this is a hard shot, try your best. o Record UTMs with the Veg tech in the Veg PD A ï· The bottom and top of the reach: Take a photograph looking both upstream and downstream. Stand parallel to the channel at a distance where you can see both banks. ï· Misc. Stream: Take a minimum of 5 Misc. stream photos . Your goal is to take photos of the stream channel (include both banks) that are either: o Representative of the site o Areas that you think may show change through time Some points to remember when taking photos at new sites: ï· Make sure you include both banks in the photo. For smaller streams s tand back from the object of interest at least 5 meters. For larger streams� (8 meters wide) stand back 10 meters or more to assure you can see both banks. ï· Try and disperse your Misc. stream photos throughout the sample reach, this will lead to a better do cumented reach. 46 Measuring Change in Reach Elevation (Gradient) Equipment: automatic level, tripod, and stadia rod Definitions: Elevation change = vertical difference or drop between the water surface at the Top of the Reach (TR) a nd the water surface at the Bottom of the Re
58 ach (BR). Gradient = the percent slope.
Gradient = the percent slope")
ach (BR). Gradient = the percent slope of the stream reach (elevation change / reach length) Introduction: ï· Measure elevation change between the water surface at the Top of the Reach (TR) and the water surface at the Bottom of the Reach (BR) using a tripod and surveyorsâ level ï· Measure elevation change 2 or more times ï· The second measurement must be ±10% of the first measurement ï· If the second measurement falls outside the ±10% window continue measuring elevation cha nge until 2 measurements are within ±10% of one another. ï· Only record the two elevation changes within 10% of one another on Form 1 and in the data logger ï· If you knowingly make an error while shooting elevation change, DO NOT enter this data into logger ï· Spe cial situation : If there is not flowing water at your BR / TR, position the stadia rod in line with the BR / TR at the deepest location within the channel. Overview: One person operates the level and records heights from the stadia rod. The other person positions the stadia rod at the BR, any intermediate spots (if necessary) and at the TR. It is very important to keep the stadia rod plumb (vertical in all directions) when taking measurements. The person operating the level will be able to tell if the s tadia rod is plumb or not and will communicate what needs to happen to the other person . The bottom surface of the stadia rod must be held at the surface of the water, not the stream bottom when positioned at the BR and TR. LEVEL SET UP STEP 1: Leveling with Tripod and Affixing Level ï· Be very careful when handling the levels because they are fragile and expensive. ï· The levels must be setup properly or the measurements wil
59 l not be accurate. ï· Stomp the tri
l not be accurate. ï· Stomp the tripod legs into the ground; when it is stable, carefully mount the level on the top of the tripod. Thread the support screw in the center of the tripod into the corresponding hole on the bottom of the level. How tight? Just right â donât break it. STEP 2: Center the bubble Once the level is secured onto the tripod, do as much leveling as possible using the tripod legs while looking at the bubble window. STEP 3: Fine adjustments Use the knobs for fine scale leveling. The three knobs can be adjusted independent of one another and it may seem counterintuitive , but if the level moves one way the bubble goes the other. Once the bubble is entirely within the center circle it is level. ï· Be careful when using the fine adjustment knobs because they will break if they are tightened too hard. ï· Be EXTREMELY careful, do not bump the tripod and level once it is set up or you will have to start over. 47 EXAMPLE 1: Measuring elevation change with one shot Position the level somewhere between the BR and TR. Under ideal conditions, you will be able to view the stadia rod throu gh the level when it is at the BR and TR. Record the heights from the stadia rod that line up with the horizontal crosshair inside the level for both locations on the back of Form 1. Calculate elevation change. The diagrams below show how to record indi vidual shots and calculate elevation change. You must measure the elevation change either two or more times. Between repeat measurements, the tripod must be re - leveled or moved (you must move 1 tripod leg at least) to get an independent measurement. In order for the two measurements to be valid, the measureme
60 nts must be ±10% of one another. For t
nts must be ±10% of one another. For the example , below: The elevation change of the first shot is 1.21m (4.1 â 2.89). The second shot must be ±10% of the first. To calculate this range, multipl y 1.21m by 0.9 to establish the lower threshold (1.09m), and multiply 1.21m by 1.1 to establish the upper threshold (1.33m). Because the second elevation change was within the ±10% range (1.19m), a thir d measurement was not required. Figure I 6 : Measuring elevation change using a single shot. The 1 st of 2 elevation changes is depicted above. Figure I 7 : Measuring elevation change using a single shot. (Top) The 1st of 2 elevation changes is depicted a bove. (Bottom) When shooting from BR to TR (uphill, record on top of Form 1) A â B = elevation difference for each shot, when shooting from TR to BR (downhill, record on bottom of Form 1) B â A = elevation difference. 48 EXAMPLE 2: Measuring elevation chan ge with multiple shots Very often, you will not be able to measure the reach elevation change with 1 shot. In the following example, 3 shots are required. When moving the level to the next shooting location, it is imperative to keep the stadia rod on the exact same spot. Intermediate rod positions serve as reference points âconnectingâ level shot #1 to shot #2, and so on. Also, as stated earlier, the rod must be at the waterâs surface at the BR and TR, but is not necessary for intermediate readings . Figure I 8 : Calculating reach elevation change using three shots. When the first two measurements are not within ±10% threshold, calculate elevation change a third time. In this example the first elevation change measurement was 2.65m. The ±10% limits w
61 ere calculated. The 2 nd elevation c
ere calculated. The 2 nd elevation change was 2.37m, which is outside the 10% threshold, so a 3rd elevation change was calculated. NOTE that elevation change measured uphill (from BR to TR) is recorded on the top of the form, and elevation change measured downhill is reco rded on the bottom of the form. 49 EXAMPLE 3: Measuring reach elevation change with multiple shots: how to compensate for shots with negative elevation change. In some situations you will have a shot with a negat ive elevation change, shot 2 in the following example. It is critical to record the numbers in the appropriate area on the form as shown in the previous examples. This way, the negative elevation change will be accurately recorded. Figure I 9 : Measuring reach elevation change with multiple shots. In this example shot 2 has a negative elevation change. 50 APPENDIX J : Instrument Placement and Retrieval HOBO (Seasonal Water Temperature Logger) Placement Hobo t emperature loggers will be placed at all Integrator sites before July 15 th . The main objective is to place the Hobo in the stream where it will be submerged all summer collecting accurate temperature data until a technician comes back to retrieve the hobo at the end of the field season. Objective ï· Place Hobo Seasonal Water Temperature Logger. ï· Record info about the Hobo and its location using the Instrument Form. Establish the best location for the Hobo at the site ï· Find where the thalweg flows through a de ep pool in the reach. o Water must flow through this pool (no backwater or side channel). o This pool should be one of the last to hold water if the rest of
62 the reach goes dry. o Avoid areas
the reach goes dry. o Avoid areas just downstream of tributaries and obvious groundwater seeps, as wat er temperatures in these areas will not be representative of the stream temperature. o If there is a steep bank on one side of the stream, try to place the logger near the opposite side such that runoff from the hillside does not influence the temperature r eadings. o Avoid very strong currents. ï· Make sure there is a secure anchor point close to the pool. Good anchor points include: o A small tree close to the bank. o A root wad overhanging the stream bed. o LWD along the bank or hanging over the stream that is not go ing to be swept away. o A rock secure in the bank with a way to loop the cable over or through it. ï· Make sure the location is camouflaged from people when in high traffic areas. o Try to prevent the Hobo from getting stolen. o Avoid high traffic areas such as cam p sites or trails on open ground. Place the HOBO ï· Make sure to record the ID# before placing the Hobo in the water. ï· Wrap the cable around the anchor and feed the Hobo through the loop to secure it. o You may need to use an extension cable to ensure the Hobo lies deep in the pool. ï· Use rocks to hold it in place if necessary. o Place the rocks on the cable not the probe, if the flow drops, the rocks can absorb heat. ï· Use grass, dirt, or moss to cover the wire if you are placing it in a high traffic area. ï· Hang a Blu e flag with âPIBO HOBOâ written on it in sharpie in a near - by location. o Place the flagging somewhere close to the hobo, not at the exact location to avoid drawing attention from people. o In highly trafficked areas, flagging should be farthe
63 r from hobo, or on opposite bank.
r from hobo, or on opposite bank. 51 Record HOBO information: ï· Record hobo placement in PDA using Forms 5.1 Completely fill out the required areas of the form before you leave the site . ï· Enter probe ID# (double check that it is correct), all reach info, all probe location inf ormation (distances should be in meters). ï· Collect GPS coordinates for the hoboâs location. ï· No Marker information is required because you will only place flagging, not a marker. ï· Jrite a detailed description of the Hoboâs location. o Ex: âThe Hobo is anchored to small pine tree (~20cm diameter) on RR, in large pool DS of huge boulder, 6m US from Hobo flag. ~25m US from BR tucked under overhanging bank. The cable is covered with moss.â o The better you hide the temperature logger, the better your map and descripti on need to be! ï· No Photos are required. ï· Draw a detailed map of the Hobo location so we can efficiently relocate them during retrieval . o Depict at least 20 - 30m of the stream. Include the Hobo, direction of flow, North arrow, flagging, and any features that w ill help to quickly relocate the logger (i.e. if the bank is covered by alders, donât just draw alders on the map without additional detail). Placing a Hobo at Beaver Impacted Sites ï· Locate the most downstream beaver - impacted area within the reach and plac e temp probe downstream from this location. ï· In the figure below, you would ideally place your probe below transect 4 or 5. o If there is a beaver pool at your BR extending downstream then place the probe downstream of your reach, make sure the probes locatio n is clearly identified in the probe form and map. Figure
64 J 1 : Depiction of reach with beaver d
J 1 : Depiction of reach with beaver dams. Place the probe below the most downstream beaver impacted area within the reach. Flow BR TR T1 T2 T4 T3 T5 T6 T7 T8 T9 T10 T11 T12 T13 T14 T15 T16 T17 T18 T19 T20 T21 T22 BR TR T1 T2 T4 T3 T5 T6 T7 T8 T9 T10 T11 T12 T13 T14 T15 T16 T17 T18 T19 T20 T21 T22 52 HOBO (Seasonal Water Temperature Logger) Retrieval Hobo temperature loggers were placed at integrator and sentinel sites, (sometimes other sites), in the sp ring by scouts and some crews. These devices will be retrieve d for data download this fall. Hobos cannot be removed from the stream before September 1 st . Information relating to the processing of the data on the Hobo will be collected by the crew when the device is removed. Objective: ï· Retrieve Hobo temperature loggers ï· Record information relating to probe condition, stream flow, and associated reach information in the Archer PDA unless there is a malfunction in which case it is recorded on the temp probe Retrieval form. See the PDA section for help with the PDA. ï· Remove reach flagging. ï· Label Hobo appropriately with flagging. 1. Navigate to the reach using site information. 2. Record all reach information in the PDA Forms 5.1 Hobo Retrieval (or on paper if the PDA is malfunctioning). 3. Walk the whole reach, you must do this first to determine flow and pick up BR/TR flagging. Examples of Stream Flow: o Flow (whole reach): there is continuous flow of water throughout the entire reach o No flow (completely dry): there is no water within your reach, it is âbone dryâ o Other (m
65 ake detailed comment): this can describ: this can describ")
ake detailed comment): this can describe a wide variety of flow conditions, so please write a thorough, detailed comment. o Examples of flow comments: ï§ âNo flowing water within reach, but there is water in poolsâ ï§ âFlow whole reach, but it is just a trickleâ ï§ âTrickle of flowing water transect 1 - 7, water in pools transects 8 â 17, rest of the reach is dryâ 4. Locate the temperature probe: o Use all available information: Blue flagging, BR, TR, and Probe UTMs, Hobo map and description. o If you cannot locate the Hobo make sure you have thoroughly searched the area. One probe costs $250 and contain s a large amount of data and cost of time to deploy it. o Crews sometimes move probes during stream sampling and the new information is not passed on. Take extra care to search the stream in spots you would place a hobo; deep pools with good anchors. 5. Before removing the probe, record probe condition and stream flow in the PDA ; or on the form. a. If the probe is buried, make sure to enter the depth it is buried. 6. Make sure that the probe ID is enter ed correctly, this is important (enter the probe ID off the HOBO d irectly, not off the instrument sheet) . 7. Remove all flagging at the reach. 8. Tie the reach flagging around the probe cable or use new flagging then label the flagging with: your name(s), date retrieved, stream name, reach ID, probe ID, and G - O - T. 9. Keep your pr obes organized together, do not mix them with other probes at the bunkhouse. It is easiest to coil the Hobos to keep them organized and manageable. 53 10. Give your probes to your supervisor at the end of the hitch, and any paper data you may have collected.
66 The re are some cases where a hobo n
The re are some cases where a hobo needs to be retrieved early or moved during an EM sampling: ï· If the stream is completely dry, remove the hobo. Be sure to follow hobo retrieval procedures listed above. ï· If there are only stagnant pools in the stream, if possib le, move the hobo to the deepest point of the deepest pool (if it is not there already), so that it remains in water for the rest of the season. ï· If the hobo is buried, in a dry spot, out of the reach, or in non - flowing water (i.e. in a side channel, tribut ary, backwater, etc.) it needs to be moved to a better spot. Wh en moving a hobo: ï· Take note of this movement on Form 1 and in PDA (see below) ï· Fill out an instrument form ( this includes drawing a new map) ï· Notify supervisor at bunkhouse so there is no conf usion when the hobo is picked up at end of season. ï· See the hobo placement procedures above for more info. 54 Tidbit (Multi - Year Water Temperature Logger) Placement The main objective is to place the Tidbit, epoxied directly to a ro ck, in the stream where it will be submerged for up to 5 years collecting accurate temperature data until a technician comes back to retrieve it. Your quality of work placing the tidbit and documenting the location should allow for the device and a differe nt technician to return to the rock and retrieve the tidbit in five years. Donât rush this process a quality installation and correct information allowing for returning to this device is very important. Equipment: ï· Wire Brush to scrub rock with ï· Nitrile g loves ï· Epoxy (A and B) ï· PDA and Camera ï· Backup Tidbit
67 Placement Form ï· Marker supplies
Placement Form ï· Marker supplies ï· Tidbit ï· Sunshield with weights and zip ties for attachment Objective: ï· Epoxy Tidbit to rock where appropriate. ï· Photograph Tidbit location. ï· Take UTMs of Tidbit and marker loca tion. ï· Draw a map of the Tidbits location. ï· Record info about the Tidbit and location in the Archer PDA; or on Tidbit installation form if the PDA is malfunctioning. Establish the best location for the Tidbit at the site: Walk the entire reach length . If n o good location is found, walk ½ mile US or TR or DS of BR to find an appropriate location; take your time to find a good tidbit location. A good tidbit location can be: 1. A large anchor rock within the reach or ½ mile US of TR or DS of BR and with the prop er criteria (listed below). a. The rock must be large enough to not be swept away during high flows. (One way , but not the only way to determine this is if the rock extends at least 15cm above bankfull it is likely large enough). b. The r ock must have a flat, ap proximately vertical surface facing directly downstream . c. The downstream surface of the rock should be in a pool or underwater during low flows . d. Avoid areas just downstream of tributaries and obvious groundwater seeps , as water temperatures in these areas w ill not be representative of the stream temperature. e. Place the tidbit at a depth where it will still be underwater at low flow, but it will not be covered with sediment . The tidbit should be several cm above the streambed. 2. Bridges or other feat ures that f it the above criteria . a. Take c aution when using man made anchor points. b. Wood will not work with
68 the epoxy. c. Culverts are stable bu
the epoxy. c. Culverts are stable but can alter the temperature readings and funnel rocks into contact with the tidbit. 55 Make sure the location is camouflaged from people when in high traffic areas . o If possible place the Tidbit in a location harder to access. o Try to prevent the Tidbit from getting stolen. o Avoid high traffic areas such as camp sites or trails on open ground. Recording Tidbit I nformation: ï· Record tidb it placement in PDA using Forms 5.1 (see the Archer PDA section of the protocol for more help ) . ï· Information to record in PDA : o Tidbit ID , reach information, technician name, marker information ( including marker location UTMs ), photo card number and photo n umbers for the Tidbit (see information about taking photos below) , any additional comments about placement. o A detailed description of the Tidbit location and Tidbit location UTMs . ï§ Ex: âThe Tidbit is epoxied to a large rock (~60cm diameter, ~8Dcm tall) on R L, in large pool DS of large spanner, 9m US from Tidbit marker. ~60m DS from BR.â ï· Draw a detailed map of the Tidbit location . o Depict at least 20 - 30m of the stream. Include the Tidbit, direction of flow, North arrow, marker, and any features that will help to quickly relocate it (i.e. if the bank is covered by alders, donât just draw alders on the map without additional detail). If using a paper form make sure to fill out all information before leaving the stream. Before you place the Tidbit fill out the ba sic reach information and Tidbit ID i n the PDA or on the paper form. Double check that the Tidbit ID is recorded correctly before placing the device. ï· Tidbit IDâs ar
69 e located on the back; it is usually an
e located on the back; it is usually an 8 digit number. ï· Make sure that the light on the Tidb it is, in fact blinking . If it is not return the Tidbit to your supervisor. Place the Tidbit: ï· Find a good prop - rock and place it within reach of your a nchor rock or attachment point . ï· Assemble all of your Tidbit placement gear wi thin reach of your a nchor rock. ï· Double check that the Tidbit ID is recorded! ï· Put on nitrile gloves. It is easier to do this while your hands are dry. ï· Using the wire brush, t horoughly clean off the area where you will attach the tidbit. ï· Mix an appropriate amount of Epoxy. o Wet the ou tside of your gloves. o Pull out equal amounts of white and black epoxy mix. ï§ Be careful not to cross contaminate the epoxy containers this will c ause the batch to set. o Mix and mold the epoxy with your fingers for at least 60 seconds until it is an e ven and consistent grey color. o Keep your fingers moist for easier mixing. ï· Spread the epoxy evenly over the back of the tidbit, about 1 cm thick. o Place the back of the tidbit on the cleaned surface of the anchor poin t. o Flip the sunshield down, and lean the prop rock against it to keep it presse d to the anchor point. o Make sure the prop rock applies horizontal pressure on the tidbit, keeping it firmly against the anchor point , NOT downward pressure forcin g the tidbit to wards the stream bed. 56 ï§ Try to ensure that the sensor bubbles on the front of the tidbit will not be damaged (these are needed to extract data, so if these are destroyed, the tidbit becomes useless). Tidbit Marker: ï· If t
70 he tidbit is placed within 15m of the B
he tidbit is placed within 15m of the B R or TR marker, use those markers. ï· If no marker is close, place a tidbit marker, except in wilderness areas where we never place markers. Placing a marker: ï· Locate an easily identifiable feature near the tidbit to attach the marker. Try to place the maker n ear the tidbit. o Use something relatively permanent like a tree. o Use something distinctive. For example a lone cottonwood tree near the tidbit, or a large stump with a burn mark. ï· Make sure the marker has âTidbitâ indented into it. ï· Attach the marker to you r chosen spot with a nail or wire. ï· Record the following information in the tidbit form on the PDA or the paper form: o Brief descriptio n of the site marker location (ex: â US of BR 5m on RL attached to trunk of large juniper â ). o The c ompass bearing from the ma rker to the tidbit. o T he distance from the marker to the tidbit in meters. Photograph the Tidbit and Marker: 1. Record the Photo Card number of the Instrument Form. 2. Take a picture of an âInfo Pageâ as the first photo in the set. ï· The Info page should contain: ï§ Stream Name ï§ Group - Order - Type - Year ï§ Name of Technician or Crew ï§ Reach ID ï§ Date ï§ Tidbit ID number Note: It is important that the info page photo is taken in addition to the Reach ID / Date photo taken during sampling, so that the tidbit ID is displayed and it is obvious where the tidbit photo set begins. 3. Take at a minimum the following photos: ï· The m arker (either BR, TR or the new Tidbit marker you placed). If possible show the Tidbit rock an d the marker in the same photo. This makes reloca
71 ting the rock eas ier in the future.
ting the rock eas ier in the future. ï· A close up of the Tidbit and rock which shows the location of the Tidbit on the rock and the rocks overall shape and size. ï· A d istant shot of the Tidbit rock which would allow for someone to find that rock when returning to the area in th e future. 4. Take additional miscella neous photos as need ed to accurately depict the location of the Tidbit. 5. Record the photo information in the PDA. Elk Cre ek 123 â 07 â I â 12 Tech Name or Crew 5144 Oct 11, 2012 Tidbit ID 10333444 57 Tidbit (Multi - Year Water Temperature Logger) Retrieval Protocol The tidbit is designed to collect outdoor and underwater stream temperature data for 5 years. After five years, tidbits will be retrieved to download the data. It is extremely important that the bubbles on the front remain intact. Prioritize this during the tidbit retrieval process. All retrieved tidbits should be flagged, entered into the PDA, and placed in a plastic bag before leaving the stream. Equipment: ï· PDA ï· Flagging ï· Shovel or Trowel (if tidbit is buried) ï· Chisel ï· Zip Lock Bags ï· Sharpie ï· Site Info, Tidbit Photo, and Tidbit Instrument Sheet s ï· Ba ckup Tidbit Retrieval Form Procedure : 1. Use GPS coordinates, photos, tidbit map, site marker, and descriptions to locate the tidbit in the stream. a. Note that coordinates may be in a different datum. For tidbits placed in 2010 and 2011, the coordinates shoul d be in NAD 27. Tidbits placed in and after 2012 will have coordinates in NAD 83. There may be exceptions to this. a. You may have to change the settings in your GPS accordingly. b. It is import
72 ant to spend quality time searching for
ant to spend quality time searching for tidbits . Do not leave the s tream unless you are certain you have found the correct location and the tidbit is missing. 2. Retrieve the Tidbit a. Tidbi ts might be buried by sediment. If necessary, u se a shovel to carefully move the sediment around to locate the tidbit. Tidbits that have become dislodged occasionally remain in the sediment beneath the rock. b. Use the chisel to carefully remove the tidbit from the rock. i. It is crucial that we do not break the tidbit during this process. Be mindful of the bubble sensors on the front of the ti dbit. c. Flag tidbit with: stream name, group - order - t ype - y ear it was placed, n ame of technician or crew, reach ID (as it is written on the instrument info sheet), d ate retrieved , type of placement (bomb, PVC h ousing, direct epoxy), and Tidbit ID n umber (only if the number is visible on the tidbit, d o not copy a number from the Ins trument Form or another source). d. Place tidbit in a plastic bag along with pvc casing, sunshield, bomb, etc. e. Remove all PIBO tidbit traces from the stream , including: the marker, cable , housing, and flagging. i. If the tidbit is missing: only remove all traces if you are completely you are in the correct spot and the tidbit is missing. 58 3. Make a Tidbit Retrieval Entry in the PDA a. A PDA entry is made for every tidbit, including tidbits that are missing. b. Select Tidbit Retrieval in Forms 5.1 ( If PDA is broken/unavailable, use the Tidbit Retrieval Backup Form ). i. Enter technician name, tidbit ID (8 or 3 digits on the back or side of tidbit), stream name, reach ID (as it is written on the instrumen t info sheet), an
73 d G - O - T. 1. Only record Tidbit I
d G - O - T. 1. Only record Tidbit ID if it is visible on the tidbit. If the tidbit ID has been scratched or is covered by epoxy, enter G - O - T in replace of the tidbit ID. Do not record the Tidbit ID number from the Instrument Form or another sour ce. ii. Enter the tidbit condition and stream reach flow (see explanation in Hobo Retrieval section), enter if the tidbit was glued to a rock or not, and if it was in a bomb, etc. (below is a visual aid). iii. You will be prompted to collect the GPS location of th e tidbit. Make sure to do this while you are at the spot where the tidbit was placed (or where you think it was placed, if you canât find it). iv. Enter if the tidbit was firmly attached or not and if you flagged it. v. PDA Comments: 1. If tidbit was determined to b e missing, comment on your level of confidence that you are in the correct location. 2. LOW: 50%, MEDIUM: 50% - 90%, and HIGH:� 90%. Collect UTMS at the location you think it should be. Sunshield PVC Metal Bomb Plastic Bomb Figure J 2 : Different tidbit placement methods that you will need to record. 59 Cow Camera Placement The Cow Cam/Plant Cam sometimes is placed at several DMA sites that will have both EM and IM performed during the field season. The main object ive is to place the camera as perpendicular to the reach as possible with a view of as much of the reach as possible. The camera will take a photo every 15 minutes from 5am to 11pm. Objective: ï· Set Cow Cam controls ï· Place Cow Cam ï· Record info about Cow Cam and location on the Instrument Form. Enter the Camera Settings: ï· Add 4 AA Lithium Titanium batteries to the camera
74 . Do not use any other type of battery.
. Do not use any other type of battery. ï· Check that the camera has a 16GB memory card labeled with the Camera Number. Each camera has its own memory card - which has space for 12,000 photos - and they should never be separated. Open the front panel of the camera to access the settings. ï· Turn the yellow arrow dial (bottom left corner of cow cam) to SETUP. ï· Press the Power/Status button (top left corn er). It takes a moment to turn on. ï· It is important to note while going through the settings, when the display is flashing it is NOT set and will default to previous settings. To keep the setting you choose push select after any change is made. Be sure th at after every selection the display is not flashing. ï· The first window is TIME LAPSE INTERVAL . Press the SELECT button and the time will start flashing. Use the +/ - buttons to select 15 MIN . Press the SELECT button again and the time will stop flashing. Press the RIGHT ARROW�() button to move to the next setting. ï· Use the +/ - buttons to choose PHOTO . Press SELECT then RIGHT ARROW �(). ï· Use the +/ - buttons to choose HIGH photo quality. Press SELECT. Press RIGHT ARROW�(). ï· Use the +/ - buttons to choose 1 - S HOT . Press SELECT then RIGHT ARROW�(). ï· Use the +/ - buttons to choose 5 A.M. DAILY WAKEUP . Press SELECT then RIGHT ARROW �(). ï· Use the +/ - buttons to choose 11 P.M. DAILY SLEEP . Press SELECT then RIGHT ARROW�(). ï· Use the +/ - buttons to choose YES for IMPRINT INFO . Press SELECT then RIGHT ARROW�(). ï· For DATE/TIME press the SELECT button and the month will flash. Use the +/ - buttons to choose th
75 e month, press SELECT to select that mon
e month, press SELECT to select that month. Repeat until the current date and time are set . Press RIGHT ARROW�(). ï· Set th e CAMERA NAME . Press SELECT. Use the +/ - buttons to choose the group order and type. Name the camera by the GROUP - ORDER - TYPE of the stream. For example 123 - 04 - K . ï· Set the focus dial around the lens to 3+ feet. ï· Turn yellow arrow dial to AUTO â You are done s etup the camera 60 Establish the best location for the camera at the site: The best location for the camera is where it can record as much of the reach as possible looking perpendicular to the stream ï· Find an appropriate tree o Approximately half way between th e BR and TR o A distance away from the stream where the camera can see all of the reach o Medium diameter where the camera can be attached to the trunk or branches o Potentially discreet area where the camera will not be easily seen by passersby ï· At a site with n o appropriate trees: o Find a good location using criteria above o Drive a T - post into the ground at least 18in ï· Make sure the location is camouflaged from people: o Try to prevent the Camera from getting stolen o Avoid high traffic areas such as camp sites or trai ls on open ground o Place the Camera in a hard to see or difficult to access location o If using a T - post take extra care to place in a concealed or hard to get to location Placement: ï· Secure the camera to the tree or T - post o Use the webbing or elastic straps o M ake sure the control panel is accessible without moving the camera o If using a ball joint attachment, electrical tape the hinge and camera to prevent it from tilting forward
76 ï· Aim the camera so that as much of
ï· Aim the camera so that as much of the reach as possible is visible Record Plant Ca m information in Archer PDA: ï· Fill out the required areas of the form in the PDA BEFORE YOU LEAVE THE SITE . ï· Collect UTMs with the location of the Cow Camera. ï· Make sure the Camera ID# is entered correctly. ï· Jrite a detailed description of the Cow Camâs locati on. ï· On the instrument map form draw a detailed map of the Cow Camâs location so we can efficiently relocate them during retrieval. o Depict some of the stream. Include the Cow Cam, direction of flow, North arrow, marker, and any features that will help to quickly relocate it, location of the BR is recommended. 61 APPENDIX F: Aquatic Invasive Protocol Invasive species pose a threat to biological diversity. PIBOâs spatial scale offers an opportunity to detect the spread of aquatic invasive species in the Co lumbia and Missouri river basin. That being said PIBO crews also pose a potential threat as a vector by which aquatic invasive could be transported. According to the literature most likely mechanism for spreading invasive speci es is contaminated equipment. Following is our collection protocols for aquatic invasive species see Appendix G for our gear decontamination protocol. Collection and recoding of aquatic invasive species: If you find one any of the following aquatic invasive species in your bug samp le or during any other sampling task such as collecting pebbles, cross sections, etc. collect an additional specimen. Do not mix your invasive samples with your macroinvertebrates samples . Store the specimen according to the PIBO protocol for macroinve rtebrate samples , include on
77 t he labels - t he labels - âinvasiv
t he labels - t he labels - âinvasive sampleâ see Figure F 1 , on Form 1 make a comment, mark the number of invasive sam ples collected in the logger. The number of bug jars on Form 1 and in the log ger will not change. A t the end of hitch record on the macroinvertebrate summary sheet the number of aquatic invasive samples collected at each reach. At the bunkhouse place the specimen in a box designated by your supervisor for aquatic invasive specimens. Do not mix your inva sive samples with your macroinvertebrates samples. Figure F 1 : Example of aquatic invasive label. Reach ID: 150 - 05 - IK - M2 - 12 Jar # 1 of 2 Stream Name: Big Ramey Cr INVASIVE SAMPLE Date: 06/15/05 62 Belo w is a list of invasive species of concern that are likely to be found in streams and riparian areas sampled by PIBO . Type Common name Genus species Aquatic Animals New Zealand mudsnails Potamopyrgus antipodarum Rusty Crayfish Orconectes rusticus Red Swamp Crayfish Procambarus clarkii Ringed Crayfish Orconectes neglectus Northern Crayfish Orconectes virili s Aquatic Plants Yellow Flag Iris Iris pseudacorus Brazilian Elodea Egeria densa Didymo Didymosphenia geminata Terrestrial Plants Japanese Knotweed Fallopia japonica Giant Knotweed Polygonum sachalinese Giant Hogweed Heracleum mantegazzianum G arlic Mustard Alliaria petiolata Himalayan blackberry Rubus discolor English Ivy Hedera helix Salt Cedar Tamarisk ramosissima Orange hawkweed Hieracium aurantiacum Yellow archangel Lamiastrum galebdolon The following pages include pictures and descriptions of each of these species. Pages 8
78 0 and 81 include a Quick Reference
0 and 81 include a Quick Reference Guide for identifying freshwater mussels in the field. Freshwater mussels are not invasive species. In fact, they are one of the most endangered groups in North America. If you find one of these invasive species or freshwater mussels: - Take a sample of it (unless it is a mussel, do not collect mussels ) . - If it is a freshwater mussel take a photo of it. - Make a comment on Form 1 and in the data logger. - Take note of what stream(s) you found it in so you can i n form your supervisor on ce you return to the bunkhouse. Give your supervisor the sample and tell them which photo #s refer to the photos of the invasive. o Supervisors will report this information back to the Logan office. 63 New Zealand mudsnail Potamopyrgus antipodarum (POAN ) General: The shell is elongated and it has a dextral coiling. The shell has 7 or 8 whorls. Between whorls are deep grooves. Shell colors vary from gray and dark brown to light brown. Habitat: The snail tolerates siltation, thrives in di sturbed watersheds, and benefits from high nutrient flows allowing for filamentous green algae growth. Impacts: New Zealand mudsnails are tiny invasive snails that threaten the food webs of trout streams and other waters. 64 Rusty crayfis h Orconectes rusticus (ORRU) General: Large, rust colored spots on either side of the carapace. They have large, grayish - green to reddish - brown claws with black bands at the tips. The claw leave s an oval gap when closed. 65 Red swamp crayfish Proca mbarus clarkia (PRCL) General: Generally large, adults (5.5 - 12 cm), and dark red in color.
79 Black stripe on abdomen. Claws and cara
Black stripe on abdomen. Claws and carapace have spiky, reddish knobs and pincers are long and narrow. 66 Ringed crayfish Orconectes neglectus (ORNE) General: Medium sized (4 - 9 cm) and is olive - green to reddish - tan in color with two dark strips cross the width of the central carapace. A pair of dark stripes runs lengthwise along the edge of the abdomen. Claws are large and broad with black or brown ring s around orange tipped pincers. Range: Introduced populations have been found specifically in the John Day River and Umpqua River in Oregon. 67 N orthern crayfish Orconectes virilis (ORVI) General: Its c oloration is typically muddy green to reddish - brown for all individuals, regardless of age, size and gender. The pincers are green to greenish - blue with orange tips and may be studded with white knobs in adults. Lengthwise blotches occur in pairs on the ab domen. Note: Do not confuse with Signal crayfish which can be identified by the smooth texture of their claws lacking noticeable bumps. The native crayfishâs claws are also more robust (wider) than their invading cousins. 68 Yellow flag ir is Iris pseudacorus (IRPS) General: S howy perennial; 3 - 4 feet (~1 m ) tall; erect stalks, multiple flowers produced on each; Large clumps formed from lateral rhizome growth, attaining 20 feet (6 m) width. Leaves: Grow from plant base; long [3 - 4 ft. (0.9 - 1. 2 m)], flattened and sword - like with raised midrib. Flowers: Three drooping, yellow sepals with purple - brown markings and 3 smaller, unmarked, upright yellow petals; 3 in.
80 (7.6 cm) wide; Blooms spring to early wide; Blooms spring to
early")
(7.6 cm) wide; Blooms spring to early sum - mer. Fruit: Brown capsules; 2 in. (5 cm) l ong; 3 - angled and up to 4 inches length; disk - like seeds. Habitat: Wet areas; still and moving water. Impacts: Displaces native plants, reducing carrying - capacity for other species. Notes: Withstands wide variety of conditions. 69 Brazilian Elodea Egeria densa (EGDE) General: Submersed freshwater perennial herb forming dense mono - specific stands. Bright green, erect, cylindrical stems, simple or branched. Grows to water surface forming dense mats. Reproduces by fragmentation; roots slender, white or pale, unbranched, without tubers. Leaves: Bright green, minutely serrated; 1 - 3 cm long, up to 5 mm broad. Lowest leaves opposite or whorls of 3; middles and upper leaves whorls of 4 to 8. Short internodes give very âleafy appearance. Flowers: Small (18 - 25 mm), white, three petals, float on or rise above water surface on thread - like appendages. Habitat: Still and flowing waters; lakes, riparian zones, water courses, wetlands. Impacts: Restricts water movement, traps sediment, and causes fluctuations in wate r quality. Out - competes native vegetation, affecting habitat and biodiversity. 70 Didymo Didymosphenia geminata (DIGE) General: Single - celled, microscopic, freshwater diatom; produces mucilaginous stalk by which live cells attach to rocks and ve getation. During blooms, stalks form mats that cover streambed. Also known as ârock snotâ because of mucous - like appearance. Ranges in color from brownish yellow to white, appearing slimy or like wet toilet paper stranges. Feels fibrous, like wet cotton/wo ol. Habitat: Mai
81 nly warm, pristine waters with abundant
nly warm, pristine waters with abundant sunlight, low nutrients, and high oxygen levels/swift currents. Formations rare in lakes. Impacts: Cover and alter habitat, displacing plant, fish, and invertebrate communities. Spreads via attachment of boats, wading gear, or fishing equipment. Notes: Colonies tend to die back in low water conditions/ at end of summer as daylight hours diminish. Mats of dead algae can resemble dried tissue paper. Dry strands 71 Japanese knotweed Fallopia japonica (FAJA) General: Perennial; 1 to 3 m tall; Stout reddish brown hairless stems; nodes slightly swollen; red/purple shoots appear early in spring; m ature canes hollow with purple speckles. Leaves: 1 - 3 cm stalks, alternate, broadly ovate, rounded, flat or hear t - shaped at base and taper to pointed end; 10 - 15 cm L x 5 - 12 cm W. Flowers: Flowers July to October; greenish - white to cream in large plume - like clusters at ends of stems. Habitat: Open areas, roadsides, waste areas, streams and ditch banks. Versatile plan t, but prefers light. Notes: Fresh rhizomes snap like carrots and usually possess dark orange central core with orange/yellow outer ring. Rhizomes may be knotty/leathery brown, extending up to 3 m deep and 6 m away from plant. bote: The hybrid between gian t and Japanese knotweeds is also an invasive. 72 Giant knotweed Polygonum sachalinense (POSA) General: Perennial; Grows 3 m tall. Similar to Japanese knotweed. Stems stout, bamboo - like, smooth, hollow, light green to red - dish - brown, sparingly branched. Leaves: Deeply heart - shaped base, blunt leaf tip, 1D to 40 cm long. Hairs on leaf underside lo
82 ng, thin, wavy. Flowers: Small, cream
ng, thin, wavy. Flowers: Small, creamy white to greenish - white inflorescence; grow in short, branched clusters from leaf and near ends of stems. Blooms July to October. Leaves: Cordate or heart shaped; often > 1ft. long. Fruit: 3 - sided, black and shiny. Habitat: Jet areas; riparian zones, water courses, wetlands, disturbed areas. 73 Giant hogweed Heracleum mantegazzianum (HEMA) General: Per ennial; large, tall (up to 15 - 20 ft. (4.6 - 6.1 m) with stout, dark reddish - purple stem and spotted, hollow leaf stalks that produce sturdy bristles. Leaves and Stems: Large stalk/stems, 5 - 10 cm diameter, hollow, usually marked with reddish - purple blotches a nd pustules/ bumps with single erect hair in center. The leaves are deeply lobed/incised, compound, sharply pointed, and up to 5 ft. (1.5 m) wide. Flowers: Large umbrella - like inflorescence up to 2 1/2 ft (0.8m) diameter. Blooms late spring to early summer . Habitat: Giant hogweed can invade a variety of habitats but prefers moist, disturbed soils such as riverbanks, ditches and railroad right - of - ways. Caution: health hazard; causes skin sensitivity to UV radiation and leads to blistering and severe burns. 74 Garlic mustard Alliaria petiolata (ALPE) General: Herbaceous, biennial; produces garlic odor when crushed. Leaves: First year plants are basal rosettes with green, heart to kidney - shaped leaves (5 - 10 cm wide) staying green through winter. Leaves on flowering plants (2nd year) are alternate, sharply - toothed, triangular, approximately 2.5 cm long and 5 - 7 cm wide. Flowers: Numerous white flowers growing in cluster at end of sterns; flow
83 ers �5 inch wide with four white
ers �5 inch wide with four white petals in "cross" pattern . Flower stalks usually single and unbranched. Blooms early spring (May to June). Fruit: Long (2 - 6 cm) slender green capsule produced summer to early fall. Habitat : Forest understory/ edges, roads, streamsides, trails and agricultural 75 Him alayan blackberry Rubus discolor (RUDI) General: Perennial shrub with ribbed, reddish stems forming dense, impenetrable thickets. Branches covered with sharp, slightly curved thorns; grows upward to 15 ft. Leaves: Palmately compound, alternate, usually wi th five large, oval leaflets toothed with thorns along under - side of mid - rib. Dark green upper sides and grayish - green underside. In 2nd year, several side shoots produced having smaller leaves with 3 leaflets. Flowers: Pinkish/white, five - petaled flowers with numerous stamens (0.8 - 1 in. (2 - 2.5 cm) in diameter); bloom late spring to early summer. No flowers on 1 st year growth. Fruit: Shiny purple to black aggregate of druplets, 1 - 3 cm diameter. Impacts: Aggressively displaces native species; dominates ripar ian areas. Notes: Trailing blackberry is smaller, straighter, low - growing, with thinner thorns and leaves with three leaflets of similar color on both sides. 76 English ivy Hedera helix (HEHE) General: Perennial; woody evergreen vine with l ong, trailing stems, growing to 100 ft. (30 m) in length. Leaves: Alternate, waxy, with palmate veins. Leaf shape variable, but commonly occurs as a 3 - 5 lobed leaf with heart - shaped base. Juvenile leaves lobed; mature leaves larger and pointed (possibly no t lobed). Flowers: Umbrella -
84 like terminal clusters of greenish or wh
like terminal clusters of greenish or white flowers. Flowers in the fall given sufficient light. Fruit: Round, black with fleshy outer covering enclosing one to a few hard, stone - like seeds; matures in spring. Habitat : Still and flowing waters; lakes, riparian zones, water courses, wetlands. Impacts: Aggressive; outcompetes and shades all levels of vegetation in forested and open areas. Kills native vegetation and decreases biodiversity. 77 Salt cedar Tamarisk ramosissima (T ARA) General: Spreading shrubs or small trees, 5 - 20 ft. tall, with numerous reddish, slender, arching branchlets. Leaves: Pale gray - green, small, alternate, scale - like leaves. Fine - textured, juniper like foliage. Flowers: Pale pink to white, small, perfe ct, and regular, arranged n spike - like racemes. The distinct petals or sepals occurs in fours and fives. Habitat : Riparian zones, replacing willows, cottonwoods, etc. 78 Orange hawkweed Hieracium aurantiacum (HIAU) General: A fibrous root ed perennial herb in the Aster family that grows 10 - 36 in. tall and branching at the top to produce flower heads. Leaves: Simple, basal with 1 or 2 leaves measuring about 4.5 inches in length. Both leaves and stems are covered with hairs. Flowers: Conspicu ous orange - red ray flowers with 5 to 35 flower heads. Habitat : Moist meadows, pasture, roadsides, forested areas, riparian zones, etc. 79 Yellow archangel Lamiastrum galebdolon (LAGA) General: Evergreen to semi - evergreen, fast growing pere nnial groundcover that can be trailing or upright of growing over other plants. Leaves: Oppositely arran
85 ged, oval shapped, toothed, and hairy wi
ged, oval shapped, toothed, and hairy with typically variegated silvery - gray markings. In cold temperatures, leaves develop purple coloring on the under sides and in the center of the leaf above. Flowers: Small and yellow, two lipped â the upper lip is hooded and the lower lip with orange to brown markings, flowers are in whorls in leaf axils on short stalks. Habitat : Often escapes residential plantings t o nearby forested areas, greenbelts, and riparian areas. 80 Quick Reference Guide to Western Freshwater Mussels 81 82 APPENDIX K : Gear Decontamination Objective To prevent the spread of invasive species (namely New Zealand Mud Sn ail, Whirling disease, didymo) ï· Gear MUST be decontaminated after every sample, before you leave the site! ï· Gear includes bug net, waders, boots, pool tail fines grid, tape, and anything else that comes in contact with the water. Equipment and Procedure: Saf ety: When handling Sparquat 256, be sure to use proper personal protective equipment (rubber gloves and protective eyewear). 1. Use a scrub brush to remove all visible mud / organic material from boots and waders before decontamination. 2. Use the large Rubbermaid Roughtote provided to make a solution of Sparquat 256 that is at least 4.7%. To do this, fill the Roughtote with 6 gallons of water and add 36oz. of Sparquat (or 6oz. of Sparquat 256 for every gallon of water). 3. Soak any gear items that hav e been in contact with the water for at least 10 minutes. For example waders, boots, bug nets, pool tail fine grids 4. When decontamination is complete, put the used Sparquat 256 solution back into
86 the labeled 7gal Aquatainer and rinse
the labeled 7gal Aquatainer and rinse the waders, boots, and other gear with water. D. Determine if the Sparquat 2D6 solution may be reused. To check for potency, Use the âQuat Check 1000â test strips that have been provided. Jhen the test strip reads below 600 ppm, you need to make a new solution. Discard the Sparquat solution when it is no longer effective, it will need to be discarded down a drain that flows to a treatment facility. TIP: Gear should be decontaminated by one crew member while another crew member fills out forms, and enters data into the logg er, etc. NOTE: A Material Safety Data Sheet for Sparquat 256 can be found in the Manual of Manuals (MOM). Preventing spread of invasive plants After each hitch wash your truck at the bunkhouse using the power washer. Pay close attention to the wheel well s and undercarriage. If your truck get especially muddy on hitch and you are going to a new group. If it is con venient, meaning the car wash is on your given route, take the time to power wash the wheel wells and undercarriage thoroughly. 83 APPENDIX L : Equipment List PDA PDA charger auto adapter PDA secure digital (SD) memory cards PDA lithium ion battery (2) Binocular Harness Compass Lumbar pack Hand lens with Lanyard (2) Field Rite - in - the - Rain notebook(s) Pencils/Pens Sharpies Plant digger Small field plant press Plant labels Standard plant press with cardboard and felt (you need to get newspaper) Dissecting probes Protocol Quadrat frame Screwdriver Titanium Scissors Ruler Forceps Field vest Pencil Case Folder w
87 ith handouts and plastic sleeves K
ith handouts and plastic sleeves Key to Salix from Intermountain Flora: Vascular Plants of the Intermountain West, U.S.A., Vol. 2, Part B, (Holmgren et al. 2005) Flora of the Pacific Northwest (Hitchcock and Cronquist 1973) Plant Identification Guide for PIBO Field Guide to Intermountain Rushes (Hurd et al. 1997) Field Guide to Intermountain Sedges (Hurd et al. 1998) Field Guide to the Willows of East Central Idaho (Brunsfeld and Johnson 1985), wi th added key Plant Identification Terminology (Harris and Harris, 1999) Montana Wetland Plants Color photo plant guide (Plants of the Rocky Mountains or Plants of Southern Interior British Columbia and the Inland Northwest) 84 A PPEND IX M : Species Not Used to Determine the Greenline Species that are not strictly perennial and should not be used to determine the greenline (this is not a complete list) Aegilops cylindrical Deschampsia danthonioides Mertensia oblongifolia Alopecu rus carolinianus Descurainia pinnata Milium vernale Alopecurus myosuroides Descurainia sophia Mimulus floribundus Alyssum alyssoides Dipsacus fullonum Mimulus guttatus Alyssum desertorum Draba verna Mimulus suksdorfii Anthriscus sylvestris Echium vulga re Montia fontana Arctium lappa Epilobium brachycarpum Montia linearis Arctium minus Epilobium minutum Muhlenbergia filiformis Bromus briziformis Epilobium torreyi Myosotis discolor Bromus carinatus Erigeron flagellaris Myosotis laxa Bromus commutatus Erigeron strigosus Nemophila breviflora Bromus hordeaceus Eriogonum vimineum Nemophila parviflora Bromus japonicus Erodium cicutarium
88 Nemophila pedunculata Bromus secali
Nemophila pedunculata Bromus secalinus Galium aparine Onopordum acanthium Bromus sterilis Galium bifolium Panicum mil iaceum Bromus tectorum Galium parisiense Phlox gracilis Capsella bursa - pastoris Galium tricornutum Plantago lanceolata Cardamine oligosperma Geranium bicknellii Poa annua Cardamine pensylvanica Geranium robertianum Polemonium micranthum Cenchrus longi spinus Geranium viscosissimum Polygonum douglasii Centaurea diffusa Grindelia squarrosa Portulaca oleracea Centaurea solstitialis Hackelia deflexa Potentilla norvegica Cerastium glomeratum Helianthus annuus Ranunculus pensylvanicus Cerastium nutans Hor deum murinum Ranunculus sceleratus Chenopodium album Hypericum anagalloides Ranunculus uncinatus Chenopodium fremontii Impatiens ecalcarata Rorippa curvisiliqua Cirsium vulgare Juncus bufonius Sisymbrium altissimum Clarkia rhomboidea Lactuca biennis So nchus asper Claytonia perfoliata Lactuca serriola Stellaria calycantha Claytonia sibirica Lapsana communis Stellaria media Collinsia grandiflora Lepidium campestre Taeniatherum caput - medusae Collinsia parviflora Lepidium perfoliatum Thlaspi arvense Co llomia grandiflora Linanthus harknessii Tragopogon dubius Collomia heterophylla Lolium perenne Tragopogon pratensis Collomia linearis Machaeranthera canescens Tribulus terrestris Conium maculatum Madia exigua Trifolium cyathiferum Conyza bonariensis Ma dia glomerata Trifolium dubium Conyza canadensis Madia gracilis Trifolium microcephalum Corydalis aurea Malva neglecta Trifolium variegatum Crepis tectorum Medicago lupulina Verbascum thapsus Cynoglossum officinale Medicago
89 sativa Veronica anagallis - aq uatica
sativa Veronica anagallis - aq uatica Datura stramonium Melilotus alba Viola nephrophylla Daucus carota Melilotus officinalis Vulpia microstachys Xanthium spinosum 85 APPENDIX N : Data Sheets/Forms 1 â Greenline and Riparian Cro ss - section Data Collection Form 2 â Specimen Data Coll ection Form 3 â Specimen Plant Labels 86 87 88 APPENDIX O : Synonyms for PDA Species List To access complete list in PDA go to Start - � File Explorer - � SD Card - � SynonymPDA20 1 4 .xls Old species name New species name Old species name New species name A gropyron caninum (in study area) Elymus trachycaulus Berberis repens Mahonia repens Agropyron intermedium Thinopyrum intermedium Betula glandulosa Betula nana Agropyron repens Elymus repens Bromus brizaeformis Bromus briziformis Agropyron smithii Pascop yrum smithii Bromus mollis Bromus hordeaceus Agropyron spicatum Pseudoroegneria spicata Calamagrostis inexpansa Calamagrostis stricta ssp. inexpansa Agrostis alba var. alba (H&C) Agrostis gigantea Caltha biflora Caltha leptosepala ssp. howellii Agrostis alba (other vars. in H&C) Agrostis stolonifera Carex bipartita Carex lachenalii Agrostis palustris Agrostis stolonifera Carex lanuginosa Carex pellita Agrostis tenuis Agrostis capillaris Carex prionophylla Carex scopulorum var. prionophylla Antennaria umbrinella Antennaria rosea ssp. pulvinata Centaurea maculosa Centaurea biebersteinii Arenaria macrophylla Moehringia macrophylla Cerastium viscosum Cerastium glomeratum Aster alpigenus Oreostemma alpigenum Ceras
90 tium vulgatum Cerastium fontanum ssp.
tium vulgatum Cerastium fontanum ssp. vulg are Aster chilensis Symphyotrichum chilense Chrysanthemum leucanthemum Leucanthemum vulgare Aster conspicuus Eurybia conspicua Chrysothamnus nauseosus Ericameria nauseosa Aster eatonii Symphyotrichum eatonii Chrysothamnus parryi Ericameria parryi Aster falcatus Symphyotrichum falcatum Dodecatheon cusickii Dodecatheon pulchellum ssp. cusickii Aster foliaceus Symphyotrichum foliaceum Eleocharis pauciflora Eleocharis quinqueflora Aster hesperius Symphyotrichum lanceolatum var. hesperium Elymus cinereus L eymus cinereus Aster integrifolius Eurybia integrifolia Elymus triticoides Leymus triticoides Aster junciformis Symphyotrichum boreale Elymus virginicus Elymus submuticus Aster lanceolatus Symphyotrichum lanceolatum Elytrigia repens Elymus repens Aster modestus Canadanthus modestus Epilobium angustifolium Chamerion angustifolium Aster occidentalis Symphyotrichum spathulatum Epilobium glandulosum Epilobium ciliatum ssp. glandulosum Aster pauciflorus Almutaster pauciflorus Epilobium latifolium Chamerion latifolium Aster scopulorum Ionactis alpina Epilobium watsonii Epilobium ciliatum ssp. watsonii Aster sibiricus Eurybia sibirica Eupatorium occidentale Ageratina occidentalis Aster simplex Symphyotrichum lanceolatum Festuca arundinacea Lolium arundinac eum Aster spathulatus Symphyotrichum spathulatum Festuca pratensis Lolium pratense Berberis nervosa Mahonia nervosa Festuca scabrella Festuca campestris 89 Old species name New species name Old species name New species name Galium asperrimum Galium m exicanum Rhamnus pu
91 rshiana Frangula purshiana Glyceria
rshiana Frangula purshiana Glyceria elata Glyceria striata Ribes cognatum Ribes oxyacanthoides ssp. cognatum Habenaria dilatata Platanthera dilatata Ribes howellii Ribes acerifolium Habenaria hyperborea Platanthera hyperborea Ribes ir riguum Ribes oxyacanthoides ssp. irriguum Heracleum lanatum Heracleum maximum Ribes setosum Ribes oxyacanthoides ssp. setosum Koeleria pyramidata Koeleria macrantha Rumex occidentalis Rumex aquaticus var. fenestratus Lolium multiflorum Lolium perenne ss p. multiflorum Salix eriocephala See willow guide - IM Flora Lotus purshianus Lotus unifoliolatus Salix lasiandra Salix lucida ssp. lasiandra Luzula campestris Luzula multiflora Sambucus cerulea Sambucus nigra ssp. cerulea Lychnis alba Silene latifolia ssp. Alba Sanguisorba sitchensis Sanguisorba canadensis Melilotus albus Melilotus alba Saxifraga arguta Saxifraga odontoloma Microsteris gracilis Phlox gracilis Scirpus maritimus Schoenoplectus maritimus Montia cordifolia Claytonia cordifolia Senecio ca nus Packera cana Montia parviflora Claytonia parviflora Senecio cymbalarioides Packera cymbalarioides Montia perfoliata Claytonia perfoliata Senecio pseudaureus Packera pseudaurea Montia sibirica Claytonia sibirica Senecio streptanthifolius Packera stre ptanthifolia Osmorhiza chilensis Osmorhiza berteroi Solidago occidentalis Euthamia occidentalis Oxytropis viscida Oxytropis borealis var. viscida Stachys cooleyae Stachys chamissonis var. cooleyae Peltiphyllum peltatum Darmera peltata Stipa lemmonii Ach natherum lemmonii Pentaphylloides floribunda Dasiphora floribunda Stipa lettermanii Achnatherum
92 lettermanii Poa epilis Poa cusicki
lettermanii Poa epilis Poa cusickii ssp. Epilis Stipa nelsonii ssp. dorei Achnatherum nelsonii ssp. dorei Poa interior Poa nemoralis ssp. Interior Stipa occi dentalis Achnatherum occidentale Poa nevadensis Poa secunda Stipa pinetorum Achnatherum pinetorum Populus trichocarpa Populus balsamifera ssp. trichocarpa Stipa richardsonii Achnatherum richardsonii Potentilla anserina Argentina anserina Stipa viridula Nassella viridula Potentilla fruticosa Dasiphora floribunda Thelypteris phegopteris Phegopteris connectilis Puccinellia pauciflora Torreyochloa pallida var. pauciflora Trisetum cernuum Trisetum canescens Pyrola secunda Orthilia secunda Vaccinium globula re Vaccinium membranaceum Ranunculus testiculatus Ceratocephala testiculata Vaccinium occidentale Vaccinium uliginosum 69 A PPENDIX P : Crew inReach Locator Beacon Instructions Use the check button to select/advance; the X button to go back/escape; Arrow bu tton is for navigation. If the upper left light is blinking red something is wrong; most likely the InReach canât get a satellite. To Use : Power up the unit: ï· Press and hold the check mark button. ï· Once the screen turns on select the Power On options b y navigating with the center button and then clicking the check mark. ï· Wait for the small light at the top left corner to blink green and you are now up and running. inReach Settings : Be sure your inReach settings are as follows ï· Message check interval i s 20min (remember to check for messages throughout the day) ï· Tracking o Moving interval 30 min o Stationary interval 4 hours o Stationary radius 100 m Messages for You :
93 Check messages at the start, middle,
Check messages at the start, middle, and end of your work day. ï· Check for messages by looking for a red box with the number of messages over the messages icon. ï· To read messages navigate to the Messages icon. ï· Select each message read and respond as needed. Messages to the Hotline : ï· Each inReach should have âHotlineâ programmed into contacts with the SMS number 435 - 760 - 5693 o If not, add a Hotline SMS contact with the number 435 - 760 - 5693 ï· Messages to the Hotline should be sent SMS unless otherwise directed. The Hotline is always the contact point, do not communicate with a crew or scout directly without expressed permission from the Hotline. ï· At the beginning and end of every hitch , send a message with your crew name to the hotline so we know what crew has what unit Ex: âI1 leaving bunkhouse â 70 Check - In Instructions ï· Friday Check In : Any form of communica tion (phone call or inReach text) is ok. inReach Check In Instructions: o Go to Messages and select new o In the To go to Select and scroll up to the Hotline SMS entry. o Go to the message box and select to get the keyboard. As you begin to select letters the unit will try to autofill words use the right arrow box to accept or just keep typing. o Type in âChecking in, all OKâ. o Select OK when done and Send to mail to the Hotline. ï· Sunday Check In : Always call the hotline. Need Help If you need non - urgent hel p you can also send texts with the inReach to the Hotline. Please be as specific as you can about the nature of the question/issue. Once you have typed in your message you have one more step to send it quickly otherwis
94 e it may take up to 20 minutes to se nd
e it may take up to 20 minutes to se nd and another to 20 minutes to receive a response. Go to the Check icon and select check now to immediately send and receive all messages. Emergency : If you have a medical/rescue emergency press the SOS button. A screen will appear confirming that you are in a real emergency, select Emergency and hit the check button. A generic emergency text will appear you may edit this or send it as is. The device will then count down from 20 seconds (giving you an opportunity to cancel) and then send your location will be sent to the emergency system. Once activated it cannot be turned off. Immediately contact the Hotline and explain the details of your emergency. *Remember this, as all federal property, is for work purposes. Be sure to have your inReach fully charged at the start of each hitch. If you are going on a long backpack or other trip that will keep you away from a charger make sure to fully charge the green lipstick charger that is in your kit. When charging the inReach from the lipstick charger you will get ~80% charge so plan accordingly (e.g. fly inâs need multiple lipstick chargers). 71 APPENDIX Q : P IBO Rules/Guiding Principles Follow PIBOâs D guiding principles: 1. Safety 2. Quality Data 3. Be a good representation of the Forest Service 4. Eff iciency 5. Enjoy your job and the opportunities it provides Hours: ï· The work day is 10 hours long and can range from 0600 hours - 2000 hours daily (6:00 am â 8:00 pm) ï· You cannot work outside of those hours without supervisor approval ï· You cannot work more than 11.5 hours in 1 day, without supervisor approval ï· You cannot wor
95 k more than 80 hours / pay period withou
k more than 80 hours / pay period without prior supervisor approval. If you anticipate that your hitch will exceed 80 hours, call the on call supervisor immediately to discuss logistics. ï· You m ust take minimum of 30 minutes for a lunch break ï· If you skip a 15 min break, you cannot quit work 15 min early ï· Setting up and breaking camp are not work hours. Buying groceries or eating lunch at a restaurant, is not working, donât record the hours. ï· Falsif ication of time & travel sheets is grounds for termination. Driving: ï· You absolutely cannot drive past 2000 (8:00 pm)! Rare exceptions may be granted with prior supervisor approval. Plan ahead so youâre not scrambling to find a camp site at 7:4D ï· You ca nnot be on the phone while driving. Violation of the FS policy is grounds for termination ï· An individual cannot drive more than 10 hours / day ï· No more than 2 hours driving without a rest stop ï· Do not depart from your approved work travel - route without superv isor approval For example, you cannot drive 1/2 hour to get food ï· No alcohol is permitted in the government trucks ï· No smoking in government trucks General : ï· You cannot stop to eat a meal at an establishment with âBarâ âTavernâ âPubâ âBreweryâ âSaloonâ etc. in the name of the establishment without prior supervisor approval ï· Maintain PIBO EM policy that safety is the top priority ï· Check in on Friday, Sunday and any ot her designated days ï· Makes effort to work cohesively with crew members and supervisors ï· Help maintain strong relationships with bunkhouse providers ï· Follow Equal Opportunity and Civil Rights policies ï· Everyone must