
SawStopRLNever place fingers toes or other body par under the mobile basWARNING1 Never place fingers toes or other body parts under the mobile base2 Always use the saw and the mobile base on a level ID: 875582
Download Pdf The PPT/PDF document "INSTALLATION GUIDE" is the property of its rightful owner. Permission is granted to download and print the materials on this web site for personal, non-commercial use only, and to display it on your personal computer provided you do not modify the materials and that you retain all copyright notices contained in the materials. By downloading content from our website, you accept the terms of this agreement.


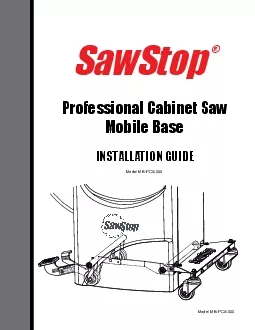
1 SawStop® INSTALLATION GUIDE R L Never p
SawStop® INSTALLATION GUIDE R L Never place fingers, toes or other body par under the mobile bas WARNING 1. Never place fingers, toes or other body parts under the mobile base.2. Always use the saw and the mobile base on a level surface. 3. Lower the saw before use. Never use the saw when it is raised off the floor. 4. Lower the saw slowly, do not let it drop back to the floor. WARNING Safety place �ngers, toes or other body parts under the saw when it is raised onto the mobile base. The base may suddenly lower and cause a severe injury.Do not attempt to use or move the saw on an inclined surface because the weight of the saw makes it di�cult to stop. Attempting to use or move the saw on an inclined surface could result in a severe injury.Make sure the saw is fully lowered to the ground and stable before operating the saw. Otherwise, the saw could move unexpectedly and cause a severe injury.Be sure to unplug or disconnect the saw from power before moving or repositioning it. The main power cord or If you are using the SawStop out-feed table you mustremove itbefore moving your saw with the mobile
2 base. Attempting to lift the saw with th
base. Attempting to lift the saw with the out-feed table attached may damage the out-feed table. SawStop warrants to the original retail purchaser of the mobile base accompanying this guide that the mobile base will be free from defects in material and workmanship for ONE YEAR from the date of purchase. This warranty does not apply to defects arising from misuse, abuse, negligence, accidents, normal wear-and-tear, unauthorized Please contact SawStop to take advantage of this warranty. If SawStop determines the mobile base is defective in material or workmanship, and not due to misuse, abuse, negligence, accidents, normal wear-and-tear, unauthorized repair or alteration, or lack of maintenance, then SawStop will, at its expense and upon proof of purchase, send replacement parts to the original retail purchaser necessary to cure the defect. Alternatively, SawStop will repair the mobile base, provided it is returned to SawStop, shipping prepaid, within the warranty period. This warranty is void if the mobile base is modi�ed without the prior permission of SawStop, or if the mobile base is located or has been used outside of the co
3 untry where the authorized SawStop distr
untry where the authorized SawStop distributor from whom the warranties, including merchantability and �tness for a particular purpose. SawStop shall not be liable for death, injuries to persons or property, or incidental, consequential, This warranty gives you speci�c legal rights. You may have other rights which, in the United States, vary from Warranty 1 Unpacking Your Mobile BaseTo install your mobile base on a new Professional Cabinet Saw GO TO PAGE To install your mobile base on a Professional Cabinet Saw that GO TO PAGE -OR- owner’s manual SawStop linkage bar OWNER’S MANUALProfessional Saw Mobile BaseModel MB-PCS-000 1. Never place fingers, toes or other body parts under the mobile base. 2. Always use the saw and the mobile base on a level surface. 3. Lower the saw before use. Never use the saw when it is raised off the floor. 4. Lower the saw slowly, do not let it drop back to the floor. WARNING Professional Cabinet Saw Mobile Base Hardware Pack Extension Spring, (1) Lock Washers, M8 x 13.6 (4) 2 Washers, M8 x 18 (2) 4 Washers, M6 x 16 (2) 14 Flange Lock He
4 x Bolts, M6 x 40 (2) 13 Lock Washers, 1
13
Lock Washers,
1")
x Bolts, M6 x 40 (2) 13 Lock Washers, 11 Caster Nuts, 3/8” thread (2) 16 Button Head Socket 1 Lock Nuts, 7 Shoulder SocketScrew, M8 x 17.7 (1) 9 Button Head Socket Washers, 12 Button Head Socket 3 Button Head ShoulderSocket Bolts, M8 x 20 (2) 5 Fixed Wheel Axles 6 2 Installing Your Mobile Base - Method 1Locate all of the mobile base components shown on page 1. All of the hardware needed to install the mobile base is located on the hardware pack (see Fig. . In order to easily identify the hardware used in each of the following steps, the di�erent pieces of hardware are numbered on the hardware pack and in the �gures. If you are missing the hardware pack or any of the other mobile base components, call the SawStop Service You will need the following tools to complete the You need access to the bottom of your saw to install the mobile base. The easiest and safest way to provide that access is to leave the saw facing up on the packaging and slide it so that the bottom of the cabinet overhangs the edge of the packaging as shown in Fig. . The saw should overhang the packaging enough to START HERE Professional
5 Cabinet Saw Mobile Base Hardware Pack E
Cabinet Saw Mobile Base Hardware Pack Extension Spring, (1) Lock Washers, 2 Washers, 4 Washers, 14 Flange LockNuts, M6 (2) 15Hex Bolts, M6 x 40 (2) 13 Lock Washers, 11 Caster Nuts, 3/8” thread (2) 16 Button Head Socket Bolts, M8 x 35 (2) 1 Lock Nuts, M6 (2) 7 Screw, M8 x 17.7 (1) 9 Button Head Socket Bolts, M10 x 40 (2) Washers, 12 Button Head SocketBolts, M8 x 20 (2) 3 Button Head ShoulderSocket Bolts, M8 x 20 (2) 5 Fixed Wheel Axles 6 3 Installing Your Mobile Base - Method 1 Locate the caster support, the linkage bar, two M8 x 35 button head socket bolts, and two M8 x 13.6 lock washers. Note that one end of the caster support has a mounting shoulder and the other end does not (see a). Mount the linkage bar to the inside of the caster support arm nearest the end the mounting shoulder as shown in Fig. . Use the button head sockets bolts, lock washers, and a 5 mm hex key to mount the linkage bar to the caster support arm. Make sure the linkage bar is positioned as shown in Fig. with the caster support in the notch on the linkage bar. With the saw resting on the packaging, facing up and overhanging the edge, place the e
6 nds of the two caster support arms throu
nds of the two caster support arms through the two holes in the inside right face of the saw, as shown in Fig. 4. Make sure that the caster support is oriented so that the linkage bar is next to the front of the 2 1 4 Installing Your Mobile Base - Method 1Align the front end of the caster support with the mounting hole in the lower right corner of the front of the cabinet and secure that end of the caster support to the cabinet with an M8 x 20 button head shoulder socket bolt (see Fig. . Note that this bolt is di�erent than the bolt used to secure the rear of the caster support to the cabinet. Fully tighten the bolt using a 5 mm hex key. The end of the caster support next to the back of the saw is the end with the mounting shoulder. Insert the mounting shoulder through the mounting hole in the rear of the cabinet and secure that end of the caster support to the cabinet with one M8 x 20 button head socket bolt, one M8 x 13.6 lock washer, and one M8 x 18 5). Fully tighten the bolt using a 5 mm hex key. 3 4 2 R Never place fingers, toes or other body parts under the mobile base. WARNING Installing Your Mobile Base - Method 1Loc
7 ate the wheel support and the two 3 inch
ate the wheel support and the two 3 inch wheels. Note that one end of the wheel support has a mounting shoulder and the other end does not. Mount one of the 3 inch wheels between the two support arms nearest the end of the wheel support that has the mounting shoulder using a �xed wheel axle and an M6 lock nut from the hardware pack (see Fig. 7). The �xed wheel axle passes through the outer support arm and threads Mount the second 3 inch wheel to the other end of the wheel support using the other �xed wheel axle, but do not thread a nut onto the axle (see Fig. The �xed wheel axle passes through the outer support arm and threads through the inner support arm. Set the wheel Locate the pedal assembly and insert it into the hole in the left side of the cabinet as shown in Fig. 9. Insert the pedal assembly as far as possible and make sure that the foot pad is facing the top of 6 7 6 Raise Never place fingers, toes or other body parts under the mobile base. WARNING 6 Remove the extension spring from the hardware pack and attach one end of the spring to the small pin in the pedal assembly by sliding o
8 ne end of the spring through the hole in
ne end of the spring through the hole in the small pin. Stretch the other end of the spring over the large pin in the pedal assembly (see Fig. . There is a circular groove on the large pin to hold the spring in place. Installing Your Mobile Base - Method 1Fig. 11 11.Take the wheel support and place it inside the cabinet and behind the pedal assembly, as shown in Fig. 11. Make sure that the end of the wheel assembly with the mounting shoulder is at the rear of the cabinet. It might be a little awkward to position the wheel support behind the pedal assembly, but the pedal assembly is loose and can move to allow you to position the wheel support. When the wheel support is correctly positioned the pedal assembly will be between the two wheels (see Fig. 11). The in the cabinet before the wheel support is placed inside the cabinet, otherwise the wheel support will block the pedal assembly. R Never place fingers, toes or other body parts under the mobile base. WARNING 7 Installing Your Mobile Base - Method 1 leverpad You must now position the pedal assembly so that it �ts against the wheel support. The pedal assembly includes
9 notches shaped to �t over th
notches shaped to �t over the wheel support bar, and a mounting hole shaped to �t over the threaded end of the �xed wheel axle (see Fig. Squeeze the foot pad and the release lever together until the notches for the wheel support align as shown in Fig. 13a. With the slots aligned, position the pedal assembly so that the wheel support bar �ts in the notches and so that the threaded end of the �xed wheel axle extends through the mounting hole in the pedal assembly. When positioning the pedal assembly make sure the linkage bar extending from the caster support is rotated outwards so that it is farther away from the saw than the pedal assembly as shown in Fig. 13b. Use an M6 lock nut from the hardware pack to secure the pedal assembly to the �xed wheel axle as shown in Fig. 13b. Fully tighten the nut using a 7 Insert the mounting shoulder on the rear end of the wheel assembly through the mounting hole on the rear of the cabinet and secure that end to the cabinet with one M8 x 20 button head socket bolt, one M8 x 13.6 lock washer, and one M8 x 18 washer (see Fig. Fully tighte
10 n the bolt using a 5 mm hex key. 2 4 3 R
n the bolt using a 5 mm hex key. 2 4 3 R Never place fingers, toes or other body parts under the mobile base. WARNING 1. Never place fingers, toes or other body parts under the mobile base.2. Always use the saw and the mobile base on a level surface. 3. Lower the saw before use. Never use the saw when it is raised off the floor. 4. Lower the saw slowly, do not let it drop back to the floor. WARNING Installing Your Mobile Base - Method 1Align the front end of the wheel support with the mounting hole in the lower left corner of the front of the cabinet. Secure that end of the wheel support to the cabinet with an M8 x 20 button head shoulder socket bolt (see Fig. Note that this bolt is di�erent than the bolt used to secure the rear of the wheel support to the cabinet. Fully tighten the bolt using a 5 mm hex key. You must now connect the pedal assembly to the linkage bar. There is a slot in the linkage bar near the pedal assembly and there is a plastic washer and threaded hole on the pedal assembly near the linkage bar. Pivot the linkage bar and the pedal assembly until the slot in the linkage bar aligns with the pla
11 stic washer and the threaded hole in the
stic washer and the threaded hole in the pedal assembly. Insert an M8 x 17.7 shoulder socket screw through the slot in the linkage bar and thread it into the hole in the pedal assembly (see Fig. 15). Fully tighten the screw with a 5 mm hex key. Stand up your saw as described in step 4 on the back of the unpacking sheet that came with your saw and also in your Professional Cabinet Saw Owner’s Manual. With the saw in the upright position, mount the caster extension bar to the two caster support arms that extend from the right side of the cabinet. Make sure that the warning label is facing outward. Use two M10 x 40 button head socket bolts, two M10.5 x 17 lock washers, and two M10.5 x 20 washers to mount the caster extension bar to the caster support arms (see Fig. 16). Fully tighten the bolts with a 6 mm hex key. 12 10 11 1. Never place fingers, toes or other body parts under the mobile base.2. Always use the saw and the mobile base on a level surface. efore use. Never use the saw when it is raised off the floor. e saw slowly, do not let it drop back to the floor. WARNING 2. Always use the saw and the mobile base the saw
12 when it is raised off the floor. 4.
when it is raised off the floor. 4. Lower the saw slowly, do not let it drop back to the floor. WARNING Installing Your Mobile Base - Method 1Mount the two 3 inch casters to the outer corners of the support plate by inserting the threaded shaft on each caster up through the corresponding holes in the caster extension bar and support plate. Secure the casters in place with two M10.5 x 20 washers, two M10.5 x 17 lock washers, and two caster nuts, as shown in Fig. 18. Fully tighten the caster nuts Position the caster support plate on the top of the caster support arms so that the mounting holes align as shown in Fig. 17. Make sure that the SawStop logo faces up. Secure the support plate to the caster support arms with two M6 x 40 hex bolts, two M6 x 16 washers, and two M6 �ange lock nuts. Fully tighten the two bolts using a 10 mm CONGRATULATIONS, your mobile base is now installed. Turn to page 19 13 14 16 11 12 10 Installing Your Mobile Base Installing Your Mobile Base - Method 2You need access to the bottom of your saw to install the mobile base. The easiest and safest way to provide that access is to tip the
13 saw so that it rests on the end of the
saw so that it rests on the end of the front rail, as shown in Fig. 19. The saw’s center of gravity makes it stable when in this position. Both the front and rear rails must be securely mounted on the saw before tipping the saw.If you already have an out-feed table mounted to your saw you will need to remove it before tipping the saw. Also, if you have an extension table with support legs attached to your saw, you will need to remove the support legs or rotate them out of the way. Steps 2 and 3 below describe how to rotate the support legs on aT-GlideProfessional Series II extension table out of the way. If you have not installed an extension table or Rotate the legs on a T-GlideProfessional Series II extension table out of the way by removing the lower M10 x 40 hex head bolt that mounts each leg its support bracket (see Fig. ). Use two 17 mm wrenches or adjustable wrenches to remove the bolts. Also remove the corresponding M10 washers and M10 lock nuts. START HERE 11 Installing Your Mobile Base - Method 2Loosen the M8 x 65 countersunk socket head bolt that mounts the front leg to the front rail, but do not remove the bolt or n
14 ut. Use the 5 mm short-arm hex key suppl
ut. Use the 5 mm short-arm hex key supplied with the mobile base to keep the bolt from turning while you loosen the nut with a 13 mm wrench (see Fig. . The 5 mm short-arm hex key is sized so that it can engage the head of the bolt without having to remove the front rail tube. Repeat the procedure to loosen the M8 hex nut on the back of the M8 x 65 countersunk socket head bolt that mounts the rear leg to the rear rail. Rotate the end of each support leg toward the saw so that both support legs are out of the way and the saw Locate all of the mobile base components shown on page 1. All of the hardware needed to install the mobile base is located on the hardware pack (see Fig. . In order to easily identify the hardware used in each of the following steps, the di�erent pieces of hardware are numbered on the hardware pack and in the �gures. If you are missing the hardware pack or any of the other mobile base components, call the SawStop Service You will need the following tools to complete the Professional Cabinet Saw Mobile Base Hardware Pack Extension Spring, (1) Lock Washers, 2 Washers, 4 Washers, 14 Flange LockNut
15 s, M6 (2) 15Hex Bolts, M6 x 40 (2) 13 Lo
15Hex Bolts, M6 x 40 (2)
13
Lo")
s, M6 (2) 15Hex Bolts, M6 x 40 (2) 13 Lock Washers, 11 Caster Nuts, 3/8” thread (2) 16 Button Head Socket Bolts, M8 x 35 (2) 1 Lock Nuts, M6 (2) 7 Screw, M8 x 17.7 (1) 9 Button Head Socket Bolts, M10 x 40 (2) Washers, 12 Button Head SocketBolts, M8 x 20 (2) 3 Button Head ShoulderSocket Bolts, M8 x 20 (2) 5 Fixed Wheel Axles 6 - With the front and rear rails are securley mounted, any out-feed table removed, and the extension table legs removed or rotated out of the way, the saw can be tipped to the side. To make the saw easier to tip, adjust the tilt handwheel until the blade is set at 45 to the table. Make sure the saw is on a level surface and then, with the help of an assistant, grip the sides of the rails near the ends and push down to gently lower the rails to the ground (see Fig. . Do not grip an extension table or the end of the rails to lower the saw to the tipped position because you might pinch your �ngers between the extension table or rails and the ground. The rear rail is shorter than the front rail and typically will not touch the ground. To prevent scratching the rails, you can 12 Installing Your Mobile B
16 ase - Method 2 Locate the caster support
ase - Method 2 Locate the caster support, the linkage bar, two M8 x 35 button head socket bolts, and two M8 x 13.6 lock washers. Note that one end of the caster support has a mounting shoulder and the other end does not (see a). Mount the linkage bar to the inside of the caster support arm nearest the end the mounting shoulder as shown in Fig. . Use the button head sockets bolts, lock washers, and a 5 mm hex key to mount the linkage bar to the caster support arm. Make sure the linkage bar is positioned as shown in Fig. with the caster support in the notch on the linkage bar.With the saw tipped, place the ends of the two caster support arms through the two holes in the inside right face of the saw, as shown in Fig. 25. Make sure that the caster support is oriented so that the linkage bar is next to the front of the 2 1 13 Align the front end of the caster support with the mounting hole in the lower right corner of the front of the cabinet and secure that end of the caster support to the cabinet with an M8 x 20 button head shoulder socket bolt (see Fig. . Note that this bolt is di�erent than the bolt used to secure the
17 rear of the caster support to the cabin
rear of the caster support to the cabinet. Fully tighten the bolt using a 5 mm hex key. Installing Your Mobile Base - Method 2The end of the caster support next to the back of the saw is the end with the mounting shoulder. Insert the mounting shoulder through the mounting hole in the rear of the cabinet and secure that end of the caster support to the cabinet with one M8 x 20 button head socket bolt, one M8 x 13.6 lock washer, and one M8 x 18 washer (see Fig. Fully tighten the bolt using a 5 mm hex key.Locate the wheel support and the two 3 inch wheels. Note that one end of the wheel support has a mounting shoulder and the other end does not. Mount one of the 3 inch wheels between the two support arms nearest the end of the wheel support that has the mounting shoulder using a �xed wheel axle and an M6 lock nut from the hardware pack (see Fig. 28). The �xed wheel axle passes through the outer support arm and threads 3 2 4 7 6 14 Installing Your Mobile Base - Method 2Locate the pedal assembly and insert it into the 30. Insert the pedal assembly as far as possible Remove the extension spring from the hardware pac
18 k and attach one end of the spring to th
k and attach one end of the spring to the small pin in the pedal assembly by sliding one end of the spring through the hole in the small pin. Stretch the other end of the spring over the large pin in the pedal assembly (see Fig. . There is a circular groove on the large pin to hold the spring in place. 11.Mount the second 3 inch wheel to the other end of the wheel support using the other �xed wheel axle, but do not thread a nut onto the axle (see Fig. ). The �xed wheel axle passes through the outer support arm and 6 Take the wheel support and place it inside the cabinet and above the pedal assembly, as shown in Fig. Make sure that the end of the wheel assembly with the mounting shoulder is at the rear of the cabinet. It might be a little awkward to position the wheel support above the pedal assembly, but the pedal assembly is loose and can move to allow you to position the wheel support above the pedal assembly. When the wheel support is correctly positioned the pedal assembly will be between the two wheels (see Fig. 32b). The pedal assembly must be inserted through the hole in the cabinet before the wheel support
19 is placed inside the cabinet, otherwise
is placed inside the cabinet, otherwise the wheel support will block the pedal assembly. Installing Your Mobile Base - Method 2Insert the mounting shoulder on the rear end of the wheel assembly through the mounting hole on the rear of the cabinet and secure that end to the cabinet with one M8 x 20 button head socket bolt, one M8 x 13.6 lock washer, and one M8 x 18 washer (see Fig. Fully tighten the bolt using a 5 mm hex key. 3 2 4 R L Never place fingers, toes or other body parts under the mobile base. WARNING 16 Installing Your Mobile Base - Method 2You must now position the pedal assembly so that it �ts against the wheel support. The pedal assembly includes notches shaped to �t over the wheel support bar, and a mounting hole shaped to �t over the threaded end of the �xed wheel axle (see Fig. Squeeze the foot pad and the release lever together until the notches for the wheel support align as shown in Fig. 34a. With the slots aligned, position the pedal assembly so that the wheel support bar �ts in the notches and so that the threaded end of the �xed wheel axle extends
20 through the mounting hole in the pedal a
through the mounting hole in the pedal assembly. When positioning the pedal assembly make sure the linkage bar extending from the caster support is below the pedal assembly. Use an M6 lock nut from the hardware pack to secure the pedal assembly to the �xed wheel axle as shown in Fig. 34b. Fully tighten the nut using a leverpad Align the front end of the wheel support with the mounting hole in the lower left corner of the front of the cabinet. Secure that end of the wheel support to the cabinet with an M8 x 20 button head shoulder socket bolt (see Note that this bolt is di�erent than the bolt used to secure the rear of the wheel support to the cabinet. Fully tighten the bolt using a 5 mm hex key. 7 1. Never place fingers, toes or other body parts under the mobile base.2. Always use the saw and the mobile base on a level surface. 3. Lower the saw before use. Never use the saw when it is raised off the floor. 4. Lower the saw slowly, do not let it drop back to the floor. WARNING 17 You must now connect the pedal assembly to the linkage bar. There is a slot in the linkage bar near the pedal
21 assembly and there is a plastic washer a
assembly and there is a plastic washer and threaded hole on the pedal assembly near the linkage bar. Pivot the linkage bar and the pedal assembly until the slot in the linkage bar aligns with the plastic washer and the threaded hole in the pedal assembly. Insert an M8 x 17.7 shoulder socket screw through the slot in the linkage bar and thread it into the hole in the pedal assembly (see Fig. 36). Fully tighten the screw with a 5 mm hex key. You have now installed all the interior components of the mobile base, so lift the end of the rails and gently bring the saw back to the upright position, as shown in Fig. 37. Be careful not to let the cabinet fall back to the �oor rapidly. Installing Your Mobile Base - Method 2With the saw in the upright position, mount the caster extension bar to the two caster support arms that extend from the right side of the cabinet. Make sure that the warning label is facing outward. Use two M10 x 40 button head socket bolts, two M10.5 x 17 lock washers, and two M10.5 x 20 washers to mount the caster extension bar to the caster support arms (see Fig. 38). Fully tighten the bolts with a 6 mm hex key.
22 R Lower Never place fingers, toes or ot
R Lower Never place fingers, toes or other body part under the mobile base. WARNING 12 10 11 1. Never place fingers, toes or other body parts under the mobile base.2. Always use the saw and the mobile base on a level surface. efore use. Never use the saw when it is raised off the floor. 4. Lower the saw slowly, do not let it drop back to the floor. WARNING 2. Always use the saw and the mobile base the saw when it is raised off the floor. 4. Lower the saw slowly, do not let it drop back to the floor. WARNING Installing Your Mobile Base - Method 2Mount the two 3 inch casters to the outer corners of the support plate by inserting the threaded shaft on each caster up through the corresponding holes in the caster extension bar and support plate. Secure the casters in place with two M10.5 x 20 washers, two M10.5 x 17 lock washers, and two caster nuts, as shown in Fig. 40. Fully tighten the caster nuts Position the caster support plate on the top of the caster support arms so that the mounting holes align as shown in Fig. 39. Make sure that the SawStop logo faces up. Secure the support plate to the caster support a
23 rms with two M6 x 40 hex bolts, two M6 x
rms with two M6 x 40 hex bolts, two M6 x 16 washers, and two M6 �ange lock nuts. Fully tighten the two bolts CONGRATULATIONS, your mobile base is now installed. You should now 13 14 16 11 12 R L Never place fingers, toes or other body part under the mobile base. WARNING L R Never place fingers, toes or other body part under the mobile base. WARNING Using Your Mobile BaseUsing your mobile base is simple and intuitive. Simply step down on the large foot pedal to raise the saw o� the �oor and onto the wheels (see Fig. 41). Continue pressing down on the foot pedal until you hear the mobile base lock in the raised position. Make sure that your foot does not contact the smaller release lever while you With the saw in the raised position you can move it as desired. The mobile base has two wheels on the left side The mobile base has been designed to lift saws with or without extension tables. You do not need an additional arm extending out from the mobile base to support your extension table. However, if you have an sing the mobile base to move your saw. To lower the saw back to the �
24 ;oor, step down on both the foot pedal a
;oor, step down on both the foot pedal and the release lever simultaneously (see Fig. 42). Slowly lift your foot upwards to allow the saw to gently lower to the �oor. Do not step on the release 20 Professional Cabinet Saw Mobile Base Exploded View Raise L Never place fingers, toes or other body parts under the mobile base. WARNING 1 2 5 5 3 2 4 3 2 4 6 6 7 7 8 9 10 10 12 11 11 12 13 14 15 15 16 16 11 12 11 12 17 18 19 20 20 22 21 24 25 26 13 14 28 27 27 30 31 32 9 2. Always use the saw and the mobile the saw when it is raised off the floor. 4. Lower the saw slowly, do not let it drop back to the floor. WARNING 29 24 23 21 Professional Cabinet Saw Mobile Base Parts List Qty.Complete Mobile Base AssemblyM8x13.6 Lock WasherM8x18 WasherM6x72 Fixed Wheel AxleM10.5x17 Lock WasherMB-PCS-011M10.5x20 WasherM6x16 WasherCaster Extension TubeMain Warning LabelFinger/Toe Warning LabelOwner’s Manual M PCS 18 0011 00Updates of this manual may be available at www.sawstop.com. 9564 S.W. Tualatin RoadTualatin, Oregon 97062www.sawstop.com SawStop® Professional Cabinet Saw Mobile Base SawStop® Professional Cabinet Saw Mobi