
For shooting video the T5 needs a large capacity SD SDHC or SDXC card that is Class 6 or higher A fast write speed is needed Be sure the cards writeprotect switch is set upward to allow writingerasing ID: 626263
Download Presentation The PPT/PDF document "Canon Rebel T5" is the property of its rightful owner. Permission is granted to download and print the materials on this web site for personal, non-commercial use only, and to display it on your personal computer provided you do not modify the materials and that you retain all copyright notices contained in the materials. By downloading content from our website, you accept the terms of this agreement.


Slide1
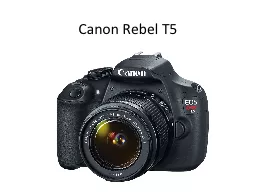
Canon Rebel T5Slide2
For shooting video, the T5 needs a large capacity
SD, SDHC or SDXC
card that is
Class 6 or higher
A fast write speed
is needed.Slide3
Be sure the card’s write-protect
switch is set upward to allow writing/erasing.Slide4
To insert SD card, open the cover on the bottom of the camera. Insert the card with the label side facing away from the lens toward the back of the camera + with the metal terminals pointing down into the camera.Slide5
Insert the battery to charge by pointing the arrow on the battery pack toward the arrow on the charger.Slide6
Plug the charger into the wall. When the
“Full” light is lit green, the battery is completely charged.
A battery will take
2 hours
to fully charge.
A fully charged battery will allow
1 hour + 15 minutes
of shooting time in Movie Mode at room temperature. It will allow 1 hour + 10 minutes at
32 degrees F.Slide7
Open the cover on the bottom of the camera + insert the battery with the arrow side facing the back of the camera + the metal terminals pointing down.Slide8
Look here on the LCD screen to see how much charge remains on your battery.Slide9
To detach the lens, press down on the lens release button while turning the lens counterclockwise.Slide10
Be sure to attach the rear lens cap to the detached lens to protect it.Slide11
To attach a lens, align the red or white index on the camera with the red or white index on the lens, matching the same color. Then turn the lens clockwise until it clicks in place.Slide12
Turn the
Image Stabilizer on or off on the side of the lens. Switch the lens to Autofocus (AF) or Manual Focus (MF)Slide13
Mode Dial Power SwitchSlide14
To begin, turn the mode dial to A+Slide15
To adjust the viewfinder’s sharpness, turn the dioptric adjustment knob left or right so that the AF points (9 boxes) in the viewfinder look sharp.Slide16
AF points (9 boxes) in the viewfinder should appear sharp Slide17
Formatting the SD Card:
If your card is new or was previously used with another camera or computer, format it with the camera.
Hit the “Menu” button
Use the Main Dial to move to the 5
th Menu Screen (or the 1st
menu with the Wrench icon).Use the arrow keys to move down to “Format Card”Select “OK” + then press “SET”. The card will be formatted.
When the formatting is complete, the menu will reappear.Slide18
The mode dial must be set to
Movie Shooting mode to shoot video.
Turn the dial to set it here +
you’ll see an image on the LCD.Slide19
To select your Movie Recording Size + frame rate:
Hit the
Menu button, scroll to the
2nd Menu Screen + scroll down to
“Movie Rec. Size” with the arrow keys.
Use the arrow keys to select the desired image size + frame rate + press the SET button.Slide20
Image Size + frame rate options:
1920 x 1080
:
Full High Definition (Full HD) recording quality. The aspect ratio will be 16:9
1920 x 1080 [[30 is recorded at 30 frames per second 1920
x 1080 [[24 is recorded at 24 frames per second1280 x 720
: High Definition (HD) recording quality. The aspect ratio will be 16:9 (records at 60fps)640 x 480
: Standard Definition recording quality. The aspect ratio will be 4:3 (records at 30fps)Slide21
Total Movie Recording Time + File Size per Minute:
Recording will stop automatically if the file size of a single movie clip reaches 4 GB. You can start shooting a movie again by pressing
the button + a new file will be created.Slide22
Image Quality:
Scroll across to the 3
rd
Menu Screen (camera icon) +
scroll down to “Image Quality”
For the best video quality, select “RAW”
Resolutions: L = Large: 18MP (megapixels)M = Medium: 8MPS1 = Small 1: 4.5 MP
S2 = Small 2: 2.5MPS3 = Small 3: 0.3MPRAW + L = Raw + Large: 18MP / Stills and Video are both capturedRAW = 18MP / uncompressedSlide23
Sound will be recorded by the built-in microphone.
An external microphone cannot be attached. It’s recommended that you use a separate audio recorder, such as the Zoom H4N Digital Recorder or the Sony PCM
M10 recorder
.Slide24
Activating a grid display for
composing shots using the Rule of 3rds:
Press the “
Menu
” button to access the Movie Menus.
Use the Main Dial to scroll to the 2nd Menu Screen. Use
the arrow keys to scroll down to “Grid Display”. Hit “SET” + select “
Grid 1”. Hit “Menu”again
to Exit.Slide25
Manual Shooting with the T5:
Setting the Shutter Speed
,
Aperture + ISO
in Movie Mode
Press the “Menu” button to access the Movie Menus. On the 1st Menu
Screen, use the arrow keys to scroll down to “Movie Exposure”. Hit “SET” + select “Manual”. Hit “Menu”again to Exit.Slide26
To manually set the Shutter Speed,
turn the Main Dial. You will see the
shutter speeds change. 60 = 1/60 sec., etc.
The settable shutter speeds depend on
the frame rate you’ve selected.Slide27
To manually set the
Aperture, hold down the
Av +/- button and then
turn the Main
Dial to select the correct F-stop. You will see the F-stops change.
(4.0 = F4, etc.) Slide28
To manually set the
ISO speed, hold
down
the Flash button + turn
the Main Dial to select
the desired ISO speed.
When shooting a moving subject, a shutter speed of 1/30 sec. to 1/125 sec. is recommended. Faster shutter speeds will produce a less smooth, more stuttered movement.Slide29
To Manually White Balance the T5:
Move the Mode Dial to “Flash Off” mode
to take a still photo.
2. Hold a white card flat in front of your subject
and zoom in until only white fills the frame. Focus manually and set the standard exposure
for the white card. Then, take a photo.Slide30
4. Move
the Mode Dial back to “Movie Mode”.
Hit
the Menu button, scroll to the 3
rd Menu Screen
+ scroll down to “Custom White Balance” + press the SET button.
The image that was captured in Step 3
will appear. Hit the SET button to select it to custom white balance your camera.
A
WB data box will appear asking if you
want
to use this image
to
custom white balance.
Use
the arrow keys to select “OK
”
+ hit SET
Confirm
that you want to manually white balance the camera
by hitting SET again to
select “OK”.
9. Hit
the Menu button to exit the Menu.Slide31
To manually focus the T5:
1. Switch the lens to “MF”Slide32
2. Aim the camera to frame your subject, and press the “Cross Keys” button + use the arrow keys to move the magnifying frame to the position where you want to focus.Slide33
3. Press the “SET” button to return the magnifying frame to the center. Or hold down the Av +/-
button and press “SET” Slide34
4. Press the Magnify button + the area within the magnifying frame will be magnified. Each time you press the button, the view will change from 5x to 10x to Normal Slide35
5. While looking at the magnified image, turn the lens’s focusing ring to finely focus the image. After achieving fine focus, press the
Magnify button again to return to the normal view. Slide36
To begin recording video, press the “Camera”
icon button above the LCD. To pause or stop,
press it again. When recording is happening,
a red dot will appear on the upper right of the screen. Slide37
Zooming the lens during recording is not recommended. Zooming the lens while shooting can cause changes in exposure. Exposure changes may be recorded as a result.Slide38
Playing Back Movies on the T5:
Press the playback button
on the bottom back of the camera.
The last captured movie will appear.
In the single image display, the icon on
the upper left of the screen indicates a movie.3. Use the right and left arrow keys to
scroll back/forward to select a movie to play.Press “SET” and the movie playback panel will
appear at the bottom of the screen. Use the
arrow keys to scroll through the playback panel.
Slide39
Press the butt button to activate the Index Display. This allows
you to see and select multiple movies. Use the arrow keys to
select one + press “SET” twice to display the playback panel to play it.
Use
the arrow keys to scroll through the playback panel.
Press “SET” to
playback an image once “PLAY”
is selected
. Press “SET” again to stop. Slide40
Erasing Movies:
Playback the movie to be erased. Scroll through the Playback Panel to select to exit.
Press the button
+ the Erase menu will appear
at the bottom of the screen.Select “Erase”, then press “SET”. The
movie displayed will be permanently erased.Slide41
To Import Your
Canon Rebel T5
Files
:
Remove the SD card from the Canon Rebel T5 Camera + insert into the SD card slot in your computer.Double click on the SD card to open it and you should see a list of QuickTime movie files or folders which contain
your image files. Drag the files you want from the SD card folder onto
a “Last Name/Cam Mem/Date” folder within your “Last Name – Premiere” folder. You should also drag the files onto another hard drive to back them up.
Eject your SD cardLaunch Adobe Premiere Pro CCYou can simply drag + drop the files you would like to import from your “Last Name/Cam Mem/Date” folder into the Project Tab of the Project
Panel in Adobe Premiere Pro CC.
Alternatively, you can click the
“Media Browser” tab in
the
Project Panel to make it active.
Find your files on the left side of the Project Panel in your Hard Drive or the Student Partition (if working in room B-56).
Slide42
S
croll
down to find your “Last Name” folder + your “Last Name – Premiere”
folder on the left side of the Project Panel. Within
that, find your “Last Name, CAM MEM, date” folder + click to open your video files in the Media Browser. Shift Click the video files you would like to
import to select them. Then Control Click in the middle of 1 file to produce a Pop-up menu + select: “Import”.
Your video files have now imported, and they are now stored under the “Project Tab” of the Project Panel.It is most important for you to “Save
” your project once you have finished importing your video files. Otherwise, your work will be lost. To do this, Scroll down under “File” on the Menu Bar + select “
Save
”, or
hit “
Command
”
+
“
S
” on
the
keyboard to save your project
.
If you need a
pictoral
step by step set of instructions for this importing process, refer to “
“Importing into Adobe Creative Cloud Premiere Pro CC with the Panasonic HDC
TM900” on D2L
Prepared
by A. Torinus