
Art Lesson Grade 3 Activity Action Painting Class Mural Keywords Abstract expressionism line color rhythm Check it out YouTube video by Nate Heck Splat Pollock and the science of paint viscosity ID: 405396
Download Presentation The PPT/PDF document "Jackson Pollock" is the property of its rightful owner. Permission is granted to download and print the materials on this web site for personal, non-commercial use only, and to display it on your personal computer provided you do not modify the materials and that you retain all copyright notices contained in the materials. By downloading content from our website, you accept the terms of this agreement.


Slide1
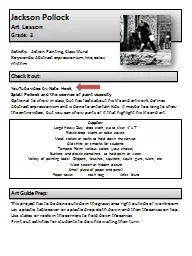
Jackson Pollock
Art Lesson
Grade: 3
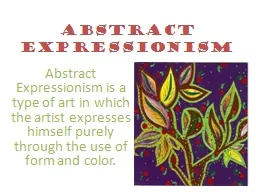
Activity: Action Painting, Class MuralKeywords: Abstract expressionism, line, color, rhythm
Check it out:
YouTube video by: Nate Heck,Splat! Pollock and the science of paint viscosity.Optional to show in class, but has facts about his life and artwork, defines Abstract expressionism and is done to entertain kids. It maybe too long to show the entire video, but you can show parts of it that highlight his life and art.
Supplies:Large Heavy Duty drop cloth, cut to size: 4’ x 7’Plastic drop cloths or table covers Metal stakes or rocks to hold down the canvasOld shirts or smocks for studentsTempera Paint- various colors (your choice)Buckets and plastic containers to hold paint or waterVariety of painting tools: Drippers, brushes, squirters, squirt guns, rulers, etc.Word search or hidden pictureSmall piece of paper and pencilPaper towel trash bag Artist blurb
Art Guide Prep:
This project has to be done outside in the grassy area right outside of workroom. Lay a plastic table cover or a plastic drop cloth down and then the canvas on top.Use stakes or rocks in the corners to hold down the canvasPrint out activities for students to do while waiting their turn.Slide2
Setup painting station around the canvas outside.
Fill squirt bottles and droppers with paint and a little bit of water to dilute just a bit. You don’t want it too watery.Use large plastic containers filled with paint to use for brushes and large squirters that need to be refilled.Take a trash bag and paper towels outside too
You can also use a large bucket filled with water, for the kids to wash their hands when done.Cut small pieces of paper 3”x3” for students to name the art.
Get out painting T-shirts or smocks.If watching the video:
Tell students that they will be watching parts of this video. It is a long video, but has great information. There is nothing bad in the video, but we just need to shorten the time on viewing it. *Watch ahead of time and see how much of the video you want to show. Total view time should be about 12-15 min.
Have students get a pencil and a clip board or something hard for them to write on while outside.Take students outside and have them put on their smocks. They need to sit up against the wall. Give everyone an activity sheet. Explain to them the different types of “action painting” tools and show them how to work them.They need to understand that it is very “controlled” and anyone who does not follow the rules can not participate.The squirt bottles should be used downward not across, so you don’t get paint on another student. Also try not to paint in one spot, move the paint around entire canvas.
Groups of students (4-5) will go up and use some of the tools. Give them a few seconds and then tell them to rotate to another tool.While one group is painting the rest of the class can be working on their activity sheets. After they finish, they can wash /dry hands , take off smock and sit back down.When everyone has had a chance to go. Optional: You can have some students sprinkle glitter over the mural.Give them each a piece of paper.Tell them to walk around their art and give it a name, not saying it out loud, just writing it down . Tell them not to tell each other what they named it.Collect the name choices and tell the kids that the art guides will pick the top 3 and then the class will vote for their favorite one.
Hands On Art
:Slide3
No Video:If you choose not to watch the video, then you will need to tell the class the Bio and about the artwork.
Proceed to the next steps.Clean up:Let mural dry outside till the end of school day. Bring mural (and drop cloth) inside and let finish drying.Will usually dry by next day. You may need to find another spot to continue to dry.
Clean out all the paint buckets and brushes.If there is a lot of paint in the droppers and squirt bottles, you can leave in there and make sure it has a lid so they don’t dry up.
Display:Once dry, hang outside classroom on art board with the title that the students voted on.When finished displaying the mural, cut into squares and staple the artist blurb on back. Put in portfolios.
Finish and Display:
Rainbow Explosion
Midnight Glow