
National Center for Home Food Preservation httpnchfpugaedu Disclaimer and Document Use This slide show is a photographic description of steps in freezing Brussels sprouts at home ID: 654770
Download Presentation The PPT/PDF document "Freezing Brussels Sprouts" is the property of its rightful owner. Permission is granted to download and print the materials on this web site for personal, non-commercial use only, and to display it on your personal computer provided you do not modify the materials and that you retain all copyright notices contained in the materials. By downloading content from our website, you accept the terms of this agreement.


Slide1
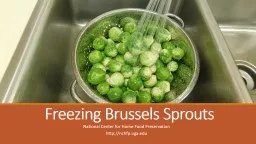
Freezing Brussels Sprouts
National Center for Home Food Preservation
http://nchfp.uga.eduSlide2
Disclaimer and Document Use
This slide show is a photographic description of steps in freezing
Brussels
sprouts
at home.
Additional information
on freezing
vegetables
at
home can be found in
So Easy to Preserve
, 6
th
ed., or at http://nchfp.uga.edu/how/freeze.html
Permission to post on other websites must be requested.
© University of
Georgia, 2017Slide3
Before Beginning the Freezing Process
Wash hands and clean your working area.
Gather and prepare materials needed.
Make sure you wear appropriate clothing, hair restraint.
Equipment list:
Cutting board, paring knife, slotted spoon, strainer
Colander, clean sink
Stovetop, blancher
(bottom, basket, lid)
M
etal bowl for ice bath, ice
Paper towels and cookie sheet
Freezer bag or rigid container, permanent marking penSlide4
Selecting and cleaning the Brussels Sprouts
Select green, firm and compact heads. Examine carefully to make sure they are free from insects.
Rinse Brussels sprouts thoroughly under running water.
Make sure there is no dirt inside of the Brussels sprouts
. Slide5
Trimming and sorting the Brussels Sprouts
Trim the end of the Brussels sprouts, remove coarse outer leaves
Sort into small, medium, and large sizes.
Discard any sprouts with insects or signs of rotting.Slide6
Blanching the Brussels Sprouts
Blanching is important because it stops enzymatic actions which can cause loss of flavor, color, and
texture during storage.
It also cleans the surface, brightens the color, helps retard loss of vitamins, and softens the Brussels sprouts.
Bring 1 gallon of water per pound of prepared vegetables to a full rolling boil.
Place Brussels sprouts in the basket insert and
lid
on
the
blancher.Slide7
Blanching the Brussels Sprouts, cont.
The water should return to a boil within 1 minute.
If not, it means there are too many Brussels sprouts for the amount of water.
Blanching time begins when the water comes to a boil again after Brussels sprouts are added.
Blanch 3 minutes for small heads, 4 minutes for medium heads, and 5 minutes for large heads. Slide8
Cooling After Blanching
After blanching, the basket of Brussels sprouts should be removed immediately and plunged into icy cold water.
The Brussels sprouts should be completely cooled before removing from the cold water. Place on clean paper towels lining the cookie sheet to drain. Slide9
Packaging for Freezing
Pat sprouts dry using clean paper towel to prevent extra moisture in the package during freezing.
A rigid freezer container and/or plastic freezer bag may be used
to store the Brussels sprouts.
The container or bag must be:
durable
and leak proof
resistant to moisture, oil and grease
able to protect foods from absorption of off flavors or odors
p
rotect food from drying out and causing freezer burn
easy to seal and mark
Make sure to wash and dry rigid freezer containers before use.
More about
freezer containers: http://nchfp.uga.edu/how/freeze/containers.htmlSlide10
Labeling Containers or Bags
Label the Brussels sprouts by writing with a dark permanent maker on freezer tape or directly onto the bag/container.
The label should include: the name of the Brussels sprouts and date frozen.Slide11
Packaging the Brussels Sprouts
( Freezer Container)
Fill drained sprouts into the container.
No headspace
is needed
for
this kind of pack when filling the container. (The heads of sprouts will have room around them for expansion.)
Wipe
the rim of the container with a damp paper towel to remove any excess
water.
Seal the lid on the container, releasing all of the air.
Make sure all edges are sealed tightly before freezing. Slide12
Packaging the Brussels Sprouts (Freezer Bag)
Carefully fill the bag with Brussels sprouts, keeping the sealing area dry.
Place a single layer of Brussels sprouts inside the bag.
Seal
the freezer bag,
releasing all
of the
air.
Make sure all edges are
dry and sealed
tightly before
placing in the freezer.Slide13
Freezing the Brussels Sprouts
Place the packaged
Brussels sprouts
in the
coldest part of the freezer
in
a horizontal position.
Leave space between packages so air can circulate freely. Rapid freezing protects against the formation of large ice crystals that hurts the quality of the sprouts.
After packages are frozen, they can be moved closer together or stacked for storage.
Keep your freezer set at 0°F or lower all the time for best quality frozen vegetables
.Slide14
Enjoying the Brussels Sprouts
Enjoy
when you are ready to
eat!
B
est
if eaten within 8 to
12 months
.
Brussels sprouts can be cooked without thawing first; cook gently until just tender.
If you must thaw them before cooking, thaw in a refrigerator at
40
o
F
or colder above raw meat, poultry or seafood.Slide15
Reference and Credits
Andress
, E.L., and Harrison, J.A., Eds. (2014).
So Easy to Preserve,
6th ed. Athens, GA: University of Georgia Cooperative Extension.
This
slide set was developed by
Yi
xu
an
Wang as a student project in FDNS 5910, Department of Foods and Nutrition, The University of Georgia
. All images are original photography.
Edited
by Extension faculty and staff of the Foods and Nutrition Department, University of Georgia. Contact: Elizabeth
Andress, Ph.D., Extension Specialist, eandress@uga.edu.
Permission to post on other websites must be requested.© University of Georgia, 2017