
Print defaults OK Create rectangle 17 by 17 Fill with cmyk red No stroke Pip pip cheerio Pip pip Have 6 surfaces On one surface 1 pip On another want 2 pips On third surface want 3 pips on 6 ID: 680918
Download Presentation The PPT/PDF document "Goal: Rev 09/21/2016 New document" is the property of its rightful owner. Permission is granted to download and print the materials on this web site for personal, non-commercial use only, and to display it on your personal computer provided you do not modify the materials and that you retain all copyright notices contained in the materials. By downloading content from our website, you accept the terms of this agreement.


Slide1
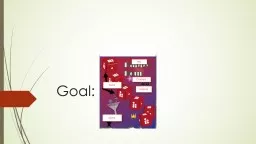
Goal:
Rev 09/21/2016Slide2
New document
Print defaults OKSlide3
Create rectangle
1.7 by 1.7”
Fill with cmyk redNo strokeSlide4
Pip pip
cheerio
Pip pipHave 6 surfaces.
On one surface: 1 pip
On another want 2 pips…. On third surface, want 3 pips, on 6
yh
side---
your pictureSlide5
Pip information
Size: .278” x .278
”, light gray
Fill
color CMYK
values seen
below,
CMY
all zeroes , K=10%, no
stroke on any.
If necessary, increase k %
OR,
if creating in canvas, make fill be white.Slide6
6 setsSlide7
Pathfinder
Use
the
Pathfinder
>
Unite
tool
Make
each
group of
pips into
a new compound
object
. And provide a name for each
Here is how to do that:
Open
Pathfinder panel Select each set (2-6), one group at a time I started with the “2” setSelect the 2-pip group:Find the Unite tool, select both pips and Alt-click it to create the new compound shape Slide8
Pathfinder again
Open
pathfinder toolSelect a group at a time (start with set of 2)
Find
Unite
tool and
Alt-click
on the setSlide9
Groups to symbols
Convert each group to a symbol
Symbols stored once, regardless how many time use themWe will save the pips in Symbols
panel: Just drag each group to the
Pathfinder
panel:Slide10
Symbol panel:
Will Insert groups here
Want to end with 6 symbols one group” has only 1 itemSlide11
Symbols will look like this:Slide12
Thus:
Choose a surface
Apply symbolSlide13
Drag to Symbols
Drag the “1” pip to
Symbol panel
Assign name “1”Slide14
Drag to Symbols
Drag the “1” pip to
Symbol panel
Assign name “1”Slide15
Repeat
Drag over remaining groups until all 6 groups converted to symbols
Name them 2,3,4,5,6Do turn on
Preview
Do NOT click OK…need to Map Art yet. (put a symbol on each surface)Slide16
No more pips
If not needed anymore move them to canvas or delete themSlide17
Extrude rectangle
Note: If there is a stroke on rectangle-delete it
Select rectangle then Effect>3D>Extrude and Bevel
Check
Preview
My values:Slide18
Values:
-44, -24, 11, 11, 108, Tall Round ,4
Press
Map Art Slide19
Map (place)
Place a symbol (1-6) onto each surface (6 surfaces)Slide20
Mapping
Map the symbol named “1” on surface 1
Symbol 2 on surface 2
…
Finish:Slide21
Map…Slide22
Skip these…represent edgesSlide23
Edit a surface
Note:
If you need to re-edit a surface, re-select the 3D Extrude & Bevel in the Appearance Tool
:Slide24
Copy and Paste
Arrange the dice this way:
What is unrealistic?Slide25
Rotate bottom die
Select lower die
Window>Appearance>3D extrude and bevel
Click Preview
Rotate the cube
.Slide26
After Rotating:Slide27
Blend
Use as many steps as will fit
Select both
Object>Blend>Blend Options
Smooth color
Illustrator decides how many steps will fit
Then:
Object>Blend>MakeSlide28
New paths
Random paths
Add some anchor points along the pathUse Direct Select (white arrow)Push, pull
Save as
poster 2Slide29
Layers, gradients, symbols
Layers
Open its panelRename Layer1 as
Dice
Lock it
Look at the sub layers
Add new layer and name it
BackgroundSlide30
Selected/not
Layer not selected:
SelectedSlide31
SubLayersSlide32
Add new layer named
Background
Be
sure it’s a complete new layer, not a
sublayer name it
Background
New layer:
Name itSlide33
Dice
What content will
Dice Layer contain?Slide34
Rearrange
Drag
Background below DiceSelect
Background
Unlock Dice layer, if necessary
Draw rectangle on
Background
that covers the dice:
no fill, no strokeSlide35
Hide
Hide
Dice layer…. eyeballSlide36
Gradient
We’re going to add a gradient fill to the rectangle
Open the
Gradient
Panel:
Window> Gradient
Note there are two types:
Linear
and
Radial
…choose
linear
At that point, Illustrator may apply the black and white gradient…don’t worry.
Tear off the
Gradient
tabSlide37
Tear off the Gradient tabSlide38
Stops
Start stop: Cyan red
End Sop: Dark Blue Move slider
What does that do?Slide39
Select gradient:Slide40
Result:Slide41
Gradient toolSlide42
Draw any direction:Slide43
Add text
Add text (point)
Window>Type>Character (look at Impact,, Broadway…better?Words:
Half Hou
r…two lines
Add symbols from
Celebration
Choose a blue 10pt stroke around the rectangle Slide44
Done
Add a text box anywhere in the poster. and enter :Poster by…” type
your name in the box, use 32 points textSlide45
Type terms
Kerning—between p and y
Tracking-select entire second wowLeading-move second row downSlide46
Upload
Export as file named
poster,pngUpload the poster.jpg to your web site