
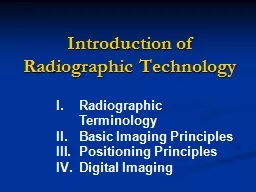
Radiographic Terminology Basic Imaging Principles Positioning Principles Digital Imaging I Radiographic Terminology General Terms Radiograph Radiography Radiograph vs xray film Radiographic images ID: 378938
Download Presentation The PPT/PDF document "Introduction of Radiographic Technology" is the property of its rightful owner. Permission is granted to download and print the materials on this web site for personal, non-commercial use only, and to display it on your personal computer provided you do not modify the materials and that you retain all copyright notices contained in the materials. By downloading content from our website, you accept the terms of this agreement.


Slide1
Introduction of Radiographic Technology
Radiographic Terminology
Basic Imaging Principles
Positioning Principles
Digital ImagingSlide2
I. Radiographic Terminology
General Terms
Radiograph
RadiographyRadiograph vs. x-ray filmRadiographic imagesRadiographic examination or procedureAnatomic positionSlide3
I. Radiographic Terminology
Body Plane
、
Section and LinesSagittal planeCoronal planeHorizontal planeOblique planeBase planeOcclusal planeSlide4
I. Radiographic Terminology
Body Surfaces and Parts
For the body
anteriorposteriorFor the hands and feetplantarpalmardorsumSlide5
I. Radiographic Terminology
General
Body Positions
SupineProneErect (stand or sit)RecumbentLying down in any positionDorsal (supine)Ventral (prone)LateralSlide6
I. Radiographic Terminology
General
Body Positions
TrendelenburgSim’s positionFowler’s positionLithotomy positionSlide7
I. Radiographic Terminology
Specific
Body Positions
The body part closest to the IR (oblique and lateral) or by the surface on which the patient is lying LateralRight/LeftObliqueLPO/RPOLAO/RAOSlide8
I. Radiographic Terminology
Decubitus (
Lie on a
horizontal surface and always used with horizontal x-ray beam)Slide9
I. Radiographic Terminology
Radiographic
Projection
The direction or path of the CR of the x-ray beamAnteroposteriorPosteroanteriorAP or PA ObliqueMediolateral or LateromedialSlide10
I. Radiographic Terminology
Additional
Special Use Projection
TermsAxial Superoinferior axialInferosuperior axialAP/PA axialSlide11
I. Radiographic Terminology
Tangential
AP axial (Lordotic)
Transthoracic lateralSlide12
I. Radiographic Terminology
Dorsoplantar / Plantodorsal
Parietoacnthial / Acanthioparietal
Submentovertex /VerticosubmentalSlide13
I. Radiographic Terminology
Relationship Terms
Meidal vs. Lateral
Proximal vs. DistalCephalad vs.CaudadSlide14
I. Radiographic Terminology
Terms Related to Movements
Flexion/Extension/Hyperextension
Ulnar deviation/Radial deviationDorsiflexion/Plantar flexion of footSlide15
I. Radiographic Terminology
Terms Related to Movements
Eversion (Valgus)/Inversion(Varus)
Medial /Lateral RotationSlide16
I. Radiographic Terminology
Terms Related to Movements
Abduction/Adduction
Supination/PronationProtraction/RetrationSlide17
I. Radiographic Terminology
Terms Related to Movements
Elevation/Depression
CircumductionTilt/RotationSlide18
I. Radiographic Terminology
Summary of Potentially Misused Terms
Position
restricted to the discussion of the patient’s physical position Projectionrestricted to the discussion of the path of the central rayViewrestricted to the discussion of the a radiograph or imageSlide19
II. Basic Imaging Principles
Radiographic Criteria
Structures Show(1~6)
PositionCollimator and CRExposure CriteriaImage Markers
2
1
5
4
3
6
a
c
bSlide20
Image Markers and Patient IdentificationPatient ID and Date
Anatomic side marker
Additional markers or Identification
II. Basic Imaging PrinciplesSlide21
Radiographic Technique and Image QualityExposure factors
kVp
mA
S (excepted when AEC is used )Image Quality FactorsDensity Contrast DetailDistortion
II. Basic Imaging PrinciplesSlide22
II. Basic Imaging Principles
Density
Definition
:the amount of blackening of the processed imageControlling factor:mAs / kVp / SIDChange rule :Underexposure Doubling mAsException:
DR and CR (controlled by image process technique)Slide23
II. Basic Imaging Principles
Contrast
Definition
:the difference in density on adjacent areas of a radiographic imagePurpose :make the anatomic detail of a radiographic image more visibleControlling factor:kVp (15% increase as mAs double)Slide24
II. Basic Imaging Principles
Detail
Definition
:the visible sharpness of structure on the imageControlling factorGeometric factors : focal spot size/SID/OIDFilm/Screen SpeedMotionSlide25
II. Basic Imaging Principles
Distortion
Definition
:the misrepresentation of object size or shape as projected onto film (because of beam divergence and SID)Slide26
II. Basic Imaging Principles
Distortion
Controlling factor
SIDOID/Focal spot size Slide27
II. Basic Imaging Principles
Alignment (object
、
film、CR)Slide28
Anode Heel Effect Intensity of cathode >
anode
Pronounced at
Shorter SIDLarger IRSmall focal spot II. Basic Imaging PrinciplesSlide29
III. Positioning Principles
Professional Ethics and Patient Care
CAMRT (1997.06)
Canadian Association of Medical Radiation Technologists ASRT (1994.07) American Society of Radiological TechnologistsProtocol and Order for General Diagnostic Radiographic ProceduresRoom and Exam Preparation Slide30
III. Positioning Principles
Positioning Method
Fixed vs. Floating tabletop
Cassette tray and Bucky gridBeam restricting device Illuminated adjustable collimatorPositive Beam Limitation (PBL)Slide31
III. Positioning Principles
Positioning Sequences
Traditional Radiography
Step1
Step3
Step4
Step2Slide32
Table
With bucky
no bucky
Standing buckySlide33
III. Positioning Principles
Essential Projections
Routine (Basic) Projections
Commonly taken on all patients who can cooperate fullySpecial (Alternate) ProjectionsBetter demonstrate specific anatomic or certain pathologyThe patients who can’t cooperate fullySlide34
III. Positioning Principles
Principle for Determining Positioning Routine
A minimum of
two projectionsProblem of anatomic structures being superimposedLocalization of lesions or foreign bodiesDetermination of alignment of fractureA minimum of three projectionsSkeletal system involving jointsAP、PA、ObliqueSlide35
III. Positioning Principles
Topographic Positioning Landmarks
Done gently
Patient should be informedBody HabitusSlide36
III. Positioning Principles
Viewing Medical Images
Radiographic Images
AP/PA/ObliqueViewing as patient is facing the viewerMarked by R/LSlide37
III. Positioning Principles
Lateral
Viewing from the same perspective as the x-ray tube
Marked R/L by the side of the patient closet to the IRDecubitus chests and abdomenViewing from the same perspective as the x-ray tubeCrosswise and p’t upside on view box upsideUpper/lower limbR/L marker appears right-side-upLimbs hanging downDigits upSlide38
III. Positioning Principles
CT or MRI Images
The patient
’s right is to the viewer’s leftSlide39
IV. Digital Imaging
PACS (Picture Archiving and Communication System)Slide40
IV. Digital Imaging
CR (Computed Radiography)
Key components
Image plate (repeatedly)IP reader (laser scanner , 20s)WorkstationExposure factor( AEC is not used)Compensation 500% overexposure, 80% underexposurePositioning consideration
Center sampling technique
Accurate and close collimation
Lead masking for multiple images
Grid Slide41
IV. Digital Imaging
DR (Digital Radiography )
Flat panel receptor (direct conversion method )
Digital Bucky grid 17”*17”Automatic Exposure Control (AEC)kVp”、”m A” manual
“
s
”
autoSlide42
IV. Digital Imaging
DR in CGMH
Digital image unitSlide43
Quality Control for Processor
Set up initial standard (base line)
In most stable condition of the processor
Individual O.D. of 21 steps (average of five days measurements)Find O.D. ≧1.2 Mid-density (MD) and Mid-step#Find O.D. ≧2.2 High-density (HD) and High-step#
Find O.D. ≧0.45
Low-density (LD) and Low-step#
Daily QA
MD <
±0.15
(measurement - base line)
DD <
±0.15
(measurement - base line)
(DD=HD-LD)