
Edward Hopper The House by the Railroad Vocabulary Perspective portraying a threedimensional object space on a 2dimensional surface Vanishing point VP Using two perspective parallel lines converge to ID: 381630
Download Presentation The PPT/PDF document "2-Point Perspective" is the property of its rightful owner. Permission is granted to download and print the materials on this web site for personal, non-commercial use only, and to display it on your personal computer provided you do not modify the materials and that you retain all copyright notices contained in the materials. By downloading content from our website, you accept the terms of this agreement.


Slide1
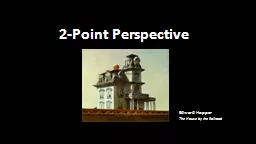
2-Point Perspective
Edward Hopper
The House by the Railroad Slide2
Vocabulary
Perspective- portraying a three-dimensional object /space on a 2-dimensional surfaceVanishing point (VP)- Using two perspective, parallel lines converge to
two points
somewhere in the distance. This point is called the vanishing point (VP). This gives objects an impression of depth.
Orthogonal
- Parallel lines that converge and recede to the vanishing point (VP).
Horizon Line
– the line in the distance where the earth and sky meetSlide3
So, What is two-point
perspective? Two-point perspective is used when artists want to draw an architectural element from the vantage point of seeing it at an angle.
The viewer is able to see both sides of the architectural element receding towards a common horizon line. Slide4
Why 2-Pt Perspective?
2-Point Perspective is a much more useful drawing system than the simple 1-Pt Perspective. Objects drawn in 2-Pt Perspective have a more natural look.Slide5
Differences in 1-Pt & 2-Pt
In 2-pt Perspective, the sides of the object vanish to one of two vanishing points on the horizon. Vertical lines in the object have NO perspective applied to them. (They are drawn VERTICALLY!)
This means that
ALL
horizontal lines are drawn to the vanishing point.Slide6
Let’s compare one-point perspective with
two-point perspective. In
one-point perspective
the view is from straight on and the sides recede to only one vanishing point on the horizon.
In
two-point perspective
, the view is from the corner and the sides recede toward two different vanishing points. Slide7Slide8
Here are the steps…..they are not so hard.
Draw a horizon line. This is horizontal line that refers to the point at which the sky meets the land. It also refers to the eye level of the viewer. Remember, the horizon line is equal to your eye level. Since you can have only one given eye level at a time, you can only have one horizon line.
Next place two
vanishing points
fairly far apart on your horizon line. The vanishing point refers to the point at which parallel lines appear to converge on the horizon. Think of railroad tracks that seem to come together on the horizon. Slide9
VANISHING POINT
HORIZON LINE Slide10
You’re doing great!
Now, place a vertical line somewhere on your page that is between the two vanishing points. This line represents the corner of the box you are drawing. Draw from the top and bottom of that vertical line towards both of your points. Slide11
THESE IMAGINARY LINES ARE CALLED
ORTHAGONAL LINES Slide12
YOU ARE ALMOST THERE.
Now draw two lines inside your “V” shape. These represent the back corners of your box. Where you put them is determined by how long or wide you want your box to be. Slide13
This is the tricky part…..
But not too tricky. Now, if your box is below your horizon line (eye level) then that means you should be able to see the top.
To draw the top, draw a line from the top of your left most line to your right vanishing point.
Now draw a line from the top of your right most line to your left most vanishing point.
The lines will cross each other creating the top.
Tip:
If your box is above your horizon line (eye level) then do the exact same thing, except draw from the bottom of your lines instead of the top. Slide14Slide15
You did it! Now just erase your extra orthogonal lines. Slide16
Let’s see that one more timeSlide17
Practice drawing several boxes at different elevations using two-point perspective. Slide18
Tip
: Keep in mind that everything that you put on the sides of your box, must recede to the correct vanishing point. That way, everything gets smaller at the same rate as it goes away from the eye and looks natural.
Correct
Incorrect