

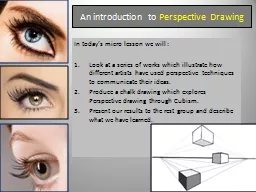
Students will tape down a piece of paper and go through the steps As we go through the presentation Defined In onepoint perspective the horizontals and verticals which run across the field of view remain parallel as their vanishing points are at infinity with horizontals which are perpen ID: 308563
Download Presentation The PPT/PDF document "1 Point Perspective" is the property of its rightful owner. Permission is granted to download and print the materials on this web site for personal, non-commercial use only, and to display it on your personal computer provided you do not modify the materials and that you retain all copyright notices contained in the materials. By downloading content from our website, you accept the terms of this agreement.


Slide1
1 Point Perspective
Students will tape down a piece of paper and go through the stepsAs we go through the presentation.Slide2
Defined
In one-point perspective, the horizontals and verticals which run across the field of view remain parallel, as their vanishing points are at 'infinity', with horizontals which are perpendicular to the viewer vanish towards a point near the center of the image. Slide3
Sample of a real
1 point PerspectiveSlide4
Step 1
First, draw a horizon line about one-third down your page.
Use a small dot or line to mark a spot roughly in the middle of the line. That's your vanishing point. Slide5
Step 2
Now draw square or rectangle, well below and to one side of your vanishing point. Make sure your vertical lines are perpendicular (at right angles) to your horizon line, and your horizontal lines are parallel. Slide6
Step 3
Now draw a line from each corner of your square or rectangle to the vanishing point. Make sure they are straight and finish exactly at the vanishing point. Slide7
Quiz
What is the Horizon Line?What is the Vanishing Point?Slide8
Step 4
Now comes the tricky bit. Draw a horizontal line, starting a little way along the bottom left vanishing line, across until it joins the bottom right vanishing line. This is the bottom edge of the back of your box. Make sure it is straight - parallel to the horizon and front edge.
Now, draw two vertical lines, straight up, from where that back line meets the two vanishing lines, up to the two top vanishing lines. Then add the horizontal line that joins them. Slide9
Step 5
Now you can erase the vanishing lines. You can keep all the lines inside the box if you want it to be see-through, like a fishtank, or, you can carefully erase the back corner - the bottom left, back, and lower back lines, as in the example. Slide10
Samples of 1 Point PerspectivesSlide11
Note the vanishing point
On the left side.Slide12
More samples of different angles
Of a 1 point perspectiveSlide13
Perspective Project
Now on your own draw a
Horizon line with a vanishing
Point and randomly draw three
Boxes on the paper like this
Sample.Slide14
Draw the vanishing lines for your boxes. So long as your ruler is lined up correctly, you can stop drawing just short of the vanishing point, so that it is still easy to see, and not lost in a tangle of lines. Slide15
Finish off your single point perspective boxes. Try drawing a fish tank, an open box, and a solid box.