/
wwwderocom wwwderocom

wwwderocom - PDF document

cadie
cadie . @cadie
Follow
343 views
Uploaded On 2021-08-20

wwwderocom - PPT Presentation

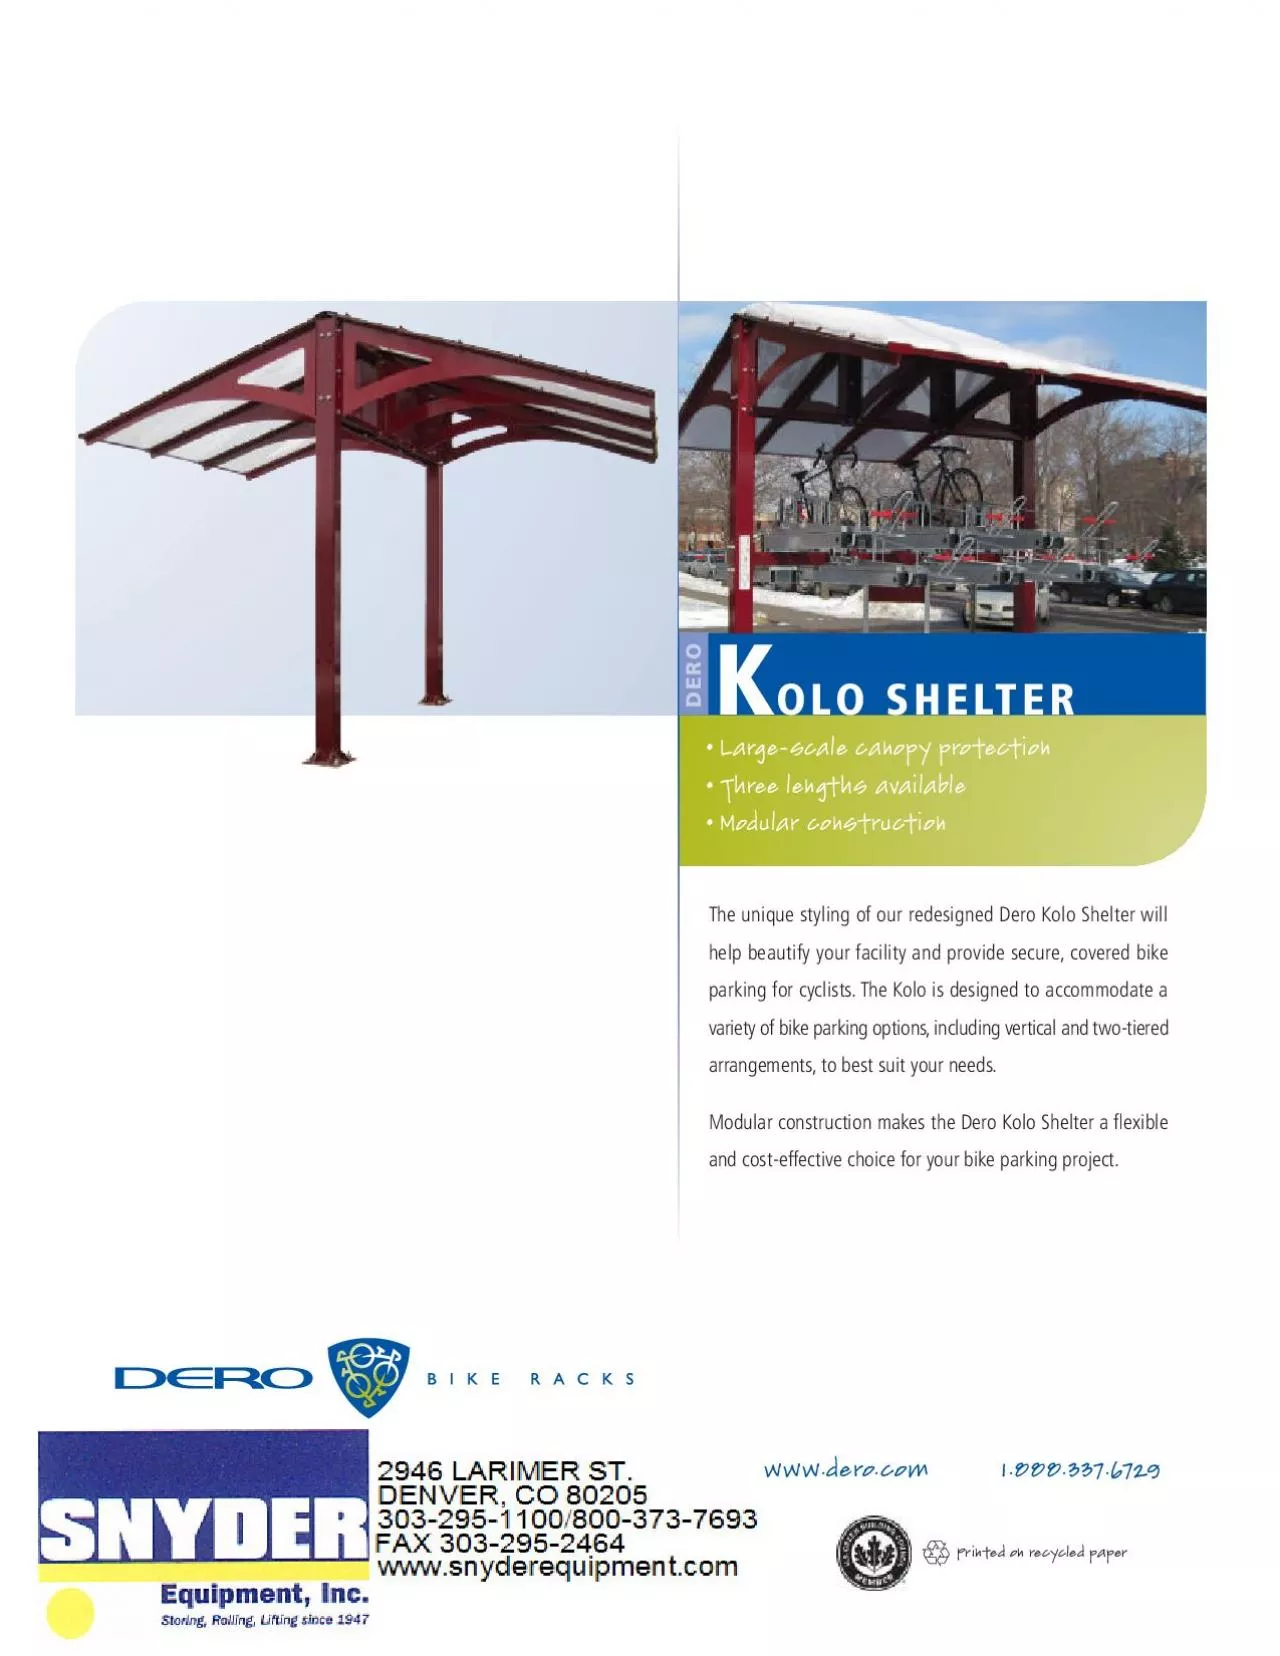
18883376729KOLO SHELTERSpeci31cations and Space UseDero Kolo Shelter As manufactured by Dero Bike RacksSee diagrams below and to the leftUprights 6148x148 square tubeCenter member 6148x148 square ID: 868052

polycarbonate 148 shelter dero 148 polycarbonate dero shelter kolo installation rafter www 888 337 6729 bolts holes place nuts

Share:

Link:

Embed:

Download Presentation from below link

Download Pdf The PPT/PDF document "wwwderocom" is the property of its rightful owner. Permission is granted to download and print the materials on this web site for personal, non-commercial use only, and to display it on your personal computer provided you do not modify the materials and that you retain all copyright notices contained in the materials. By downloading content from our website, you accept the terms of this agreement.


Presentation Transcript

1 www.dero.com 1-888-337-6729 KOLO SHELTE
www.dero.com 1-888-337-6729 KOLO SHELTER Specications and Space Use Dero Kolo Shelter As manufactured by Dero Bike Racks See diagrams below and to the left Uprights: 6”x¼” square tube Center member: 6”x¼” square tube, C6 channel Feet: ½” plate Rafter: 3/16” plate Roof Panels: ” UV resistant polycarbonate An after fabrication hot dipped galvanized nish is our standard option. 250 TGIC powder coat colors, and a thermoplastic coating are also available as alternate options. Our powder coat nish assures a high level of adhesion and durability by following these steps: 1. Sandblast 2. Epoxy primer electrostat

2 ically applied 3. Final thick TGIC polye
ically applied 3. Final thick TGIC polyester powder coat Surface Mount: It is the responsibility of the installer to ensure that all base materials into which the shelter will be installed can support the rack and will not be damaged by any required installation procedures. See structural drawings for details. Overall dimensions: Short: L 80”, W 185”, H 135” Medium: L 117”, W 185”, H 135” Long: L 154”, W 185”, H 135” Dead load = self weight of structure Live load = 40 psf Wind load = 90 mph exposure B Seismic load = Moderate Footing: see page 4 Anchor bolt = 1” diameter x 12” Simpson Strong-Bolt wedg

3 e anchor Product Materials Finishes Fini
e anchor Product Materials Finishes Finishes Installation Methods Space Use and Load Data 135”185” Campus Rack Dero Deckers Ultra Space Saver Dero Shelters can be used in a modular fashion (shared uprights) however, when used in this manner, please consult a Dero Bike Rack sales associate for layout, as the rack spacing and bike capacity can change! Capacity by shelter length Short: 5 Bikes Medium: 9 Bikes Long: 11 Bikes Capacity by shelter length Short: 14 Bikes Medium: 22 Bikes Long: 30 Bikes Capacity by shelter length Short: 6-9 Bikes Medium: 12-18 Bikes Long: 16-24 Bikes www.dero.com 1-888-337-6729 KOLO SHELTER Parts List Rafter Polycarbonate

4 Flange Bolt .25” x 6.5” Bolt .
Flange Bolt .25” x 6.5” Bolt .625” x 7.5” Wedge Anchor 1” x 12” Self Drilling Screw .25” x 1” Bolt .625” x 1.5” Polycarbonate Drop Polycarbonate Edge Upright Center Weldment (Short length shown above) Roof Cap Polycarbonate Tools Needed for Installation Tape Measure Marker or chalk Level Sledge Hammer Rubber Mallet Large Hammer Drill Standard Drill 3/8” Socket with drill attachment 1” Diameter Masonry Bit 7/16” Wrench/Socket 15/16” Wrench/Socket 1.5” Wrench/Socket Spud Wrench Heavy Lifting Equipment and Strap www.dero.com 1-888-337-6729 KOLO SHELTER Footing Details SIMPSON STRONG BOLTS(9

5 .00” MIN. IMBEDMENT)DRILL HOLES AT
.00” MIN. IMBEDMENT)DRILL HOLES AT INSTALLATION@BOTTOM OF FOOTING(3” CLR)@BOTTOM OF FOOTING(3” CLR)16” THICK 3000 PSISIMPSON STRONG BOLTS(9.00” MIN. IMBEDMENT)DRILL HOLES AT INSTALLATION@BOTTOM OF FOOTING(3” CLR)@BOTTOM OF FOOTING(3” CLR)16” THICK 3000 PSISIMPSON STRONG BOLTS(9.00” MIN. IMBEDMENT)DRILL HOLES AT INSTALLATION@BOTTOM OF FOOTING(3” CLR)@BOTTOM OF FOOTING(3” CLR)16” THICK 3000 PSI4-6” 3000 PSI KOLO 2 (SHORT)16” X 16” X .50”BASE PL W/(4) 1.00” DIA.SIMPSON STRONG BOLTWEDGE ANCHORS (9” MIN EMBED)AT EACH COLUMNKOLO 2 (MEDIUM)KOLO 2 (LARGE) www.dero.com 1-888-337-67

6 29 KOLO SHELTER Installation Instruction
29 KOLO SHELTER Installation Instructions Place Uprights based on footing diagram and drill (4) 1” diameter holes in concrete 12” deep for each Upright. Drive in Simpson Strong- Bolts and install washers and nuts nger-tight. It’s helpful to place a sheet of rubber or thick cardboard between the anchor and Upright to avoid hitting the Upright with the hammer. 1 Lift the Center in place and fasten nger-tight with (8) 5/8x7.5” bolts, lock washers and nuts. 2 www.dero.com 1-888-337-6729 KOLO SHELTER Installation Instructions If building a Kolo shelter with Dero Decker racks, lift the Dero Decker Beam in place and fasten with (8) 5

7 /8x7.5” bolts, lock washers and nu
/8x7.5” bolts, lock washers and nuts. 3 If building a Kolo shelter with Dero Campus Racks, lift the Campus Rack in place and fasten with (8) 5/8x7.5” bolts, lock washers and nuts 6 4 www.dero.com 1-888-337-6729 KOLO SHELTER Installation Instructions If building a modular system of Kolo shelters, continue to place and fasten Uprights, Center Weldments, and Dero Decker Beams/Campus Racks. 5 Apply foam rubber tape to the Rafter without covering .30” holes. Working from one end of the shelter to the other, lift a Rafter into place using a lifting strap. Secure the lifting strap at the rafter’s center of gravity which is indicated by a not

8 ch at the apex of the Rafter cut-out.
ch at the apex of the Rafter cut-out. Once the Rafter is in place, fasten the rafter to the Upright with (2) 5/8x1.5” bolts, (4) lock washers, and (2) nuts using the two upper-most holes. Continue to fasten all remaining Rafters with the above method. 7 Fully tighten all above bolts and nuts. Then tighten Simpson Strong-Bolt nuts to 230 ft-lbs. 6 Center of Gravity Notch www.dero.com 1-888-337-6729 KOLO SHELTER Installation Instructions Apply foam rubber tape to the Polycarbonate Flange without covering .20” holes. Place (1) Polycarbonate Drop, (1) Polycarbonate, (1) Polycarbonate Edge in place. Make sure the Polycarbonate Drop is ush wit

9 h the outside edge of the Rafter and tha
h the outside edge of the Rafter and that the Polycarbonate is centered between both Rafters. Use care to not scratch the Polycarbonate. Using the 16 holes in the Polycarbonate Flange and 16 holes in the Rafter, align the Polycarbonate Flange over the Rafter so that the Polycarbonate and Polycarbonate Drop are sandwiched between them. Starting at the holes furthest from the shelter center, secure the Polycarbonate Flange with (16) ¼x1.5” self-drilling screws. It’s recommended that the assembly be clamped together while fastening the rst two screws. The self-drilling screws will pass through the Rafter, drill through the Polycarbonate,

10 and tap through the Polycarbonate a
and tap through the Polycarbonate ange. 9 Fully secure the Rafters with (6) 5/8x7.5” bolts, (12) lock washers, and (6) nuts for each pair of Rafters 6 8 www.dero.com 1-888-337-6729 KOLO SHELTER Installation Instructions (Continued) 9 Polycarbonate Edge Polycarbonate Flange Polycarbonate Rafter Polycarbonate Polycarbonate Drop www.dero.com 1-888-337-6729 KOLO SHELTER Installation Instructions ”x6.5” bolts, (4) washers, and (2) lock nuts. Do not over-tighten to avoid bowing of the Roof Cap. 11 Continue installing the remaining Polycarbonates, Polycarbonate Drops, Polycarbonate Edges, and Polycarbonate Flanges. 10 www.dero.com 1-888-337-672

11 9 KOLO SHELTER Installation Instructions
9 KOLO SHELTER Installation Instructions If installing Dero Decker bike racks, see Dero Decker instructions. 6 12 Printed on recycled paper www.dero.com 1.888.337.6729 The unique styling of our redesigned Dero Kolo Shelter will help beautify your facility and provide secure, covered bike parking for cyclists. The Kolo is designed to accommodate a variety of bike parking options, including vertical and two-tiered arrangements, to best suit your needs. Modular construction makes the Dero Kolo Shelter a exible and cost-effective choice for your bike parking project. Large-scale canopy protection Three lengths available Modular construction K OLO SHELTER D

Related Contents


Next Show more