PDF-easiest kind of heatingto install
Author : test | Published Date : 2016-08-03
You
Presentation Embed Code
Download Presentation
Download Presentation The PPT/PDF document "easiest kind of heatingto install" is the property of its rightful owner. Permission is granted to download and print the materials on this website for personal, non-commercial use only, and to display it on your personal computer provided you do not modify the materials and that you retain all copyright notices contained in the materials. By downloading content from our website, you accept the terms of this agreement.
easiest kind of heatingto install: Transcript
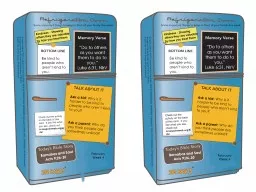
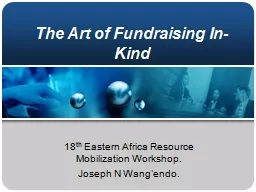
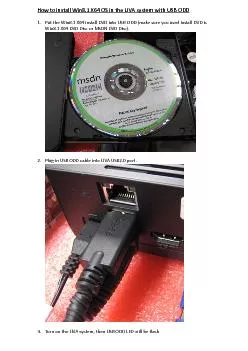
You. Magix. The MESA facility for light dark matter search. Stefano Caiazza. LDMA . 2015 – . Camogli. ,. June 25 . 2015. Current Facility: MAMI. Jun 25 2015. S. Caiazza - Camogli - It's a kind of Magix. with special attention to. Military Manpower Conscription. by Casey B. Mulligan. Taxation in Kind. examples. conscription of manpower by the military or civil service. conscription of materials and factories by the military. . Making Your Home A Safer Place . Young Adults and Infants. For a child, the world is a constant source of new things to explore, discover and experience. . A child's natural curiosity and fearlessness are also what lead dangerous and potentially deadly situations. . If we confess our sins, he is faithful and just and will forgive us our sins.. 1 John 1:9. Bryan Jeffery Leech, 1973. ELFAKER. Trinity Hymnal tune . #. 496. CCLI #977558. 1. Kind and merciful God, . we . Digital Classroom. Spring 2013. Why?. Environmentally-friendly. Reduce expenses for reams of paper. . & printer ink. Employ digital devices for learning rather than other non-productive uses. Develop digitally competent and technology literate learners. Methods include a selection from those related to:. precedence tables. network diagrams. critical events. scheduling. float times. . Critical . P. ath Analysis (CPA). A complex project must be well planned, especially if a number of people are involved.. Kindness - . Showing . others they are valuable by how you treat them. . . “Do to others as you want them to do to you.” . Luke . 6:31, . NIrV. Check out the activity on the back of this card. If you like what you see, check out: . with special attention to. Military Manpower Conscription. by Casey B. Mulligan. Taxation in Kind. examples. conscription of manpower by the military or civil service. conscription of materials and factories by the military. Powerpoints. Nowak Week 20 . Powerpoints. . Alg. 1. Day 1. Nowak Week 20 . Powerpoints. . Alg. 1. #89 Do Now (Week 20 day 1). Solve each inequality. . Then match it with the correct graph.. 1) -6 + h ≥ 15 2. Different Kind of People. “...purify for Himself His own special people...”. . Titus 2:13-14. “...you are a chosen generation, a royal priesthood, a holy nation, His own special people...”. . 18. th. Eastern Africa . Resource Mobilization Workshop.. Joseph N Wang’endo.. In-kind fundraising. In kind funding is all the volunteer time, services and goods that your group gets for . free . or at a reduced rate. Build shelves. Fencing. Pavers. Power Washing. Install Ceiling Fan. Install interior & exterior doors. Install window A/C units. Partial List of Things I can Do. Electrical Issues. Plumbing Issues. How to in the LIVA system with USB ODD 1. Put the Win8.1 X64 install DVD into USB ODD ( make sure you used install DVD is Win8.1 X64 DVD Disc or MSDN DVD Disc) . 2. Plug - in USB ODD cable into LIV Oblique. Comminuted. Spiral. Compound. Kind of fractures (2). Greenstick. Segmental. Transverse. Kind of fractures (3). Closed fracture. Open fracture. Ankle fractures. Fracture of femur. Rib fractures.
Download Document
Here is the link to download the presentation.
"easiest kind of heatingto install"The content belongs to its owner. You may download and print it for personal use, without modification, and keep all copyright notices. By downloading, you agree to these terms.
Related Documents