/
SSEMBLYNSTRUCTIONS SSEMBLYNSTRUCTIONS

SSEMBLYNSTRUCTIONS - PDF document

test
test . @test
Follow
371 views
Uploaded On 2016-06-22

SSEMBLYNSTRUCTIONS - PPT Presentation

TAPES 
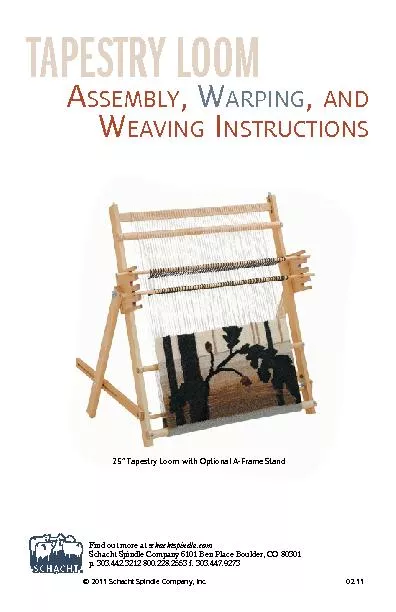
25148 Tapestry Loom with Optional AFrame Stand 15 100 100 1067 49 36 042 5 92 438 37 94 240 76 81 3190 7 0 363 66 100 949 24 0 700 42 59 49 Find out more at Schacht Sp ID: 373275

TAPES 25” Tapestry Loom with Optional

Share:

Link:

Embed:

Download Presentation from below link

Download Pdf The PPT/PDF document "SSEMBLYNSTRUCTIONS" is the property of its rightful owner. Permission is granted to download and print the materials on this web site for personal, non-commercial use only, and to display it on your personal computer provided you do not modify the materials and that you retain all copyright notices contained in the materials. By downloading content from our website, you accept the terms of this agreement.


Presentation Transcript

TAPES SSEMBLYNSTRUCTIONS 25” Tapestry Loom with Optional A-Frame Stand 15 100 100 1067 49 36 042 5 92 438 37 94 240 76 81 3190 7 0 363 66 100 949 24 0 700 42 59 49 Find out more at Schacht Spindle Company 6101 Ben Place Boulder, CO 80301© 2011 Schacht Spindle Company, Inc. 18” AND 25” TAPESRY LOOM SSEMBLYNSTRUCTIONS PARTS1 – short dowel (warp bar)portsHARDWARE2 – 1 ½" athead screws 4 – 1 ¾" athead wood screws2 – ¼" square nuts2 – 2 ½" thumb screws Phillips screwdriver thumbscrew A-frame heddle bar neutral position (slot) raised position – 3 – OOMSSEMBLY Place a washer on each thumb screw. Insert a thumb screw in each end with a square nut (gure 2).E LOOM FRAMEsurface with the routed slots facing inwards and the half- round grooves Place the tension bar in the routed slots of the sides. Make sure the washers and thumb screws are on the square nuts and tension bar are inside the slot as shown in gure 2. Position with 1 ¾” screws.using 1 ½” screws.Install the warp bar (short dowel) between the rubber wedge and the ESTRY OOMbooks to hold it level. Make sure that bar of the loom towards you.warp yarn, tie the warp yarn to the warp bar at the point labelled “start”.Bring the yarn toward you, then away from you toward the top of the loom. Go underneath the warp bar, center bar, top bar and tension bar. thumbscrewwasherhalf-round grooverouted slottension square FIGURE 2 STEP 1 start warp bar rubber wedge tension bartop barcenter barbottom bar STEP 2warp bar rubber wedge tension bartop barcenter barbottom bar Bring the yarn up and over the tension bar and back towards you. Go over the top bar, center bar and warp bar. Wrap the yarn under the warp bar, then head back toward the top of the loom, going over the center, top, and Go down to the bottom bar, making sure the yarn is under the top bar, center bar, warp bar, and bottom bar. Bring the yarn toward you under the bottom bar, then up and over the warp bar. This completes one full relent to two warp ends). Bring the yarn back toward you and over the over the bottom bar. STEP 4warp bar rubber wedge tension bartop barcenter barbottom bar STEP 3warp bar rubber wedge tension bartop barcenter barbottom bar STEP 5warp bar rubber wedge tension bartop barcenter barbottom bar STEP 6warp bar rubber wedge tension bartop barcenter barbottom bar the yarn underneath all bars up to the tension bar. Bring the yarn up and over the tension bar, then back down to the warp bar, going over all bars, following steps 3 - 7 until the desired CONTINUOUS HEDDLE Measure two lengths of string. You tion on the heddle bar supports. Tie heddle bar. Loop the string down and around the rst warp thread on top of the pick-up arping Hint” sidebar if you are having di�culty with warping You can make heddles out of string to lift the warp threads and allow you to weave more efciently. To weave four heddle bars provided and some strong cotton string. Weave a pick-up stick or ruler over and under the warp threads across ends that are on top of the stick will be attached to your rst heddle bar. reusable heddle method. If you are having di�culty warping your Remove the warp bar.Wrap the loom in paper, from the tento the tension bar. Secure the paper with tape. You will need approximately 65” of length to wrap the loom. The paper can be the width of your warp, or you can use a narrower strip as an aid until you get the With the back of the loom toward you, replace the warp bar as shown in �gure 3. Warp the loom, following the directions Removethe paper before tightening the tension on the warp. warp bar paper STEP 7warp bar rubber wedge tension bartop barcenter barbottom bar Make one reusable heddle for each of To install the heddles on the rst heddle bars nearby. Fold a heddle in half around the rst warp thread and then slide the two Repeat across until the warp ends on tached to the heddle bar. Put rubber bands around each end from sliding off. Slide the heddle bar position on the heddle bar support. Repeat the installation process with a second heddle bar, using the ends not placed on the rst heddle bar.To spread the warp evenly and provide a rm base for weaving, make a twined edge across the bottom of the Use a yarn slightly heavier than your warp yarn. Cut a length approximately Starting at one side of your warp, wrap the twining yarn around the rst back to and around the heddle bar as shown in gure 4. to the heddle bar. but are short enough to lift the ends raised position. Be sure the loops are all approximately the same length and Tie the end of the heddle string to the heddle bar. Secure the heddle string Repeat this process for the warp ends that are under the pick-up stick.Loop string around three of the four uprights of the heddle support as shown in gure 5. Tie with a square Remove the heddle from the heddle support. pick-up stickreus FIGURE 6 heddle barheddle heddle bar warp ends FIGURE 4FIGURE 5 heddleknot bar support and repeat steps 3-5.Continue to alternate lifting and lowering the heddle bars, inserting a weft pick in each shed to create the basic plain weave structure. DVANLoosen the warp tension by turning the thumbscrews counter-clockwise.downward. On the back of the loom, pull up on the warp bar until the front desired position. screws. Learning to WeaveTapestry Weaving, Kirsten GlasbrookTapestry Weaving: A Comprehensive , Nancy Harvey Weaving: A Handbook for Fiber Craftswarp thread and adjust the twining yarn ends to be the same length. Twist the twining yarn ends over each other and pull rmly to tighten the twist (gure 7). Wrap the next warp thread in the same way. Continue to wrap each warp end, twisting the twining yarn until all the ends are wrapped. Tie off the twining yarn with an overhand To tighten the tension on the warp, turn both thumbscrews in the clockwise direction. To loosen the tension on the warp, turn the thumbscrews in the counter-clockwise direction.EAVING ON TESTRY OOMWind a shuttle with weft yarn. Stick shuttles work very well. To make a shed, lift one heddle the heddle bar support. Insert the shuttle with the weft yarn through the open shed. Lower the heddle bar. comb or tapestry beater. warp endstwining yarn FIGURE – 8 – RY WEAVING ACCESSORIESWeighted, Single-end and Double-end Tapestry BeatersTrestle Floor Stand EAVING ERMINOLOGY - device used to hold a warp thread threads for weaving - the simplest weave structure in which the threads pass over, under, over, pick-up stick - smooth pointed stick, also called a “shed stick”yarn to pass through - a �at stick with grooved spread the warp evenly for weaving - threads stretched on loom - a single warp thread - threads that are woven through the warp threads - one weft row

Related Contents


Next Show more