Balloon powered cars Making a balloon powered car
Description: Balloon powered cars Making a balloon powered car to learn about forces Stay safe Whether you are a scientist researching a new medicine or an engineer solving climate change, safety always comes first. An adult must always be around and
Related Topics
Download Presentation
"Balloon powered cars Making a balloon powered car" is the property of its rightful owner. Permission is granted to download and print the materials on this website for personal, non-commercial use only, and to display it on your personal computer provided you do not modify the materials and that you retain all copyright notices contained in the materials. By downloading content from our website, you accept the terms of this agreement.
Presentation Transcript
slide1. Balloon powered cars Making a balloon powered car to learn
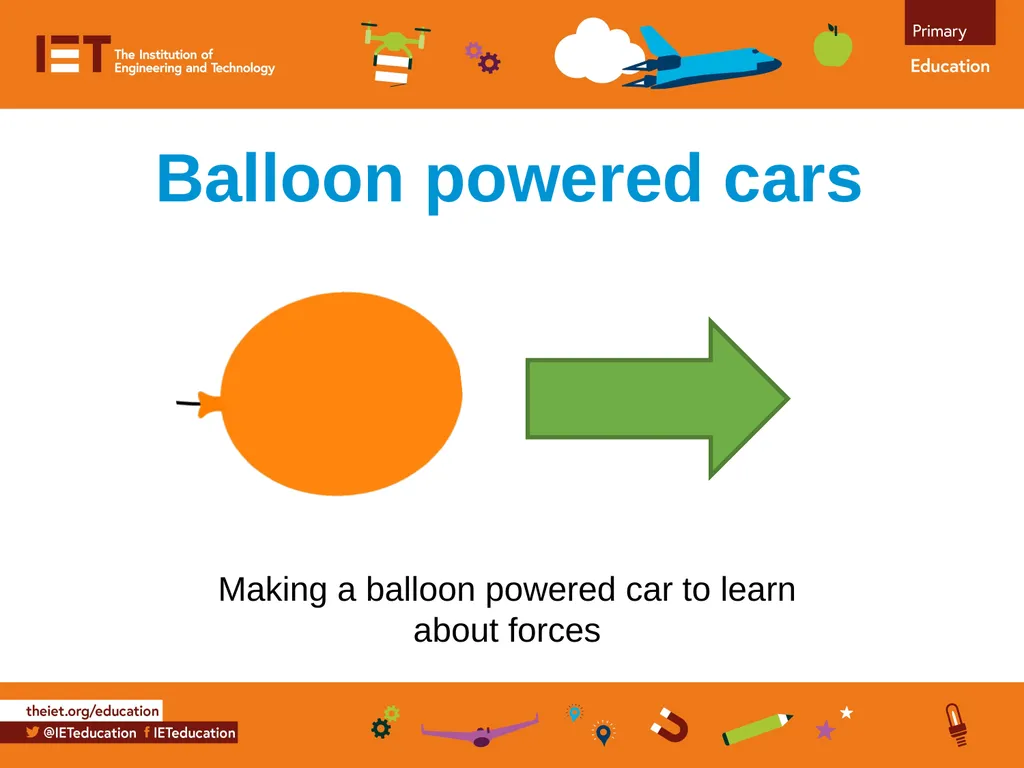
about forces<br>
slide2. Stay safe
Whether you are a scientist researching a new medicine or an engineer solving climate change, safety always comes first. An adult must always be around and supervising when doing this activity. You are responsible for:
• ensuring that any equipment used for this activity is in good working condition
• behaving sensibly and following any safety instructions so as not to hurt or injure yourself or others
Please note that in the absence of any negligence or other breach of duty by us, this activity is carried out at your own risk. It is important to take extra care at the stages marked with this symbol: âš <br>
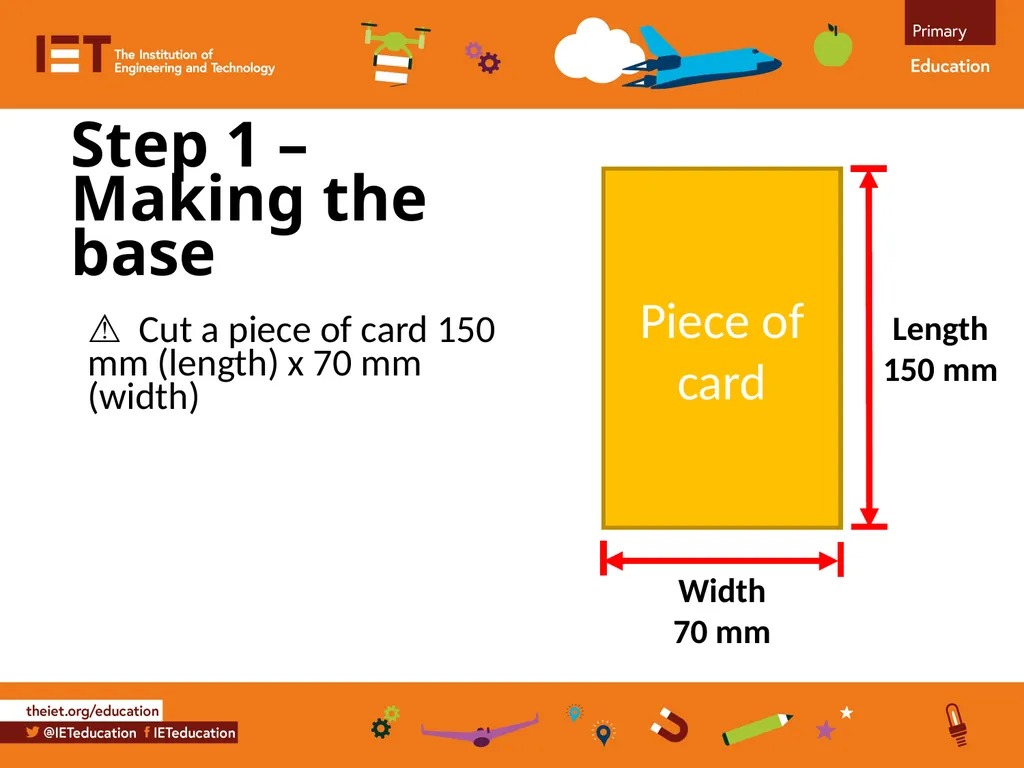
slide3. Step 1 – Making the base ⚠Cut a piece of card 150 mm (length) x 70 mm (width) Piece of card Length
150 mm Width
70 mm<br>
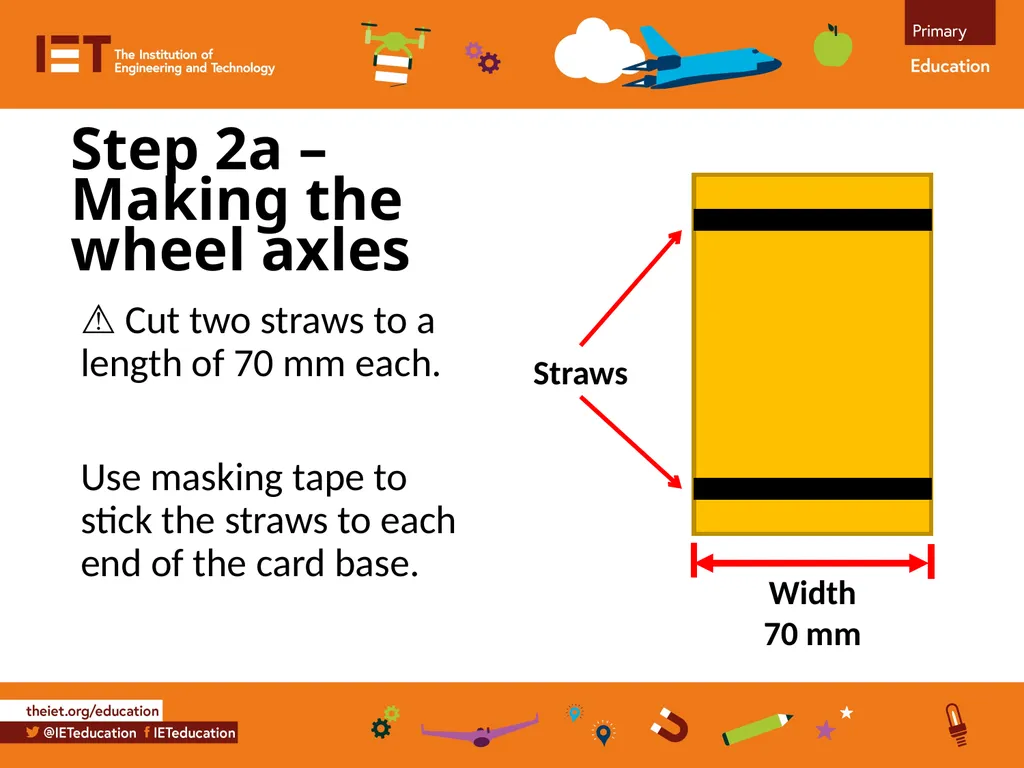
slide4. Step 2a – Making the wheel axles ⚠Cut two straws to a length of 70 mm each.
Use masking tape to stick the straws to each end of the card base. Width
70 mm Straws<br>
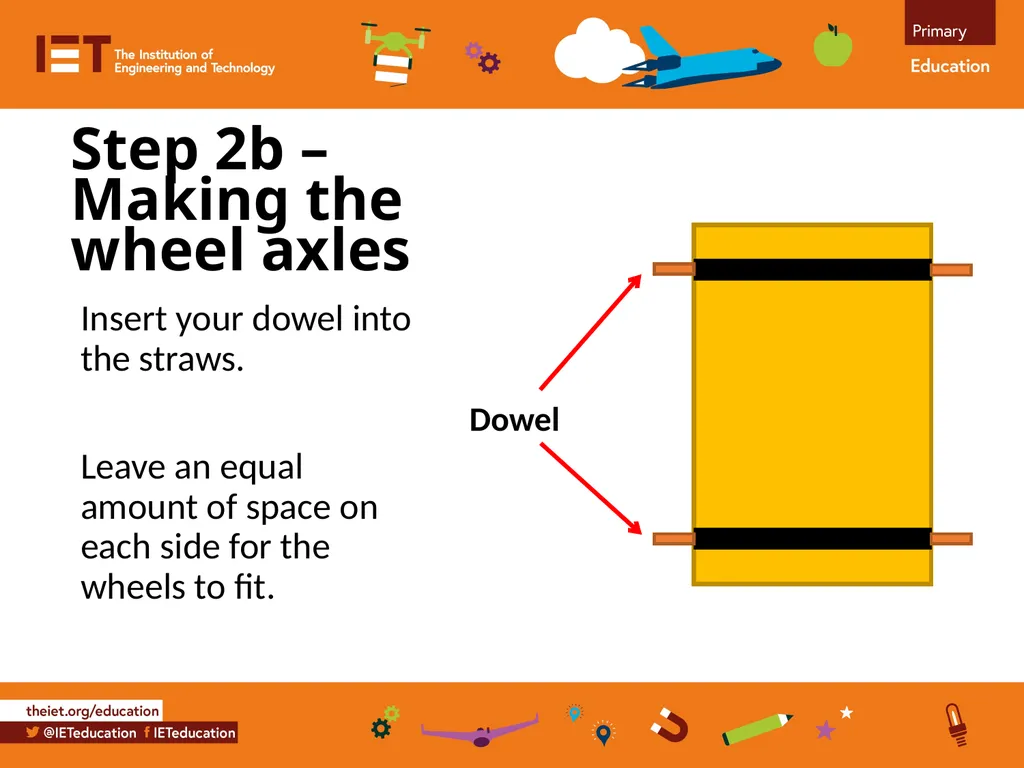
slide5. Step 2b – Making the wheel axles Insert your dowel into the straws.
Leave an equal amount of space on each side for the wheels to fit. Dowel<br>
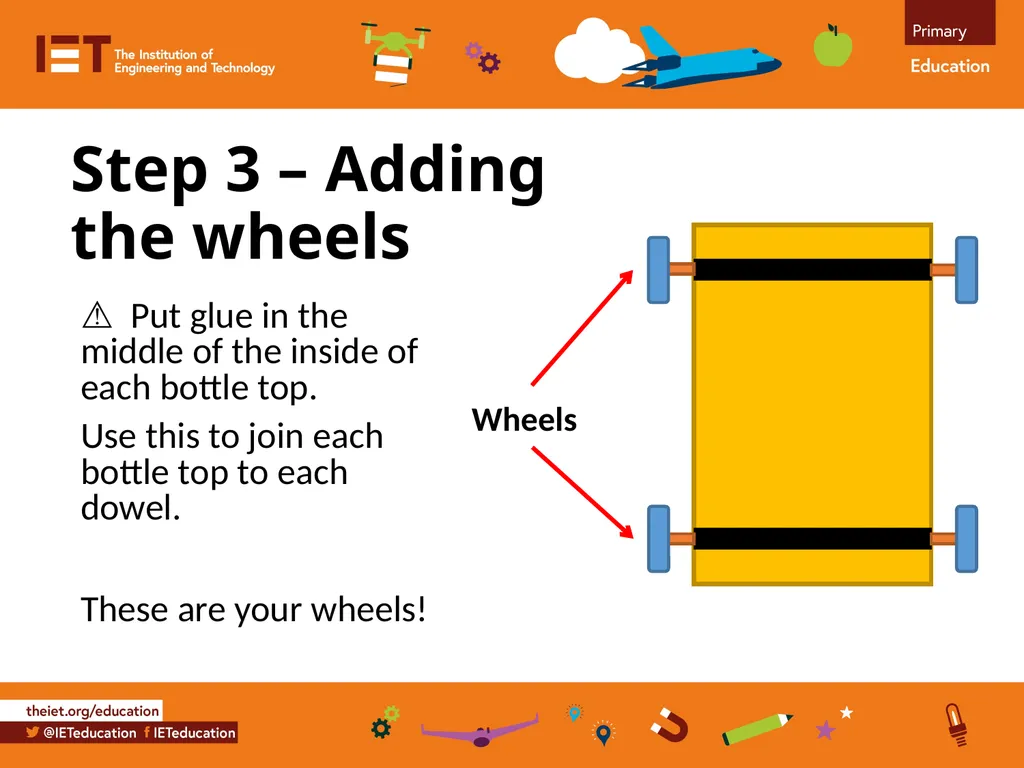
slide6. Step 3 – Adding the wheels ⚠Put glue in the middle of the inside of each bottle top.
Use this to join each bottle top to each dowel.
These are your wheels! Wheels<br>
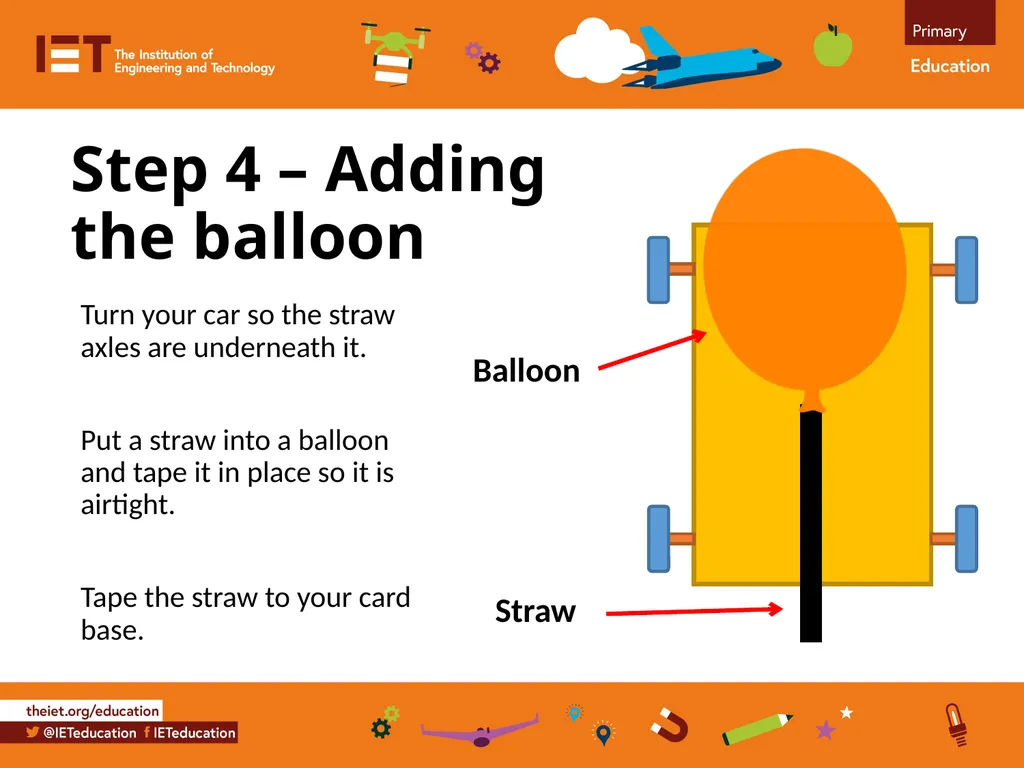
slide7. Step 4 – Adding the balloon Turn your car so the straw axles are underneath it.
Put a straw into a balloon and tape it in place so it is airtight.
Tape the straw to your card base. Balloon Straw<br>
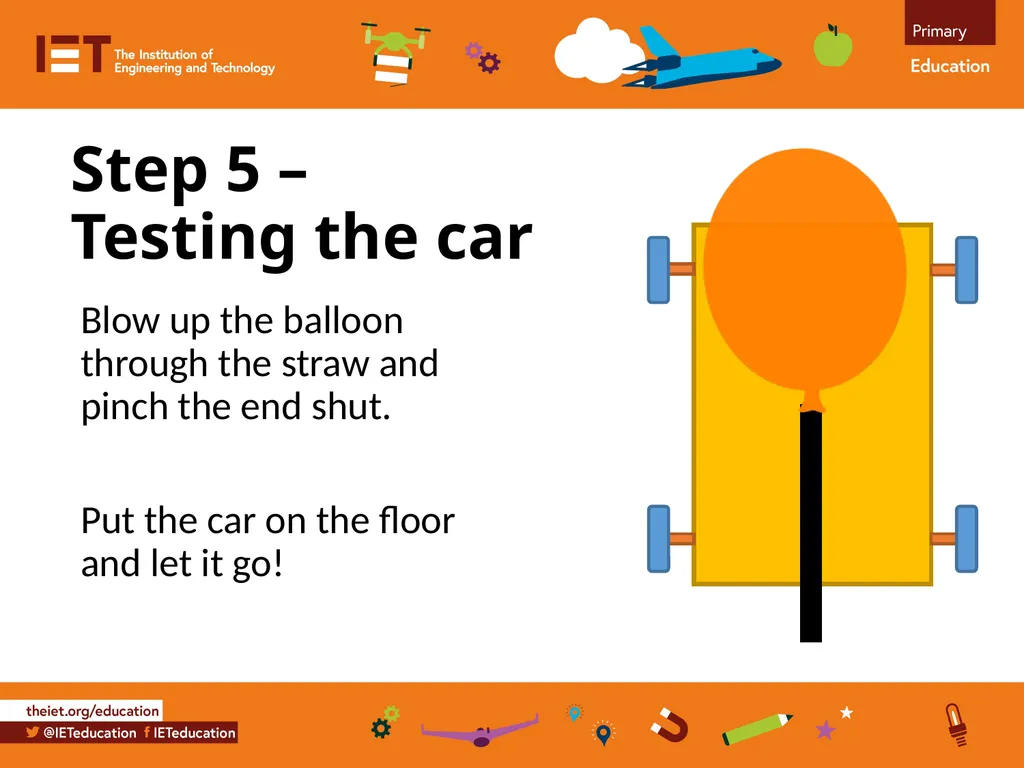
slide8. Step 5 – Testing the car Blow up the balloon through the straw and pinch the end shut.
Put the car on the floor and let it go!<br>
about forces<br>
slide2. Stay safe
Whether you are a scientist researching a new medicine or an engineer solving climate change, safety always comes first. An adult must always be around and supervising when doing this activity. You are responsible for:
• ensuring that any equipment used for this activity is in good working condition
• behaving sensibly and following any safety instructions so as not to hurt or injure yourself or others
Please note that in the absence of any negligence or other breach of duty by us, this activity is carried out at your own risk. It is important to take extra care at the stages marked with this symbol: âš <br>
slide3. Step 1 – Making the base ⚠Cut a piece of card 150 mm (length) x 70 mm (width) Piece of card Length
150 mm Width
70 mm<br>
slide4. Step 2a – Making the wheel axles ⚠Cut two straws to a length of 70 mm each.
Use masking tape to stick the straws to each end of the card base. Width
70 mm Straws<br>
slide5. Step 2b – Making the wheel axles Insert your dowel into the straws.
Leave an equal amount of space on each side for the wheels to fit. Dowel<br>
slide6. Step 3 – Adding the wheels ⚠Put glue in the middle of the inside of each bottle top.
Use this to join each bottle top to each dowel.
These are your wheels! Wheels<br>
slide7. Step 4 – Adding the balloon Turn your car so the straw axles are underneath it.
Put a straw into a balloon and tape it in place so it is airtight.
Tape the straw to your card base. Balloon Straw<br>
slide8. Step 5 – Testing the car Blow up the balloon through the straw and pinch the end shut.
Put the car on the floor and let it go!<br>