
Chapter 8 Lifting and Moving Patients Introduction

Description: Chapter 8 Lifting and Moving Patients Introduction In the course of a call, you will have to move patients. To move patients without injury, you need to learn the proper techniques. Knowledge of proper body mechanics and a power grip are
Related Topics
Download Presentation
"Chapter 8 Lifting and Moving Patients Introduction" is the property of its rightful owner. Permission is granted to download and print the materials on this website for personal, non-commercial use only, and to display it on your personal computer provided you do not modify the materials and that you retain all copyright notices contained in the materials. By downloading content from our website, you accept the terms of this agreement.
Presentation Transcript
slide1. Chapter 8
Lifting and Moving Patients<br>
slide2. Introduction In the course of a call, you will have to move patients.
To move patients without injury, you need to learn the proper techniques.
Knowledge of proper body mechanics and a power grip are important.<br>
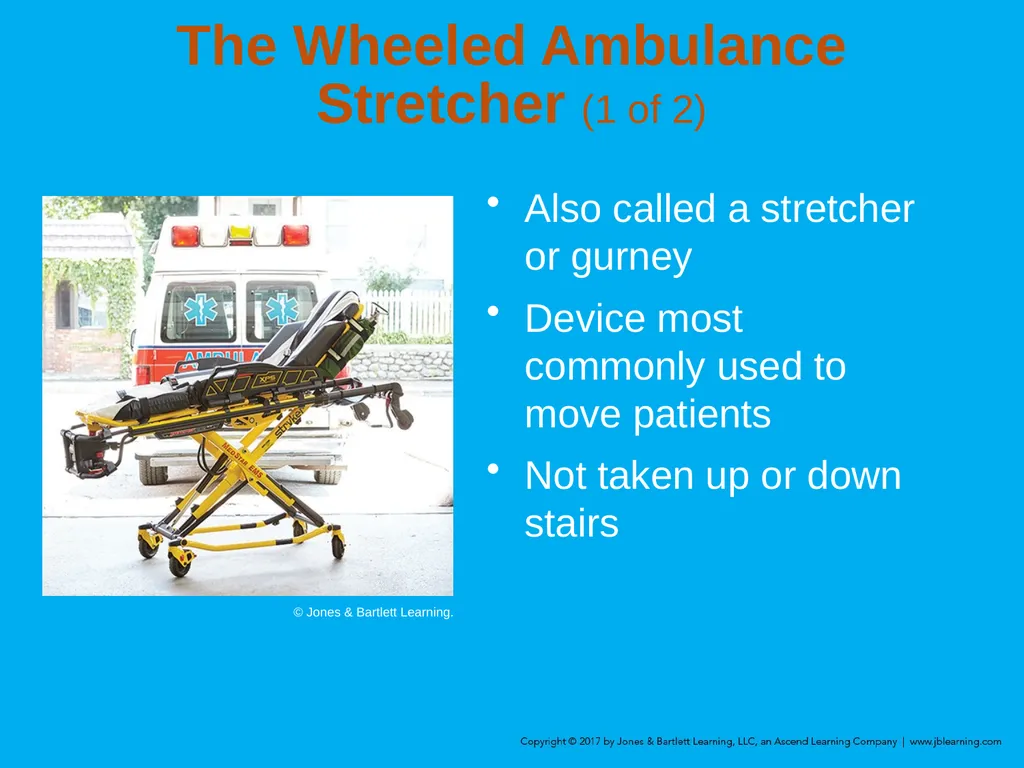
slide3. The Wheeled Ambulance Stretcher (1 of 2) Also called a stretcher or gurney
Device most commonly used to move patients
Not taken up or down stairs © Jones & Bartlett Learning.<br>
slide4. The Wheeled Ambulance Stretcher (2 of 2) General features
Strong metal frame, adjustable to any height
Hinges at center allow the head end to be elevated
Guardrails prevent patient from rolling off
Mattress must be fluid resistant
Patient is secured with straps<br>
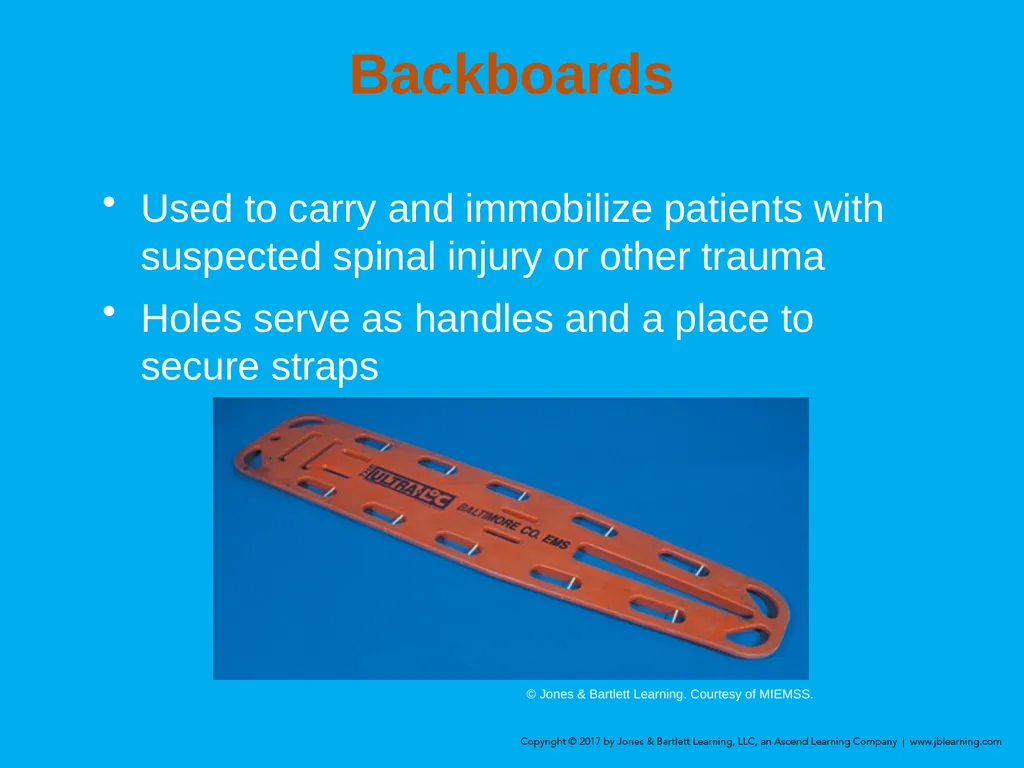
slide5. Backboards Used to carry and immobilize patients with suspected spinal injury or other trauma
Holes serve as handles and a place to secure straps © Jones & Bartlett Learning. Courtesy of MIEMSS.<br>
slide6. Moving and Positioning the Patient When you move a patient, take care that injury does not occur.
Patient lifting and moving are technical skills that require repeated training and practice.
Using proper body mechanics and maintaining physical fitness greatly reduces the chance of injuries.<br>
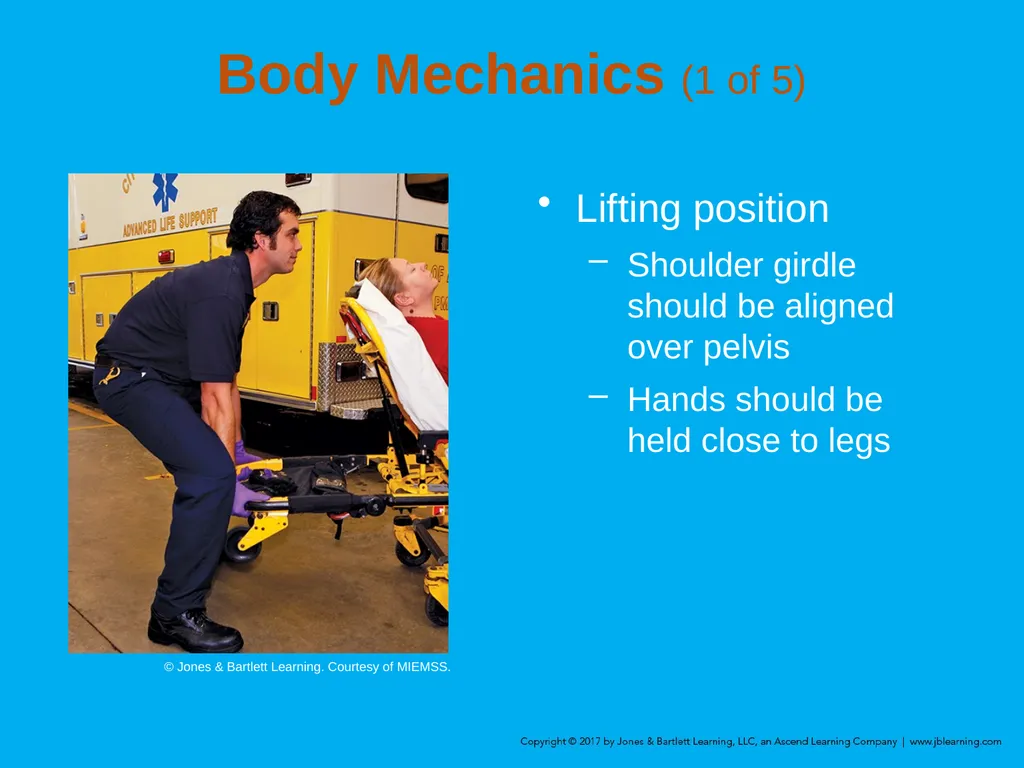
slide7. Body Mechanics (1 of 5) Lifting position
Shoulder girdle should be aligned over pelvis
Hands should be held close to legs © Jones & Bartlett Learning. Courtesy of MIEMSS.<br>
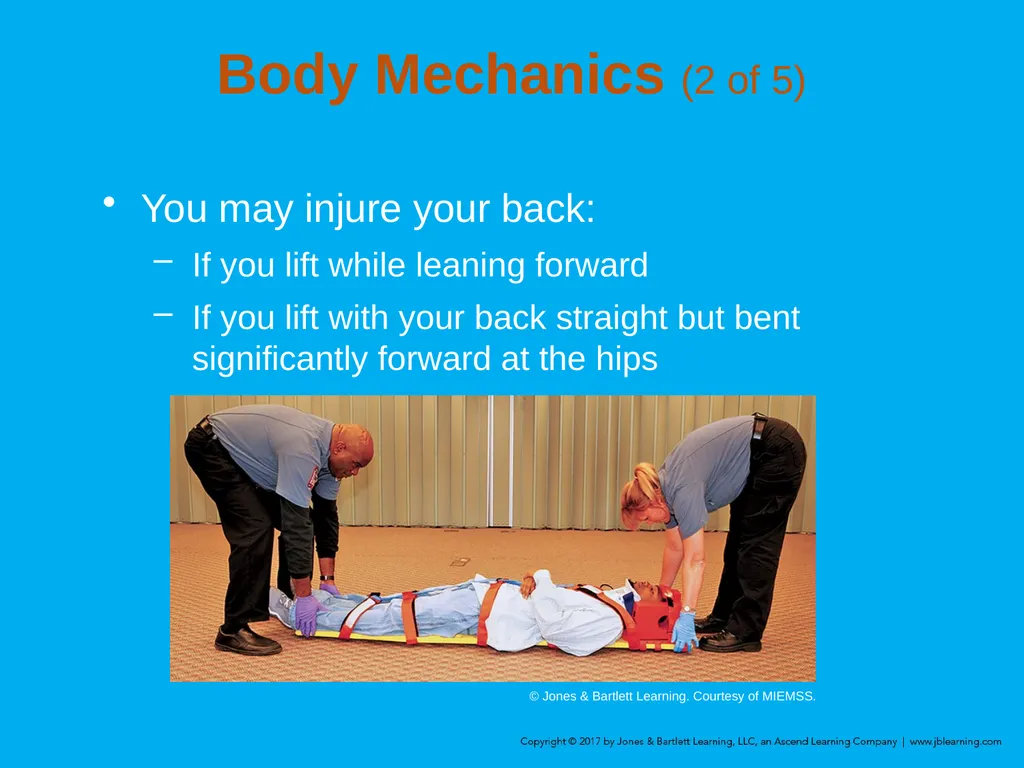
slide8. Body Mechanics (2 of 5) You may injure your back:
If you lift while leaning forward
If you lift with your back straight but bent significantly forward at the hips © Jones & Bartlett Learning. Courtesy of MIEMSS.<br>
slide9. Body Mechanics (3 of 5) Lifting technique
Legs should be spread about 15 inches apart (shoulder width).
Place feet so the center of gravity is balanced.
With your back held upright, bring your upper body down by bending the legs.
Grasp the patient/stretcher.<br>
slide10. Body Mechanics (4 of 5) Lifting technique (cont’d)
Lift the patient by raising your upper body and arms and straightening your legs until standing.
Keep the weight close to your body.
Keep your arms the same distance apart.<br>
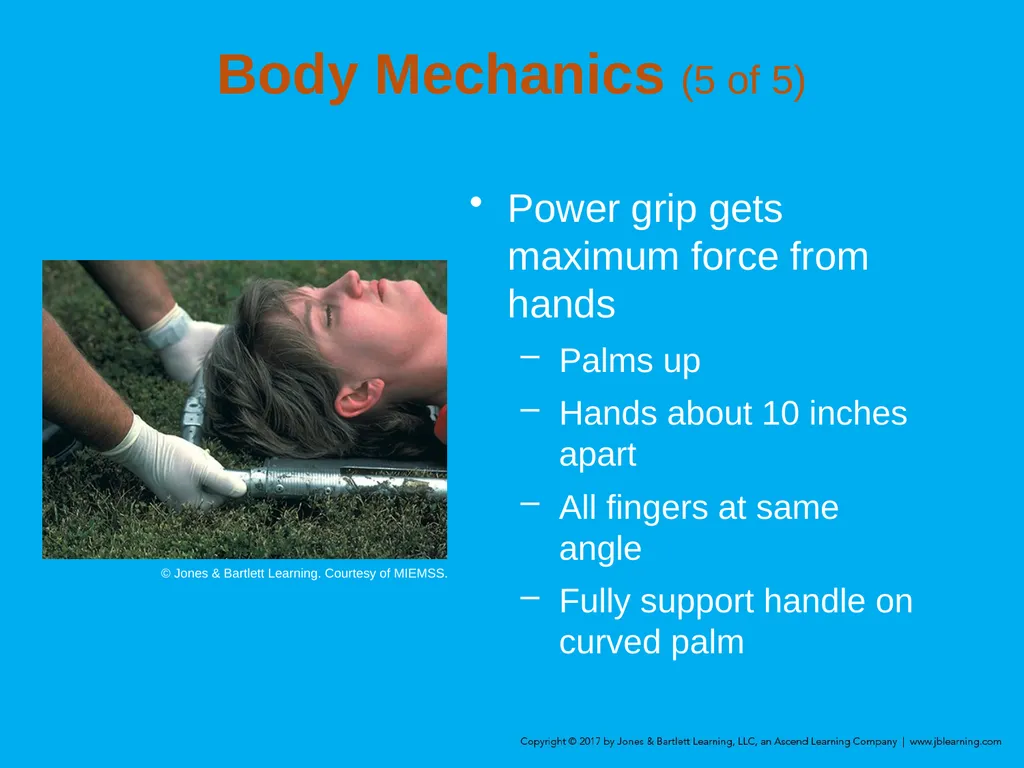
slide11. Body Mechanics (5 of 5) Power grip gets maximum force from hands
Palms up
Hands about 10 inches apart
All fingers at same angle
Fully support handle on curved palm © Jones & Bartlett Learning. Courtesy of MIEMSS.<br>
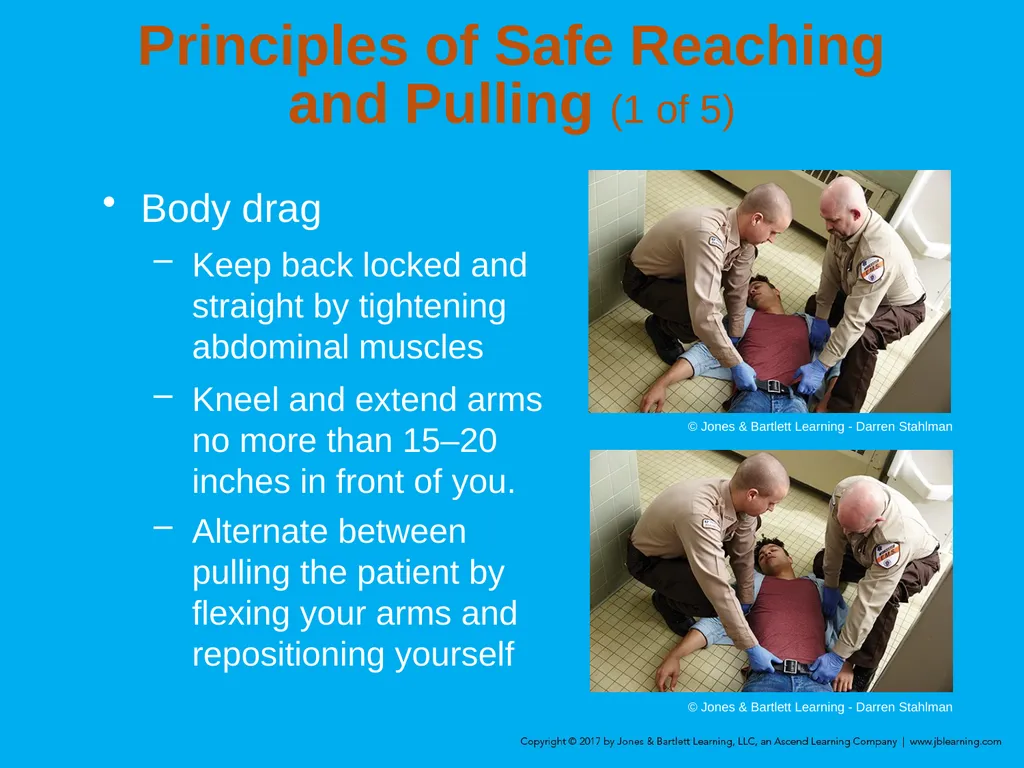
slide12. Principles of Safe Reaching and Pulling (1 of 5) Body drag
Keep back locked and straight by tightening abdominal muscles
Kneel and extend arms no more than 15–20 inches in front of you.
Alternate between pulling the patient by flexing your arms and repositioning yourself © Jones & Bartlett Learning - Darren Stahlman © Jones & Bartlett Learning - Darren Stahlman<br>
slide13. Principles of Safe Reaching and Pulling (2 of 5) To drag a patient across a bed
Kneel on the bed to avoid reaching beyond the recommended distance.
Complete the drag while standing at the side of the bed.
Use the sheet or blanket under the patient rather than dragging the patient by his or her clothing.<br>
slide14. Principles of Safe Reaching and Pulling (3 of 5) In the hospital, transfer the patient from the stretcher to a bed with a body drag.
The stretcher should be the same height or slightly higher than the bed.
You and a partner should kneel on the bed and drag in increments.<br>
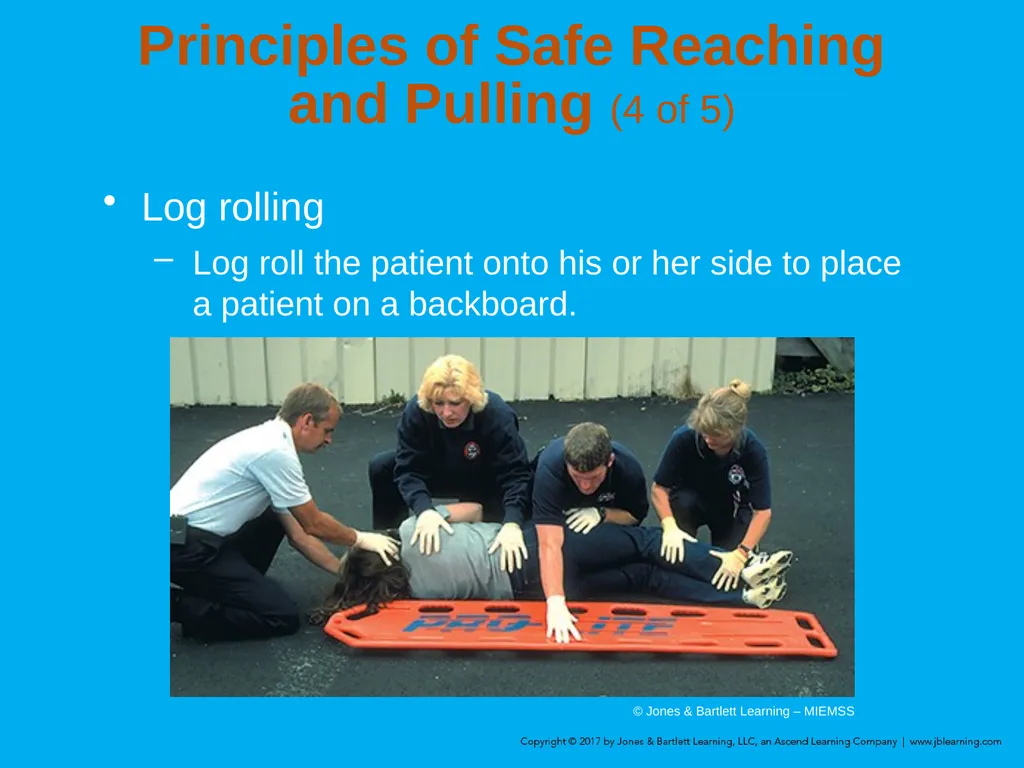
slide15. Principles of Safe Reaching and Pulling (4 of 5) Log rolling
Log roll the patient onto his or her side to place a patient on a backboard. © Jones & Bartlett Learning – MIEMSS<br>
slide16. Principles of Safe Reaching and Pulling (5 of 5) Log rolling (cont’d)
Kneel as close to the patient’s side as possible.
Keep your back straight and lean solely from the hips.
Roll the patient without stopping until the patient is resting on his or her side and braced against your thighs.
Pulling toward you allows your legs to prevent the patient from rolling over completely.<br>
slide17. Principles of Safe Lifting and Carrying (1 of 7) Patient weight
Estimate the patient’s weight before lifting.
Do not attempt to lift a patient who weighs more than 250 lb with fewer than four providers.
Know the weight limitations of the equipment and how to handle patients who exceed the weight limitations.<br>
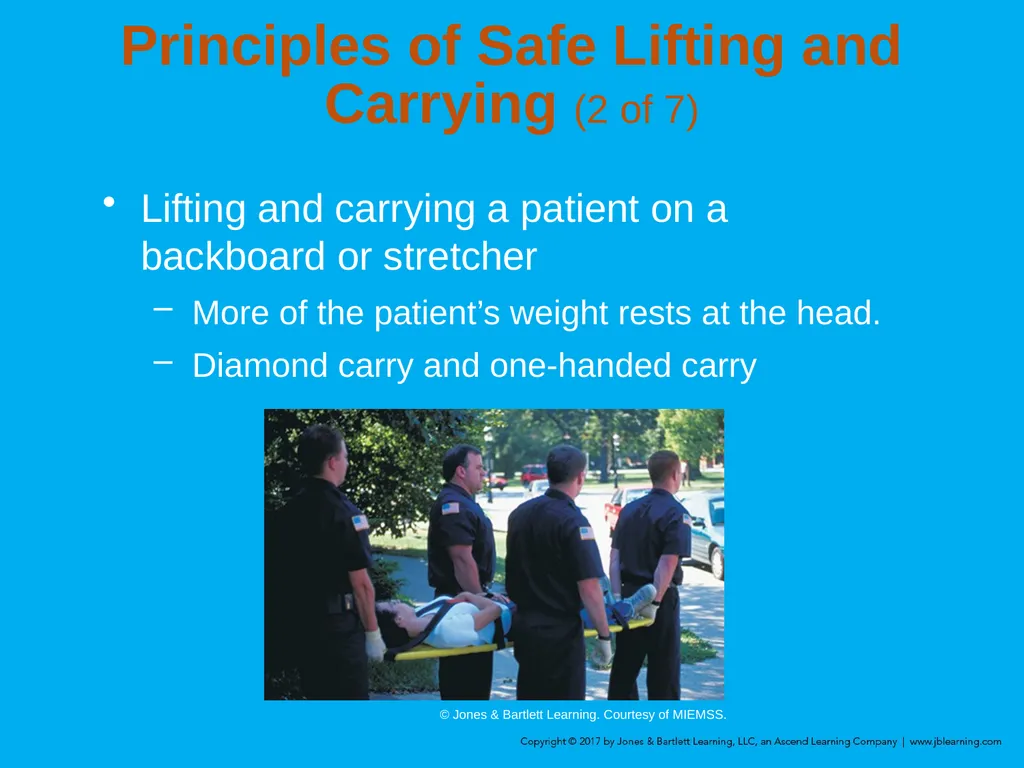
slide18. Principles of Safe Lifting and Carrying (2 of 7) Lifting and carrying a patient on a backboard or stretcher
More of the patient’s weight rests at the head.
Diamond carry and one-handed carry © Jones & Bartlett Learning. Courtesy of MIEMSS.<br>
slide19. Principles of Safe Lifting and Carrying (3 of 7) Rolling a wheeled stretcher
Make sure that it is in the fully elevated position.
Your partner should control the head end and assist you by pushing with his or her arms held with the elbows bent.<br>
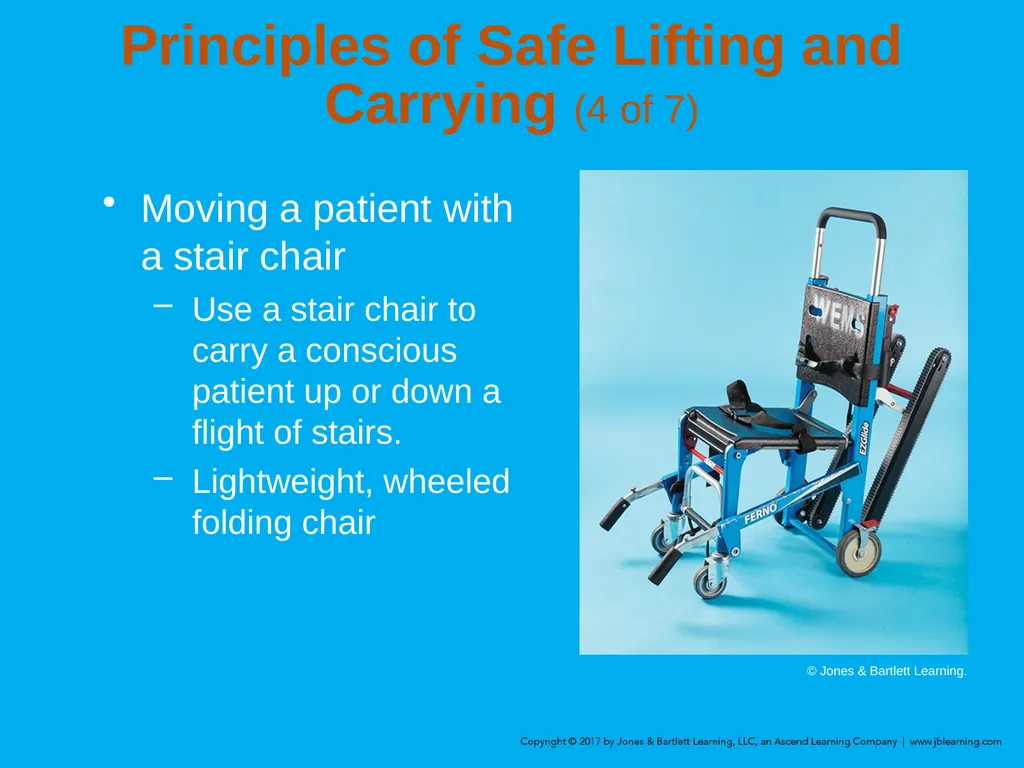
slide20. Principles of Safe Lifting and Carrying (4 of 7) Moving a patient with a stair chair
Use a stair chair to carry a conscious patient up or down a flight of stairs.
Lightweight, wheeled folding chair © Jones & Bartlett Learning.<br>
slide21. Principles of Safe Lifting and Carrying (5 of 7) Moving a patient on stairs
Backboard should be used instead for patient:
Who is unresponsive
Who must be moved in supine position
Who must be immobilized
Carry the patient on the backboard down the stairs to the prepared stretcher.<br>
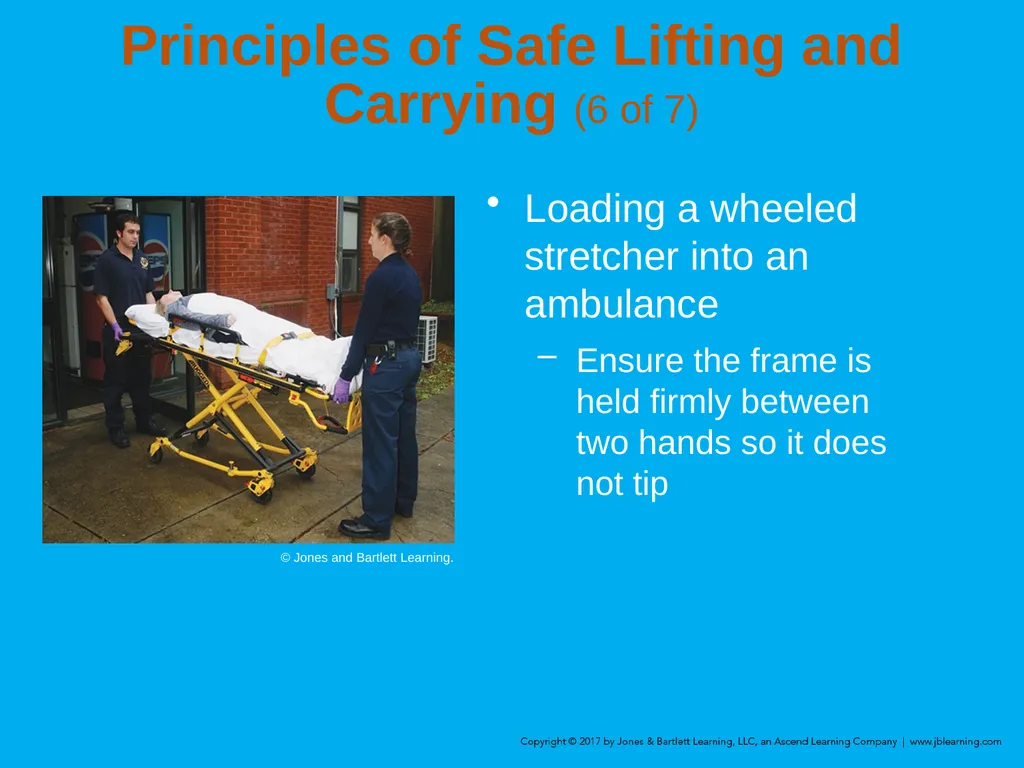
slide22. Principles of Safe Lifting and Carrying (6 of 7) Loading a wheeled stretcher into an ambulance
Ensure the frame is held firmly between two hands so it does not tip © Jones and Bartlett Learning.<br>
slide23. Principles of Safe Lifting and Carrying (7 of 7) Loading a wheeled stretcher into an ambulance (cont.)
Newer models are self-loading, allowing you to push the stretcher into the ambulance.
Other models need to be lowered and lifted to the height of the floor of ambulance.
Clamps in the ambulance hold the stretcher in place.<br>
slide24. Directions and Commands Team actions must be coordinated.
Team leader:
Indicates where each team member should be
Rapidly describes sequence of steps to perform before lifting
Use preparatory commands and countdowns.<br>
slide25. Emergency Moves (1 of 4) Use when there is potential for danger
Fire, explosives, hazardous materials
Use when you cannot properly assess the patient or provide immediate care because of the patient’s location or position<br>
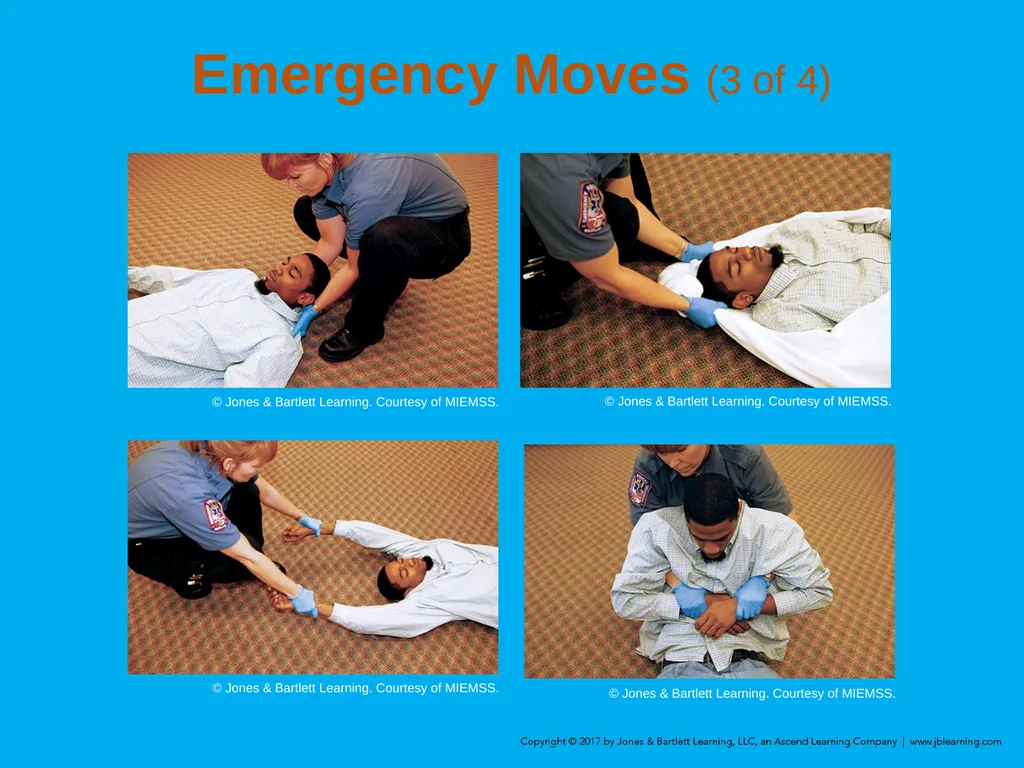
slide26. Emergency Moves (2 of 4) Use techniques to help prevent aggravation of patient spinal injury
Clothes drag
Blanket drag
Arm drag
Arm-to-arm drag<br>
slide27. Emergency Moves (3 of 4) © Jones & Bartlett Learning. Courtesy of MIEMSS. © Jones & Bartlett Learning. Courtesy of MIEMSS. © Jones & Bartlett Learning. Courtesy of MIEMSS. © Jones & Bartlett Learning. Courtesy of MIEMSS.<br>
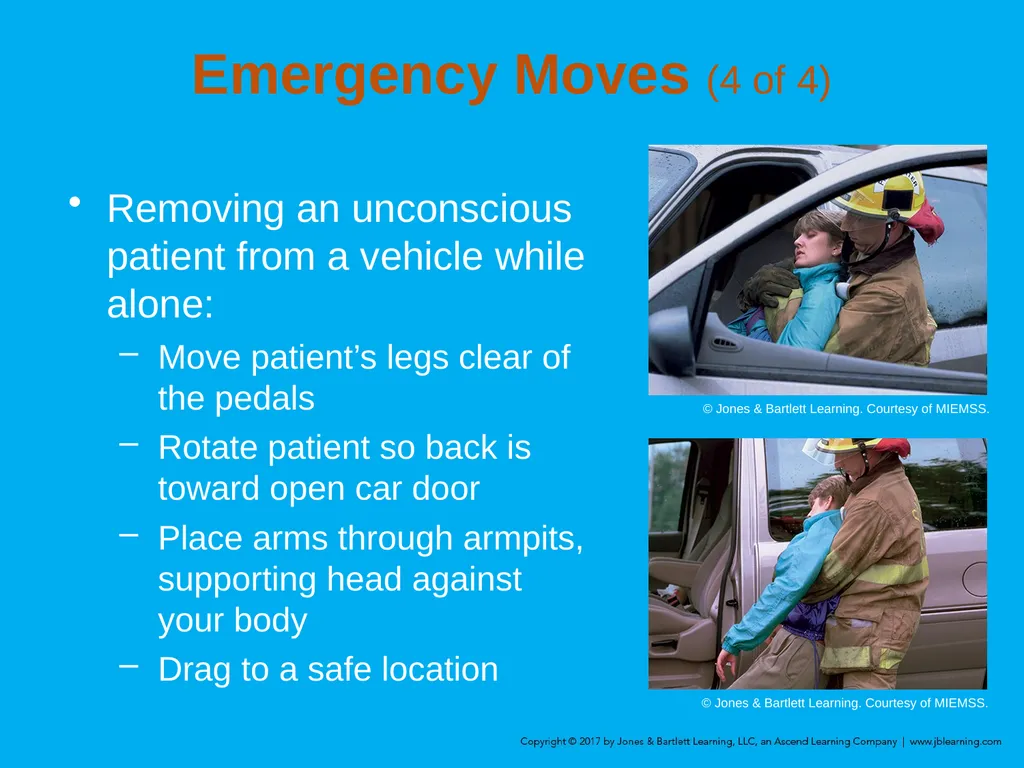
slide28. Emergency Moves (4 of 4) Removing an unconscious patient from a vehicle while alone:
Move patient’s legs clear of the pedals
Rotate patient so back is toward open car door
Place arms through armpits, supporting head against your body
Drag to a safe location © Jones & Bartlett Learning. Courtesy of MIEMSS. © Jones & Bartlett Learning. Courtesy of MIEMSS.<br>
slide29. Urgent Moves (1 of 2) Necessary to move patients:
With altered level of consciousness
With inadequate ventilation
In shock<br>
slide30. Urgent Moves (2 of 2) Rapid extrication technique should be used only if urgency exists.
This technique increases the risk of damage if the patient has a spinal injury.
Consider all options before using this technique.<br>
slide31. Nonurgent Moves (1 of 4) Used when both scene and patient are stable
Carefully plan how to move the patient.<br>
slide32. Nonurgent Moves (2 of 4) Choose between:
Direct ground lift
For supine patients with no suspected spinal injury
For patients who need to be carried over some distance
EMTs stand side by side to lift/carry the patient.<br>
slide33. Nonurgent Moves (3 of 4) Extremity lift
For patients with no suspected spinal injury who are supine or sitting
Patients who are in a small space
One EMT is at the patient’s head and the other at the patient’s feet.
Coordinate moves verbally.<br>
slide34. Nonurgent Moves (4 of 4) Transfer moves
Direct carry
Move supine patient from bed to stretcher
Draw sheet method
Move patient using a sheet or blanket
Scoop stretcher<br>
slide35. Geriatrics (1 of 2) Many patients transported by EMS are geriatric patients.
Brittle bones, rigidity, and spinal curvatures may present special challenges.
Allay the patient’s fears with a sympathetic and compassionate approach.<br>
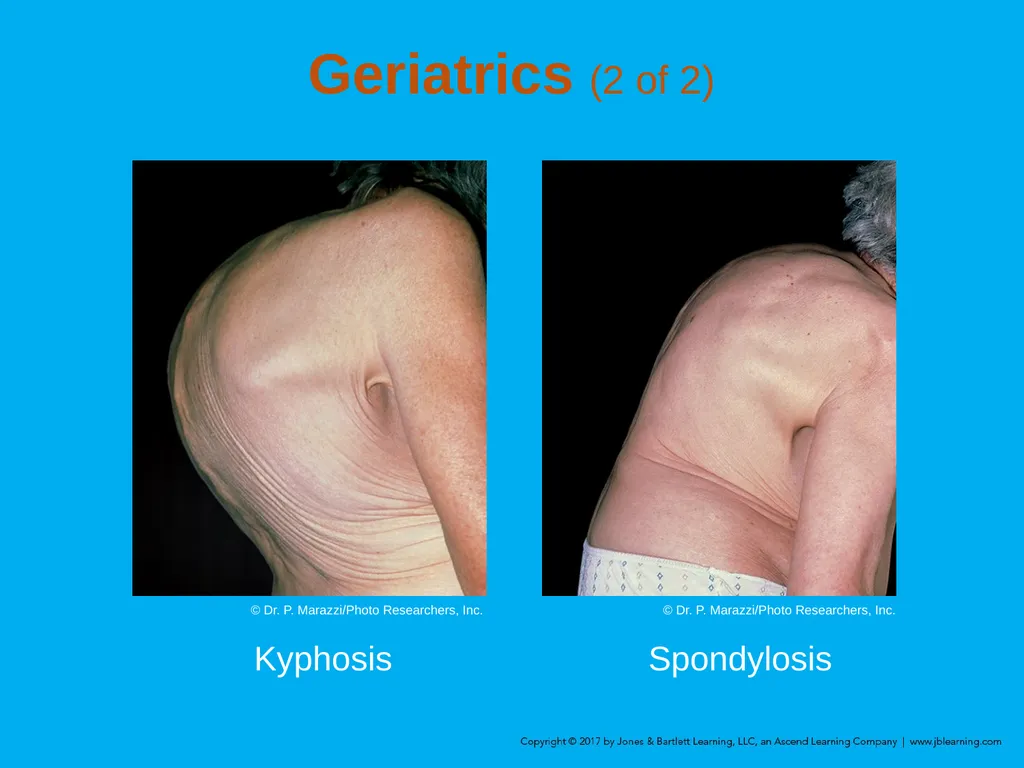
slide36. Geriatrics (2 of 2) Kyphosis Spondylosis © Dr. P. Marazzi/Photo Researchers, Inc. © Dr. P. Marazzi/Photo Researchers, Inc.<br>
slide37. Bariatrics Refers to management of obesity
Back injuries account for the largest number of missed days of work.
Stretchers and equipment are being produced with higher capacities.
Does not address danger to users of that equipment<br>
slide38. Bariatric stretchers
Specialized for overweight or obese patients
Wider wheelbase for increased stability Courtesy of Stryker Medical, a division of Stryker Corporation. Additional Patient-Moving Equipment (1 of 10)<br>
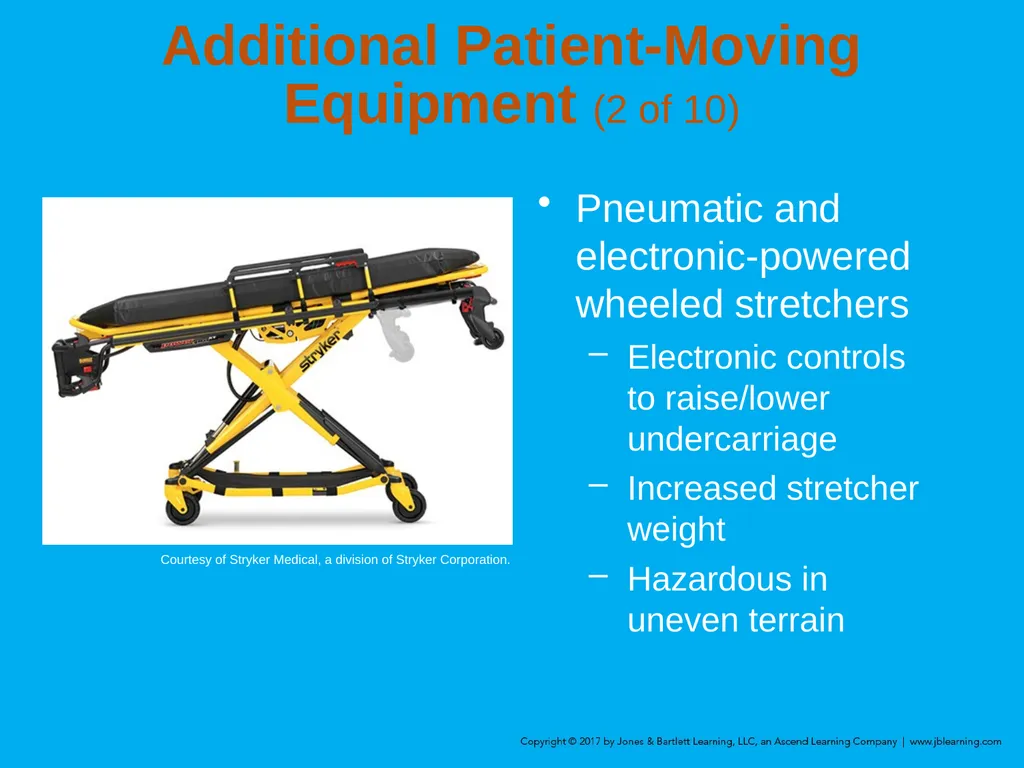
slide39. Additional Patient-Moving Equipment (2 of 10) Pneumatic and electronic-powered wheeled stretchers
Electronic controls to raise/lower undercarriage
Increased stretcher weight
Hazardous in uneven terrain Courtesy of Stryker Medical, a division of Stryker Corporation.<br>
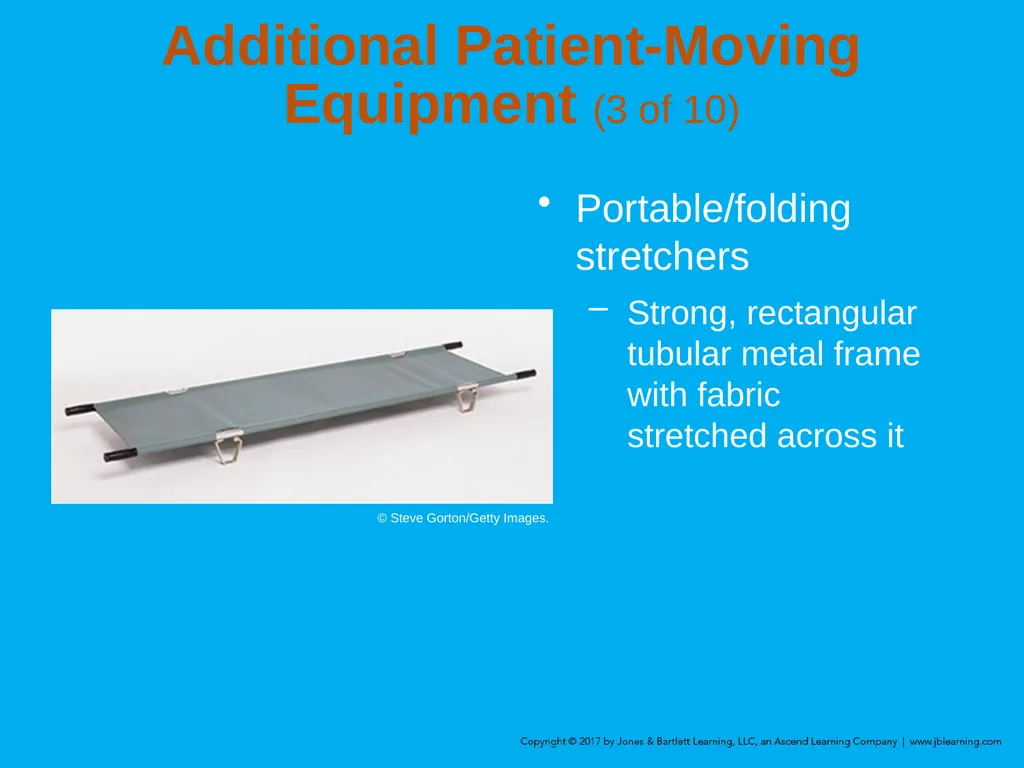
slide40. Additional Patient-Moving Equipment (3 of 10) Portable/folding stretchers
Strong, rectangular tubular metal frame with fabric stretched across it © Steve Gorton/Getty Images.<br>
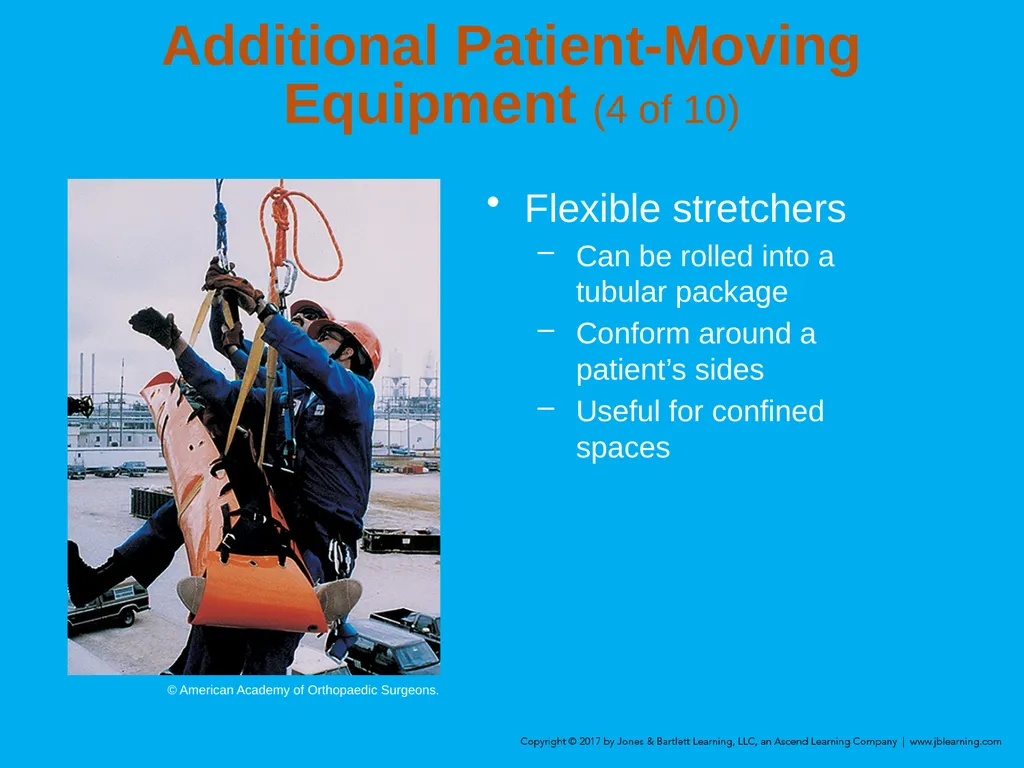
slide41. Additional Patient-Moving Equipment (4 of 10) Flexible stretchers
Can be rolled into a tubular package
Conform around a patient’s sides
Useful for confined spaces © American Academy of Orthopaedic Surgeons.<br>
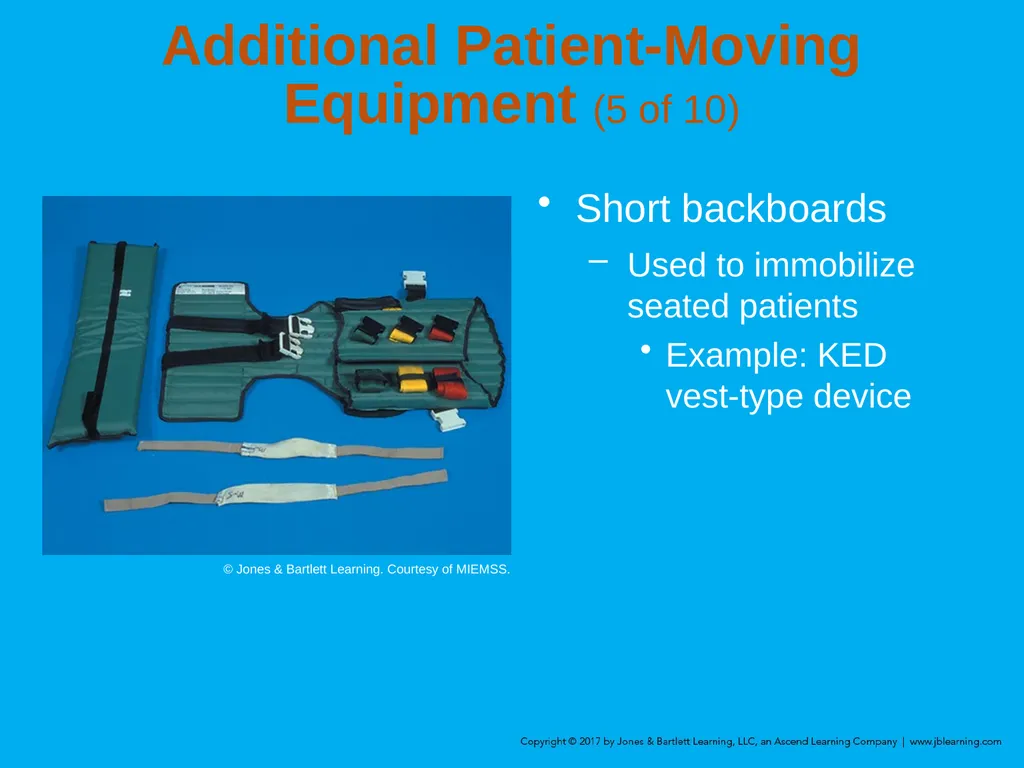
slide42. Additional Patient-Moving Equipment (5 of 10) Short backboards
Used to immobilize seated patients
Example: KED vest-type device © Jones & Bartlett Learning. Courtesy of MIEMSS.<br>
slide43. Additional Patient-Moving Equipment (6 of 10) Vacuum mattresses
Alternative to backboard for immobilizing geriatric and pediatric patients
Air is removed from the device, allowing it to mold around the patient.
Provides immobilization, comfort, and thermal insulation<br>
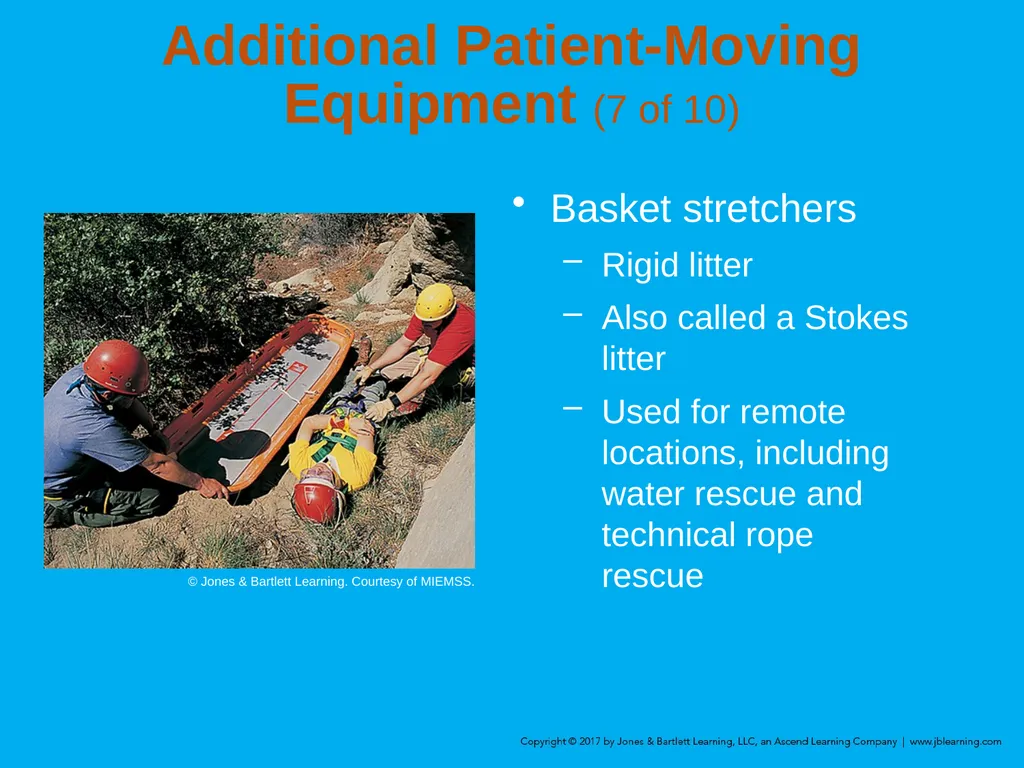
slide44. Additional Patient-Moving Equipment (7 of 10) Basket stretchers
Rigid litter
Also called a Stokes litter
Used for remote locations, including water rescue and technical rope rescue © Jones & Bartlett Learning. Courtesy of MIEMSS.<br>
slide45. Additional Patient-Moving Equipment (8 of 10) Basket stretchers (cont’d)
In case of spinal injury, secure the patient to the backboard, and then secure it inside the basket stretcher to carry the patient out of the location.
When you return to the ambulance, lift the backboard out of basket stretcher and place it on the wheeled stretcher.<br>
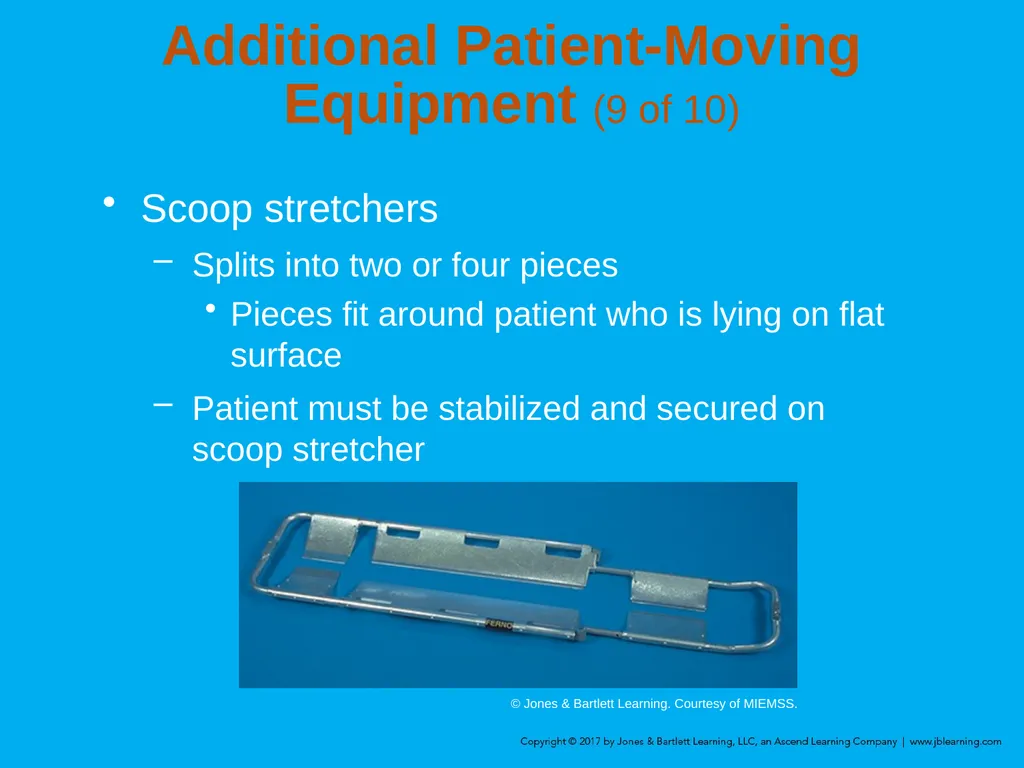
slide46. Additional Patient-Moving Equipment (9 of 10) Scoop stretchers
Splits into two or four pieces
Pieces fit around patient who is lying on flat surface
Patient must be stabilized and secured on scoop stretcher © Jones & Bartlett Learning. Courtesy of MIEMSS.<br>
slide47. Additional Patient-Moving Equipment (10 of 10) Neonatal isolettes
Neonates cannot be transported on a wheeled stretcher.
The isolette keeps the neonate warm, and protects the child from noise, draft, infection, and excess handling.
The isolette may be secured to a wheeled ambulance stretcher or freestanding.<br>
slide48. Decontamination Decontaminate equipment after use:
For your safety
For the safety of the crew
For the safety of the patient
To prevent the spread of disease<br>
slide49. Patient Positioning (1 of 2) Proper position is based on the chief complaint.
A patient reporting chest pain or respiratory distress should be placed in a position of comfort
Patients in shock should be placed supine.
Patients in late stages of pregnancy should be positioned and transported on their left side.<br>
slide50. Patient Positioning (2 of 2) Proper position (cont’d)
An unresponsive patient with no suspected spinal injury should be placed in the recovery position.
A patient who is nauseated or vomiting should be transported in a position of comfort.<br>
slide51. Medical Restraints (1 of 2) Evaluate for correctible causes of combativeness.
Head injury, hypoxia, hypoglycemia
Follow local protocols.
Restraint requires five personnel.
Restrain the patient supine.
Positional asphyxia may develop in prone position.<br>
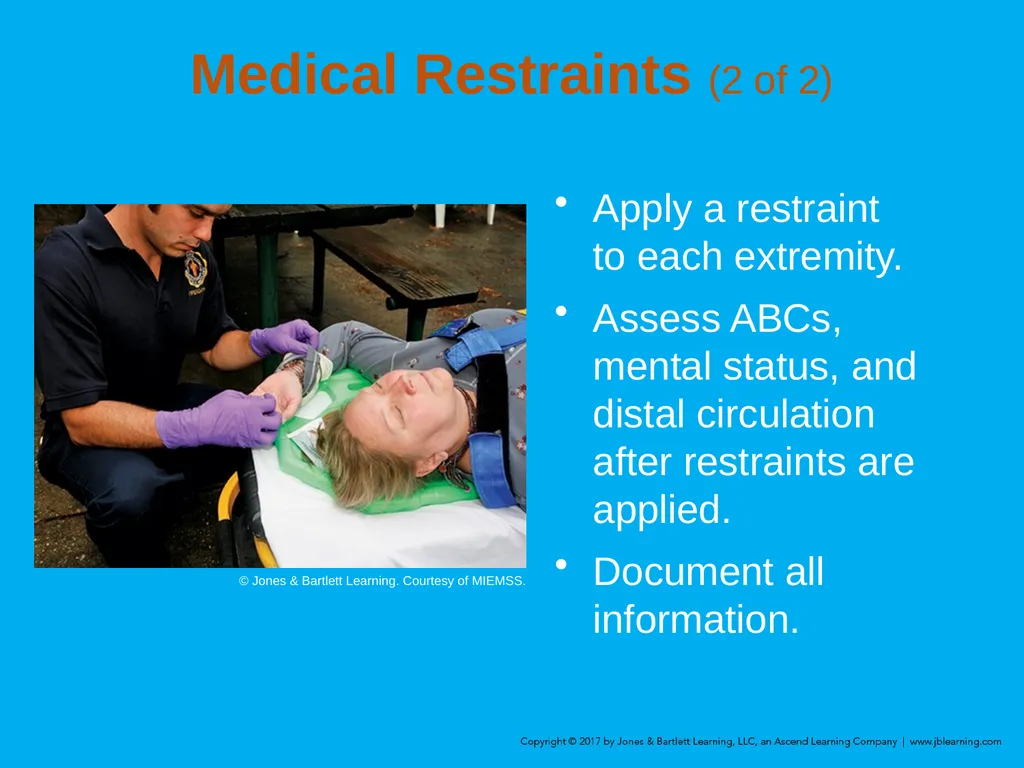
slide52. Medical Restraints (2 of 2) Apply a restraint to each extremity.
Assess ABCs, mental status, and distal circulation after restraints are applied.
Document all information. © Jones & Bartlett Learning. Courtesy of MIEMSS.<br>
slide53. Personnel Considerations Questions to ask before moving a patient:
Am I physically strong enough to lift/move this patient?
Is there adequate room to get the proper stance to lift the patient?
Do I need additional personnel for lifting assistance?
Injured EMTs cannot help anyone.<br>
slide54. Review What is the first rule of lifting?
Twist slowly when you lift
Keep your back in a straight position
Bend at the waist to pick something up
Use your arms to do most of the lifting<br>
slide55. Review Answer: B
Rationale: The first rule of lifting is to always keep your back in a straight, upright, position and use the powerful muscles of your thighs. Never twist while lifting.<br>
slide56. Review What is the first rule of lifting?
Twist slowly when you lift Rationale: You should never twist your back.
Keep your back in a straight position Rationale: Correct answer
Bend at the waist to pick something up Rationale: You should never bend at the waist. Your back should be properly maintained in an upright position.
Use your arms to do most of the lifting Rationale: Use your leg muscles since they are well developed and very strong.<br>
slide57. Review When lifting a stretcher using the power lift, you should:
bend at the hips, knees, back, and arms.
bend at the waist and keep your back straight.
place your hands palms up on the litter handle.
place your hands palms down on the litter's side bars.<br>
slide58. Review Answer: C
Rationale: When lifting any heavy object, your hands should be facing palms up; this provides better lifting power and is not as stressful on the wrists.<br>
slide59. Review (1 of 2) When lifting a stretcher using the power lift, you should:
bend at the hips, knees, back, and arms. Rationale: When lifting, keep your back and arms straight. Always bend at the knees.
bend at the waist and keep your back straight. Rationale: When lifting, always keep your back straight. Never bend at the waist.<br>
slide60. Review (2 of 2) When lifting a stretcher using the power lift, you should:
place your hands palms up on the litter handle. Rationale: Correct answer
place your hands palms down on the litter's side bars. Rationale: Your hands have the greatest strength when your palms are facing up.<br>
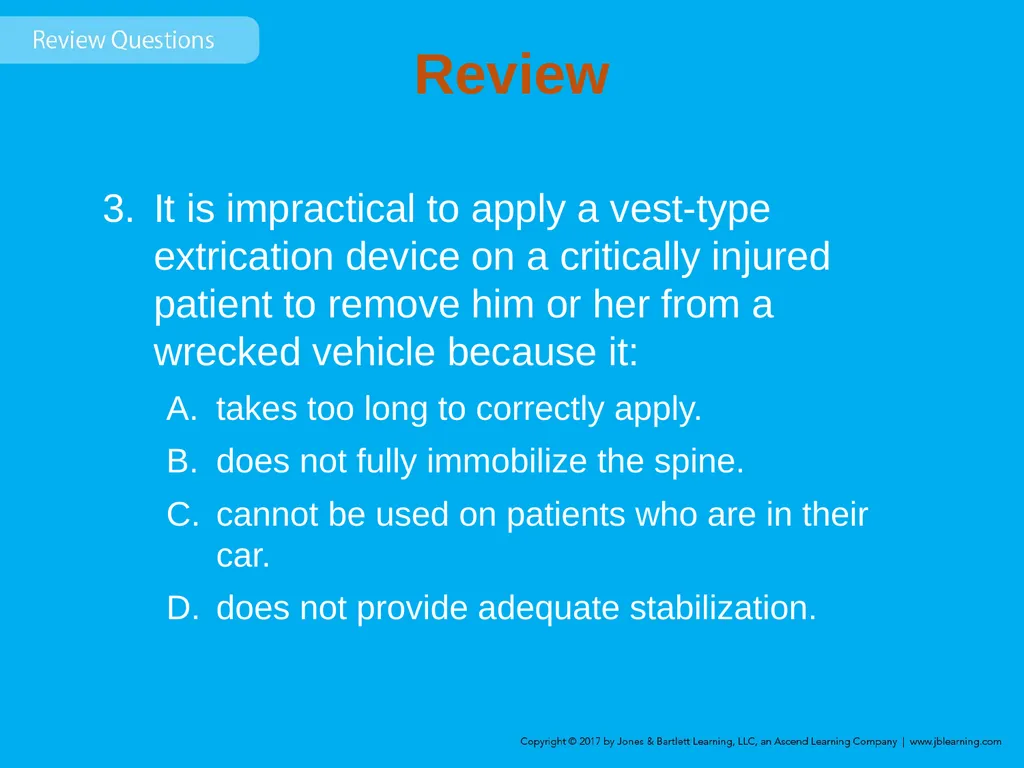
slide61. Review It is impractical to apply a vest-type extrication device on a critically injured patient to remove him or her from a wrecked vehicle because it:
takes too long to correctly apply.
does not fully immobilize the spine.
cannot be used on patients who are in their car.
does not provide adequate stabilization.<br>
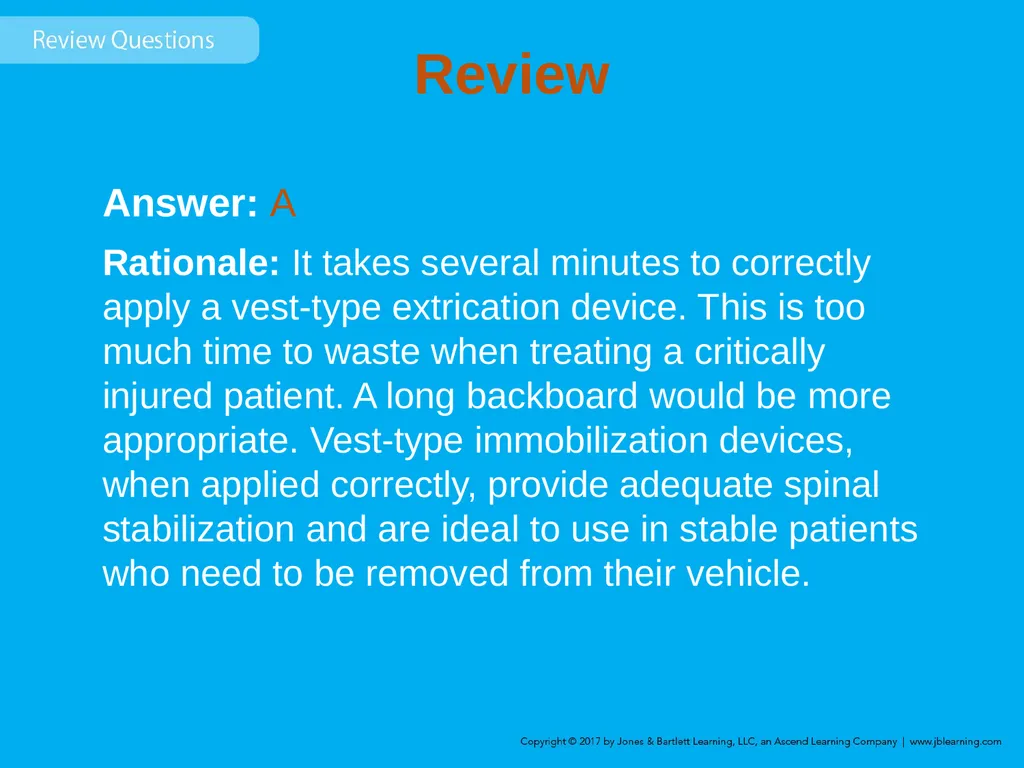
slide62. Review Answer: A
Rationale: It takes several minutes to correctly apply a vest-type extrication device. This is too much time to waste when treating a critically injured patient. A long backboard would be more appropriate. Vest-type immobilization devices, when applied correctly, provide adequate spinal stabilization and are ideal to use in stable patients who need to be removed from their vehicle.<br>
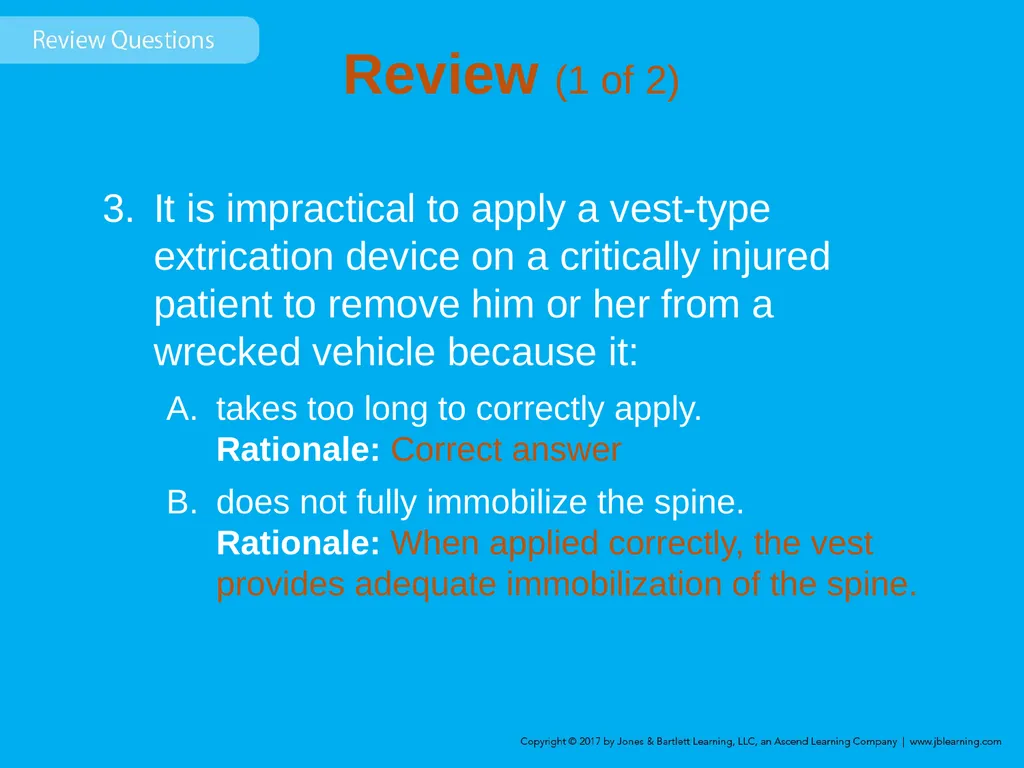
slide63. Review (1 of 2) It is impractical to apply a vest-type extrication device on a critically injured patient to remove him or her from a wrecked vehicle because it:
takes too long to correctly apply. Rationale: Correct answer
does not fully immobilize the spine. Rationale: When applied correctly, the vest provides adequate immobilization of the spine.<br>
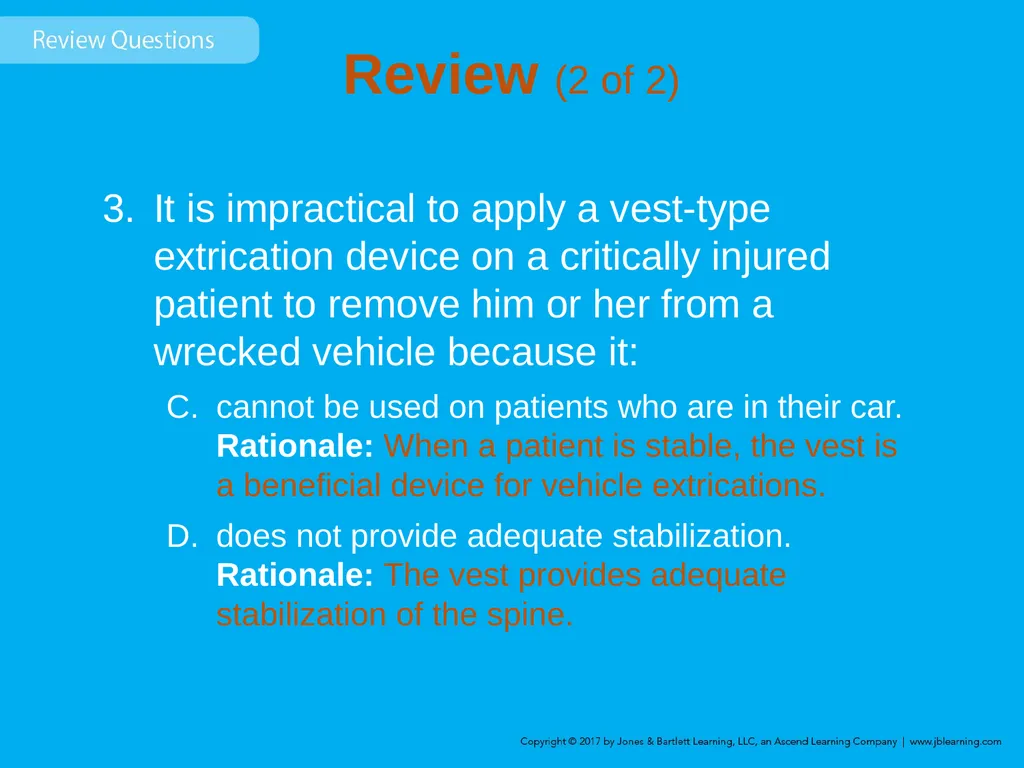
slide64. Review (2 of 2) It is impractical to apply a vest-type extrication device on a critically injured patient to remove him or her from a wrecked vehicle because it:
cannot be used on patients who are in their car. Rationale: When a patient is stable, the vest is a beneficial device for vehicle extrications.
does not provide adequate stabilization. Rationale: The vest provides adequate stabilization of the spine.<br>
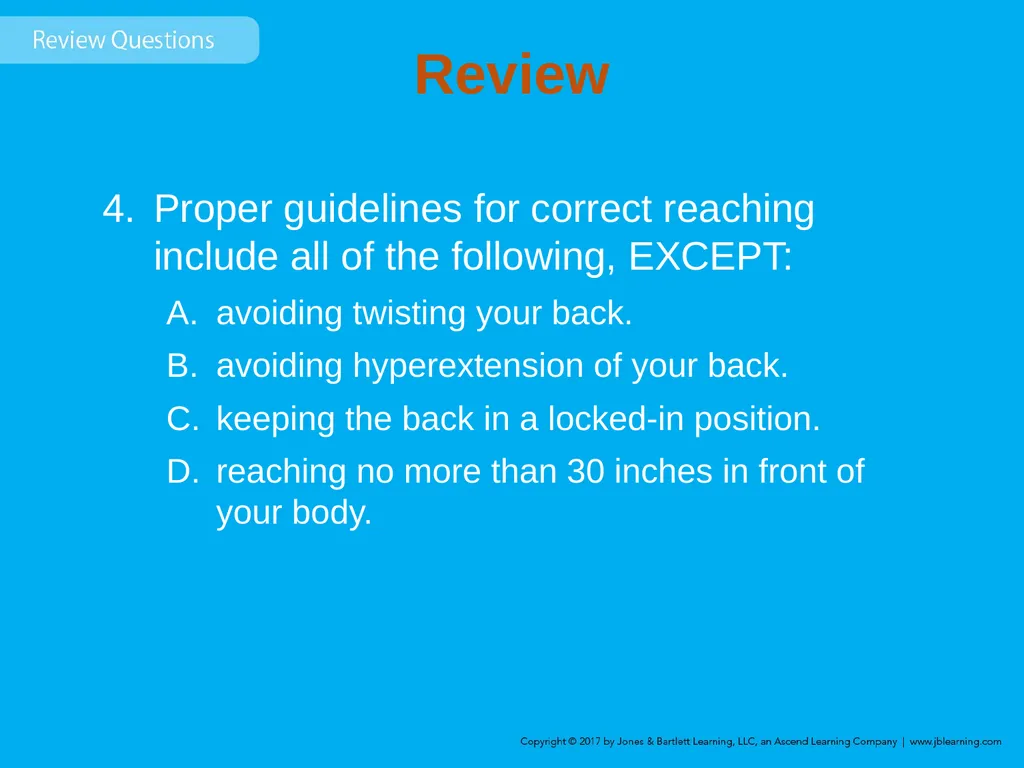
slide65. Review Proper guidelines for correct reaching include all of the following, EXCEPT:
avoiding twisting your back.
avoiding hyperextension of your back.
keeping the back in a locked-in position.
reaching no more than 30 inches in front of your body.<br>
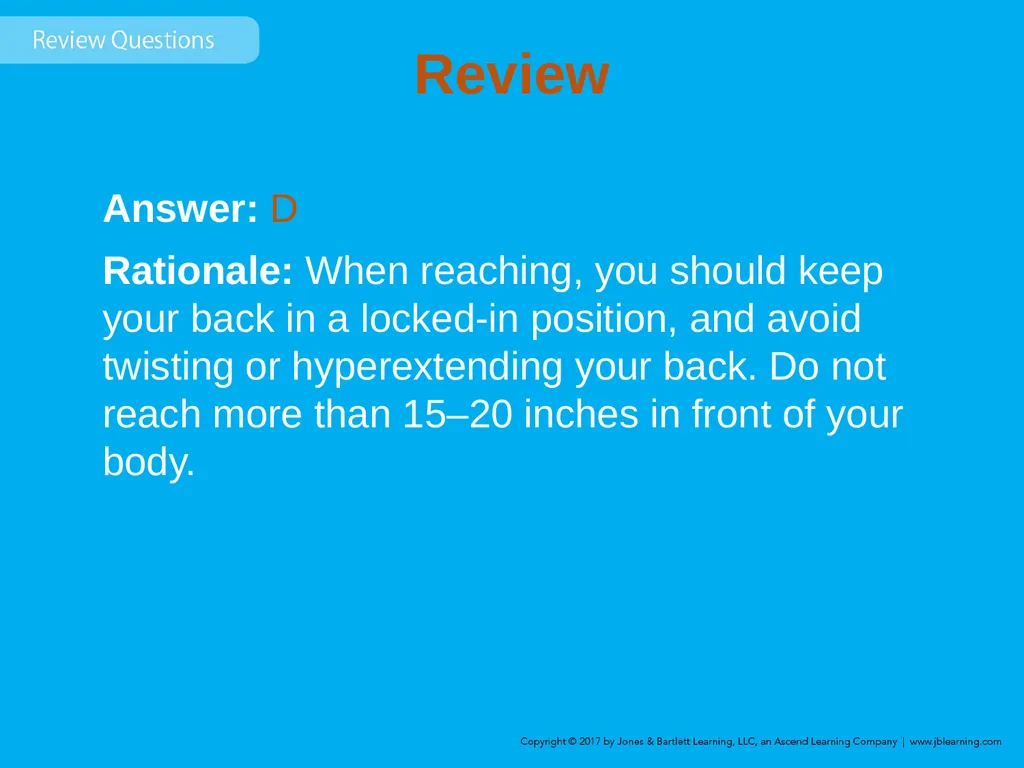
slide66. Review Answer: D
Rationale: When reaching, you should keep your back in a locked-in position, and avoid twisting or hyperextending your back. Do not reach more than 15–20 inches in front of your body.<br>
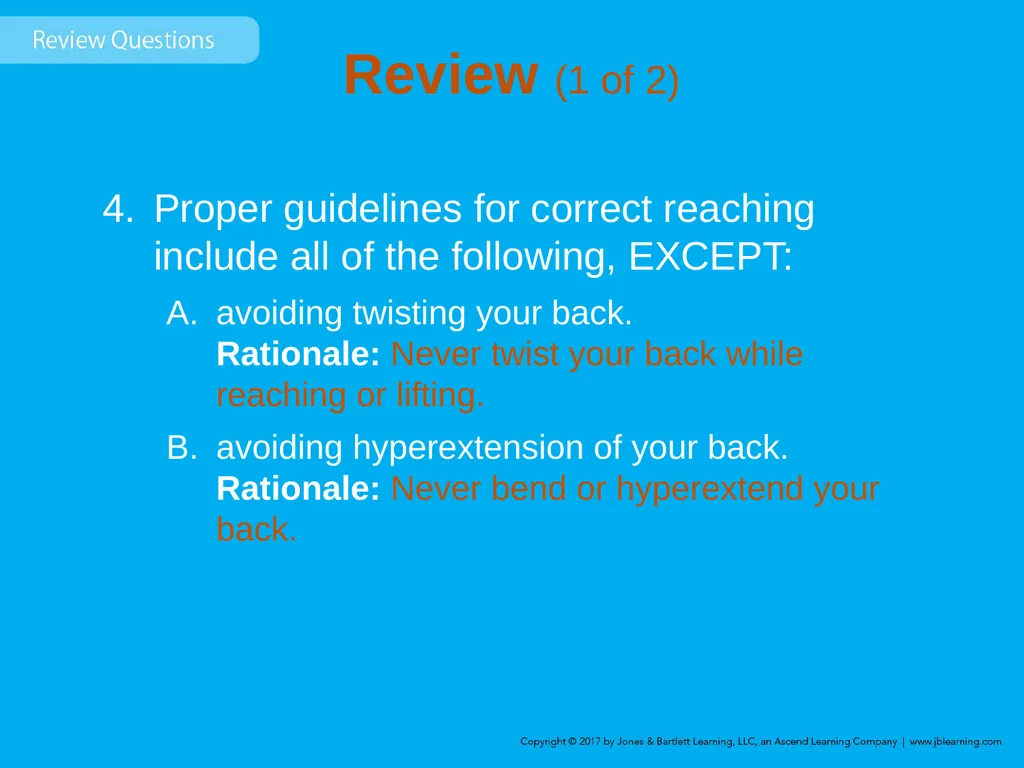
slide67. Review (1 of 2) Proper guidelines for correct reaching include all of the following, EXCEPT:
avoiding twisting your back. Rationale: Never twist your back while reaching or lifting.
avoiding hyperextension of your back. Rationale: Never bend or hyperextend your back.<br>
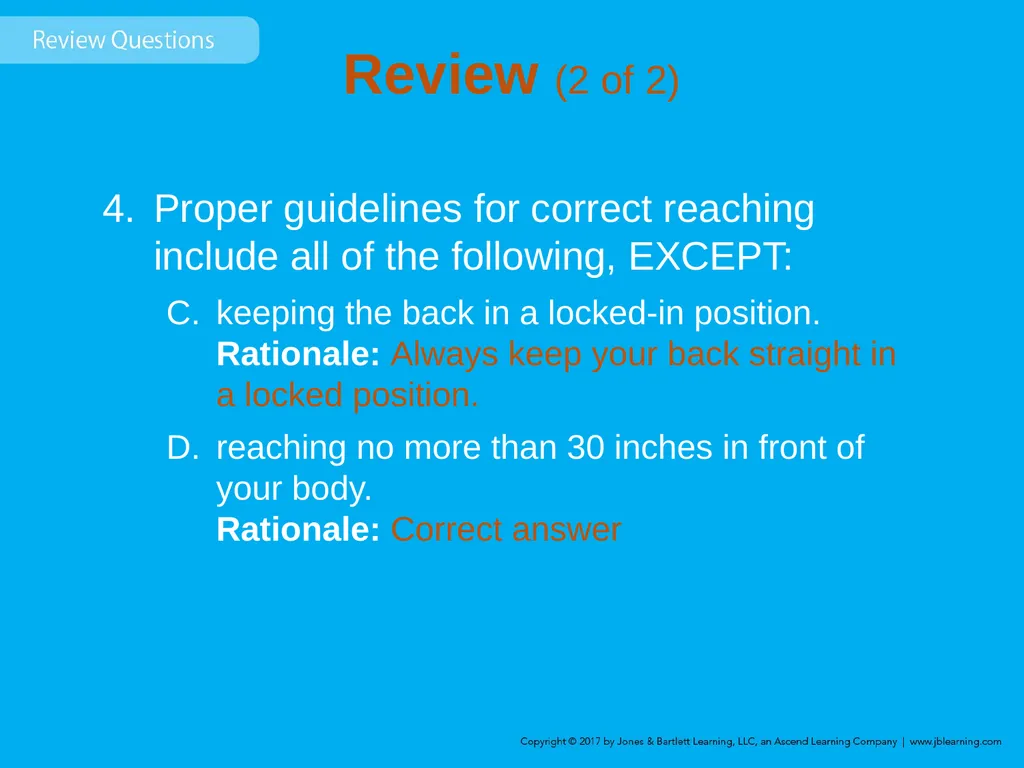
slide68. Review (2 of 2) Proper guidelines for correct reaching include all of the following, EXCEPT:
keeping the back in a locked-in position. Rationale: Always keep your back straight in a locked position.
reaching no more than 30 inches in front of your body. Rationale: Correct answer<br>
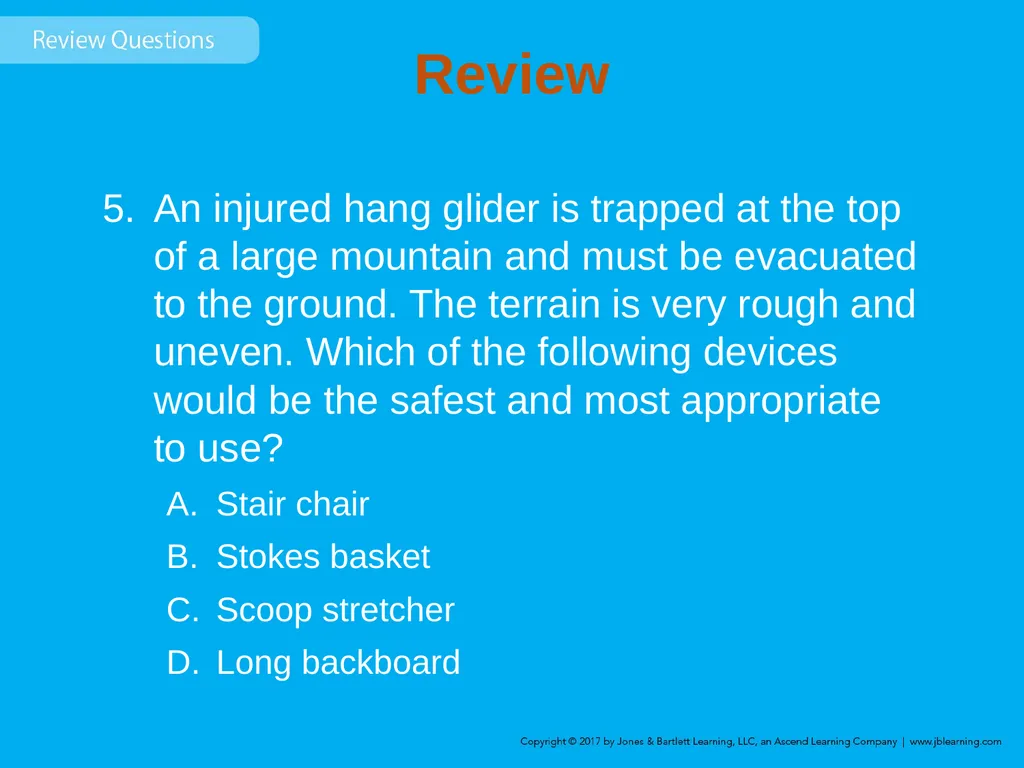
slide69. Review An injured hang glider is trapped at the top of a large mountain and must be evacuated to the ground. The terrain is very rough and uneven. Which of the following devices would be the safest and most appropriate to use?
Stair chair
Stokes basket
Scoop stretcher
Long backboard<br>
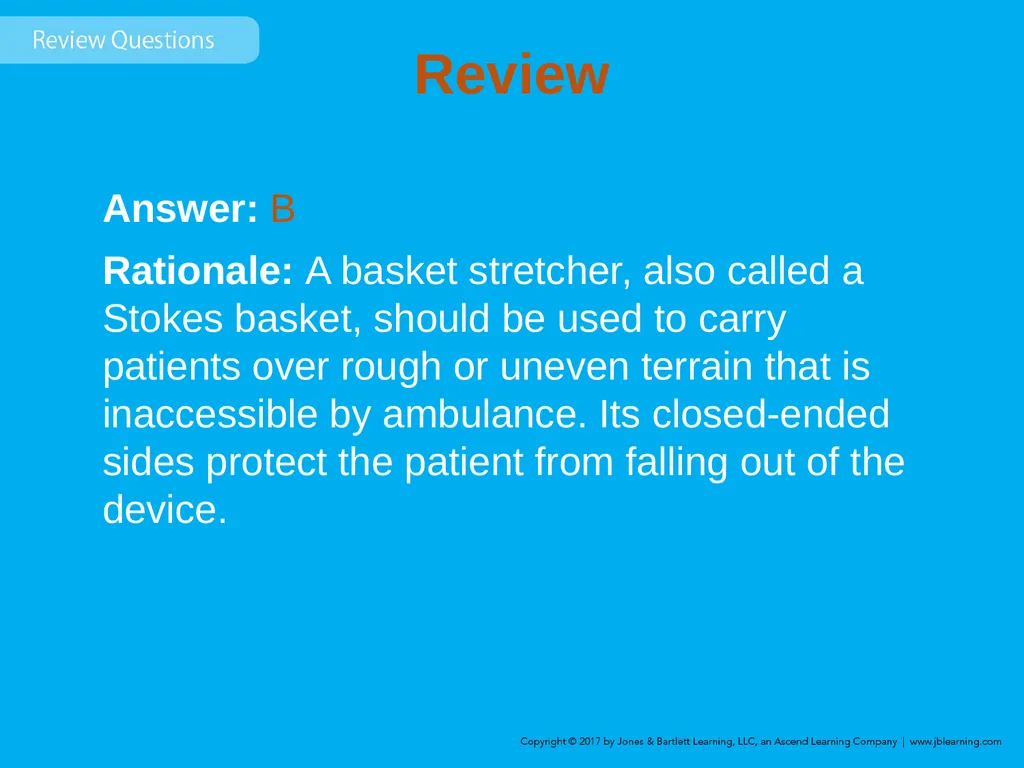
slide70. Review Answer: B
Rationale: A basket stretcher, also called a Stokes basket, should be used to carry patients over rough or uneven terrain that is inaccessible by ambulance. Its closed-ended sides protect the patient from falling out of the device.<br>
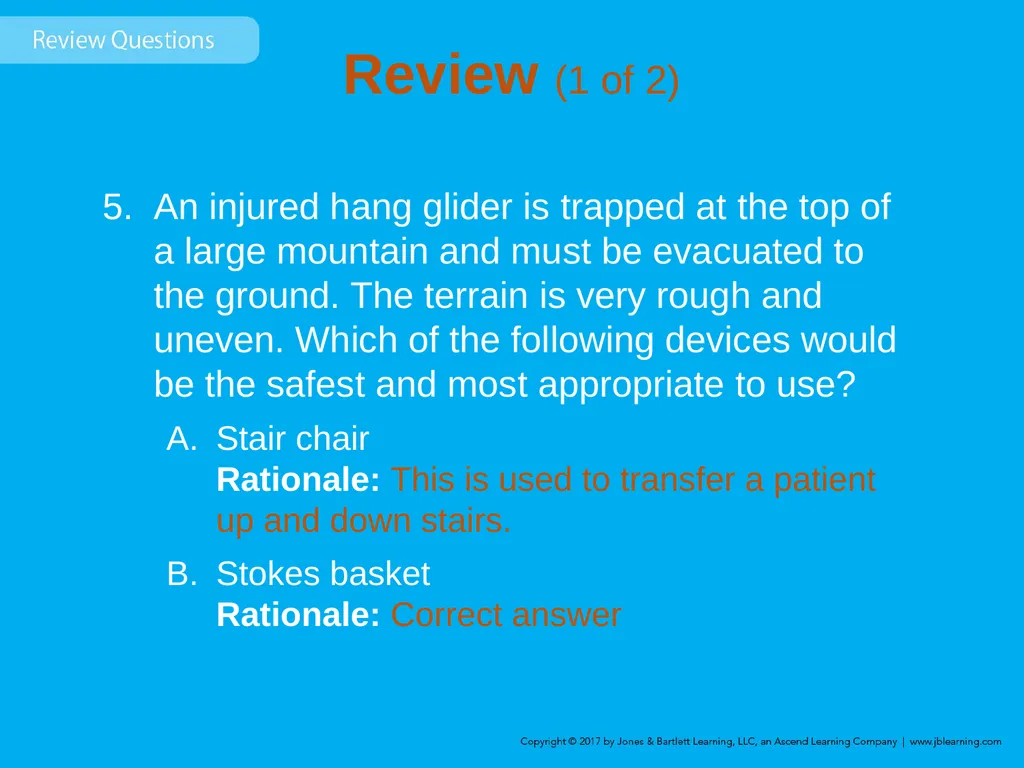
slide71. Review (1 of 2) An injured hang glider is trapped at the top of a large mountain and must be evacuated to the ground. The terrain is very rough and uneven. Which of the following devices would be the safest and most appropriate to use?
Stair chair Rationale: This is used to transfer a patient up and down stairs.
Stokes basket Rationale: Correct answer<br>
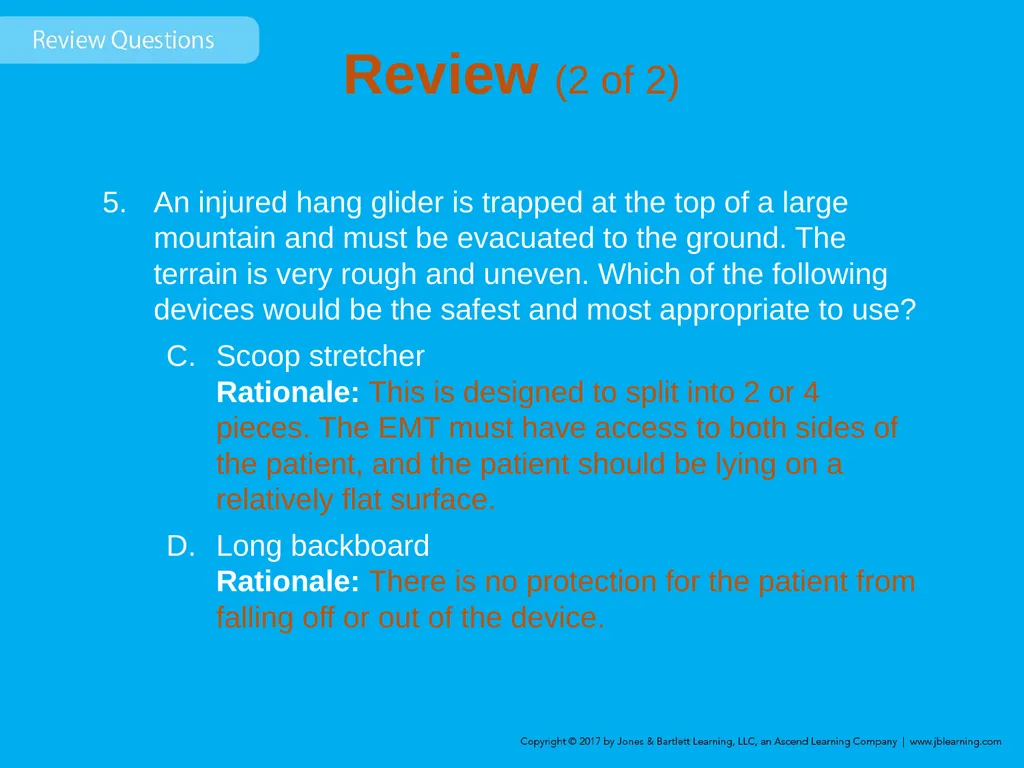
slide72. Review (2 of 2) An injured hang glider is trapped at the top of a large mountain and must be evacuated to the ground. The terrain is very rough and uneven. Which of the following devices would be the safest and most appropriate to use?
Scoop stretcher Rationale: This is designed to split into 2 or 4 pieces. The EMT must have access to both sides of the patient, and the patient should be lying on a relatively flat surface.
Long backboard Rationale: There is no protection for the patient from falling off or out of the device.<br>
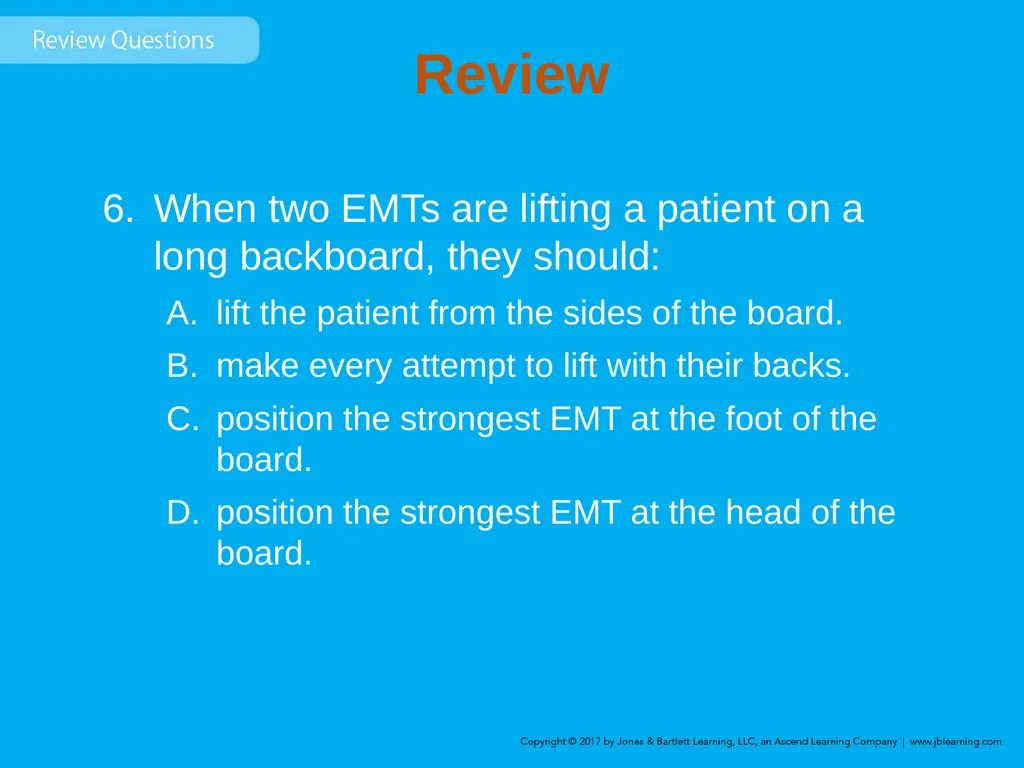
slide73. Review When two EMTs are lifting a patient on a long backboard, they should:
lift the patient from the sides of the board.
make every attempt to lift with their backs.
position the strongest EMT at the foot of the board.
position the strongest EMT at the head of the board.<br>
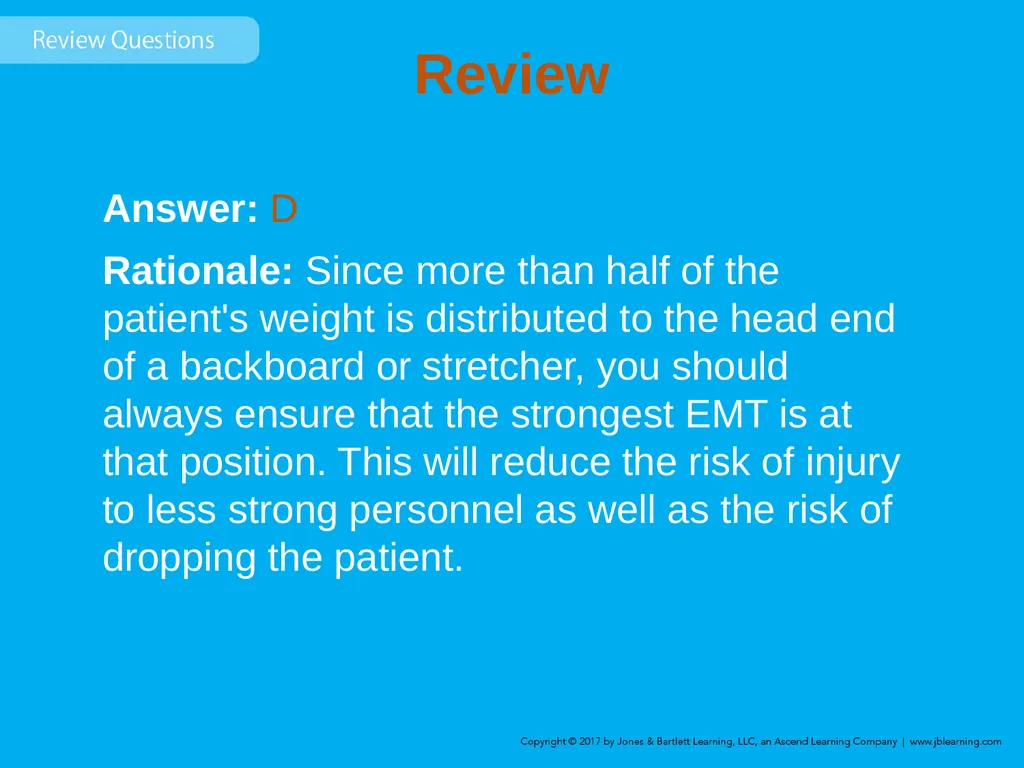
slide74. Review Answer: D
Rationale: Since more than half of the patient's weight is distributed to the head end of a backboard or stretcher, you should always ensure that the strongest EMT is at that position. This will reduce the risk of injury to less strong personnel as well as the risk of dropping the patient.<br>
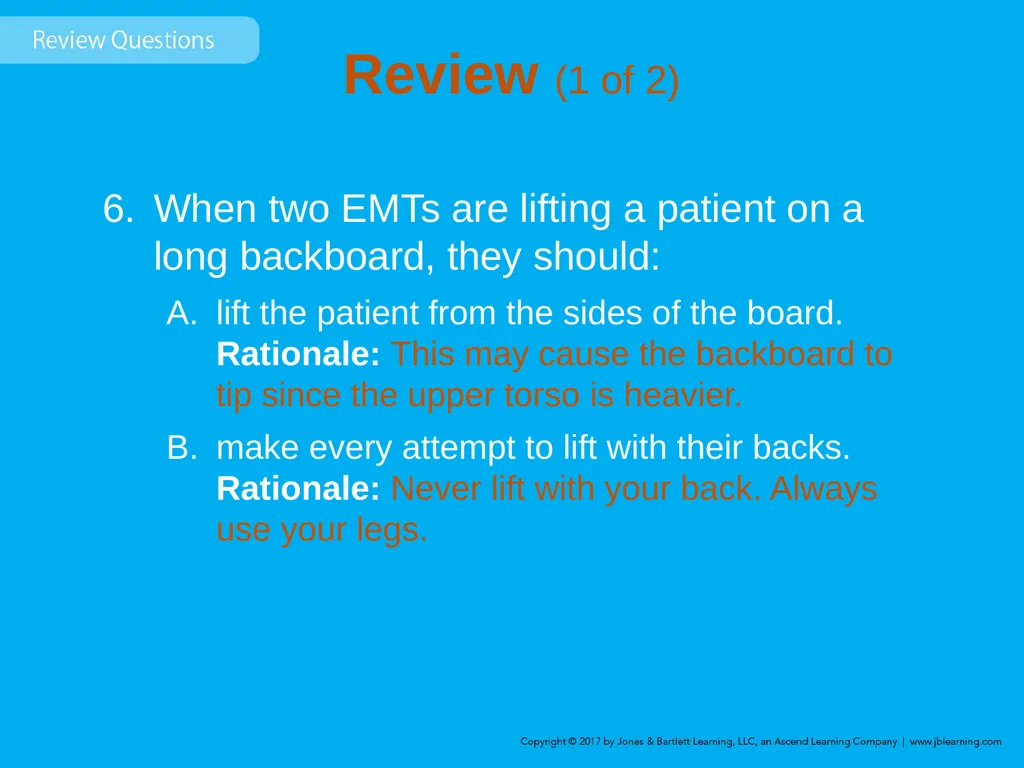
slide75. Review (1 of 2) When two EMTs are lifting a patient on a long backboard, they should:
lift the patient from the sides of the board. Rationale: This may cause the backboard to tip since the upper torso is heavier.
make every attempt to lift with their backs. Rationale: Never lift with your back. Always use your legs.<br>
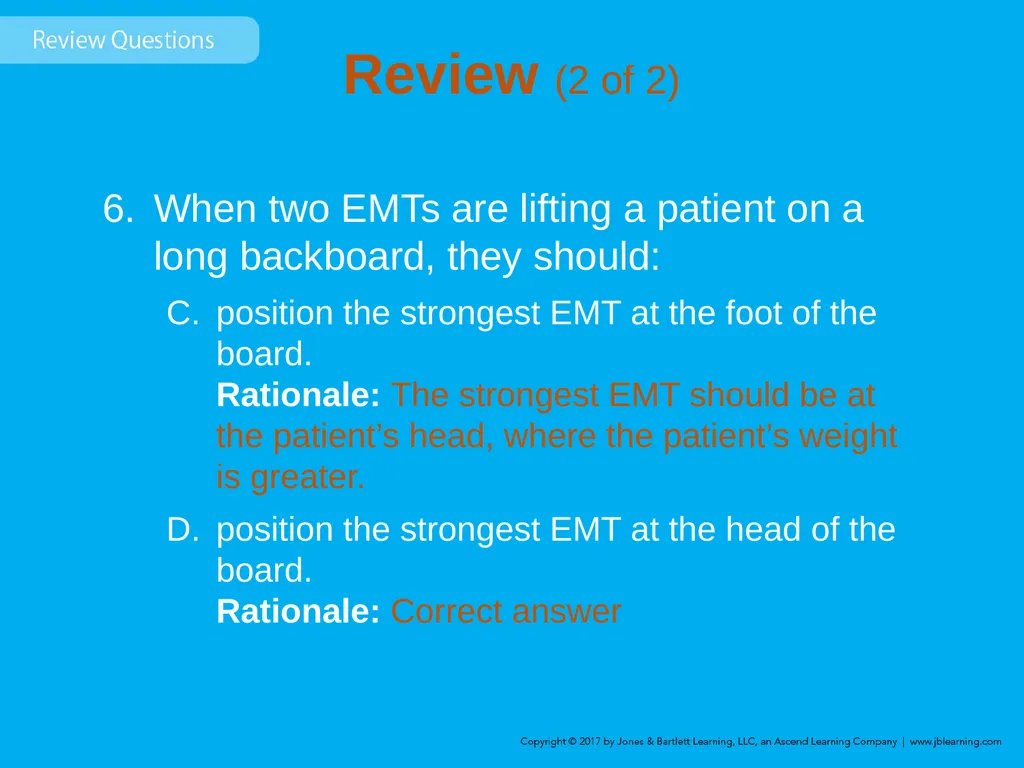
slide76. Review (2 of 2) When two EMTs are lifting a patient on a long backboard, they should:
position the strongest EMT at the foot of the board. Rationale: The strongest EMT should be at the patient’s head, where the patient’s weight is greater.
position the strongest EMT at the head of the board. Rationale: Correct answer<br>
slide77. Review Which of the following techniques is considered to be an emergency move?
Extremity lift
Supine transfer
Firefighter's drag
Direct ground lift<br>
slide78. Review Answer: C
Rationale: The firefighter's drag is a one-person technique that is used when a patient must be removed from a life-threatening situation immediately.<br>
slide79. Review Which of the following techniques is considered to be an emergency move?
Extremity lift Rationale: This is a nonurgent move, helpful in narrow spaces.
Supine transfer Rationale: This is not considered an emergency move.
Firefighter's drag Rationale: Correct answer
Direct ground lift Rationale: This is a nonurgent move, used to carry a patient long distances to the cot.<br>
slide80. Review To extract a patient from the basement of a building, you must transport the patient up a flight of stairs. In doing this, you must ensure that:
the elevated head of the backboard goes first.
the backboard with the elevated foot end goes first.
the backboard is slightly tilted to the left to distribute weight.
the patient's feet are higher than his or her head, whichever end is carried first.<br>
slide81. Review Answer: A
Rationale: When you carry a patient upstairs or up an incline, you must ensure that the elevated head of the backboard or stretcher goes first. This will help to equally distribute the weight.<br>
slide82. Review (1 of 2) To extract a patient from the basement of a building, you must transport the patient up a flight of stairs. In doing this, you must ensure that:
the elevated head of the backboard goes first. Rationale: Correct answer
the backboard with the elevated foot end goes first. Rationale: Always try to carry the head higher to distribute the weight.<br>
slide83. Review (2 of 2) To extract a patient from the basement of a building, you must transport the patient up a flight of stairs. In doing this, you must ensure that:
the backboard is slightly tilted to the left to distribute weight. Rationale: Backboards are designed to carry a patient flat, and the weight is best distributed when the head is slightly elevated.
the patient's feet are higher than his or her head, whichever end is carried first. Rationale: Carries are easier with the patient’s head first and elevated for distribution of the patient’s weight.<br>
slide84. Review If an injured patient needs to be moved but is not in immediate danger from fire or building collapse, you should first:
order the equipment you need for extrication.
check the patient’s airway, breathing, and circulation.
remove the patient with the rapid extrication technique.
determine the number of people you will need to move the patient.<br>
slide85. Review Answer: B
Rationale: The only time your attention should be directed away from the primary assessment of the patient is when the patient’s life or your life is in immediate danger.<br>
slide86. Review (1 of 2) If an injured patient needs to be moved but is not in immediate danger from fire or building collapse, you should first:
order the equipment you need for extrication. Rationale: This is not the first thing you should do.
check the patient’s airway, breathing, and circulation. Rationale: Correct answer<br>
slide87. Review (2 of 2) If an injured patient needs to be moved but is not in immediate danger from fire or building collapse, you should first:
remove the patient with the rapid extrication technique. Rationale: The patient is not in immediate danger, so this is not needed.
determine the number of people you will need to move the patient. Rationale: After the ABCs have been checked, then the EMT can determine the safest method of extrication.<br>
slide88. Review The rapid extrication technique is a:
nonurgent technique to remove a patient from a vehicle.
technique used to transfer a patient from a bed to a stretcher.
technique used to lift a patient with no suspected spinal injury onto a stretcher.
technique used to quickly remove a patient from a vehicle and onto a backboard.<br>
slide89. Review Answer: D
Rationale: By using the rapid extrication technique, a seriously injured patient can be moved from a sitting position in a vehicle to a supine position on a backboard while protecting the spine at the same time.<br>
slide90. Review (1 of 2) The rapid extrication technique is a:
nonurgent technique to remove a patient from a vehicle. Rationale: This technique is considered to be an urgent move.
technique used to transfer a patient from a bed to a stretcher. Rationale: This technique is used to move a patient from a vehicle to a backboard.<br>
slide91. Review (2 of 2) The rapid extrication technique is a:
technique used to lift a patient with no suspected spinal injury onto a stretcher. Rationale: This is not a lifting technique. The patient is placed on a backboard, not a stretcher.
technique used to quickly remove a patient from a vehicle and onto a backboard. Rationale: Correct answer<br>
Lifting and Moving Patients<br>
slide2. Introduction In the course of a call, you will have to move patients.
To move patients without injury, you need to learn the proper techniques.
Knowledge of proper body mechanics and a power grip are important.<br>
slide3. The Wheeled Ambulance Stretcher (1 of 2) Also called a stretcher or gurney
Device most commonly used to move patients
Not taken up or down stairs © Jones & Bartlett Learning.<br>
slide4. The Wheeled Ambulance Stretcher (2 of 2) General features
Strong metal frame, adjustable to any height
Hinges at center allow the head end to be elevated
Guardrails prevent patient from rolling off
Mattress must be fluid resistant
Patient is secured with straps<br>
slide5. Backboards Used to carry and immobilize patients with suspected spinal injury or other trauma
Holes serve as handles and a place to secure straps © Jones & Bartlett Learning. Courtesy of MIEMSS.<br>
slide6. Moving and Positioning the Patient When you move a patient, take care that injury does not occur.
Patient lifting and moving are technical skills that require repeated training and practice.
Using proper body mechanics and maintaining physical fitness greatly reduces the chance of injuries.<br>
slide7. Body Mechanics (1 of 5) Lifting position
Shoulder girdle should be aligned over pelvis
Hands should be held close to legs © Jones & Bartlett Learning. Courtesy of MIEMSS.<br>
slide8. Body Mechanics (2 of 5) You may injure your back:
If you lift while leaning forward
If you lift with your back straight but bent significantly forward at the hips © Jones & Bartlett Learning. Courtesy of MIEMSS.<br>
slide9. Body Mechanics (3 of 5) Lifting technique
Legs should be spread about 15 inches apart (shoulder width).
Place feet so the center of gravity is balanced.
With your back held upright, bring your upper body down by bending the legs.
Grasp the patient/stretcher.<br>
slide10. Body Mechanics (4 of 5) Lifting technique (cont’d)
Lift the patient by raising your upper body and arms and straightening your legs until standing.
Keep the weight close to your body.
Keep your arms the same distance apart.<br>
slide11. Body Mechanics (5 of 5) Power grip gets maximum force from hands
Palms up
Hands about 10 inches apart
All fingers at same angle
Fully support handle on curved palm © Jones & Bartlett Learning. Courtesy of MIEMSS.<br>
slide12. Principles of Safe Reaching and Pulling (1 of 5) Body drag
Keep back locked and straight by tightening abdominal muscles
Kneel and extend arms no more than 15–20 inches in front of you.
Alternate between pulling the patient by flexing your arms and repositioning yourself © Jones & Bartlett Learning - Darren Stahlman © Jones & Bartlett Learning - Darren Stahlman<br>
slide13. Principles of Safe Reaching and Pulling (2 of 5) To drag a patient across a bed
Kneel on the bed to avoid reaching beyond the recommended distance.
Complete the drag while standing at the side of the bed.
Use the sheet or blanket under the patient rather than dragging the patient by his or her clothing.<br>
slide14. Principles of Safe Reaching and Pulling (3 of 5) In the hospital, transfer the patient from the stretcher to a bed with a body drag.
The stretcher should be the same height or slightly higher than the bed.
You and a partner should kneel on the bed and drag in increments.<br>
slide15. Principles of Safe Reaching and Pulling (4 of 5) Log rolling
Log roll the patient onto his or her side to place a patient on a backboard. © Jones & Bartlett Learning – MIEMSS<br>
slide16. Principles of Safe Reaching and Pulling (5 of 5) Log rolling (cont’d)
Kneel as close to the patient’s side as possible.
Keep your back straight and lean solely from the hips.
Roll the patient without stopping until the patient is resting on his or her side and braced against your thighs.
Pulling toward you allows your legs to prevent the patient from rolling over completely.<br>
slide17. Principles of Safe Lifting and Carrying (1 of 7) Patient weight
Estimate the patient’s weight before lifting.
Do not attempt to lift a patient who weighs more than 250 lb with fewer than four providers.
Know the weight limitations of the equipment and how to handle patients who exceed the weight limitations.<br>
slide18. Principles of Safe Lifting and Carrying (2 of 7) Lifting and carrying a patient on a backboard or stretcher
More of the patient’s weight rests at the head.
Diamond carry and one-handed carry © Jones & Bartlett Learning. Courtesy of MIEMSS.<br>
slide19. Principles of Safe Lifting and Carrying (3 of 7) Rolling a wheeled stretcher
Make sure that it is in the fully elevated position.
Your partner should control the head end and assist you by pushing with his or her arms held with the elbows bent.<br>
slide20. Principles of Safe Lifting and Carrying (4 of 7) Moving a patient with a stair chair
Use a stair chair to carry a conscious patient up or down a flight of stairs.
Lightweight, wheeled folding chair © Jones & Bartlett Learning.<br>
slide21. Principles of Safe Lifting and Carrying (5 of 7) Moving a patient on stairs
Backboard should be used instead for patient:
Who is unresponsive
Who must be moved in supine position
Who must be immobilized
Carry the patient on the backboard down the stairs to the prepared stretcher.<br>
slide22. Principles of Safe Lifting and Carrying (6 of 7) Loading a wheeled stretcher into an ambulance
Ensure the frame is held firmly between two hands so it does not tip © Jones and Bartlett Learning.<br>
slide23. Principles of Safe Lifting and Carrying (7 of 7) Loading a wheeled stretcher into an ambulance (cont.)
Newer models are self-loading, allowing you to push the stretcher into the ambulance.
Other models need to be lowered and lifted to the height of the floor of ambulance.
Clamps in the ambulance hold the stretcher in place.<br>
slide24. Directions and Commands Team actions must be coordinated.
Team leader:
Indicates where each team member should be
Rapidly describes sequence of steps to perform before lifting
Use preparatory commands and countdowns.<br>
slide25. Emergency Moves (1 of 4) Use when there is potential for danger
Fire, explosives, hazardous materials
Use when you cannot properly assess the patient or provide immediate care because of the patient’s location or position<br>
slide26. Emergency Moves (2 of 4) Use techniques to help prevent aggravation of patient spinal injury
Clothes drag
Blanket drag
Arm drag
Arm-to-arm drag<br>
slide27. Emergency Moves (3 of 4) © Jones & Bartlett Learning. Courtesy of MIEMSS. © Jones & Bartlett Learning. Courtesy of MIEMSS. © Jones & Bartlett Learning. Courtesy of MIEMSS. © Jones & Bartlett Learning. Courtesy of MIEMSS.<br>
slide28. Emergency Moves (4 of 4) Removing an unconscious patient from a vehicle while alone:
Move patient’s legs clear of the pedals
Rotate patient so back is toward open car door
Place arms through armpits, supporting head against your body
Drag to a safe location © Jones & Bartlett Learning. Courtesy of MIEMSS. © Jones & Bartlett Learning. Courtesy of MIEMSS.<br>
slide29. Urgent Moves (1 of 2) Necessary to move patients:
With altered level of consciousness
With inadequate ventilation
In shock<br>
slide30. Urgent Moves (2 of 2) Rapid extrication technique should be used only if urgency exists.
This technique increases the risk of damage if the patient has a spinal injury.
Consider all options before using this technique.<br>
slide31. Nonurgent Moves (1 of 4) Used when both scene and patient are stable
Carefully plan how to move the patient.<br>
slide32. Nonurgent Moves (2 of 4) Choose between:
Direct ground lift
For supine patients with no suspected spinal injury
For patients who need to be carried over some distance
EMTs stand side by side to lift/carry the patient.<br>
slide33. Nonurgent Moves (3 of 4) Extremity lift
For patients with no suspected spinal injury who are supine or sitting
Patients who are in a small space
One EMT is at the patient’s head and the other at the patient’s feet.
Coordinate moves verbally.<br>
slide34. Nonurgent Moves (4 of 4) Transfer moves
Direct carry
Move supine patient from bed to stretcher
Draw sheet method
Move patient using a sheet or blanket
Scoop stretcher<br>
slide35. Geriatrics (1 of 2) Many patients transported by EMS are geriatric patients.
Brittle bones, rigidity, and spinal curvatures may present special challenges.
Allay the patient’s fears with a sympathetic and compassionate approach.<br>
slide36. Geriatrics (2 of 2) Kyphosis Spondylosis © Dr. P. Marazzi/Photo Researchers, Inc. © Dr. P. Marazzi/Photo Researchers, Inc.<br>
slide37. Bariatrics Refers to management of obesity
Back injuries account for the largest number of missed days of work.
Stretchers and equipment are being produced with higher capacities.
Does not address danger to users of that equipment<br>
slide38. Bariatric stretchers
Specialized for overweight or obese patients
Wider wheelbase for increased stability Courtesy of Stryker Medical, a division of Stryker Corporation. Additional Patient-Moving Equipment (1 of 10)<br>
slide39. Additional Patient-Moving Equipment (2 of 10) Pneumatic and electronic-powered wheeled stretchers
Electronic controls to raise/lower undercarriage
Increased stretcher weight
Hazardous in uneven terrain Courtesy of Stryker Medical, a division of Stryker Corporation.<br>
slide40. Additional Patient-Moving Equipment (3 of 10) Portable/folding stretchers
Strong, rectangular tubular metal frame with fabric stretched across it © Steve Gorton/Getty Images.<br>
slide41. Additional Patient-Moving Equipment (4 of 10) Flexible stretchers
Can be rolled into a tubular package
Conform around a patient’s sides
Useful for confined spaces © American Academy of Orthopaedic Surgeons.<br>
slide42. Additional Patient-Moving Equipment (5 of 10) Short backboards
Used to immobilize seated patients
Example: KED vest-type device © Jones & Bartlett Learning. Courtesy of MIEMSS.<br>
slide43. Additional Patient-Moving Equipment (6 of 10) Vacuum mattresses
Alternative to backboard for immobilizing geriatric and pediatric patients
Air is removed from the device, allowing it to mold around the patient.
Provides immobilization, comfort, and thermal insulation<br>
slide44. Additional Patient-Moving Equipment (7 of 10) Basket stretchers
Rigid litter
Also called a Stokes litter
Used for remote locations, including water rescue and technical rope rescue © Jones & Bartlett Learning. Courtesy of MIEMSS.<br>
slide45. Additional Patient-Moving Equipment (8 of 10) Basket stretchers (cont’d)
In case of spinal injury, secure the patient to the backboard, and then secure it inside the basket stretcher to carry the patient out of the location.
When you return to the ambulance, lift the backboard out of basket stretcher and place it on the wheeled stretcher.<br>
slide46. Additional Patient-Moving Equipment (9 of 10) Scoop stretchers
Splits into two or four pieces
Pieces fit around patient who is lying on flat surface
Patient must be stabilized and secured on scoop stretcher © Jones & Bartlett Learning. Courtesy of MIEMSS.<br>
slide47. Additional Patient-Moving Equipment (10 of 10) Neonatal isolettes
Neonates cannot be transported on a wheeled stretcher.
The isolette keeps the neonate warm, and protects the child from noise, draft, infection, and excess handling.
The isolette may be secured to a wheeled ambulance stretcher or freestanding.<br>
slide48. Decontamination Decontaminate equipment after use:
For your safety
For the safety of the crew
For the safety of the patient
To prevent the spread of disease<br>
slide49. Patient Positioning (1 of 2) Proper position is based on the chief complaint.
A patient reporting chest pain or respiratory distress should be placed in a position of comfort
Patients in shock should be placed supine.
Patients in late stages of pregnancy should be positioned and transported on their left side.<br>
slide50. Patient Positioning (2 of 2) Proper position (cont’d)
An unresponsive patient with no suspected spinal injury should be placed in the recovery position.
A patient who is nauseated or vomiting should be transported in a position of comfort.<br>
slide51. Medical Restraints (1 of 2) Evaluate for correctible causes of combativeness.
Head injury, hypoxia, hypoglycemia
Follow local protocols.
Restraint requires five personnel.
Restrain the patient supine.
Positional asphyxia may develop in prone position.<br>
slide52. Medical Restraints (2 of 2) Apply a restraint to each extremity.
Assess ABCs, mental status, and distal circulation after restraints are applied.
Document all information. © Jones & Bartlett Learning. Courtesy of MIEMSS.<br>
slide53. Personnel Considerations Questions to ask before moving a patient:
Am I physically strong enough to lift/move this patient?
Is there adequate room to get the proper stance to lift the patient?
Do I need additional personnel for lifting assistance?
Injured EMTs cannot help anyone.<br>
slide54. Review What is the first rule of lifting?
Twist slowly when you lift
Keep your back in a straight position
Bend at the waist to pick something up
Use your arms to do most of the lifting<br>
slide55. Review Answer: B
Rationale: The first rule of lifting is to always keep your back in a straight, upright, position and use the powerful muscles of your thighs. Never twist while lifting.<br>
slide56. Review What is the first rule of lifting?
Twist slowly when you lift Rationale: You should never twist your back.
Keep your back in a straight position Rationale: Correct answer
Bend at the waist to pick something up Rationale: You should never bend at the waist. Your back should be properly maintained in an upright position.
Use your arms to do most of the lifting Rationale: Use your leg muscles since they are well developed and very strong.<br>
slide57. Review When lifting a stretcher using the power lift, you should:
bend at the hips, knees, back, and arms.
bend at the waist and keep your back straight.
place your hands palms up on the litter handle.
place your hands palms down on the litter's side bars.<br>
slide58. Review Answer: C
Rationale: When lifting any heavy object, your hands should be facing palms up; this provides better lifting power and is not as stressful on the wrists.<br>
slide59. Review (1 of 2) When lifting a stretcher using the power lift, you should:
bend at the hips, knees, back, and arms. Rationale: When lifting, keep your back and arms straight. Always bend at the knees.
bend at the waist and keep your back straight. Rationale: When lifting, always keep your back straight. Never bend at the waist.<br>
slide60. Review (2 of 2) When lifting a stretcher using the power lift, you should:
place your hands palms up on the litter handle. Rationale: Correct answer
place your hands palms down on the litter's side bars. Rationale: Your hands have the greatest strength when your palms are facing up.<br>
slide61. Review It is impractical to apply a vest-type extrication device on a critically injured patient to remove him or her from a wrecked vehicle because it:
takes too long to correctly apply.
does not fully immobilize the spine.
cannot be used on patients who are in their car.
does not provide adequate stabilization.<br>
slide62. Review Answer: A
Rationale: It takes several minutes to correctly apply a vest-type extrication device. This is too much time to waste when treating a critically injured patient. A long backboard would be more appropriate. Vest-type immobilization devices, when applied correctly, provide adequate spinal stabilization and are ideal to use in stable patients who need to be removed from their vehicle.<br>
slide63. Review (1 of 2) It is impractical to apply a vest-type extrication device on a critically injured patient to remove him or her from a wrecked vehicle because it:
takes too long to correctly apply. Rationale: Correct answer
does not fully immobilize the spine. Rationale: When applied correctly, the vest provides adequate immobilization of the spine.<br>
slide64. Review (2 of 2) It is impractical to apply a vest-type extrication device on a critically injured patient to remove him or her from a wrecked vehicle because it:
cannot be used on patients who are in their car. Rationale: When a patient is stable, the vest is a beneficial device for vehicle extrications.
does not provide adequate stabilization. Rationale: The vest provides adequate stabilization of the spine.<br>
slide65. Review Proper guidelines for correct reaching include all of the following, EXCEPT:
avoiding twisting your back.
avoiding hyperextension of your back.
keeping the back in a locked-in position.
reaching no more than 30 inches in front of your body.<br>
slide66. Review Answer: D
Rationale: When reaching, you should keep your back in a locked-in position, and avoid twisting or hyperextending your back. Do not reach more than 15–20 inches in front of your body.<br>
slide67. Review (1 of 2) Proper guidelines for correct reaching include all of the following, EXCEPT:
avoiding twisting your back. Rationale: Never twist your back while reaching or lifting.
avoiding hyperextension of your back. Rationale: Never bend or hyperextend your back.<br>
slide68. Review (2 of 2) Proper guidelines for correct reaching include all of the following, EXCEPT:
keeping the back in a locked-in position. Rationale: Always keep your back straight in a locked position.
reaching no more than 30 inches in front of your body. Rationale: Correct answer<br>
slide69. Review An injured hang glider is trapped at the top of a large mountain and must be evacuated to the ground. The terrain is very rough and uneven. Which of the following devices would be the safest and most appropriate to use?
Stair chair
Stokes basket
Scoop stretcher
Long backboard<br>
slide70. Review Answer: B
Rationale: A basket stretcher, also called a Stokes basket, should be used to carry patients over rough or uneven terrain that is inaccessible by ambulance. Its closed-ended sides protect the patient from falling out of the device.<br>
slide71. Review (1 of 2) An injured hang glider is trapped at the top of a large mountain and must be evacuated to the ground. The terrain is very rough and uneven. Which of the following devices would be the safest and most appropriate to use?
Stair chair Rationale: This is used to transfer a patient up and down stairs.
Stokes basket Rationale: Correct answer<br>
slide72. Review (2 of 2) An injured hang glider is trapped at the top of a large mountain and must be evacuated to the ground. The terrain is very rough and uneven. Which of the following devices would be the safest and most appropriate to use?
Scoop stretcher Rationale: This is designed to split into 2 or 4 pieces. The EMT must have access to both sides of the patient, and the patient should be lying on a relatively flat surface.
Long backboard Rationale: There is no protection for the patient from falling off or out of the device.<br>
slide73. Review When two EMTs are lifting a patient on a long backboard, they should:
lift the patient from the sides of the board.
make every attempt to lift with their backs.
position the strongest EMT at the foot of the board.
position the strongest EMT at the head of the board.<br>
slide74. Review Answer: D
Rationale: Since more than half of the patient's weight is distributed to the head end of a backboard or stretcher, you should always ensure that the strongest EMT is at that position. This will reduce the risk of injury to less strong personnel as well as the risk of dropping the patient.<br>
slide75. Review (1 of 2) When two EMTs are lifting a patient on a long backboard, they should:
lift the patient from the sides of the board. Rationale: This may cause the backboard to tip since the upper torso is heavier.
make every attempt to lift with their backs. Rationale: Never lift with your back. Always use your legs.<br>
slide76. Review (2 of 2) When two EMTs are lifting a patient on a long backboard, they should:
position the strongest EMT at the foot of the board. Rationale: The strongest EMT should be at the patient’s head, where the patient’s weight is greater.
position the strongest EMT at the head of the board. Rationale: Correct answer<br>
slide77. Review Which of the following techniques is considered to be an emergency move?
Extremity lift
Supine transfer
Firefighter's drag
Direct ground lift<br>
slide78. Review Answer: C
Rationale: The firefighter's drag is a one-person technique that is used when a patient must be removed from a life-threatening situation immediately.<br>
slide79. Review Which of the following techniques is considered to be an emergency move?
Extremity lift Rationale: This is a nonurgent move, helpful in narrow spaces.
Supine transfer Rationale: This is not considered an emergency move.
Firefighter's drag Rationale: Correct answer
Direct ground lift Rationale: This is a nonurgent move, used to carry a patient long distances to the cot.<br>
slide80. Review To extract a patient from the basement of a building, you must transport the patient up a flight of stairs. In doing this, you must ensure that:
the elevated head of the backboard goes first.
the backboard with the elevated foot end goes first.
the backboard is slightly tilted to the left to distribute weight.
the patient's feet are higher than his or her head, whichever end is carried first.<br>
slide81. Review Answer: A
Rationale: When you carry a patient upstairs or up an incline, you must ensure that the elevated head of the backboard or stretcher goes first. This will help to equally distribute the weight.<br>
slide82. Review (1 of 2) To extract a patient from the basement of a building, you must transport the patient up a flight of stairs. In doing this, you must ensure that:
the elevated head of the backboard goes first. Rationale: Correct answer
the backboard with the elevated foot end goes first. Rationale: Always try to carry the head higher to distribute the weight.<br>
slide83. Review (2 of 2) To extract a patient from the basement of a building, you must transport the patient up a flight of stairs. In doing this, you must ensure that:
the backboard is slightly tilted to the left to distribute weight. Rationale: Backboards are designed to carry a patient flat, and the weight is best distributed when the head is slightly elevated.
the patient's feet are higher than his or her head, whichever end is carried first. Rationale: Carries are easier with the patient’s head first and elevated for distribution of the patient’s weight.<br>
slide84. Review If an injured patient needs to be moved but is not in immediate danger from fire or building collapse, you should first:
order the equipment you need for extrication.
check the patient’s airway, breathing, and circulation.
remove the patient with the rapid extrication technique.
determine the number of people you will need to move the patient.<br>
slide85. Review Answer: B
Rationale: The only time your attention should be directed away from the primary assessment of the patient is when the patient’s life or your life is in immediate danger.<br>
slide86. Review (1 of 2) If an injured patient needs to be moved but is not in immediate danger from fire or building collapse, you should first:
order the equipment you need for extrication. Rationale: This is not the first thing you should do.
check the patient’s airway, breathing, and circulation. Rationale: Correct answer<br>
slide87. Review (2 of 2) If an injured patient needs to be moved but is not in immediate danger from fire or building collapse, you should first:
remove the patient with the rapid extrication technique. Rationale: The patient is not in immediate danger, so this is not needed.
determine the number of people you will need to move the patient. Rationale: After the ABCs have been checked, then the EMT can determine the safest method of extrication.<br>
slide88. Review The rapid extrication technique is a:
nonurgent technique to remove a patient from a vehicle.
technique used to transfer a patient from a bed to a stretcher.
technique used to lift a patient with no suspected spinal injury onto a stretcher.
technique used to quickly remove a patient from a vehicle and onto a backboard.<br>
slide89. Review Answer: D
Rationale: By using the rapid extrication technique, a seriously injured patient can be moved from a sitting position in a vehicle to a supine position on a backboard while protecting the spine at the same time.<br>
slide90. Review (1 of 2) The rapid extrication technique is a:
nonurgent technique to remove a patient from a vehicle. Rationale: This technique is considered to be an urgent move.
technique used to transfer a patient from a bed to a stretcher. Rationale: This technique is used to move a patient from a vehicle to a backboard.<br>
slide91. Review (2 of 2) The rapid extrication technique is a:
technique used to lift a patient with no suspected spinal injury onto a stretcher. Rationale: This is not a lifting technique. The patient is placed on a backboard, not a stretcher.
technique used to quickly remove a patient from a vehicle and onto a backboard. Rationale: Correct answer<br>