
HTML 2 HTML Hypertext Markup Language (HTML) a







Description: HTML 2 HTML Hypertext Markup Language (HTML) a tag-based language used to format static content, which is unchanging information. Dynamic content, on the other hand, uses scripting languages, applets, Flash files to interact with the user.
Related Topics
Download Presentation
"HTML 2 HTML Hypertext Markup Language (HTML) a" is the property of its rightful owner. Permission is granted to download and print the materials on this website for personal, non-commercial use only, and to display it on your personal computer provided you do not modify the materials and that you retain all copyright notices contained in the materials. By downloading content from our website, you accept the terms of this agreement.
Presentation Transcript
slide1. HTML<br>
slide2. 2 HTML Hypertext Markup Language (HTML) a tag-based language used to format static content, which is unchanging information.
Dynamic content, on the other hand, uses scripting languages, applets, Flash files to interact with the user.
We will get to all that later in the semester.<br>
slide3. 3 HTML HTML files have file name extensions of either .htm (from the older three-character file name extension limit) or .html.
HTML files are ASCII files; that is, text-based files.<br>
slide4. 4 HTML History HTML, developed by Tim Boerners-Lee, and (this is important!) charitably released in 1989 for free use, no copyright restrictions.
Boerners-Lee formed the W3C to manage the specs.
Three releases: 1.0, 2.0, 3.0, 4.0 (1998)<br>
slide5. 5 HTML History Then there was XHTML 1.0 (2000):
Created newer (many silly) standards (more later).
Incorporated support for XML (a data transport language).
Was XHTML really all that different? Certainly not different enough to support the claims that it was a whole new language.<br>
slide6. 6 HTML History XHTML 1.0 was the universal standard, for a while.
Then two competing groups spent several years working on two competing standards, HTML5 and XHTML 2.0.
It actually got nasty – each group hated the other.<br>
slide7. 7 HTML History XHTML 2.0 first:
The XHTML 2.0 group, authorized by the W3C, insisted it wasn’t HTML anymore, it was a whole new language. (Not.)
I heard a couple of them present at a conference –pretty darn arrogant.
Though XHTML 2.0 was essentially HTML, it was not fully backwards compatible with older websites.<br>
slide8. 8 HTML History HTML5:
In 2004, a Boerners-Lee group reintroduced the idea of evolving HTML4 into HTML5.
W3C rejected that proposal, continuing with XHTML.
Apple, Mozilla, and Opera (and Boerners-Lee) formed a group called WHATWG to continue evolving HTML5 anyway. Guiding principle:
Technologies need to be backwards compatible and oriented toward the way the world is, not the way we want the world to be.<br>
slide9. 9 HTML History HTML5, continued:
In 2006, the W3C agreed to participate in development of HTML5.
Finally, in Spring 2010, Microsoft joined the HTML5 working group.
In Spring 2011, the W3C stopped all development on XHTML 2.0 and declared HTML 5.0 the future standard.
All major browser manufacturers now on board.<br>
slide10. 10 HTML History HTML5, continued:
HTML5 will incorporate many of the best elements of XHTML 2.0.
Messier but more reasonable specifications, in order to be backward compatible with the quite messy evolution of HTML over the decades.
Invalid code that would have been just ignored in the past will be disallowed and flagged as errors in the future.<br>
slide11. 11 HTML History HTML5, continued:
Parts of HTML5 supported in newest browsers, some parts not available for many years (2020?)
This may be the last release number – just an evolution, bit by bit, from now on.
HTML5.0 evolving specifications http://dev.w3.org/html5/spec/Overview.html<br>
slide12. 12 HTML History HTML5 includes/will include support for:
Graphic effects like filters, rounded corners, and enhanced transparency.
Standardized sections such as “navigation” and “footer.”
Scalable Vector Graphics (SVG): vector and raster images and their behaviors defined in XML text files, so they can be scripted.
<canvas> (a drawing screen) – raster only, so drawn elements cannot be manipulated in an SVG-like way.<br>
slide13. 13 HTML History Native animation and video (replacing Flash???).
“Flash Professional Toolkit for CreateJS” plug-in allows you to create in Flash but export to HTML5/JavaScript: http://www.adobe.com/devnet/createjs/articles/using-flash-pro-toolkit-createjs.html
<video> tag
Thirty new tags, plus lots of new attributes for existing tags.<br>
slide14. 14 HTML History HTML5 and “Standards”
Trying to avoid the “browser wars” of the past, when we had to “sniff the browser” and write different versions of the page for different browsers.
BUT… the standards will be implemented at different rates by different browser manufacturers over the next decade, so still problematic.<br>
slide15. 15 HTML History Probably even more problematic now than 5 years ago, because mobile browsers, too.
For further discussion, see
http://www.adobe.com/inspire/2012/04/what-are-web-standards.html and
http://www.adobe.com/inspire/2012/08/web-standards-primer.html?trackingid=JZYSJ
IE 8 supports only bits of HTML5 standards – IE 9 and up are more compliant.
What to do? Use plug-ins or degrade gracefully.<br>
slide16. 16 HTML History Resources (more on some of these in JavaScript lectures):
Demos at Chrome Experiments http://www.chromeexperiments.com/
Articles and tutorials at Google’s HTML5 Rocks http://www.html5rocks.com/en/
Browser compatibility tables at HTML5 Please http://html5please.com/
Browser compatibility tables at CanIUse http://caniuse.com/
Tutorials on the Adobe Developer Connection http://www.adobe.com/devnet.html , especially Adobe, Standards, and HTML5 http://www.adobe.com/devnet/html5/articles/adobe-standards-html5.html
HTML5: Edition for Web Authors: http://www.w3.org/TR/2011/WD-html5-author-20110809/
JavaScript feature detection library, Modernizr http://modernizr.com/<br>
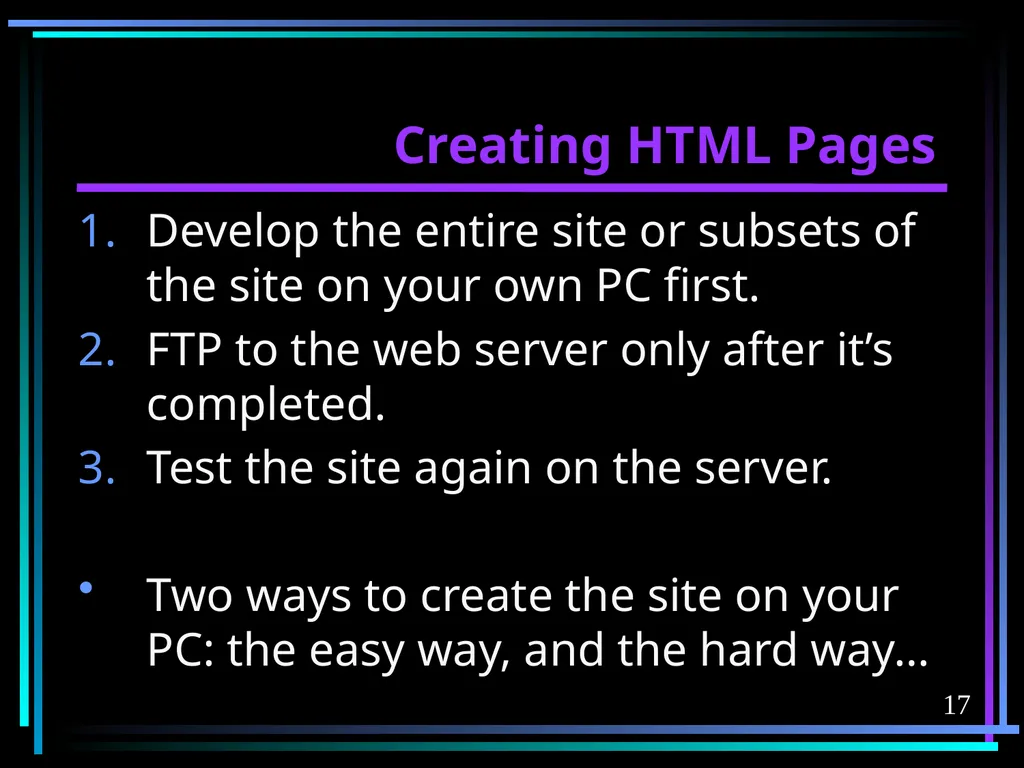
slide17. 17 Creating HTML Pages Develop the entire site or subsets of the site on your own PC first.
FTP to the web server only after it’s completed.
Test the site again on the server.
Two ways to create the site on your PC: the easy way, and the hard way…<br>
slide18. 18 Creating HTML Pages Easy way: Create the page visually using an integrated development environment (IDE), which translates your visual design to HTML.
Adobe’s Dreamweaver – the Cadillac of editors, in our labs.
Microsoft’s Expression Web, a part of Microsoft DreamSpark software program– see the CS website for information.
Seamonkey’s free HTML editor, in the labs, http://www.seamonkey-project.org/<br>
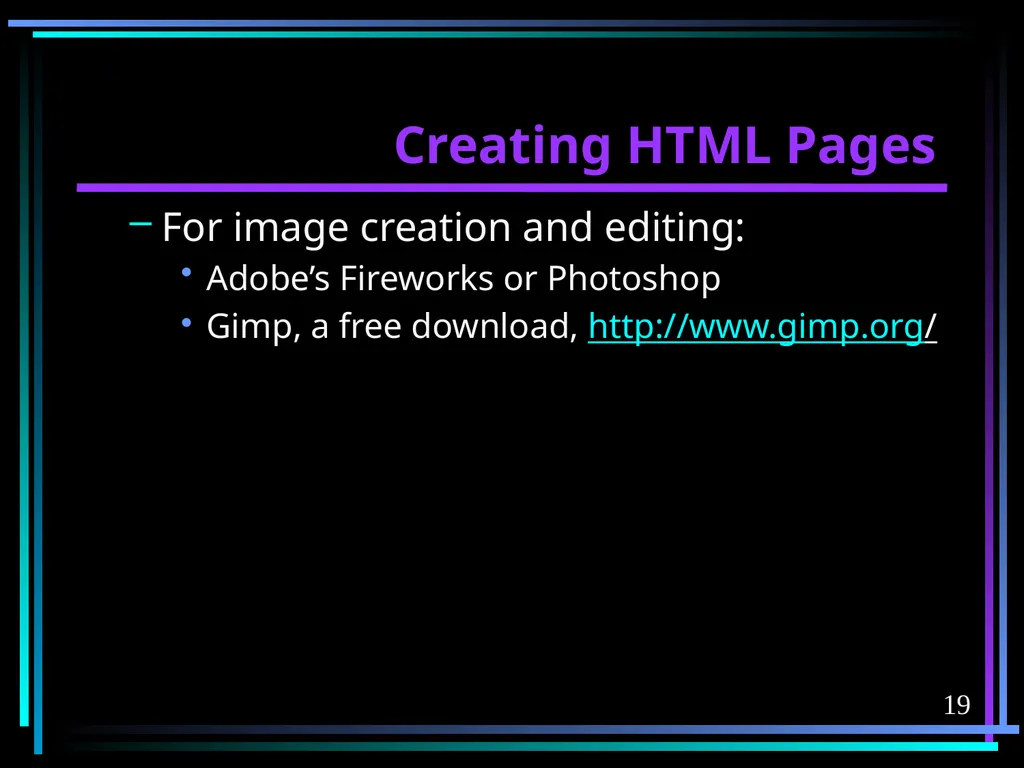
slide19. 19 Creating HTML Pages For image creation and editing:
Adobe’s Fireworks or Photoshop
Gimp, a free download, http://www.gimp.org/<br>
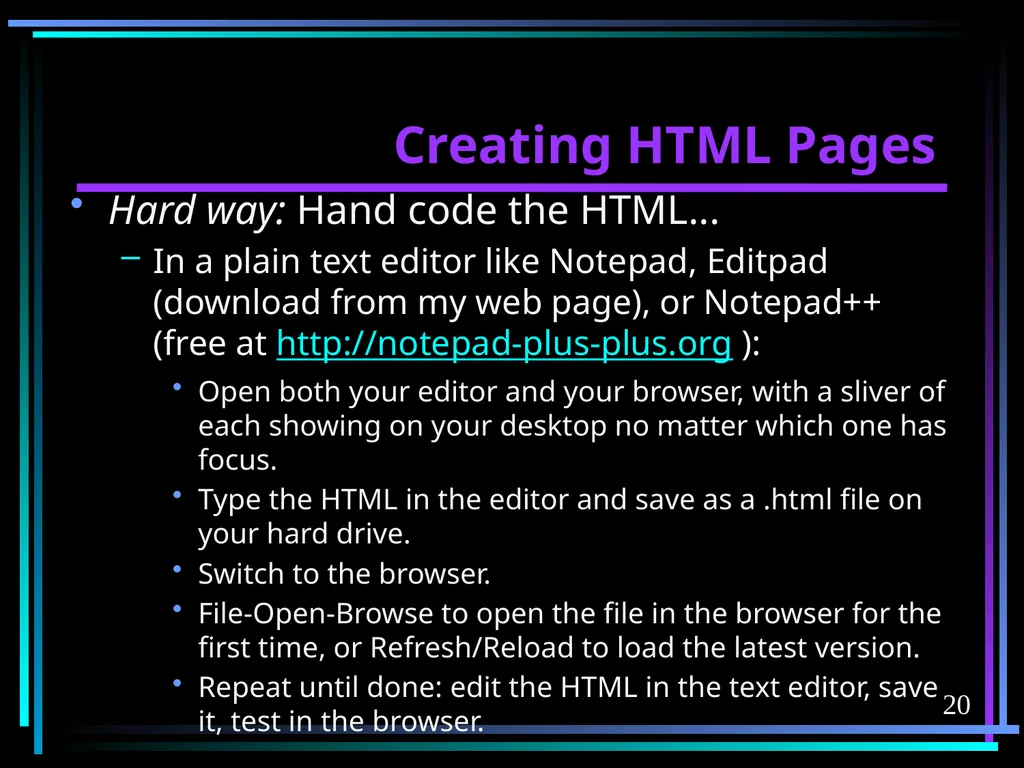
slide20. 20 Creating HTML Pages Hard way: Hand code the HTML...
In a plain text editor like Notepad, Editpad (download from my web page), or Notepad++ (free at http://notepad-plus-plus.org ):
Open both your editor and your browser, with a sliver of each showing on your desktop no matter which one has focus.
Type the HTML in the editor and save as a .html file on your hard drive.
Switch to the browser.
File-Open-Browse to open the file in the browser for the first time, or Refresh/Reload to load the latest version.
Repeat until done: edit the HTML in the text editor, save it, test in the browser.<br>
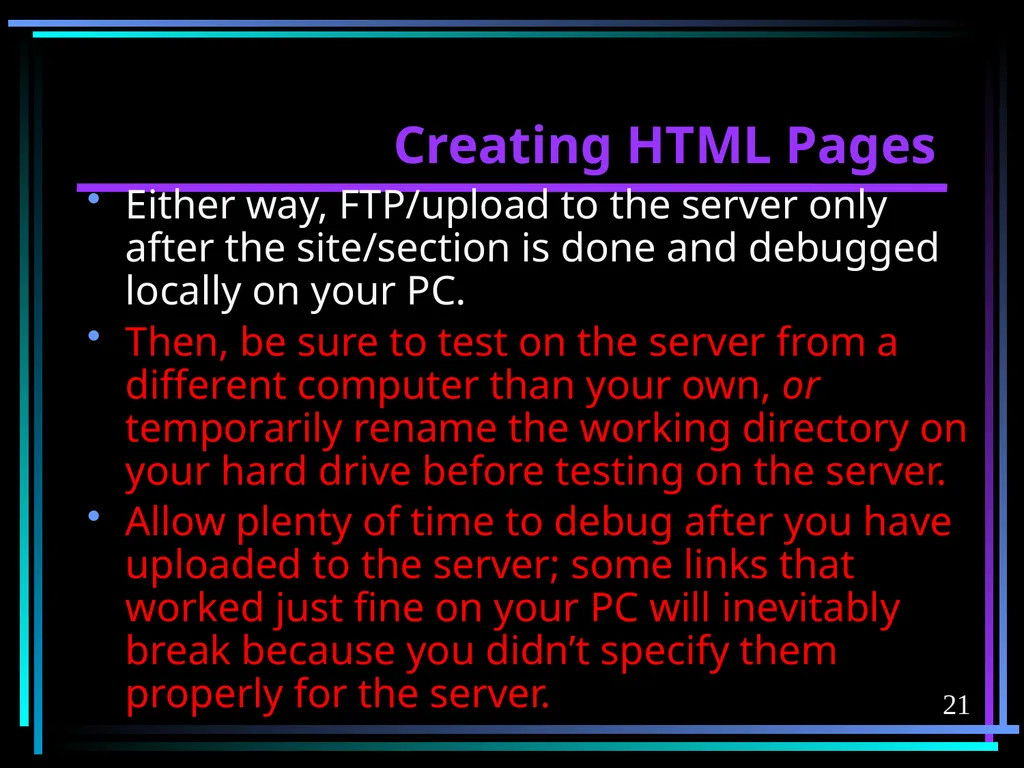
slide21. 21 Creating HTML Pages Either way, FTP/upload to the server only after the site/section is done and debugged locally on your PC.
Then, be sure to test on the server from a different computer than your own, or temporarily rename the working directory on your hard drive before testing on the server.
Allow plenty of time to debug after you have uploaded to the server; some links that worked just fine on your PC will inevitably break because you didn’t specify them properly for the server.<br>
slide22. 22 Creating HTML Pages Do not use a word processor to create HTML files.
Native word processor files, like .wpd and .doc files, have hidden formatting characters that will choke the browser.
Could do a “save as txt/ASCII”, though, to strip out formatting, leaving just the text.
Could do a “save as HTML”, but the code will be unbelievably ugly!
Do not use a UNIX text editor to create HTML or CSS files – puts everything on one line for “View Source,” and I won’t grade it or help debug it that way.<br>
slide23. 23 Creating HTML Pages Can use a specialized HTML editor to validate the HTML and speed up repetitive tasks.
Check out the free editor and tools at www.chami.com/html-kit .
To check syntax, try the utilities at:
http://watson.addy.com (although I disagree with many of its syntax findings)
www.w3c.org
HTML online reference: http://www.w3.org/2009/cheatsheet/<br>
slide24. 24 If You Have an IDE, Why Bother to Learn HTML? IDEs will not always do what you want them to do, so you have to tweak the code they generate.
Sometimes it’s a whole lot faster to hand-code a tag than to create it in the IDE.
Knowing HTML is absolutely essential when debugging HTML created by IDEs.<br>
slide25. 25 Introduction We won’t cover everything in HTML; we will cover the basics, and you can look up anything else when the need arises.
However, you will be tested on the HTML. The code you are expected to know will be in the HTML Study Guide on my web page.<br>
slide26. 26 Introduction In these PowerPoint presentations, HTML tags (commands) appear in green; while the results that display in the browser appear in yellow.
Formatting is often compromised because there isn’t enough room on the screen to format properly.<br>
slide27. 27 Introduction Designed originally to define structure (the way the parts are inherently related), not presentation/formatting (the way the document looks in the browser). Examples:
Structure : top-level header, sub-head, paragraph text, tables, table cells, bulleted lists, etc.
Presentation : color, size, positioning, etc.<br>
slide28. 28 Introduction How to tell the difference between structure and presentation?
If relevant to a blind person, it’s structure.
If not relevant to a blind person, it’s presentation.<br>
slide29. 29 Introduction The name of the homepage should be index.htm or index.html.
That’s the default file that a web server delivers if the browser doesn’t specify the name.
Search engines look for that file.
Please get in the habit by using that name for your homepage for this class.<br>
slide30. 30 Introduction If you have errors in your HTML, the browser might still attempt to display your page.
“Attempt” is the key word here; the page might not display at all, or it might not display as you intended.
Browsers don’t give you error messages the way compilers do.<br>
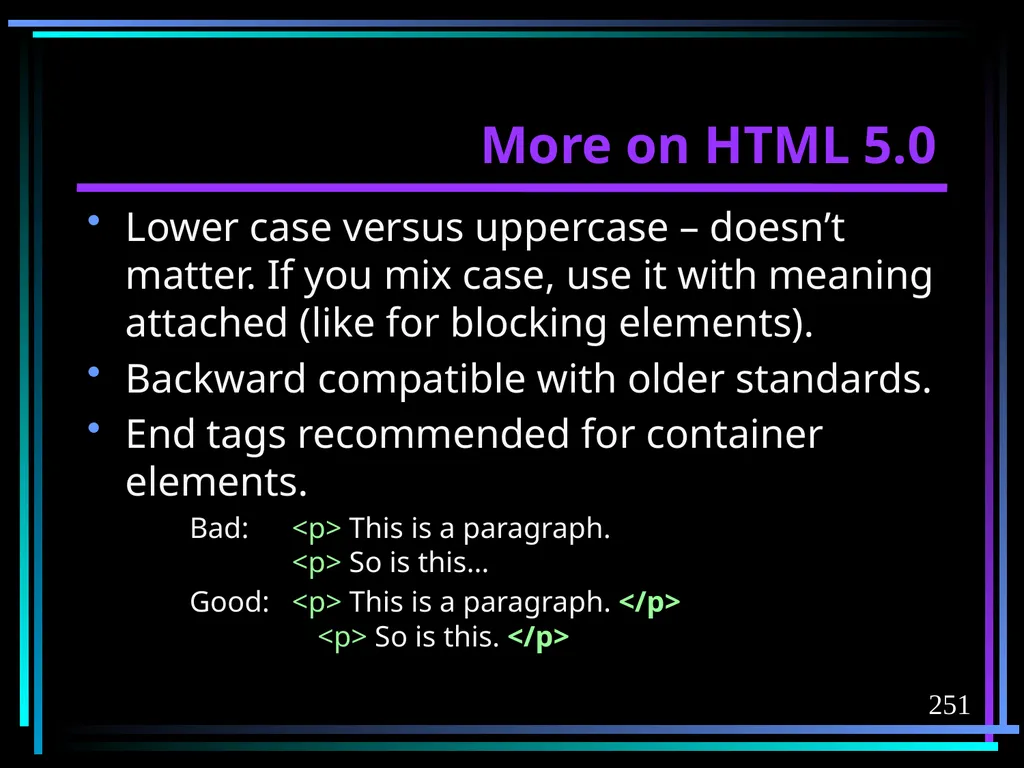
slide31. 31 Introduction We will be enforcing “well-formed HTML”; that is, you must follow the rules (even when the tags will work without following the rules) and do proper formatting.
We will be following the newer HTML standards as they are widely supported by current browsers.<br>
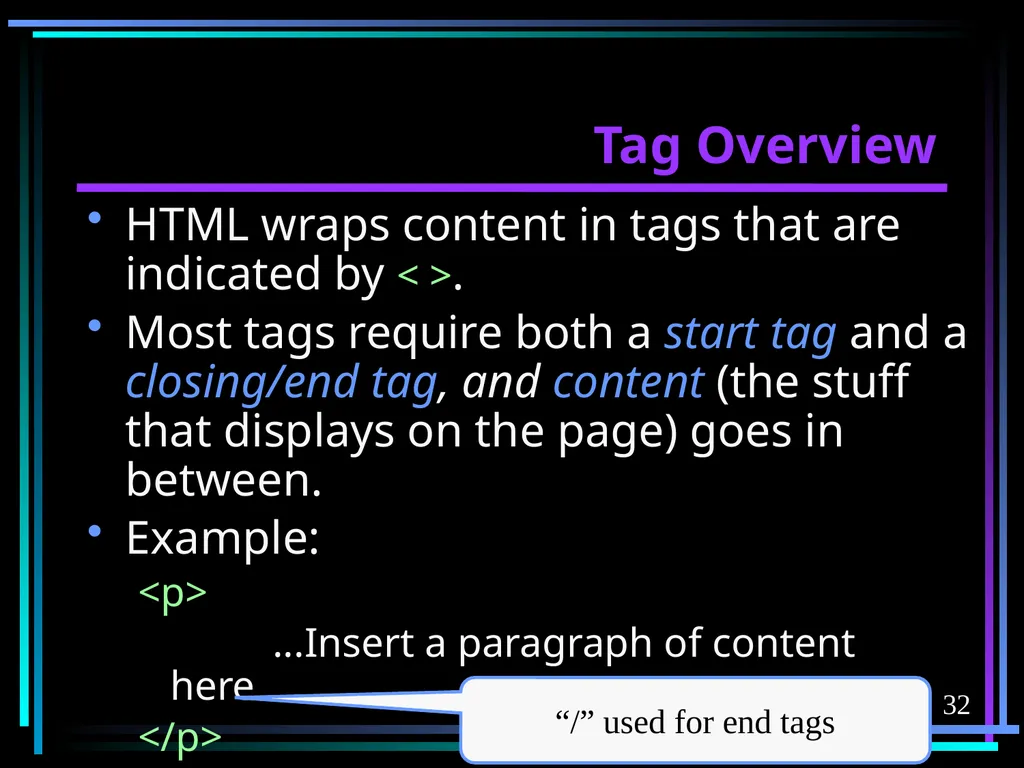
slide32. 32 Tag Overview HTML wraps content in tags that are indicated by < >.
Most tags require both a start tag and a closing/end tag, and content (the stuff that displays on the page) goes in between.
Example:
<p>
...Insert a paragraph of content here ...
</p> “/” used for end tags<br>
slide33. 33 Tag Overview A start tag and its end tag are viewed as a container.
In some situations, in some browsers, the browser may forgive you if you forget an end tag, but other browsers in other situations don’t.
Well-formed HTML following the newer standards requires the end tag even if the browser lets you get away with omitting it.<br>
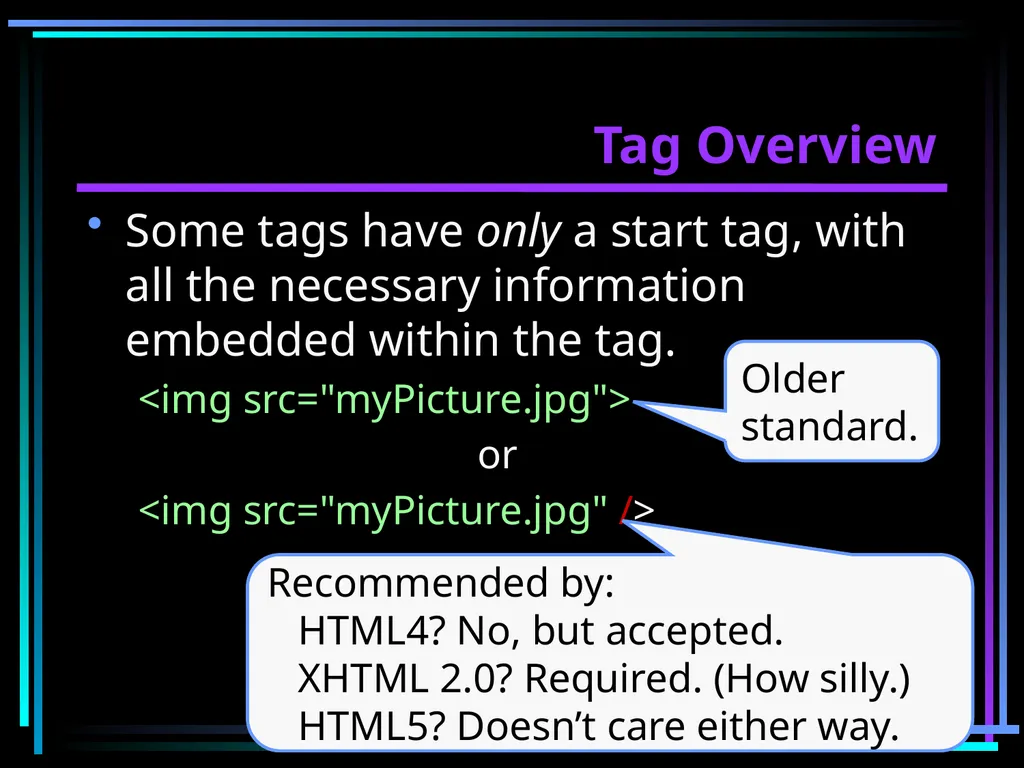
slide34. 34 Tag Overview Some tags have only a start tag, with all the necessary information embedded within the tag.
<img src="myPicture.jpg">
or
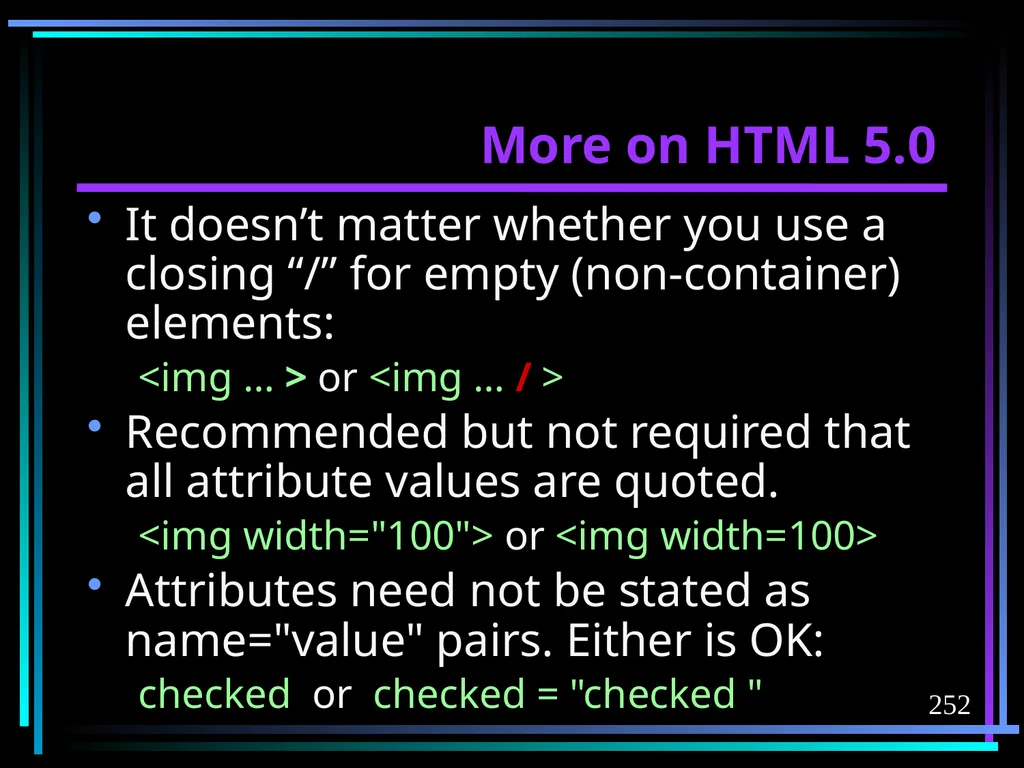
<img src="myPicture.jpg" /> Recommended by: HTML4? No, but accepted. XHTML 2.0? Required. (How silly.) HTML5? Doesn’t care either way. Older standard.<br>
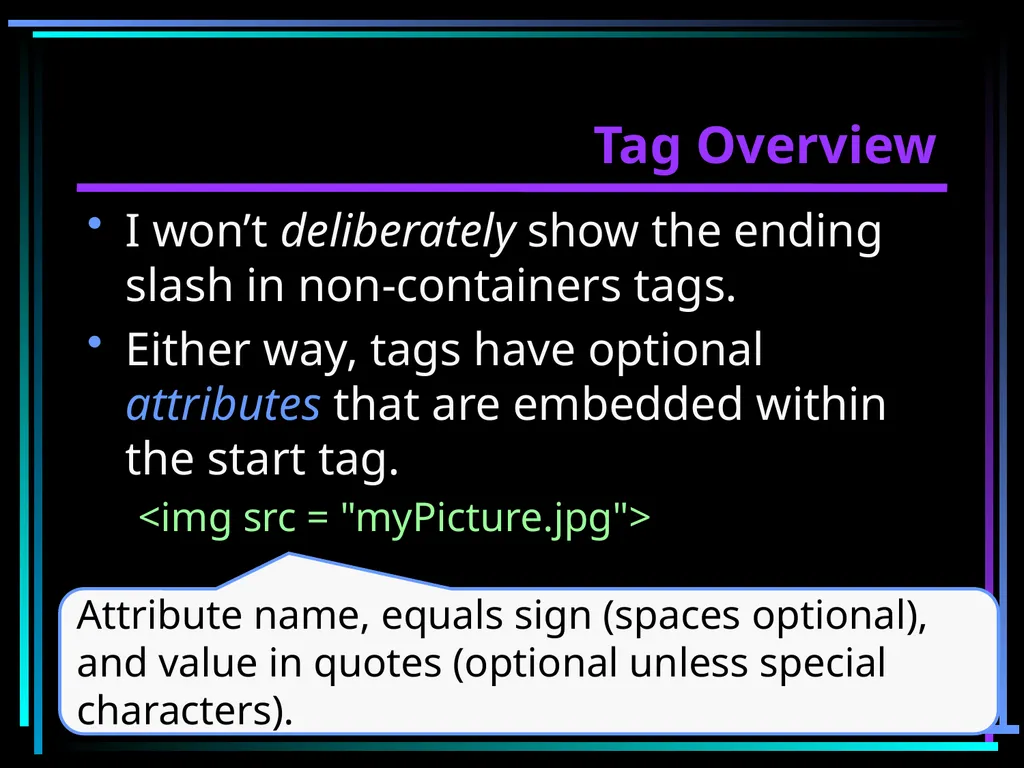
slide35. 35 Tag Overview I won’t deliberately show the ending slash in non-containers tags.
Either way, tags have optional attributes that are embedded within the start tag.
<img src = "myPicture.jpg"> Attribute name, equals sign (spaces optional), and value in quotes (optional unless special characters).<br>
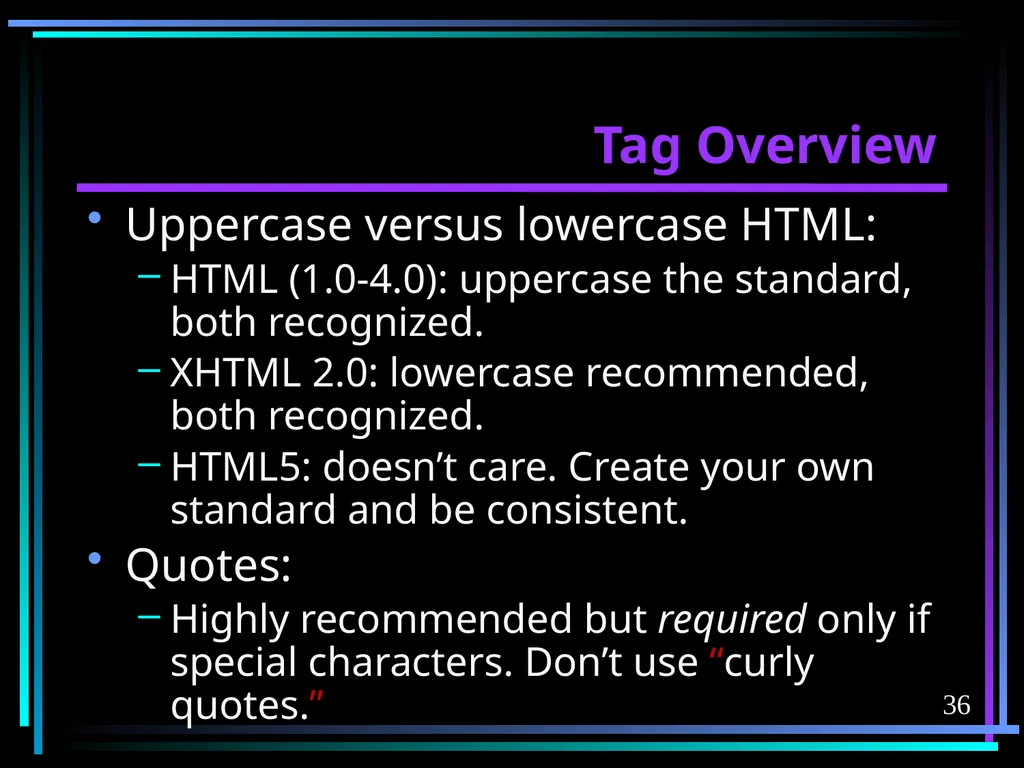
slide36. 36 Tag Overview Uppercase versus lowercase HTML:
HTML (1.0-4.0): uppercase the standard, both recognized.
XHTML 2.0: lowercase recommended, both recognized.
HTML5: doesn’t care. Create your own standard and be consistent.
Quotes:
Highly recommended but required only if special characters. Don’t use “curly quotes.”<br>
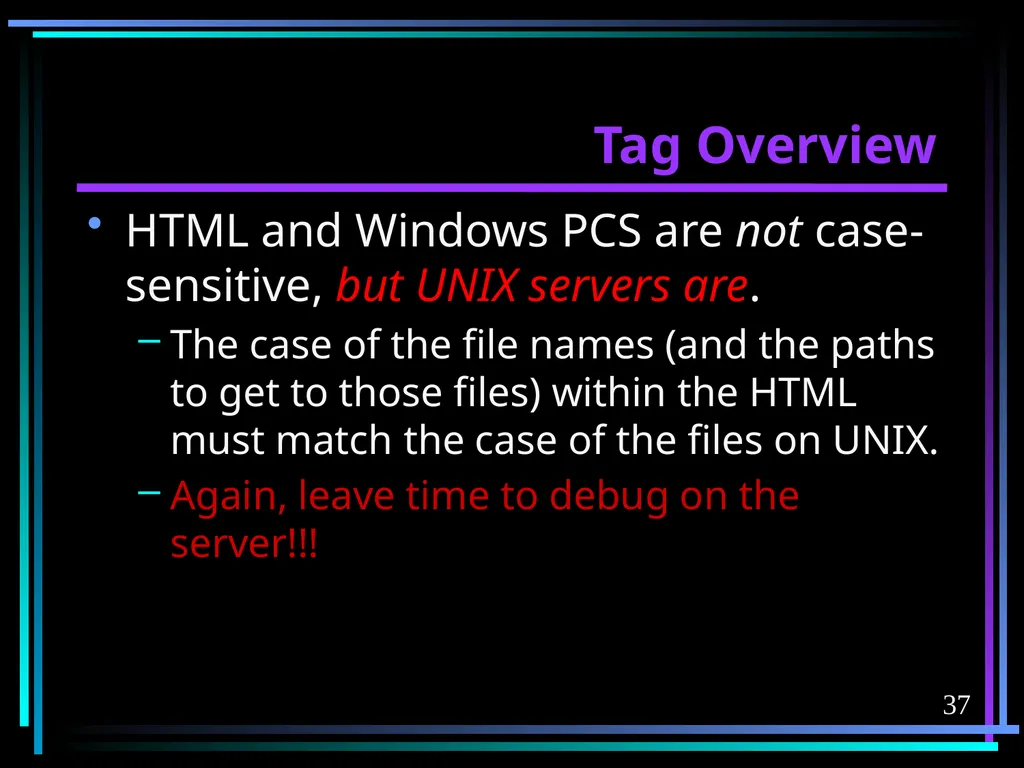
slide37. 37 Tag Overview HTML and Windows PCS are not case-sensitive, but UNIX servers are.
The case of the file names (and the paths to get to those files) within the HTML must match the case of the files on UNIX.
Again, leave time to debug on the server!!!<br>
slide38. 38 Tag Overview Common file naming methods:
fileName.html (Hungarian notation/camel case)
file_name.html
In any case, be consistent!<br>
slide39. 39 Documentation Tags Tags that start with <! never display within the browser.
Two types:
Comments
DOCTYPE tag<br>
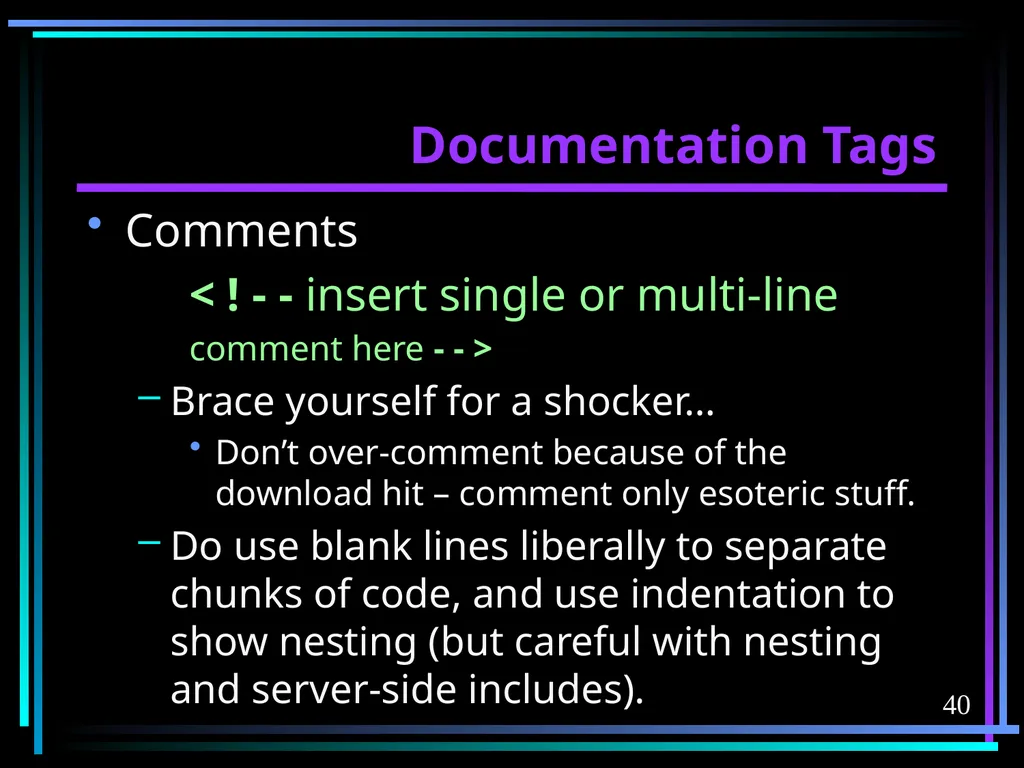
slide40. 40 Documentation Tags Comments
< ! - - insert single or multi-line
comment here - - >
Brace yourself for a shocker…
Don’t over-comment because of the download hit – comment only esoteric stuff.
Do use blank lines liberally to separate chunks of code, and use indentation to show nesting (but careful with nesting and server-side includes).<br>
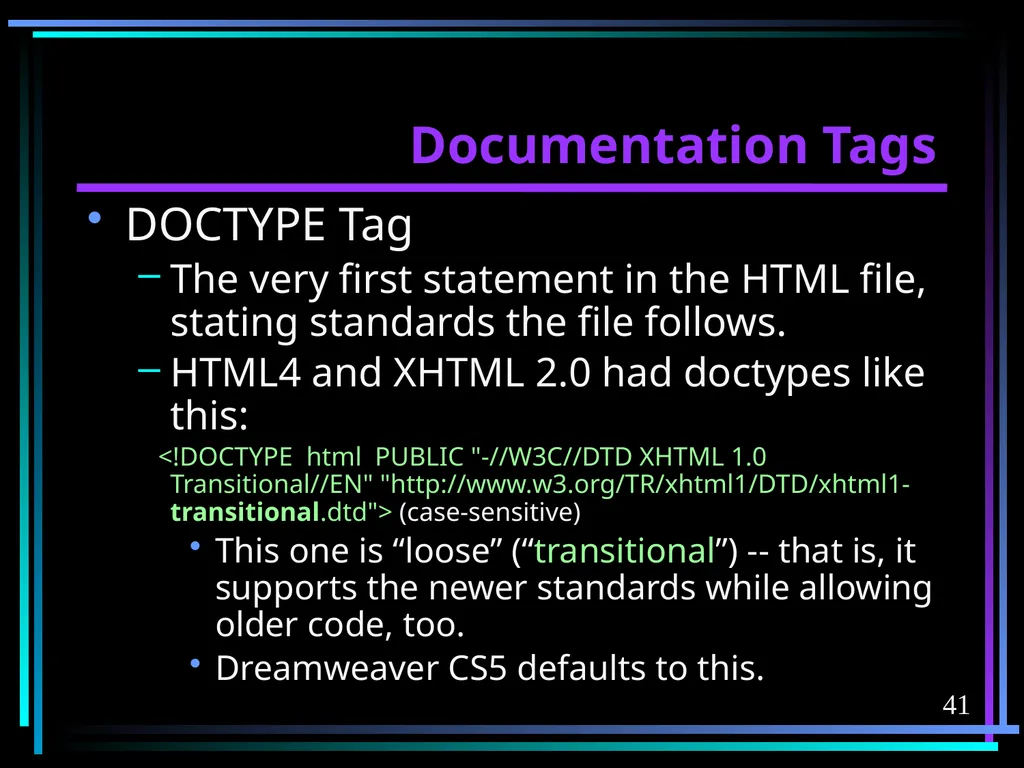
slide41. 41 DOCTYPE Tag
The very first statement in the HTML file, stating standards the file follows.
HTML4 and XHTML 2.0 had doctypes like this:
<!DOCTYPE html PUBLIC "-//W3C//DTD XHTML 1.0 Transitional//EN" "http://www.w3.org/TR/xhtml1/DTD/xhtml1-transitional.dtd"> (case-sensitive)
This one is “loose” (“transitional”) -- that is, it supports the newer standards while allowing older code, too.
Dreamweaver CS5 defaults to this. Documentation Tags<br>
slide42. 42 DOCTYPE Tag
HTML5:
<!DOCTYPE html> (woo-hoo!)
Can choose as an option in Dreamweaver, under “Edit” > “Preferences” > “New Document”
If in doubt, use whatever Dreamweaver puts in for you, for now. Avoid “strict” (instead of “transitional”) – may well make your code break. Documentation Tags<br>
slide43. HTML Tags<br>
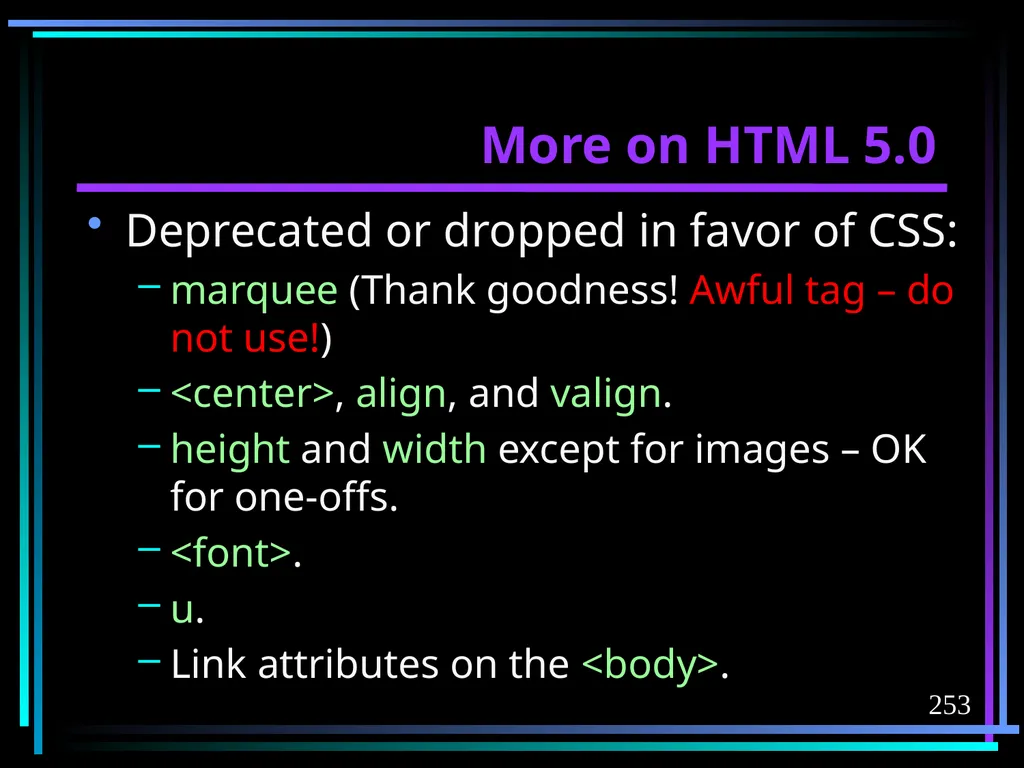
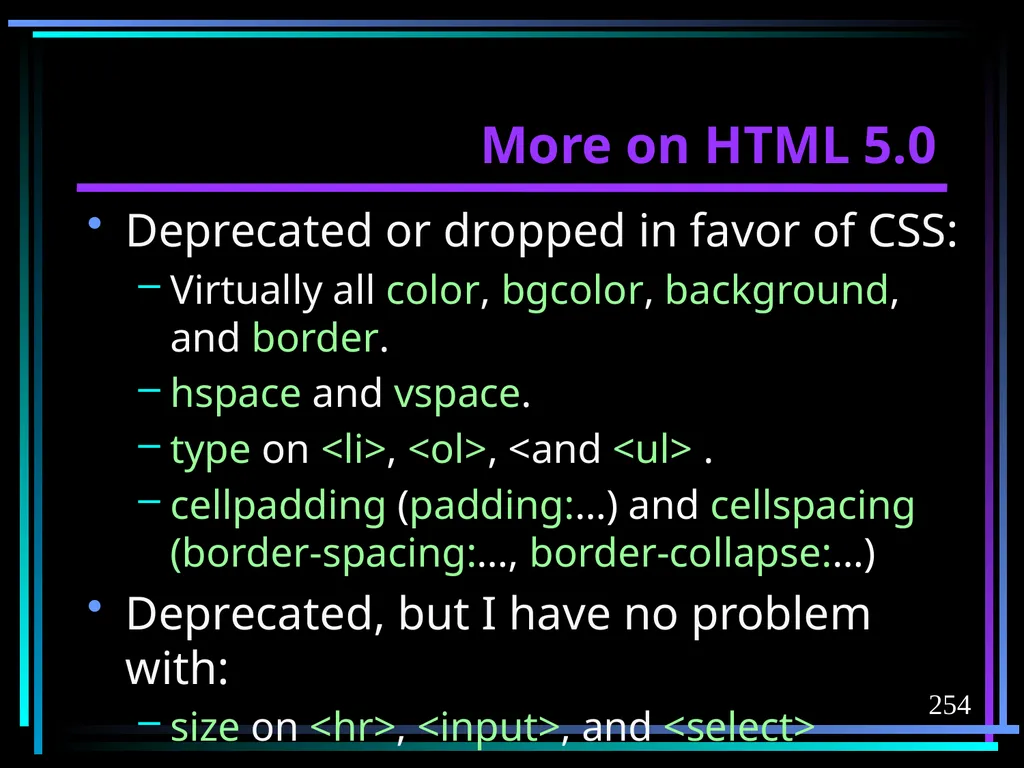
slide44. 44 Deprecated Tags and Attributes Deprecated tags and attributes are older versions whose use is not recommended even though they will still work in modern browsers.
We will learn the deprecated tags and attributes, because you will still encounter them on the web.
You can use them in your first HTML assignment, then remove all of them for your CSS assignment. (Fastest way I know to make you a believer in CSS!)<br>
slide45. 45 Deprecated Tags and Attributes No deprecated tags or attributes in your personal or group website – 1 point off for each instance I find.
Let's look at a simple HTML file…<br>
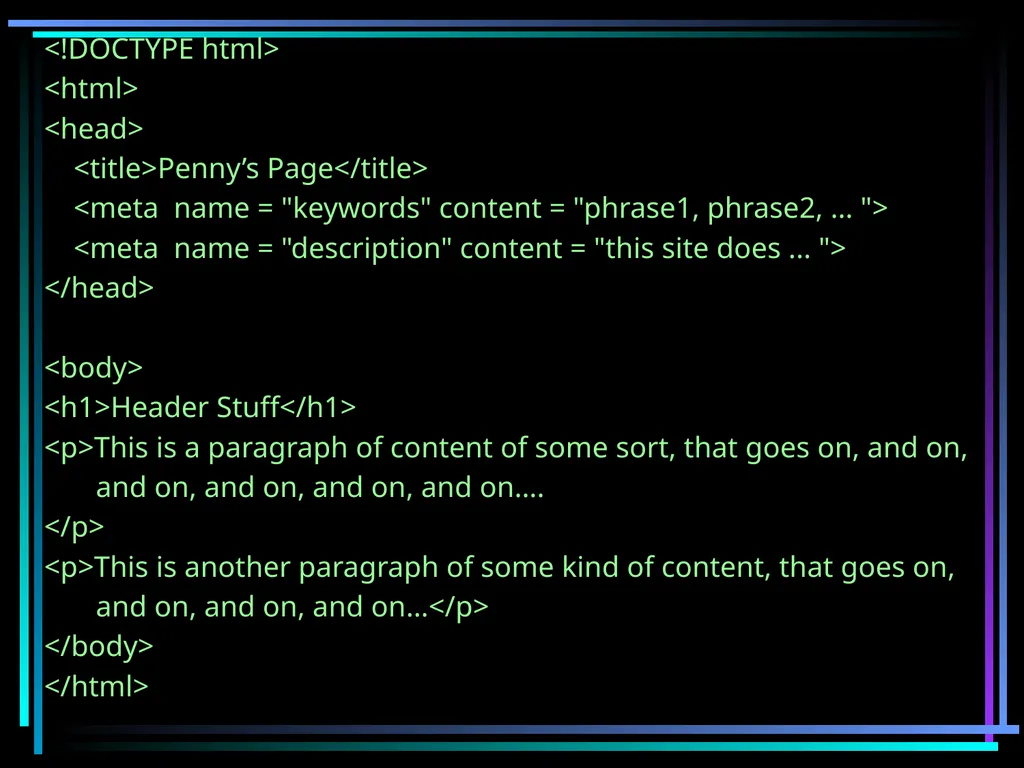
slide46. <!DOCTYPE html>
<html>
<head>
<title>Penny’s Page</title>
<meta name = "keywords" content = "phrase1, phrase2, … ">
<meta name = "description" content = "this site does ... ">
</head>
<body>
<h1>Header Stuff</h1>
<p>This is a paragraph of content of some sort, that goes on, and on,
and on, and on, and on, and on….
</p>
<p>This is another paragraph of some kind of content, that goes on,
and on, and on, and on…</p>
</body>
</html><br>
slide47. 47 Loading an HTML File into the Browser Loaded sequentially, line by line, displaying each line of HTML before moving on to the next line.
A given HTML tag has no knowledge of the line before it or the line after it.
So, with HTML alone, you can’t jump around the way you can with most programming languages, because HTML isn’t a programming language.<br>
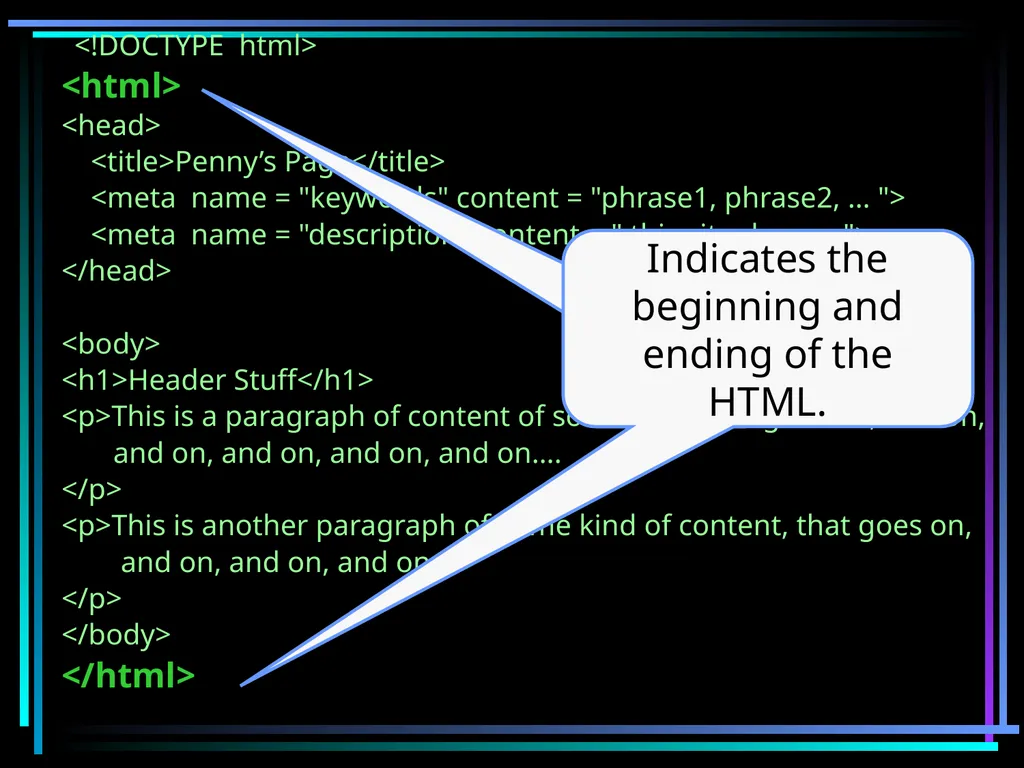
slide48. <!DOCTYPE html>
<html>
<head>
<title>Penny’s Page</title>
<meta name = "keywords" content = "phrase1, phrase2, … ">
<meta name = "description" content = " this site does ... ">
</head>
<body>
<h1>Header Stuff</h1>
<p>This is a paragraph of content of some sort, that goes on, and on,
and on, and on, and on, and on….
</p>
<p>This is another paragraph of some kind of content, that goes on,
and on, and on, and on…
</p>
</body>
</html><br>
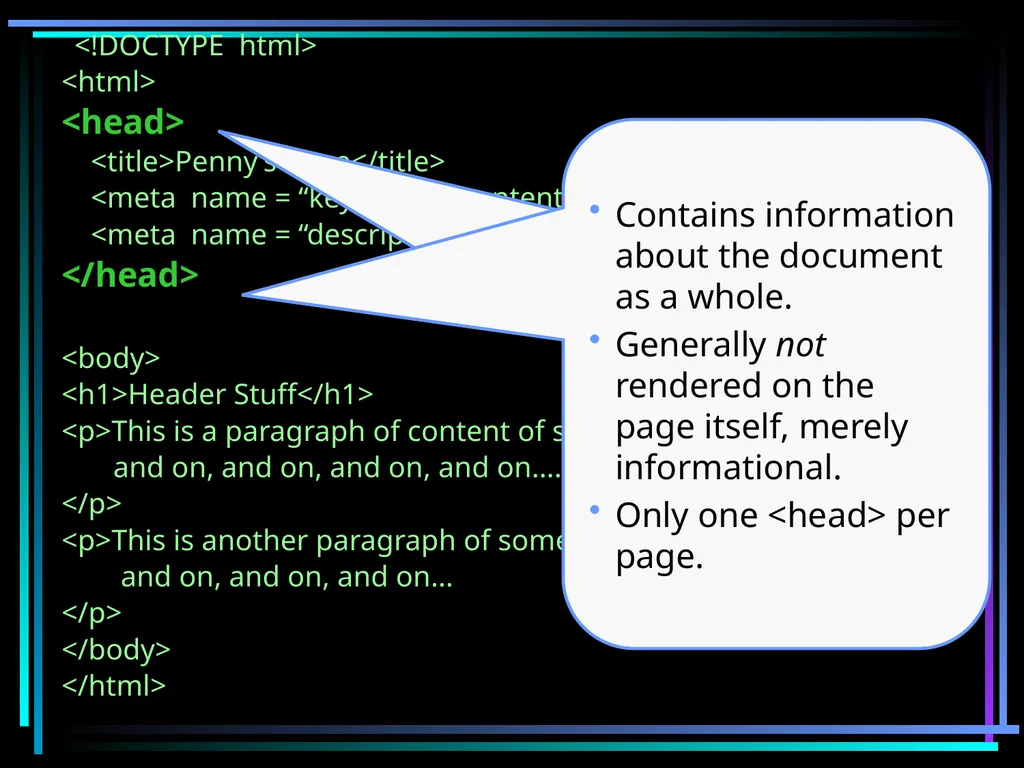
slide49. <!DOCTYPE html>
<html>
<head>
<title>Penny’s Page</title>
<meta name = “keywords” content = “ phrase1, phrase2, …”>
<meta name = “description” content = “this site does ...”>
</head>
<body>
<h1>Header Stuff</h1>
<p>This is a paragraph of content of some sort, that goes on, and on,
and on, and on, and on, and on….
</p>
<p>This is another paragraph of some kind of content, that goes on,
and on, and on, and on…
</p>
</body>
</html><br>
slide50. <!DOCTYPE html>
<html>
<head>
<title>Penny’s Page</title>
<meta name = "keywords" content = "phrase1, phrase2, … ">
<meta name = "description" content = "this site does ... ">
</head>
<body>
<h1>Header Stuff</h1>
<p>This is a paragraph of content of some sort, that goes on, and on,
and on, and on, and on, and on….
</p>
<p>This is another paragraph of some kind of content, that goes on,
and on, and on, and on…
</p>
</body>
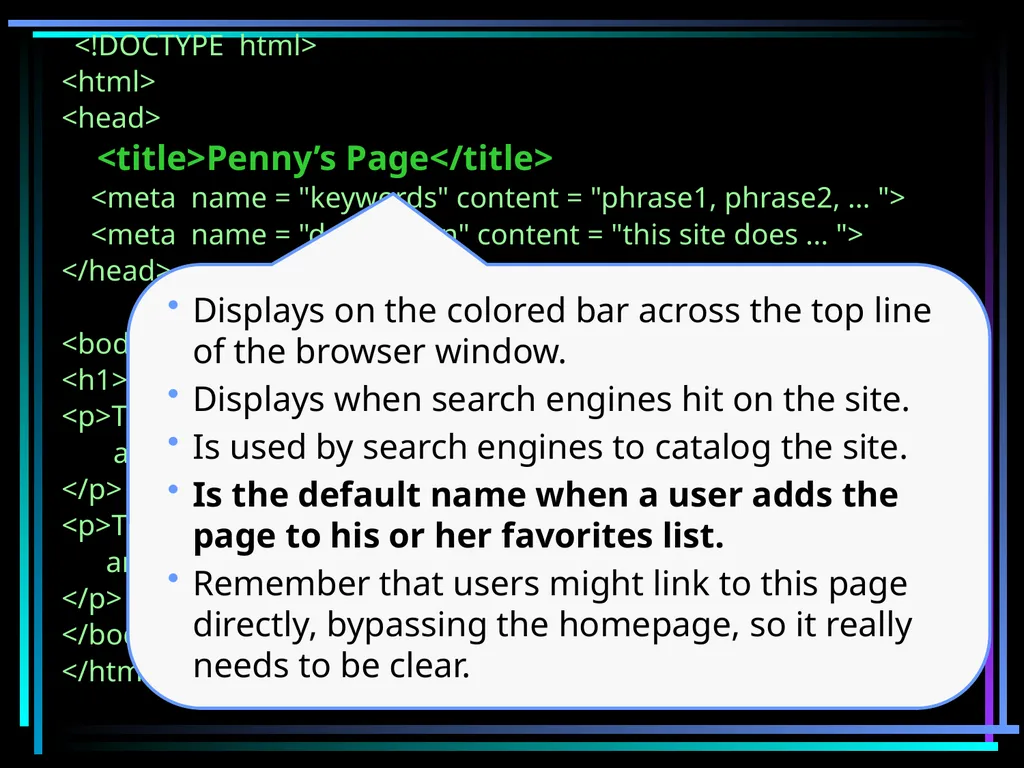
</html> Displays on the colored bar across the top line of the browser window.
Displays when search engines hit on the site.
Is used by search engines to catalog the site.
Is the default name when a user adds the page to his or her favorites list.
Remember that users might link to this page directly, bypassing the homepage, so it really needs to be clear.<br>
slide51. <!DOCTYPE html>
<html>
<head>
<title>Penny’s Page</title>
<meta name = "keywords" content = "phrase1, p2, … ">
<meta name = "description" content = "this site does ... ">
</head>
<body>
<h1>Header Stuff</h1>
<p>This is a paragraph of content of some sort, that goes on, and on,
and on, and on, and on, and on….
</p>
<p>This is another paragraph of some kind of content, that goes on,
and on, and on, and on…
</p>
</body>
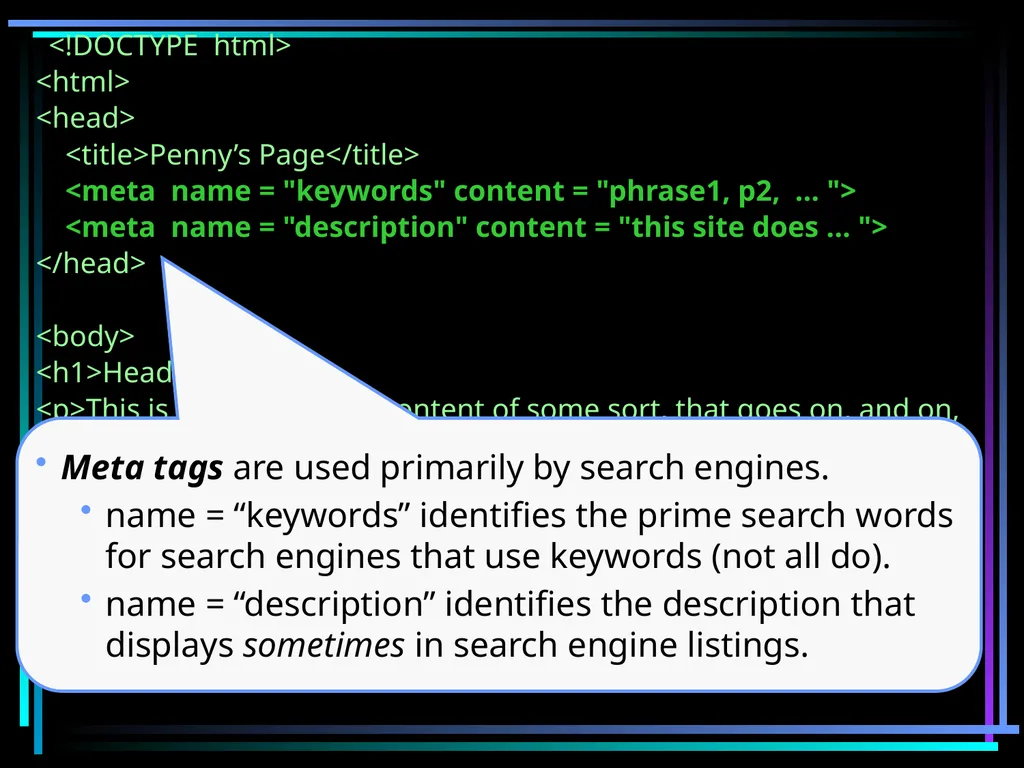
</html> Meta tags are used primarily by search engines.
name = “keywords” identifies the prime search words for search engines that use keywords (not all do).
name = “description” identifies the description that displays sometimes in search engine listings.<br>
slide52. <!DOCTYPE HTML PUBLIC “-//W3C/DTD HTML4.0//EN”
“http://www.w3c.org/TR/REC-html40/strict.dtd”>
<html>
<head>
<title>penny’s page</title>
<meta name = “keywords” content = “ phrase1, phrase2, …”>
<meta name = “description” content = “this site does ...”>
</head>
<body >
<h1>Header Stuff</h1>
<p>This is a paragraph of content of some sort, that goes on, and on,
and on, and on, and on, and on….
</p>
<p>This is another paragraph of some kind of content, that goes on,
and on, and on, and on…
</p>
</body>
</html><br>
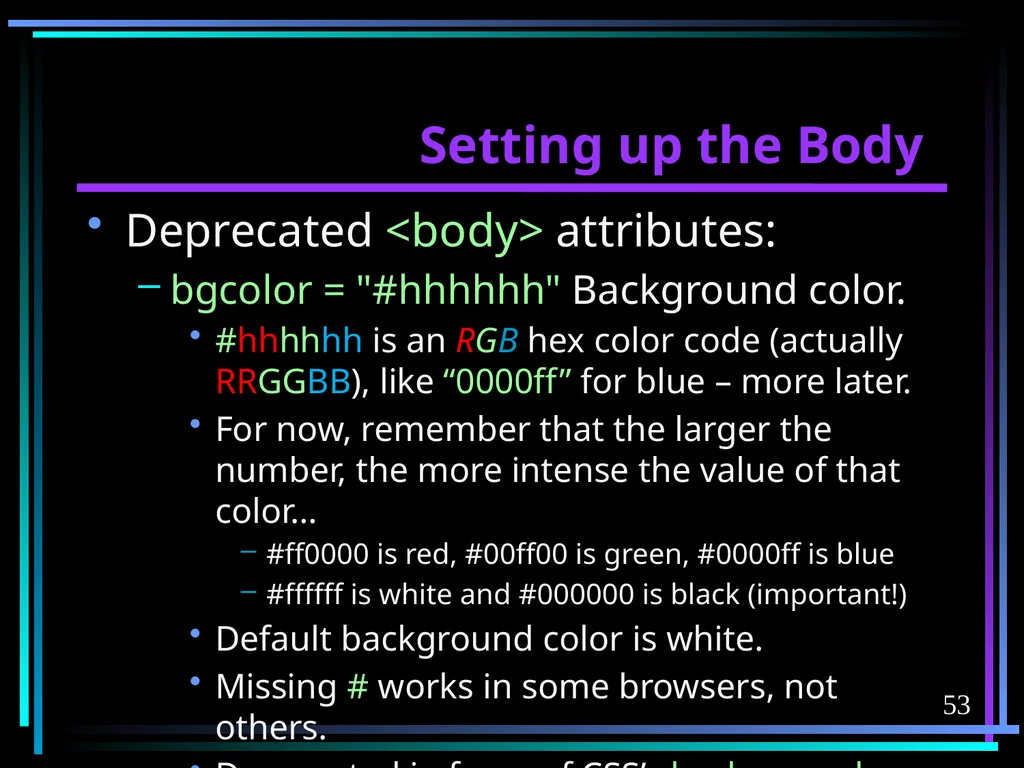
slide53. 53 Setting up the Body Deprecated <body> attributes:
bgcolor = "#hhhhhh" Background color.
#hhhhhh is an RGB hex color code (actually RRGGBB), like “0000ff” for blue – more later.
For now, remember that the larger the number, the more intense the value of that color…
#ff0000 is red, #00ff00 is green, #0000ff is blue
#ffffff is white and #000000 is black (important!)
Default background color is white.
Missing # works in some browsers, not others.
Deprecated in favor of CSS’s background-color.<br>
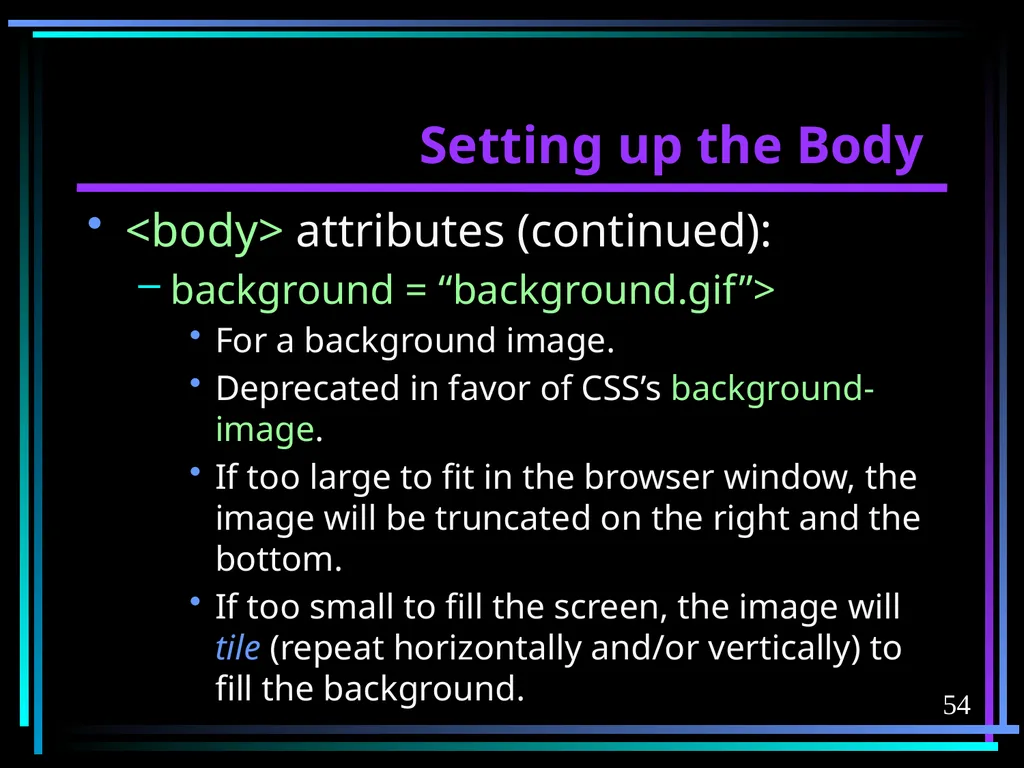
slide54. 54 Setting up the Body <body> attributes (continued):
background = “background.gif”>
For a background image.
Deprecated in favor of CSS’s background-image.
If too large to fit in the browser window, the image will be truncated on the right and the bottom.
If too small to fill the screen, the image will tile (repeat horizontally and/or vertically) to fill the background.<br>
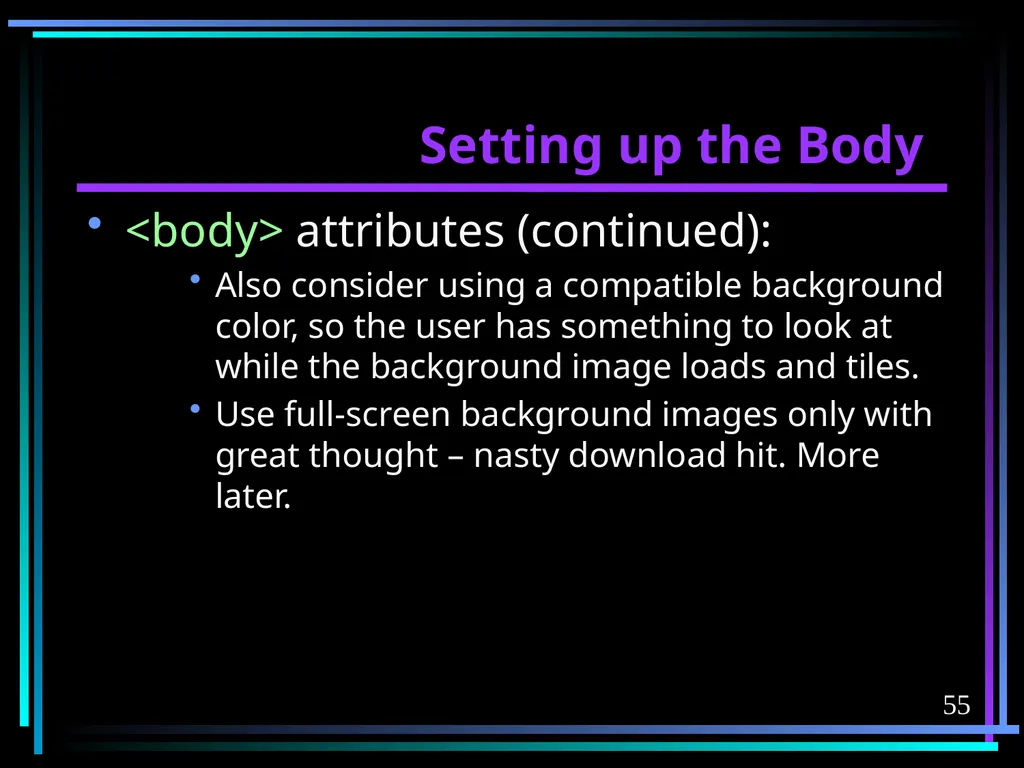
slide55. 55 Setting up the Body <body> attributes (continued):
Also consider using a compatible background color, so the user has something to look at while the background image loads and tiles.
Use full-screen background images only with great thought – nasty download hit. More later.<br>
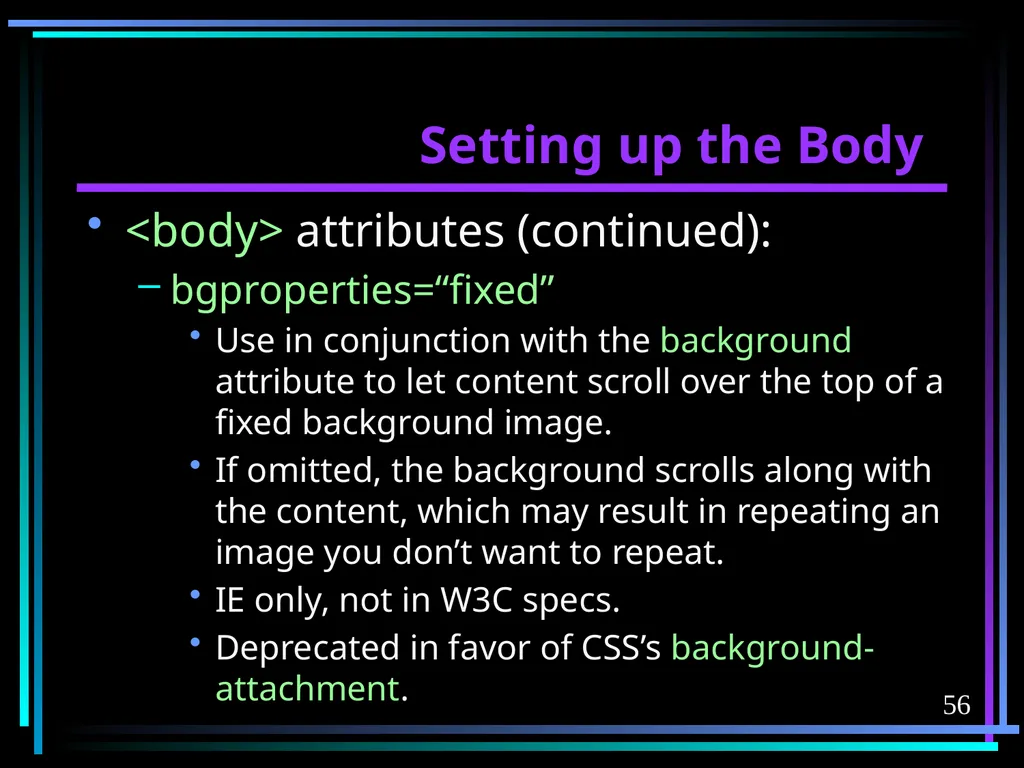
slide56. 56 Setting up the Body <body> attributes (continued):
bgproperties=“fixed”
Use in conjunction with the background attribute to let content scroll over the top of a fixed background image.
If omitted, the background scrolls along with the content, which may result in repeating an image you don’t want to repeat.
IE only, not in W3C specs.
Deprecated in favor of CSS’s background-attachment.<br>
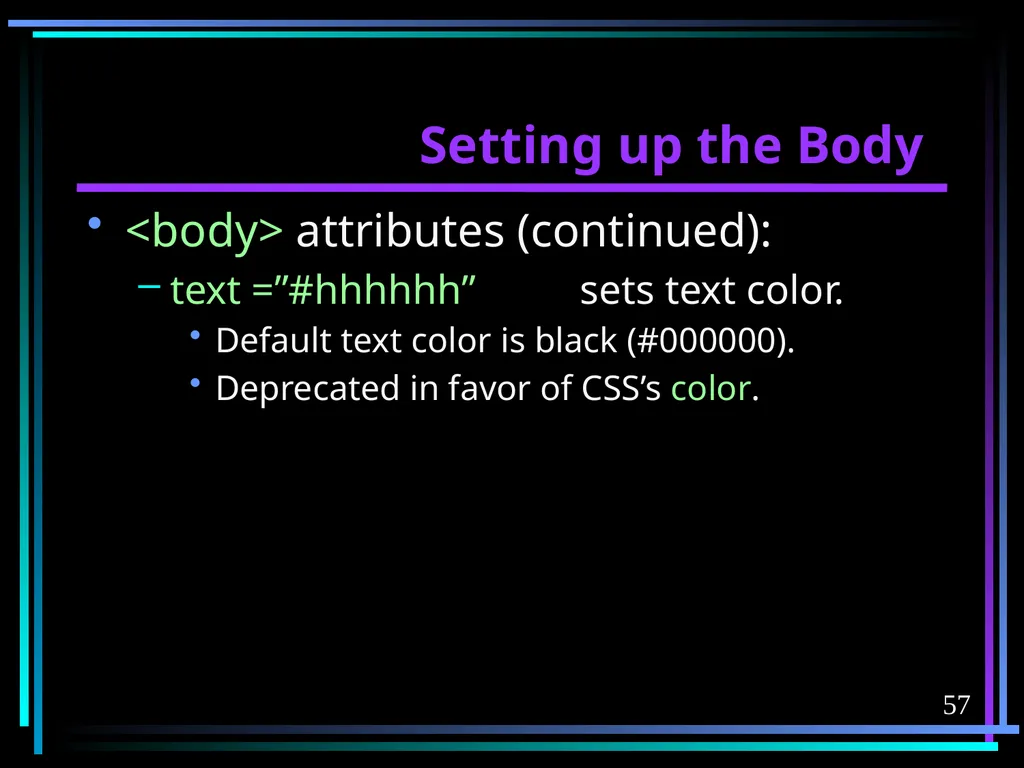
slide57. 57 Setting up the Body <body> attributes (continued):
text =”#hhhhhh” sets text color.
Default text color is black (#000000).
Deprecated in favor of CSS’s color.<br>
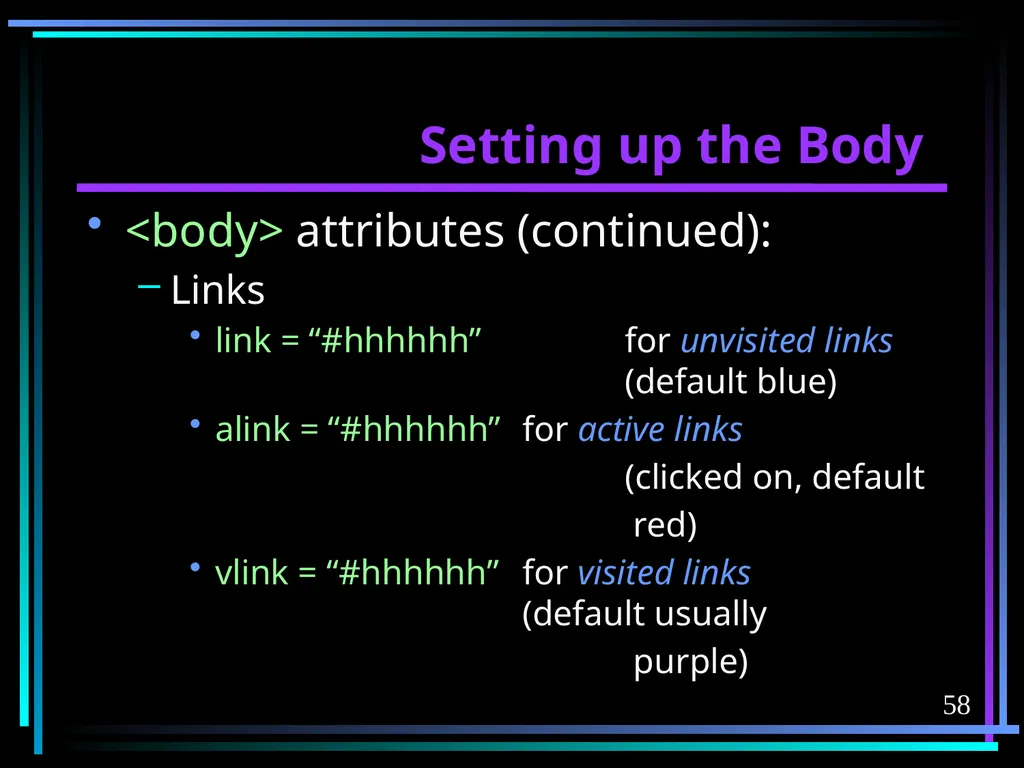
slide58. 58 Setting up the Body <body> attributes (continued):
Links
link = “#hhhhhh” for unvisited links (default blue)
alink = “#hhhhhh” for active links
(clicked on, default
red)
vlink = “#hhhhhh” for visited links (default usually
purple)<br>
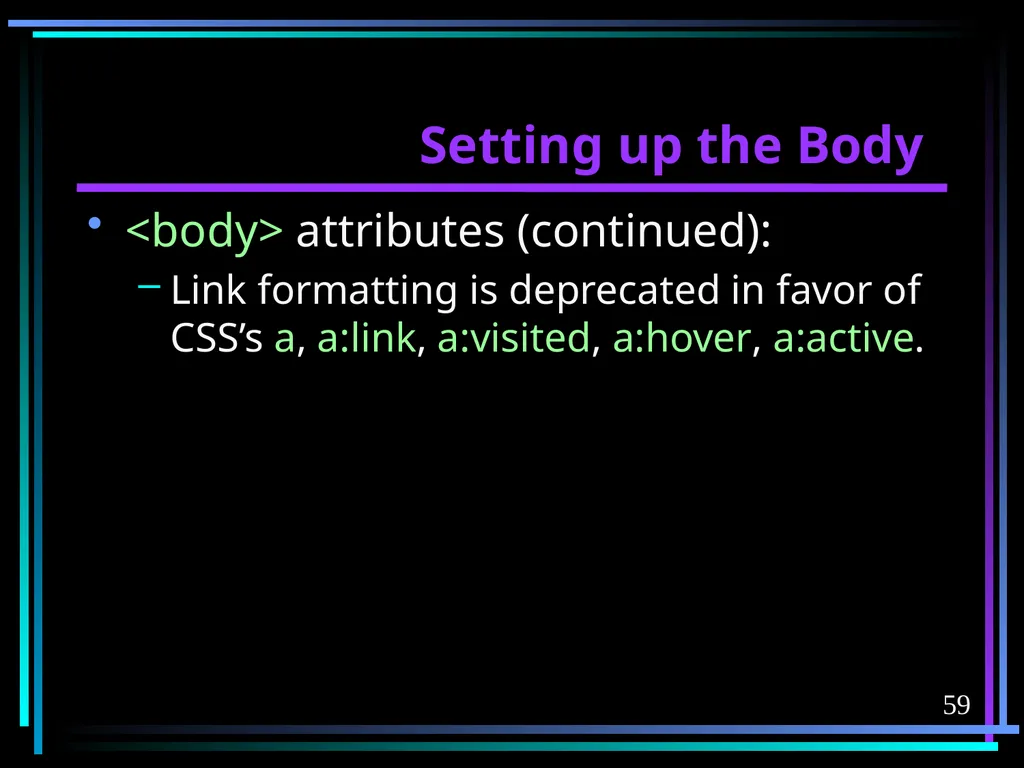
slide59. 59 Setting up the Body <body> attributes (continued):
Link formatting is deprecated in favor of CSS’s a, a:link, a:visited, a:hover, a:active.<br>
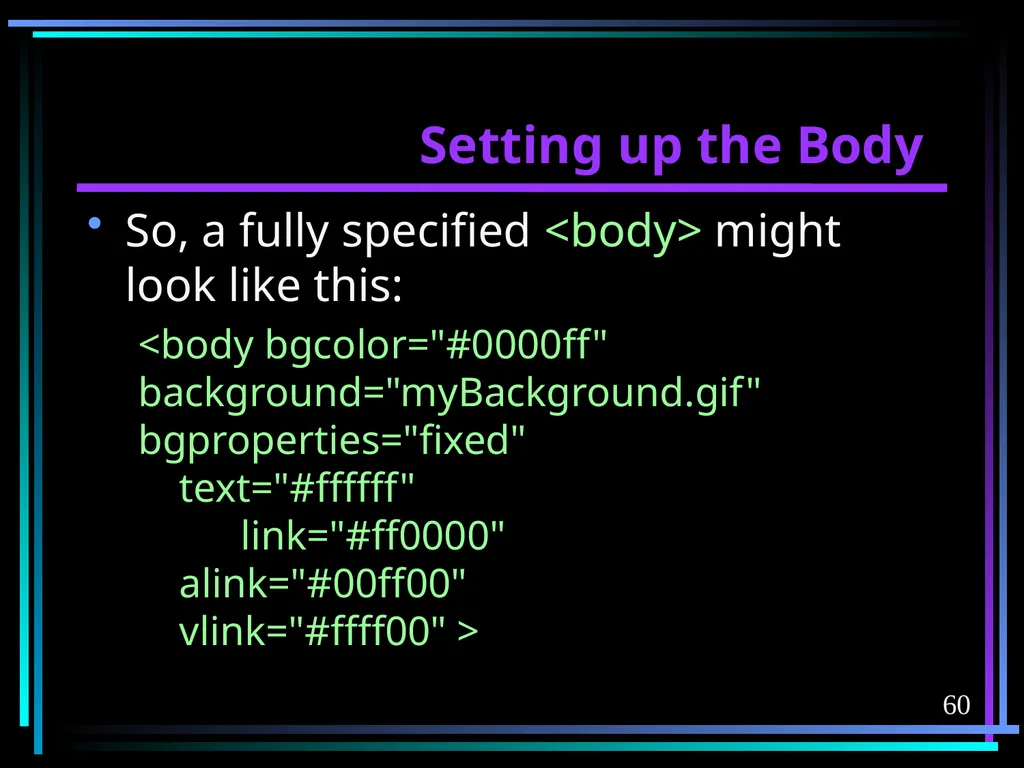
slide60. 60 Setting up the Body So, a fully specified <body> might look like this:
<body bgcolor="#0000ff" background="myBackground.gif" bgproperties="fixed" text="#ffffff" link="#ff0000" alink="#00ff00" vlink="#ffff00" ><br>
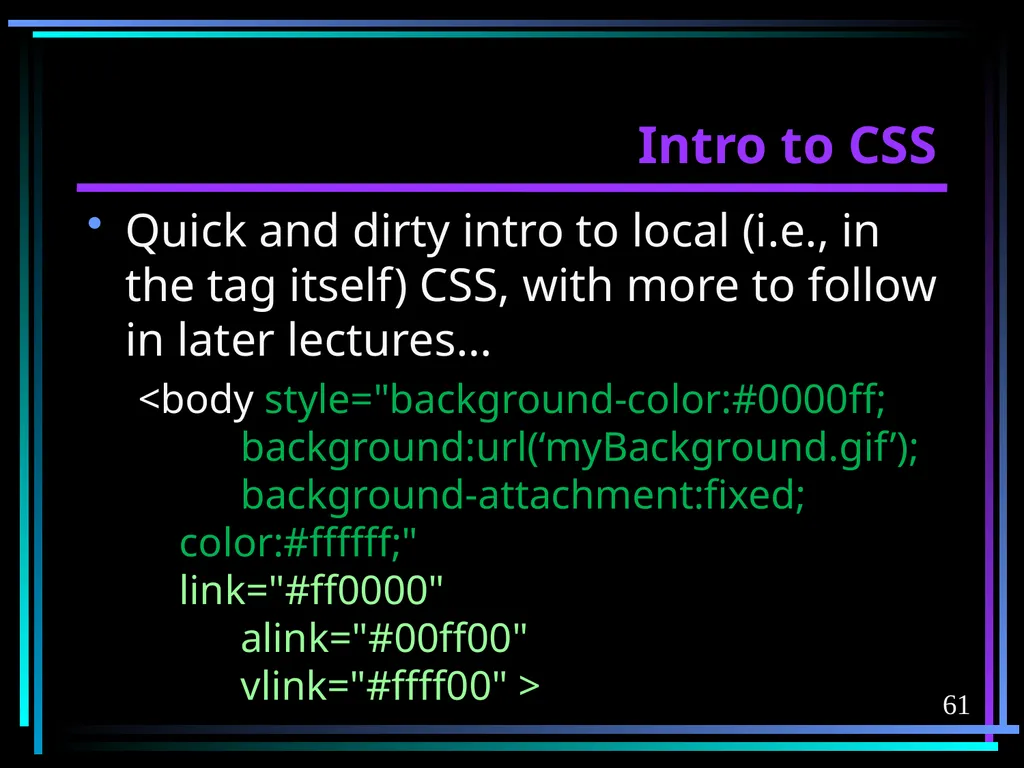
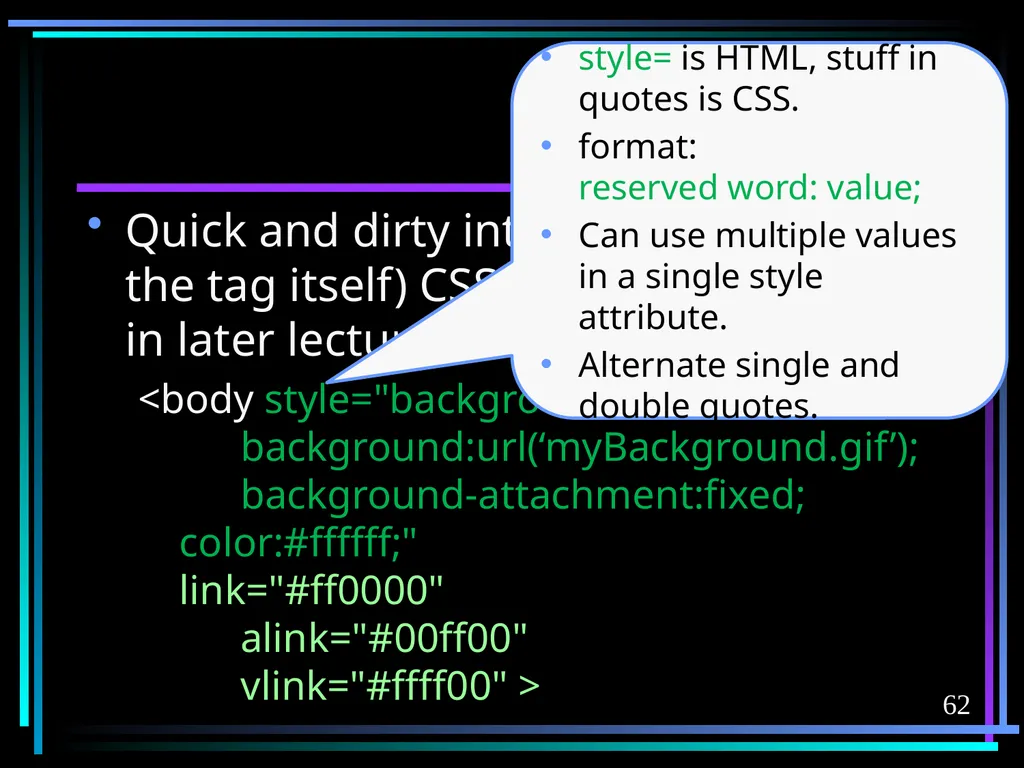
slide61. 61 Intro to CSS Quick and dirty intro to local (i.e., in the tag itself) CSS, with more to follow in later lectures…
<body style="background-color:#0000ff; background:url(‘myBackground.gif’); background-attachment:fixed; color:#ffffff;" link="#ff0000" alink="#00ff00" vlink="#ffff00" ><br>
slide62. 62 Intro to CSS Quick and dirty intro to local (i.e., in the tag itself) CSS, with more to follow in later lectures…
<body style="background-color:#0000ff; background:url(‘myBackground.gif’); background-attachment:fixed; color:#ffffff;" link="#ff0000" alink="#00ff00" vlink="#ffff00" > style= is HTML, stuff in quotes is CSS.
format: reserved word: value;
Can use multiple values in a single style attribute.
Alternate single and double quotes.<br>
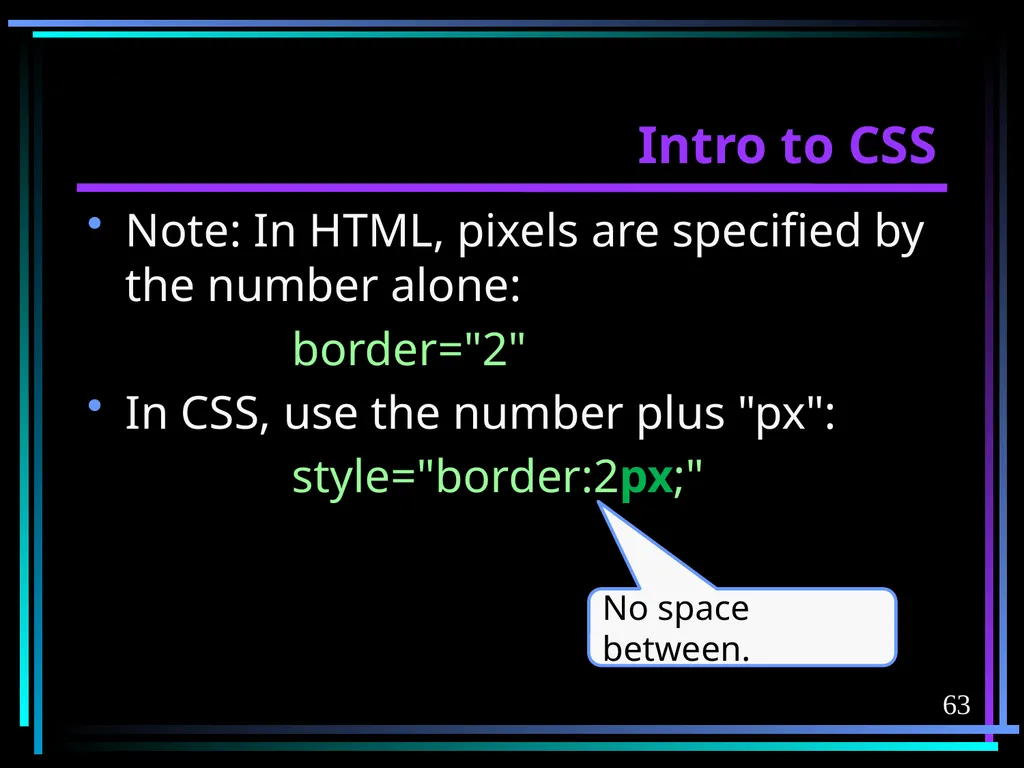
slide63. 63 Intro to CSS Note: In HTML, pixels are specified by the number alone:
border="2"
In CSS, use the number plus "px":
style="border:2px;" No space between.<br>
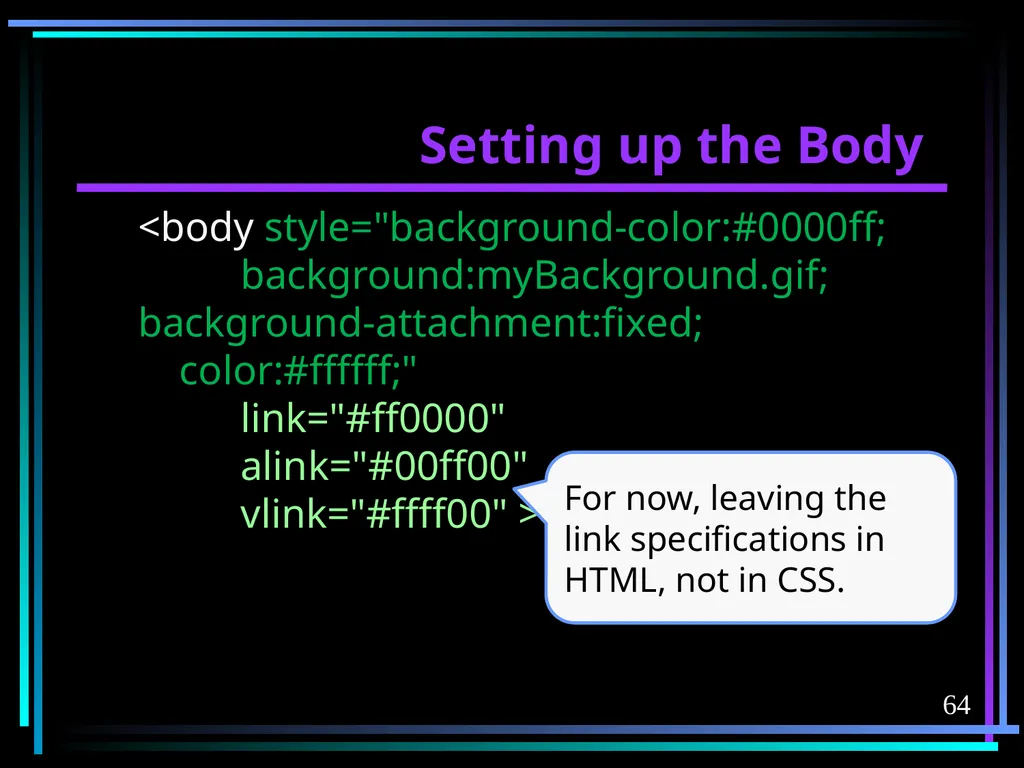
slide64. 64 Setting up the Body <body style="background-color:#0000ff; background:myBackground.gif; background-attachment:fixed; color:#ffffff;" link="#ff0000" alink="#00ff00" vlink="#ffff00" > For now, leaving the link specifications in HTML, not in CSS.<br>
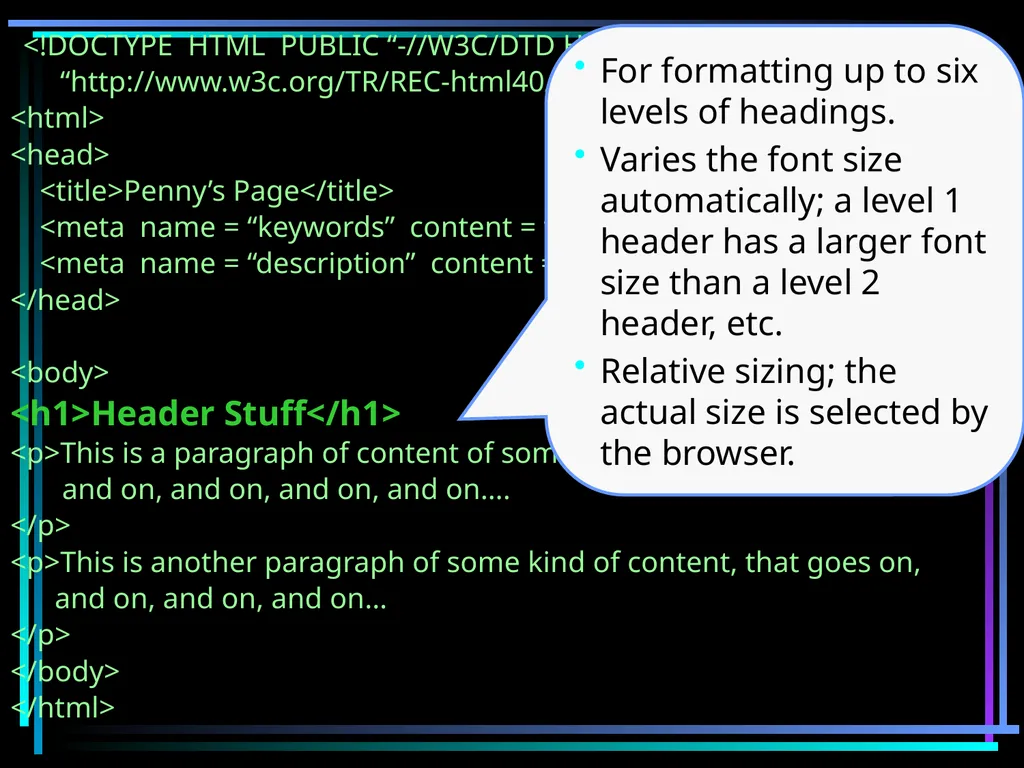
slide65. <!DOCTYPE HTML PUBLIC “-//W3C/DTD HTML4.0//EN”
“http://www.w3c.org/TR/REC-html40/strict.dtd”>
<html>
<head>
<title>Penny’s Page</title>
<meta name = “keywords” content = “ phrase1, phrase2, …”>
<meta name = “description” content = “this site does ...”>
</head>
<body>
<h1>Header Stuff</h1>
<p>This is a paragraph of content of some sort, that goes on, and on,
and on, and on, and on, and on….
</p>
<p>This is another paragraph of some kind of content, that goes on,
and on, and on, and on…
</p>
</body>
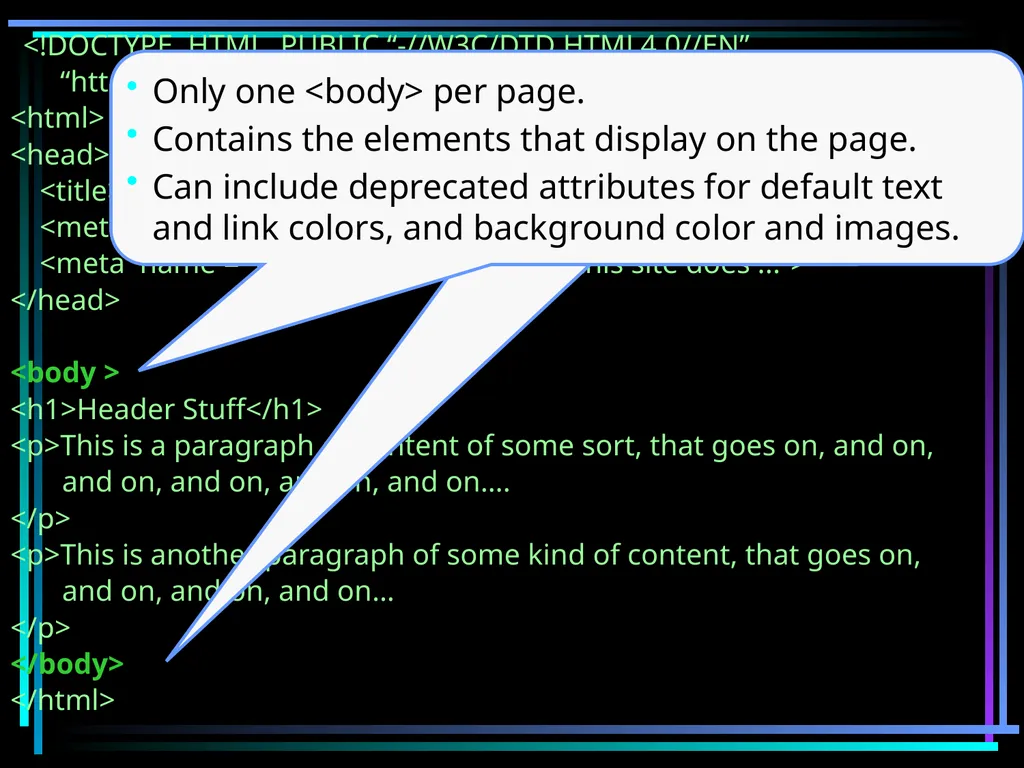
</html> For formatting up to six levels of headings.
Varies the font size automatically; a level 1 header has a larger font size than a level 2 header, etc.
Relative sizing; the actual size is selected by the browser.<br>
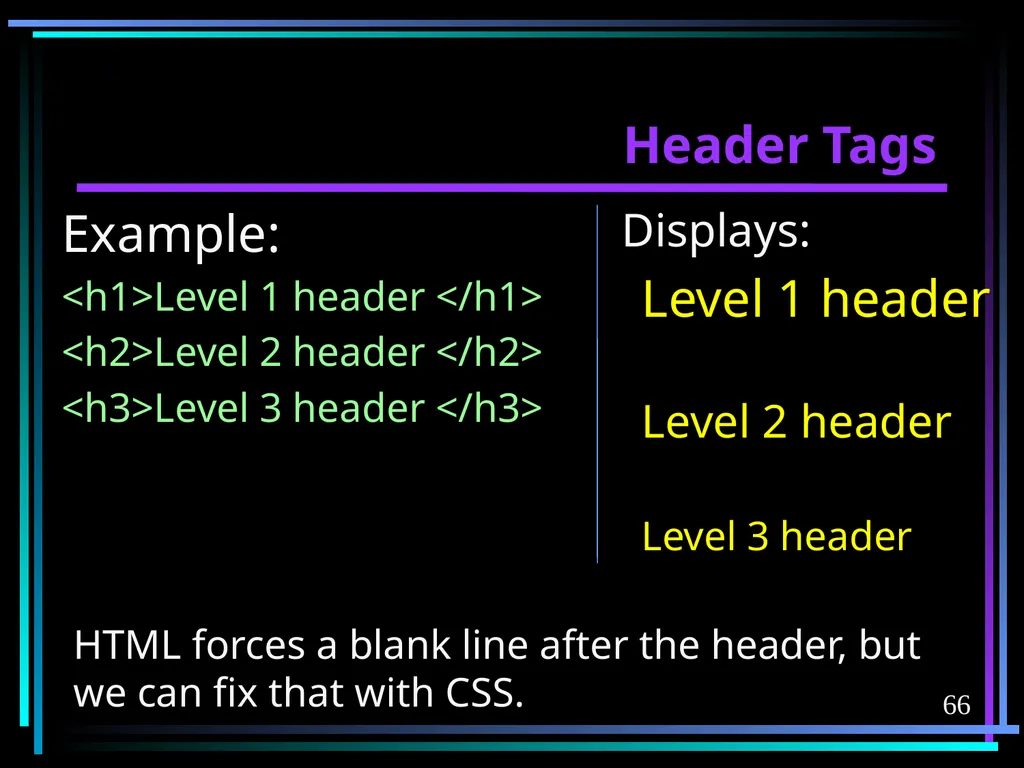
slide66. 66 Header Tags Example:
<h1>Level 1 header </h1>
<h2>Level 2 header </h2>
<h3>Level 3 header </h3> Displays:
Level 1 header
Level 2 header
Level 3 header HTML forces a blank line after the header, but we can fix that with CSS.<br>
slide67. 67 Header Tags Header tags are actually intended to be structural (formatting is incidental these days), following a progression – h2 under h1, h3 under h2, etc.
Do not use a header tag for a non-header item, just to get a particular font size or other formatting!
Important to maintain the progression properly, for accessibility.<br>
slide68. <!DOCTYPE HTML PUBLIC “-//W3C/DTD HTML4.0//EN”
“http://www.w3c.org/TR/REC-html40/strict.dtd”>
<html>
<head>
<title>Penny’s Page</title>
<meta name = “keywords” content = “ phrase1, phrase2, …”>
<meta name = “description” content = “this site does ...”>
</head>
<body>
<h1>Header Stuff</h1>
<p>This is a paragraph of content of some sort, that goes on, and
on, and on, and on, and on, and on….
</p>
<p>This is another paragraph of some kind of content, that goes
on, and on, and on, and on…
</p>
</body>
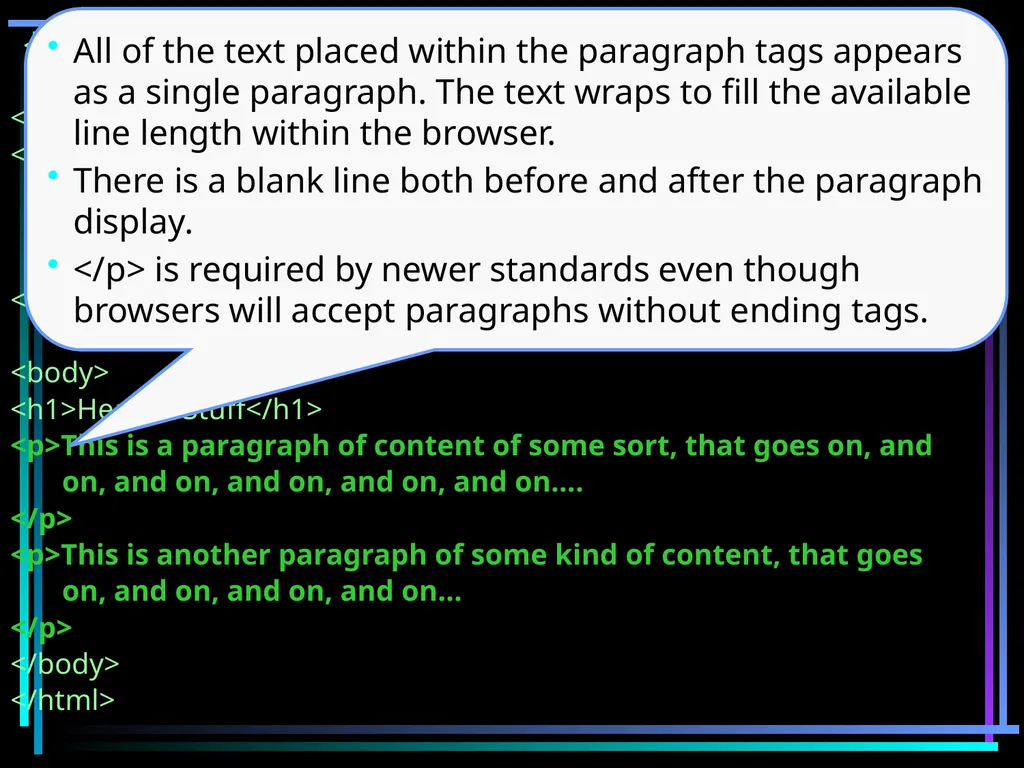
</html> All of the text placed within the paragraph tags appears as a single paragraph. The text wraps to fill the available line length within the browser.
There is a blank line both before and after the paragraph display.
</p> is required by newer standards even though browsers will accept paragraphs without ending tags.<br>
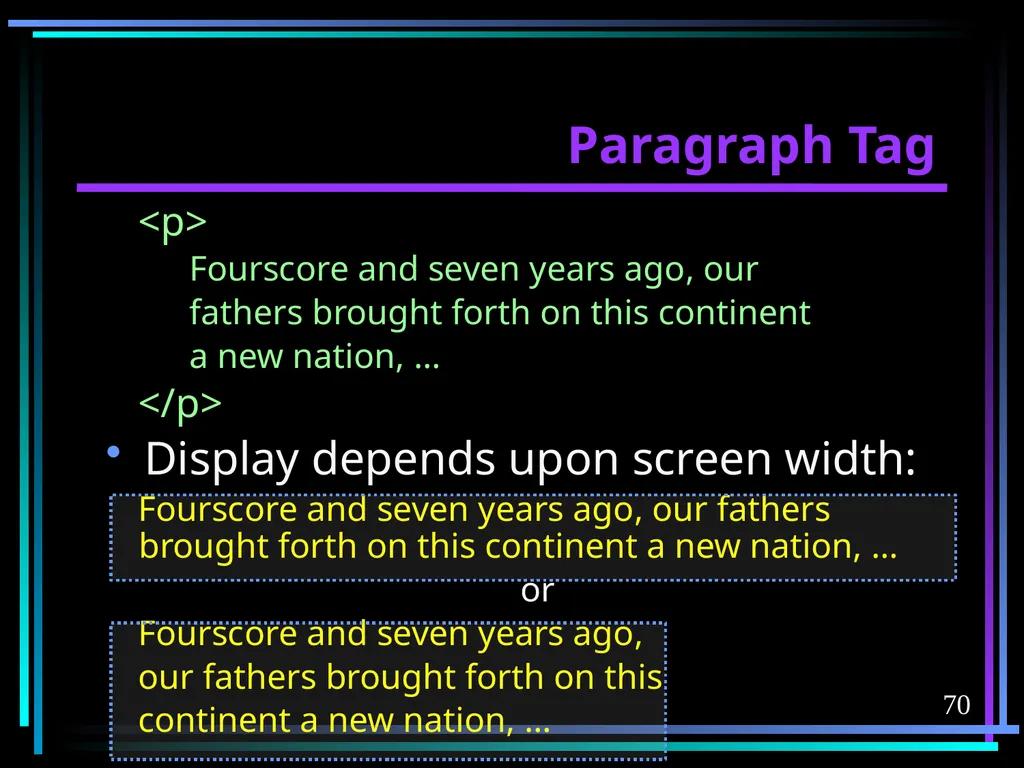
slide69. 69 Paragraph Tag Blank lines (created with carriage returns) or extra spaces within the text are ignored.
In other words, you must do formatting with HTML, not by formatting within the text.<br>
slide70. 70 Paragraph Tag <p>
Fourscore and seven years ago, our
fathers brought forth on this continent
a new nation, …
</p>
Display depends upon screen width:
Fourscore and seven years ago, our fathers brought forth on this continent a new nation, …
or
Fourscore and seven years ago,
our fathers brought forth on this
continent a new nation, …<br>
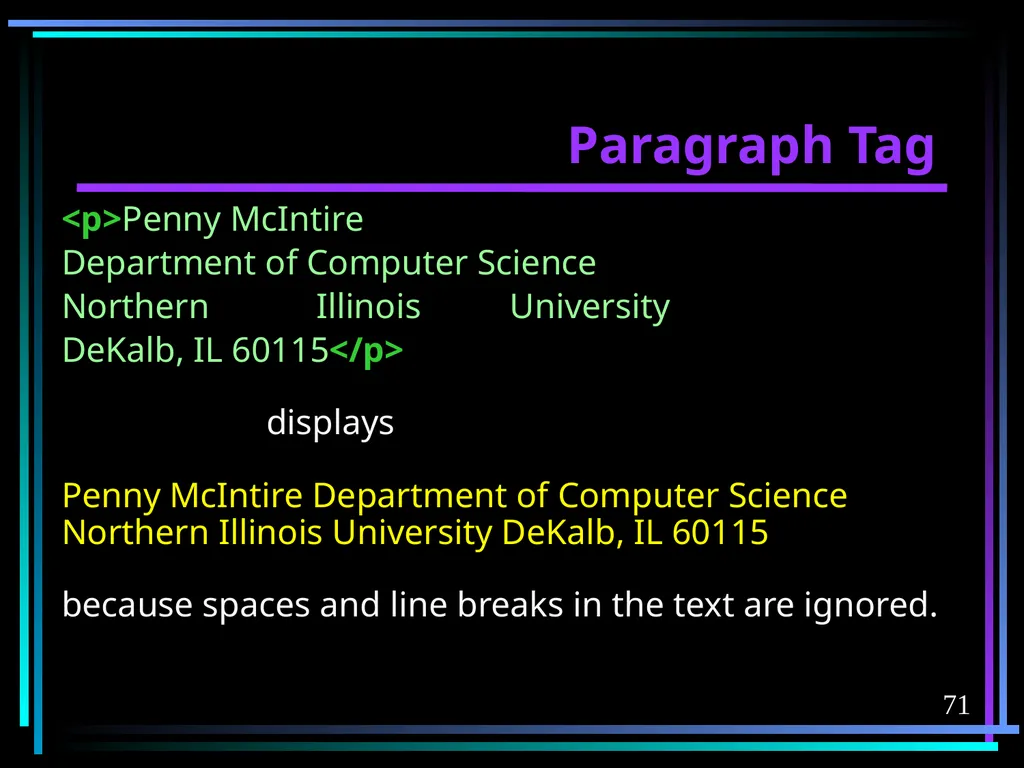
slide71. 71 Paragraph Tag <p>Penny McIntire
Department of Computer Science
Northern Illinois University
DeKalb, IL 60115</p>
displays
Penny McIntire Department of Computer Science Northern Illinois University DeKalb, IL 60115
because spaces and line breaks in the text are ignored.<br>
slide72. 72 Paragraph Tag On the other hand, using <p>...</p> on every line can insert blank lines where you don’t want them...<br>
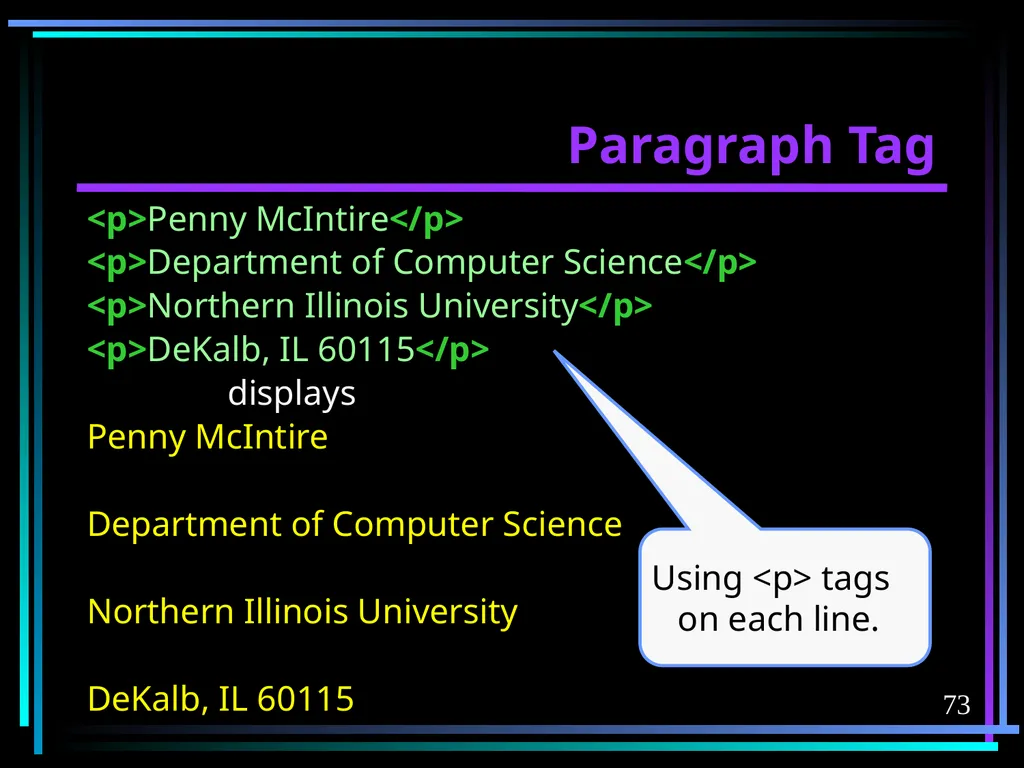
slide73. 73 Paragraph Tag Using <p> tags on each line. <p>Penny McIntire</p>
<p>Department of Computer Science</p>
<p>Northern Illinois University</p>
<p>DeKalb, IL 60115</p>
displays
Penny McIntire
Department of Computer Science
Northern Illinois University
DeKalb, IL 60115<br>
slide74. 74 Break Tag <br> Forces a line break, with no extra blank line, like a carriage return.
Was deprecated and <br/> for XHTML, but <br> is fine for HTML5.
Inserted within text within other tags like <p>...</p>.
Useful for times when the additional spacing caused by <p> would be irritating...<br>
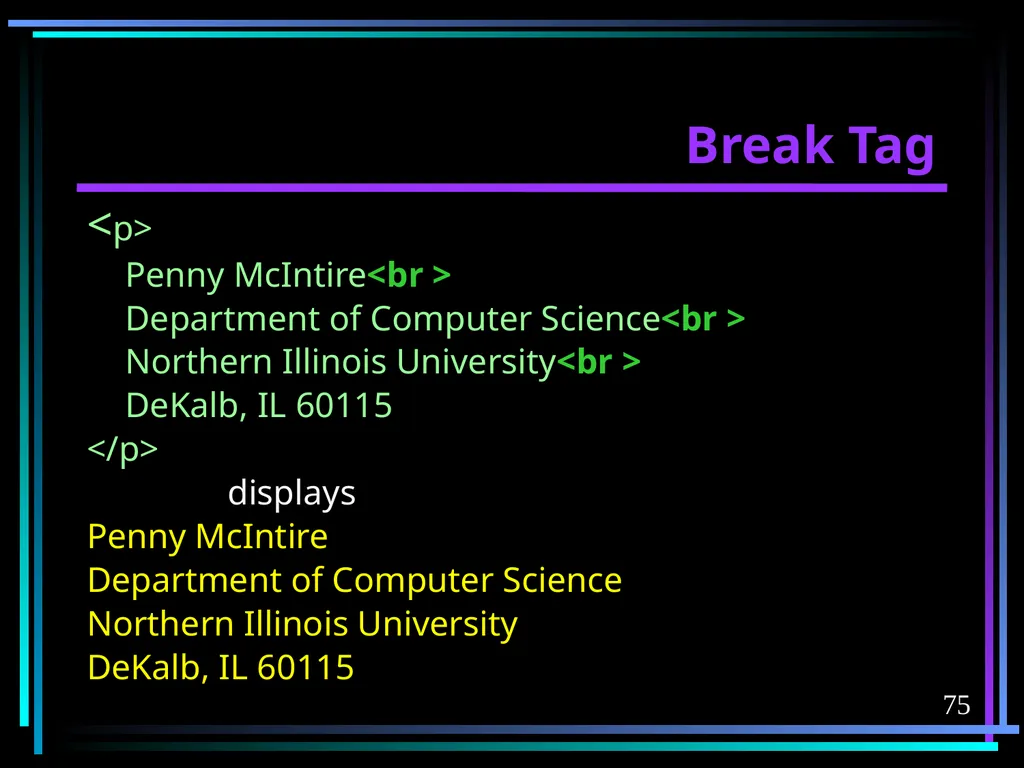
slide75. 75 Break Tag <p>
Penny McIntire<br >
Department of Computer Science<br >
Northern Illinois University<br >
DeKalb, IL 60115
</p>
displays
Penny McIntire
Department of Computer Science
Northern Illinois University
DeKalb, IL 60115<br>
slide76. Other HTML tags<br>
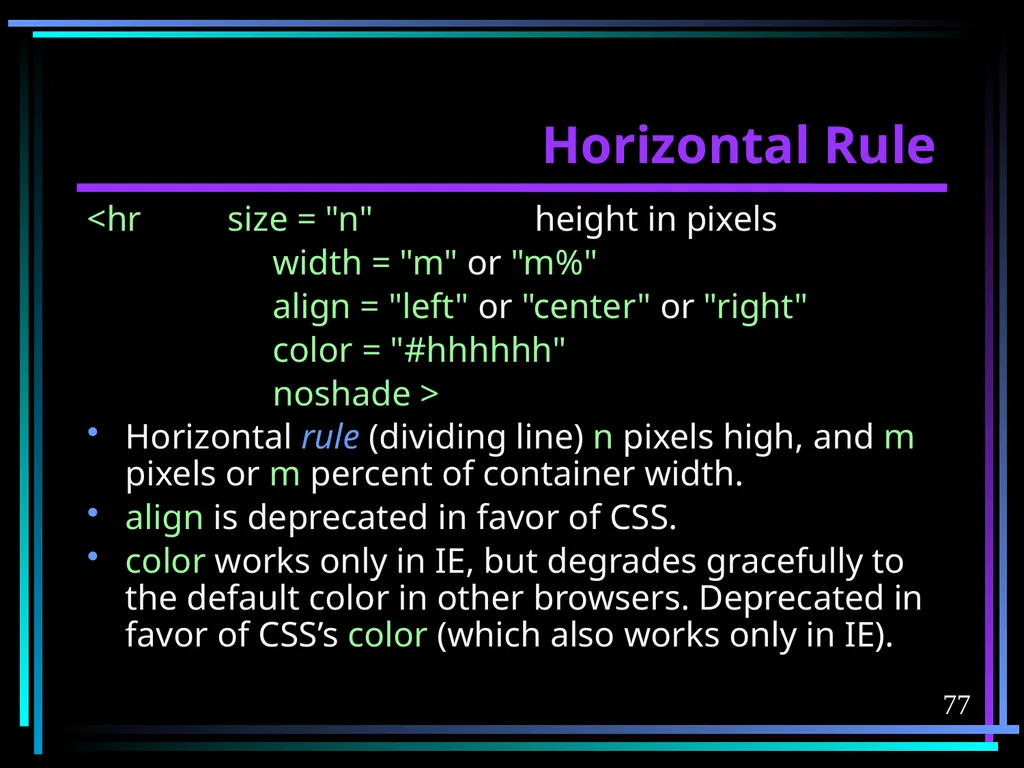
slide77. 77 Horizontal Rule <hr size = "n" height in pixels
width = "m" or "m%"
align = "left" or "center" or "right"
color = "#hhhhhh"
noshade >
Horizontal rule (dividing line) n pixels high, and m pixels or m percent of container width.
align is deprecated in favor of CSS.
color works only in IE, but degrades gracefully to the default color in other browsers. Deprecated in favor of CSS’s color (which also works only in IE).<br>
slide78. 78 Horizontal Rules noshade is optional – shades the line with a 3-D speed bump effect if omitted and line is tall enough.<br>
slide79. 79 Center Tag <center>...</center>
Causes the items within this container (a tag with both start and end tags) to be centered horizontally on the page.
Deprecated in favor of CSS’s
text-align
or
margin-left:auto; margin-right:auto;<br>
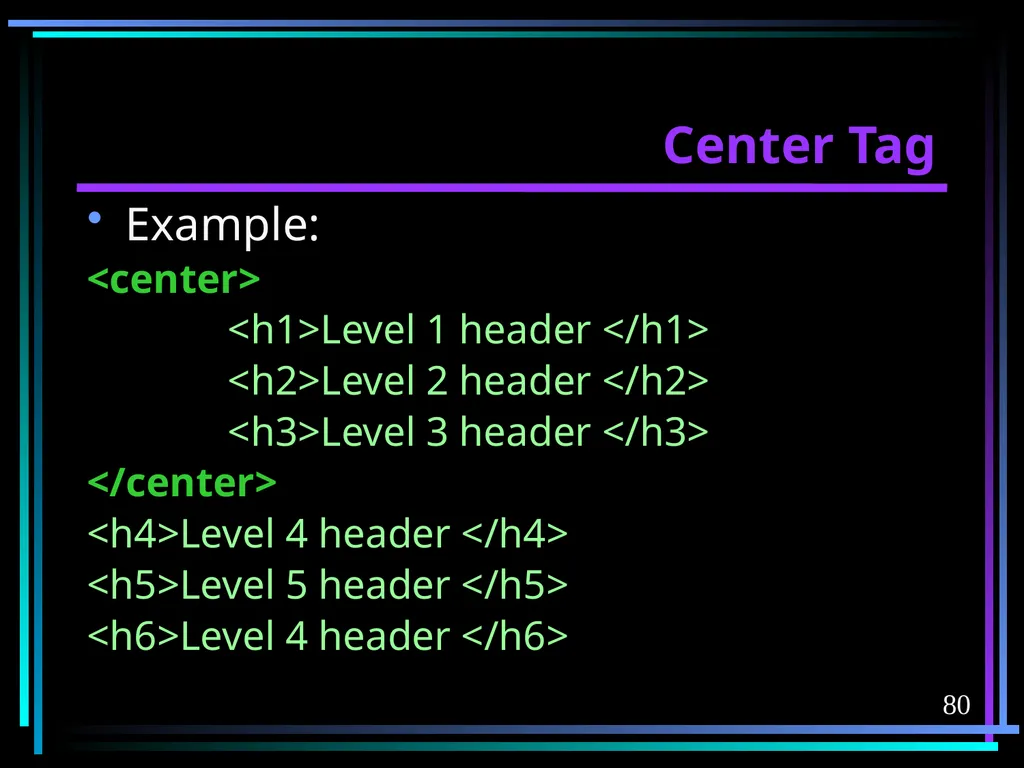
slide80. 80 Center Tag Example:
<center>
<h1>Level 1 header </h1>
<h2>Level 2 header </h2>
<h3>Level 3 header </h3>
</center>
<h4>Level 4 header </h4>
<h5>Level 5 header </h5>
<h6>Level 4 header </h6><br>
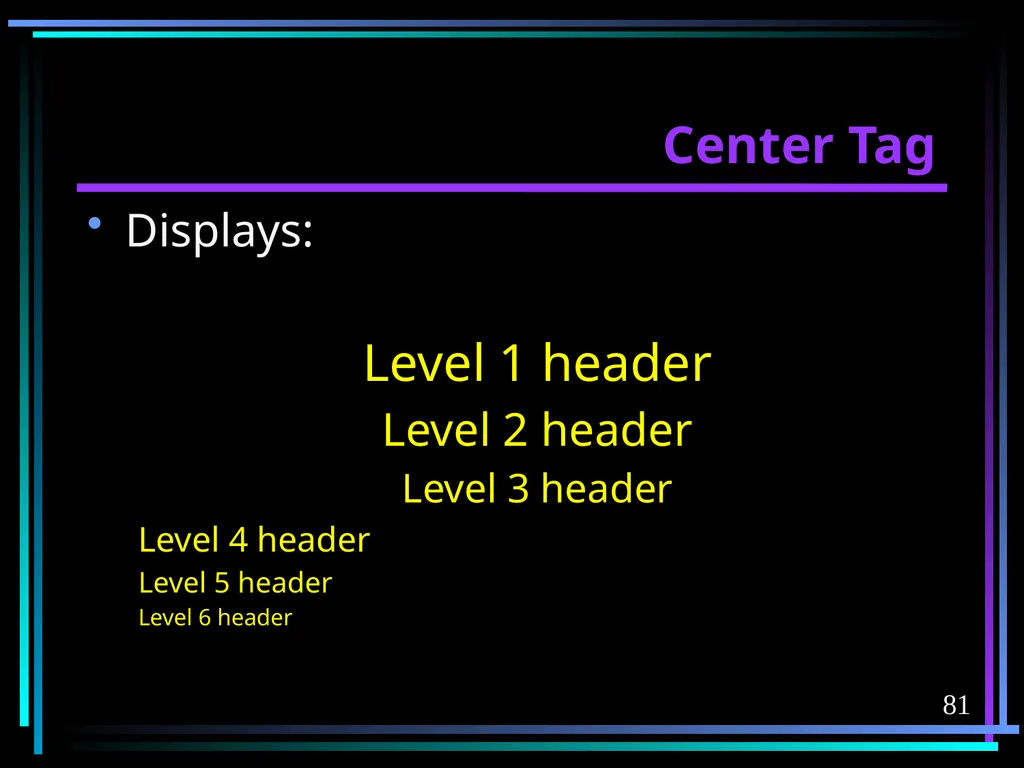
slide81. 81 Center Tag Displays:
Level 1 header
Level 2 header
Level 3 header
Level 4 header
Level 5 header
Level 6 header<br>
slide82. 82 Align Attribute align = "center"/"left"/"right"/"justify"
An attribute, not a tag, so embedded within another tag, such as an <h1> tag.
Used to align a single element such as a header or a paragraph.
align = "center" works the same as <center>...</center> except <center> is used to enclose multiple tags all at once.
Deprecated in favor of CSS.<br>
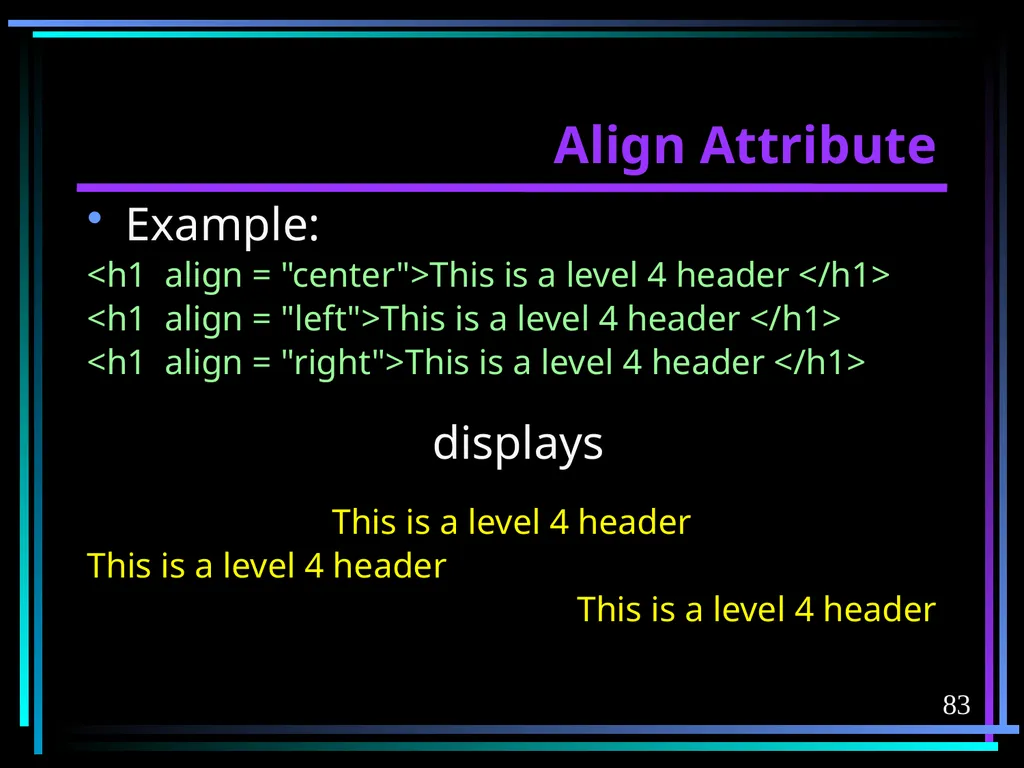
slide83. 83 Align Attribute Example:
<h1 align = "center">This is a level 4 header </h1>
<h1 align = "left">This is a level 4 header </h1>
<h1 align = "right">This is a level 4 header </h1>
displays
This is a level 4 header
This is a level 4 header
This is a level 4 header<br>
slide84. 84 Text Styles <u>...</u> underline
Avoid, because underline is generally reserved for links.
Deprecated in favor of CSS’s text-decoration.
<strong>...</strong> boldface
<b>...</b>
<b> is deprecated.
CSS’s font-weight a better option than <strong>? (I disagree.)<br>
slide85. 85 Text Styles <em>...</em> italics (“emphasized”)
<i>...</i> (deprecated)
CSS’s font-style a better option? (I disagree.)
<tt>...</tt> fixed width font
CSS’s typeface options are preferred.
<del>...</del> strike-through
CSS’s text-decoration a better option? (Maybe).
<sup>...</sup> superscript
CSS’s vertical-align a better option? (I disagree).
<sub>...</sub> subscript
CSS’s vertical-align a better option? (I disagree).<br>
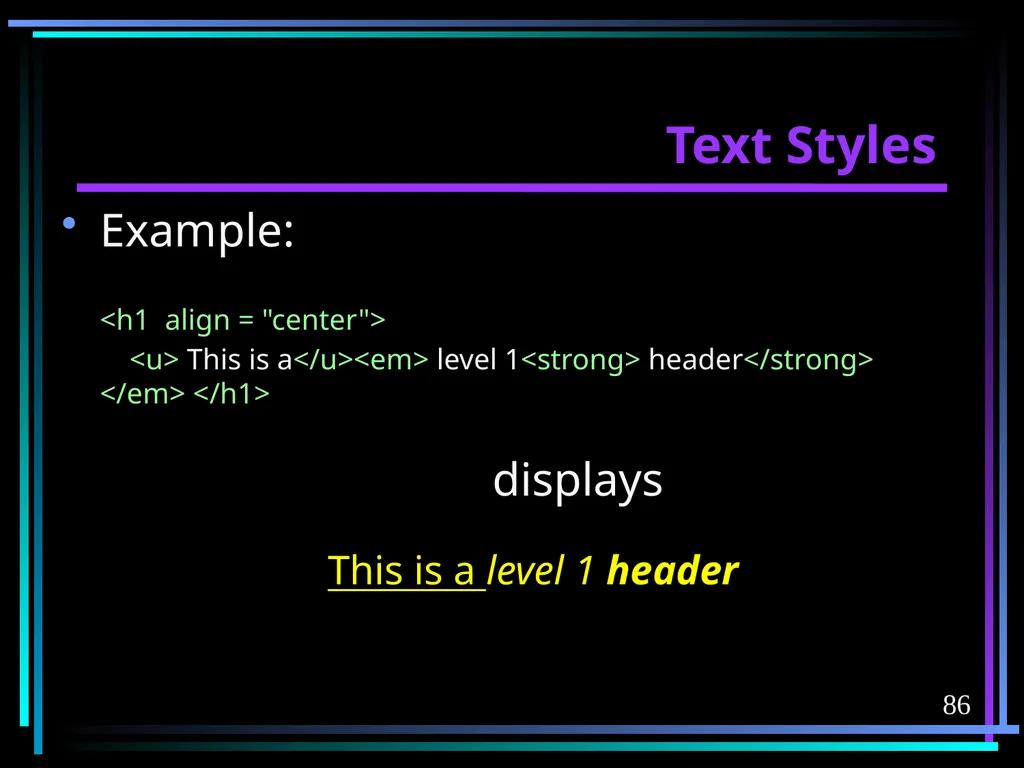
slide86. 86 Text Styles Example:
<h1 align = "center">
<u> This is a</u><em> level 1<strong> header</strong> </em> </h1>
displays
This is a level 1 header<br>
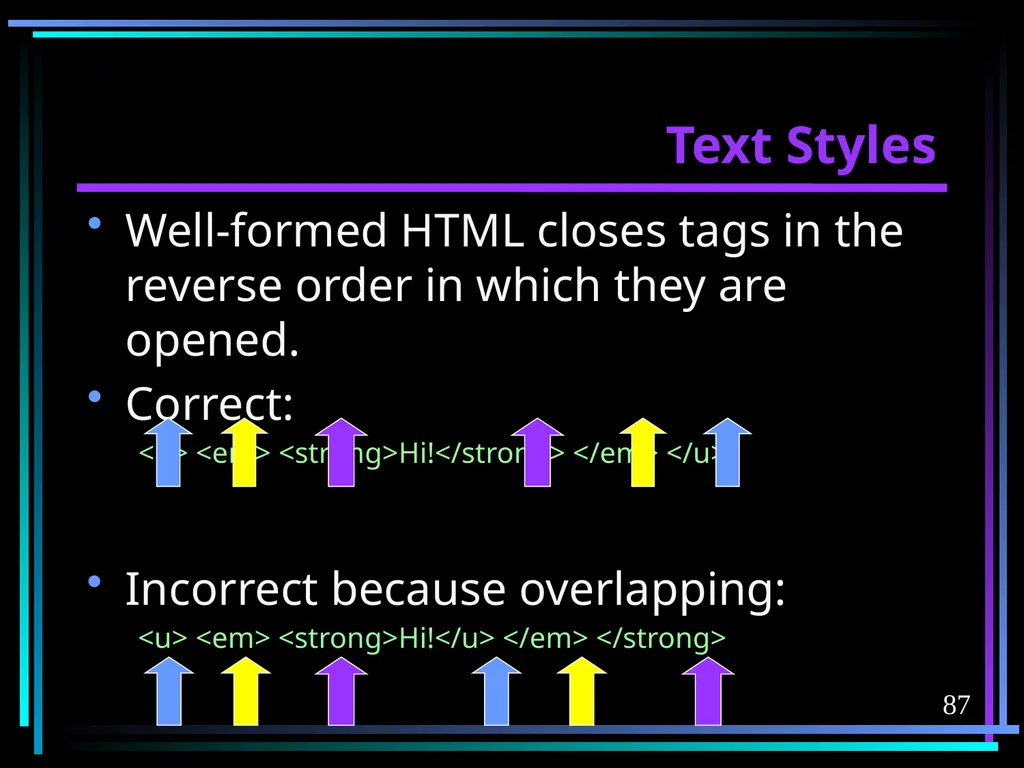
slide87. 87 Text Styles Well-formed HTML closes tags in the reverse order in which they are opened.
Correct:
<u> <em> <strong>Hi!</strong> </em> </u> Incorrect because overlapping:
<u> <em> <strong>Hi!</u> </em> </strong><br>
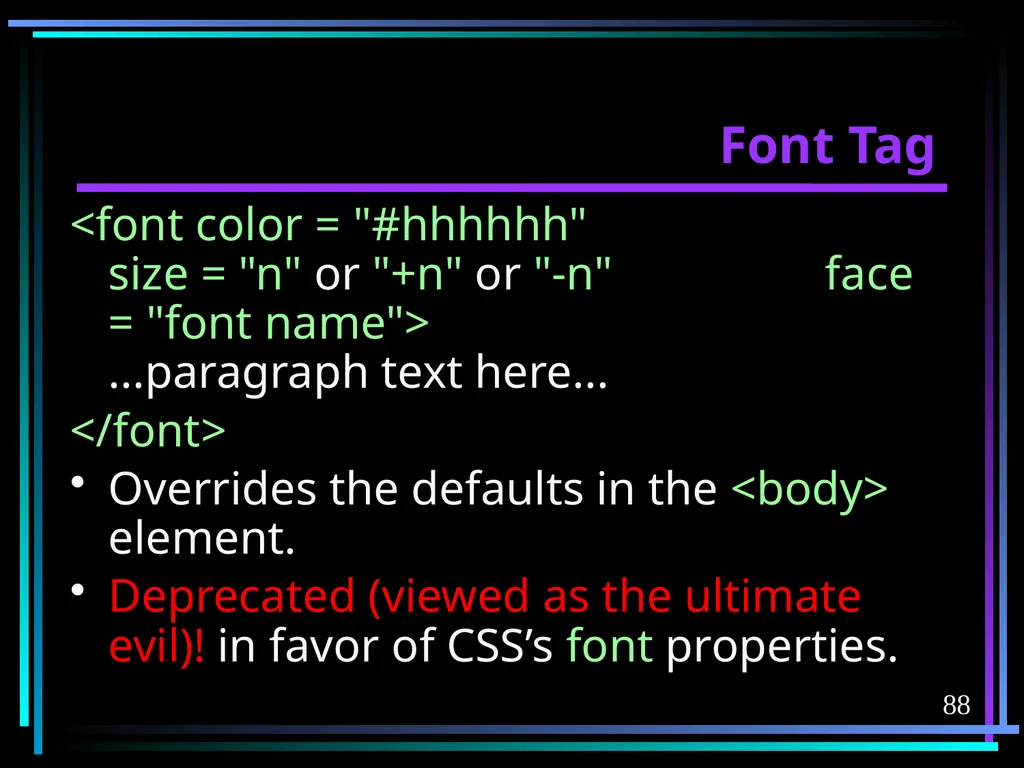
slide88. 88 Font Tag <font color = "#hhhhhh" size = "n" or "+n" or "-n" face = "font name"> ...paragraph text here...
</font>
Overrides the defaults in the <body> element.
Deprecated (viewed as the ultimate evil)! in favor of CSS’s font properties.<br>
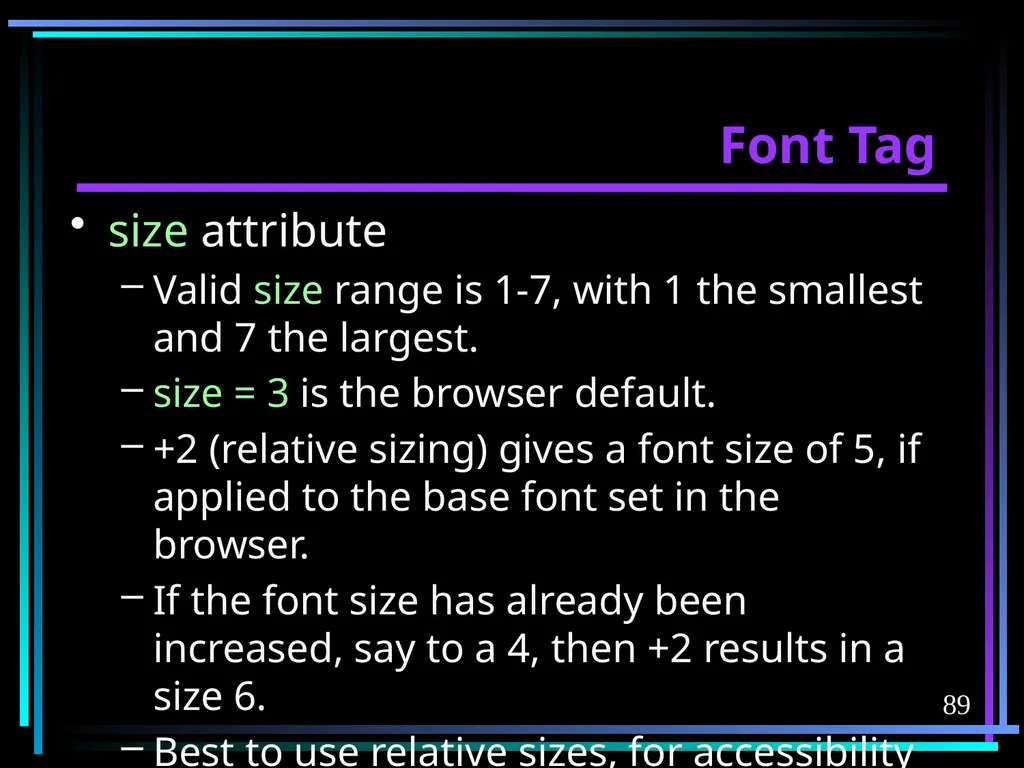
slide89. 89 Font Tag size attribute
Valid size range is 1-7, with 1 the smallest and 7 the largest.
size = 3 is the browser default.
+2 (relative sizing) gives a font size of 5, if applied to the base font set in the browser.
If the font size has already been increased, say to a 4, then +2 results in a size 6.
Best to use relative sizes, for accessibility reasons.<br>
slide90. 90 Font Tag face attribute changes the typeface.
The typeface must exist on the user’s browser.
You can list multiple typefaces as attributes for face – the browser checks the user’s system for the first one, then the second one, etc. The last one on the list should be a standard font like Times or Ariel, or serif or san-serif..
face = "Calligrapher, Georgia, Times, serif"<br>
slide91. 91 Font Tag If the browser doesn’t find any of them, it uses the default.
Nothing to lose here if the font isn’t found; it “degrades gracefully.”<br>
slide92. 92 Font Tag If you need a fancy font for something special, create a text graphic, save it as an image, and use the image.
This comes with a download price and is harder to maintain in the future, so use sparingly.
Newer browsers provide the ability to save fonts with the page.
A huge download hit (font files can be above 100K).
In theory, the fonts could contain viruses.<br>
slide93. 93 Preformatted Text <pre width="n">...</pre>
Preformatted text preserves the formatting in the original, including spaces, line breaks, and tabs.
Particularly useful for displaying code listings because the text won’t wrap to fit the available space in the browser window.
The width attribute specifies the maximum number of characters in a line.
Don’t use as a way of avoiding HTML/CSS formatting!<br>
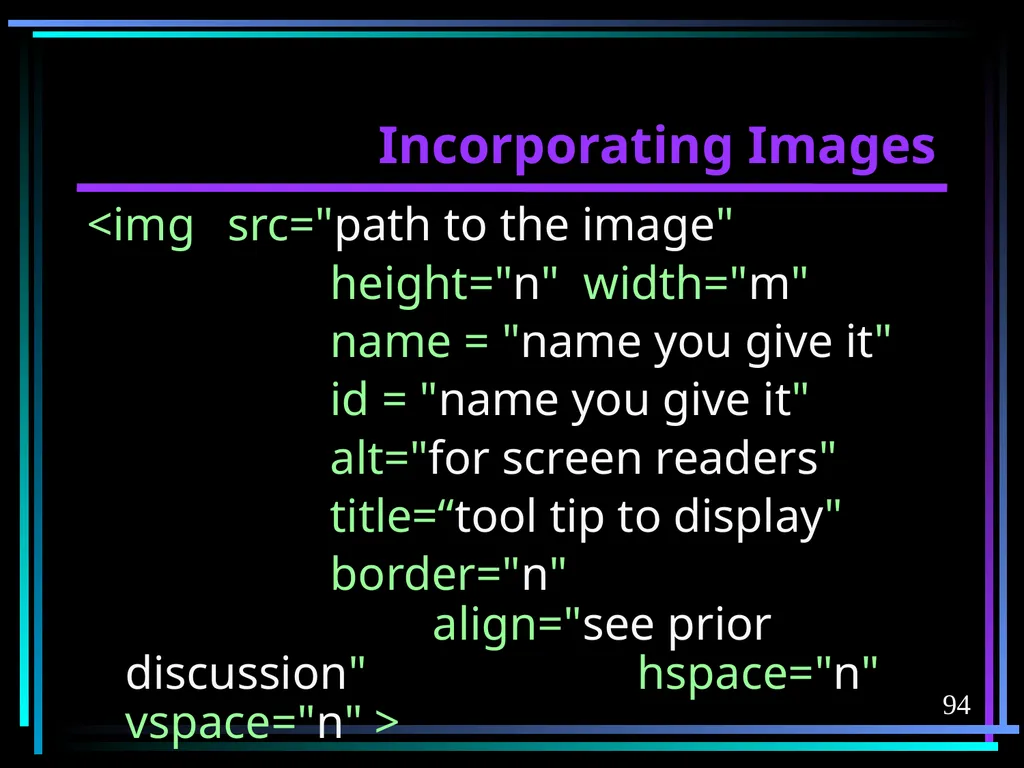
slide94. 94 Incorporating Images <img src="path to the image"
height="n" width="m"
name = "name you give it"
id = "name you give it"
alt="for screen readers"
title=“tool tip to display"
border="n" align="see prior discussion" hspace="n" vspace="n" ><br>
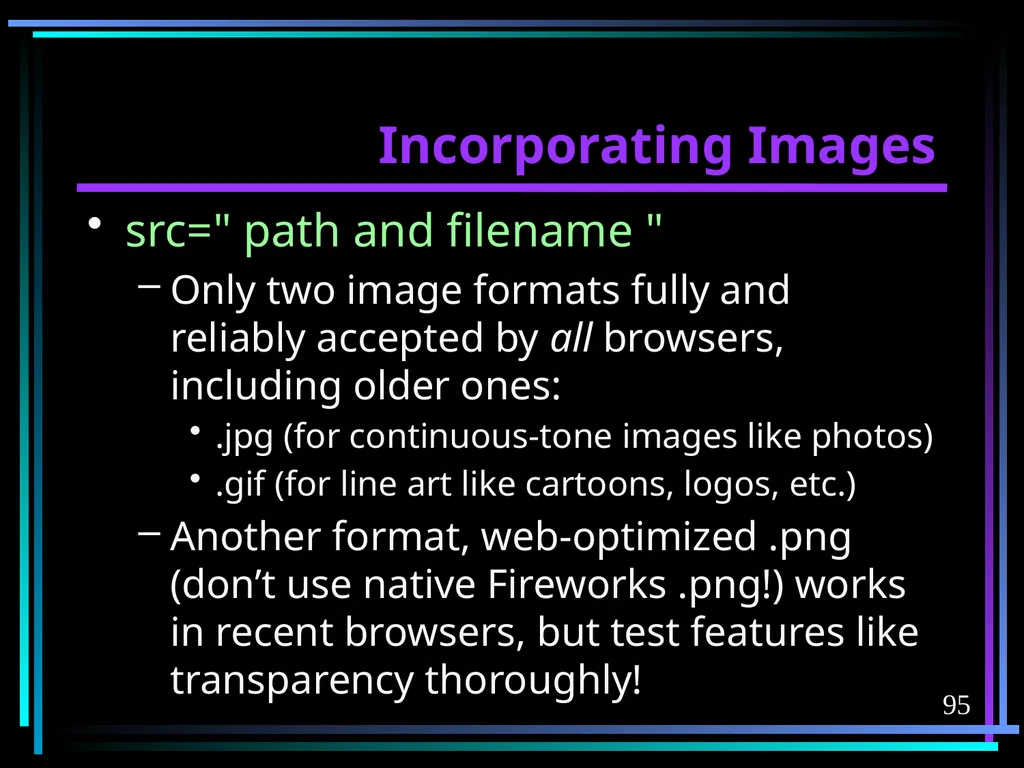
slide95. 95 Incorporating Images src=" path and filename "
Only two image formats fully and reliably accepted by all browsers, including older ones:
.jpg (for continuous-tone images like photos)
.gif (for line art like cartoons, logos, etc.)
Another format, web-optimized .png (don’t use native Fireworks .png!) works in recent browsers, but test features like transparency thoroughly!<br>
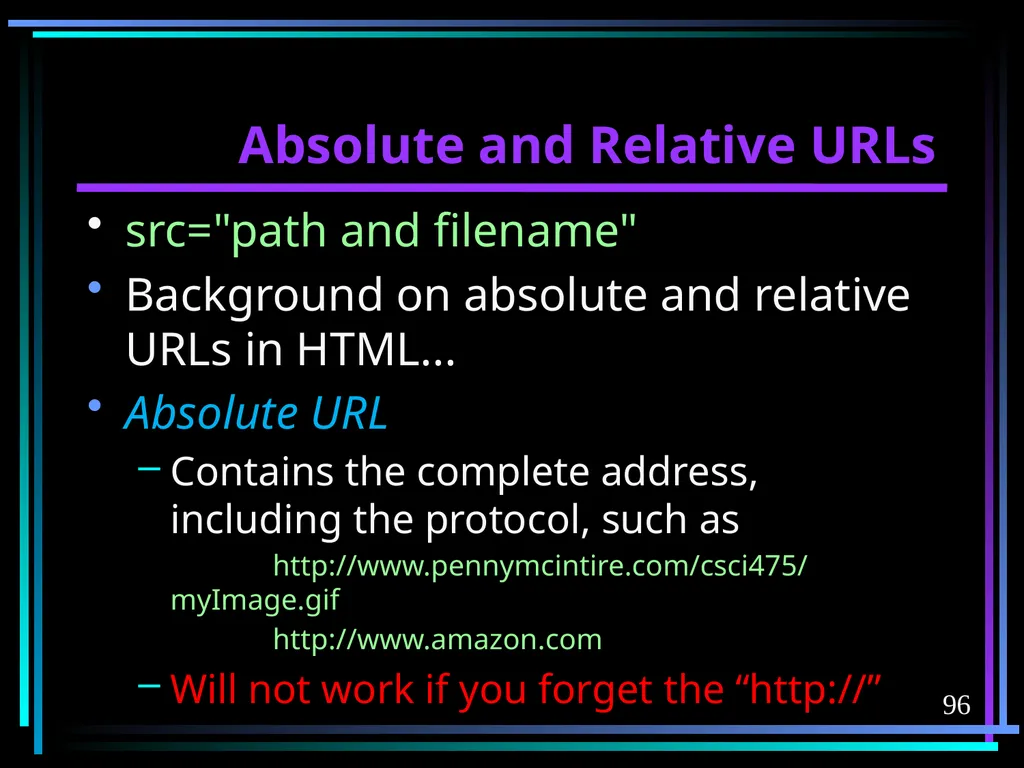
slide96. 96 Absolute and Relative URLs src="path and filename"
Background on absolute and relative URLs in HTML...
Absolute URL
Contains the complete address, including the protocol, such as
http://www.pennymcintire.com/csci475/myImage.gif
http://www.amazon.com
Will not work if you forget the “http://”<br>
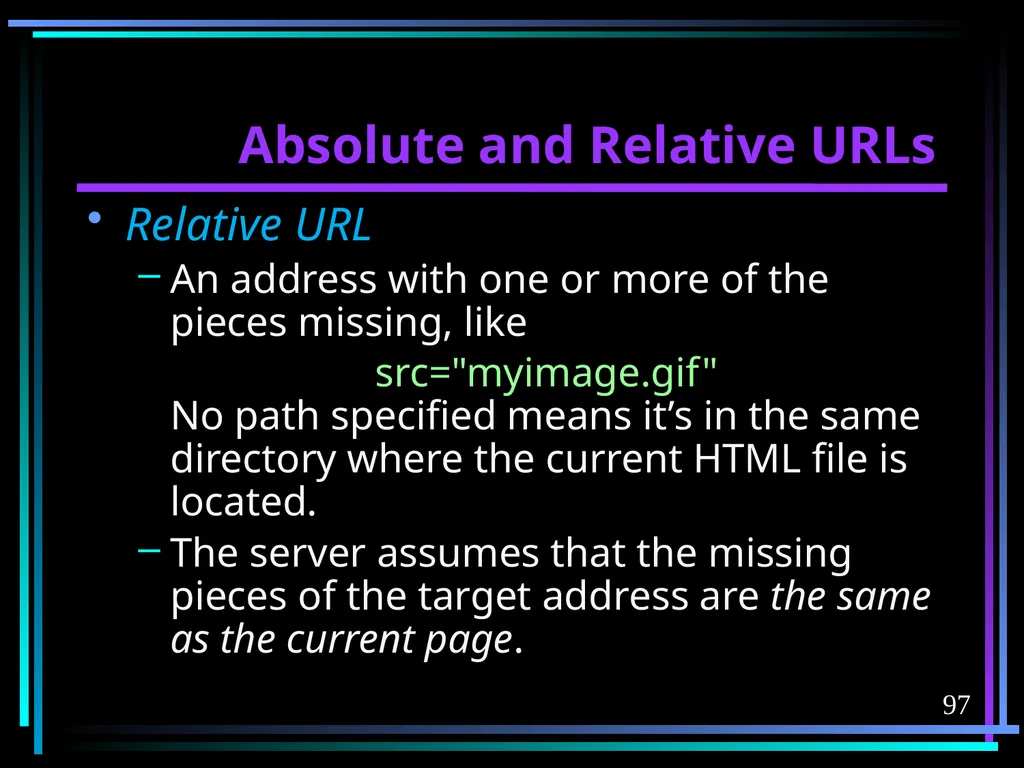
slide97. 97 Absolute and Relative URLs Relative URL
An address with one or more of the pieces missing, like
src="myimage.gif" No path specified means it’s in the same directory where the current HTML file is located.
The server assumes that the missing pieces of the target address are the same as the current page.<br>
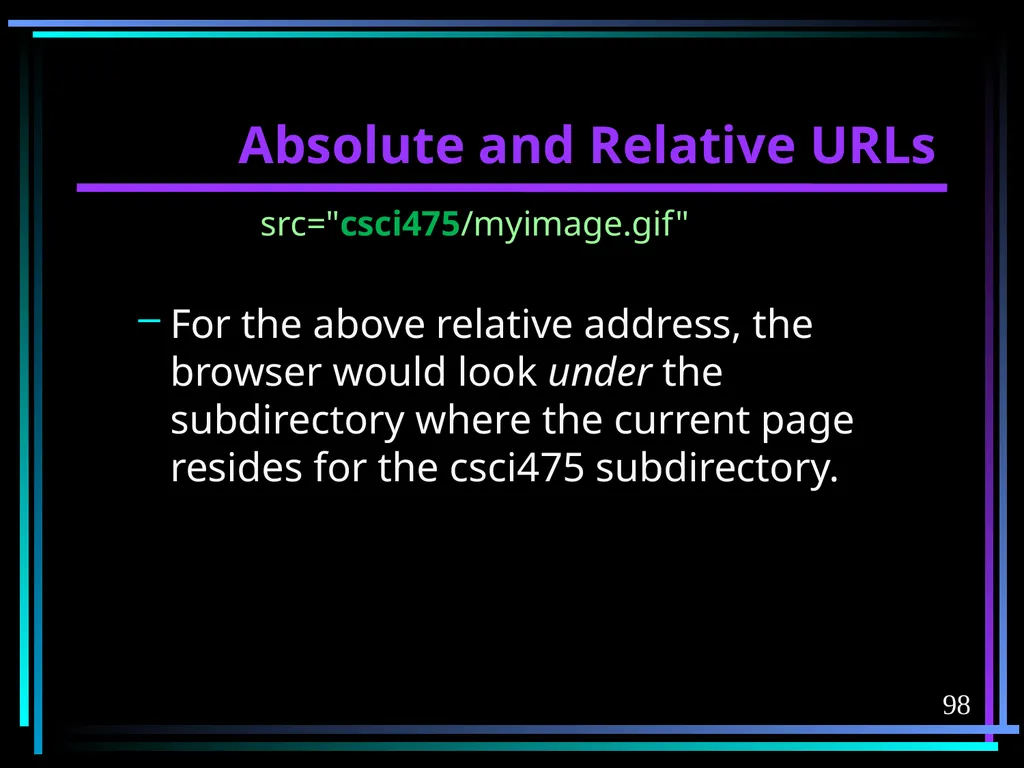
slide98. 98 Absolute and Relative URLs src="csci475/myimage.gif"
For the above relative address, the browser would look under the subdirectory where the current page resides for the csci475 subdirectory.<br>
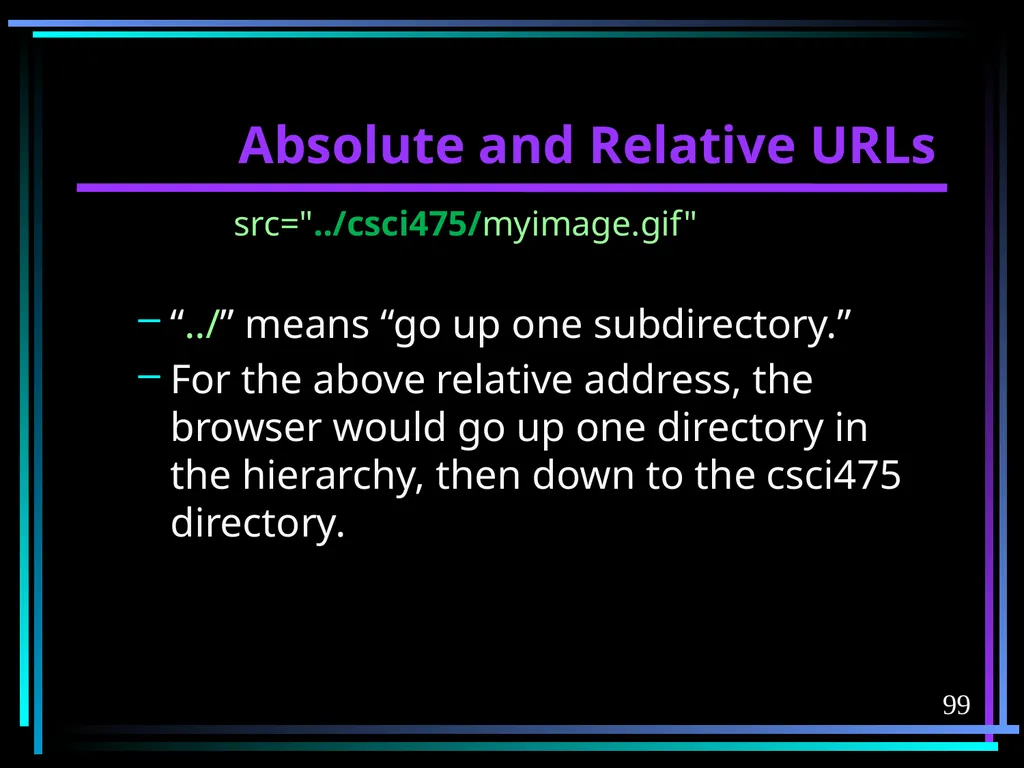
slide99. 99 Absolute and Relative URLs src="../csci475/myimage.gif"
“../” means “go up one subdirectory.”
For the above relative address, the browser would go up one directory in the hierarchy, then down to the csci475 directory.<br>
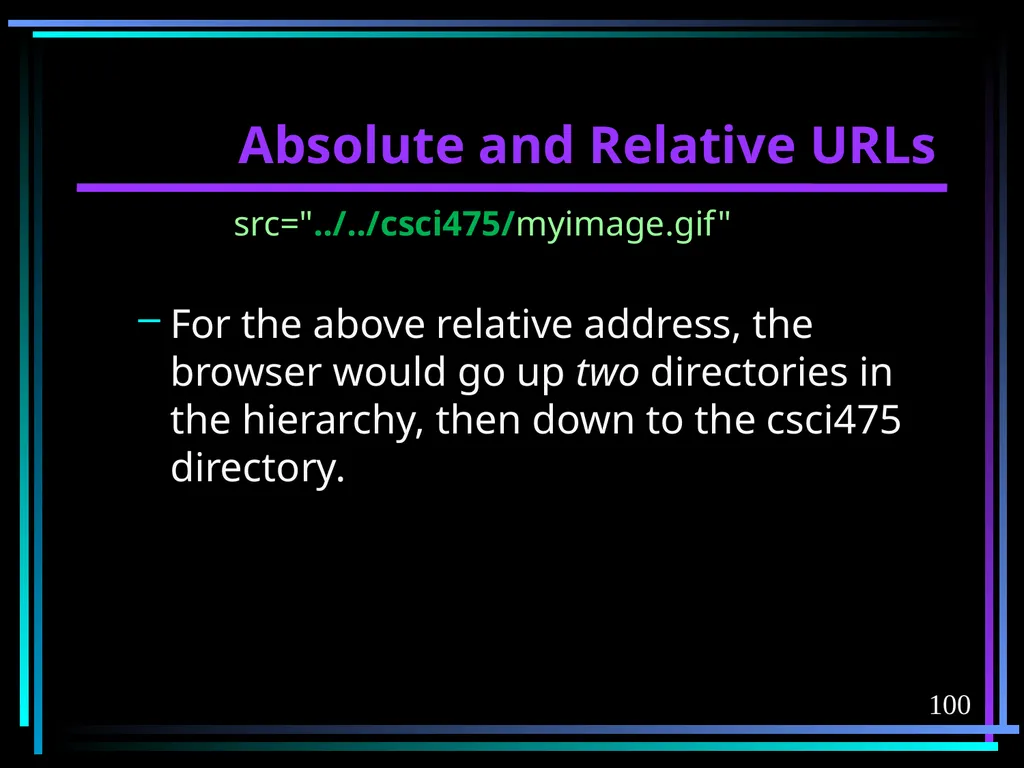
slide100. 100 Absolute and Relative URLs src="../../csci475/myimage.gif"
For the above relative address, the browser would go up two directories in the hierarchy, then down to the csci475 directory.<br>
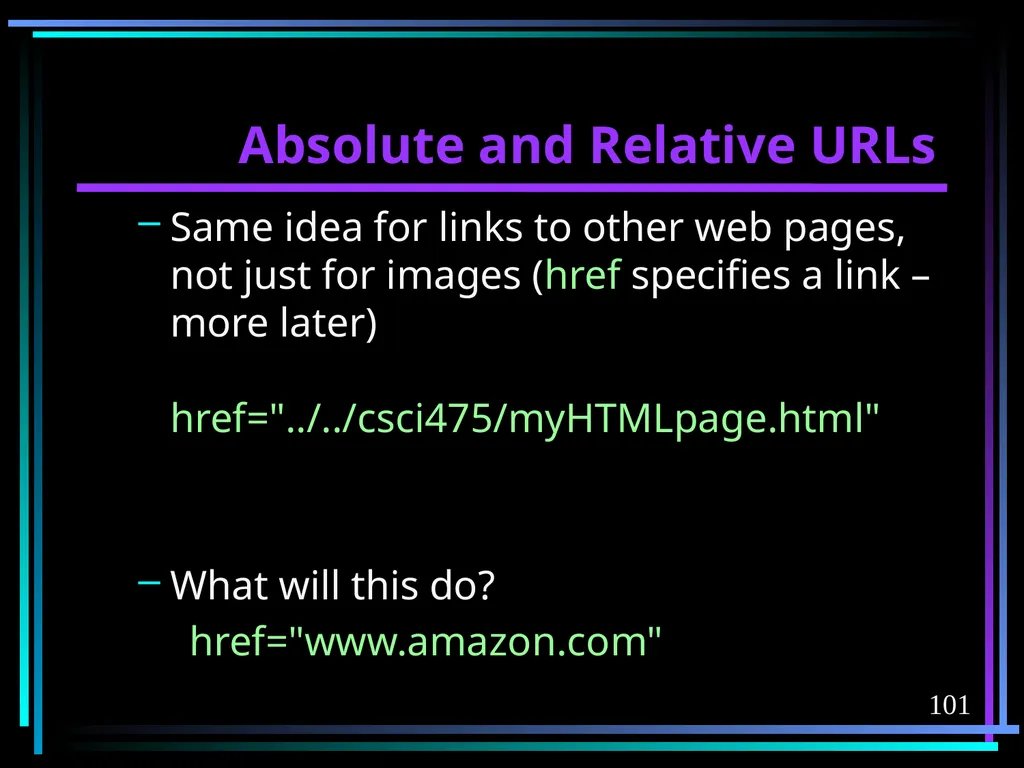
slide101. 101 Absolute and Relative URLs Same idea for links to other web pages, not just for images (href specifies a link – more later) href="../../csci475/myHTMLpage.html"
What will this do?
href="www.amazon.com"<br>
slide102. 102 Incorporating Images Back to src="…"
Use an absolute address like
http://www.niu.edu/cs/myimage.gif
for all external addresses (not under your own site).
Use a relative address like
../csci475/assign.html
for all addresses within your site.
Why? Portability!<br>
slide103. 103 Incorporating Images Either way, addresses can work when testing on your own computer but break when you put them out on the web.
Why?
Windows is not case-sensitive, UNIX is.
You might have accidentally changed the directory structure for the server.
You might have forgotten to FTP ancillary files like images.<br>
slide104. 104 Incorporating Images OR, it might work on the server when you are testing from your own computer, but breaks on a different computer. Why?
If you accidentally specified a path and filename on your own computer, the image may still show up when vieing from your own computer.
Test from another computer, or rename the directory on your own computer!<br>
slide105. 105 Incorporating Images height = "nnn" height, in pixels
width = "nnn" width, in pixels
height and width default to the exact size of the saved image if not specified, but specify that default anyway. Why?
Text on the page displays properly right off the bat, with empty boxes of the correct size as placeholders for the images.
Faster display.<br>
slide106. 106 Incorporating Images Don’t use the height and width attributes to change the size of the image on the page.
Don’t use to resize image smaller, because you’re still paying the download hit for the larger image.
Don’t use to resize the image bigger, because quality will be seriously degraded.
Instead, use an image-editing program to resize images and save them in the precise size (in pixels) that you want it to be on the screen.<br>
slide107. 107 Incorporating Images But this is changing, due to querying to media queries, which change the image depending upon resolution of the browser window.
More later, under graphics, or check out http://msdn.microsoft.com/en-us/magazine/hh882445.aspx if you are anxious to get going with media queries and CSS.
Better to use height: and width: in CSS, unless one-offs.<br>
slide108. 108 Incorporating Images name = "name you give it"
id = "name you give it"
Needed only if you want to reference the image by name, for things like mouseovers.
name is deprecated (but still works, and will for years to come) in favor of id in the newer standards.
Use both if in doubt (which is what Dreamweaver does for you, when it needs to reference images).<br>
slide109. 109 Incorporating Images alt = "some text" Text that displays if the browser can’t display graphics or the image errors off.
Always (repeat, always) include.
Used by search engines.
Screen readers use for vision-impaired users.
alt = "" (empty quotes) if no meaning, so skipped by screen readers.
title="some text"
For a tooltip on mouseover (newer).<br>
slide110. 110 Incorporating Images border = "n"
border width, in pixels.
0 for no border.
Deprecated in favor of CSS border.
HTML image borders went out of style for a number of years, but now graceful, one-pixel wide borders are back in style.<br>
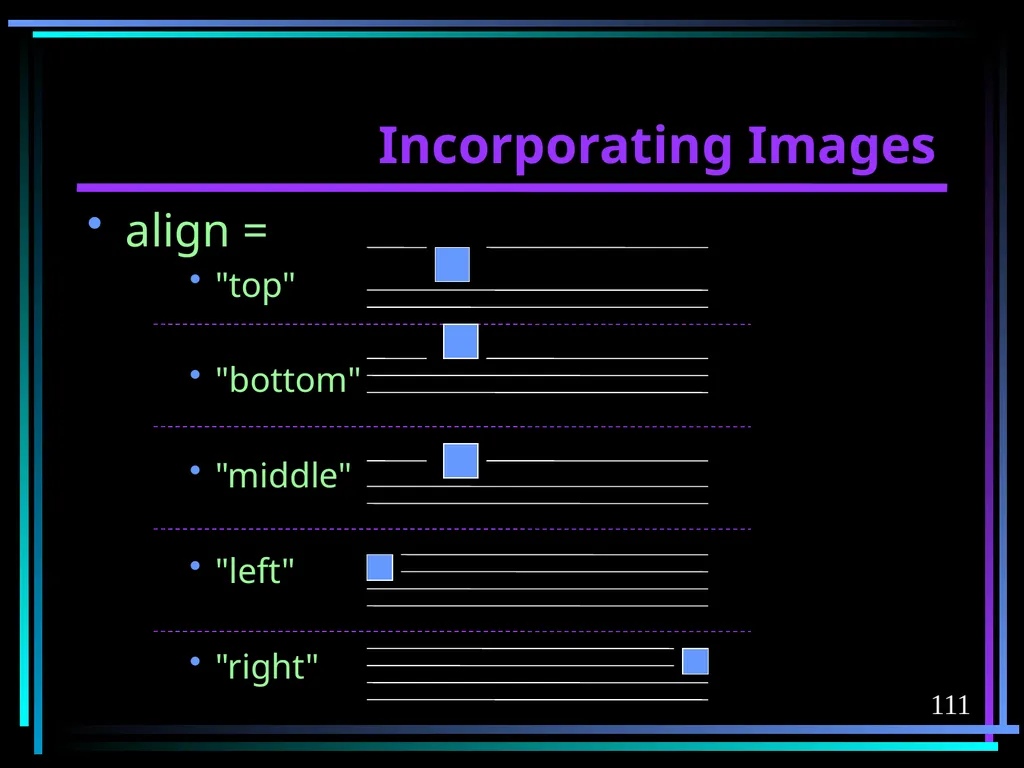
slide111. 111 Incorporating Images align =
"top"
"bottom"
"middle"
"left"
"right"<br>
slide112. 112 Incorporating Images hspace=“m" vspace="n"
Vertical and horizontal white space left around the image, in pixels.
Each applies to two margins (that's unfortunate)
Default is usually 3 pixels.<br>
slide113. 113 Incorporating Images align, hspace, and vspace
Deprecated in favor of:
CSS margin, which can be specified on all four sides independently: margin-left, margin-right, margin-top, margin-bottom.
margin-left:auto; margin-right:auto; centers the item.
CSS float, text-align, vertical-align, position, etc.<br>
slide114. 114 Incorporating Sound and Movies Linking to sound or movie files is identical to linking to images, but the file name extensions are different.
The user must have the appropriate “player” on his or her PC – for example, the Shockwave player if it is a Shockwave file.
You can ask the user if he or she wants to download the appropriate player, but also provide an alternative.<br>
slide115. 115 Incorporating Sound and Movies Flash was already embedded in all browsers for the last decade or so, until recently.
Now, Apple and Adobe are feuding, so all bets are off.
The death knell for Flash?
Especially since Flash animations can now be converted to HTML5/JavaScript animations, even from the Flash editor.<br>
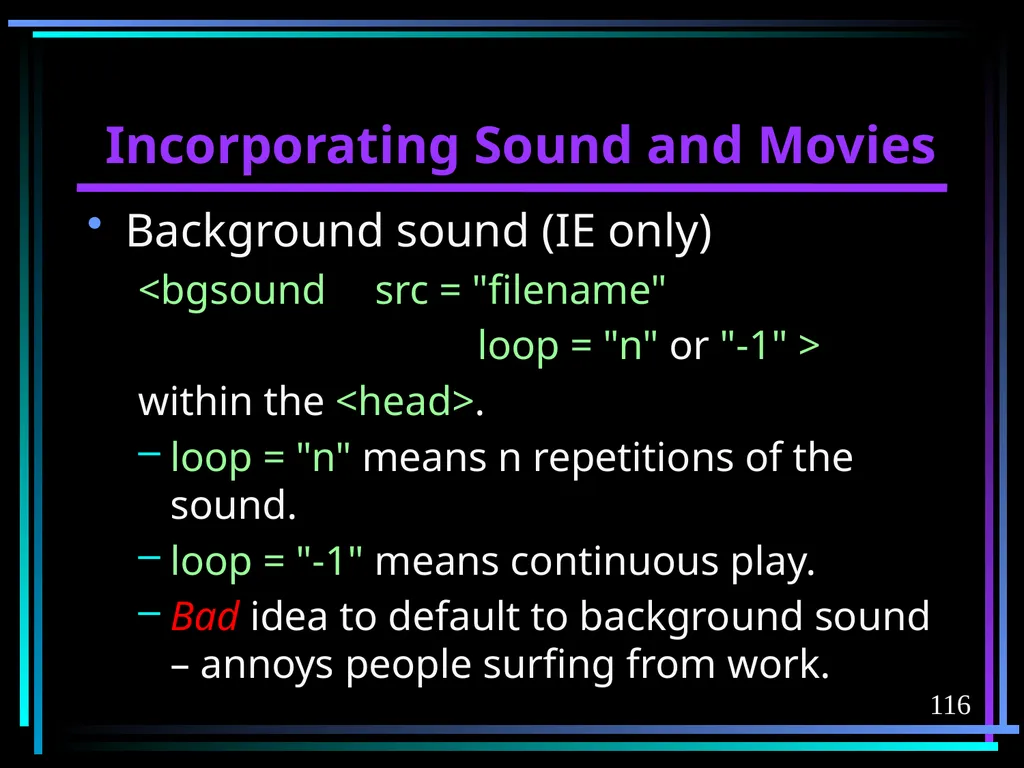
slide116. 116 Incorporating Sound and Movies Background sound (IE only)
<bgsound src = "filename"
loop = "n" or "-1" >
within the <head>.
loop = "n" means n repetitions of the sound.
loop = "-1" means continuous play.
Bad idea to default to background sound – annoys people surfing from work.<br>
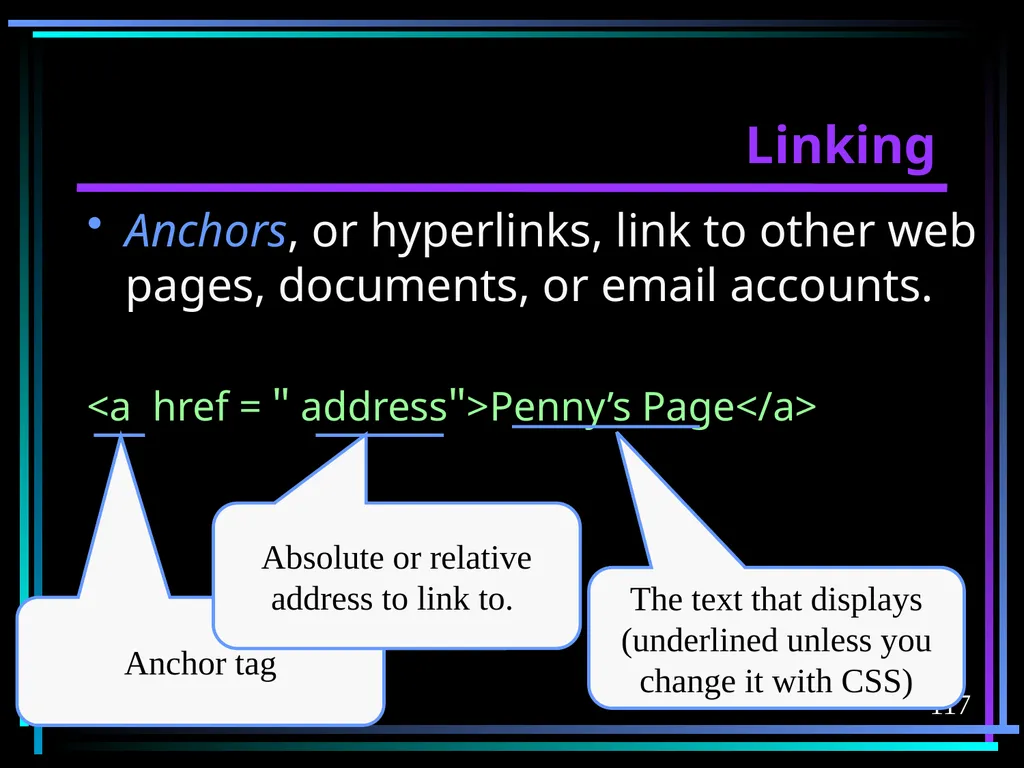
slide117. 117 Anchors, or hyperlinks, link to other web pages, documents, or email accounts.
<a href = " address">Penny’s Page</a> Linking<br>
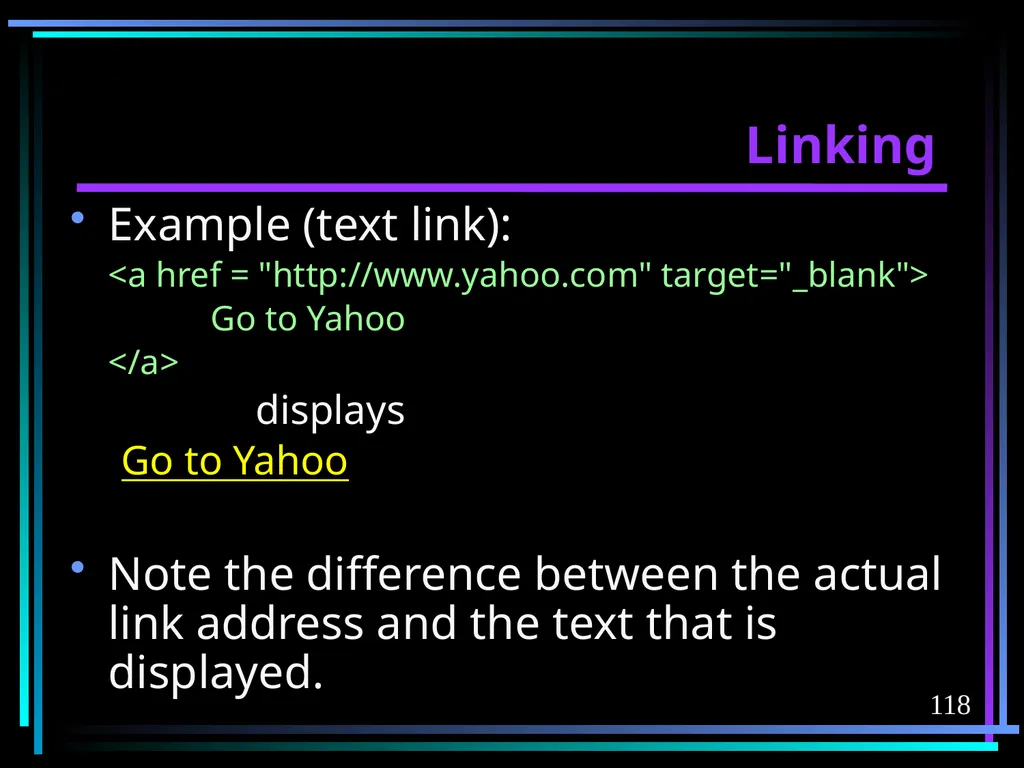
slide118. 118 Linking Example (text link):
<a href = "http://www.yahoo.com" target="_blank">
Go to Yahoo
</a>
displays
Go to Yahoo
Note the difference between the actual link address and the text that is displayed.<br>
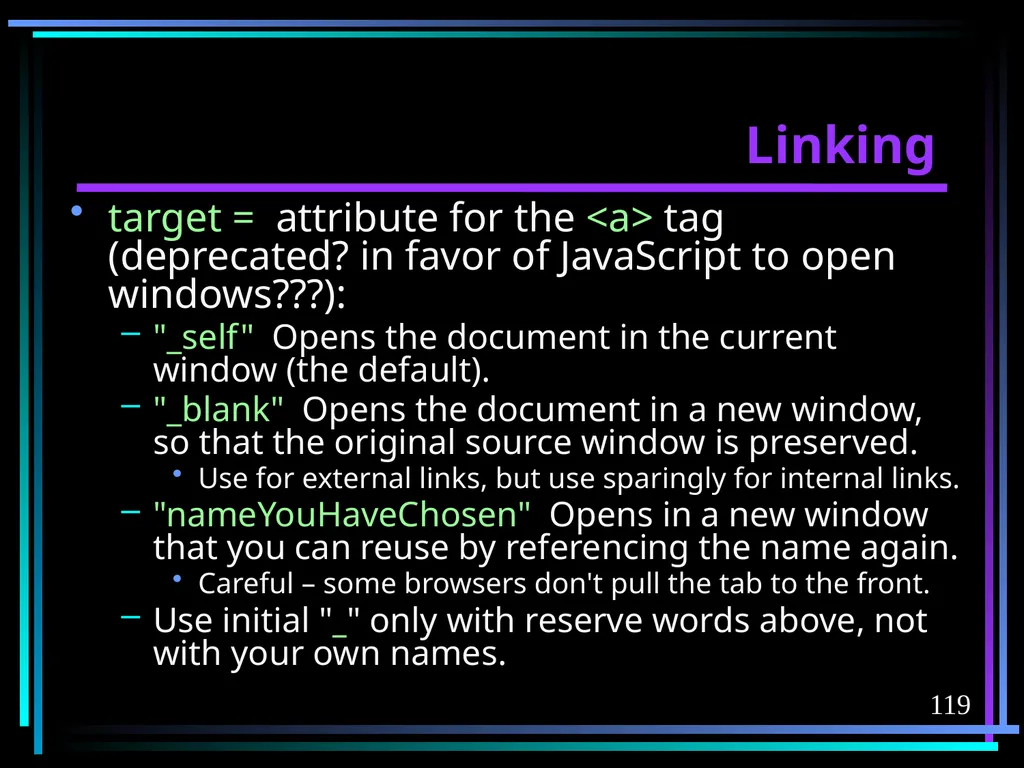
slide119. 119 Linking target = attribute for the <a> tag (deprecated? in favor of JavaScript to open windows???):
"_self" Opens the document in the current window (the default).
"_blank" Opens the document in a new window, so that the original source window is preserved.
Use for external links, but use sparingly for internal links.
"nameYouHaveChosen" Opens in a new window that you can reuse by referencing the name again.
Careful – some browsers don't pull the tab to the front.
Use initial "_" only with reserve words above, not with your own names.<br>
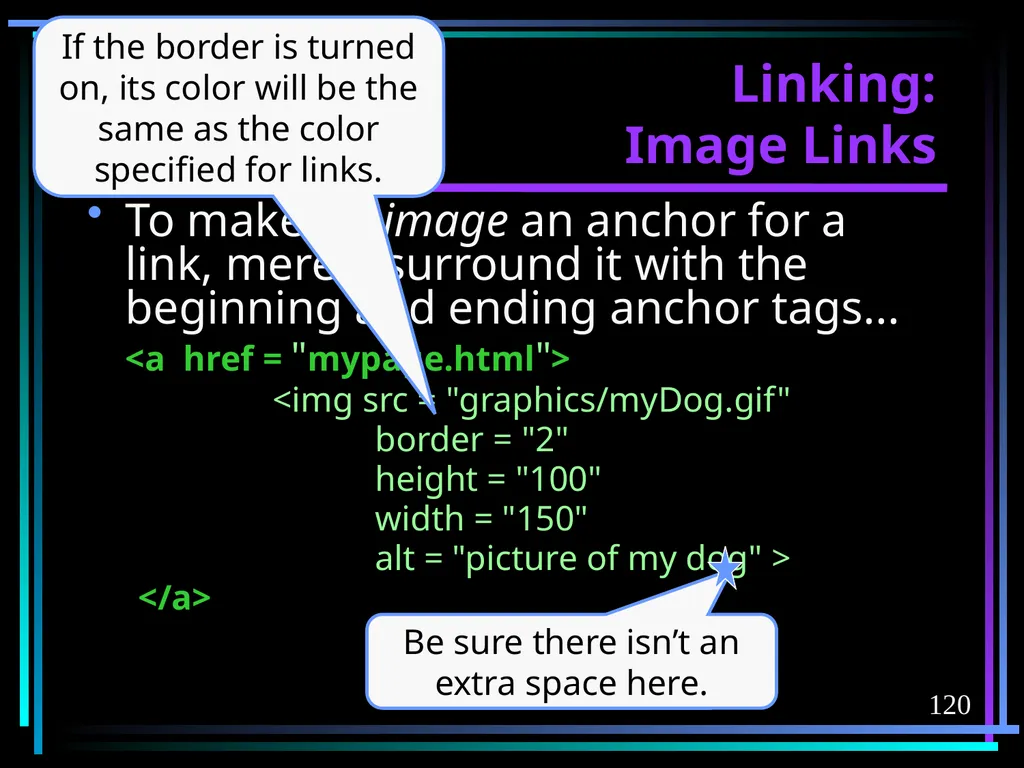
slide120. 120 Linking: Image Links To make an image an anchor for a link, merely surround it with the beginning and ending anchor tags...
<a href = "mypage.html">
<img src = "graphics/myDog.gif"
border = "2"
height = "100"
width = "150"
alt = "picture of my dog" >
</a> If the border is turned on, its color will be the same as the color specified for links. Be sure there isn’t an extra space here.<br>
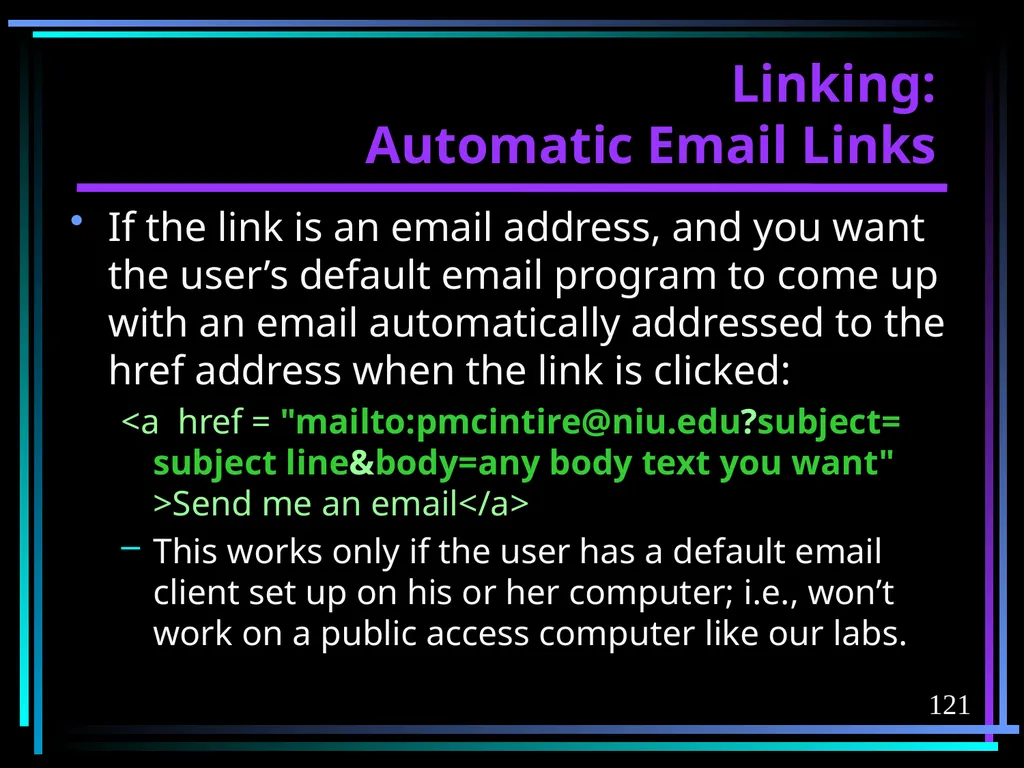
slide121. 121 Linking: Automatic Email Links If the link is an email address, and you want the user’s default email program to come up with an email automatically addressed to the href address when the link is clicked:
<a href = "mailto:pmcintire@niu.edu?subject= subject line&body=any body text you want" >Send me an email</a>
This works only if the user has a default email client set up on his or her computer; i.e., won’t work on a public access computer like our labs.<br>
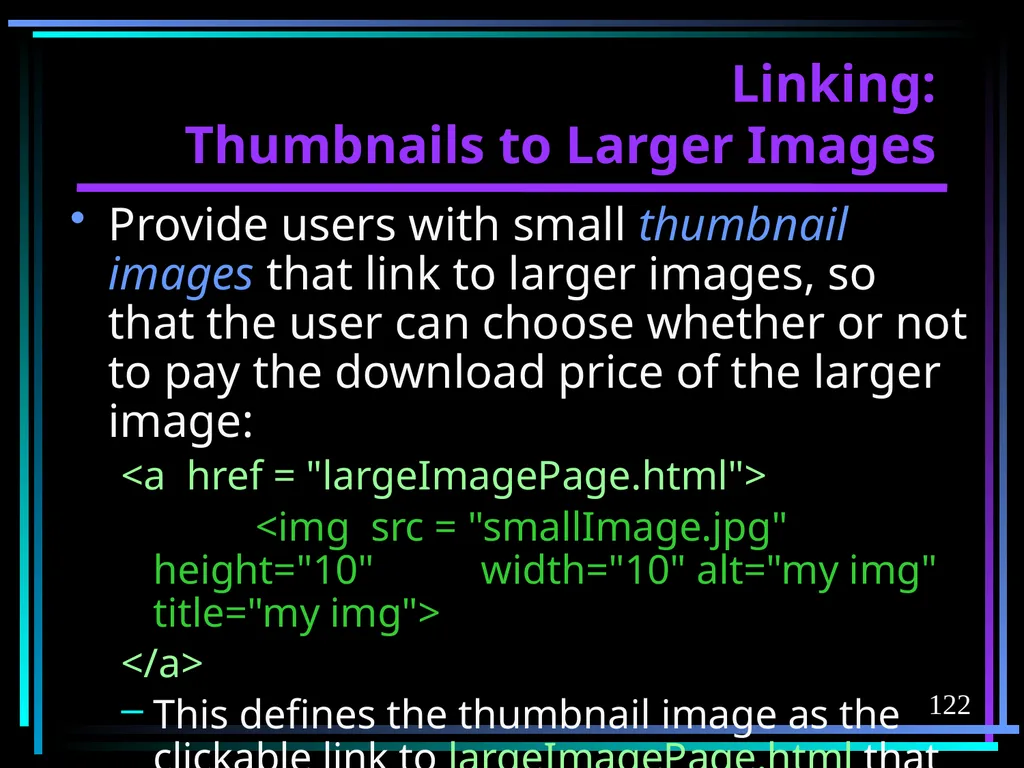
slide122. 122 Linking: Thumbnails to Larger Images Provide users with small thumbnail images that link to larger images, so that the user can choose whether or not to pay the download price of the larger image:
<a href = "largeImagePage.html">
<img src = "smallImage.jpg" height="10" width="10" alt="my img" title="my img">
</a>
This defines the thumbnail image as the clickable link to largeImagePage.html that contains the larger image.<br>
slide123. 123 Linking: Thumbnails to Larger Images Don’t just use the height and width attributes to downscale the larger image to become the thumbnail; in that case, the thumbnail would take just as long to load as the larger image.
That would defeat the purpose of having fast load on the little image and letting the user choose whether or not to wait for the larger image.<br>
slide124. 124 Linking: Internal Anchors Sometimes it might be nice to be able to link to a specific location in the current page, or to a specific location deep in another page, not just to the top of that page.
HTML has a facility to assign an internal anchor to any location in an HTML file; a bookmark, of sorts.
Then, we can direct the user directly to that location by adding that location name at the end of path to the page.<br>
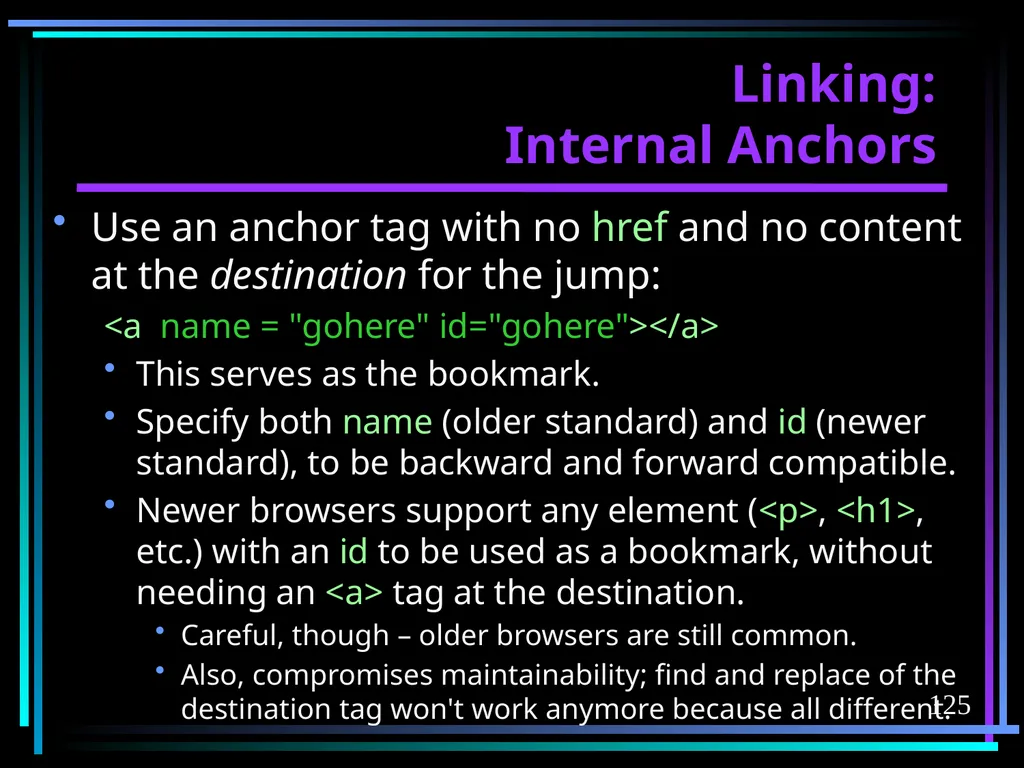
slide125. 125 Linking: Internal Anchors Use an anchor tag with no href and no content at the destination for the jump:
<a name = "gohere" id="gohere"></a>
This serves as the bookmark.
Specify both name (older standard) and id (newer standard), to be backward and forward compatible.
Newer browsers support any element (<p>, <h1>, etc.) with an id to be used as a bookmark, without needing an <a> tag at the destination.
Careful, though – older browsers are still common.
Also, compromises maintainability; find and replace of the destination tag won't work anymore because all different.<br>
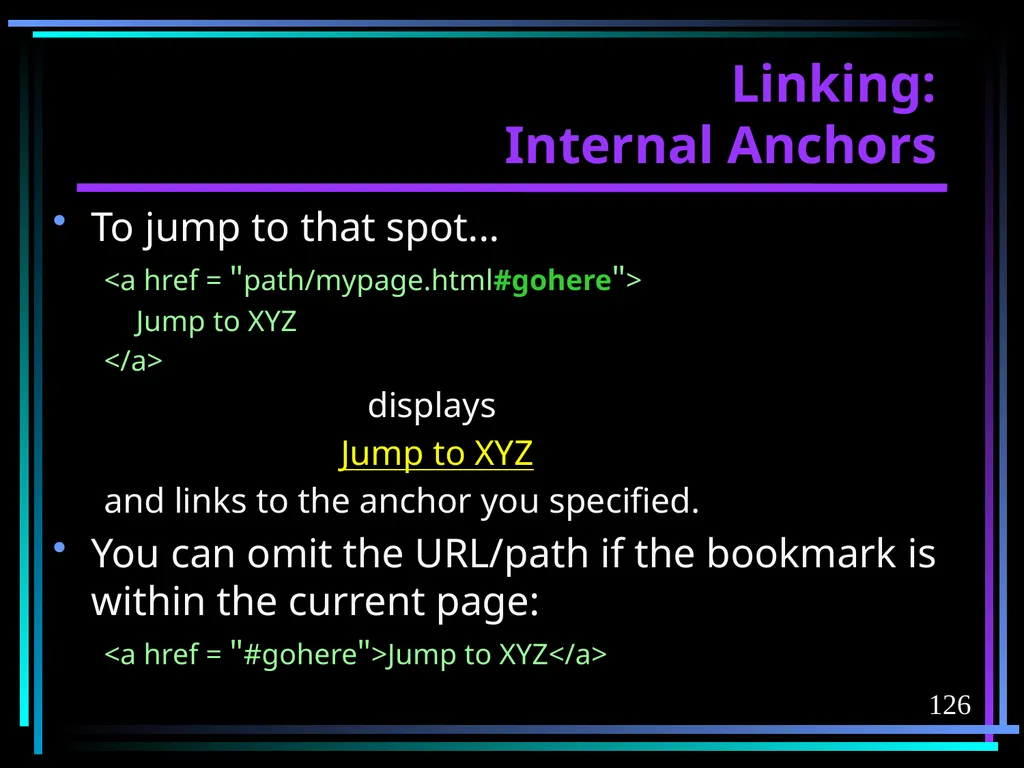
slide126. 126 Linking: Internal Anchors To jump to that spot...
<a href = "path/mypage.html#gohere">
Jump to XYZ
</a>
displays
Jump to XYZ
and links to the anchor you specified.
You can omit the URL/path if the bookmark is within the current page:
<a href = "#gohere">Jump to XYZ</a><br>
slide127. 127 Linking Hint Be sure not to include a space or inside any anchor tags, either before or after the link content, whether that content is text or an image.
On a text link, the extra spaces will be underlined, which looks awful.
On an image link, the dotted outline that displays on click will have an odd shape.<br>
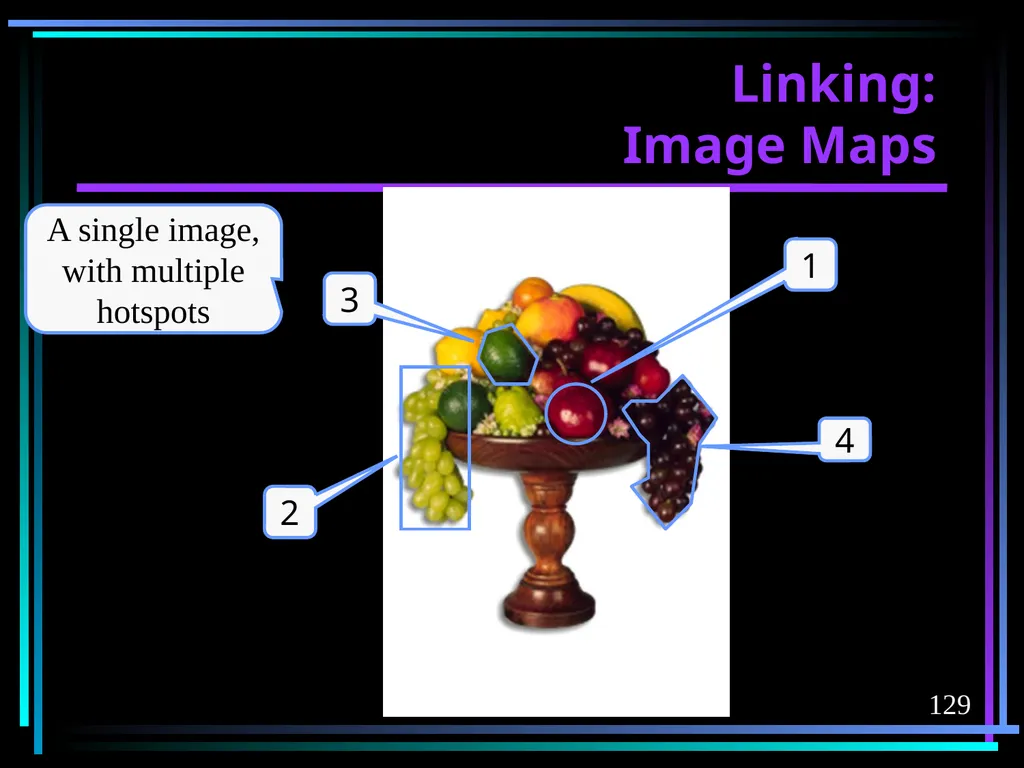
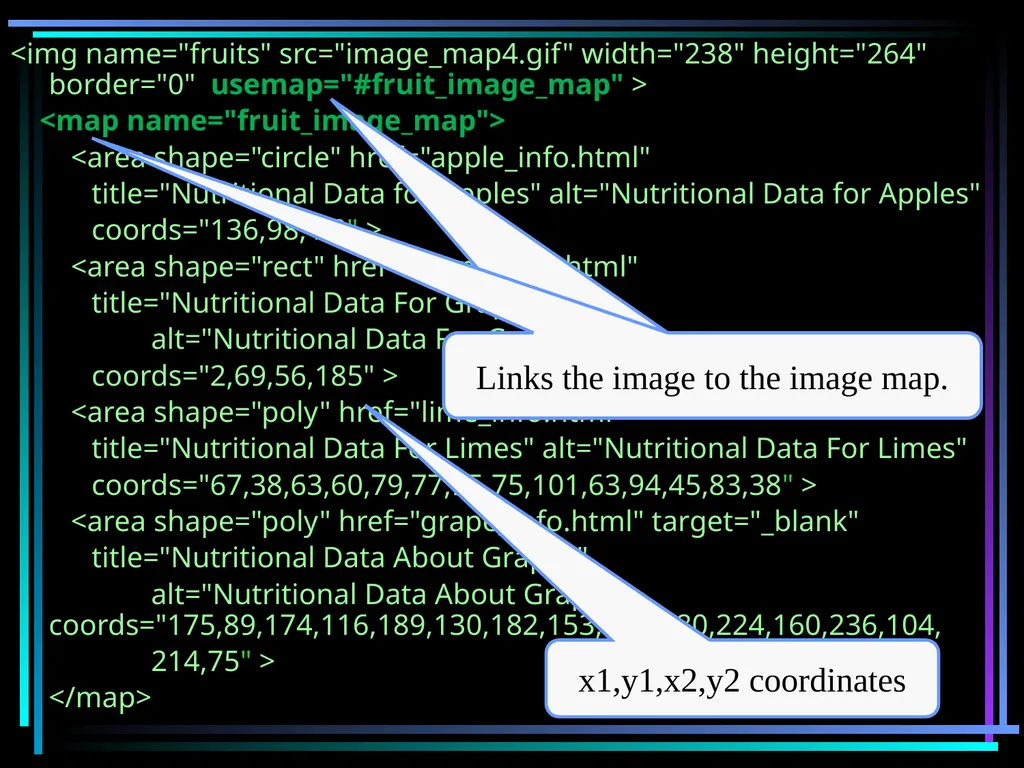
slide128. 128 Linking: Image Maps An image map is a single image that encompasses multiple links.
We specify different areas of the image as hotspots, or anchors.
This involves more complicated HTML than using several separate image links; use only when you can’t get the effect you want using separate images.
(ImageMapTest.html)<br>
slide129. 129 Linking: Image Maps A single image, with multiple hotspots 1 2 3 4<br>
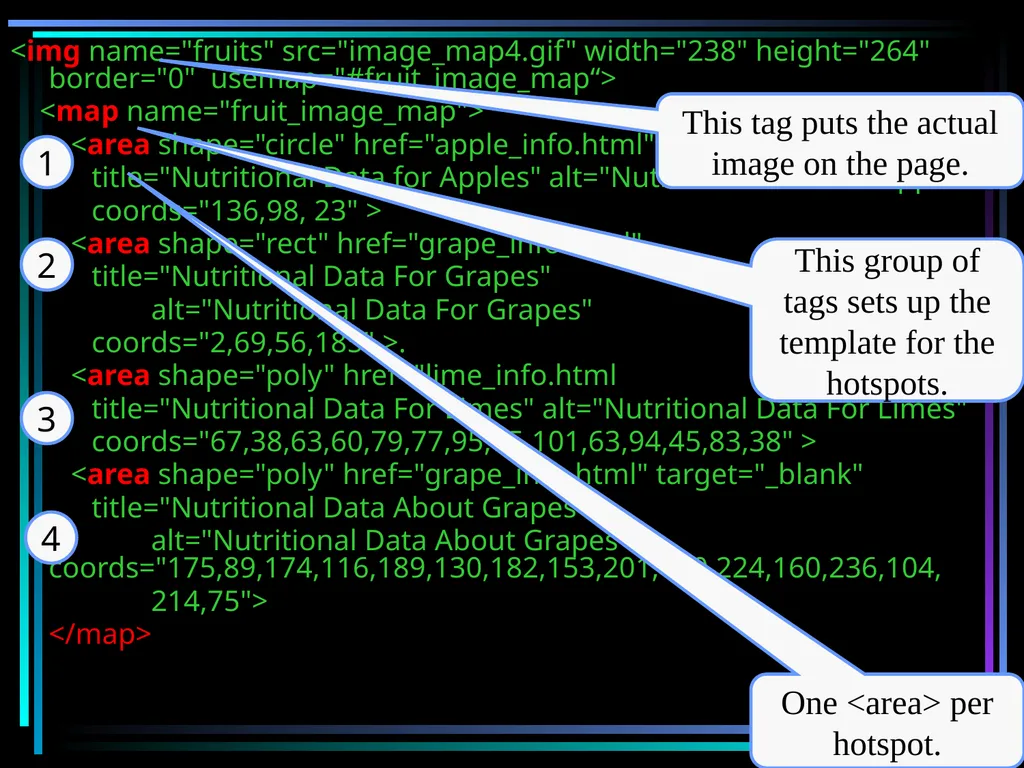
slide130. <img name="fruits" src="image_map4.gif" width="238" height="264" border="0" usemap="#fruit_image_map“>
<map name="fruit_image_map">
<area shape="circle" href="apple_info.html"
title="Nutritional Data for Apples" alt="Nutritional Data for Apples"
coords="136,98, 23" >
<area shape="rect" href="grape_info.html"
title="Nutritional Data For Grapes"
alt="Nutritional Data For Grapes"
coords="2,69,56,185" >.
<area shape="poly" href="lime_info.html
title="Nutritional Data For Limes" alt="Nutritional Data For Limes"
coords="67,38,63,60,79,77,95,75,101,63,94,45,83,38" >
<area shape="poly" href="grape_info.html" target="_blank"
title="Nutritional Data About Grapes"
alt="Nutritional Data About Grapes coords="175,89,174,116,189,130,182,153,201,180,224,160,236,104,
214,75">
</map> This tag puts the actual image on the page. This group of tags sets up the template for the hotspots.<br>
slide131. 131 Image Maps Sorta like a DSECT in assembler.
<map name = "name of the map">
Sets up the entire image map.
Put all map definitions within the <body> tag.
name and id are the only attributes (use both for forward and backward compatibility
<area... >
Sets up an individual hotspot within the map.
So, one <area> tag per hotspot.<br>
slide132. 132 Image Maps <area > attributes:
href = "path to the destination page"
shape = "rect" or "poly" or "circle"
coords = "coordinate points"
For shape = "rect", x1,y1,x2,y2 points for top left and bottom right corners, in pixels, starting at top left corner of the image.
For shape = "poly", must list x,y for each point. Can get complicated very quickly.
For shape = "circle", x,y for center, plus radius in pixels.<br>
slide133. 133 Image Maps No formatting – spaces, line breaks, tabs – within coords attribute value (so formatting your code is impossible for this tag).
Trial and error if you do the coordinates manually, but...
Much easier in a package like Fireworks or Dreamweaver, where you simply draw a shape around the area and it calculates the coordinates for you and writes the HTML.<br>
slide134. 134 Image Maps Within the body, define the image the way you would otherwise, but connect to the map by adding the attribute
usemap = "#mapname"
Like a “using” statement in assembler.
The browser then overlays the image map on the image.
Use both the alt and title attributes for cross-browser display of the name of the links on mouseover.
Let’s look again…<br>
slide135. <img name="fruits" src="image_map4.gif" width="238" height="264" border="0" usemap="#fruit_image_map" >
<map name="fruit_image_map">
<area shape="circle" href="apple_info.html"
title="Nutritional Data for Apples" alt="Nutritional Data for Apples"
coords="136,98, 23" >
<area shape="rect" href="grape_info.html"
title="Nutritional Data For Grapes"
alt="Nutritional Data For Grapes"
coords="2,69,56,185" >
<area shape="poly" href="lime_info.html
title="Nutritional Data For Limes" alt="Nutritional Data For Limes"
coords="67,38,63,60,79,77,95,75,101,63,94,45,83,38" >
<area shape="poly" href="grape_info.html" target="_blank"
title="Nutritional Data About Grapes"
alt="Nutritional Data About Grapes coords="175,89,174,116,189,130,182,153,201,180,224,160,236,104,
214,75" >
</map> x1,y1,x2,y2 coordinates<br>
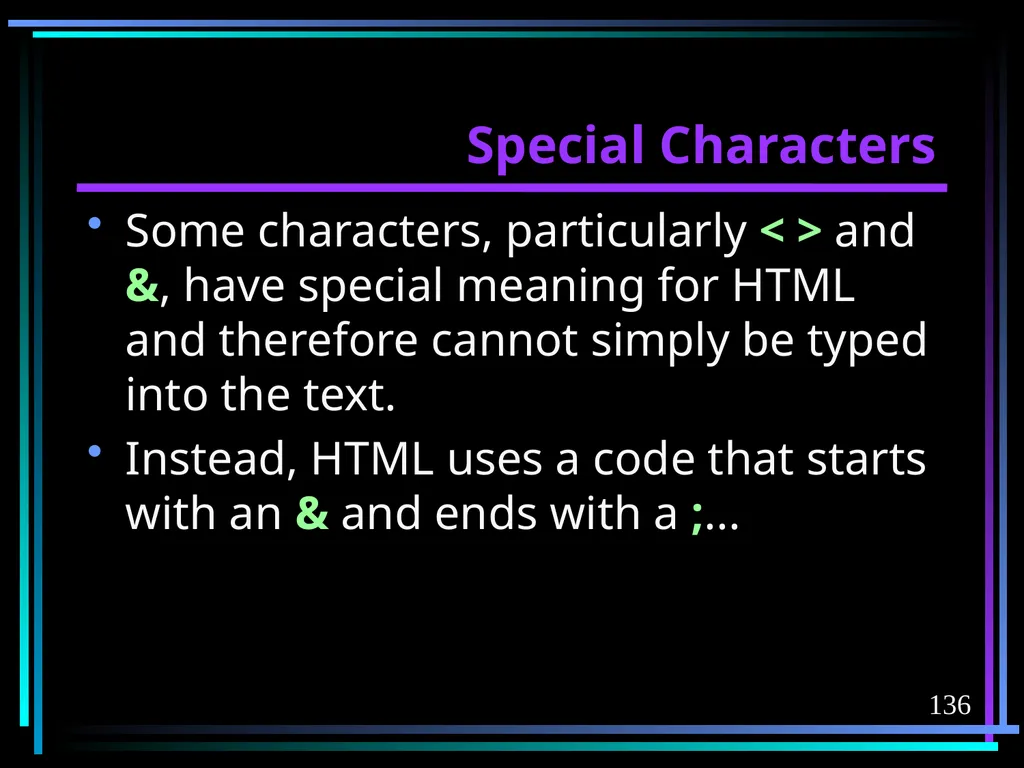
slide136. 136 Special Characters Some characters, particularly < > and &, have special meaning for HTML and therefore cannot simply be typed into the text.
Instead, HTML uses a code that starts with an & and ends with a ;...<br>
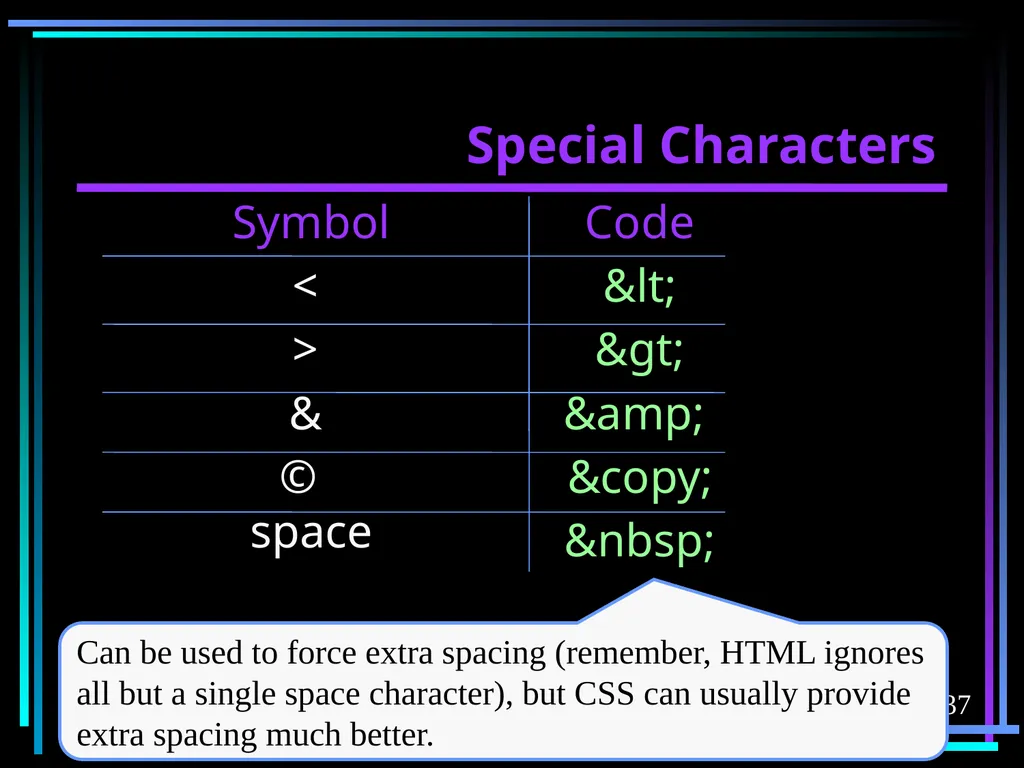
slide137. 137 Special Characters Symbol
<
>
&
©
space Code
<
>
&
©
Can be used to force extra spacing (remember, HTML ignores all but a single space character), but CSS can usually provide extra spacing much better.<br>
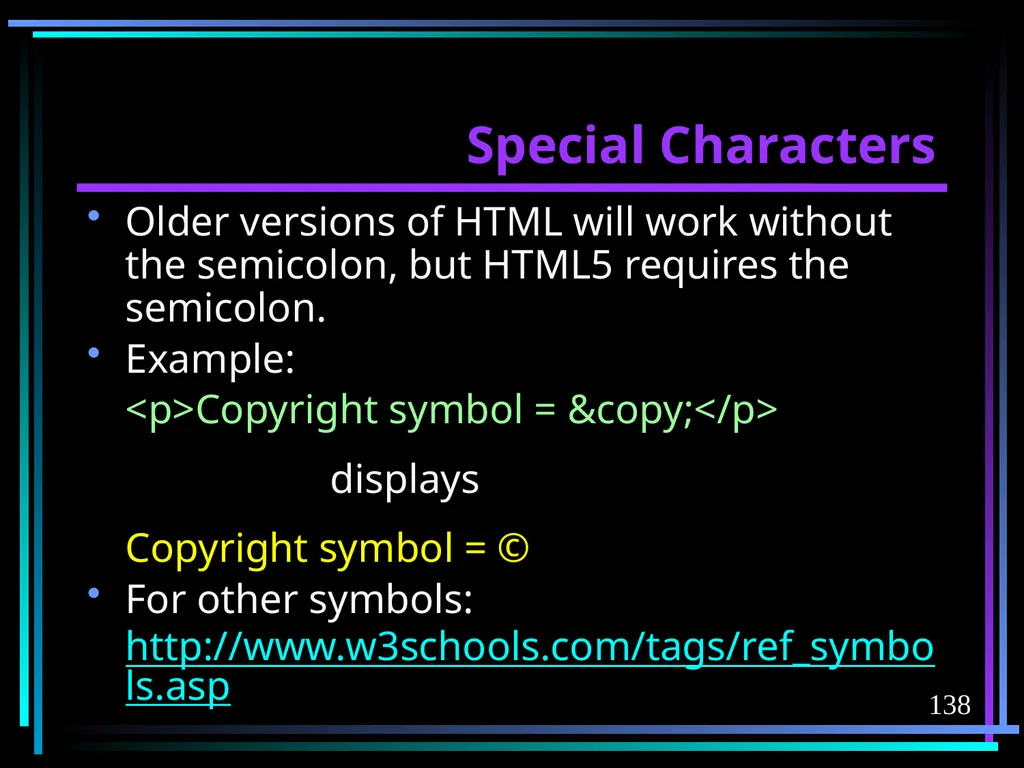
slide138. 138 Special Characters Older versions of HTML will work without the semicolon, but HTML5 requires the semicolon.
Example:
<p>Copyright symbol = ©</p>
displays
Copyright symbol = ©
For other symbols: http://www.w3schools.com/tags/ref_symbols.asp<br>
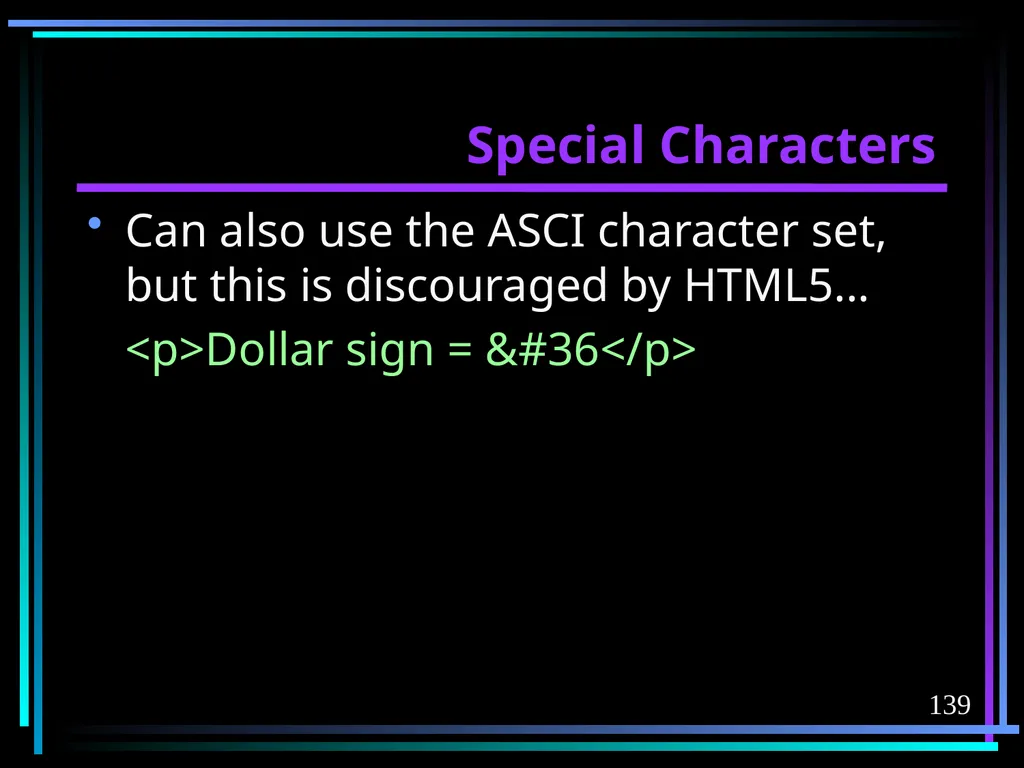
slide139. 139 Special Characters Can also use the ASCI character set, but this is discouraged by HTML5...
<p>Dollar sign = $</p><br>
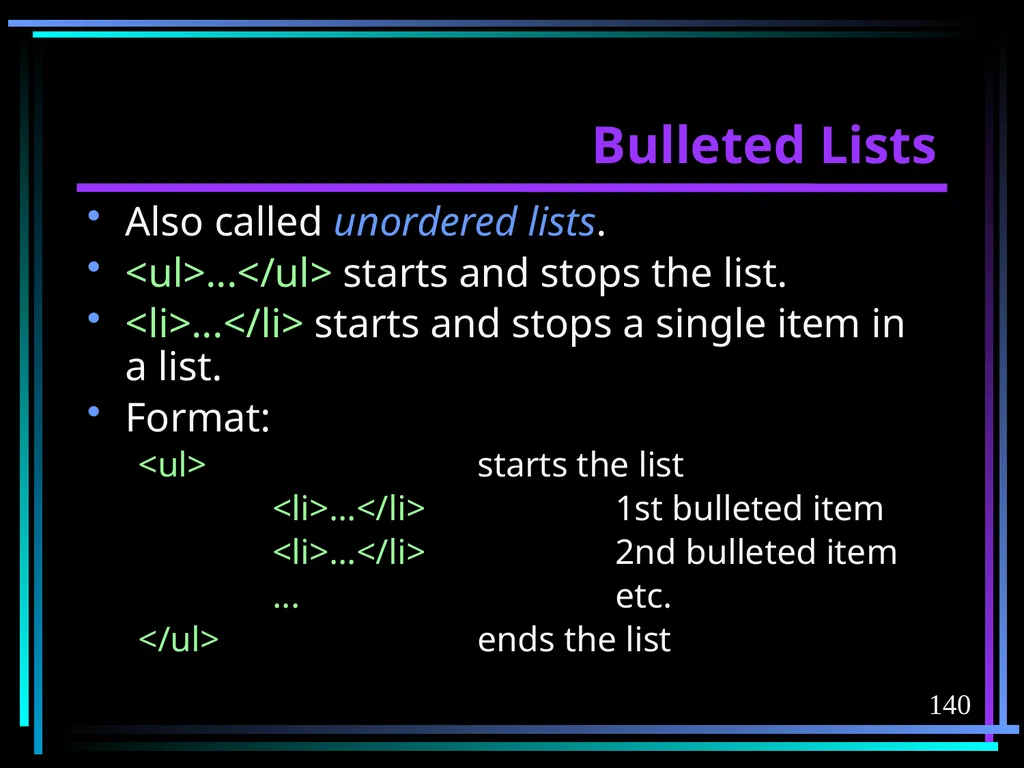
slide140. 140 Bulleted Lists Also called unordered lists.
<ul>...</ul> starts and stops the list.
<li>...</li> starts and stops a single item in a list.
Format:
<ul> starts the list
<li>...</li> 1st bulleted item
<li>...</li> 2nd bulleted item
... etc.
</ul> ends the list<br>
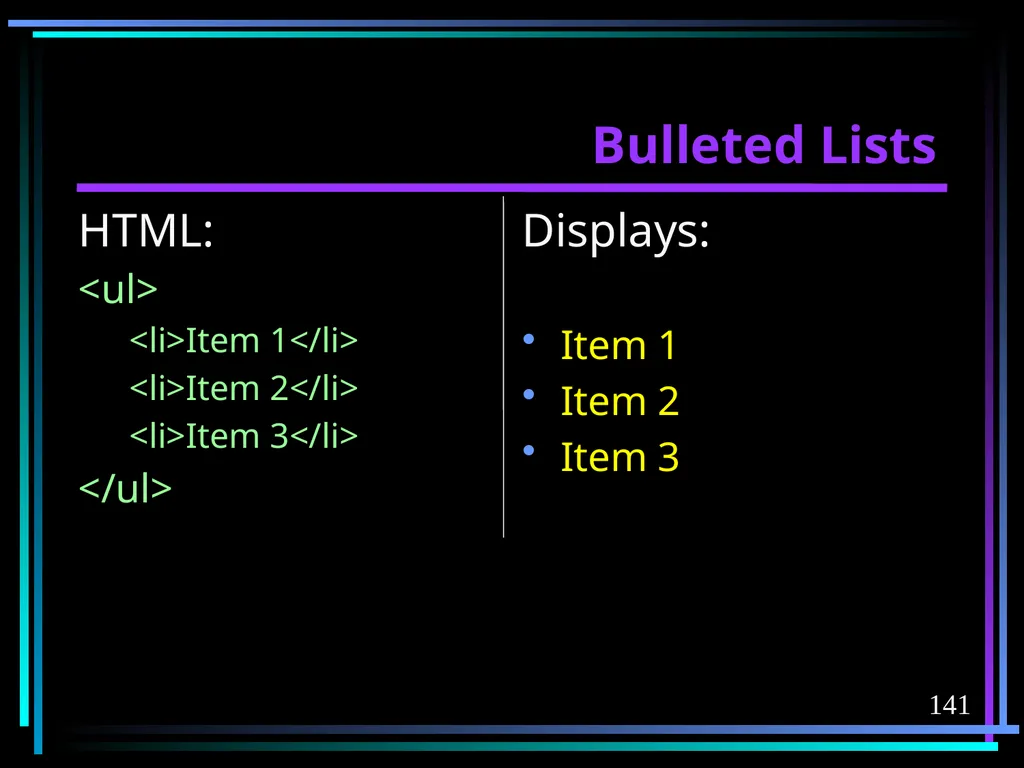
slide141. 141 Bulleted Lists Displays:
Item 1
Item 2
Item 3 HTML:
<ul>
<li>Item 1</li>
<li>Item 2</li>
<li>Item 3</li>
</ul><br>
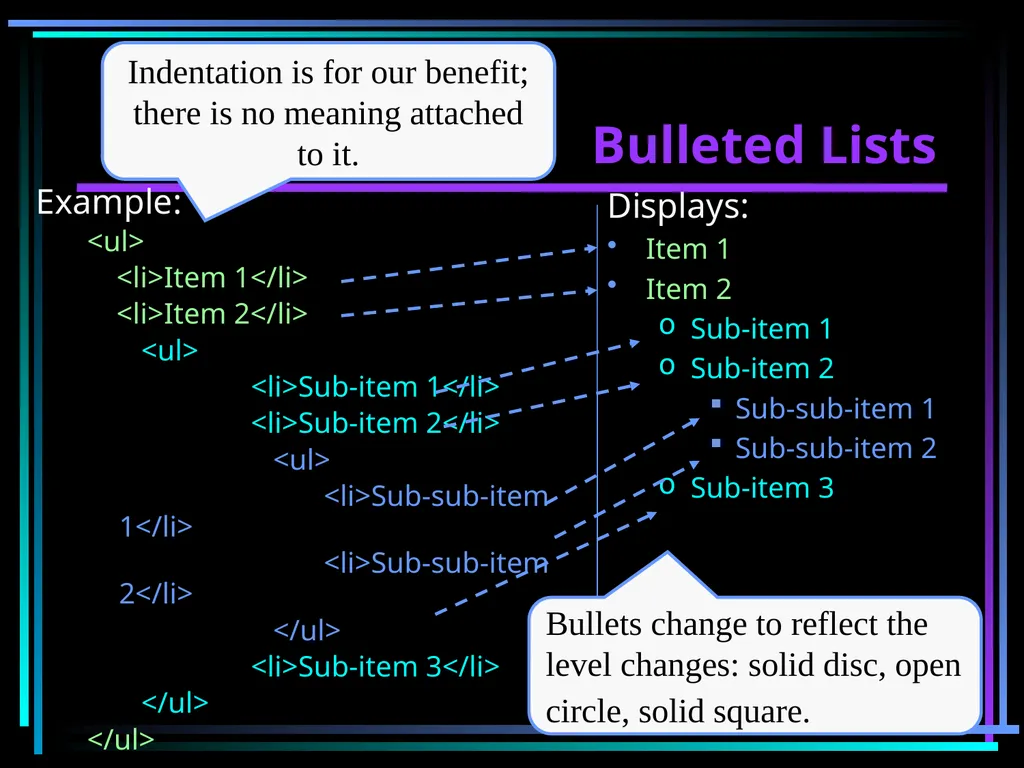
slide142. 142 Bulleted Lists Can also nest bulleted lists...<br>
slide143. 143 Bulleted Lists Example:
<ul>
<li>Item 1</li>
<li>Item 2</li>
<ul>
<li>Sub-item 1</li>
<li>Sub-item 2</li>
<ul>
<li>Sub-sub-item 1</li>
<li>Sub-sub-item 2</li>
</ul>
<li>Sub-item 3</li>
</ul>
</ul> Displays:
Item 1
Item 2
Sub-item 1
Sub-item 2
Sub-sub-item 1
Sub-sub-item 2
Sub-item 3 Indentation is for our benefit; there is no meaning attached to it. Bullets change to reflect the level changes: solid disc, open circle, solid square.<br>
slide144. 144 Bulleted Lists Can specify bullet types:
On <ul>, type="disc"/"circle"/"square"
There is no nesting limit.
Don’t forget to close your lists, or your web page will be, uhm, interesting.
CSS: list-style-type:disc or circle or square; list-style-position:inside or outside; list-style-image:url("myImage.gif");<br>
slide145. 145 Numbered Lists Also called ordered lists.
<ol type = "... " >
<li>...</li> <li> used the same as for
<li>...</li> unordered lists.
…
</ol>
Works identically to a bulleted list except numbers/letters the list instead of using bullets.
Default numbers are decimal number: 1, 2, 3, etc.<br>
slide146. 146 Numbered Lists Attributes for both <ol> and <li> include:
type = “1” decimal numbers, the default
type = “A” uppercase alphabet
type = “a” lowercase alphabet
type = “I” uppercase Roman numerals
type = “i” lowercase Roman numerals
Example...<br>
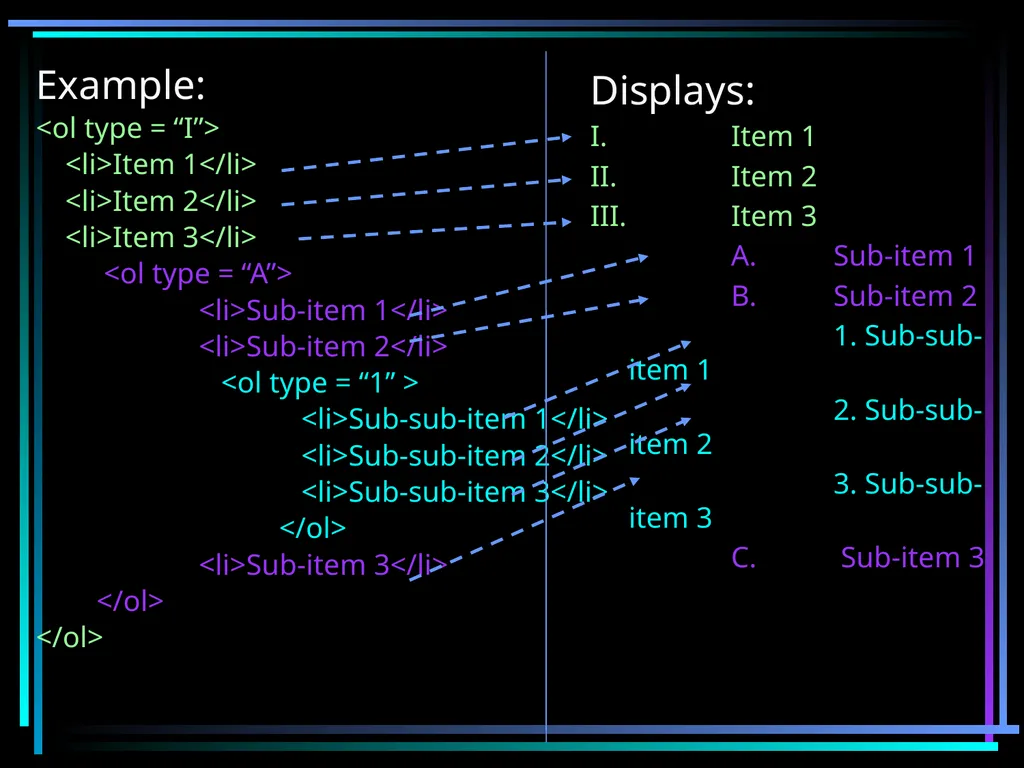
slide147. Example:
<ol type = “I”>
<li>Item 1</li>
<li>Item 2</li>
<li>Item 3</li>
<ol type = “A”>
<li>Sub-item 1</li>
<li>Sub-item 2</li>
<ol type = “1” >
<li>Sub-sub-item 1</li>
<li>Sub-sub-item 2</li>
<li>Sub-sub-item 3</li>
</ol>
<li>Sub-item 3</li>
</ol>
</ol> Displays:
I. Item 1
II. Item 2
III. Item 3
A. Sub-item 1
B. Sub-item 2
1. Sub-sub-item 1
2. Sub-sub-item 2
3. Sub-sub-item 3
C. Sub-item 3<br>
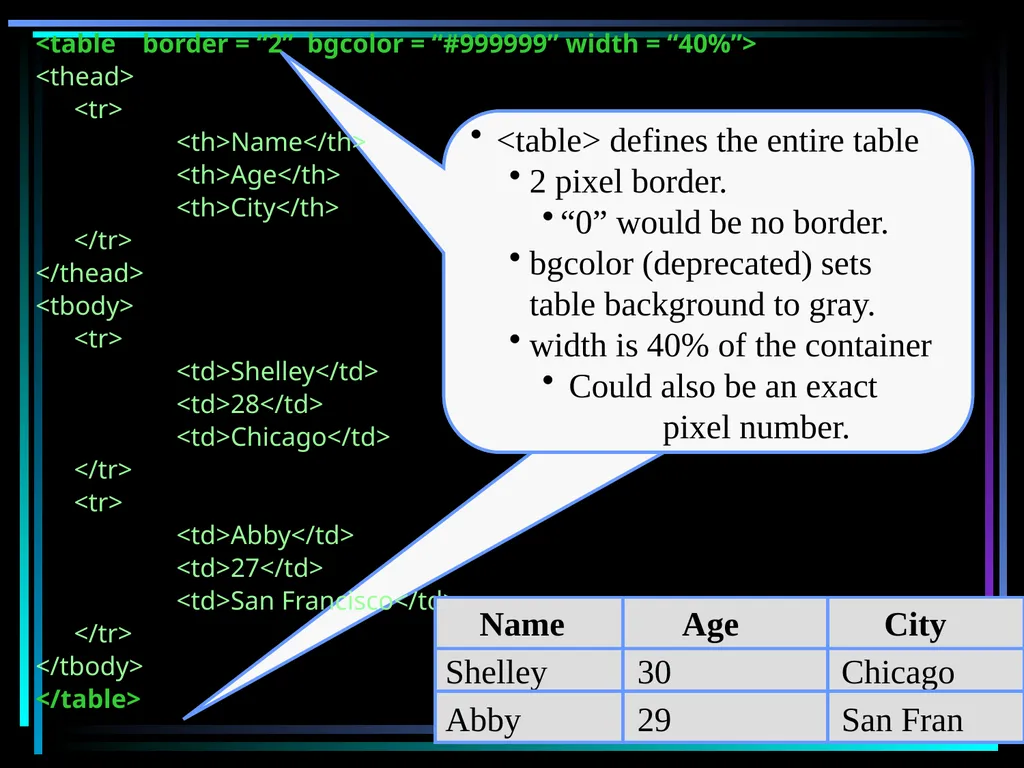
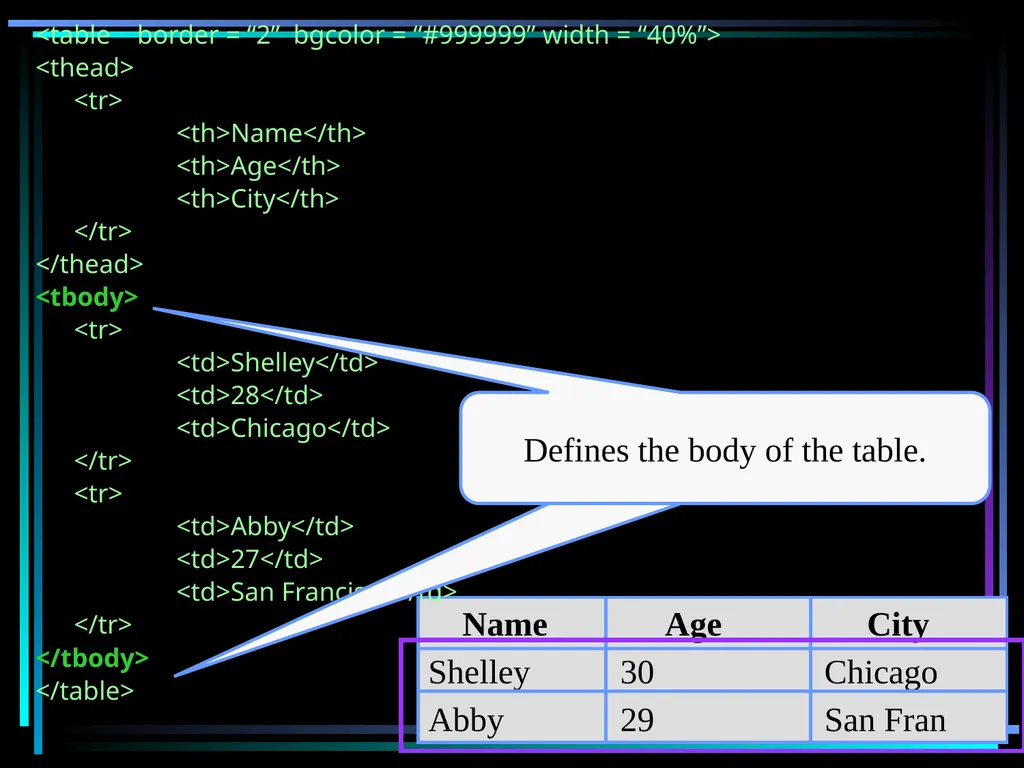
slide148. 148 Tables Tables are used for formatting table data just as in Word or Excel…<br>
slide149. <table> defines the entire table
2 pixel border.
“0” would be no border.
bgcolor (deprecated) sets table background to gray.
width is 40% of the container
Could also be an exact pixel number. <table border = “2” bgcolor = “#999999” width = “40%”>
<thead>
<tr>
<th>Name</th>
<th>Age</th>
<th>City</th>
</tr>
</thead>
<tbody>
<tr>
<td>Shelley</td>
<td>28</td>
<td>Chicago</td>
</tr>
<tr>
<td>Abby</td>
<td>27</td>
<td>San Francisco</td>
</tr>
</tbody>
</table><br>
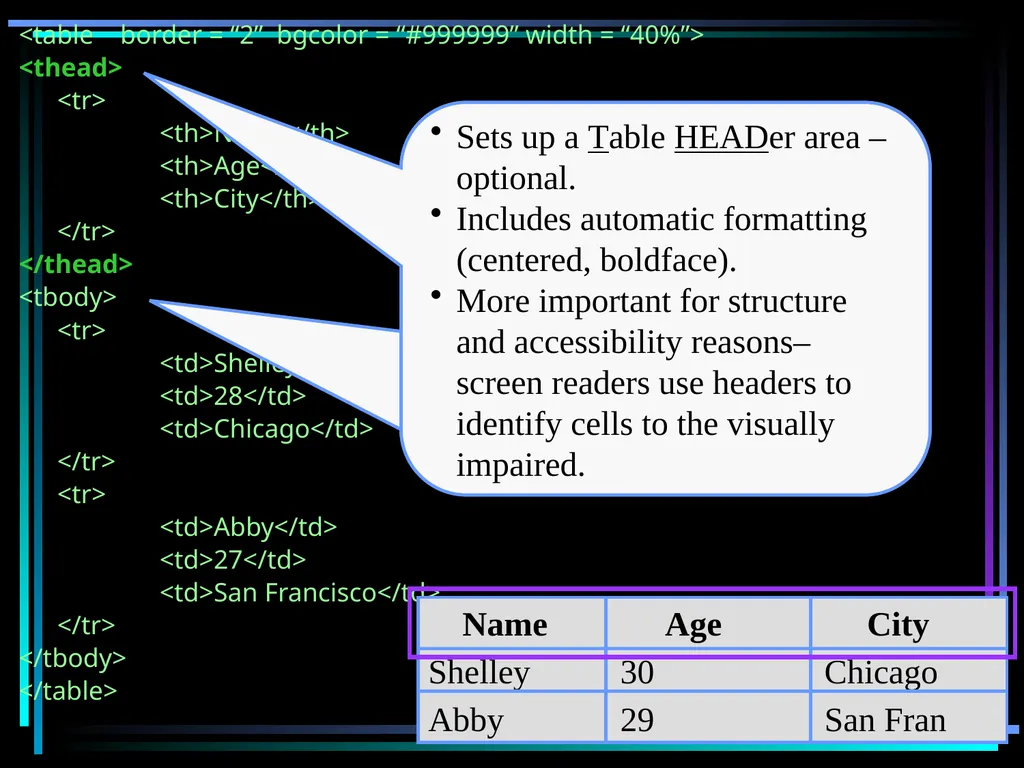
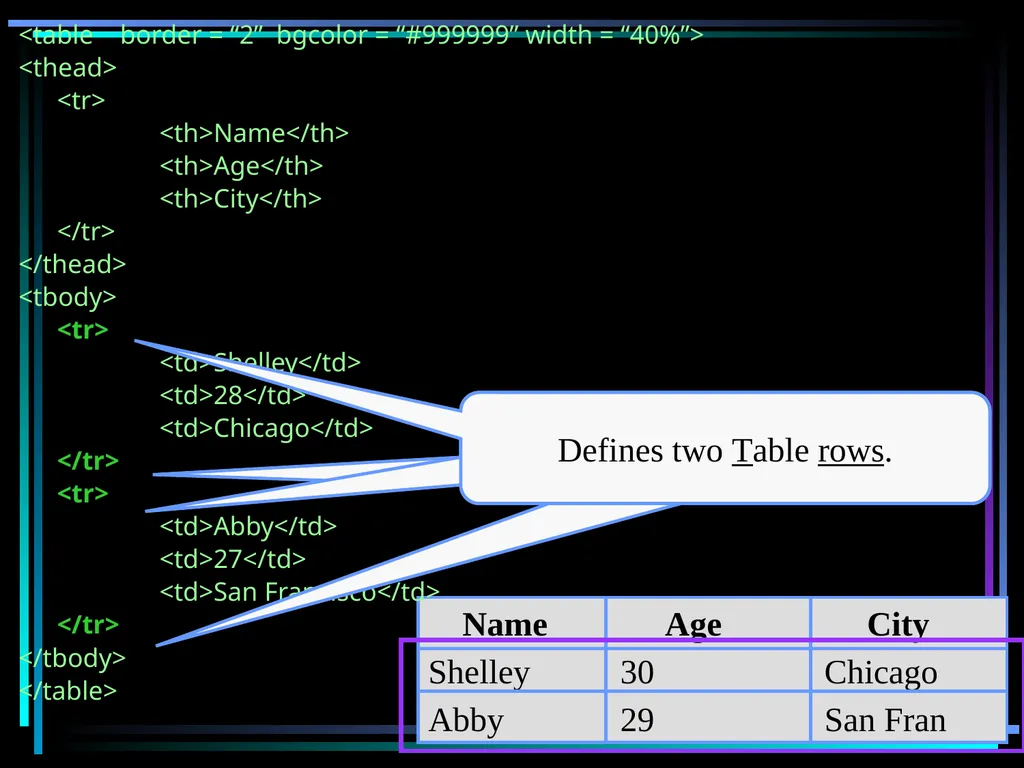
slide150. <table border = “2” bgcolor = “#999999” width = “40%”>
<thead>
<tr>
<th>Name</th>
<th>Age</th>
<th>City</th>
</tr>
</thead>
<tbody>
<tr>
<td>Shelley</td>
<td>28</td>
<td>Chicago</td>
</tr>
<tr>
<td>Abby</td>
<td>27</td>
<td>San Francisco</td>
</tr>
</tbody>
</table><br>
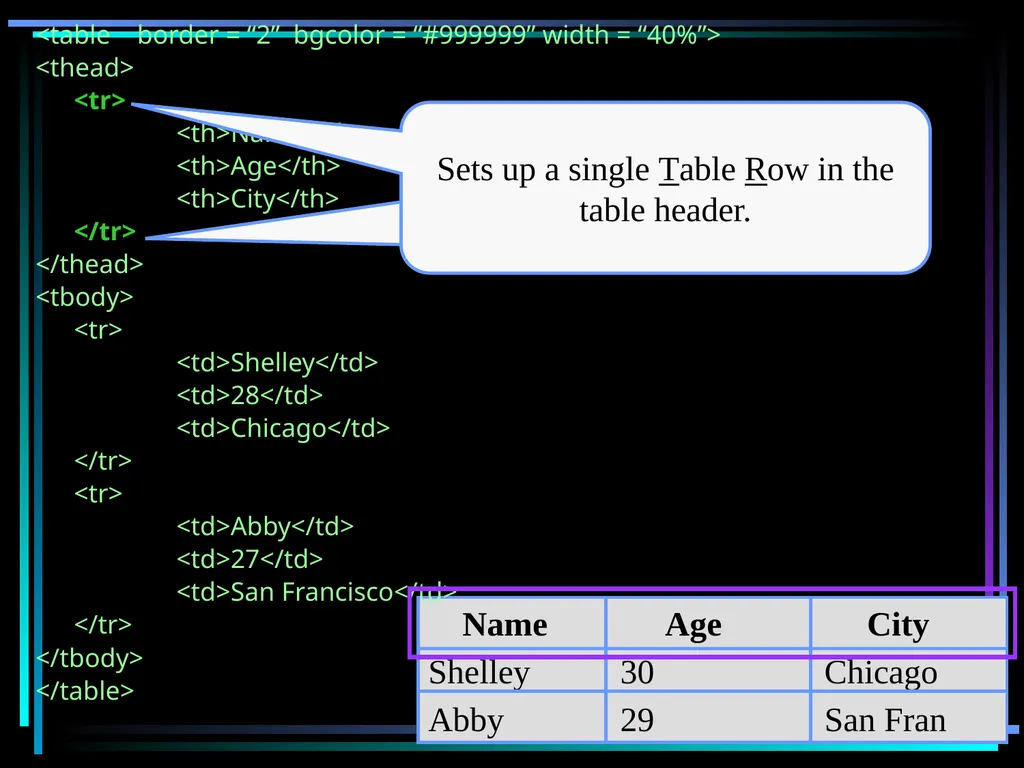
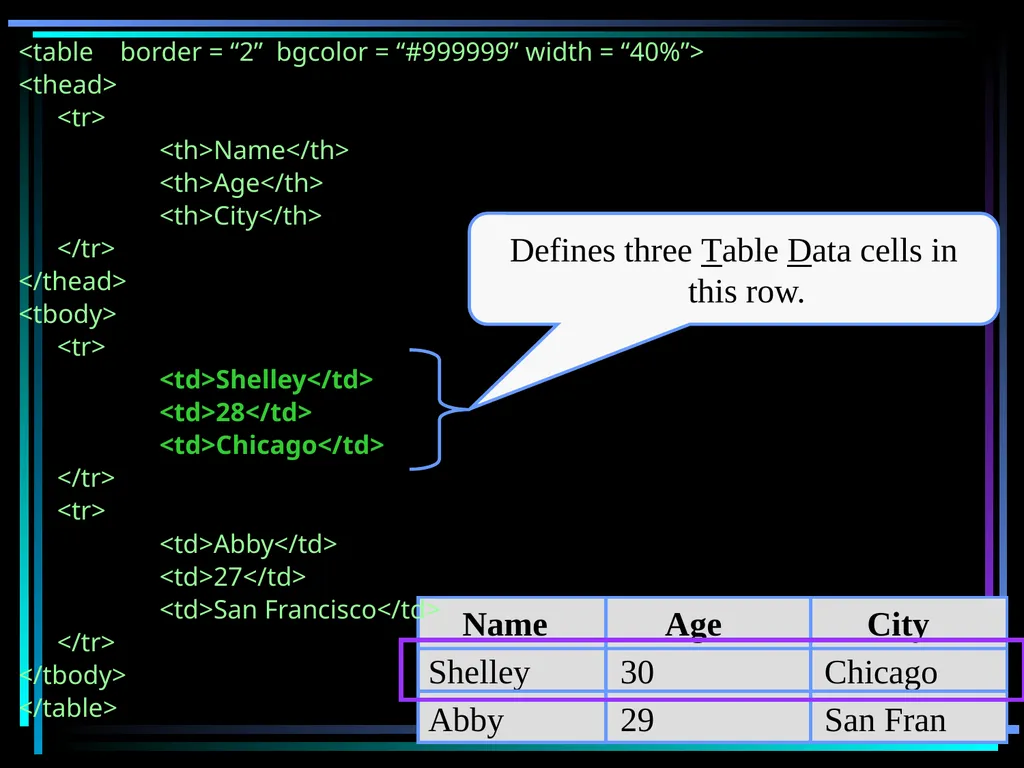
slide151. <table border = “2” bgcolor = “#999999” width = “40%”>
<thead>
<tr>
<th>Name</th>
<th>Age</th>
<th>City</th>
</tr>
</thead>
<tbody>
<tr>
<td>Shelley</td>
<td>28</td>
<td>Chicago</td>
</tr>
<tr>
<td>Abby</td>
<td>27</td>
<td>San Francisco</td>
</tr>
</tbody>
</table><br>
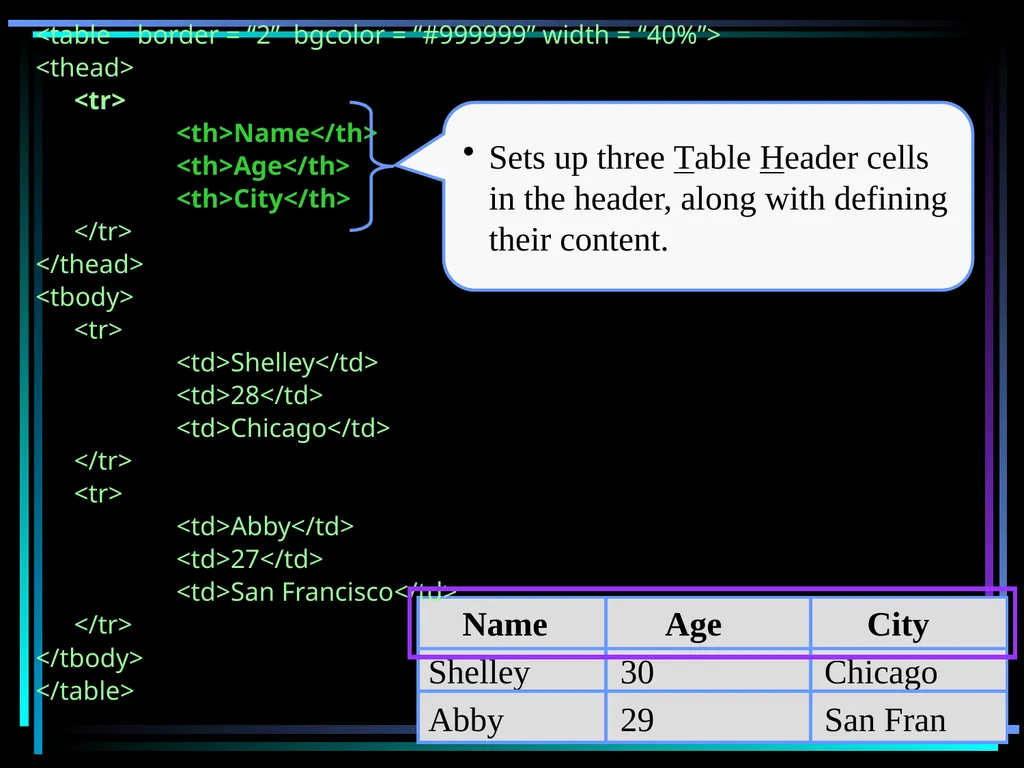
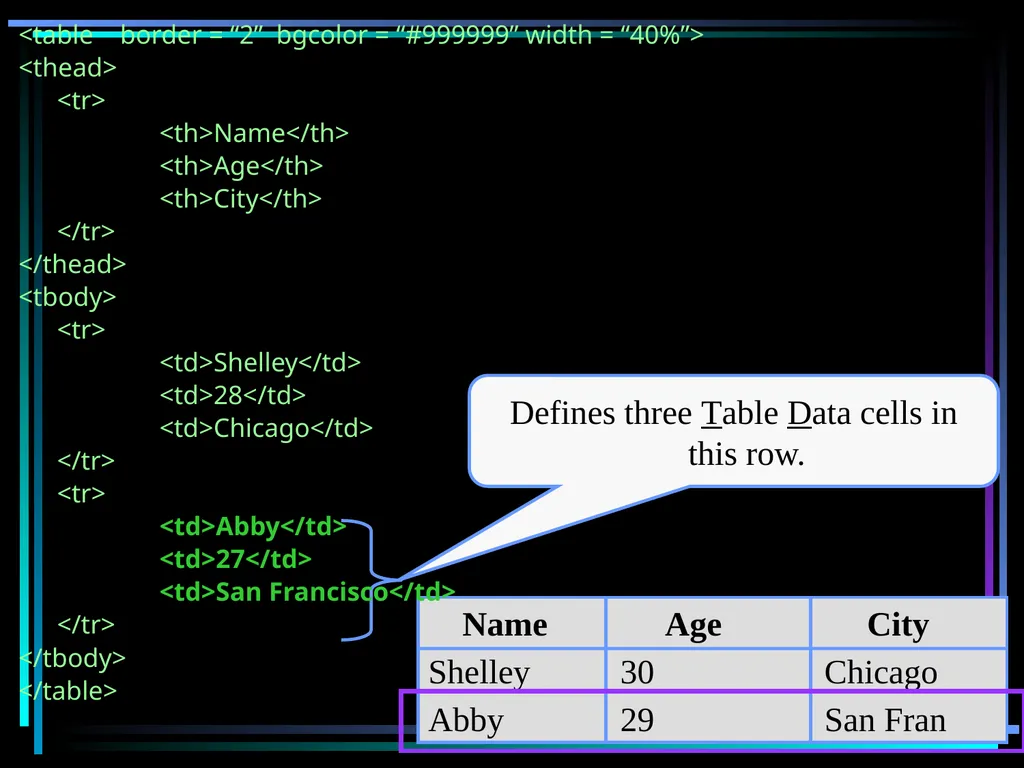
slide152. <table border = “2” bgcolor = “#999999” width = “40%”>
<thead>
<tr>
<th>Name</th>
<th>Age</th>
<th>City</th>
</tr>
</thead>
<tbody>
<tr>
<td>Shelley</td>
<td>28</td>
<td>Chicago</td>
</tr>
<tr>
<td>Abby</td>
<td>27</td>
<td>San Francisco</td>
</tr>
</tbody>
</table><br>
slide153. <table border = “2” bgcolor = “#999999” width = “40%”>
<thead>
<tr>
<th>Name</th>
<th>Age</th>
<th>City</th>
</tr>
</thead>
<tbody>
<tr>
<td>Shelley</td>
<td>28</td>
<td>Chicago</td>
</tr>
<tr>
<td>Abby</td>
<td>27</td>
<td>San Francisco</td>
</tr>
</tbody>
</table><br>
slide154. <table border = “2” bgcolor = “#999999” width = “40%”>
<thead>
<tr>
<th>Name</th>
<th>Age</th>
<th>City</th>
</tr>
</thead>
<tbody>
<tr>
<td>Shelley</td>
<td>28</td>
<td>Chicago</td>
</tr>
<tr>
<td>Abby</td>
<td>27</td>
<td>San Francisco</td>
</tr>
</tbody>
</table><br>
slide155. <table border = “2” bgcolor = “#999999” width = “40%”>
<thead>
<tr>
<th>Name</th>
<th>Age</th>
<th>City</th>
</tr>
</thead>
<tbody>
<tr>
<td>Shelley</td>
<td>28</td>
<td>Chicago</td>
</tr>
<tr>
<td>Abby</td>
<td>27</td>
<td>San Francisco</td>
</tr>
</tbody>
</table><br>
slide156. <table border = “2” bgcolor = “#999999” width = “40%”>
<thead>
<tr>
<th>Name</th>
<th>Age</th>
<th>City</th>
</tr>
</thead>
<tbody>
<tr>
<td>Shelley</td>
<td>28</td>
<td>Chicago</td>
</tr>
<tr>
<td>Abby</td>
<td>27</td>
<td>San Francisco</td>
</tr>
</tbody>
</table><br>
slide157. <table border = “2” bgcolor = “#999999” width = “40%”>
<tr>
<th>Name</th>
<th>Age</th>
<th>City</th>
</tr>
<tr>
<td>Shelley</td>
<td>28</td>
<td>Chicago</td>
</tr>
<tr>
<td>Abby</td>
<td>27</td>
<td>San Francisco</td>
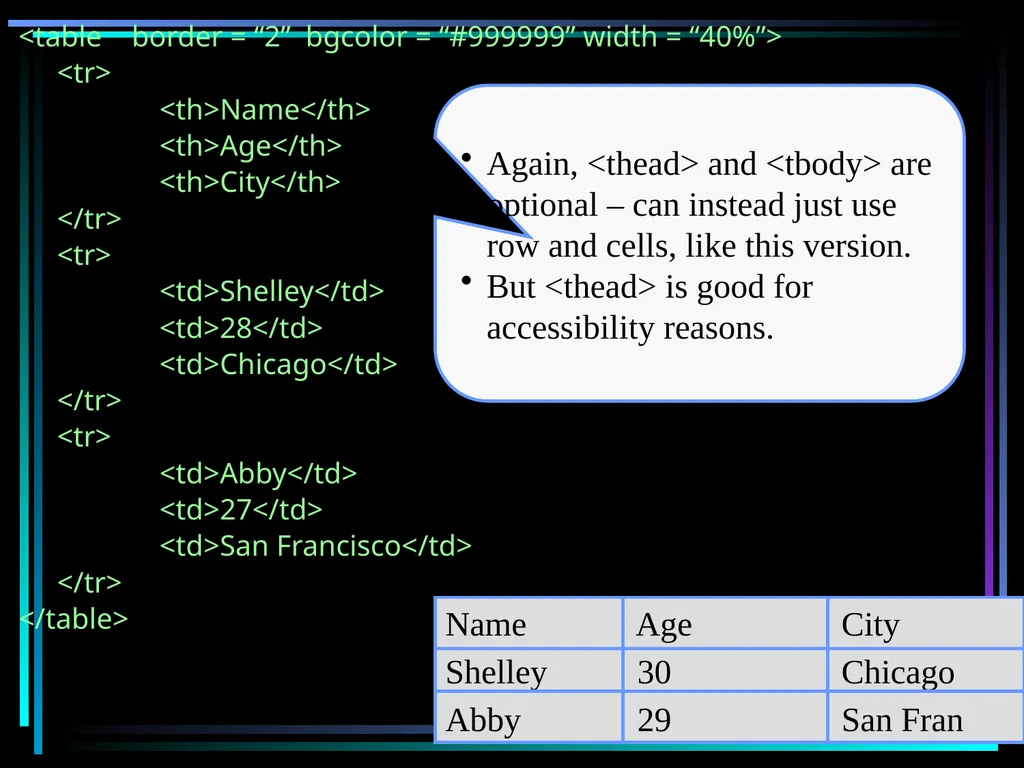
</tr>
</table> Again, <thead> and <tbody> are optional – can instead just use row and cells, like this version.
But <thead> is good for accessibility reasons.<br>
slide158. 158 Tables As we just saw, tables are used for formatting tabular data, just as in Word or Excel.
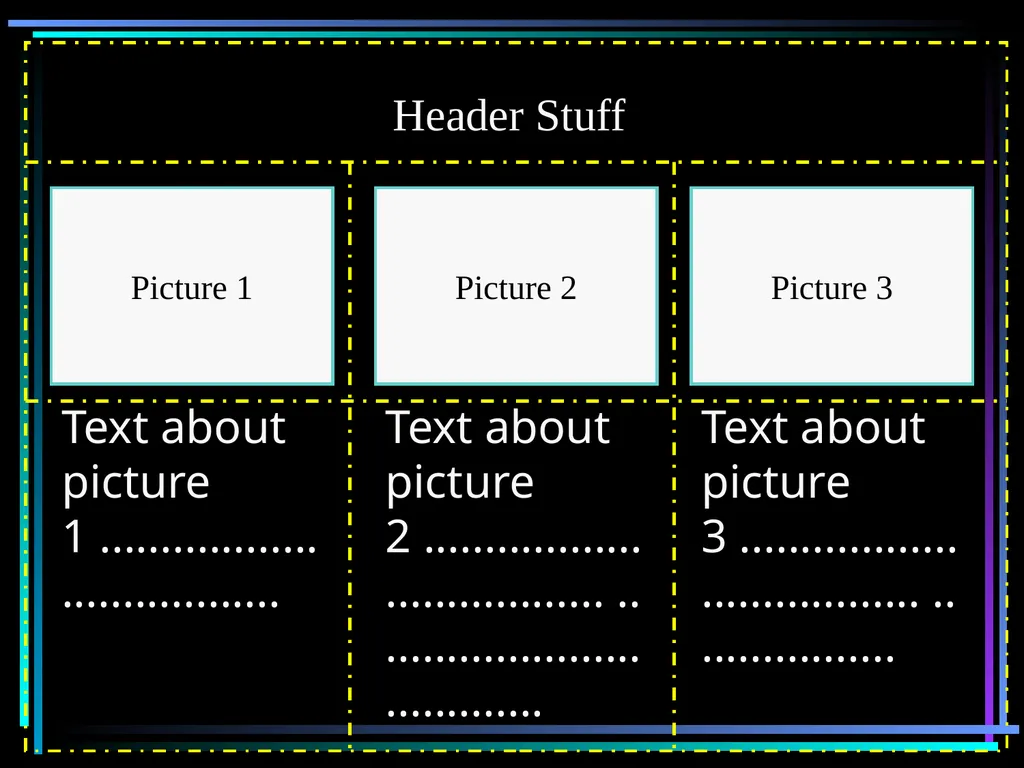
In addition, invisible tables can be used to line objects up with each other using just HTML (other ways will be discussed when we get to CSS).
So, you might put objects in a table with invisible borders, just to line them up the way you want them...<br>
slide159. Text about picture 1 .................................... Picture 1 Text about picture 2 .................................... .................................... Picture 2 Text about picture 3 .................................... .................. Picture 3 Header Stuff<br>
slide160. 160 Tables An “invisible” table like this allows more exact positioning of items than you can get in other ways.
Of course, you can have the borders visible, too, when it suits your purpose.
A more modern (but still sometimes buggy) way of lining things up, using <div>s, will be discussed a bit later – can't use <div>s until we know more CSS.
Still circumstances where ONLY tables are practical.
That is changing rapidly!<br>
slide161. 161 Tables Failure to close any of the table tags can lead to major formatting problems, depending upon the browser.
For instance, a missing </table> tag can work just fine in one browser and cause the entire page to break in another.
Every row must have an identical number of cells (with an exception to be discussed in a bit).<br>
slide162. 162 Tables Attributes for the <table> tag:
width = "n" or "n%" to set the width of table.
If omitted, “100%” is assumed.
width:… for CSS.<br>
slide163. 163 Tables Attributes for the <table> tag:
align = "left" or "right" or "center" aligns the table within the browser screen.
If not specified, the table aligns left and content that follows appears below the table.
If explicitly specified as "left", other content wraps on the right.
CSS equivalents: margin:…, float:…, text-align: …<br>
slide164. 164 Tables cellpadding = "n" sets the space between the table border and the cell content.
cellspacing = "n" sets the width of the space between cells.
Set both of these to zero if you want to slice a large graphic and put the slices into table cells seamlessly.
Note: be sure to open and close each cell <td>…</td> on the same line to make this work.<br>
slide165. 165 Tables bgcolor="…" and background="…"
Deprecated in favor of CSS’s background-color and background-image.<br>
slide166. 166 Tables Attributes for the rest of the table tags:
align = "center" or "left" or "right"
For horizontal alignment of the content within the tag.
Left aligned is the default.
Deprecated in favor of CSS’s text-align, margin, etc.
valign = “top" or "middle" or "bottom" or "baseline”
For vertical alignment of content.
Deprecated in favor of CSS’s vertical-align.
valign = “baseline”
All cells in the row will have their first lines on a common baseline, regardless of font size, rather than centering the lines vertically in the row.<br>
slide167. 167 Tables bgcolor="…" and background="…"
Same as for <table>, deprecated as well.
nowrap turns off word wrap.<br>
slide168. 168 Tables width = "n" or "n%" on individual table cells to set the width of columns.
a number will set the exact number of pixels.
"n%" will set the width as a percent of what is available for the container/table.
No width means the browser decides.<br>
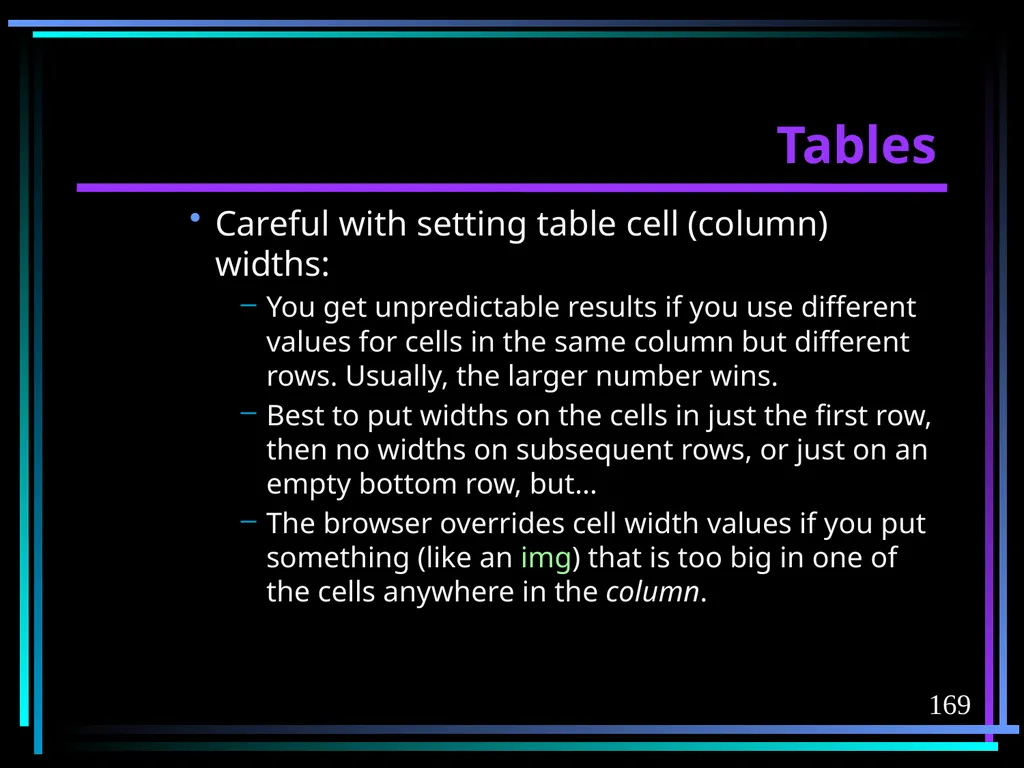
slide169. 169 Tables Careful with setting table cell (column) widths:
You get unpredictable results if you use different values for cells in the same column but different rows. Usually, the larger number wins.
Best to put widths on the cells in just the first row, then no widths on subsequent rows, or just on an empty bottom row, but…
The browser overrides cell width values if you put something (like an img) that is too big in one of the cells anywhere in the column.<br>
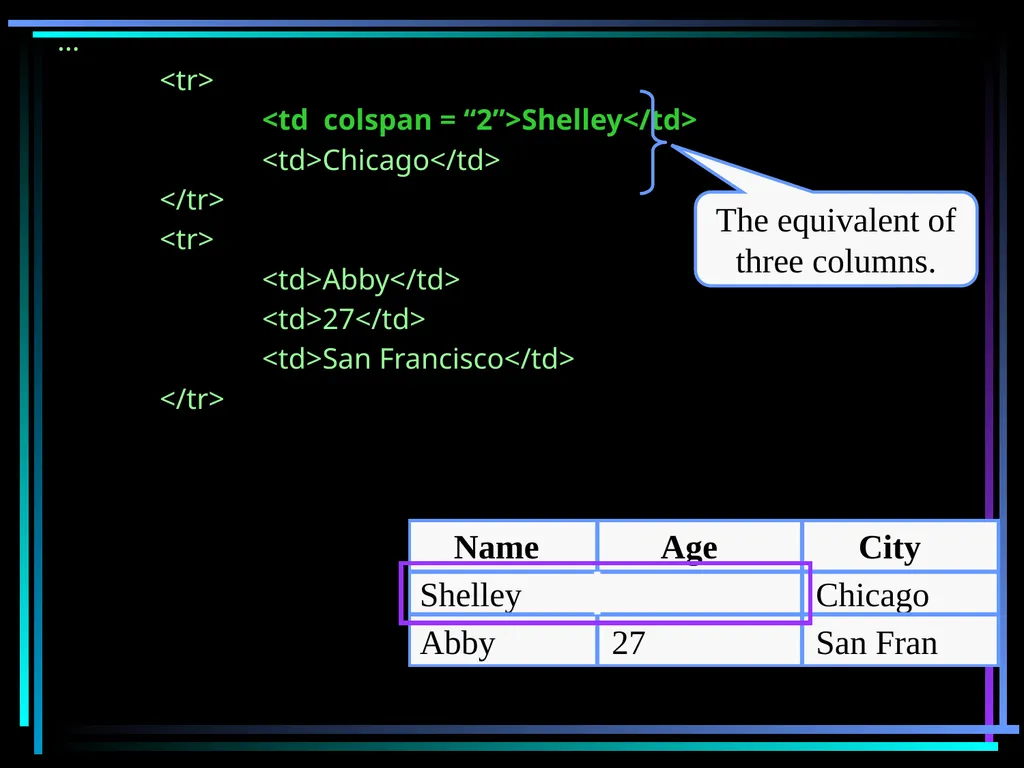
slide170. 170 Tables Can make some data cells larger than others, similar to a “merge” in the cells of a Word table.
This allows one cell to span multiple columns or rows.
colspan = "n", rowspan = "n", as attributes within <th> or <td> elements.<br>
slide171. …
<tr>
<td colspan = “2”>Shelley</td>
<td>Chicago</td>
</tr>
<tr>
<td>Abby</td>
<td>27</td>
<td>San Francisco</td>
</tr> Name Age City
Shelley Chicago
Abby 27 San Fran<br>
slide172. 172 Tables Avoid nested tables, unless there is no other way to do what you need to do.
Nested tables break and are also hard to read.<br>
slide173. 173 Tables Again, tables are often used more for formatting than for what we would normally consider to be a table.
Many experts are discouraging the use of tables in favor of <div>s – more to come later.
My opinion – tables will be around for a while yet, until the alternatives are less buggy.<br>
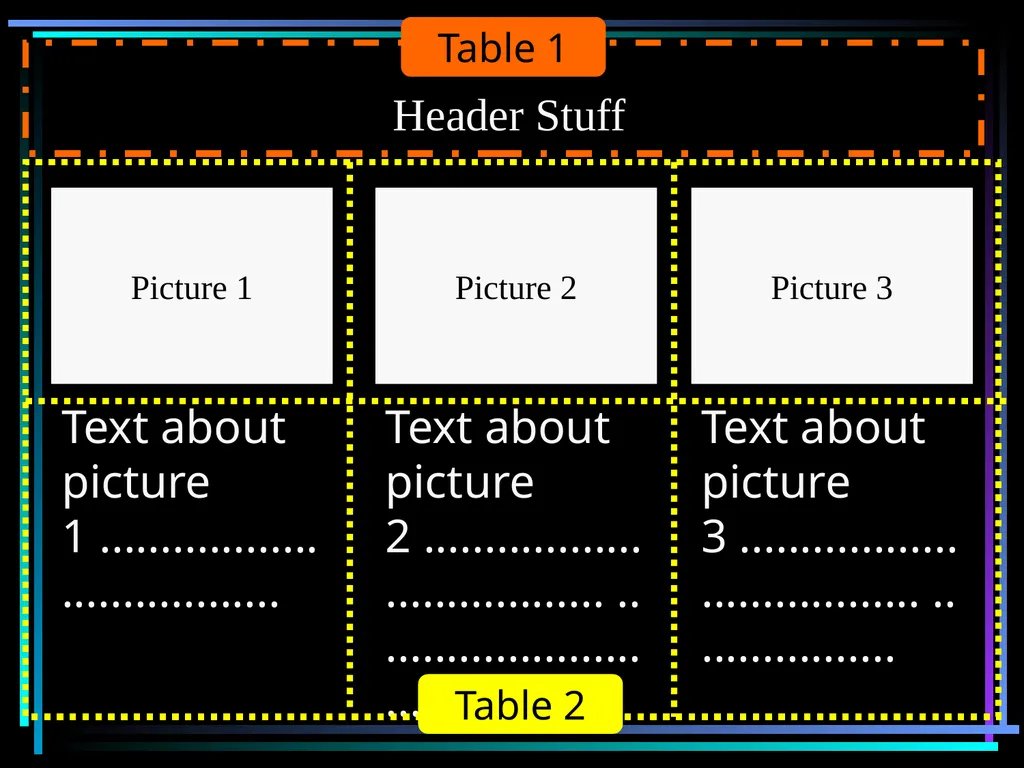
slide174. 174 Tables It is easiest to make a table for the entire page layout first, then insert text and images within the table.
If you are having trouble trying to get a single table to accommodate the layout for an entire page, stop trying.
Use multiple tables instead…<br>
slide175. Text about picture 1 .................................... Picture 1 Text about picture 2 .................................... .................................... Picture 2 Text about picture 3 .................................... .................. Picture 3 Header Stuff Table 1 Table 2<br>
slide176. 176 Tables Table hints:
In Dreamweaver, you might find it easier to start by simply drawing layers (boxes), then “convert to tables” when done. Be sure to check “don’t allow overlapping layers” on the preferences first.
Must use or transparent gif as a placeholder in empty cells, or they may break in some browsers (Dreamweaver inserts automatically when you draw a table.)<br>
slide177. 177 Tables Table hints:
Be sure to explicitly specify cellpadding, cellspacing, and border so that the table looks the same in all browsers (defaults vary in the browsers).<br>
slide178. 178 Tables Table hints:
Use the first row to establish column widths, then omit column widths on all subsequent rows.
This makes it quite easy to change column widths later.<br>
slide179. 179 Tables Table hints:
A table row cannot be sized any shorter than the tallest element in the row.
Any charactier or even will be standard text height (25-30 pixels, usually) and it forces the entire row to be at least that height.
For a shorter row, fill cells with a 1-pixel by 1-pixel (or whatever) transparent gif instead.
May also have to enter height ="n" on every table cell in the row.<br>
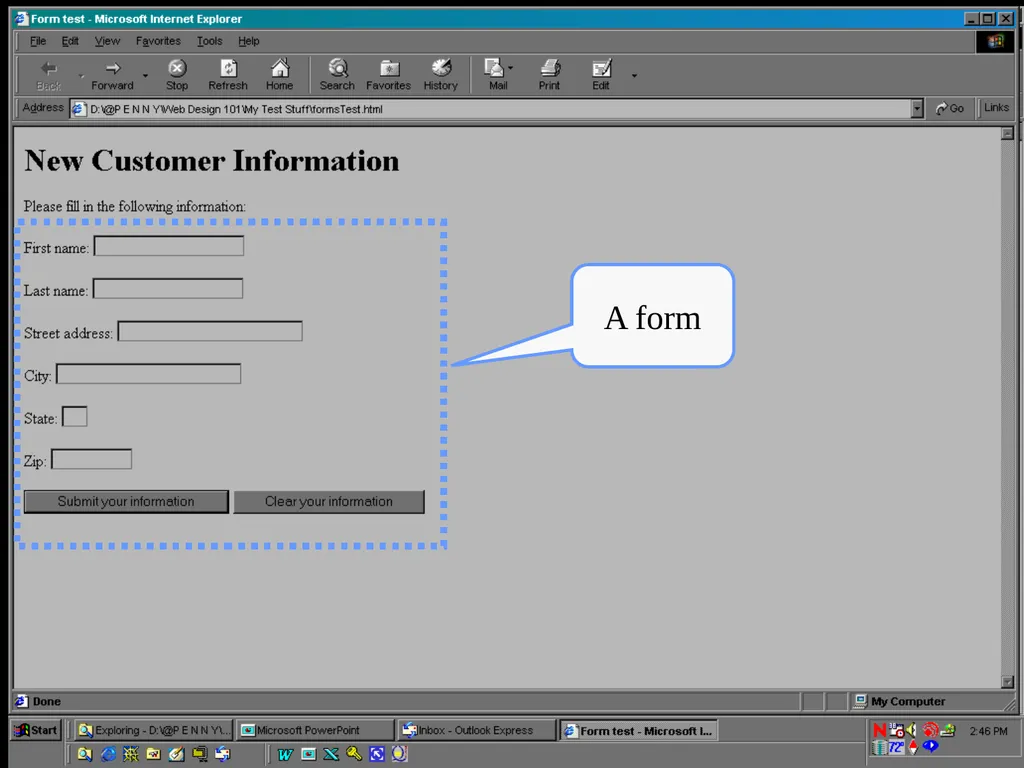
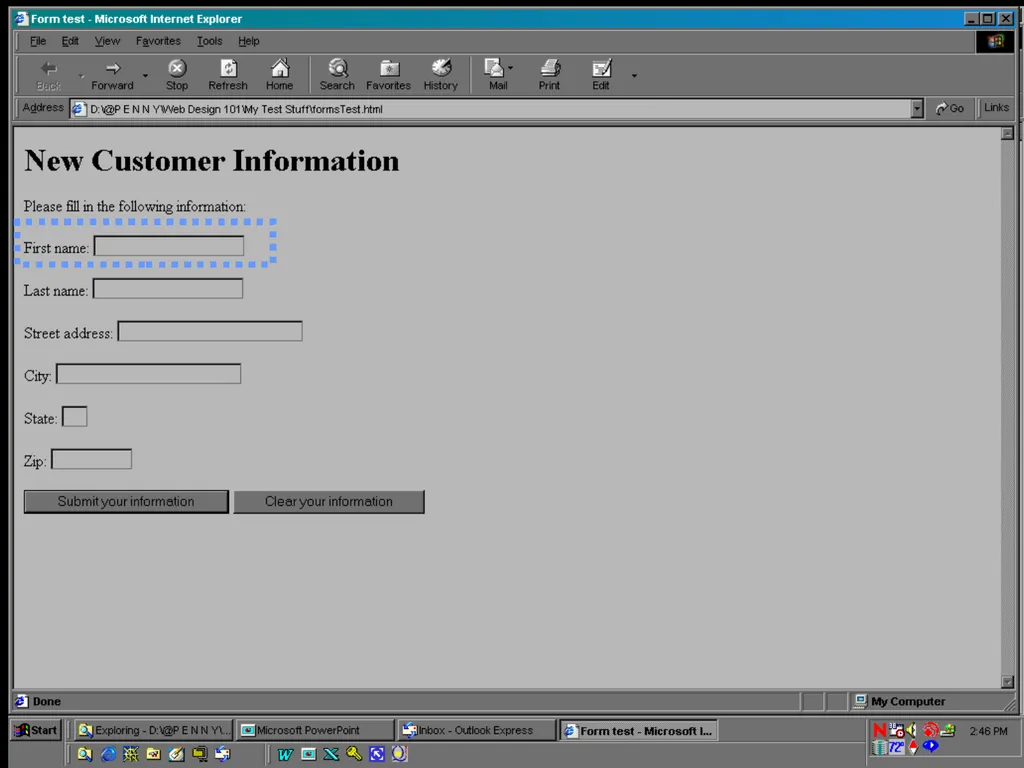
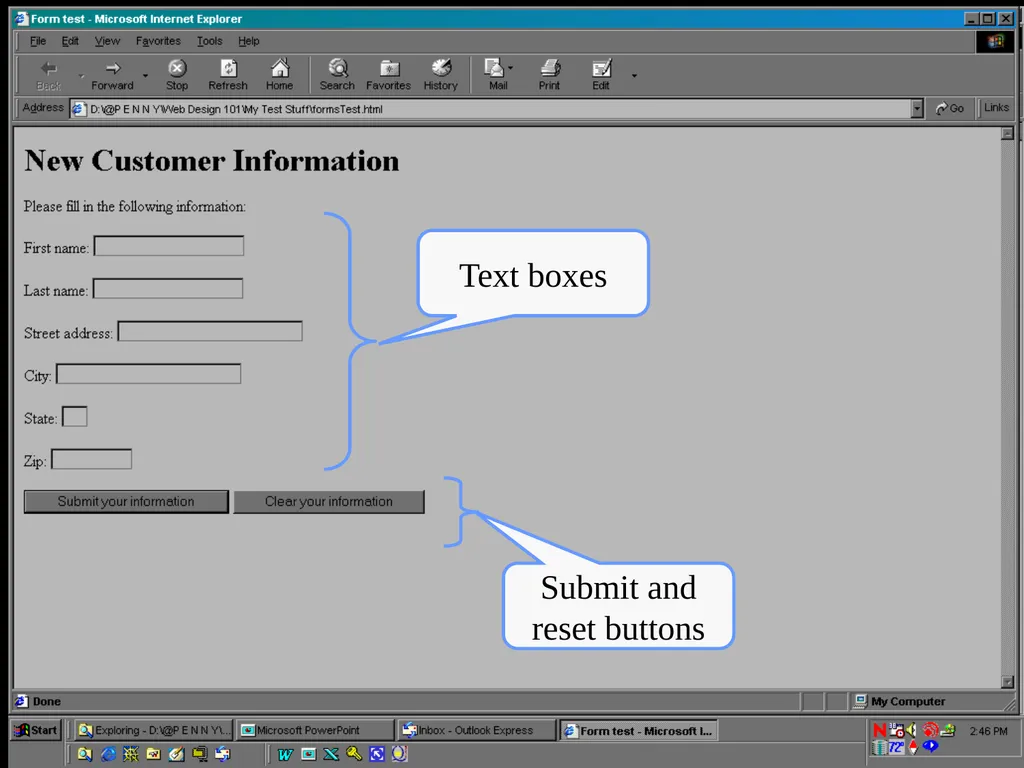
slide180. 180 Forms Forms are used to collect information from users viewing your site.
They are the foundation upon which interactive elements (push buttons, check boxes, text fields the users enter) live.
Example... (formstest.html)<br>
slide181. A form<br>
slide182. 182 Forms Note that this is not exactly a sophisticated or pretty input form.
We will build upon it to make it look better as we know more.
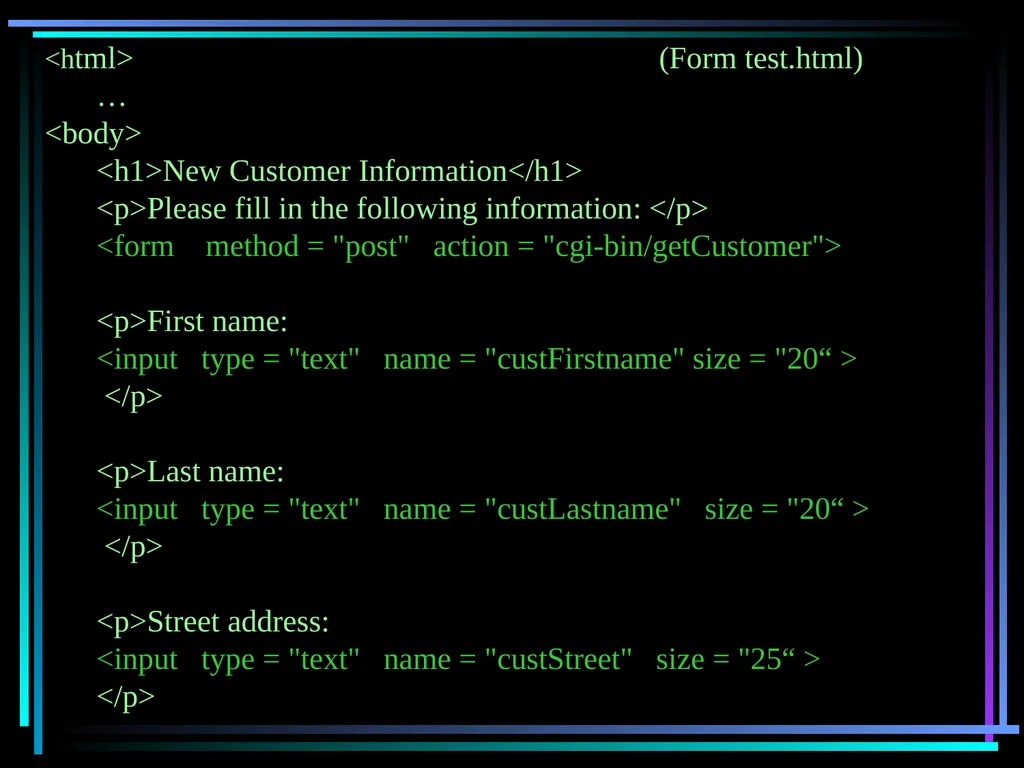
First, the following two slides show the complete HTML for this form, reproduced just for reference.
Then we will look at the statements individually...<br>
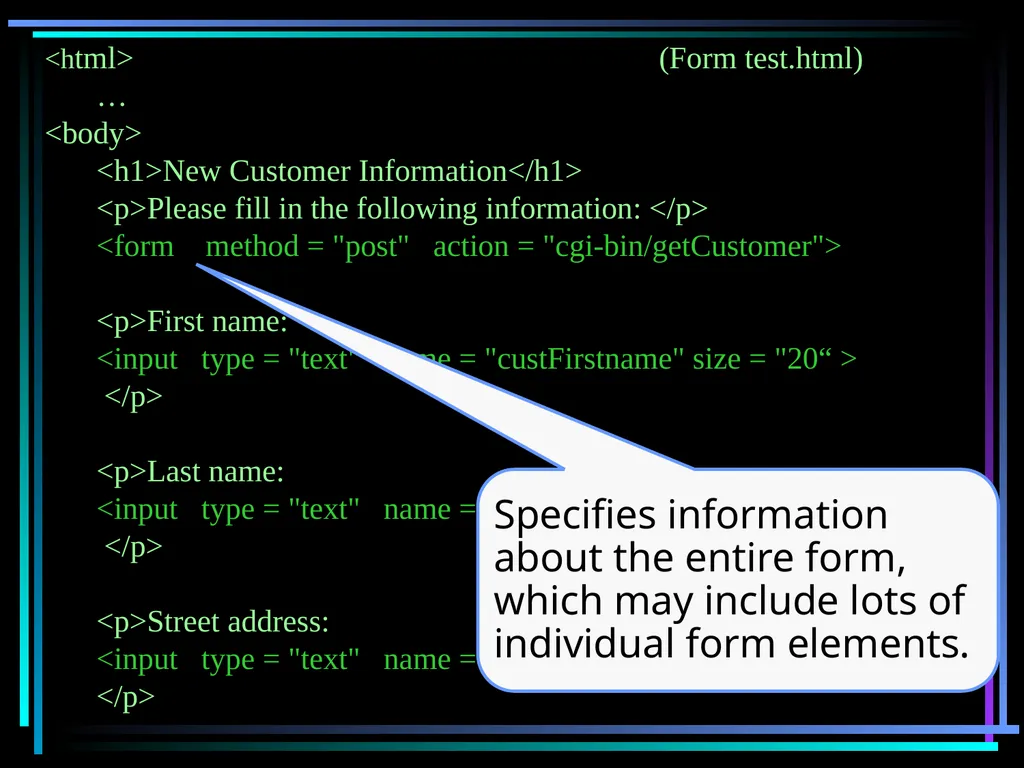
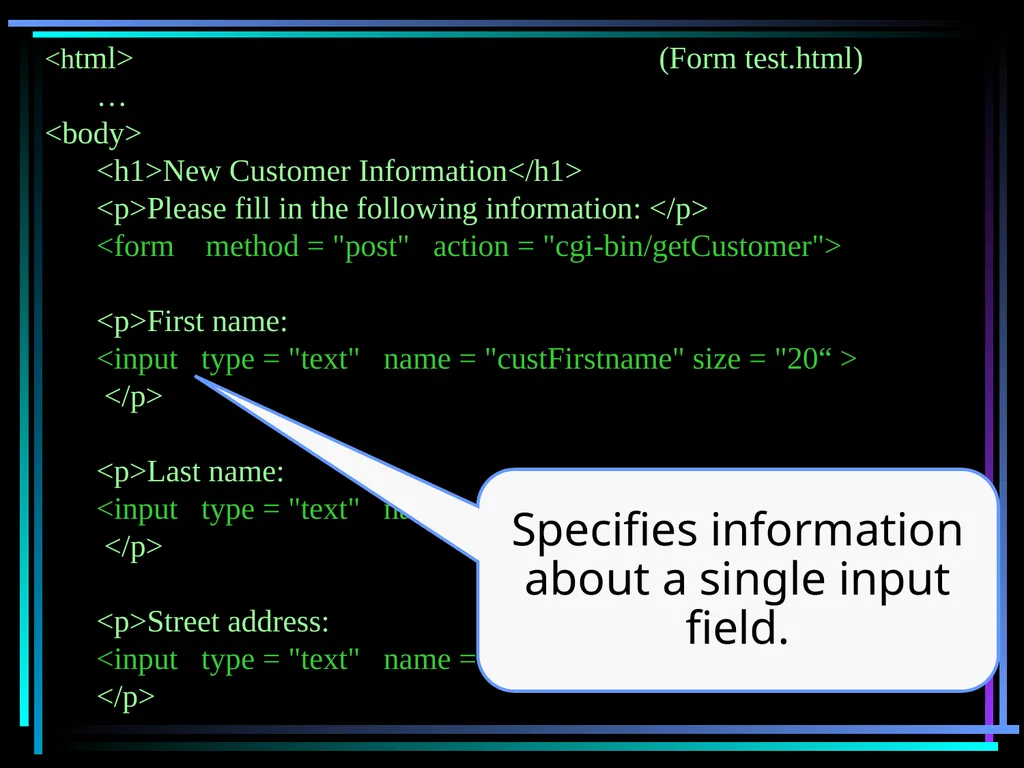
slide183. <html> (Form test.html)
…
<body>
<h1>New Customer Information</h1>
<p>Please fill in the following information: </p>
<form method = "post" action = "cgi-bin/getCustomer">
<p>First name:
<input type = "text" name = "custFirstname" size = "20“ >
</p>
<p>Last name:
<input type = "text" name = "custLastname" size = "20“ >
</p>
<p>Street address:
<input type = "text" name = "custStreet" size = "25“ >
</p><br>
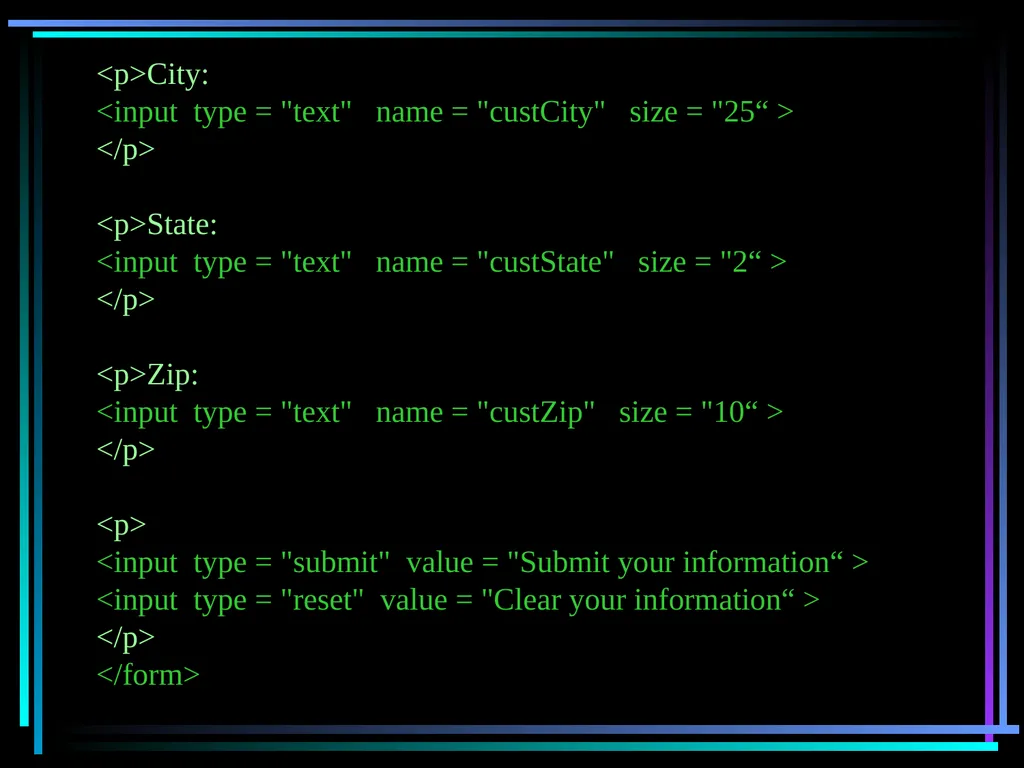
slide184. <p>City:
<input type = "text" name = "custCity" size = "25“ >
</p>
<p>State:
<input type = "text" name = "custState" size = "2“ >
</p>
<p>Zip:
<input type = "text" name = "custZip" size = "10“ >
</p>
<p>
<input type = "submit" value = "Submit your information“ >
<input type = "reset" value = "Clear your information“ >
</p>
</form><br>
slide185. <html> (Form test.html)
…
<body>
<h1>New Customer Information</h1>
<p>Please fill in the following information: </p>
<form method = "post" action = "cgi-bin/getCustomer">
<p>First name:
<input type = "text" name = "custFirstname" size = "20“ >
</p>
<p>Last name:
<input type = "text" name = "custLastname" size = "20“ >
</p>
<p>Street address:
<input type = "text" name = "custStreet" size = "25“ >
</p> Specifies information about the entire form, which may include lots of individual form elements.<br>
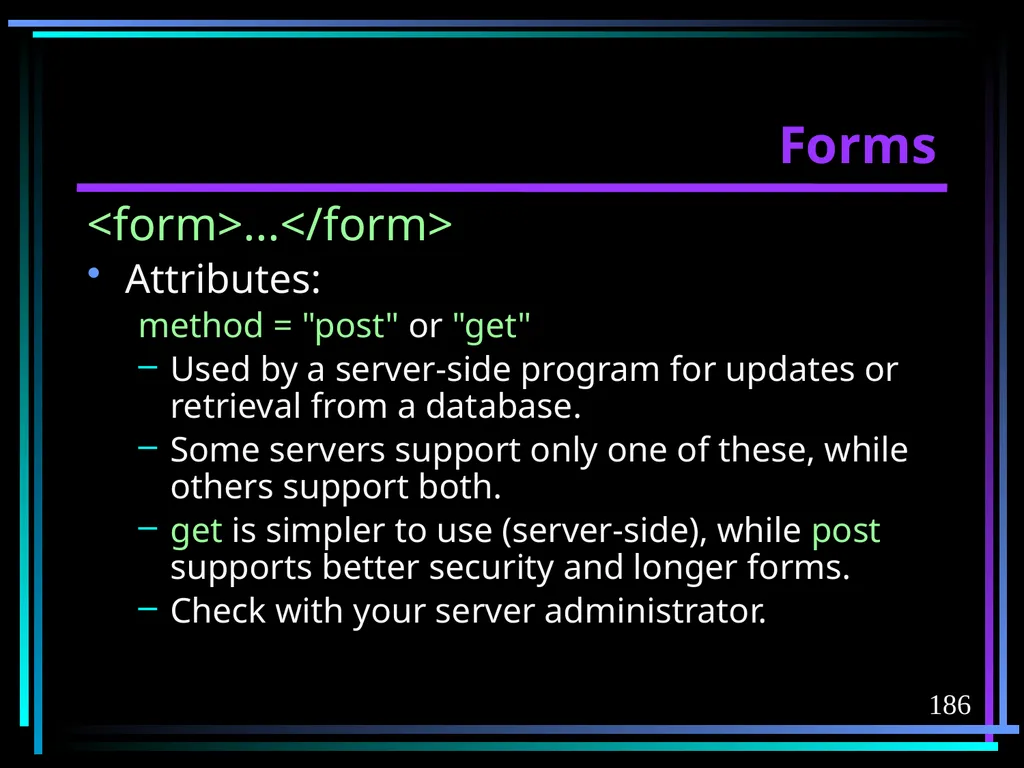
slide186. 186 Forms <form>...</form>
Attributes:
method = "post" or "get"
Used by a server-side program for updates or retrieval from a database.
Some servers support only one of these, while others support both.
get is simpler to use (server-side), while post supports better security and longer forms.
Check with your server administrator.<br>
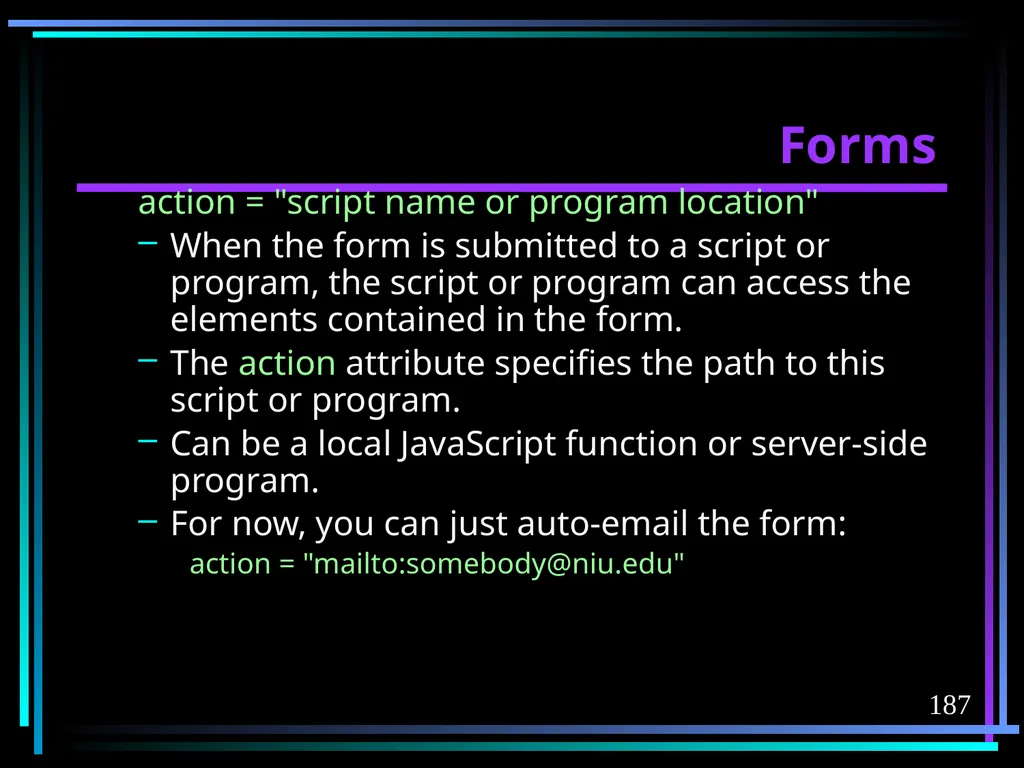
slide187. 187 Forms action = "script name or program location"
When the form is submitted to a script or program, the script or program can access the elements contained in the form.
The action attribute specifies the path to this script or program.
Can be a local JavaScript function or server-side program.
For now, you can just auto-email the form:
action = "mailto:somebody@niu.edu"<br>
slide188. 188 Forms method and action are used in tandem to pass form elements to scripts or programs for processing.<br>
slide189. 189 Forms Widgets/controls: the individual input areas (several types) on the forms.
We will look at the attributes for individual widgets in a moment, but first the attributes that they have in common…<br>
slide190. 190 Forms name vs. id: some recent browsers still require the name attribute on all form elements, and even just putting in the id in addition to name can break the widget.
Can be added to any of the controls, HTML5 only, not yet widely supported:
required -- Pops up an error message if the form is submitted without a value.
autofocus – places the cursor in that field when the page opens. Can use only once on a form. (You will learn the JavaScript to do this later in semester.)
Now, let’s look at individual elements…<br>
slide192. <html> (Form test.html)
…
<body>
<h1>New Customer Information</h1>
<p>Please fill in the following information: </p>
<form method = "post" action = "cgi-bin/getCustomer">
<p>First name:
<input type = "text" name = "custFirstname" size = "20“ >
</p>
<p>Last name:
<input type = "text" name = "custLastname" size = "20“ >
</p>
<p>Street address:
<input type = "text" name = "custStreet" size = "25“ >
</p> Specifies information about a single input field.<br>
slide193. 193 Forms Attributes for the input element (one of several types of controls)
name = "programmer defined name"
required for all input types.
The name that will be used to refer to this input tag in the scripts or programs that use it.
type = "…"
Three types for now, for three common uses:
To capture a user-input text field.
To define reset and submit buttons.
To pass invisible (hard-coded) values to the script or program.
We will look at each...<br>
slide194. 194 Forms type = "text" for one-line text input, as in our example.
size = "n"
The visual size of the input box, in characters.
maxlength = "n"
The number of characters that can be entered.
value = "default value"
Displays in the box and will be submitted if the user doesn’t replace it with other text.
placeholder = "default value"
Like value, but placeholder disappears on focus (user clicks into field). All browsers except not until IE 10. Use both?<br>
slide195. 195 Forms type = "text" for one-line text input, as in our example.
autocomplete= "off/on" (on is default)
Browser remembers when a prior entry was made in that same field, or a field with the same name on a completely different webpage.
Some browsers remember only a list of fairly standard names, although that list varies from browser to browser: firstName, first_name, fname, etc.
Turn off when security concerns, such as SSN, credit card, password, etc.<br>
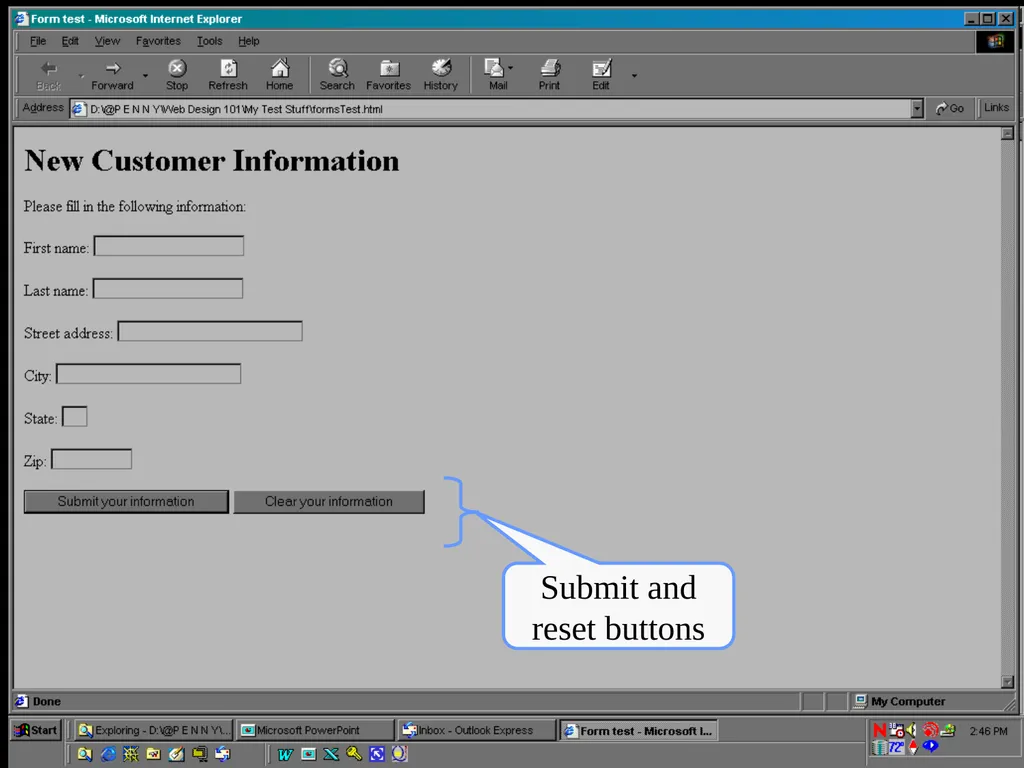
slide196. Submit and reset buttons<br>
slide197. 197 Forms type = "reset" or "submit" for specialized buttons
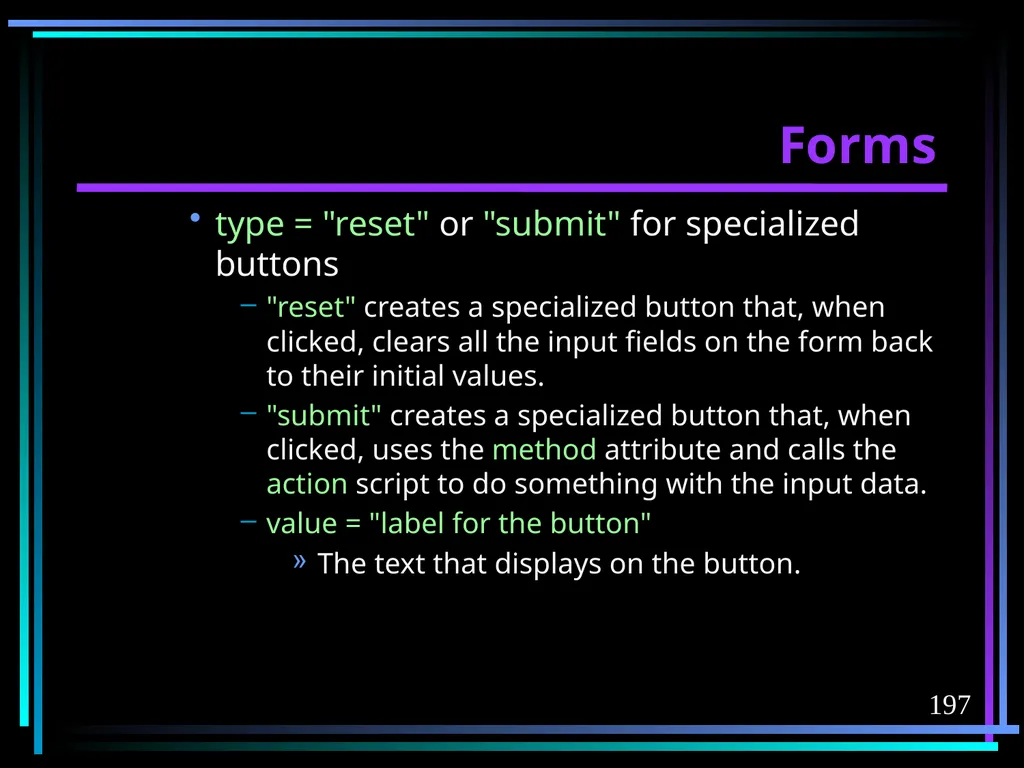
"reset" creates a specialized button that, when clicked, clears all the input fields on the form back to their initial values.
"submit" creates a specialized button that, when clicked, uses the method attribute and calls the action script to do something with the input data.
value = "label for the button"
The text that displays on the button.<br>
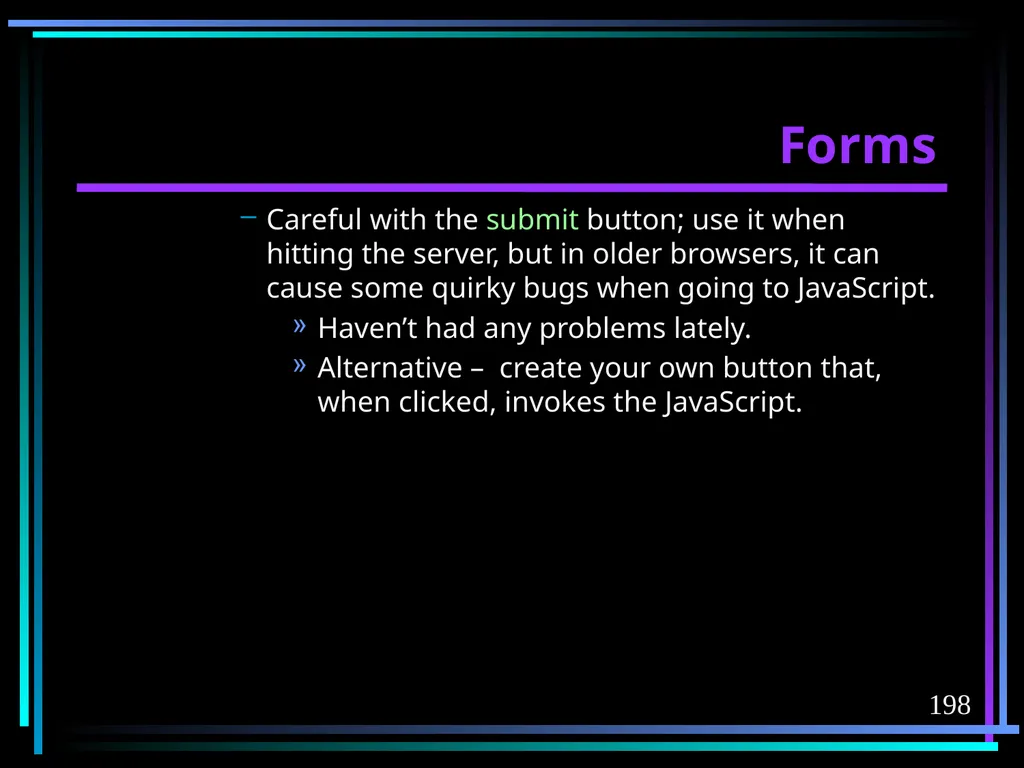
slide198. 198 Forms Careful with the submit button; use it when hitting the server, but in older browsers, it can cause some quirky bugs when going to JavaScript.
Haven’t had any problems lately.
Alternative – create your own button that, when clicked, invokes the JavaScript.<br>
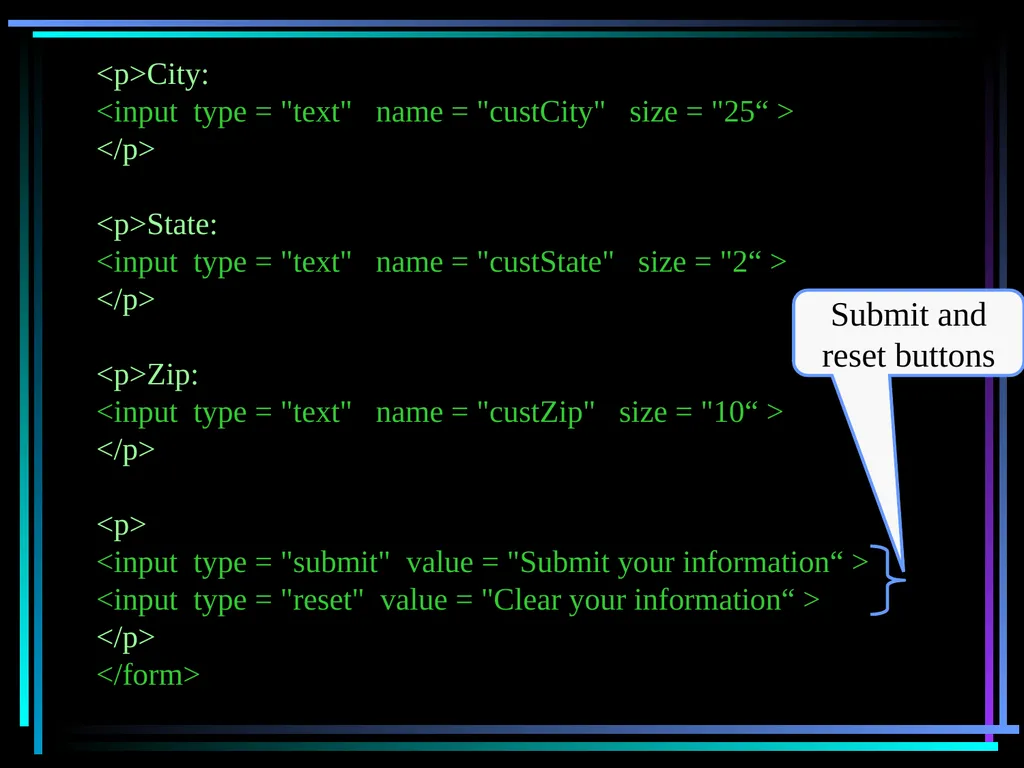
slide199. <p>City:
<input type = "text" name = "custCity" size = "25“ >
</p>
<p>State:
<input type = "text" name = "custState" size = "2“ >
</p>
<p>Zip:
<input type = "text" name = "custZip" size = "10“ >
</p>
<p>
<input type = "submit" value = "Submit your information“ >
<input type = "reset" value = "Clear your information“ >
</p>
</form> Submit and reset buttons<br>
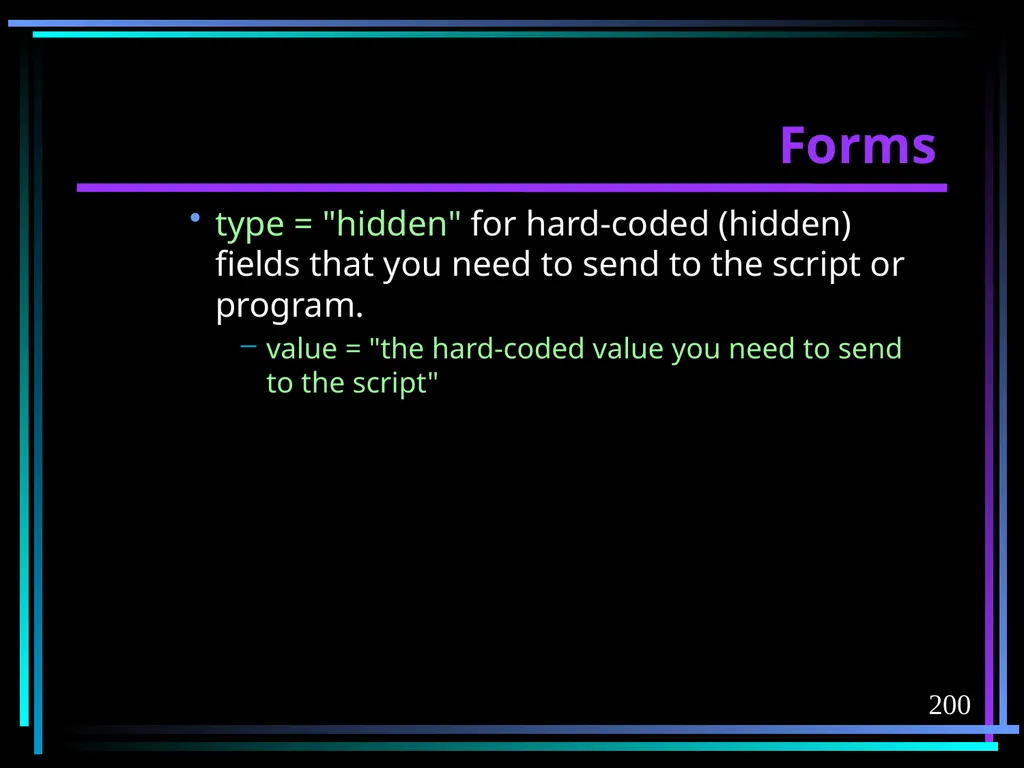
slide200. 200 Forms type = "hidden" for hard-coded (hidden) fields that you need to send to the script or program.
value = "the hard-coded value you need to send to the script"<br>
slide201. 201 Forms Keep in mind that for now, our form won’t actually do anything – we need to associate the form with a script or program, a skill we will explore a bit later in the semester.
Therefore, we will just set up the skeleton of the input form now and worry about making it work later.<br>
slide202. Text boxes Submit and reset buttons<br>
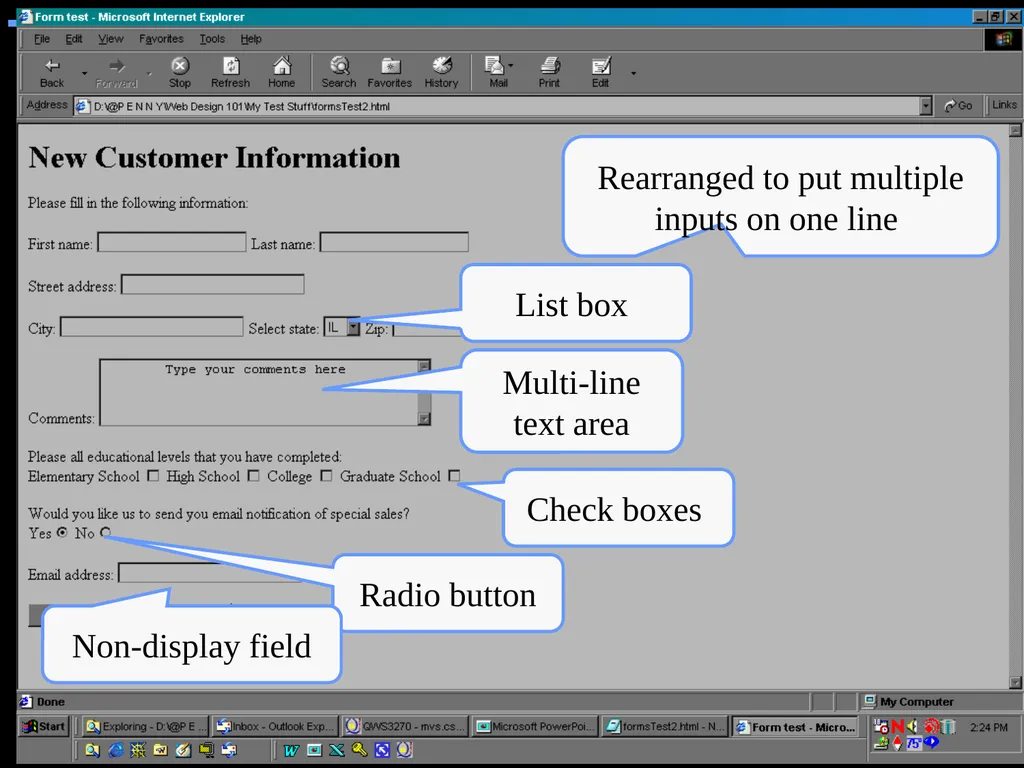
slide203. 203 Forms Let’s add a few more features to our form...
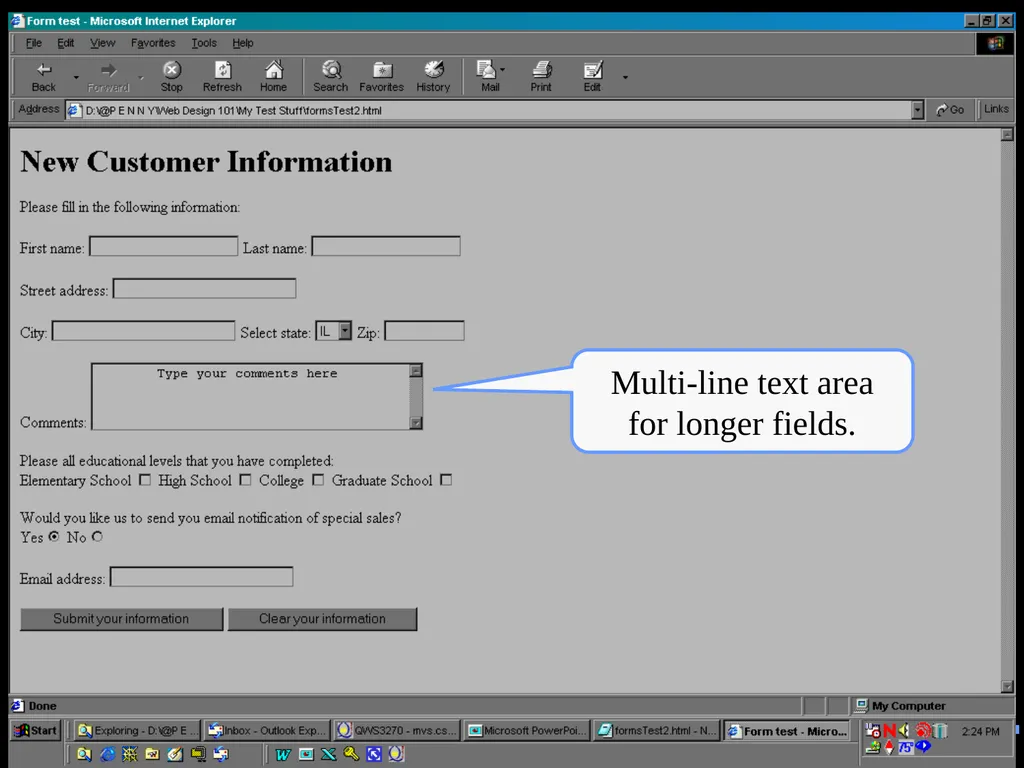
(formsTest2.html)<br>
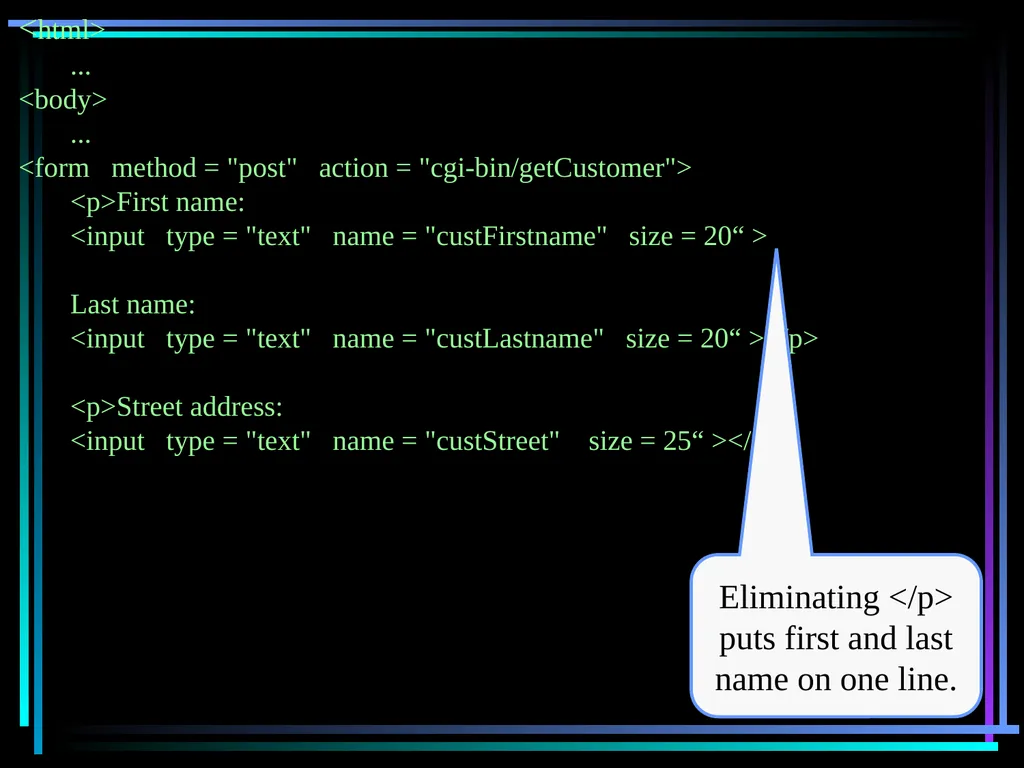
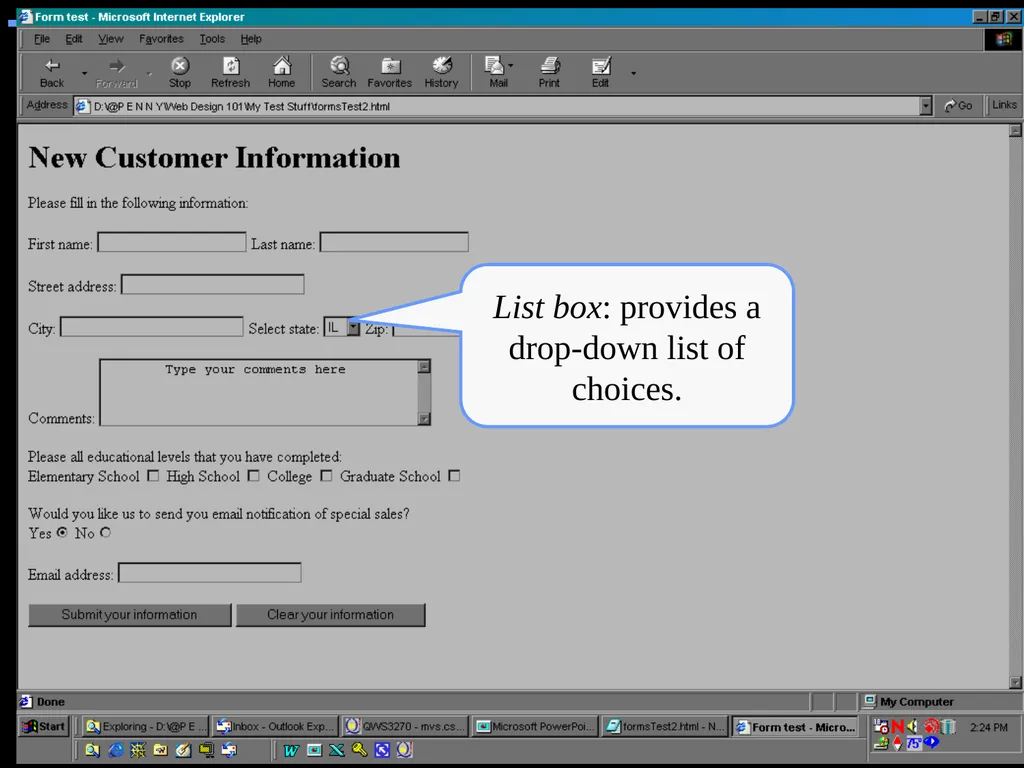
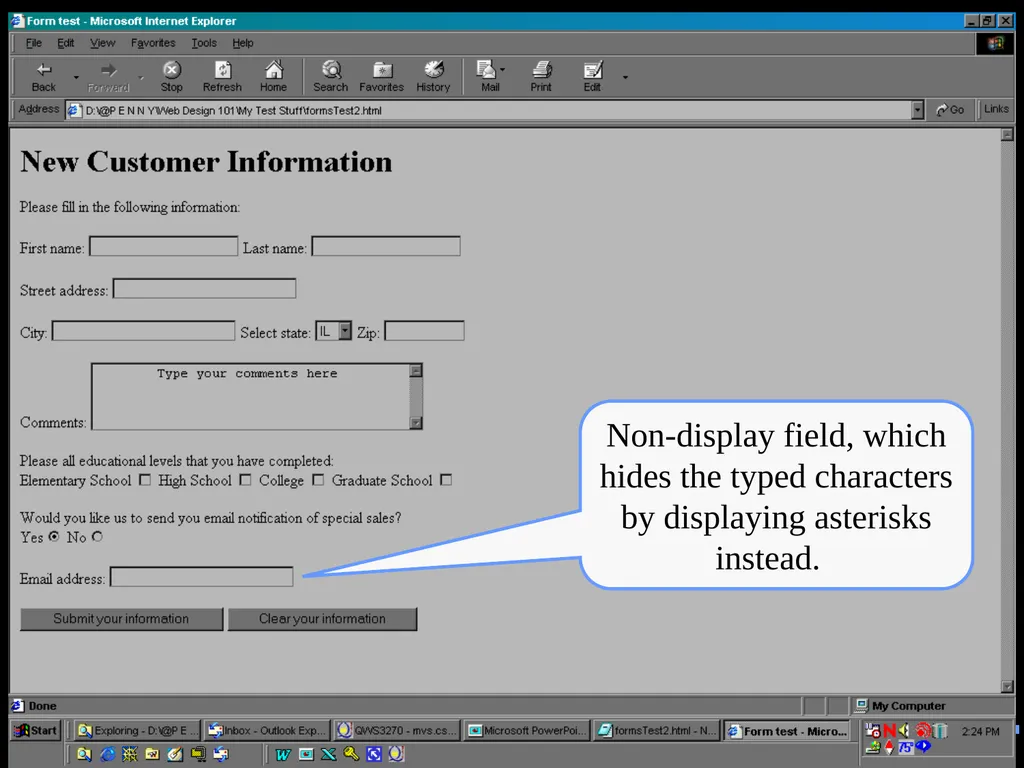
slide204. Rearranged to put multiple inputs on one line Multi-line text area List box Check boxes Radio button Non-display field<br>
slide205. <html>
...
<body>
...
<form method = "post" action = "cgi-bin/getCustomer">
<p>First name:
<input type = "text" name = "custFirstname" size = 20“ >
Last name:
<input type = "text" name = "custLastname" size = 20“ ></p>
<p>Street address:
<input type = "text" name = "custStreet" size = 25“ ></p> Eliminating </p> puts first and last name on one line.<br>
slide206. List box: provides a drop-down list of choices.<br>
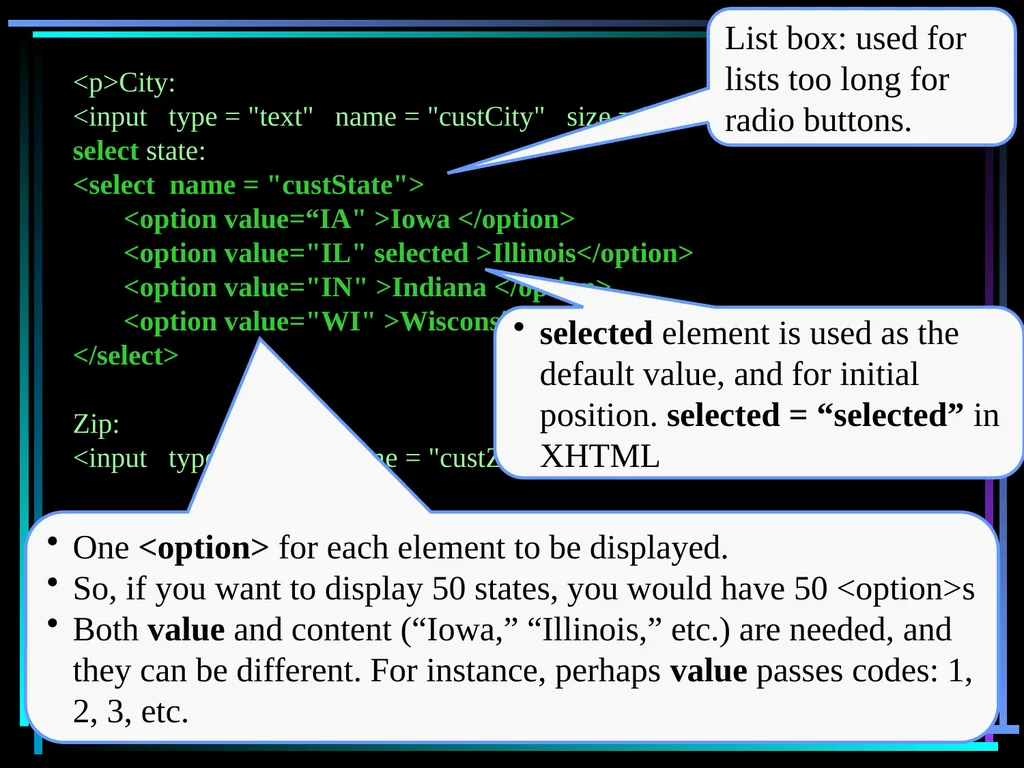
slide207. <p>City:
<input type = "text" name = "custCity" size = 25">
select state:
<select name = "custState">
<option value=“IA" >Iowa </option>
<option value="IL" selected >Illinois</option>
<option value="IN" >Indiana </option>
<option value="WI" >Wisconsin </option>
</select>
Zip:
<input type = "text” name = "custZip" size = 10“ ></p> List box: used for lists too long for radio buttons. One <option> for each element to be displayed.
So, if you want to display 50 states, you would have 50 <option>s
Both value and content (“Iowa,” “Illinois,” etc.) are needed, and they can be different. For instance, perhaps value passes codes: 1, 2, 3, etc. selected element is used as the default value, and for initial position. selected = “selected” in XHTML<br>
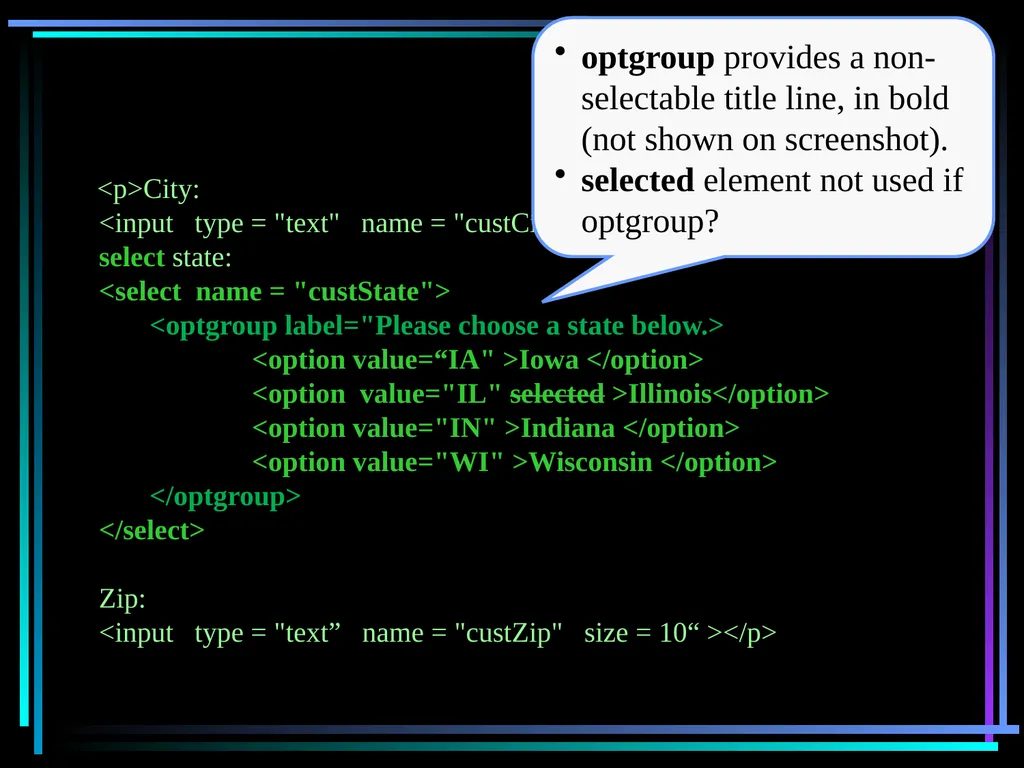
slide208. <p>City:
<input type = "text" name = "custCity" size = 25">
select state:
<select name = "custState">
<optgroup label="Please choose a state below.>
<option value=“IA" >Iowa </option>
<option value="IL" selected >Illinois</option>
<option value="IN" >Indiana </option>
<option value="WI" >Wisconsin </option>
</optgroup>
</select>
Zip:
<input type = "text” name = "custZip" size = 10“ ></p> optgroup provides a non-selectable title line, in bold (not shown on screenshot).
selected element not used if optgroup?<br>
slide209. 209 Forms <select>...</select>
Attributes:
name = "programmer supplied" id="…"
Used to refer to the item in scripts and programs.
Again, careful with id.
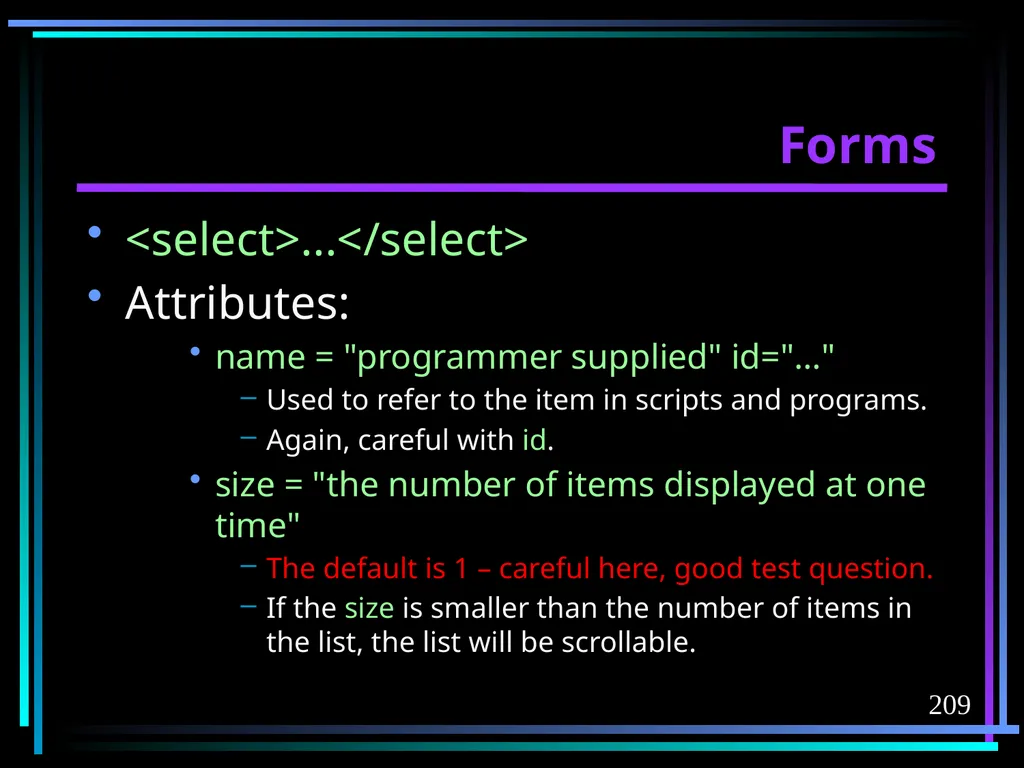
size = "the number of items displayed at one time"
The default is 1 – careful here, good test question.
If the size is smaller than the number of items in the list, the list will be scrollable.<br>
slide210. 210 Multi-line text area for longer fields.<br>
slide211. <p>Comments:
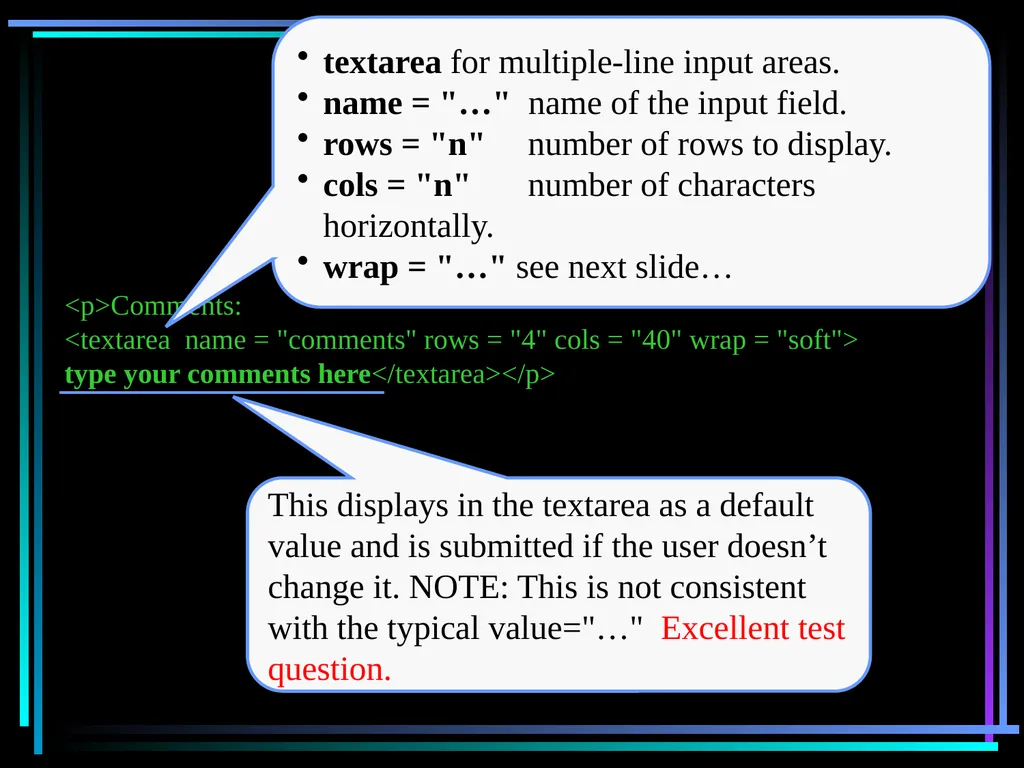
<textarea name = "comments" rows = "4" cols = "40" wrap = "soft">
type your comments here</textarea></p> This displays in the textarea as a default value and is submitted if the user doesn’t change it. NOTE: This is not consistent with the typical value="…" Excellent test question. textarea for multiple-line input areas.
name = "…" name of the input field.
rows = "n" number of rows to display.
cols = "n" number of characters horizontally.
wrap = "…" see next slide…<br>
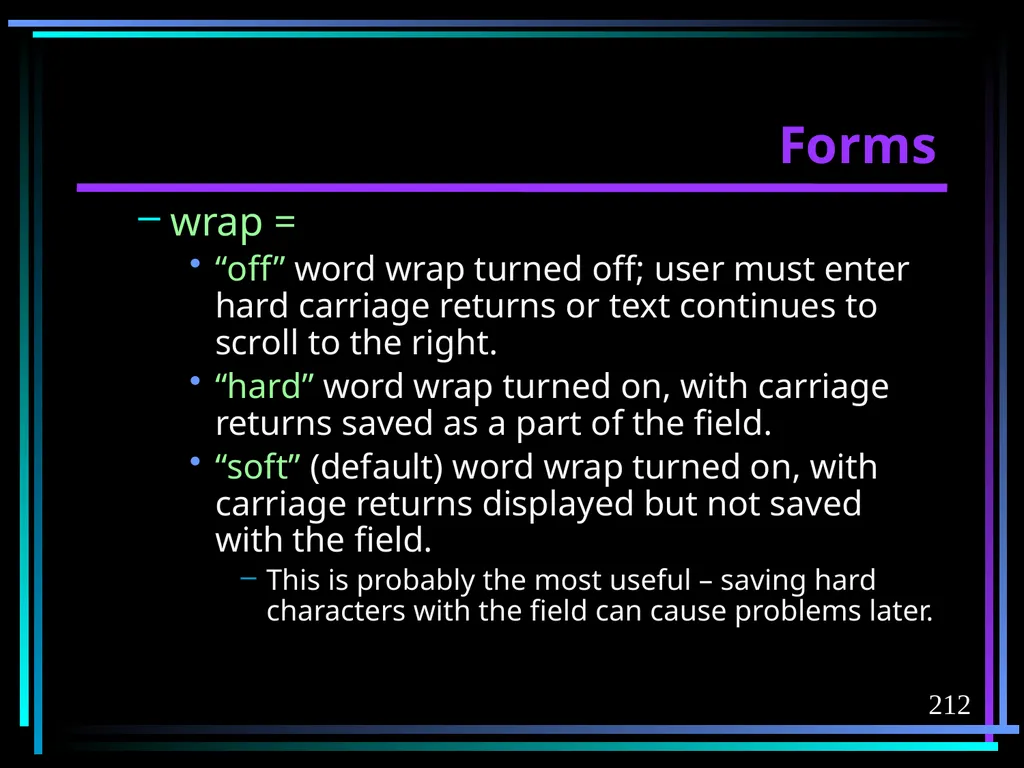
slide212. 212 Forms wrap =
“off” word wrap turned off; user must enter hard carriage returns or text continues to scroll to the right.
“hard” word wrap turned on, with carriage returns saved as a part of the field.
“soft” (default) word wrap turned on, with carriage returns displayed but not saved with the field.
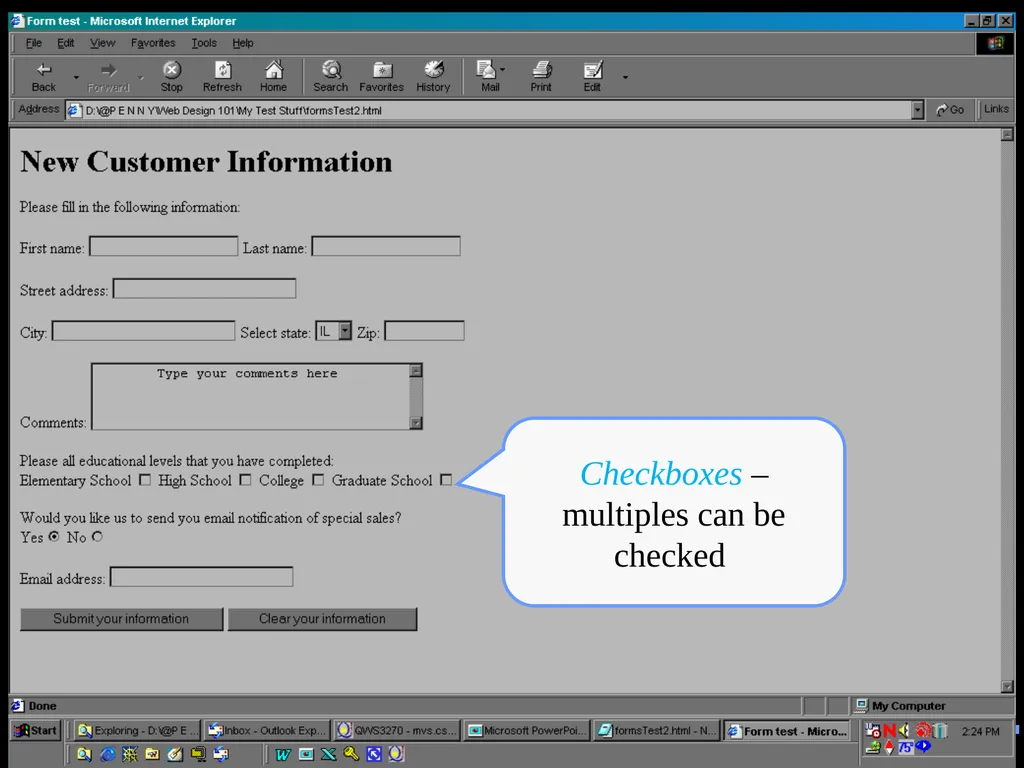
This is probably the most useful – saving hard characters with the field can cause problems later.<br>
slide213. 213 Checkboxes – multiples can be checked<br>
slide214. 214 Forms <input type="checkbox"> allows choosing multiple items from a list of choices.
<input type = "checkbox"
name = “group name"
value = "name of that single box within the group" >
name will be a group name, with several buttons grouped together.
value the name of the individual checkbox within the group.<br>
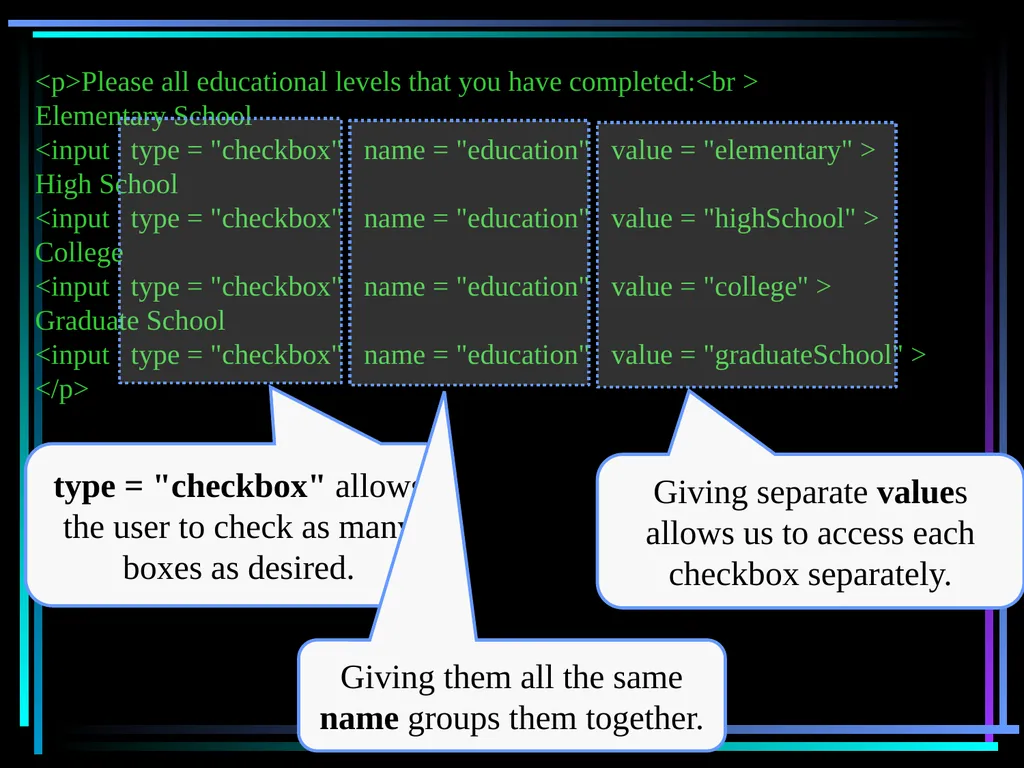
slide215. <p>Please all educational levels that you have completed:<br >
Elementary School
<input type = "checkbox" name = "education" value = "elementary" >
High School
<input type = "checkbox" name = "education" value = "highSchool" >
College
<input type = "checkbox" name = "education" value = "college" >
Graduate School
<input type = "checkbox" name = "education" value = "graduateSchool" >
</p><br>
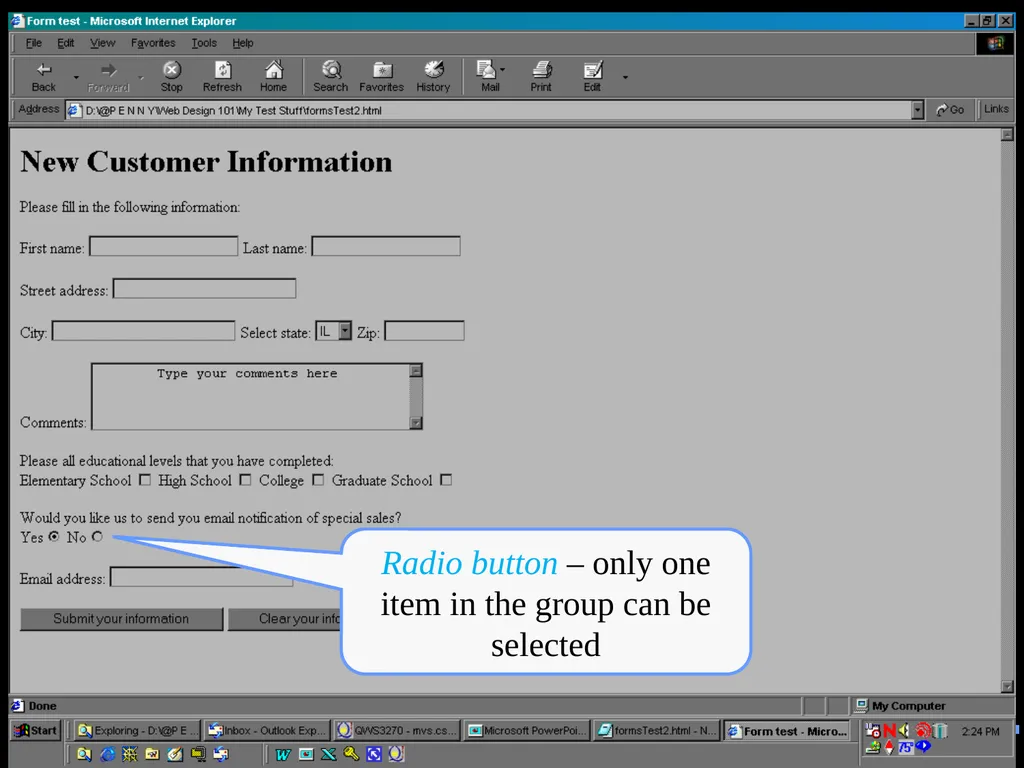
slide216. Radio button – only one item in the group can be selected<br>
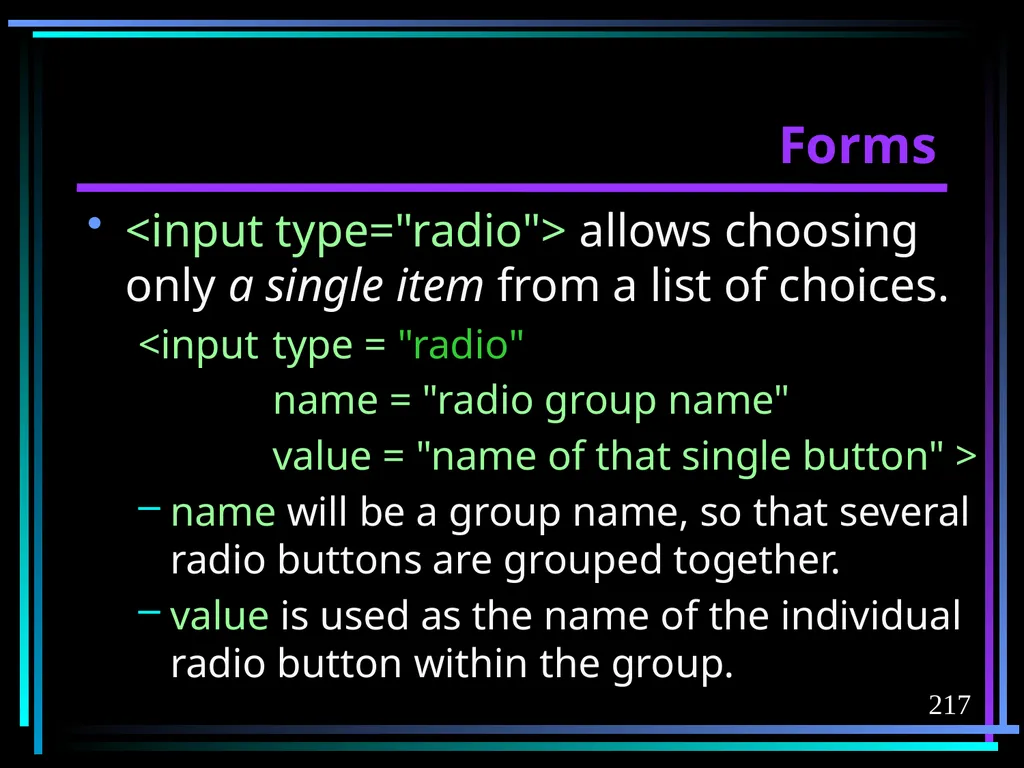
slide217. 217 Forms <input type="radio"> allows choosing only a single item from a list of choices.
<input type = "radio"
name = "radio group name"
value = "name of that single button" >
name will be a group name, so that several radio buttons are grouped together.
value is used as the name of the individual radio button within the group.<br>
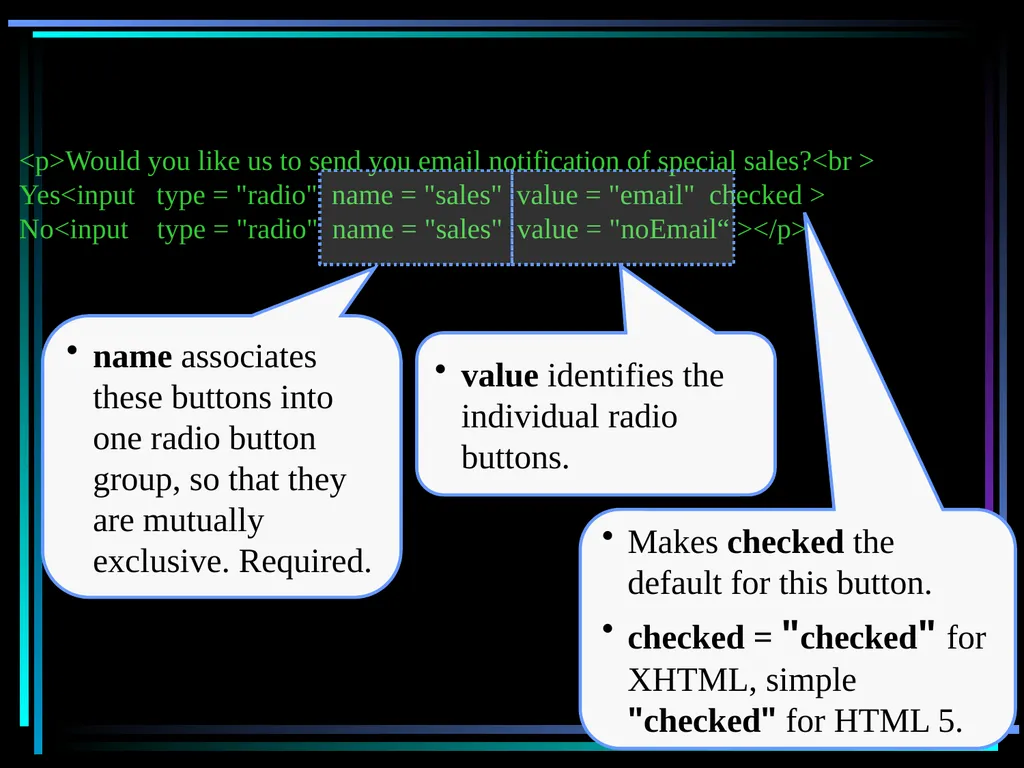
slide218. <p>Would you like us to send you email notification of special sales?<br >
Yes<input type = "radio" name = "sales" value = "email" checked >
No<input type = "radio" name = "sales" value = "noEmail“ ></p> Makes checked the default for this button.
checked = "checked" for XHTML, simple "checked" for HTML 5.<br>
slide219. 219 Non-display field, which hides the typed characters by displaying asterisks instead.<br>
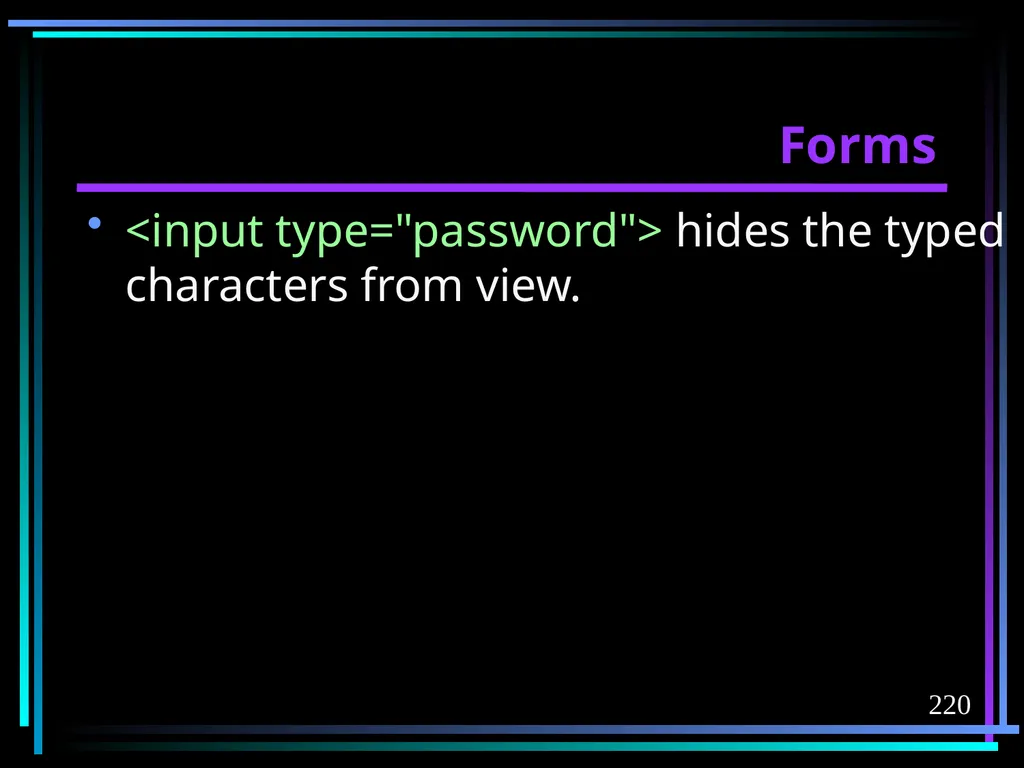
slide220. 220 Forms <input type="password"> hides the typed characters from view.<br>
slide221. <p>Email address:
<input type = "password" name = "email" size = "25“ ></p>
<p>
<input type = "submit" value = "Submit your information“ >
<input type = "reset" value = "Clear your information“ ></p>
</form>
</body>
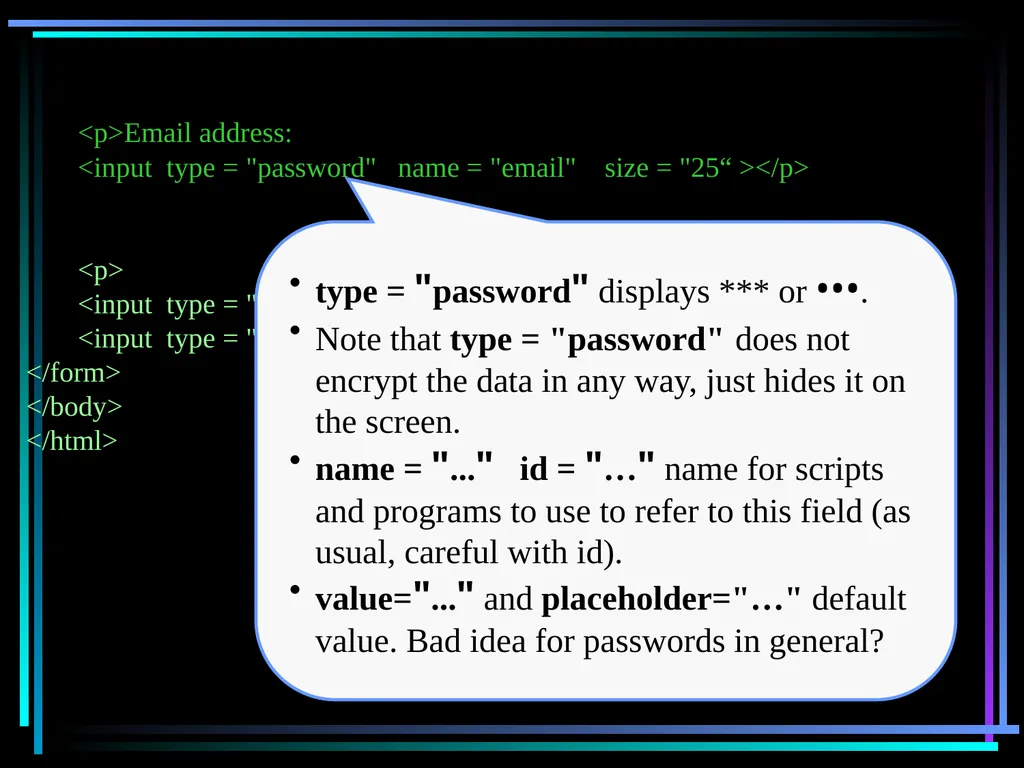
</html> type = "password" displays *** or •••.
Note that type = "password" does not encrypt the data in any way, just hides it on the screen.
name = "..." id = "…" name for scripts and programs to use to refer to this field (as usual, careful with id).
value="..." and placeholder="…" default value. Bad idea for passwords in general?<br>
slide222. 222 Forms <input type="button"> primarily used to call a JavaScript script.<br>
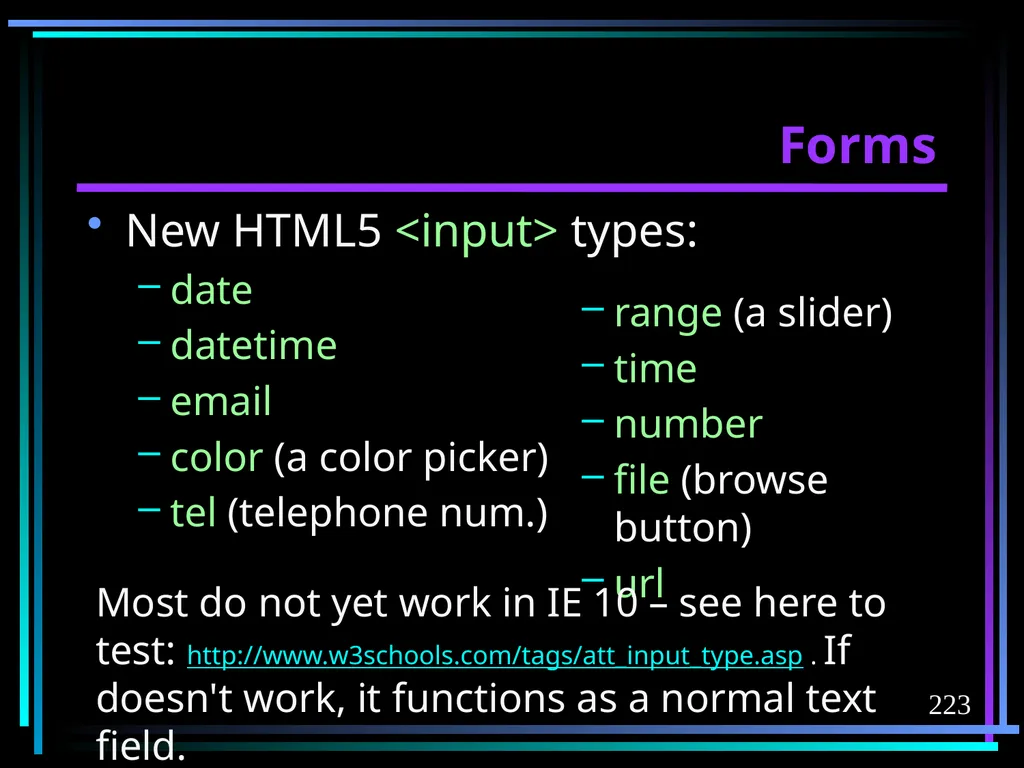
slide223. 223 Forms New HTML5 <input> types:
date
datetime
email
color (a color picker)
tel (telephone num.) range (a slider)
time
number
file (browse button)
url Most do not yet work in IE 10 – see here to test: http://www.w3schools.com/tags/att_input_type.asp . If doesn't work, it functions as a normal text field.<br>
slide224. 224 Forms Other widget attributes:
tabindex="…" alters the sequence of moving through form fields. Quirky in older IE.
title="…" provides brief mouseover instructions.<br>
slide225. 225 Forms More on using forms when we get into JavaScript.<br>
slide226. 226 Frames Frames are inherently evil. We will not use them in this class AT ALL (nor will anything about frames be on tests).
Even so, you need to know what they are…
Each frame loads a different HTML file.
For instance, when a web page has
a title and logo across the top that don’t scroll
a small menu on the left that doesn’t scroll, and
a main body on the right that does scroll,
you may be looking at three frames (though not necessarily)<br>
slide227. 227 Frames So, let’s look at a frames page (admittedly quite ugly)…<br>
slide228. “menu” file not found. “main” “animals”<br>
slide229. 229 Frames The page that defines where the frames lie is called the frameset page.
The frameset page contains the <head> and the frames – no body at all.
Its only purpose is to define the size and placement of each of the frames.
It is, of course, loaded first.<br>
slide230. <!DOCTYPE HTML PUBLIC "-//W3C//DTD HTML4.0 frameset//EN">
<html><hEAD><TITLE>frame test</TITLE></hEAD>
<frameset cols = “200,500,*”>
<frame name = "menu" src = "menu.html” noresize >
<frame name = "main" src = "formsTest2.html">
<frame name = "animals" src = "imageMapTest.html">
<noframes>
<p>This page requires frames, but your browser does not support them.</p>
<p>Download the latest version of Internet Explorer from
<a href = "http://www.microsoft.com/">Microsoft</a></p>
</noframes>
</frameset>
</html><br>
slide231. 231 Frames Can nest <frameset> within <frame>, but we aren’t going that far.
Advantage of frames:
More control over what is always on display on the page; for instance, you can make sure your menu is always present.
Persistent menu display is probably the strongest (only?) argument for using frames.
But there are better ways of doing that today, using positioned <div>s.<br>
slide232. 232 Frames Disadvantages:
The initial page takes longer to load because it is loading multiple files.
Frames have unique security issues; each frame can potentially have different permission levels.
Search engines can have problems indexing sites with frames.
Can print individual frames (if you know how – most users don’t), but can’t print an entire page of frames.<br>
slide233. 233 Frames Mostly irrelevant these days, because of <div>s…
Bottom line – do not use unless you have some overwhelming reason to do so!<br>
slide234. 234 Frames But what about <iframes> ?
An inline, scrolling frame, no <frameset> required.
Not quite so bad, but still controversial.
Removed in HTML 4, back in HTML5.
Probably best reserved for when you need a “sandbox” environment – i.e., you need to isolate content from your CSS, etc.
Not going further on this one.<br>
slide235. 235 Containment Two new tags used to establish containment:
<span>
<div><br>
slide236. 236 Containment <span> is an in-line container, meaning that it is surrounded by running text.
So, <span> could be embedded within a paragraph to identify a particular group of words or characters.
Perhaps we want to make embedded vocabulary words within a paragraph a different color, as for “in-line container” above.<br>
slide237. 237 Containment Only two attributes for <span>
id = "…" (for an element that occurs only once on the page)
class = "…" (for an element that might occur multiple times on a page)
id and class bind the <span> to named CSS properties in the head of the document or to CSS in an external file -- we will look at both later in the semester.<br>
slide238. 238 Containment <div> is used to define a group of some sort, so that we can apply formatting to the group as a whole.
Sets up a block-level container: an element that normally begins at the start of one line and ends in a way that forces the next element to appear on a new line following the block.
i.e., a box.<br>
slide239. 239 Containment Block-level elements include h1, h2,…, p, ul, ol, and li.
On the other hand, em and strong are not block-level elements.
<div> might have several paragraphs <p>…</p> enclosed within it.<br>
slide240. Document Head Body h1 Heading Paragraph 1 Paragraph 2 Paragraph 3 Link <div><br>
slide241. 241 Containment Example:
<div class = "indentedParagraphs">
<p>…</p>
<p>…</p>
<p>…</p>
</div> The only two possible attributes are, again, id and class.<br>
slide242. 242 Containment <div>s are also used extensively in page layout, to replace tables.
Can position <div>s so that they look like tables and table cells.
That topic will have to wait until we get into CSS more thoroughly.<br>
slide243. 243 Containment HTML5 adds some new blocking elements that function like <div>s, but with meaning attached:
<HEADER> <SECTION>
<FOOTER> <ARTICLE>
<NAV> <ASIDE>
<FIGURE> (to group an image and its description)
Can be in capital letters, to make them more visible (good idea).<br>
slide244. 244 Viewing the Source Code of Other Web Pages Learn from the code of other web pages:
“Imitation is the sincerest form of theft.” Jeffrey Zeldman, Taking Your Talent to the Web
You can view the HTML of pages on the web by simply clicking “View, Source” on the browser menu.
This won’t show much if you are on a page with frames, BTW.<br>
slide245. 245 Viewing the Source Code of Other Web Pages Alternately, right-click on the page or frame, then click “View Source.”
Developer tools under "Tools" in Firefox, IE, and Chrome: can do useful things like view partial source, show if images are resized, view page in grayscale, etc.<br>
slide246. 246 Viewing the Source Code of Other Web Pages Especially helpful -- the AIS Web Toolbar for IE from http://www.visionaustralia.org.au/ais/toolbar/<br>
slide247. 247 Viewing the Source Code of Other Web Pages You can get your hands on the files of any web page you are viewing, because those files are downloaded in a temporary cache on your hard drive.
Under "Internet Options" – find where the temporary internet files are stored, then you can view them (may have to unhide the directory first).<br>
slide248. 248 Class Standards Target browsers for this class are Chrome and Firefox (new this semester!). Personal and group web sites should work (or degrade gracefully) in both.
Initial grading will be done in Chrome, followed by a check in Firefox.
Example of degrading gracefully: color attribute on <hr> tag works in IE but is ignored in other browsers.<br>
slide249. 249 Class Standards Also, all pages will be graded at 800 px wide, because many users are still at this resolution – hardcode 800 px wide, or responsive design that adjusts to width. Why?
Older computers, bad vision (anyone over age 45 a candidate), smaller portable device displays, windows rarely at full-screen, etc.
My job isn’t to make it easy on you.<br>
slide250. 250 Class Standards 800 px means you have only 750 px to work with (because of browser chrome), with no horizontal scroll bar, or I will deduct points
Scrolling vertically is fine.
For your HTML and CSS assignments, you may NOT use Dreamweaver or any other IDE – you must hand code in an ASCI text editor.
After that, you may use Dreamweaver for all assignments.<br>
slide251. 251 More on HTML 5.0 Lower case versus uppercase – doesn’t matter. If you mix case, use it with meaning attached (like for blocking elements).
Backward compatible with older standards.
End tags recommended for container elements.
Bad: <p> This is a paragraph. <p> So is this…
Good: <p> This is a paragraph. </p> <p> So is this. </p><br>
slide252. 252 More on HTML 5.0 It doesn’t matter whether you use a closing “/” for empty (non-container) elements:
<img … > or <img … / >
Recommended but not required that all attribute values are quoted.
<img width="100"> or <img width=100>
Attributes need not be stated as name="value" pairs. Either is OK:
checked or checked = "checked "<br>
slide253. 253 More on HTML 5.0 Deprecated or dropped in favor of CSS:
marquee (Thank goodness! Awful tag – do not use!)
<center>, align, and valign.
height and width except for images – OK for one-offs.
<font>.
u.
Link attributes on the <body>.<br>
slide254. 254 More on HTML 5.0 Deprecated or dropped in favor of CSS:
Virtually all color, bgcolor, background, and border.
hspace and vspace.
type on <li>, <ol>, <and <ul> .
cellpadding (padding:…) and cellspacing (border-spacing:…, border-collapse:…)
Deprecated, but I have no problem with:
size on <hr>, <input>, and <select><br>
slide255. 255 More on HTML 5.0 Keep in mind that although most browsers will support the CSS to replace the stuff on the last couple of slides, many of the new HTML5 elements are not yet widely supported, if at all.
Test your own browser for HTML5 compatibility: http://html5test.com/<br>
slide256. 256 More on HTML 5.0 Resources to check what's supported in various browsers:
http://html5doctor.com
http://www.html5rocks.com
http://html5boilerplate.com/
http://html5please.com/
Modernizr – code to swap out HTML5 code in favor of HTML4 code automatically http://modernizr.com/<br>
slide257. 257 More on HTML 5.0 Cross browser list of polyfills (fills a hole in a browser), shims (fixing something automatically, like putting a transparent gif in all empty <td>s automatically), and fallbacks (degrading gracefully) https://github.com/Modernizr/Modernizr/wiki/HTML5-Cross-Browser-Polyfills<br>
slide258. 258 More on HTML 5.0 Using premade dynamic behaviors:
On Dreamweaver prior to CS6, “Insert Widget” > then download the widgets you want to install from the web.
On Dreamweaver CS6, “Insert”>“Spry” (very limited) or use a framework like JQuery.
On Dreamweaver Cloud, apparently a new way of installing widgets.
Test everything (not just strict HTML5) using Dreamweaver's Browser Lab.<br>
slide259. 259 More on HTML 5.0 Widget help:
http://helpx.adobe.com/dreamweaver/using/jquery-widget-dreamweaver.html
and
http://tv.adobe.com/watch/learn-dreamweaver-cc/using-jquery-widgets-in-web-pages-in-dreamweaver/<br>
slide260. 260 Web Standards Long gone are the wild wild West days of the Web.
Now, expected to follow the accepted standards, although those standards are evolving day by day.
Avoid deprecated tags and tags used in non-standard ways (e.g., tables for layout instead of divs).<br>
slide261. 261 HTML References Beginner sites:
W3Schools: http://www.w3schools.com/html/default.asp
HTML Goodies: http://www.htmlgoodies.com/primers/html/
HTML Code Tutorial: http://www.htmlcodetutorial.com/<br>
slide262. 262 HTML References Developer sites:
www.alistapart.com
http://www.webmonkey.com
http://validator.w3.org test your page for various and sundry errors. Free!
www.adobe.com<br>
slide2. 2 HTML Hypertext Markup Language (HTML) a tag-based language used to format static content, which is unchanging information.
Dynamic content, on the other hand, uses scripting languages, applets, Flash files to interact with the user.
We will get to all that later in the semester.<br>
slide3. 3 HTML HTML files have file name extensions of either .htm (from the older three-character file name extension limit) or .html.
HTML files are ASCII files; that is, text-based files.<br>
slide4. 4 HTML History HTML, developed by Tim Boerners-Lee, and (this is important!) charitably released in 1989 for free use, no copyright restrictions.
Boerners-Lee formed the W3C to manage the specs.
Three releases: 1.0, 2.0, 3.0, 4.0 (1998)<br>
slide5. 5 HTML History Then there was XHTML 1.0 (2000):
Created newer (many silly) standards (more later).
Incorporated support for XML (a data transport language).
Was XHTML really all that different? Certainly not different enough to support the claims that it was a whole new language.<br>
slide6. 6 HTML History XHTML 1.0 was the universal standard, for a while.
Then two competing groups spent several years working on two competing standards, HTML5 and XHTML 2.0.
It actually got nasty – each group hated the other.<br>
slide7. 7 HTML History XHTML 2.0 first:
The XHTML 2.0 group, authorized by the W3C, insisted it wasn’t HTML anymore, it was a whole new language. (Not.)
I heard a couple of them present at a conference –pretty darn arrogant.
Though XHTML 2.0 was essentially HTML, it was not fully backwards compatible with older websites.<br>
slide8. 8 HTML History HTML5:
In 2004, a Boerners-Lee group reintroduced the idea of evolving HTML4 into HTML5.
W3C rejected that proposal, continuing with XHTML.
Apple, Mozilla, and Opera (and Boerners-Lee) formed a group called WHATWG to continue evolving HTML5 anyway. Guiding principle:
Technologies need to be backwards compatible and oriented toward the way the world is, not the way we want the world to be.<br>
slide9. 9 HTML History HTML5, continued:
In 2006, the W3C agreed to participate in development of HTML5.
Finally, in Spring 2010, Microsoft joined the HTML5 working group.
In Spring 2011, the W3C stopped all development on XHTML 2.0 and declared HTML 5.0 the future standard.
All major browser manufacturers now on board.<br>
slide10. 10 HTML History HTML5, continued:
HTML5 will incorporate many of the best elements of XHTML 2.0.
Messier but more reasonable specifications, in order to be backward compatible with the quite messy evolution of HTML over the decades.
Invalid code that would have been just ignored in the past will be disallowed and flagged as errors in the future.<br>
slide11. 11 HTML History HTML5, continued:
Parts of HTML5 supported in newest browsers, some parts not available for many years (2020?)
This may be the last release number – just an evolution, bit by bit, from now on.
HTML5.0 evolving specifications http://dev.w3.org/html5/spec/Overview.html<br>
slide12. 12 HTML History HTML5 includes/will include support for:
Graphic effects like filters, rounded corners, and enhanced transparency.
Standardized sections such as “navigation” and “footer.”
Scalable Vector Graphics (SVG): vector and raster images and their behaviors defined in XML text files, so they can be scripted.
<canvas> (a drawing screen) – raster only, so drawn elements cannot be manipulated in an SVG-like way.<br>
slide13. 13 HTML History Native animation and video (replacing Flash???).
“Flash Professional Toolkit for CreateJS” plug-in allows you to create in Flash but export to HTML5/JavaScript: http://www.adobe.com/devnet/createjs/articles/using-flash-pro-toolkit-createjs.html
<video> tag
Thirty new tags, plus lots of new attributes for existing tags.<br>
slide14. 14 HTML History HTML5 and “Standards”
Trying to avoid the “browser wars” of the past, when we had to “sniff the browser” and write different versions of the page for different browsers.
BUT… the standards will be implemented at different rates by different browser manufacturers over the next decade, so still problematic.<br>
slide15. 15 HTML History Probably even more problematic now than 5 years ago, because mobile browsers, too.
For further discussion, see
http://www.adobe.com/inspire/2012/04/what-are-web-standards.html and
http://www.adobe.com/inspire/2012/08/web-standards-primer.html?trackingid=JZYSJ
IE 8 supports only bits of HTML5 standards – IE 9 and up are more compliant.
What to do? Use plug-ins or degrade gracefully.<br>
slide16. 16 HTML History Resources (more on some of these in JavaScript lectures):
Demos at Chrome Experiments http://www.chromeexperiments.com/
Articles and tutorials at Google’s HTML5 Rocks http://www.html5rocks.com/en/
Browser compatibility tables at HTML5 Please http://html5please.com/
Browser compatibility tables at CanIUse http://caniuse.com/
Tutorials on the Adobe Developer Connection http://www.adobe.com/devnet.html , especially Adobe, Standards, and HTML5 http://www.adobe.com/devnet/html5/articles/adobe-standards-html5.html
HTML5: Edition for Web Authors: http://www.w3.org/TR/2011/WD-html5-author-20110809/
JavaScript feature detection library, Modernizr http://modernizr.com/<br>
slide17. 17 Creating HTML Pages Develop the entire site or subsets of the site on your own PC first.
FTP to the web server only after it’s completed.
Test the site again on the server.
Two ways to create the site on your PC: the easy way, and the hard way…<br>
slide18. 18 Creating HTML Pages Easy way: Create the page visually using an integrated development environment (IDE), which translates your visual design to HTML.
Adobe’s Dreamweaver – the Cadillac of editors, in our labs.
Microsoft’s Expression Web, a part of Microsoft DreamSpark software program– see the CS website for information.
Seamonkey’s free HTML editor, in the labs, http://www.seamonkey-project.org/<br>
slide19. 19 Creating HTML Pages For image creation and editing:
Adobe’s Fireworks or Photoshop
Gimp, a free download, http://www.gimp.org/<br>
slide20. 20 Creating HTML Pages Hard way: Hand code the HTML...
In a plain text editor like Notepad, Editpad (download from my web page), or Notepad++ (free at http://notepad-plus-plus.org ):
Open both your editor and your browser, with a sliver of each showing on your desktop no matter which one has focus.
Type the HTML in the editor and save as a .html file on your hard drive.
Switch to the browser.
File-Open-Browse to open the file in the browser for the first time, or Refresh/Reload to load the latest version.
Repeat until done: edit the HTML in the text editor, save it, test in the browser.<br>
slide21. 21 Creating HTML Pages Either way, FTP/upload to the server only after the site/section is done and debugged locally on your PC.
Then, be sure to test on the server from a different computer than your own, or temporarily rename the working directory on your hard drive before testing on the server.
Allow plenty of time to debug after you have uploaded to the server; some links that worked just fine on your PC will inevitably break because you didn’t specify them properly for the server.<br>
slide22. 22 Creating HTML Pages Do not use a word processor to create HTML files.
Native word processor files, like .wpd and .doc files, have hidden formatting characters that will choke the browser.
Could do a “save as txt/ASCII”, though, to strip out formatting, leaving just the text.
Could do a “save as HTML”, but the code will be unbelievably ugly!
Do not use a UNIX text editor to create HTML or CSS files – puts everything on one line for “View Source,” and I won’t grade it or help debug it that way.<br>
slide23. 23 Creating HTML Pages Can use a specialized HTML editor to validate the HTML and speed up repetitive tasks.
Check out the free editor and tools at www.chami.com/html-kit .
To check syntax, try the utilities at:
http://watson.addy.com (although I disagree with many of its syntax findings)
www.w3c.org
HTML online reference: http://www.w3.org/2009/cheatsheet/<br>
slide24. 24 If You Have an IDE, Why Bother to Learn HTML? IDEs will not always do what you want them to do, so you have to tweak the code they generate.
Sometimes it’s a whole lot faster to hand-code a tag than to create it in the IDE.
Knowing HTML is absolutely essential when debugging HTML created by IDEs.<br>
slide25. 25 Introduction We won’t cover everything in HTML; we will cover the basics, and you can look up anything else when the need arises.
However, you will be tested on the HTML. The code you are expected to know will be in the HTML Study Guide on my web page.<br>
slide26. 26 Introduction In these PowerPoint presentations, HTML tags (commands) appear in green; while the results that display in the browser appear in yellow.
Formatting is often compromised because there isn’t enough room on the screen to format properly.<br>
slide27. 27 Introduction Designed originally to define structure (the way the parts are inherently related), not presentation/formatting (the way the document looks in the browser). Examples:
Structure : top-level header, sub-head, paragraph text, tables, table cells, bulleted lists, etc.
Presentation : color, size, positioning, etc.<br>
slide28. 28 Introduction How to tell the difference between structure and presentation?
If relevant to a blind person, it’s structure.
If not relevant to a blind person, it’s presentation.<br>
slide29. 29 Introduction The name of the homepage should be index.htm or index.html.
That’s the default file that a web server delivers if the browser doesn’t specify the name.
Search engines look for that file.
Please get in the habit by using that name for your homepage for this class.<br>
slide30. 30 Introduction If you have errors in your HTML, the browser might still attempt to display your page.
“Attempt” is the key word here; the page might not display at all, or it might not display as you intended.
Browsers don’t give you error messages the way compilers do.<br>
slide31. 31 Introduction We will be enforcing “well-formed HTML”; that is, you must follow the rules (even when the tags will work without following the rules) and do proper formatting.
We will be following the newer HTML standards as they are widely supported by current browsers.<br>
slide32. 32 Tag Overview HTML wraps content in tags that are indicated by < >.
Most tags require both a start tag and a closing/end tag, and content (the stuff that displays on the page) goes in between.
Example:
<p>
...Insert a paragraph of content here ...
</p> “/” used for end tags<br>
slide33. 33 Tag Overview A start tag and its end tag are viewed as a container.
In some situations, in some browsers, the browser may forgive you if you forget an end tag, but other browsers in other situations don’t.
Well-formed HTML following the newer standards requires the end tag even if the browser lets you get away with omitting it.<br>
slide34. 34 Tag Overview Some tags have only a start tag, with all the necessary information embedded within the tag.
<img src="myPicture.jpg">
or
<img src="myPicture.jpg" /> Recommended by: HTML4? No, but accepted. XHTML 2.0? Required. (How silly.) HTML5? Doesn’t care either way. Older standard.<br>
slide35. 35 Tag Overview I won’t deliberately show the ending slash in non-containers tags.
Either way, tags have optional attributes that are embedded within the start tag.
<img src = "myPicture.jpg"> Attribute name, equals sign (spaces optional), and value in quotes (optional unless special characters).<br>
slide36. 36 Tag Overview Uppercase versus lowercase HTML:
HTML (1.0-4.0): uppercase the standard, both recognized.
XHTML 2.0: lowercase recommended, both recognized.
HTML5: doesn’t care. Create your own standard and be consistent.
Quotes:
Highly recommended but required only if special characters. Don’t use “curly quotes.”<br>
slide37. 37 Tag Overview HTML and Windows PCS are not case-sensitive, but UNIX servers are.
The case of the file names (and the paths to get to those files) within the HTML must match the case of the files on UNIX.
Again, leave time to debug on the server!!!<br>
slide38. 38 Tag Overview Common file naming methods:
fileName.html (Hungarian notation/camel case)
file_name.html
In any case, be consistent!<br>
slide39. 39 Documentation Tags Tags that start with <! never display within the browser.
Two types:
Comments
DOCTYPE tag<br>
slide40. 40 Documentation Tags Comments
< ! - - insert single or multi-line
comment here - - >
Brace yourself for a shocker…
Don’t over-comment because of the download hit – comment only esoteric stuff.
Do use blank lines liberally to separate chunks of code, and use indentation to show nesting (but careful with nesting and server-side includes).<br>
slide41. 41 DOCTYPE Tag
The very first statement in the HTML file, stating standards the file follows.
HTML4 and XHTML 2.0 had doctypes like this:
<!DOCTYPE html PUBLIC "-//W3C//DTD XHTML 1.0 Transitional//EN" "http://www.w3.org/TR/xhtml1/DTD/xhtml1-transitional.dtd"> (case-sensitive)
This one is “loose” (“transitional”) -- that is, it supports the newer standards while allowing older code, too.
Dreamweaver CS5 defaults to this. Documentation Tags<br>
slide42. 42 DOCTYPE Tag
HTML5:
<!DOCTYPE html> (woo-hoo!)
Can choose as an option in Dreamweaver, under “Edit” > “Preferences” > “New Document”
If in doubt, use whatever Dreamweaver puts in for you, for now. Avoid “strict” (instead of “transitional”) – may well make your code break. Documentation Tags<br>
slide43. HTML Tags<br>
slide44. 44 Deprecated Tags and Attributes Deprecated tags and attributes are older versions whose use is not recommended even though they will still work in modern browsers.
We will learn the deprecated tags and attributes, because you will still encounter them on the web.
You can use them in your first HTML assignment, then remove all of them for your CSS assignment. (Fastest way I know to make you a believer in CSS!)<br>
slide45. 45 Deprecated Tags and Attributes No deprecated tags or attributes in your personal or group website – 1 point off for each instance I find.
Let's look at a simple HTML file…<br>
slide46. <!DOCTYPE html>
<html>
<head>
<title>Penny’s Page</title>
<meta name = "keywords" content = "phrase1, phrase2, … ">
<meta name = "description" content = "this site does ... ">
</head>
<body>
<h1>Header Stuff</h1>
<p>This is a paragraph of content of some sort, that goes on, and on,
and on, and on, and on, and on….
</p>
<p>This is another paragraph of some kind of content, that goes on,
and on, and on, and on…</p>
</body>
</html><br>
slide47. 47 Loading an HTML File into the Browser Loaded sequentially, line by line, displaying each line of HTML before moving on to the next line.
A given HTML tag has no knowledge of the line before it or the line after it.
So, with HTML alone, you can’t jump around the way you can with most programming languages, because HTML isn’t a programming language.<br>
slide48. <!DOCTYPE html>
<html>
<head>
<title>Penny’s Page</title>
<meta name = "keywords" content = "phrase1, phrase2, … ">
<meta name = "description" content = " this site does ... ">
</head>
<body>
<h1>Header Stuff</h1>
<p>This is a paragraph of content of some sort, that goes on, and on,
and on, and on, and on, and on….
</p>
<p>This is another paragraph of some kind of content, that goes on,
and on, and on, and on…
</p>
</body>
</html><br>
slide49. <!DOCTYPE html>
<html>
<head>
<title>Penny’s Page</title>
<meta name = “keywords” content = “ phrase1, phrase2, …”>
<meta name = “description” content = “this site does ...”>
</head>
<body>
<h1>Header Stuff</h1>
<p>This is a paragraph of content of some sort, that goes on, and on,
and on, and on, and on, and on….
</p>
<p>This is another paragraph of some kind of content, that goes on,
and on, and on, and on…
</p>
</body>
</html><br>
slide50. <!DOCTYPE html>
<html>
<head>
<title>Penny’s Page</title>
<meta name = "keywords" content = "phrase1, phrase2, … ">
<meta name = "description" content = "this site does ... ">
</head>
<body>
<h1>Header Stuff</h1>
<p>This is a paragraph of content of some sort, that goes on, and on,
and on, and on, and on, and on….
</p>
<p>This is another paragraph of some kind of content, that goes on,
and on, and on, and on…
</p>
</body>
</html> Displays on the colored bar across the top line of the browser window.
Displays when search engines hit on the site.
Is used by search engines to catalog the site.
Is the default name when a user adds the page to his or her favorites list.
Remember that users might link to this page directly, bypassing the homepage, so it really needs to be clear.<br>
slide51. <!DOCTYPE html>
<html>
<head>
<title>Penny’s Page</title>
<meta name = "keywords" content = "phrase1, p2, … ">
<meta name = "description" content = "this site does ... ">
</head>
<body>
<h1>Header Stuff</h1>
<p>This is a paragraph of content of some sort, that goes on, and on,
and on, and on, and on, and on….
</p>
<p>This is another paragraph of some kind of content, that goes on,
and on, and on, and on…
</p>
</body>
</html> Meta tags are used primarily by search engines.
name = “keywords” identifies the prime search words for search engines that use keywords (not all do).
name = “description” identifies the description that displays sometimes in search engine listings.<br>
slide52. <!DOCTYPE HTML PUBLIC “-//W3C/DTD HTML4.0//EN”
“http://www.w3c.org/TR/REC-html40/strict.dtd”>
<html>
<head>
<title>penny’s page</title>
<meta name = “keywords” content = “ phrase1, phrase2, …”>
<meta name = “description” content = “this site does ...”>
</head>
<body >
<h1>Header Stuff</h1>
<p>This is a paragraph of content of some sort, that goes on, and on,
and on, and on, and on, and on….
</p>
<p>This is another paragraph of some kind of content, that goes on,
and on, and on, and on…
</p>
</body>
</html><br>
slide53. 53 Setting up the Body Deprecated <body> attributes:
bgcolor = "#hhhhhh" Background color.
#hhhhhh is an RGB hex color code (actually RRGGBB), like “0000ff” for blue – more later.
For now, remember that the larger the number, the more intense the value of that color…
#ff0000 is red, #00ff00 is green, #0000ff is blue
#ffffff is white and #000000 is black (important!)
Default background color is white.
Missing # works in some browsers, not others.
Deprecated in favor of CSS’s background-color.<br>
slide54. 54 Setting up the Body <body> attributes (continued):
background = “background.gif”>
For a background image.
Deprecated in favor of CSS’s background-image.
If too large to fit in the browser window, the image will be truncated on the right and the bottom.
If too small to fill the screen, the image will tile (repeat horizontally and/or vertically) to fill the background.<br>
slide55. 55 Setting up the Body <body> attributes (continued):
Also consider using a compatible background color, so the user has something to look at while the background image loads and tiles.
Use full-screen background images only with great thought – nasty download hit. More later.<br>
slide56. 56 Setting up the Body <body> attributes (continued):
bgproperties=“fixed”
Use in conjunction with the background attribute to let content scroll over the top of a fixed background image.
If omitted, the background scrolls along with the content, which may result in repeating an image you don’t want to repeat.
IE only, not in W3C specs.
Deprecated in favor of CSS’s background-attachment.<br>
slide57. 57 Setting up the Body <body> attributes (continued):
text =”#hhhhhh” sets text color.
Default text color is black (#000000).
Deprecated in favor of CSS’s color.<br>
slide58. 58 Setting up the Body <body> attributes (continued):
Links
link = “#hhhhhh” for unvisited links (default blue)
alink = “#hhhhhh” for active links
(clicked on, default
red)
vlink = “#hhhhhh” for visited links (default usually
purple)<br>
slide59. 59 Setting up the Body <body> attributes (continued):
Link formatting is deprecated in favor of CSS’s a, a:link, a:visited, a:hover, a:active.<br>
slide60. 60 Setting up the Body So, a fully specified <body> might look like this:
<body bgcolor="#0000ff" background="myBackground.gif" bgproperties="fixed" text="#ffffff" link="#ff0000" alink="#00ff00" vlink="#ffff00" ><br>
slide61. 61 Intro to CSS Quick and dirty intro to local (i.e., in the tag itself) CSS, with more to follow in later lectures…
<body style="background-color:#0000ff; background:url(‘myBackground.gif’); background-attachment:fixed; color:#ffffff;" link="#ff0000" alink="#00ff00" vlink="#ffff00" ><br>
slide62. 62 Intro to CSS Quick and dirty intro to local (i.e., in the tag itself) CSS, with more to follow in later lectures…
<body style="background-color:#0000ff; background:url(‘myBackground.gif’); background-attachment:fixed; color:#ffffff;" link="#ff0000" alink="#00ff00" vlink="#ffff00" > style= is HTML, stuff in quotes is CSS.
format: reserved word: value;
Can use multiple values in a single style attribute.
Alternate single and double quotes.<br>
slide63. 63 Intro to CSS Note: In HTML, pixels are specified by the number alone:
border="2"
In CSS, use the number plus "px":
style="border:2px;" No space between.<br>
slide64. 64 Setting up the Body <body style="background-color:#0000ff; background:myBackground.gif; background-attachment:fixed; color:#ffffff;" link="#ff0000" alink="#00ff00" vlink="#ffff00" > For now, leaving the link specifications in HTML, not in CSS.<br>
slide65. <!DOCTYPE HTML PUBLIC “-//W3C/DTD HTML4.0//EN”
“http://www.w3c.org/TR/REC-html40/strict.dtd”>
<html>
<head>
<title>Penny’s Page</title>
<meta name = “keywords” content = “ phrase1, phrase2, …”>
<meta name = “description” content = “this site does ...”>
</head>
<body>
<h1>Header Stuff</h1>
<p>This is a paragraph of content of some sort, that goes on, and on,
and on, and on, and on, and on….
</p>
<p>This is another paragraph of some kind of content, that goes on,
and on, and on, and on…
</p>
</body>
</html> For formatting up to six levels of headings.
Varies the font size automatically; a level 1 header has a larger font size than a level 2 header, etc.
Relative sizing; the actual size is selected by the browser.<br>
slide66. 66 Header Tags Example:
<h1>Level 1 header </h1>
<h2>Level 2 header </h2>
<h3>Level 3 header </h3> Displays:
Level 1 header
Level 2 header
Level 3 header HTML forces a blank line after the header, but we can fix that with CSS.<br>
slide67. 67 Header Tags Header tags are actually intended to be structural (formatting is incidental these days), following a progression – h2 under h1, h3 under h2, etc.
Do not use a header tag for a non-header item, just to get a particular font size or other formatting!
Important to maintain the progression properly, for accessibility.<br>
slide68. <!DOCTYPE HTML PUBLIC “-//W3C/DTD HTML4.0//EN”
“http://www.w3c.org/TR/REC-html40/strict.dtd”>
<html>
<head>
<title>Penny’s Page</title>
<meta name = “keywords” content = “ phrase1, phrase2, …”>
<meta name = “description” content = “this site does ...”>
</head>
<body>
<h1>Header Stuff</h1>
<p>This is a paragraph of content of some sort, that goes on, and
on, and on, and on, and on, and on….
</p>
<p>This is another paragraph of some kind of content, that goes
on, and on, and on, and on…
</p>
</body>
</html> All of the text placed within the paragraph tags appears as a single paragraph. The text wraps to fill the available line length within the browser.
There is a blank line both before and after the paragraph display.
</p> is required by newer standards even though browsers will accept paragraphs without ending tags.<br>
slide69. 69 Paragraph Tag Blank lines (created with carriage returns) or extra spaces within the text are ignored.
In other words, you must do formatting with HTML, not by formatting within the text.<br>
slide70. 70 Paragraph Tag <p>
Fourscore and seven years ago, our
fathers brought forth on this continent
a new nation, …
</p>
Display depends upon screen width:
Fourscore and seven years ago, our fathers brought forth on this continent a new nation, …
or
Fourscore and seven years ago,
our fathers brought forth on this
continent a new nation, …<br>
slide71. 71 Paragraph Tag <p>Penny McIntire
Department of Computer Science
Northern Illinois University
DeKalb, IL 60115</p>
displays
Penny McIntire Department of Computer Science Northern Illinois University DeKalb, IL 60115
because spaces and line breaks in the text are ignored.<br>
slide72. 72 Paragraph Tag On the other hand, using <p>...</p> on every line can insert blank lines where you don’t want them...<br>
slide73. 73 Paragraph Tag Using <p> tags on each line. <p>Penny McIntire</p>
<p>Department of Computer Science</p>
<p>Northern Illinois University</p>
<p>DeKalb, IL 60115</p>
displays
Penny McIntire
Department of Computer Science
Northern Illinois University
DeKalb, IL 60115<br>
slide74. 74 Break Tag <br> Forces a line break, with no extra blank line, like a carriage return.
Was deprecated and <br/> for XHTML, but <br> is fine for HTML5.
Inserted within text within other tags like <p>...</p>.
Useful for times when the additional spacing caused by <p> would be irritating...<br>
slide75. 75 Break Tag <p>
Penny McIntire<br >
Department of Computer Science<br >
Northern Illinois University<br >
DeKalb, IL 60115
</p>
displays
Penny McIntire
Department of Computer Science
Northern Illinois University
DeKalb, IL 60115<br>
slide76. Other HTML tags<br>
slide77. 77 Horizontal Rule <hr size = "n" height in pixels
width = "m" or "m%"
align = "left" or "center" or "right"
color = "#hhhhhh"
noshade >
Horizontal rule (dividing line) n pixels high, and m pixels or m percent of container width.
align is deprecated in favor of CSS.
color works only in IE, but degrades gracefully to the default color in other browsers. Deprecated in favor of CSS’s color (which also works only in IE).<br>
slide78. 78 Horizontal Rules noshade is optional – shades the line with a 3-D speed bump effect if omitted and line is tall enough.<br>
slide79. 79 Center Tag <center>...</center>
Causes the items within this container (a tag with both start and end tags) to be centered horizontally on the page.
Deprecated in favor of CSS’s
text-align
or
margin-left:auto; margin-right:auto;<br>
slide80. 80 Center Tag Example:
<center>
<h1>Level 1 header </h1>
<h2>Level 2 header </h2>
<h3>Level 3 header </h3>
</center>
<h4>Level 4 header </h4>
<h5>Level 5 header </h5>
<h6>Level 4 header </h6><br>
slide81. 81 Center Tag Displays:
Level 1 header
Level 2 header
Level 3 header
Level 4 header
Level 5 header
Level 6 header<br>
slide82. 82 Align Attribute align = "center"/"left"/"right"/"justify"
An attribute, not a tag, so embedded within another tag, such as an <h1> tag.
Used to align a single element such as a header or a paragraph.
align = "center" works the same as <center>...</center> except <center> is used to enclose multiple tags all at once.
Deprecated in favor of CSS.<br>
slide83. 83 Align Attribute Example:
<h1 align = "center">This is a level 4 header </h1>
<h1 align = "left">This is a level 4 header </h1>
<h1 align = "right">This is a level 4 header </h1>
displays
This is a level 4 header
This is a level 4 header
This is a level 4 header<br>
slide84. 84 Text Styles <u>...</u> underline
Avoid, because underline is generally reserved for links.
Deprecated in favor of CSS’s text-decoration.
<strong>...</strong> boldface
<b>...</b>
<b> is deprecated.
CSS’s font-weight a better option than <strong>? (I disagree.)<br>
slide85. 85 Text Styles <em>...</em> italics (“emphasized”)
<i>...</i> (deprecated)
CSS’s font-style a better option? (I disagree.)
<tt>...</tt> fixed width font
CSS’s typeface options are preferred.
<del>...</del> strike-through
CSS’s text-decoration a better option? (Maybe).
<sup>...</sup> superscript
CSS’s vertical-align a better option? (I disagree).
<sub>...</sub> subscript
CSS’s vertical-align a better option? (I disagree).<br>
slide86. 86 Text Styles Example:
<h1 align = "center">
<u> This is a</u><em> level 1<strong> header</strong> </em> </h1>
displays
This is a level 1 header<br>
slide87. 87 Text Styles Well-formed HTML closes tags in the reverse order in which they are opened.
Correct:
<u> <em> <strong>Hi!</strong> </em> </u> Incorrect because overlapping:
<u> <em> <strong>Hi!</u> </em> </strong><br>
slide88. 88 Font Tag <font color = "#hhhhhh" size = "n" or "+n" or "-n" face = "font name"> ...paragraph text here...
</font>
Overrides the defaults in the <body> element.
Deprecated (viewed as the ultimate evil)! in favor of CSS’s font properties.<br>
slide89. 89 Font Tag size attribute
Valid size range is 1-7, with 1 the smallest and 7 the largest.
size = 3 is the browser default.
+2 (relative sizing) gives a font size of 5, if applied to the base font set in the browser.
If the font size has already been increased, say to a 4, then +2 results in a size 6.
Best to use relative sizes, for accessibility reasons.<br>
slide90. 90 Font Tag face attribute changes the typeface.
The typeface must exist on the user’s browser.
You can list multiple typefaces as attributes for face – the browser checks the user’s system for the first one, then the second one, etc. The last one on the list should be a standard font like Times or Ariel, or serif or san-serif..
face = "Calligrapher, Georgia, Times, serif"<br>
slide91. 91 Font Tag If the browser doesn’t find any of them, it uses the default.
Nothing to lose here if the font isn’t found; it “degrades gracefully.”<br>
slide92. 92 Font Tag If you need a fancy font for something special, create a text graphic, save it as an image, and use the image.
This comes with a download price and is harder to maintain in the future, so use sparingly.
Newer browsers provide the ability to save fonts with the page.
A huge download hit (font files can be above 100K).
In theory, the fonts could contain viruses.<br>
slide93. 93 Preformatted Text <pre width="n">...</pre>
Preformatted text preserves the formatting in the original, including spaces, line breaks, and tabs.
Particularly useful for displaying code listings because the text won’t wrap to fit the available space in the browser window.
The width attribute specifies the maximum number of characters in a line.
Don’t use as a way of avoiding HTML/CSS formatting!<br>
slide94. 94 Incorporating Images <img src="path to the image"
height="n" width="m"
name = "name you give it"
id = "name you give it"
alt="for screen readers"
title=“tool tip to display"
border="n" align="see prior discussion" hspace="n" vspace="n" ><br>
slide95. 95 Incorporating Images src=" path and filename "
Only two image formats fully and reliably accepted by all browsers, including older ones:
.jpg (for continuous-tone images like photos)
.gif (for line art like cartoons, logos, etc.)
Another format, web-optimized .png (don’t use native Fireworks .png!) works in recent browsers, but test features like transparency thoroughly!<br>
slide96. 96 Absolute and Relative URLs src="path and filename"
Background on absolute and relative URLs in HTML...
Absolute URL
Contains the complete address, including the protocol, such as
http://www.pennymcintire.com/csci475/myImage.gif
http://www.amazon.com
Will not work if you forget the “http://”<br>
slide97. 97 Absolute and Relative URLs Relative URL
An address with one or more of the pieces missing, like
src="myimage.gif" No path specified means it’s in the same directory where the current HTML file is located.
The server assumes that the missing pieces of the target address are the same as the current page.<br>
slide98. 98 Absolute and Relative URLs src="csci475/myimage.gif"
For the above relative address, the browser would look under the subdirectory where the current page resides for the csci475 subdirectory.<br>
slide99. 99 Absolute and Relative URLs src="../csci475/myimage.gif"
“../” means “go up one subdirectory.”
For the above relative address, the browser would go up one directory in the hierarchy, then down to the csci475 directory.<br>
slide100. 100 Absolute and Relative URLs src="../../csci475/myimage.gif"
For the above relative address, the browser would go up two directories in the hierarchy, then down to the csci475 directory.<br>
slide101. 101 Absolute and Relative URLs Same idea for links to other web pages, not just for images (href specifies a link – more later) href="../../csci475/myHTMLpage.html"
What will this do?
href="www.amazon.com"<br>
slide102. 102 Incorporating Images Back to src="…"
Use an absolute address like
http://www.niu.edu/cs/myimage.gif
for all external addresses (not under your own site).
Use a relative address like
../csci475/assign.html
for all addresses within your site.
Why? Portability!<br>
slide103. 103 Incorporating Images Either way, addresses can work when testing on your own computer but break when you put them out on the web.
Why?
Windows is not case-sensitive, UNIX is.
You might have accidentally changed the directory structure for the server.
You might have forgotten to FTP ancillary files like images.<br>
slide104. 104 Incorporating Images OR, it might work on the server when you are testing from your own computer, but breaks on a different computer. Why?
If you accidentally specified a path and filename on your own computer, the image may still show up when vieing from your own computer.
Test from another computer, or rename the directory on your own computer!<br>
slide105. 105 Incorporating Images height = "nnn" height, in pixels
width = "nnn" width, in pixels
height and width default to the exact size of the saved image if not specified, but specify that default anyway. Why?
Text on the page displays properly right off the bat, with empty boxes of the correct size as placeholders for the images.
Faster display.<br>
slide106. 106 Incorporating Images Don’t use the height and width attributes to change the size of the image on the page.
Don’t use to resize image smaller, because you’re still paying the download hit for the larger image.
Don’t use to resize the image bigger, because quality will be seriously degraded.
Instead, use an image-editing program to resize images and save them in the precise size (in pixels) that you want it to be on the screen.<br>
slide107. 107 Incorporating Images But this is changing, due to querying to media queries, which change the image depending upon resolution of the browser window.
More later, under graphics, or check out http://msdn.microsoft.com/en-us/magazine/hh882445.aspx if you are anxious to get going with media queries and CSS.
Better to use height: and width: in CSS, unless one-offs.<br>
slide108. 108 Incorporating Images name = "name you give it"
id = "name you give it"
Needed only if you want to reference the image by name, for things like mouseovers.
name is deprecated (but still works, and will for years to come) in favor of id in the newer standards.
Use both if in doubt (which is what Dreamweaver does for you, when it needs to reference images).<br>
slide109. 109 Incorporating Images alt = "some text" Text that displays if the browser can’t display graphics or the image errors off.
Always (repeat, always) include.
Used by search engines.
Screen readers use for vision-impaired users.
alt = "" (empty quotes) if no meaning, so skipped by screen readers.
title="some text"
For a tooltip on mouseover (newer).<br>
slide110. 110 Incorporating Images border = "n"
border width, in pixels.
0 for no border.
Deprecated in favor of CSS border.
HTML image borders went out of style for a number of years, but now graceful, one-pixel wide borders are back in style.<br>
slide111. 111 Incorporating Images align =
"top"
"bottom"
"middle"
"left"
"right"<br>
slide112. 112 Incorporating Images hspace=“m" vspace="n"
Vertical and horizontal white space left around the image, in pixels.
Each applies to two margins (that's unfortunate)
Default is usually 3 pixels.<br>
slide113. 113 Incorporating Images align, hspace, and vspace
Deprecated in favor of:
CSS margin, which can be specified on all four sides independently: margin-left, margin-right, margin-top, margin-bottom.
margin-left:auto; margin-right:auto; centers the item.
CSS float, text-align, vertical-align, position, etc.<br>
slide114. 114 Incorporating Sound and Movies Linking to sound or movie files is identical to linking to images, but the file name extensions are different.
The user must have the appropriate “player” on his or her PC – for example, the Shockwave player if it is a Shockwave file.
You can ask the user if he or she wants to download the appropriate player, but also provide an alternative.<br>
slide115. 115 Incorporating Sound and Movies Flash was already embedded in all browsers for the last decade or so, until recently.
Now, Apple and Adobe are feuding, so all bets are off.
The death knell for Flash?
Especially since Flash animations can now be converted to HTML5/JavaScript animations, even from the Flash editor.<br>
slide116. 116 Incorporating Sound and Movies Background sound (IE only)
<bgsound src = "filename"
loop = "n" or "-1" >
within the <head>.
loop = "n" means n repetitions of the sound.
loop = "-1" means continuous play.
Bad idea to default to background sound – annoys people surfing from work.<br>
slide117. 117 Anchors, or hyperlinks, link to other web pages, documents, or email accounts.
<a href = " address">Penny’s Page</a> Linking<br>
slide118. 118 Linking Example (text link):
<a href = "http://www.yahoo.com" target="_blank">
Go to Yahoo
</a>
displays
Go to Yahoo
Note the difference between the actual link address and the text that is displayed.<br>
slide119. 119 Linking target = attribute for the <a> tag (deprecated? in favor of JavaScript to open windows???):
"_self" Opens the document in the current window (the default).
"_blank" Opens the document in a new window, so that the original source window is preserved.
Use for external links, but use sparingly for internal links.
"nameYouHaveChosen" Opens in a new window that you can reuse by referencing the name again.
Careful – some browsers don't pull the tab to the front.
Use initial "_" only with reserve words above, not with your own names.<br>
slide120. 120 Linking: Image Links To make an image an anchor for a link, merely surround it with the beginning and ending anchor tags...
<a href = "mypage.html">
<img src = "graphics/myDog.gif"
border = "2"
height = "100"
width = "150"
alt = "picture of my dog" >
</a> If the border is turned on, its color will be the same as the color specified for links. Be sure there isn’t an extra space here.<br>
slide121. 121 Linking: Automatic Email Links If the link is an email address, and you want the user’s default email program to come up with an email automatically addressed to the href address when the link is clicked:
<a href = "mailto:pmcintire@niu.edu?subject= subject line&body=any body text you want" >Send me an email</a>
This works only if the user has a default email client set up on his or her computer; i.e., won’t work on a public access computer like our labs.<br>
slide122. 122 Linking: Thumbnails to Larger Images Provide users with small thumbnail images that link to larger images, so that the user can choose whether or not to pay the download price of the larger image:
<a href = "largeImagePage.html">
<img src = "smallImage.jpg" height="10" width="10" alt="my img" title="my img">
</a>
This defines the thumbnail image as the clickable link to largeImagePage.html that contains the larger image.<br>
slide123. 123 Linking: Thumbnails to Larger Images Don’t just use the height and width attributes to downscale the larger image to become the thumbnail; in that case, the thumbnail would take just as long to load as the larger image.
That would defeat the purpose of having fast load on the little image and letting the user choose whether or not to wait for the larger image.<br>
slide124. 124 Linking: Internal Anchors Sometimes it might be nice to be able to link to a specific location in the current page, or to a specific location deep in another page, not just to the top of that page.
HTML has a facility to assign an internal anchor to any location in an HTML file; a bookmark, of sorts.
Then, we can direct the user directly to that location by adding that location name at the end of path to the page.<br>
slide125. 125 Linking: Internal Anchors Use an anchor tag with no href and no content at the destination for the jump:
<a name = "gohere" id="gohere"></a>
This serves as the bookmark.
Specify both name (older standard) and id (newer standard), to be backward and forward compatible.
Newer browsers support any element (<p>, <h1>, etc.) with an id to be used as a bookmark, without needing an <a> tag at the destination.
Careful, though – older browsers are still common.
Also, compromises maintainability; find and replace of the destination tag won't work anymore because all different.<br>
slide126. 126 Linking: Internal Anchors To jump to that spot...
<a href = "path/mypage.html#gohere">
Jump to XYZ
</a>
displays
Jump to XYZ
and links to the anchor you specified.
You can omit the URL/path if the bookmark is within the current page:
<a href = "#gohere">Jump to XYZ</a><br>
slide127. 127 Linking Hint Be sure not to include a space or inside any anchor tags, either before or after the link content, whether that content is text or an image.
On a text link, the extra spaces will be underlined, which looks awful.
On an image link, the dotted outline that displays on click will have an odd shape.<br>
slide128. 128 Linking: Image Maps An image map is a single image that encompasses multiple links.
We specify different areas of the image as hotspots, or anchors.
This involves more complicated HTML than using several separate image links; use only when you can’t get the effect you want using separate images.
(ImageMapTest.html)<br>
slide129. 129 Linking: Image Maps A single image, with multiple hotspots 1 2 3 4<br>
slide130. <img name="fruits" src="image_map4.gif" width="238" height="264" border="0" usemap="#fruit_image_map“>
<map name="fruit_image_map">
<area shape="circle" href="apple_info.html"
title="Nutritional Data for Apples" alt="Nutritional Data for Apples"
coords="136,98, 23" >
<area shape="rect" href="grape_info.html"
title="Nutritional Data For Grapes"
alt="Nutritional Data For Grapes"
coords="2,69,56,185" >.
<area shape="poly" href="lime_info.html
title="Nutritional Data For Limes" alt="Nutritional Data For Limes"
coords="67,38,63,60,79,77,95,75,101,63,94,45,83,38" >
<area shape="poly" href="grape_info.html" target="_blank"
title="Nutritional Data About Grapes"
alt="Nutritional Data About Grapes coords="175,89,174,116,189,130,182,153,201,180,224,160,236,104,
214,75">
</map> This tag puts the actual image on the page. This group of tags sets up the template for the hotspots.<br>
slide131. 131 Image Maps Sorta like a DSECT in assembler.
<map name = "name of the map">
Sets up the entire image map.
Put all map definitions within the <body> tag.
name and id are the only attributes (use both for forward and backward compatibility
<area... >
Sets up an individual hotspot within the map.
So, one <area> tag per hotspot.<br>
slide132. 132 Image Maps <area > attributes:
href = "path to the destination page"
shape = "rect" or "poly" or "circle"
coords = "coordinate points"
For shape = "rect", x1,y1,x2,y2 points for top left and bottom right corners, in pixels, starting at top left corner of the image.
For shape = "poly", must list x,y for each point. Can get complicated very quickly.
For shape = "circle", x,y for center, plus radius in pixels.<br>
slide133. 133 Image Maps No formatting – spaces, line breaks, tabs – within coords attribute value (so formatting your code is impossible for this tag).
Trial and error if you do the coordinates manually, but...
Much easier in a package like Fireworks or Dreamweaver, where you simply draw a shape around the area and it calculates the coordinates for you and writes the HTML.<br>
slide134. 134 Image Maps Within the body, define the image the way you would otherwise, but connect to the map by adding the attribute
usemap = "#mapname"
Like a “using” statement in assembler.
The browser then overlays the image map on the image.
Use both the alt and title attributes for cross-browser display of the name of the links on mouseover.
Let’s look again…<br>
slide135. <img name="fruits" src="image_map4.gif" width="238" height="264" border="0" usemap="#fruit_image_map" >
<map name="fruit_image_map">
<area shape="circle" href="apple_info.html"
title="Nutritional Data for Apples" alt="Nutritional Data for Apples"
coords="136,98, 23" >
<area shape="rect" href="grape_info.html"
title="Nutritional Data For Grapes"
alt="Nutritional Data For Grapes"
coords="2,69,56,185" >
<area shape="poly" href="lime_info.html
title="Nutritional Data For Limes" alt="Nutritional Data For Limes"
coords="67,38,63,60,79,77,95,75,101,63,94,45,83,38" >
<area shape="poly" href="grape_info.html" target="_blank"
title="Nutritional Data About Grapes"
alt="Nutritional Data About Grapes coords="175,89,174,116,189,130,182,153,201,180,224,160,236,104,
214,75" >
</map> x1,y1,x2,y2 coordinates<br>
slide136. 136 Special Characters Some characters, particularly < > and &, have special meaning for HTML and therefore cannot simply be typed into the text.
Instead, HTML uses a code that starts with an & and ends with a ;...<br>
slide137. 137 Special Characters Symbol
<
>
&
©
space Code
<
>
&
©
Can be used to force extra spacing (remember, HTML ignores all but a single space character), but CSS can usually provide extra spacing much better.<br>
slide138. 138 Special Characters Older versions of HTML will work without the semicolon, but HTML5 requires the semicolon.
Example:
<p>Copyright symbol = ©</p>
displays
Copyright symbol = ©
For other symbols: http://www.w3schools.com/tags/ref_symbols.asp<br>
slide139. 139 Special Characters Can also use the ASCI character set, but this is discouraged by HTML5...
<p>Dollar sign = $</p><br>
slide140. 140 Bulleted Lists Also called unordered lists.
<ul>...</ul> starts and stops the list.
<li>...</li> starts and stops a single item in a list.
Format:
<ul> starts the list
<li>...</li> 1st bulleted item
<li>...</li> 2nd bulleted item
... etc.
</ul> ends the list<br>
slide141. 141 Bulleted Lists Displays:
Item 1
Item 2
Item 3 HTML:
<ul>
<li>Item 1</li>
<li>Item 2</li>
<li>Item 3</li>
</ul><br>
slide142. 142 Bulleted Lists Can also nest bulleted lists...<br>
slide143. 143 Bulleted Lists Example:
<ul>
<li>Item 1</li>
<li>Item 2</li>
<ul>
<li>Sub-item 1</li>
<li>Sub-item 2</li>
<ul>
<li>Sub-sub-item 1</li>
<li>Sub-sub-item 2</li>
</ul>
<li>Sub-item 3</li>
</ul>
</ul> Displays:
Item 1
Item 2
Sub-item 1
Sub-item 2
Sub-sub-item 1
Sub-sub-item 2
Sub-item 3 Indentation is for our benefit; there is no meaning attached to it. Bullets change to reflect the level changes: solid disc, open circle, solid square.<br>
slide144. 144 Bulleted Lists Can specify bullet types:
On <ul>, type="disc"/"circle"/"square"
There is no nesting limit.
Don’t forget to close your lists, or your web page will be, uhm, interesting.
CSS: list-style-type:disc or circle or square; list-style-position:inside or outside; list-style-image:url("myImage.gif");<br>
slide145. 145 Numbered Lists Also called ordered lists.
<ol type = "... " >
<li>...</li> <li> used the same as for
<li>...</li> unordered lists.
…
</ol>
Works identically to a bulleted list except numbers/letters the list instead of using bullets.
Default numbers are decimal number: 1, 2, 3, etc.<br>
slide146. 146 Numbered Lists Attributes for both <ol> and <li> include:
type = “1” decimal numbers, the default
type = “A” uppercase alphabet
type = “a” lowercase alphabet
type = “I” uppercase Roman numerals
type = “i” lowercase Roman numerals
Example...<br>
slide147. Example:
<ol type = “I”>
<li>Item 1</li>
<li>Item 2</li>
<li>Item 3</li>
<ol type = “A”>
<li>Sub-item 1</li>
<li>Sub-item 2</li>
<ol type = “1” >
<li>Sub-sub-item 1</li>
<li>Sub-sub-item 2</li>
<li>Sub-sub-item 3</li>
</ol>
<li>Sub-item 3</li>
</ol>
</ol> Displays:
I. Item 1
II. Item 2
III. Item 3
A. Sub-item 1
B. Sub-item 2
1. Sub-sub-item 1
2. Sub-sub-item 2
3. Sub-sub-item 3
C. Sub-item 3<br>
slide148. 148 Tables Tables are used for formatting table data just as in Word or Excel…<br>
slide149. <table> defines the entire table
2 pixel border.
“0” would be no border.
bgcolor (deprecated) sets table background to gray.
width is 40% of the container
Could also be an exact pixel number. <table border = “2” bgcolor = “#999999” width = “40%”>
<thead>
<tr>
<th>Name</th>
<th>Age</th>
<th>City</th>
</tr>
</thead>
<tbody>
<tr>
<td>Shelley</td>
<td>28</td>
<td>Chicago</td>
</tr>
<tr>
<td>Abby</td>
<td>27</td>
<td>San Francisco</td>
</tr>
</tbody>
</table><br>
slide150. <table border = “2” bgcolor = “#999999” width = “40%”>
<thead>
<tr>
<th>Name</th>
<th>Age</th>
<th>City</th>
</tr>
</thead>
<tbody>
<tr>
<td>Shelley</td>
<td>28</td>
<td>Chicago</td>
</tr>
<tr>
<td>Abby</td>
<td>27</td>
<td>San Francisco</td>
</tr>
</tbody>
</table><br>
slide151. <table border = “2” bgcolor = “#999999” width = “40%”>
<thead>
<tr>
<th>Name</th>
<th>Age</th>
<th>City</th>
</tr>
</thead>
<tbody>
<tr>
<td>Shelley</td>
<td>28</td>
<td>Chicago</td>
</tr>
<tr>
<td>Abby</td>
<td>27</td>
<td>San Francisco</td>
</tr>
</tbody>
</table><br>
slide152. <table border = “2” bgcolor = “#999999” width = “40%”>
<thead>
<tr>
<th>Name</th>
<th>Age</th>
<th>City</th>
</tr>
</thead>
<tbody>
<tr>
<td>Shelley</td>
<td>28</td>
<td>Chicago</td>
</tr>
<tr>
<td>Abby</td>
<td>27</td>
<td>San Francisco</td>
</tr>
</tbody>
</table><br>
slide153. <table border = “2” bgcolor = “#999999” width = “40%”>
<thead>
<tr>
<th>Name</th>
<th>Age</th>
<th>City</th>
</tr>
</thead>
<tbody>
<tr>
<td>Shelley</td>
<td>28</td>
<td>Chicago</td>
</tr>
<tr>
<td>Abby</td>
<td>27</td>
<td>San Francisco</td>
</tr>
</tbody>
</table><br>
slide154. <table border = “2” bgcolor = “#999999” width = “40%”>
<thead>
<tr>
<th>Name</th>
<th>Age</th>
<th>City</th>
</tr>
</thead>
<tbody>
<tr>
<td>Shelley</td>
<td>28</td>
<td>Chicago</td>
</tr>
<tr>
<td>Abby</td>
<td>27</td>
<td>San Francisco</td>
</tr>
</tbody>
</table><br>
slide155. <table border = “2” bgcolor = “#999999” width = “40%”>
<thead>
<tr>
<th>Name</th>
<th>Age</th>
<th>City</th>
</tr>
</thead>
<tbody>
<tr>
<td>Shelley</td>
<td>28</td>
<td>Chicago</td>
</tr>
<tr>
<td>Abby</td>
<td>27</td>
<td>San Francisco</td>
</tr>
</tbody>
</table><br>
slide156. <table border = “2” bgcolor = “#999999” width = “40%”>
<thead>
<tr>
<th>Name</th>
<th>Age</th>
<th>City</th>
</tr>
</thead>
<tbody>
<tr>
<td>Shelley</td>
<td>28</td>
<td>Chicago</td>
</tr>
<tr>
<td>Abby</td>
<td>27</td>
<td>San Francisco</td>
</tr>
</tbody>
</table><br>
slide157. <table border = “2” bgcolor = “#999999” width = “40%”>
<tr>
<th>Name</th>
<th>Age</th>
<th>City</th>
</tr>
<tr>
<td>Shelley</td>
<td>28</td>
<td>Chicago</td>
</tr>
<tr>
<td>Abby</td>
<td>27</td>
<td>San Francisco</td>
</tr>
</table> Again, <thead> and <tbody> are optional – can instead just use row and cells, like this version.
But <thead> is good for accessibility reasons.<br>
slide158. 158 Tables As we just saw, tables are used for formatting tabular data, just as in Word or Excel.
In addition, invisible tables can be used to line objects up with each other using just HTML (other ways will be discussed when we get to CSS).
So, you might put objects in a table with invisible borders, just to line them up the way you want them...<br>
slide159. Text about picture 1 .................................... Picture 1 Text about picture 2 .................................... .................................... Picture 2 Text about picture 3 .................................... .................. Picture 3 Header Stuff<br>
slide160. 160 Tables An “invisible” table like this allows more exact positioning of items than you can get in other ways.
Of course, you can have the borders visible, too, when it suits your purpose.
A more modern (but still sometimes buggy) way of lining things up, using <div>s, will be discussed a bit later – can't use <div>s until we know more CSS.
Still circumstances where ONLY tables are practical.
That is changing rapidly!<br>
slide161. 161 Tables Failure to close any of the table tags can lead to major formatting problems, depending upon the browser.
For instance, a missing </table> tag can work just fine in one browser and cause the entire page to break in another.
Every row must have an identical number of cells (with an exception to be discussed in a bit).<br>
slide162. 162 Tables Attributes for the <table> tag:
width = "n" or "n%" to set the width of table.
If omitted, “100%” is assumed.
width:… for CSS.<br>
slide163. 163 Tables Attributes for the <table> tag:
align = "left" or "right" or "center" aligns the table within the browser screen.
If not specified, the table aligns left and content that follows appears below the table.
If explicitly specified as "left", other content wraps on the right.
CSS equivalents: margin:…, float:…, text-align: …<br>
slide164. 164 Tables cellpadding = "n" sets the space between the table border and the cell content.
cellspacing = "n" sets the width of the space between cells.
Set both of these to zero if you want to slice a large graphic and put the slices into table cells seamlessly.
Note: be sure to open and close each cell <td>…</td> on the same line to make this work.<br>
slide165. 165 Tables bgcolor="…" and background="…"
Deprecated in favor of CSS’s background-color and background-image.<br>
slide166. 166 Tables Attributes for the rest of the table tags:
align = "center" or "left" or "right"
For horizontal alignment of the content within the tag.
Left aligned is the default.
Deprecated in favor of CSS’s text-align, margin, etc.
valign = “top" or "middle" or "bottom" or "baseline”
For vertical alignment of content.
Deprecated in favor of CSS’s vertical-align.
valign = “baseline”
All cells in the row will have their first lines on a common baseline, regardless of font size, rather than centering the lines vertically in the row.<br>
slide167. 167 Tables bgcolor="…" and background="…"
Same as for <table>, deprecated as well.
nowrap turns off word wrap.<br>
slide168. 168 Tables width = "n" or "n%" on individual table cells to set the width of columns.
a number will set the exact number of pixels.
"n%" will set the width as a percent of what is available for the container/table.
No width means the browser decides.<br>
slide169. 169 Tables Careful with setting table cell (column) widths:
You get unpredictable results if you use different values for cells in the same column but different rows. Usually, the larger number wins.
Best to put widths on the cells in just the first row, then no widths on subsequent rows, or just on an empty bottom row, but…
The browser overrides cell width values if you put something (like an img) that is too big in one of the cells anywhere in the column.<br>
slide170. 170 Tables Can make some data cells larger than others, similar to a “merge” in the cells of a Word table.
This allows one cell to span multiple columns or rows.
colspan = "n", rowspan = "n", as attributes within <th> or <td> elements.<br>
slide171. …
<tr>
<td colspan = “2”>Shelley</td>
<td>Chicago</td>
</tr>
<tr>
<td>Abby</td>
<td>27</td>
<td>San Francisco</td>
</tr> Name Age City
Shelley Chicago
Abby 27 San Fran<br>
slide172. 172 Tables Avoid nested tables, unless there is no other way to do what you need to do.
Nested tables break and are also hard to read.<br>
slide173. 173 Tables Again, tables are often used more for formatting than for what we would normally consider to be a table.
Many experts are discouraging the use of tables in favor of <div>s – more to come later.
My opinion – tables will be around for a while yet, until the alternatives are less buggy.<br>
slide174. 174 Tables It is easiest to make a table for the entire page layout first, then insert text and images within the table.
If you are having trouble trying to get a single table to accommodate the layout for an entire page, stop trying.
Use multiple tables instead…<br>
slide175. Text about picture 1 .................................... Picture 1 Text about picture 2 .................................... .................................... Picture 2 Text about picture 3 .................................... .................. Picture 3 Header Stuff Table 1 Table 2<br>
slide176. 176 Tables Table hints:
In Dreamweaver, you might find it easier to start by simply drawing layers (boxes), then “convert to tables” when done. Be sure to check “don’t allow overlapping layers” on the preferences first.
Must use or transparent gif as a placeholder in empty cells, or they may break in some browsers (Dreamweaver inserts automatically when you draw a table.)<br>
slide177. 177 Tables Table hints:
Be sure to explicitly specify cellpadding, cellspacing, and border so that the table looks the same in all browsers (defaults vary in the browsers).<br>
slide178. 178 Tables Table hints:
Use the first row to establish column widths, then omit column widths on all subsequent rows.
This makes it quite easy to change column widths later.<br>
slide179. 179 Tables Table hints:
A table row cannot be sized any shorter than the tallest element in the row.
Any charactier or even will be standard text height (25-30 pixels, usually) and it forces the entire row to be at least that height.
For a shorter row, fill cells with a 1-pixel by 1-pixel (or whatever) transparent gif instead.
May also have to enter height ="n" on every table cell in the row.<br>
slide180. 180 Forms Forms are used to collect information from users viewing your site.
They are the foundation upon which interactive elements (push buttons, check boxes, text fields the users enter) live.
Example... (formstest.html)<br>
slide181. A form<br>
slide182. 182 Forms Note that this is not exactly a sophisticated or pretty input form.
We will build upon it to make it look better as we know more.
First, the following two slides show the complete HTML for this form, reproduced just for reference.
Then we will look at the statements individually...<br>
slide183. <html> (Form test.html)
…
<body>
<h1>New Customer Information</h1>
<p>Please fill in the following information: </p>
<form method = "post" action = "cgi-bin/getCustomer">
<p>First name:
<input type = "text" name = "custFirstname" size = "20“ >
</p>
<p>Last name:
<input type = "text" name = "custLastname" size = "20“ >
</p>
<p>Street address:
<input type = "text" name = "custStreet" size = "25“ >
</p><br>
slide184. <p>City:
<input type = "text" name = "custCity" size = "25“ >
</p>
<p>State:
<input type = "text" name = "custState" size = "2“ >
</p>
<p>Zip:
<input type = "text" name = "custZip" size = "10“ >
</p>
<p>
<input type = "submit" value = "Submit your information“ >
<input type = "reset" value = "Clear your information“ >
</p>
</form><br>
slide185. <html> (Form test.html)
…
<body>
<h1>New Customer Information</h1>
<p>Please fill in the following information: </p>
<form method = "post" action = "cgi-bin/getCustomer">
<p>First name:
<input type = "text" name = "custFirstname" size = "20“ >
</p>
<p>Last name:
<input type = "text" name = "custLastname" size = "20“ >
</p>
<p>Street address:
<input type = "text" name = "custStreet" size = "25“ >
</p> Specifies information about the entire form, which may include lots of individual form elements.<br>
slide186. 186 Forms <form>...</form>
Attributes:
method = "post" or "get"
Used by a server-side program for updates or retrieval from a database.
Some servers support only one of these, while others support both.
get is simpler to use (server-side), while post supports better security and longer forms.
Check with your server administrator.<br>
slide187. 187 Forms action = "script name or program location"
When the form is submitted to a script or program, the script or program can access the elements contained in the form.
The action attribute specifies the path to this script or program.
Can be a local JavaScript function or server-side program.
For now, you can just auto-email the form:
action = "mailto:somebody@niu.edu"<br>
slide188. 188 Forms method and action are used in tandem to pass form elements to scripts or programs for processing.<br>
slide189. 189 Forms Widgets/controls: the individual input areas (several types) on the forms.
We will look at the attributes for individual widgets in a moment, but first the attributes that they have in common…<br>
slide190. 190 Forms name vs. id: some recent browsers still require the name attribute on all form elements, and even just putting in the id in addition to name can break the widget.
Can be added to any of the controls, HTML5 only, not yet widely supported:
required -- Pops up an error message if the form is submitted without a value.
autofocus – places the cursor in that field when the page opens. Can use only once on a form. (You will learn the JavaScript to do this later in semester.)
Now, let’s look at individual elements…<br>
slide192. <html> (Form test.html)
…
<body>
<h1>New Customer Information</h1>
<p>Please fill in the following information: </p>
<form method = "post" action = "cgi-bin/getCustomer">
<p>First name:
<input type = "text" name = "custFirstname" size = "20“ >
</p>
<p>Last name:
<input type = "text" name = "custLastname" size = "20“ >
</p>
<p>Street address:
<input type = "text" name = "custStreet" size = "25“ >
</p> Specifies information about a single input field.<br>
slide193. 193 Forms Attributes for the input element (one of several types of controls)
name = "programmer defined name"
required for all input types.
The name that will be used to refer to this input tag in the scripts or programs that use it.
type = "…"
Three types for now, for three common uses:
To capture a user-input text field.
To define reset and submit buttons.
To pass invisible (hard-coded) values to the script or program.
We will look at each...<br>
slide194. 194 Forms type = "text" for one-line text input, as in our example.
size = "n"
The visual size of the input box, in characters.
maxlength = "n"
The number of characters that can be entered.
value = "default value"
Displays in the box and will be submitted if the user doesn’t replace it with other text.
placeholder = "default value"
Like value, but placeholder disappears on focus (user clicks into field). All browsers except not until IE 10. Use both?<br>
slide195. 195 Forms type = "text" for one-line text input, as in our example.
autocomplete= "off/on" (on is default)
Browser remembers when a prior entry was made in that same field, or a field with the same name on a completely different webpage.
Some browsers remember only a list of fairly standard names, although that list varies from browser to browser: firstName, first_name, fname, etc.
Turn off when security concerns, such as SSN, credit card, password, etc.<br>
slide196. Submit and reset buttons<br>
slide197. 197 Forms type = "reset" or "submit" for specialized buttons
"reset" creates a specialized button that, when clicked, clears all the input fields on the form back to their initial values.
"submit" creates a specialized button that, when clicked, uses the method attribute and calls the action script to do something with the input data.
value = "label for the button"
The text that displays on the button.<br>
slide198. 198 Forms Careful with the submit button; use it when hitting the server, but in older browsers, it can cause some quirky bugs when going to JavaScript.
Haven’t had any problems lately.
Alternative – create your own button that, when clicked, invokes the JavaScript.<br>
slide199. <p>City:
<input type = "text" name = "custCity" size = "25“ >
</p>
<p>State:
<input type = "text" name = "custState" size = "2“ >
</p>
<p>Zip:
<input type = "text" name = "custZip" size = "10“ >
</p>
<p>
<input type = "submit" value = "Submit your information“ >
<input type = "reset" value = "Clear your information“ >
</p>
</form> Submit and reset buttons<br>
slide200. 200 Forms type = "hidden" for hard-coded (hidden) fields that you need to send to the script or program.
value = "the hard-coded value you need to send to the script"<br>
slide201. 201 Forms Keep in mind that for now, our form won’t actually do anything – we need to associate the form with a script or program, a skill we will explore a bit later in the semester.
Therefore, we will just set up the skeleton of the input form now and worry about making it work later.<br>
slide202. Text boxes Submit and reset buttons<br>
slide203. 203 Forms Let’s add a few more features to our form...
(formsTest2.html)<br>
slide204. Rearranged to put multiple inputs on one line Multi-line text area List box Check boxes Radio button Non-display field<br>
slide205. <html>
...
<body>
...
<form method = "post" action = "cgi-bin/getCustomer">
<p>First name:
<input type = "text" name = "custFirstname" size = 20“ >
Last name:
<input type = "text" name = "custLastname" size = 20“ ></p>
<p>Street address:
<input type = "text" name = "custStreet" size = 25“ ></p> Eliminating </p> puts first and last name on one line.<br>
slide206. List box: provides a drop-down list of choices.<br>
slide207. <p>City:
<input type = "text" name = "custCity" size = 25">
select state:
<select name = "custState">
<option value=“IA" >Iowa </option>
<option value="IL" selected >Illinois</option>
<option value="IN" >Indiana </option>
<option value="WI" >Wisconsin </option>
</select>
Zip:
<input type = "text” name = "custZip" size = 10“ ></p> List box: used for lists too long for radio buttons. One <option> for each element to be displayed.
So, if you want to display 50 states, you would have 50 <option>s
Both value and content (“Iowa,” “Illinois,” etc.) are needed, and they can be different. For instance, perhaps value passes codes: 1, 2, 3, etc. selected element is used as the default value, and for initial position. selected = “selected” in XHTML<br>
slide208. <p>City:
<input type = "text" name = "custCity" size = 25">
select state:
<select name = "custState">
<optgroup label="Please choose a state below.>
<option value=“IA" >Iowa </option>
<option value="IL" selected >Illinois</option>
<option value="IN" >Indiana </option>
<option value="WI" >Wisconsin </option>
</optgroup>
</select>
Zip:
<input type = "text” name = "custZip" size = 10“ ></p> optgroup provides a non-selectable title line, in bold (not shown on screenshot).
selected element not used if optgroup?<br>
slide209. 209 Forms <select>...</select>
Attributes:
name = "programmer supplied" id="…"
Used to refer to the item in scripts and programs.
Again, careful with id.
size = "the number of items displayed at one time"
The default is 1 – careful here, good test question.
If the size is smaller than the number of items in the list, the list will be scrollable.<br>
slide210. 210 Multi-line text area for longer fields.<br>
slide211. <p>Comments:
<textarea name = "comments" rows = "4" cols = "40" wrap = "soft">
type your comments here</textarea></p> This displays in the textarea as a default value and is submitted if the user doesn’t change it. NOTE: This is not consistent with the typical value="…" Excellent test question. textarea for multiple-line input areas.
name = "…" name of the input field.
rows = "n" number of rows to display.
cols = "n" number of characters horizontally.
wrap = "…" see next slide…<br>
slide212. 212 Forms wrap =
“off” word wrap turned off; user must enter hard carriage returns or text continues to scroll to the right.
“hard” word wrap turned on, with carriage returns saved as a part of the field.
“soft” (default) word wrap turned on, with carriage returns displayed but not saved with the field.
This is probably the most useful – saving hard characters with the field can cause problems later.<br>
slide213. 213 Checkboxes – multiples can be checked<br>
slide214. 214 Forms <input type="checkbox"> allows choosing multiple items from a list of choices.
<input type = "checkbox"
name = “group name"
value = "name of that single box within the group" >
name will be a group name, with several buttons grouped together.
value the name of the individual checkbox within the group.<br>
slide215. <p>Please all educational levels that you have completed:<br >
Elementary School
<input type = "checkbox" name = "education" value = "elementary" >
High School
<input type = "checkbox" name = "education" value = "highSchool" >
College
<input type = "checkbox" name = "education" value = "college" >
Graduate School
<input type = "checkbox" name = "education" value = "graduateSchool" >
</p><br>
slide216. Radio button – only one item in the group can be selected<br>
slide217. 217 Forms <input type="radio"> allows choosing only a single item from a list of choices.
<input type = "radio"
name = "radio group name"
value = "name of that single button" >
name will be a group name, so that several radio buttons are grouped together.
value is used as the name of the individual radio button within the group.<br>
slide218. <p>Would you like us to send you email notification of special sales?<br >
Yes<input type = "radio" name = "sales" value = "email" checked >
No<input type = "radio" name = "sales" value = "noEmail“ ></p> Makes checked the default for this button.
checked = "checked" for XHTML, simple "checked" for HTML 5.<br>
slide219. 219 Non-display field, which hides the typed characters by displaying asterisks instead.<br>
slide220. 220 Forms <input type="password"> hides the typed characters from view.<br>
slide221. <p>Email address:
<input type = "password" name = "email" size = "25“ ></p>
<p>
<input type = "submit" value = "Submit your information“ >
<input type = "reset" value = "Clear your information“ ></p>
</form>
</body>
</html> type = "password" displays *** or •••.
Note that type = "password" does not encrypt the data in any way, just hides it on the screen.
name = "..." id = "…" name for scripts and programs to use to refer to this field (as usual, careful with id).
value="..." and placeholder="…" default value. Bad idea for passwords in general?<br>
slide222. 222 Forms <input type="button"> primarily used to call a JavaScript script.<br>
slide223. 223 Forms New HTML5 <input> types:
date
datetime
color (a color picker)
tel (telephone num.) range (a slider)
time
number
file (browse button)
url Most do not yet work in IE 10 – see here to test: http://www.w3schools.com/tags/att_input_type.asp . If doesn't work, it functions as a normal text field.<br>
slide224. 224 Forms Other widget attributes:
tabindex="…" alters the sequence of moving through form fields. Quirky in older IE.
title="…" provides brief mouseover instructions.<br>
slide225. 225 Forms More on using forms when we get into JavaScript.<br>
slide226. 226 Frames Frames are inherently evil. We will not use them in this class AT ALL (nor will anything about frames be on tests).
Even so, you need to know what they are…
Each frame loads a different HTML file.
For instance, when a web page has
a title and logo across the top that don’t scroll
a small menu on the left that doesn’t scroll, and
a main body on the right that does scroll,
you may be looking at three frames (though not necessarily)<br>
slide227. 227 Frames So, let’s look at a frames page (admittedly quite ugly)…<br>
slide228. “menu” file not found. “main” “animals”<br>
slide229. 229 Frames The page that defines where the frames lie is called the frameset page.
The frameset page contains the <head> and the frames – no body at all.
Its only purpose is to define the size and placement of each of the frames.
It is, of course, loaded first.<br>
slide230. <!DOCTYPE HTML PUBLIC "-//W3C//DTD HTML4.0 frameset//EN">
<html><hEAD><TITLE>frame test</TITLE></hEAD>
<frameset cols = “200,500,*”>
<frame name = "menu" src = "menu.html” noresize >
<frame name = "main" src = "formsTest2.html">
<frame name = "animals" src = "imageMapTest.html">
<noframes>
<p>This page requires frames, but your browser does not support them.</p>
<p>Download the latest version of Internet Explorer from
<a href = "http://www.microsoft.com/">Microsoft</a></p>
</noframes>
</frameset>
</html><br>
slide231. 231 Frames Can nest <frameset> within <frame>, but we aren’t going that far.
Advantage of frames:
More control over what is always on display on the page; for instance, you can make sure your menu is always present.
Persistent menu display is probably the strongest (only?) argument for using frames.
But there are better ways of doing that today, using positioned <div>s.<br>
slide232. 232 Frames Disadvantages:
The initial page takes longer to load because it is loading multiple files.
Frames have unique security issues; each frame can potentially have different permission levels.
Search engines can have problems indexing sites with frames.
Can print individual frames (if you know how – most users don’t), but can’t print an entire page of frames.<br>
slide233. 233 Frames Mostly irrelevant these days, because of <div>s…
Bottom line – do not use unless you have some overwhelming reason to do so!<br>
slide234. 234 Frames But what about <iframes> ?
An inline, scrolling frame, no <frameset> required.
Not quite so bad, but still controversial.
Removed in HTML 4, back in HTML5.
Probably best reserved for when you need a “sandbox” environment – i.e., you need to isolate content from your CSS, etc.
Not going further on this one.<br>
slide235. 235 Containment Two new tags used to establish containment:
<span>
<div><br>
slide236. 236 Containment <span> is an in-line container, meaning that it is surrounded by running text.
So, <span> could be embedded within a paragraph to identify a particular group of words or characters.
Perhaps we want to make embedded vocabulary words within a paragraph a different color, as for “in-line container” above.<br>
slide237. 237 Containment Only two attributes for <span>
id = "…" (for an element that occurs only once on the page)
class = "…" (for an element that might occur multiple times on a page)
id and class bind the <span> to named CSS properties in the head of the document or to CSS in an external file -- we will look at both later in the semester.<br>
slide238. 238 Containment <div> is used to define a group of some sort, so that we can apply formatting to the group as a whole.
Sets up a block-level container: an element that normally begins at the start of one line and ends in a way that forces the next element to appear on a new line following the block.
i.e., a box.<br>
slide239. 239 Containment Block-level elements include h1, h2,…, p, ul, ol, and li.
On the other hand, em and strong are not block-level elements.
<div> might have several paragraphs <p>…</p> enclosed within it.<br>
slide240. Document Head Body h1 Heading Paragraph 1 Paragraph 2 Paragraph 3 Link <div><br>
slide241. 241 Containment Example:
<div class = "indentedParagraphs">
<p>…</p>
<p>…</p>
<p>…</p>
</div> The only two possible attributes are, again, id and class.<br>
slide242. 242 Containment <div>s are also used extensively in page layout, to replace tables.
Can position <div>s so that they look like tables and table cells.
That topic will have to wait until we get into CSS more thoroughly.<br>
slide243. 243 Containment HTML5 adds some new blocking elements that function like <div>s, but with meaning attached:
<HEADER> <SECTION>
<FOOTER> <ARTICLE>
<NAV> <ASIDE>
<FIGURE> (to group an image and its description)
Can be in capital letters, to make them more visible (good idea).<br>
slide244. 244 Viewing the Source Code of Other Web Pages Learn from the code of other web pages:
“Imitation is the sincerest form of theft.” Jeffrey Zeldman, Taking Your Talent to the Web
You can view the HTML of pages on the web by simply clicking “View, Source” on the browser menu.
This won’t show much if you are on a page with frames, BTW.<br>
slide245. 245 Viewing the Source Code of Other Web Pages Alternately, right-click on the page or frame, then click “View Source.”
Developer tools under "Tools" in Firefox, IE, and Chrome: can do useful things like view partial source, show if images are resized, view page in grayscale, etc.<br>
slide246. 246 Viewing the Source Code of Other Web Pages Especially helpful -- the AIS Web Toolbar for IE from http://www.visionaustralia.org.au/ais/toolbar/<br>
slide247. 247 Viewing the Source Code of Other Web Pages You can get your hands on the files of any web page you are viewing, because those files are downloaded in a temporary cache on your hard drive.
Under "Internet Options" – find where the temporary internet files are stored, then you can view them (may have to unhide the directory first).<br>
slide248. 248 Class Standards Target browsers for this class are Chrome and Firefox (new this semester!). Personal and group web sites should work (or degrade gracefully) in both.
Initial grading will be done in Chrome, followed by a check in Firefox.
Example of degrading gracefully: color attribute on <hr> tag works in IE but is ignored in other browsers.<br>
slide249. 249 Class Standards Also, all pages will be graded at 800 px wide, because many users are still at this resolution – hardcode 800 px wide, or responsive design that adjusts to width. Why?
Older computers, bad vision (anyone over age 45 a candidate), smaller portable device displays, windows rarely at full-screen, etc.
My job isn’t to make it easy on you.<br>
slide250. 250 Class Standards 800 px means you have only 750 px to work with (because of browser chrome), with no horizontal scroll bar, or I will deduct points
Scrolling vertically is fine.
For your HTML and CSS assignments, you may NOT use Dreamweaver or any other IDE – you must hand code in an ASCI text editor.
After that, you may use Dreamweaver for all assignments.<br>
slide251. 251 More on HTML 5.0 Lower case versus uppercase – doesn’t matter. If you mix case, use it with meaning attached (like for blocking elements).
Backward compatible with older standards.
End tags recommended for container elements.
Bad: <p> This is a paragraph. <p> So is this…
Good: <p> This is a paragraph. </p> <p> So is this. </p><br>
slide252. 252 More on HTML 5.0 It doesn’t matter whether you use a closing “/” for empty (non-container) elements:
<img … > or <img … / >
Recommended but not required that all attribute values are quoted.
<img width="100"> or <img width=100>
Attributes need not be stated as name="value" pairs. Either is OK:
checked or checked = "checked "<br>
slide253. 253 More on HTML 5.0 Deprecated or dropped in favor of CSS:
marquee (Thank goodness! Awful tag – do not use!)
<center>, align, and valign.
height and width except for images – OK for one-offs.
<font>.
u.
Link attributes on the <body>.<br>
slide254. 254 More on HTML 5.0 Deprecated or dropped in favor of CSS:
Virtually all color, bgcolor, background, and border.
hspace and vspace.
type on <li>, <ol>, <and <ul> .
cellpadding (padding:…) and cellspacing (border-spacing:…, border-collapse:…)
Deprecated, but I have no problem with:
size on <hr>, <input>, and <select><br>
slide255. 255 More on HTML 5.0 Keep in mind that although most browsers will support the CSS to replace the stuff on the last couple of slides, many of the new HTML5 elements are not yet widely supported, if at all.
Test your own browser for HTML5 compatibility: http://html5test.com/<br>
slide256. 256 More on HTML 5.0 Resources to check what's supported in various browsers:
http://html5doctor.com
http://www.html5rocks.com
http://html5boilerplate.com/
http://html5please.com/
Modernizr – code to swap out HTML5 code in favor of HTML4 code automatically http://modernizr.com/<br>
slide257. 257 More on HTML 5.0 Cross browser list of polyfills (fills a hole in a browser), shims (fixing something automatically, like putting a transparent gif in all empty <td>s automatically), and fallbacks (degrading gracefully) https://github.com/Modernizr/Modernizr/wiki/HTML5-Cross-Browser-Polyfills<br>
slide258. 258 More on HTML 5.0 Using premade dynamic behaviors:
On Dreamweaver prior to CS6, “Insert Widget” > then download the widgets you want to install from the web.
On Dreamweaver CS6, “Insert”>“Spry” (very limited) or use a framework like JQuery.
On Dreamweaver Cloud, apparently a new way of installing widgets.
Test everything (not just strict HTML5) using Dreamweaver's Browser Lab.<br>
slide259. 259 More on HTML 5.0 Widget help:
http://helpx.adobe.com/dreamweaver/using/jquery-widget-dreamweaver.html
and
http://tv.adobe.com/watch/learn-dreamweaver-cc/using-jquery-widgets-in-web-pages-in-dreamweaver/<br>
slide260. 260 Web Standards Long gone are the wild wild West days of the Web.
Now, expected to follow the accepted standards, although those standards are evolving day by day.
Avoid deprecated tags and tags used in non-standard ways (e.g., tables for layout instead of divs).<br>
slide261. 261 HTML References Beginner sites:
W3Schools: http://www.w3schools.com/html/default.asp
HTML Goodies: http://www.htmlgoodies.com/primers/html/
HTML Code Tutorial: http://www.htmlcodetutorial.com/<br>
slide262. 262 HTML References Developer sites:
www.alistapart.com
http://www.webmonkey.com
http://validator.w3.org test your page for various and sundry errors. Free!
www.adobe.com<br>