Keysight N432A Thermistor Power Meter Firmware Upgrade Process Firmware Upgrade The current hardware requirements for this procedure are: A PC running Windows XP, Windows 7 or Windows 10. A GPIB interface card, LAN connection, or USB
"Keysight N432A Thermistor Power Meter Firmware" is the property of its rightful owner. Permission is granted to
download and print the materials on this website for personal, non-commercial use only, and to display it
on your personal computer provided you do not modify the materials and that you retain all copyright
notices contained in the materials. By downloading content from our website, you accept the terms of this
agreement.
Presentation Transcript
01
Keysight N432A Thermistor Power Meter Firmware Upgrade Process<br>
02
Firmware Upgrade The current hardware requirements for this procedure are:
A PC running Windows XP®, Windows 7® or Windows 10®.
A GPIB interface card, LAN connection, or USB port.
The current software requirements for this procedure are:
A VISA library (e.g. Keysight IO Libraries/Connection Expert).
The N432A Firmware Files Folder
The N432A Firmware Upgrade Utility (FwUpdateApp.exe). Hardware/Software Requirements<br>
03
Firmware Upgrade (Cont’) The latest version of the Keysight IO Libraries can be obtained from Keysight.com (IO Libraries Suite)
The latest N432A Firmware can be obtained from Keysight.com
Save the file to PC hard drive
Note: This is a WinZip® executable file that must be unpacked before use.
The N432A Firmware Upgrade Application/Utility is included in the WinZip® executable file (“FwUpdateApp.exe”) Obtaining The Software<br>
04
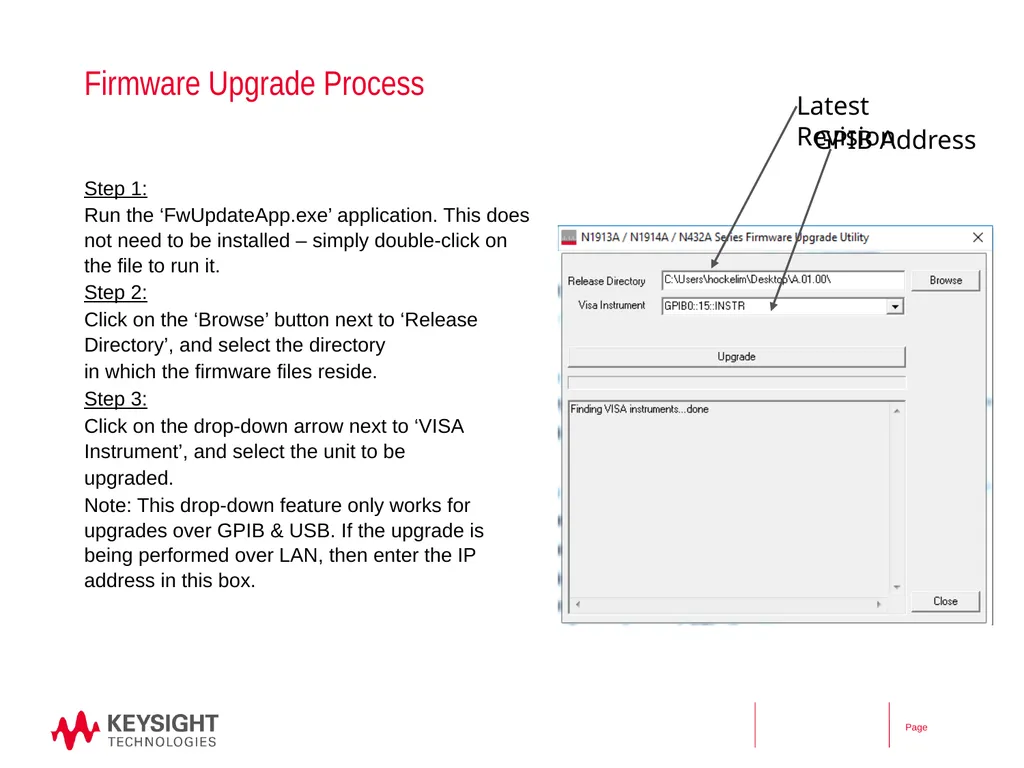
Firmware Upgrade Process Step 1:
Run the ‘FwUpdateApp.exe’ application. This does not need to be installed – simply double-click on the file to run it.
Step 2:
Click on the ‘Browse’ button next to ‘Release Directory’, and select the directory
in which the firmware files reside.
Step 3:
Click on the drop-down arrow next to ‘VISA Instrument’, and select the unit to be
upgraded.
Note: This drop-down feature only works for upgrades over GPIB & USB. If the upgrade is being performed over LAN, then enter the IP address in this box. Latest Revision GPIB Address<br>
05
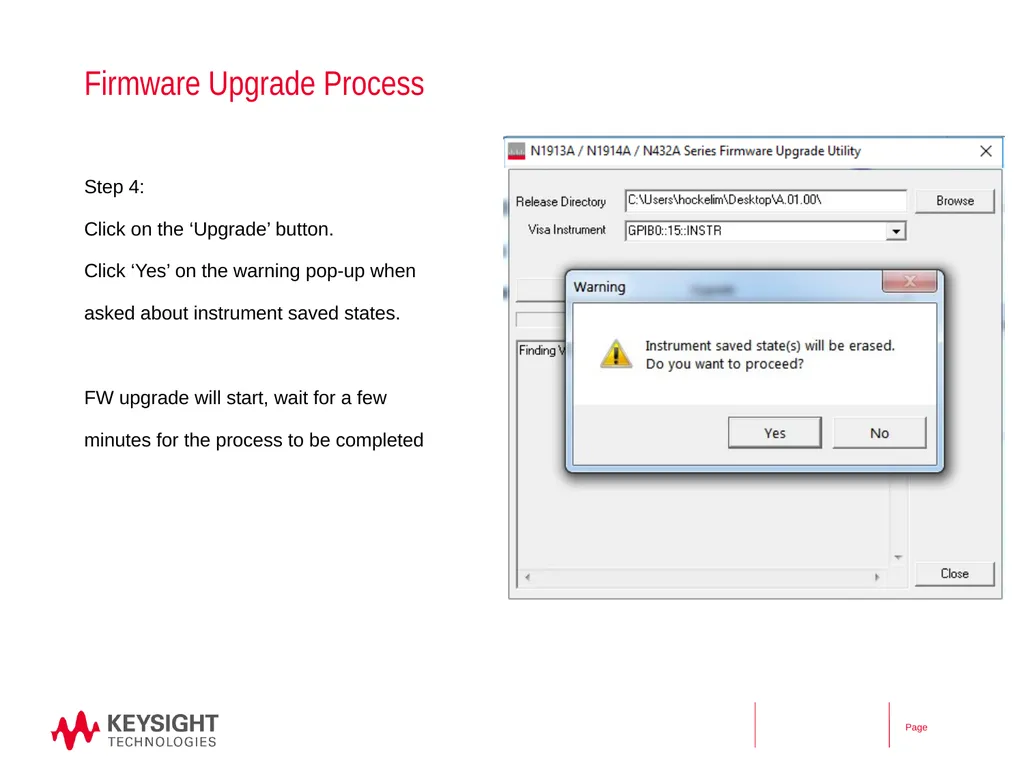
Firmware Upgrade Process Step 4:
Click on the ‘Upgrade’ button.
Click ‘Yes’ on the warning pop-up when
asked about instrument saved states.
FW upgrade will start, wait for a few
minutes for the process to be completed<br>
06
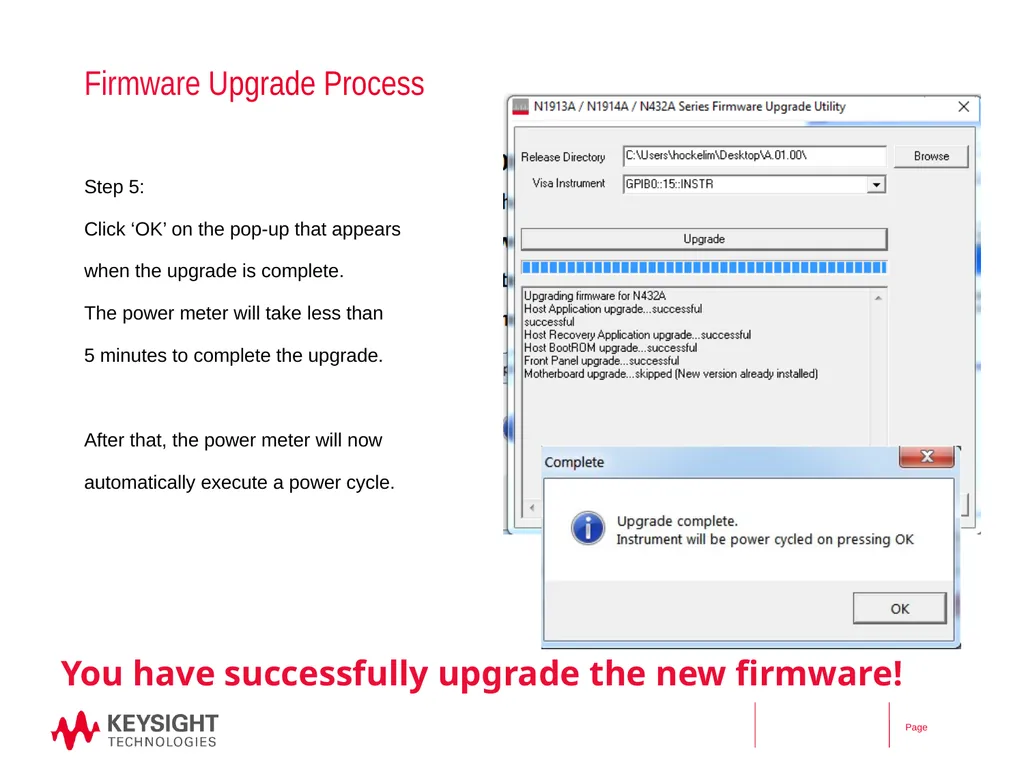
Firmware Upgrade Process Step 5:
Click ‘OK’ on the pop-up that appears
when the upgrade is complete.
The power meter will take less than
5 minutes to complete the upgrade.
After that, the power meter will now
automatically execute a power cycle. You have successfully upgrade the new firmware!<br>