
Presentation Basics Hussein Alsheakh Quiz 2 Quiz 2
TF
Published · 16 slides · 0 views

1 / 1
Description
Presentation Basics Hussein Alsheakh Quiz 2 Quiz 2 Open Presentation from Template Create a Blank Presentation 1. Click the File tab. Backstage view opens. 2. Click New. The New tab of Backstage view opens. 3. Click Blank Presentation. A
Related Topics
Share
Embed code
Download this presentation From Below
"Presentation Basics Hussein Alsheakh Quiz 2 Quiz 2" is the property of its rightful owner. Permission is granted to download and print the materials on this website for personal, non-commercial use only, and to display it on your personal computer provided you do not modify the materials and that you retain all copyright notices contained in the materials. By downloading content from our website, you accept the terms of this agreement.
Presentation Transcript
01
Presentation Basics Hussein Alsheakh<br>
02
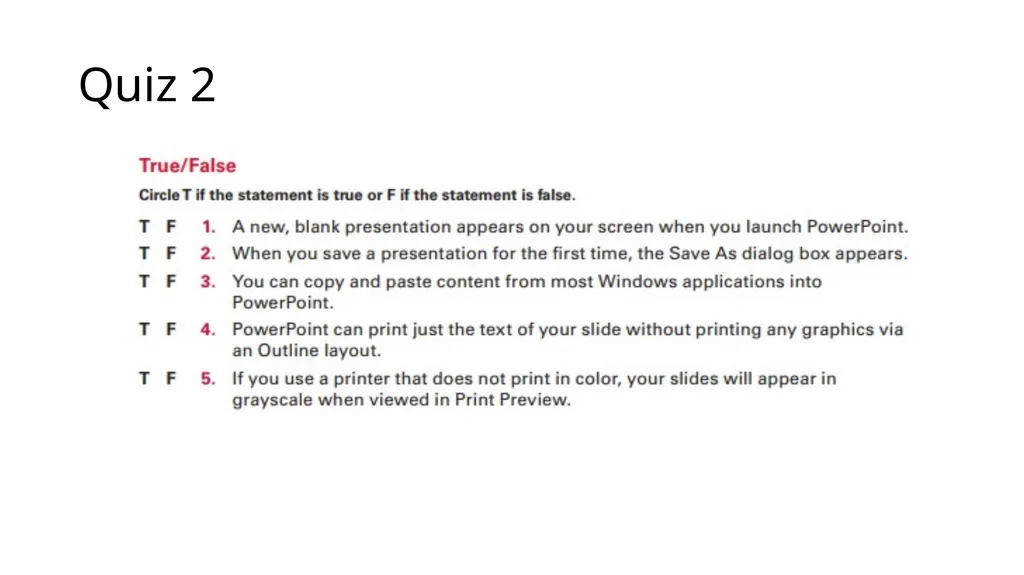
Quiz 2<br>
03
Quiz 2<br>
04
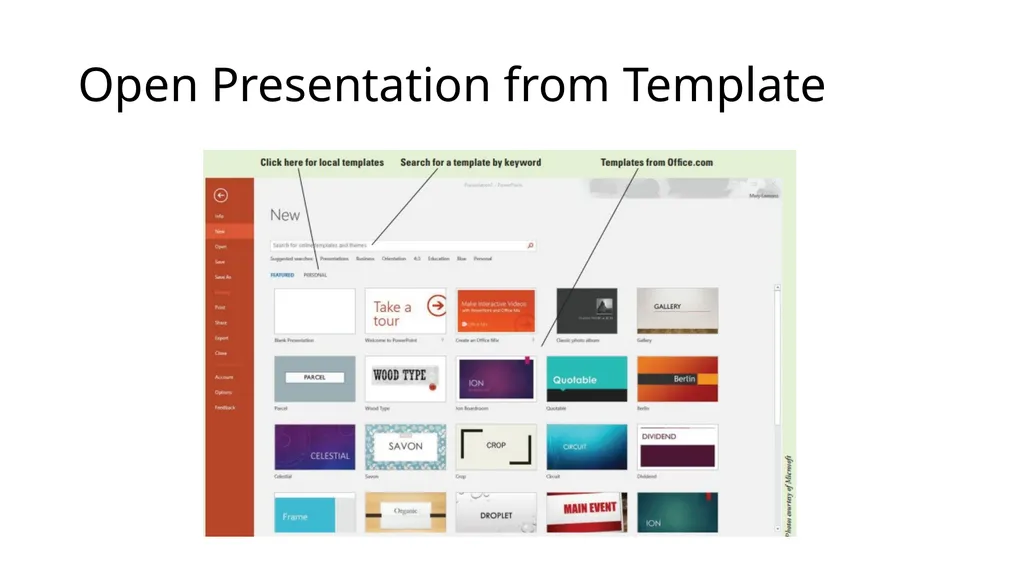
Open Presentation from Template<br>
05
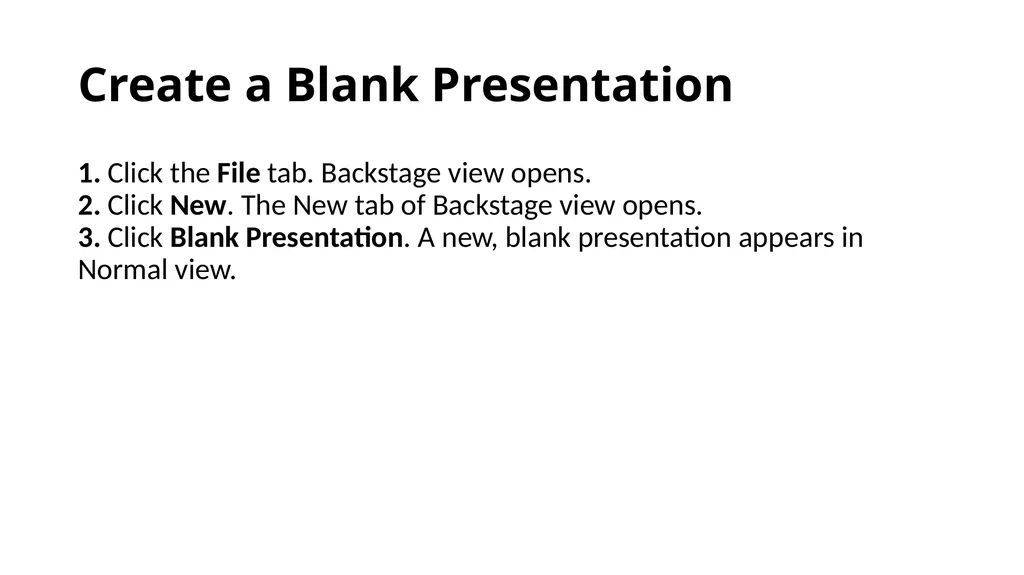
Create a Blank Presentation 1. Click the File tab. Backstage view opens.
2. Click New. The New tab of Backstage view opens.
3. Click Blank Presentation. A new, blank presentation appears in Normal view.<br>
06
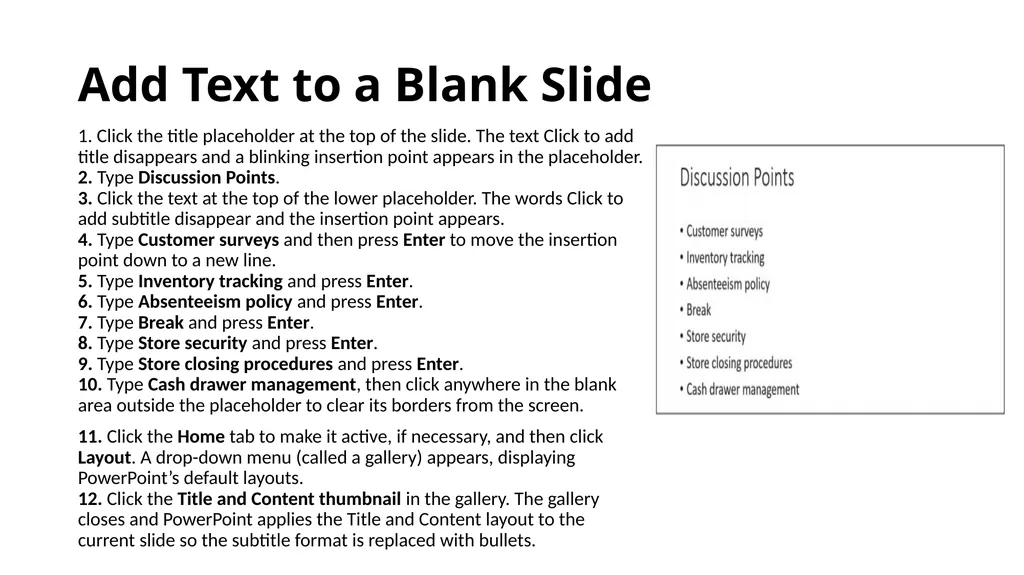
Add Text to a Blank Slide 1. Click the title placeholder at the top of the slide. The text Click to add title disappears and a blinking insertion point appears in the placeholder.
2. Type Discussion Points.
3. Click the text at the top of the lower placeholder. The words Click to add subtitle disappear and the insertion point appears.
4. Type Customer surveys and then press Enter to move the insertion point down to a new line.
5. Type Inventory tracking and press Enter.
6. Type Absenteeism policy and press Enter.
7. Type Break and press Enter.
8. Type Store security and press Enter.
9. Type Store closing procedures and press Enter.
10. Type Cash drawer management, then click anywhere in the blank area outside the placeholder to clear its borders from the screen.
11. Click the Home tab to make it active, if necessary, and then click Layout. A drop-down menu (called a gallery) appears, displaying PowerPoint’s default layouts. 12. Click the Title and Content thumbnail in the gallery. The gallery closes and PowerPoint applies the Title and Content layout to the current slide so the subtitle format is replaced with bullets.<br>
11. Click the Home tab to make it active, if necessary, and then click Layout. A drop-down menu (called a gallery) appears, displaying PowerPoint’s default layouts. 12. Click the Title and Content thumbnail in the gallery. The gallery closes and PowerPoint applies the Title and Content layout to the current slide so the subtitle format is replaced with bullets.<br>
07
Save a New Presentation 1. On the Quick Access Toolbar, click Save. The Save As tab of Backstage view appears.
2. Navigate to the folder where you want to save your file. To do so, click Browse. Then use the Save As dialog box to find the location as needed.
3. Select the text in the File name box by dragging the mouse pointer over it and then press Delete to delete it.
4. Type Managers Meeting.
5. Click Save. PowerPoint saves the presentation in the folder you chose with the name you gave it.<br>
08
Create a Presentation from a Template Click the File tab.
Click New to open the New tab.
Search for a template and click Create.
On slide 1, Northwind Traders as a title
Click the text in the subtitle, Type New Product Preview, press Enter, and then type October 2022.
On the Quick Access Toolbar, click Save. The Save As tab of Backstage view appears.
Navigate to the folder where you want to save your files and then save the presentation with the file name New Product Preview<br>
Click New to open the New tab.
Search for a template and click Create.
On slide 1, Northwind Traders as a title
Click the text in the subtitle, Type New Product Preview, press Enter, and then type October 2022.
On the Quick Access Toolbar, click Save. The Save As tab of Backstage view appears.
Navigate to the folder where you want to save your files and then save the presentation with the file name New Product Preview<br>
09
ADDING, DELETING, AND ORGANIZING SLIDES<br>
10
Add a New Slide USE the New Product Preview presentation that is still open from the previous exercise.
1. On the Home tab in the Slides group, click the New Slide button drop-down arrow. A gallery opens, showing thumbnail images of the slide layouts that are available for this template.
2. Scroll down to the bottom of the gallery and then click Title and Content.
3. On the new slide, click the title placeholder and type This Year’s New Products.<br>
3. On the new slide, click the title placeholder and type This Year’s New Products.<br>
11
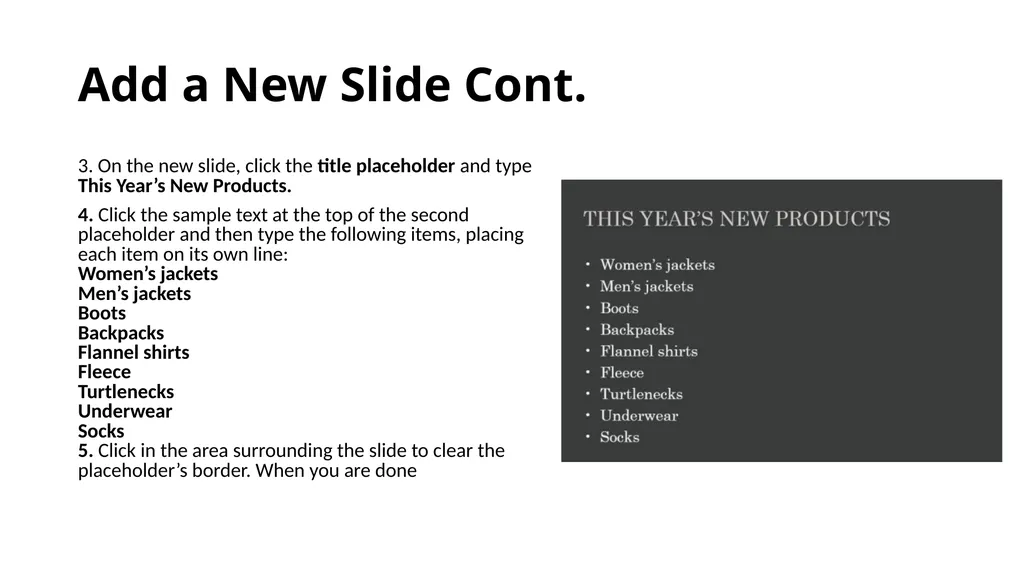
Add a New Slide Cont. 3. On the new slide, click the title placeholder and type This Year’s New Products.
4. Click the sample text at the top of the second placeholder and then type the following items, placing each item on its own line: Women’s jackets Men’s jackets Boots Backpacks Flannel shirts Fleece Turtlenecks Underwear Socks 5. Click in the area surrounding the slide to clear the placeholder’s border. When you are done<br>
4. Click the sample text at the top of the second placeholder and then type the following items, placing each item on its own line: Women’s jackets Men’s jackets Boots Backpacks Flannel shirts Fleece Turtlenecks Underwear Socks 5. Click in the area surrounding the slide to clear the placeholder’s border. When you are done<br>
12
Add a New Slide Cont. 6. On the View tab, click the Outline View button to switch to Outline view
7. In the Outline pane, click to place the text insertion point after the word Socks in slide 2 and then press Enter, creating a new paragraph. At this point the new paragraph is a bullet on slide 2. 8. Press Shift+Tab. The new paragraph is promoted into a new slide title. 9. Type Clearance Items and then press Enter. A new slide appears. Because the previous paragraph was a slide title, the new one is too. 10. Press Tab. The new paragraph is indented so that it is a bullet on the Clearance Items slide. 11. Type the following items, pressing Enter after each one except the last item to place it in its own paragraph: Biking accessories Camping supplies Spelunking gear 12. After all the text is typed in for the new slide, it appears in the Outline.<br>
7. In the Outline pane, click to place the text insertion point after the word Socks in slide 2 and then press Enter, creating a new paragraph. At this point the new paragraph is a bullet on slide 2. 8. Press Shift+Tab. The new paragraph is promoted into a new slide title. 9. Type Clearance Items and then press Enter. A new slide appears. Because the previous paragraph was a slide title, the new one is too. 10. Press Tab. The new paragraph is indented so that it is a bullet on the Clearance Items slide. 11. Type the following items, pressing Enter after each one except the last item to place it in its own paragraph: Biking accessories Camping supplies Spelunking gear 12. After all the text is typed in for the new slide, it appears in the Outline.<br>
13
Duplicate Non-Contiguous Slides USE the New Product Preview presentation that is still open from the previous exercise.
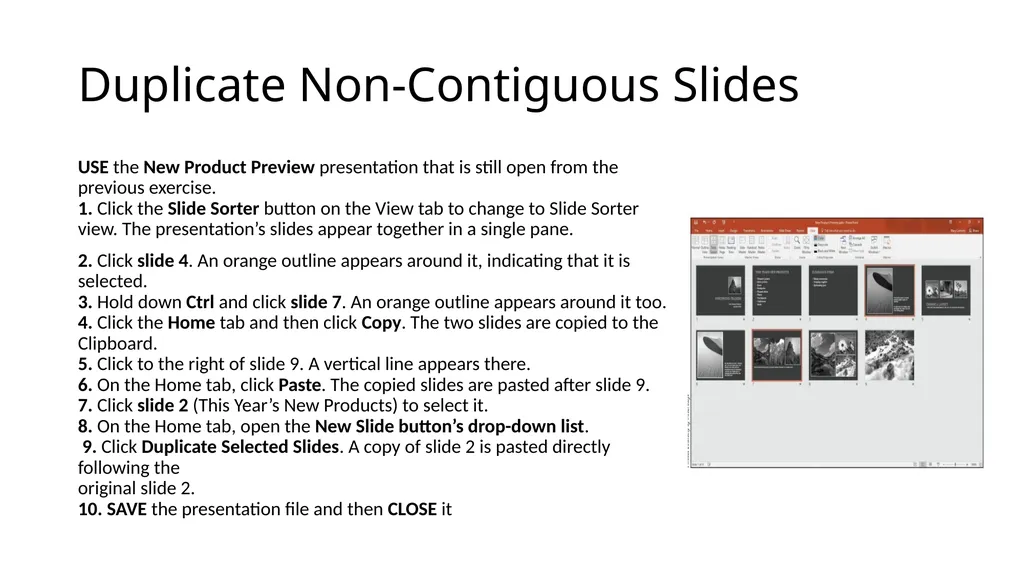
1. Click the Slide Sorter button on the View tab to change to Slide Sorter view. The presentation’s slides appear together in a single pane.
2. Click slide 4. An orange outline appears around it, indicating that it is selected. 3. Hold down Ctrl and click slide 7. An orange outline appears around it too. 4. Click the Home tab and then click Copy. The two slides are copied to the Clipboard. 5. Click to the right of slide 9. A vertical line appears there. 6. On the Home tab, click Paste. The copied slides are pasted after slide 9. 7. Click slide 2 (This Year’s New Products) to select it. 8. On the Home tab, open the New Slide button’s drop-down list. 9. Click Duplicate Selected Slides. A copy of slide 2 is pasted directly following the original slide 2. 10. SAVE the presentation file and then CLOSE it<br>
2. Click slide 4. An orange outline appears around it, indicating that it is selected. 3. Hold down Ctrl and click slide 7. An orange outline appears around it too. 4. Click the Home tab and then click Copy. The two slides are copied to the Clipboard. 5. Click to the right of slide 9. A vertical line appears there. 6. On the Home tab, click Paste. The copied slides are pasted after slide 9. 7. Click slide 2 (This Year’s New Products) to select it. 8. On the Home tab, open the New Slide button’s drop-down list. 9. Click Duplicate Selected Slides. A copy of slide 2 is pasted directly following the original slide 2. 10. SAVE the presentation file and then CLOSE it<br>
14
Rearrange the Slides in a Presentation Click the View tab and then click the Slide Sorter button to change to Slide Sorter view. The presentation’s slides appear together in a single window.
Use the Zoom control in the status bar to set the Zoom so all the slides fit on one screen.
Click slide 5 (Our extended family) and drag it to the left of slide 4 (Our customers). Themoved slide is now slide 4
Switch to normal view and drag slide 3 between slide 4 and 5.
SAVE the presentation<br>
Use the Zoom control in the status bar to set the Zoom so all the slides fit on one screen.
Click slide 5 (Our extended family) and drag it to the left of slide 4 (Our customers). Themoved slide is now slide 4
Switch to normal view and drag slide 3 between slide 4 and 5.
SAVE the presentation<br>
15
Delete a Slide 1. In Slide Sorter view, click slide 2 (
2. Press the Delete key. The slide is removed from the presentation.
3. SAVE the presentation and then CLOSE the presentation file<br>
16
Use Print Preview and Change the Print Layout On the View tab, click the Normal view button and display slide 1 (Cashier Training).
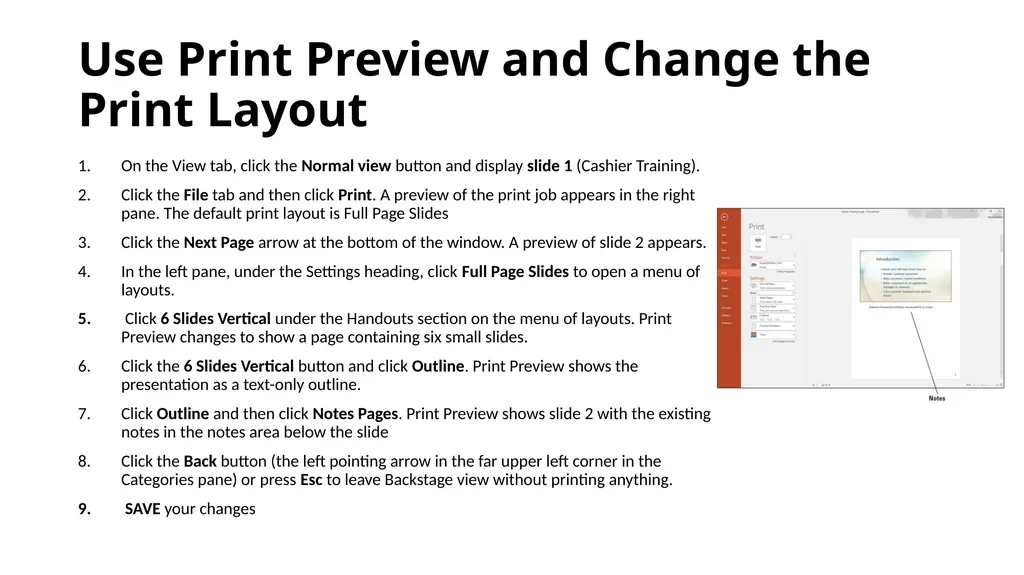
Click the File tab and then click Print. A preview of the print job appears in the right pane. The default print layout is Full Page Slides
Click the Next Page arrow at the bottom of the window. A preview of slide 2 appears.
In the left pane, under the Settings heading, click Full Page Slides to open a menu of layouts.
Click 6 Slides Vertical under the Handouts section on the menu of layouts. Print Preview changes to show a page containing six small slides.
Click the 6 Slides Vertical button and click Outline. Print Preview shows the presentation as a text-only outline.
Click Outline and then click Notes Pages. Print Preview shows slide 2 with the existing notes in the notes area below the slide
Click the Back button (the left pointing arrow in the far upper left corner in the Categories pane) or press Esc to leave Backstage view without printing anything.
SAVE your changes<br>
Click the File tab and then click Print. A preview of the print job appears in the right pane. The default print layout is Full Page Slides
Click the Next Page arrow at the bottom of the window. A preview of slide 2 appears.
In the left pane, under the Settings heading, click Full Page Slides to open a menu of layouts.
Click 6 Slides Vertical under the Handouts section on the menu of layouts. Print Preview changes to show a page containing six small slides.
Click the 6 Slides Vertical button and click Outline. Print Preview shows the presentation as a text-only outline.
Click Outline and then click Notes Pages. Print Preview shows slide 2 with the existing notes in the notes area below the slide
Click the Back button (the left pointing arrow in the far upper left corner in the Categories pane) or press Esc to leave Backstage view without printing anything.
SAVE your changes<br>
17
Set Print Options 1. Click the File tab and then click Print. The printing options and Print Preview appear in Backstage view. The Notes Pages layout is still selected from the previous exercise.
2. In the Copies box at the top of the window, type 2 to print two copies.
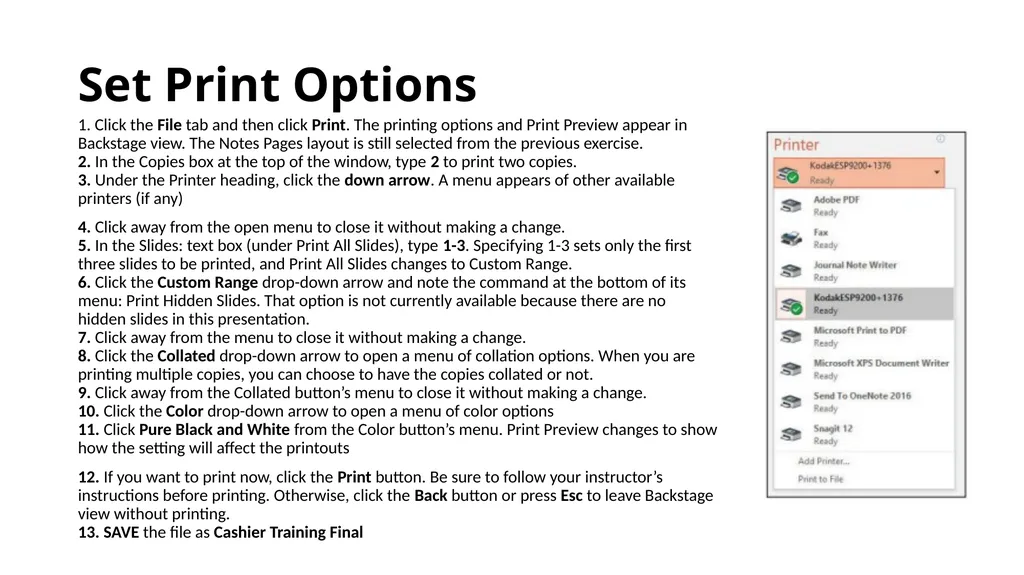
3. Under the Printer heading, click the down arrow. A menu appears of other available printers (if any)
4. Click away from the open menu to close it without making a change. 5. In the Slides: text box (under Print All Slides), type 1-3. Specifying 1-3 sets only the first three slides to be printed, and Print All Slides changes to Custom Range. 6. Click the Custom Range drop-down arrow and note the command at the bottom of its menu: Print Hidden Slides. That option is not currently available because there are no hidden slides in this presentation. 7. Click away from the menu to close it without making a change. 8. Click the Collated drop-down arrow to open a menu of collation options. When you are printing multiple copies, you can choose to have the copies collated or not. 9. Click away from the Collated button’s menu to close it without making a change. 10. Click the Color drop-down arrow to open a menu of color options 11. Click Pure Black and White from the Color button’s menu. Print Preview changes to show how the setting will affect the printouts
12. If you want to print now, click the Print button. Be sure to follow your instructor’s instructions before printing. Otherwise, click the Back button or press Esc to leave Backstage view without printing. 13. SAVE the file as Cashier Training Final<br>
4. Click away from the open menu to close it without making a change. 5. In the Slides: text box (under Print All Slides), type 1-3. Specifying 1-3 sets only the first three slides to be printed, and Print All Slides changes to Custom Range. 6. Click the Custom Range drop-down arrow and note the command at the bottom of its menu: Print Hidden Slides. That option is not currently available because there are no hidden slides in this presentation. 7. Click away from the menu to close it without making a change. 8. Click the Collated drop-down arrow to open a menu of collation options. When you are printing multiple copies, you can choose to have the copies collated or not. 9. Click away from the Collated button’s menu to close it without making a change. 10. Click the Color drop-down arrow to open a menu of color options 11. Click Pure Black and White from the Color button’s menu. Print Preview changes to show how the setting will affect the printouts
12. If you want to print now, click the Print button. Be sure to follow your instructor’s instructions before printing. Otherwise, click the Back button or press Esc to leave Backstage view without printing. 13. SAVE the file as Cashier Training Final<br>