Shopping is Easy in ePro! 1 Creating a Service Form Change Request Quick Guide Creating a Change Request for a Service Form Quick Guide 2 ePro Shoppers and Requestors: Requestors have additional permissions: Requestors can submit change
"Shopping is Easy in ePro! 1 Creating a Service" is the property of its rightful owner. Permission is granted to
download and print the materials on this website for personal, non-commercial use only, and to display it
on your personal computer provided you do not modify the materials and that you retain all copyright
notices contained in the materials. By downloading content from our website, you accept the terms of this
agreement.
Presentation Transcript
01
Shopping is Easy in ePro! 1 Creating a Service Form Change Request
Quick Guide<br>
02
Creating a Change Request for a Service Form Quick Guide 2 ePro Shoppers and Requestors:
Requestors have additional permissions:
Requestors can submit change requests. Changes can include general information, shipping information, Service Descriptions, pricing, quantity, Service Dates, and Commodity Code.
Requestors can submit change requests on behalf of Shoppers, who do not have permission to submit change requests.
Requestors are users who have knowledge of ePro accounting codes and Chartfields. The requestor may need to update the Change Request with these codes before placing an order.
Responsibilities of a Requestor include following Procurement Guidelines, bid thresholds, validating accuracy of Accounting Chartfields, Ship To information, and Business Purpose.<br>
03
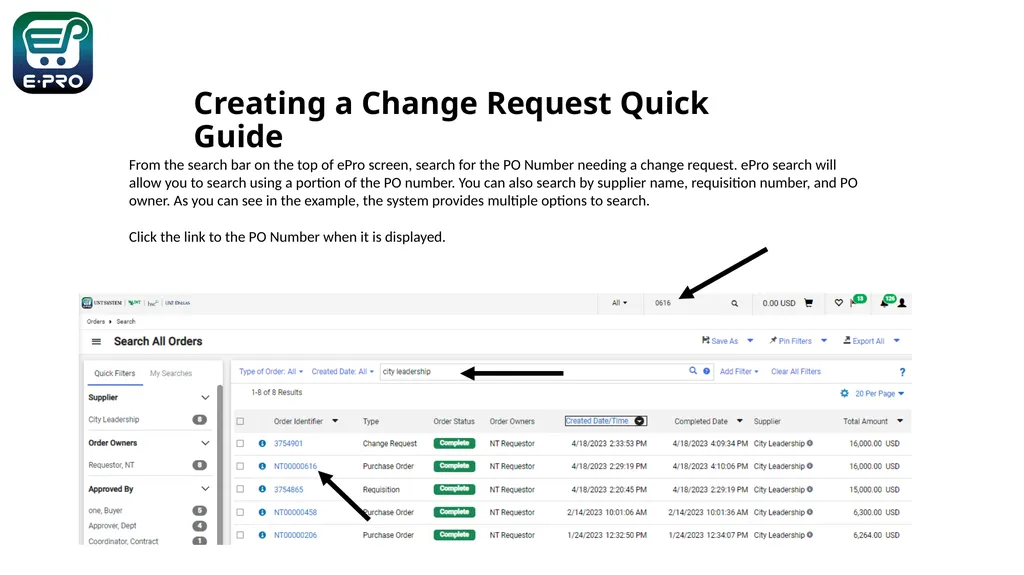
Creating a Change Request Quick Guide 3 From the search bar on the top of ePro screen, search for the PO Number needing a change request. ePro search will allow you to search using a portion of the PO number. You can also search by supplier name, requisition number, and PO owner. As you can see in the example, the system provides multiple options to search.
Click the link to the PO Number when it is displayed.<br>
04
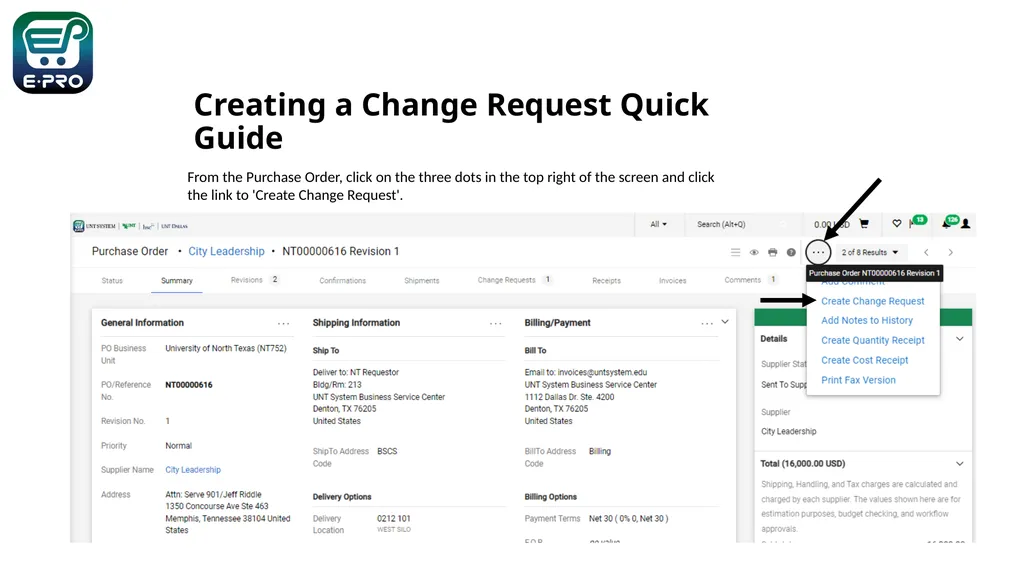
Creating a Change Request Quick Guide 4 From the Purchase Order, click on the three dots in the top right of the screen and click the link to 'Create Change Request'.<br>
05
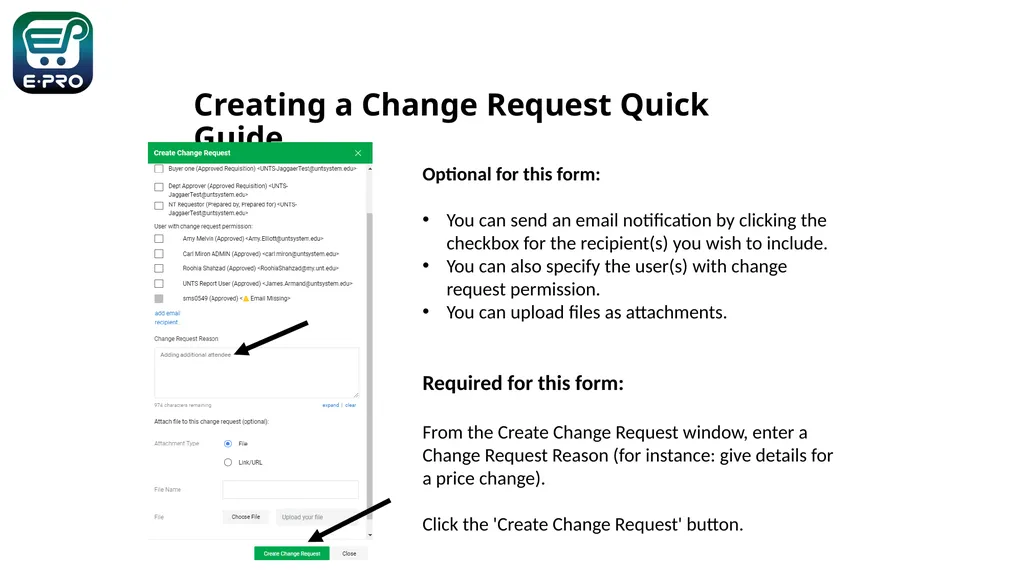
Creating a Change Request Quick Guide 5 Optional for this form:
You can send an email notification by clicking the checkbox for the recipient(s) you wish to include.
You can also specify the user(s) with change request permission.
You can upload files as attachments.
Required for this form:
From the Create Change Request window, enter a Change Request Reason (for instance: give details for a price change).
Click the 'Create Change Request' button.<br>
06
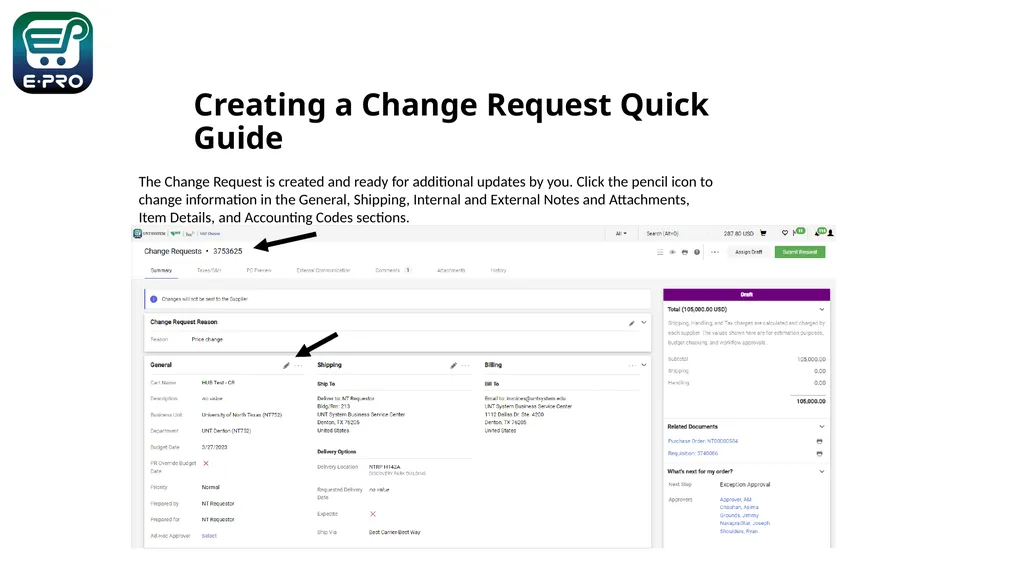
Creating a Change Request Quick Guide 6 The Change Request is created and ready for additional updates by you. Click the pencil icon to change information in the General, Shipping, Internal and External Notes and Attachments, Item Details, and Accounting Codes sections.<br>
07
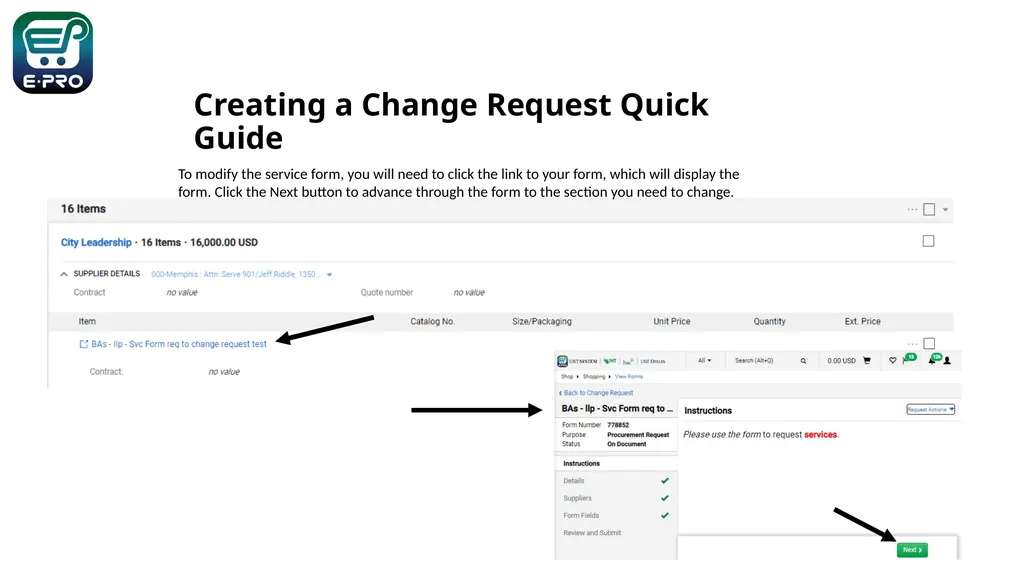
Creating a Change Request Quick Guide 7 To modify the service form, you will need to click the link to your form, which will display the form. Click the Next button to advance through the form to the section you need to change.<br>
08
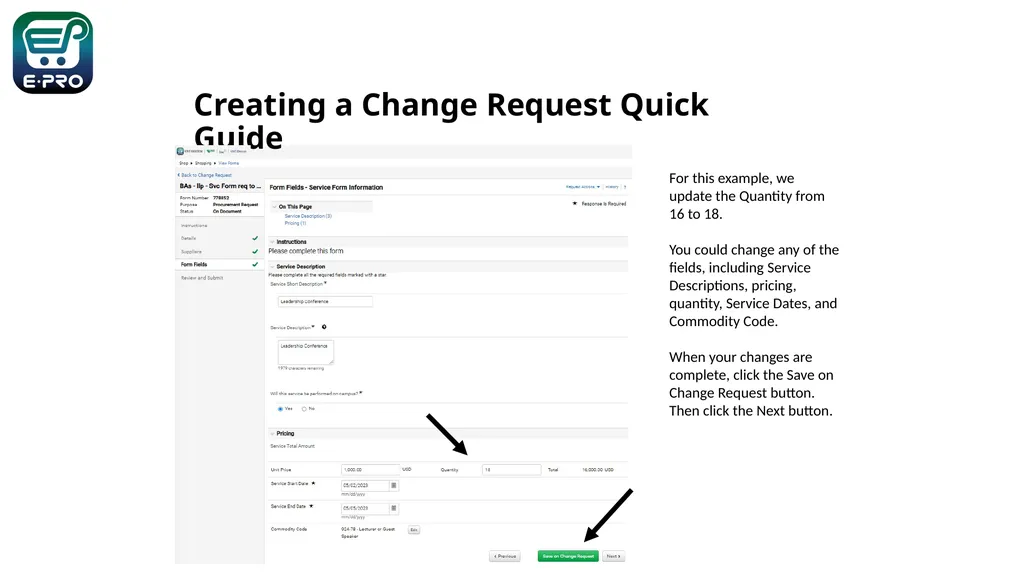
Creating a Change Request Quick Guide 8 For this example, we update the Quantity from 16 to 18.
You could change any of the fields, including Service Descriptions, pricing, quantity, Service Dates, and Commodity Code.
When your changes are complete, click the Save on Change Request button. Then click the Next button.<br>
09
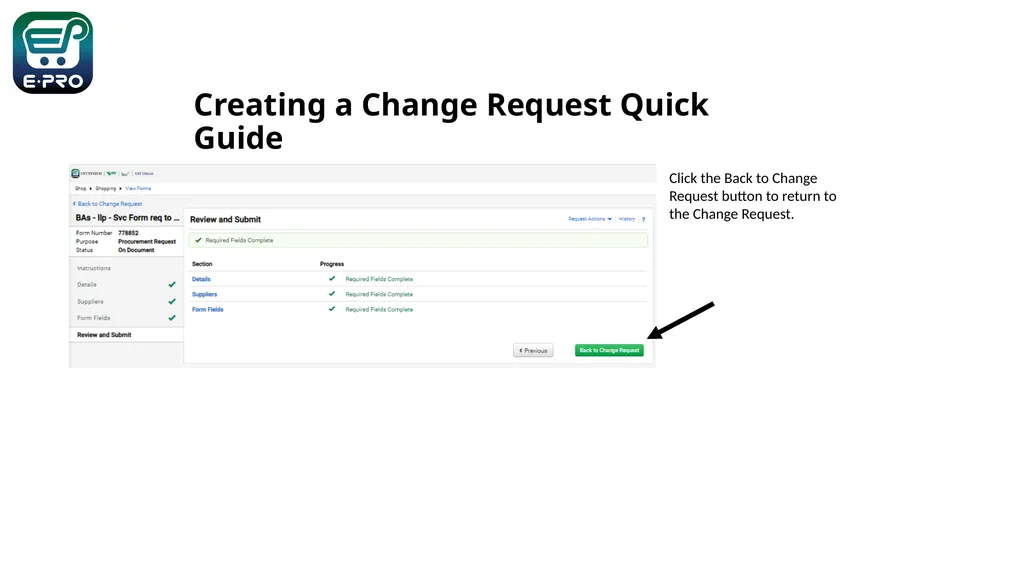
Creating a Change Request Quick Guide 9 Click the Back to Change Request button to return to the Change Request.<br>
10
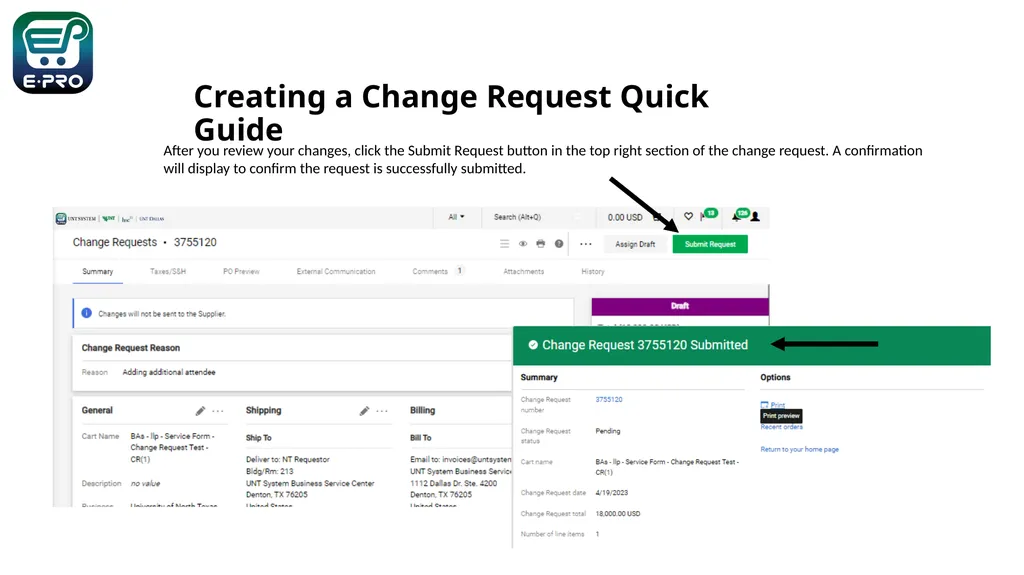
After you review your changes, click the Submit Request button in the top right section of the change request. A confirmation will display to confirm the request is successfully submitted. Creating a Change Request Quick Guide 10<br>
11
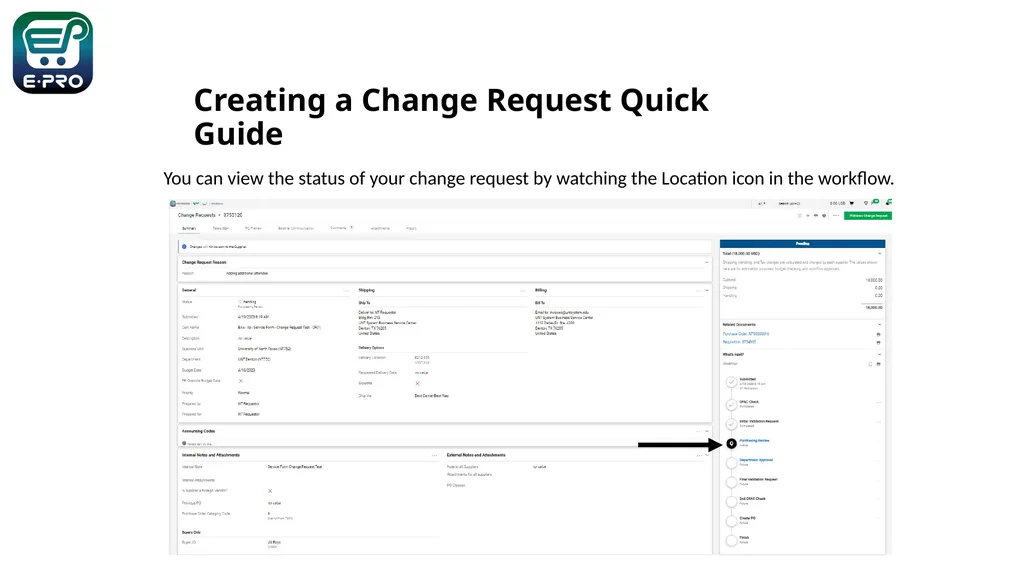
You can view the status of your change request by watching the Location icon in the workflow. Creating a Change Request Quick Guide 11<br>