
Welcome to Dr. Tad Gerlinger’s JOINT Replacement
CP
Published · 35 slides · 0 views

1 / 1
Description
Welcome to Dr. Tad Gerlingers JOINT Replacement Education Class Joint Replacement Journey Class Objectives Understand why and how surgery is performed Understand typical hospital course Understand typical recovery Discuss possible
Related Topics
Share
Embed code
Download this presentation From Below
"Welcome to Dr. Tad Gerlinger’s JOINT Replacement" is the property of its rightful owner. Permission is granted to download and print the materials on this website for personal, non-commercial use only, and to display it on your personal computer provided you do not modify the materials and that you retain all copyright notices contained in the materials. By downloading content from our website, you accept the terms of this agreement.
Presentation Transcript
01
Welcome to Dr. Tad Gerlinger’s
JOINT Replacement Education Class Joint Replacement Journey<br>
JOINT Replacement Education Class Joint Replacement Journey<br>
02
Class Objectives Understand why and how surgery is performed
Understand typical hospital course
Understand typical recovery
Discuss possible complications and how you and your surgical team can prevent possible complications<br>
Understand typical hospital course
Understand typical recovery
Discuss possible complications and how you and your surgical team can prevent possible complications<br>
03
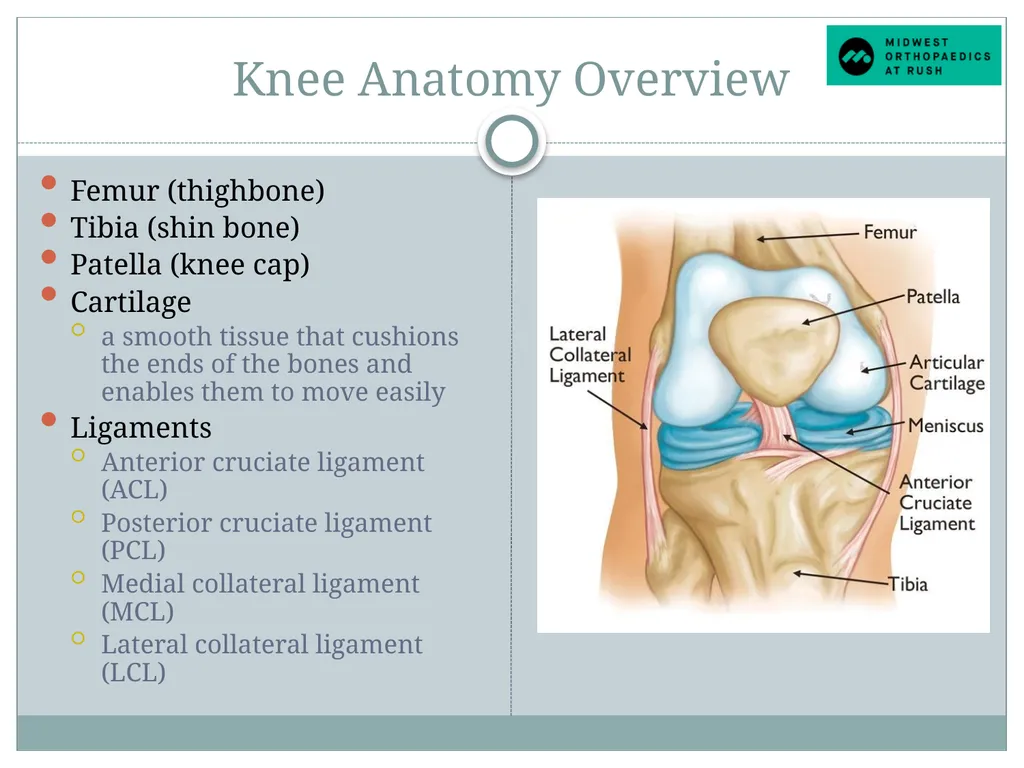
Knee Anatomy Overview Femur (thighbone)
Tibia (shin bone)
Patella (knee cap)
Cartilage
a smooth tissue that cushions the ends of the bones and enables them to move easily
Ligaments
Anterior cruciate ligament (ACL)
Posterior cruciate ligament (PCL)
Medial collateral ligament (MCL)
Lateral collateral ligament (LCL)<br>
Tibia (shin bone)
Patella (knee cap)
Cartilage
a smooth tissue that cushions the ends of the bones and enables them to move easily
Ligaments
Anterior cruciate ligament (ACL)
Posterior cruciate ligament (PCL)
Medial collateral ligament (MCL)
Lateral collateral ligament (LCL)<br>
04
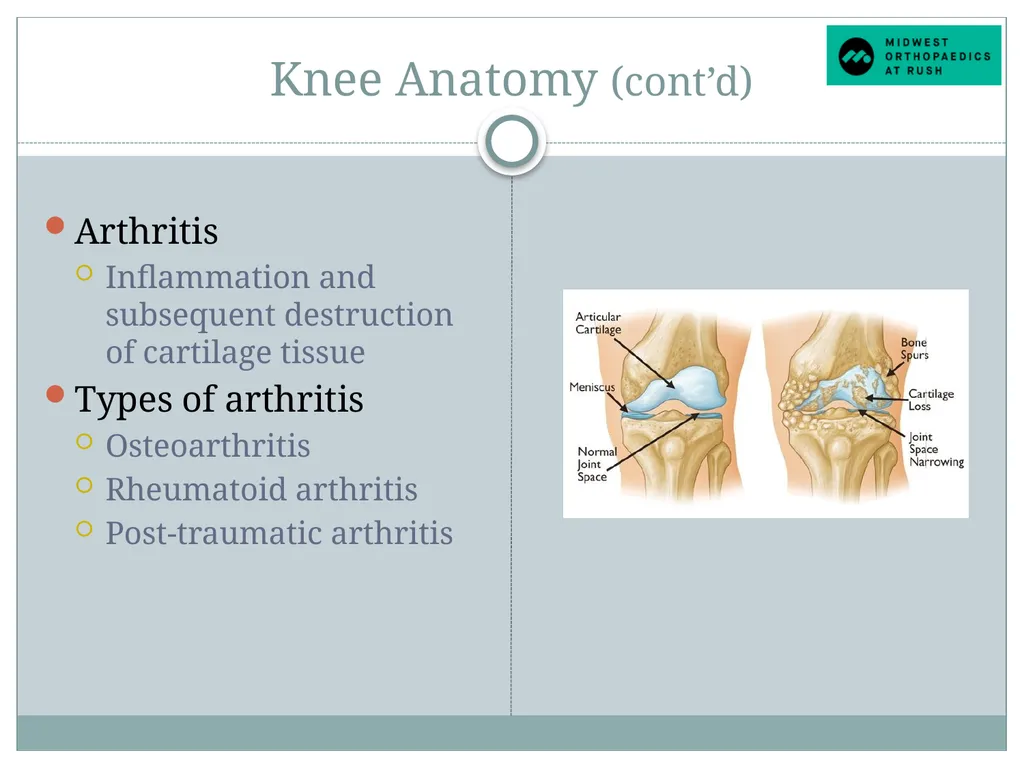
Knee Anatomy (cont’d) Arthritis
Inflammation and subsequent destruction of cartilage tissue
Types of arthritis
Osteoarthritis
Rheumatoid arthritis
Post-traumatic arthritis<br>
Inflammation and subsequent destruction of cartilage tissue
Types of arthritis
Osteoarthritis
Rheumatoid arthritis
Post-traumatic arthritis<br>
05
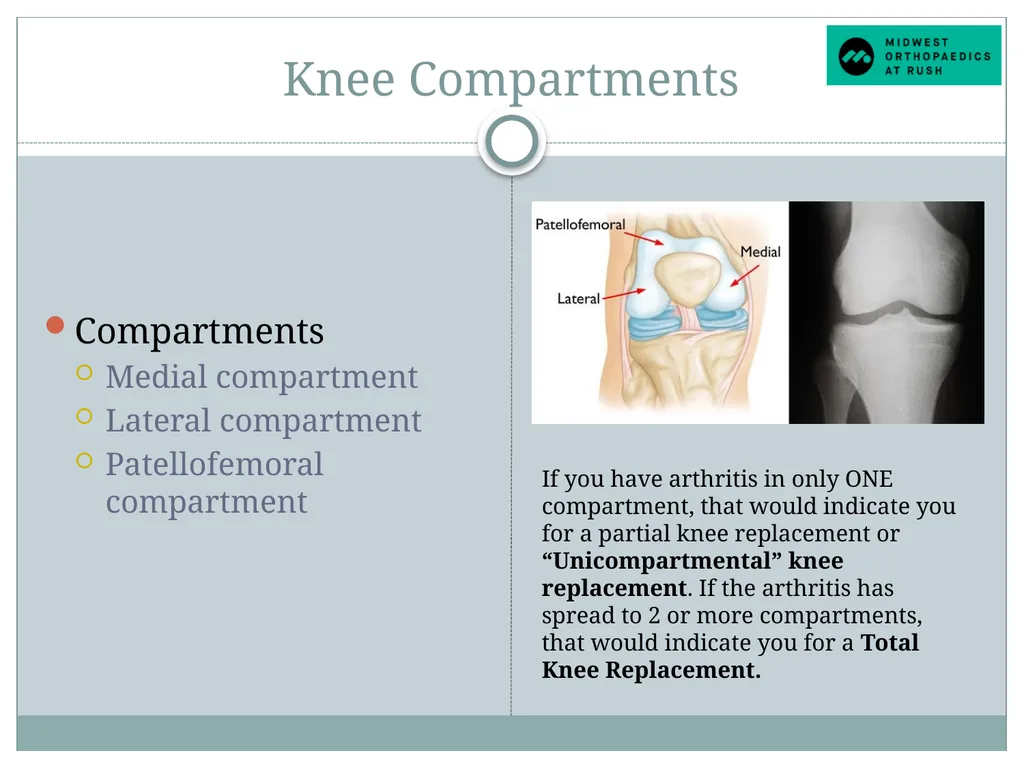
Knee Compartments Compartments
Medial compartment
Lateral compartment
Patellofemoral compartment If you have arthritis in only ONE compartment, that would indicate you for a partial knee replacement or “Unicompartmental” knee replacement. If the arthritis has spread to 2 or more compartments, that would indicate you for a Total Knee Replacement.<br>
Medial compartment
Lateral compartment
Patellofemoral compartment If you have arthritis in only ONE compartment, that would indicate you for a partial knee replacement or “Unicompartmental” knee replacement. If the arthritis has spread to 2 or more compartments, that would indicate you for a Total Knee Replacement.<br>
06
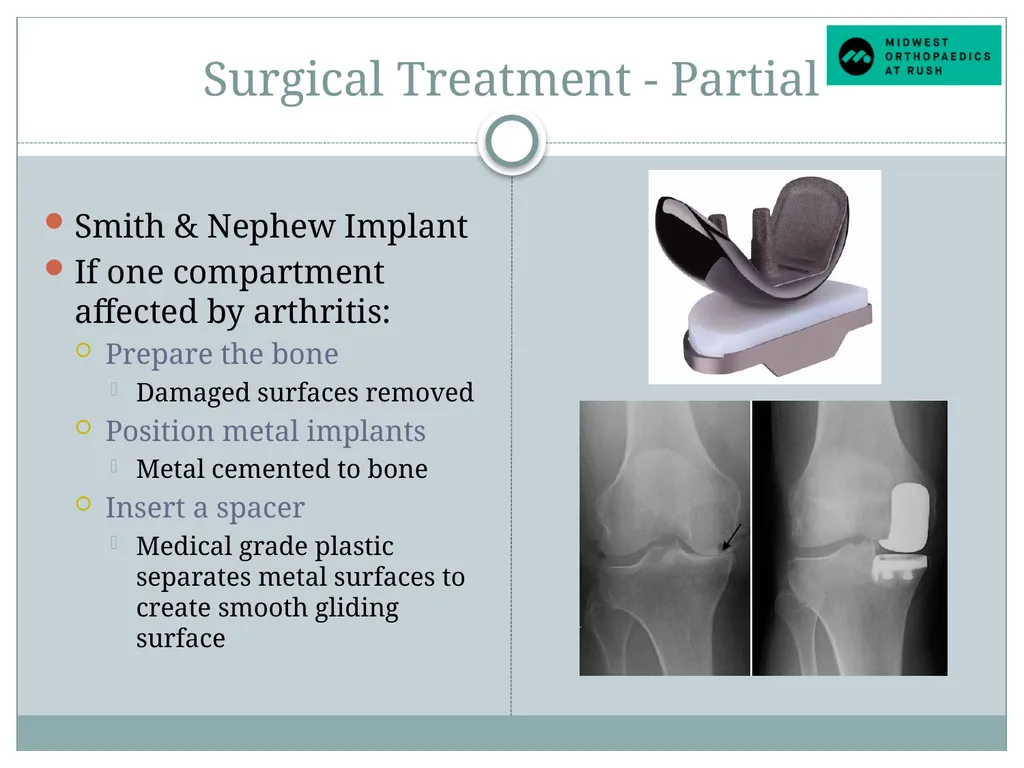
Surgical Treatment - Partial Smith & Nephew Implant
If one compartment affected by arthritis:
Prepare the bone
Damaged surfaces removed
Position metal implants
Metal cemented to bone
Insert a spacer
Medical grade plastic separates metal surfaces to create smooth gliding surface<br>
If one compartment affected by arthritis:
Prepare the bone
Damaged surfaces removed
Position metal implants
Metal cemented to bone
Insert a spacer
Medical grade plastic separates metal surfaces to create smooth gliding surface<br>
07
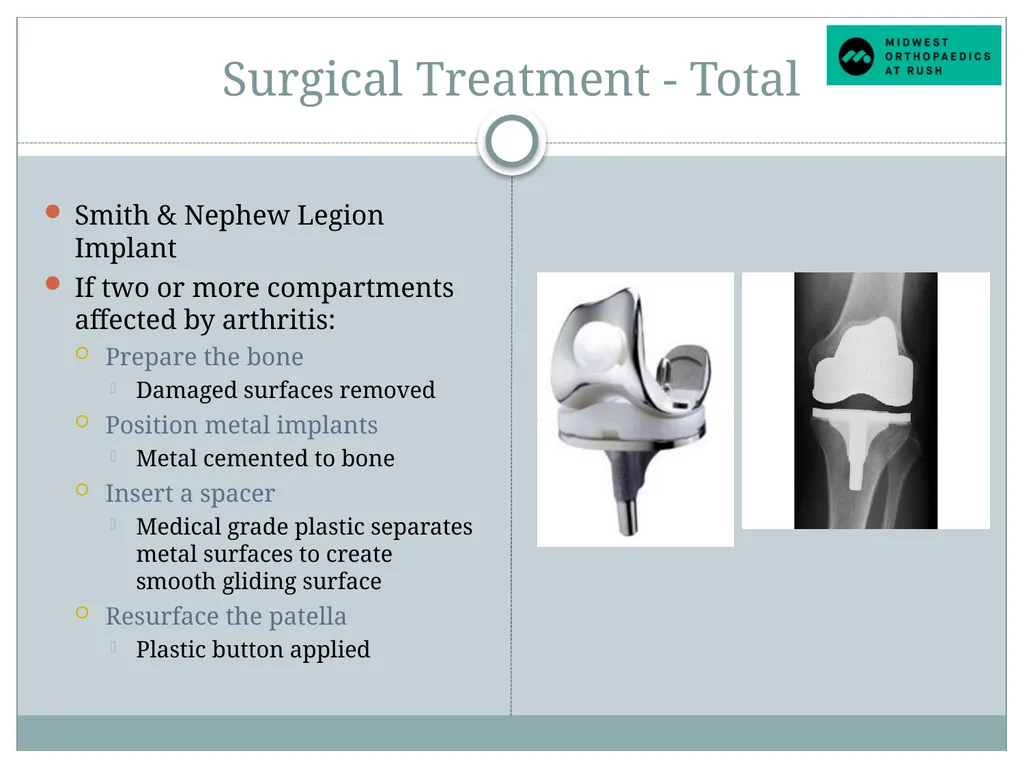
Surgical Treatment - Total Smith & Nephew Legion Implant
If two or more compartments affected by arthritis:
Prepare the bone
Damaged surfaces removed
Position metal implants
Metal cemented to bone
Insert a spacer
Medical grade plastic separates metal surfaces to create smooth gliding surface
Resurface the patella
Plastic button applied<br>
If two or more compartments affected by arthritis:
Prepare the bone
Damaged surfaces removed
Position metal implants
Metal cemented to bone
Insert a spacer
Medical grade plastic separates metal surfaces to create smooth gliding surface
Resurface the patella
Plastic button applied<br>
08
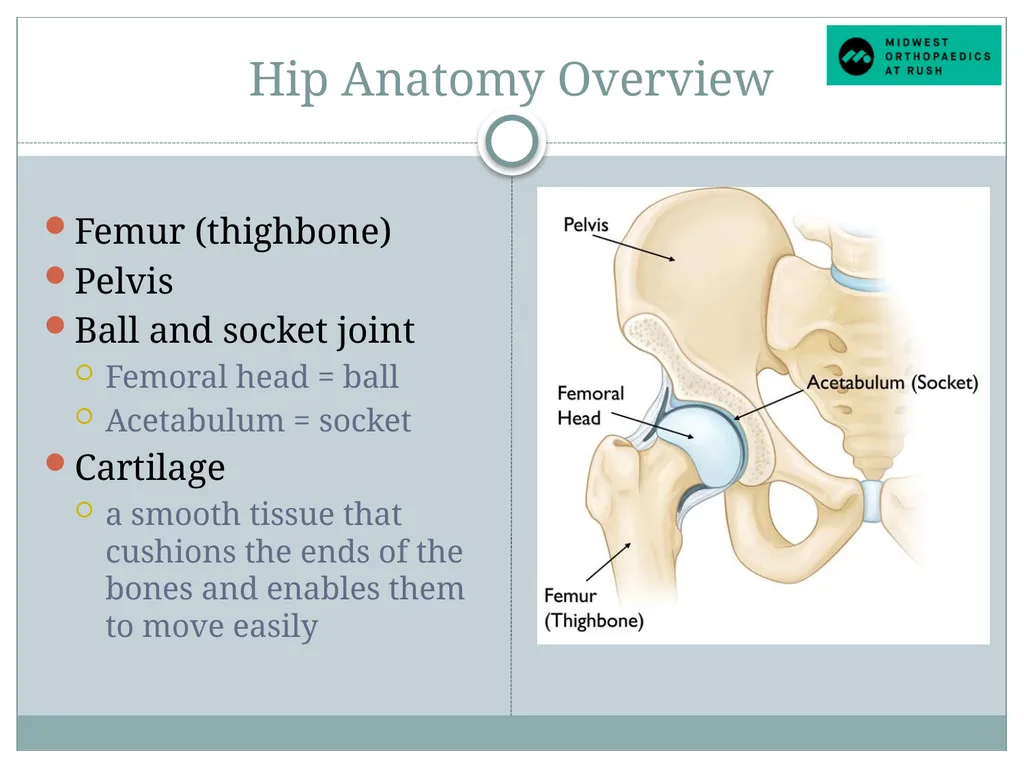
Hip Anatomy Overview Femur (thighbone)
Pelvis
Ball and socket joint
Femoral head = ball
Acetabulum = socket
Cartilage
a smooth tissue that cushions the ends of the bones and enables them to move easily<br>
Pelvis
Ball and socket joint
Femoral head = ball
Acetabulum = socket
Cartilage
a smooth tissue that cushions the ends of the bones and enables them to move easily<br>
09
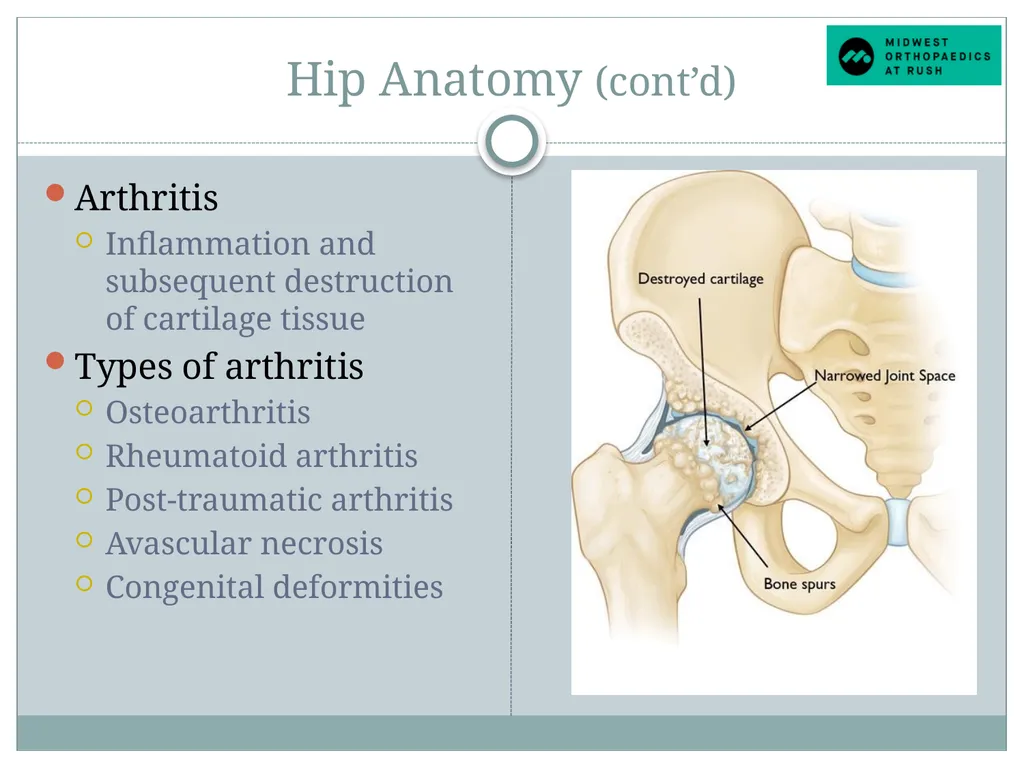
Hip Anatomy (cont’d) Arthritis
Inflammation and subsequent destruction of cartilage tissue
Types of arthritis
Osteoarthritis
Rheumatoid arthritis
Post-traumatic arthritis
Avascular necrosis
Congenital deformities<br>
Inflammation and subsequent destruction of cartilage tissue
Types of arthritis
Osteoarthritis
Rheumatoid arthritis
Post-traumatic arthritis
Avascular necrosis
Congenital deformities<br>
10
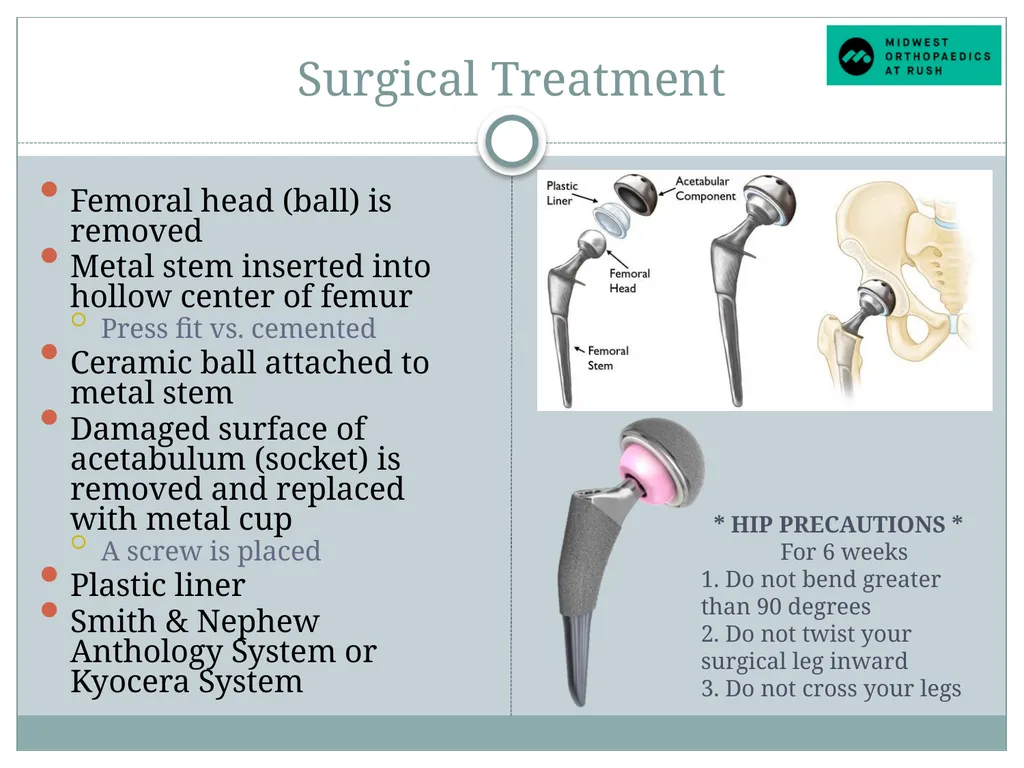
Surgical Treatment Femoral head (ball) is removed
Metal stem inserted into hollow center of femur
Press fit vs. cemented
Ceramic ball attached to metal stem
Damaged surface of acetabulum (socket) is removed and replaced with metal cup
A screw is placed
Plastic liner
Smith & Nephew Anthology System or Kyocera System * HIP PRECAUTIONS *
For 6 weeks
1. Do not bend greater than 90 degrees
2. Do not twist your surgical leg inward
3. Do not cross your legs<br>
Metal stem inserted into hollow center of femur
Press fit vs. cemented
Ceramic ball attached to metal stem
Damaged surface of acetabulum (socket) is removed and replaced with metal cup
A screw is placed
Plastic liner
Smith & Nephew Anthology System or Kyocera System * HIP PRECAUTIONS *
For 6 weeks
1. Do not bend greater than 90 degrees
2. Do not twist your surgical leg inward
3. Do not cross your legs<br>
11
Minimally Invasive Joint Surgery Knee: Incision smaller than traditional
3-5 inches in length vs. 8-10 inches
Hip: (Posterior Approach) Incision placed over outside of hip
3-5 inches in length
Benefits:
Less tissue disturbance
Less blood loss
Less postoperative pain
Faster rehabilitation<br>
3-5 inches in length vs. 8-10 inches
Hip: (Posterior Approach) Incision placed over outside of hip
3-5 inches in length
Benefits:
Less tissue disturbance
Less blood loss
Less postoperative pain
Faster rehabilitation<br>
12
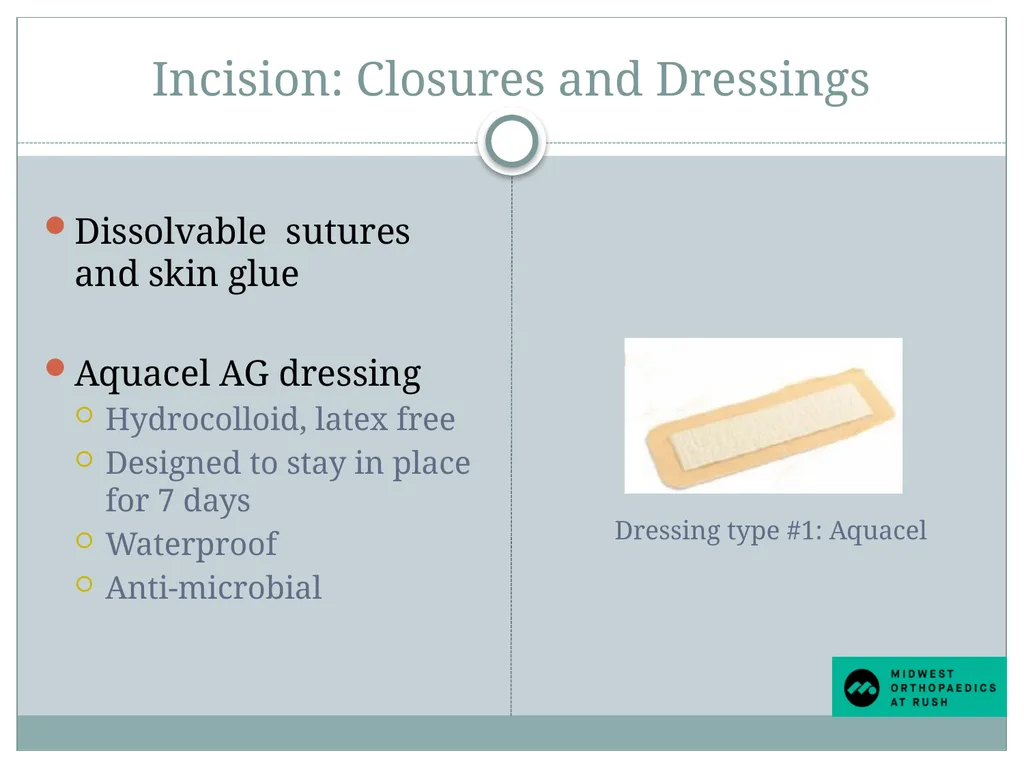
Incision: Closures and Dressings Dissolvable sutures and skin glue
Aquacel AG dressing
Hydrocolloid, latex free
Designed to stay in place for 7 days
Waterproof
Anti-microbial Dressing type #1: Aquacel<br>
Aquacel AG dressing
Hydrocolloid, latex free
Designed to stay in place for 7 days
Waterproof
Anti-microbial Dressing type #1: Aquacel<br>
13
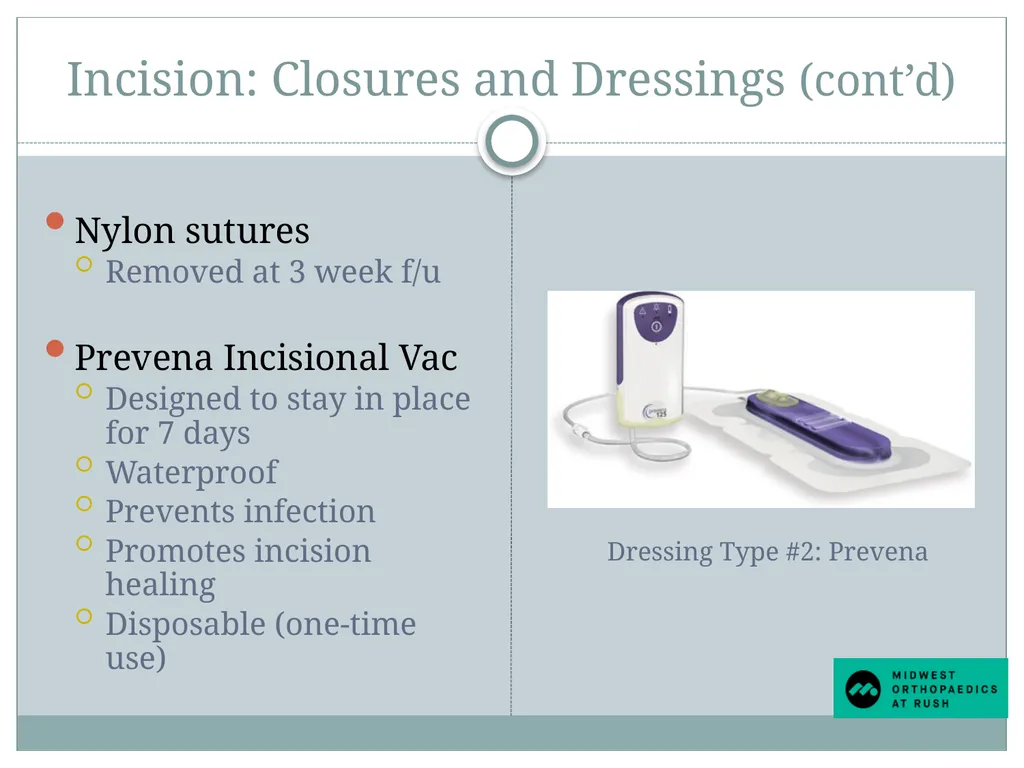
Incision: Closures and Dressings (cont’d) Nylon sutures
Removed at 3 week f/u
Prevena Incisional Vac
Designed to stay in place for 7 days
Waterproof
Prevents infection
Promotes incision healing
Disposable (one-time use) Dressing Type #2: Prevena<br>
Removed at 3 week f/u
Prevena Incisional Vac
Designed to stay in place for 7 days
Waterproof
Prevents infection
Promotes incision healing
Disposable (one-time use) Dressing Type #2: Prevena<br>
14
Post Surgical Dressing Incision Care Aquacel/Prevena is removed 7 days after surgery
Peel off like a band-aid and discard everything (including Prevena vac)
If no drainage, may leave incision open to air
If drainage, or if you prefer, cover with gauze dressing and hold in place with ACE wrap – NO TAPE
Change daily and as needed
OK to shower after surgical dressing is removed
Do not cover with saran wrap or subsequent waterproof dressing
No baths, pools, hot tubs until cleared by Dr. Gerlinger
No creams, lotions, ointments until cleared by Dr. Gerlinger<br>
Peel off like a band-aid and discard everything (including Prevena vac)
If no drainage, may leave incision open to air
If drainage, or if you prefer, cover with gauze dressing and hold in place with ACE wrap – NO TAPE
Change daily and as needed
OK to shower after surgical dressing is removed
Do not cover with saran wrap or subsequent waterproof dressing
No baths, pools, hot tubs until cleared by Dr. Gerlinger
No creams, lotions, ointments until cleared by Dr. Gerlinger<br>
15
Anesthesia Knee: Combination spinal/regional anesthesia with twilight sedation
Hip: Epidural with Twilight Sedation
Wake up easier with less side effects
Better pain control
Able to get up and move faster
General anesthesia if indicated by anesthesiologist
**You will meet with the anesthesia team prior to surgery<br>
Hip: Epidural with Twilight Sedation
Wake up easier with less side effects
Better pain control
Able to get up and move faster
General anesthesia if indicated by anesthesiologist
**You will meet with the anesthesia team prior to surgery<br>
16
Oral Hydration for better results! Stay well hydrated 3 days prior to surgery
Patient must finish 500mL of Gatorade 2 hours prior to scheduled arrival time to hospital.
If patient forgets to drink gatorade in time frame, surgery will not be cancelled. This is primarily to aid in your success!<br>
Patient must finish 500mL of Gatorade 2 hours prior to scheduled arrival time to hospital.
If patient forgets to drink gatorade in time frame, surgery will not be cancelled. This is primarily to aid in your success!<br>
17
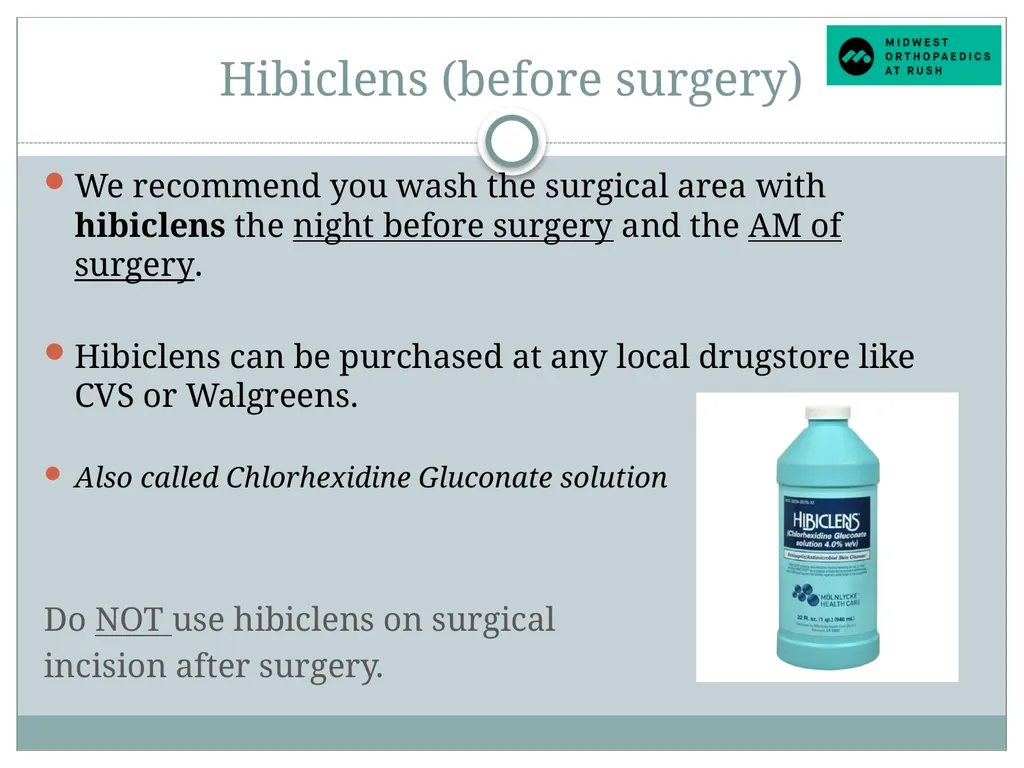
Hibiclens (before surgery) We recommend you wash the surgical area with hibiclens the night before surgery and the AM of surgery.
Hibiclens can be purchased at any local drugstore like CVS or Walgreens.
Also called Chlorhexidine Gluconate solution
Do NOT use hibiclens on surgical
incision after surgery.<br>
Hibiclens can be purchased at any local drugstore like CVS or Walgreens.
Also called Chlorhexidine Gluconate solution
Do NOT use hibiclens on surgical
incision after surgery.<br>
18
Hospital & Surgery Center Course Preop Telephone Call
Perioperative Care Nurse (business day before surgery)
Given time of surgery, when to arrive, when to stop eating/drinking
Day of Surgery
Rush Medical Center (Inpatient surgery only)
Midwest Orthopaedics at Rush Oak Brook Outpatient Center
Gold Coast Surgicenter
South Suburban Surgical Suites in Indiana
Preop/Holding (1-1/2 to 2 hours before surgery)<br>
Perioperative Care Nurse (business day before surgery)
Given time of surgery, when to arrive, when to stop eating/drinking
Day of Surgery
Rush Medical Center (Inpatient surgery only)
Midwest Orthopaedics at Rush Oak Brook Outpatient Center
Gold Coast Surgicenter
South Suburban Surgical Suites in Indiana
Preop/Holding (1-1/2 to 2 hours before surgery)<br>
19
Hospital Course (cont’d) Operating Room (1-1/2 to 2 hours)
Positioning
Surgical Procedure (30 to 45 minutes)
Incision Closure
Reverse Anesthesia
Recovery Room (1 to 2 hours)
Last stop for outpatient surgery
Orthopedic Floor / 13 East Tower (1-2 days)<br>
Positioning
Surgical Procedure (30 to 45 minutes)
Incision Closure
Reverse Anesthesia
Recovery Room (1 to 2 hours)
Last stop for outpatient surgery
Orthopedic Floor / 13 East Tower (1-2 days)<br>
20
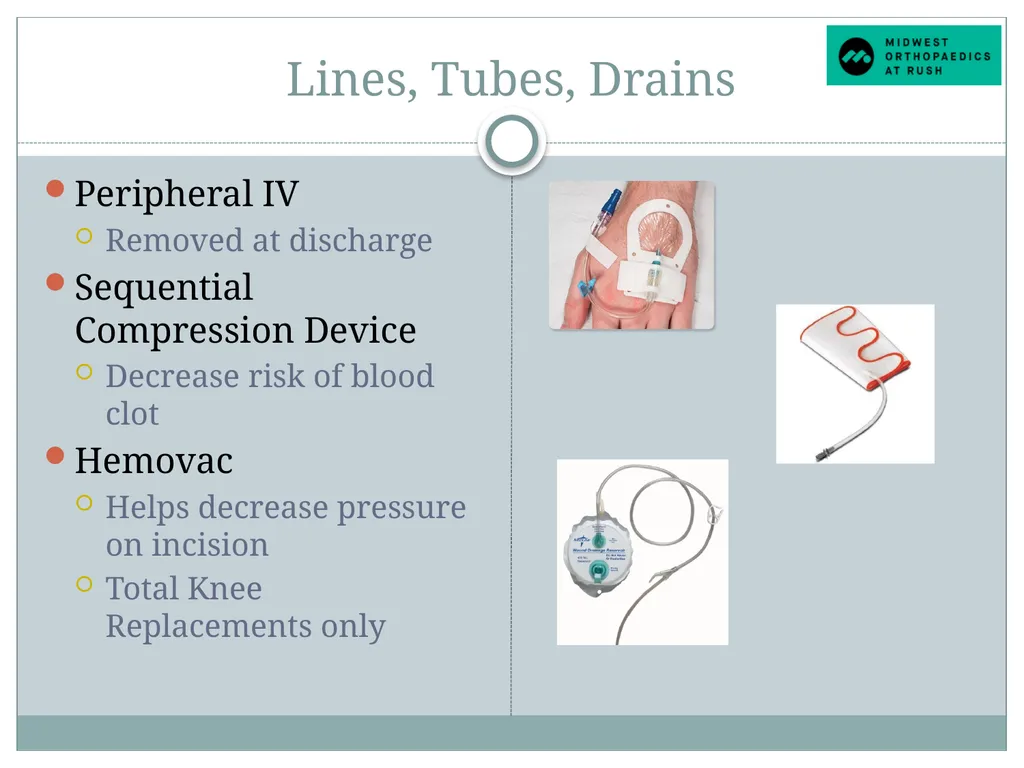
Lines, Tubes, Drains Peripheral IV
Removed at discharge
Sequential Compression Device
Decrease risk of blood clot
Hemovac
Helps decrease pressure on incision
Total Knee Replacements only<br>
Removed at discharge
Sequential Compression Device
Decrease risk of blood clot
Hemovac
Helps decrease pressure on incision
Total Knee Replacements only<br>
21
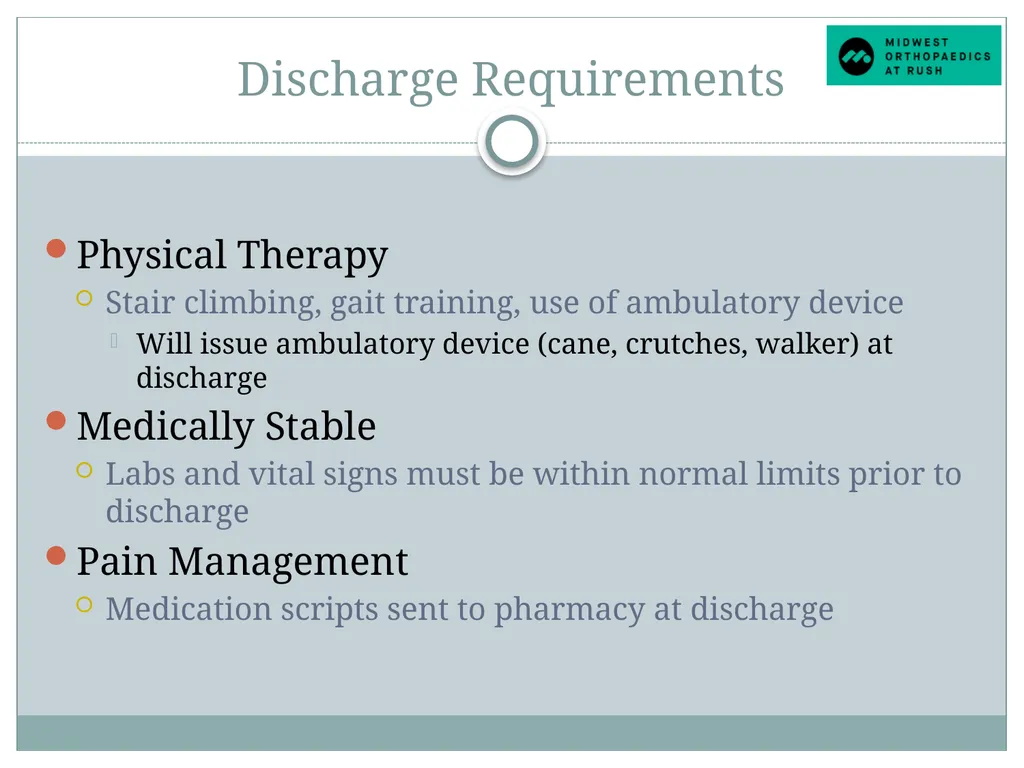
Discharge Requirements Physical Therapy
Stair climbing, gait training, use of ambulatory device
Will issue ambulatory device (cane, crutches, walker) at discharge
Medically Stable
Labs and vital signs must be within normal limits prior to discharge
Pain Management
Medication scripts sent to pharmacy at discharge<br>
Stair climbing, gait training, use of ambulatory device
Will issue ambulatory device (cane, crutches, walker) at discharge
Medically Stable
Labs and vital signs must be within normal limits prior to discharge
Pain Management
Medication scripts sent to pharmacy at discharge<br>
22
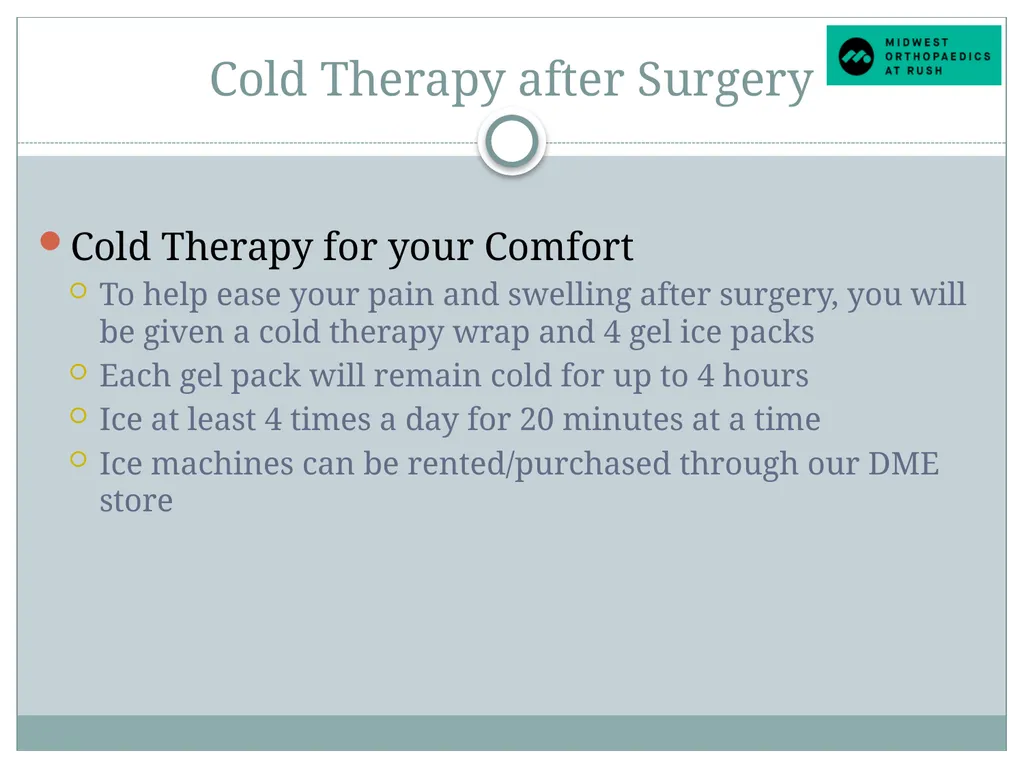
Cold Therapy after Surgery Cold Therapy for your Comfort
To help ease your pain and swelling after surgery, you will be given a cold therapy wrap and 4 gel ice packs
Each gel pack will remain cold for up to 4 hours
Ice at least 4 times a day for 20 minutes at a time
Ice machines can be rented/purchased through our DME store<br>
To help ease your pain and swelling after surgery, you will be given a cold therapy wrap and 4 gel ice packs
Each gel pack will remain cold for up to 4 hours
Ice at least 4 times a day for 20 minutes at a time
Ice machines can be rented/purchased through our DME store<br>
23
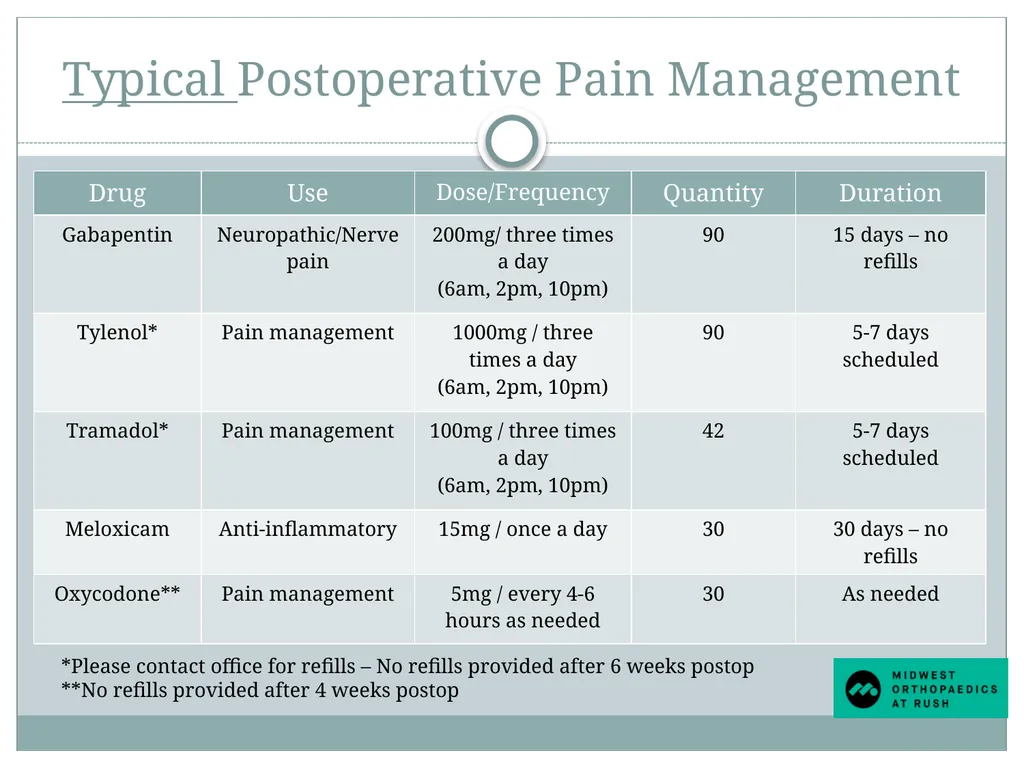
Typical Postoperative Pain Management *Please contact office for refills – No refills provided after 6 weeks postop
**No refills provided after 4 weeks postop<br>
**No refills provided after 4 weeks postop<br>
24
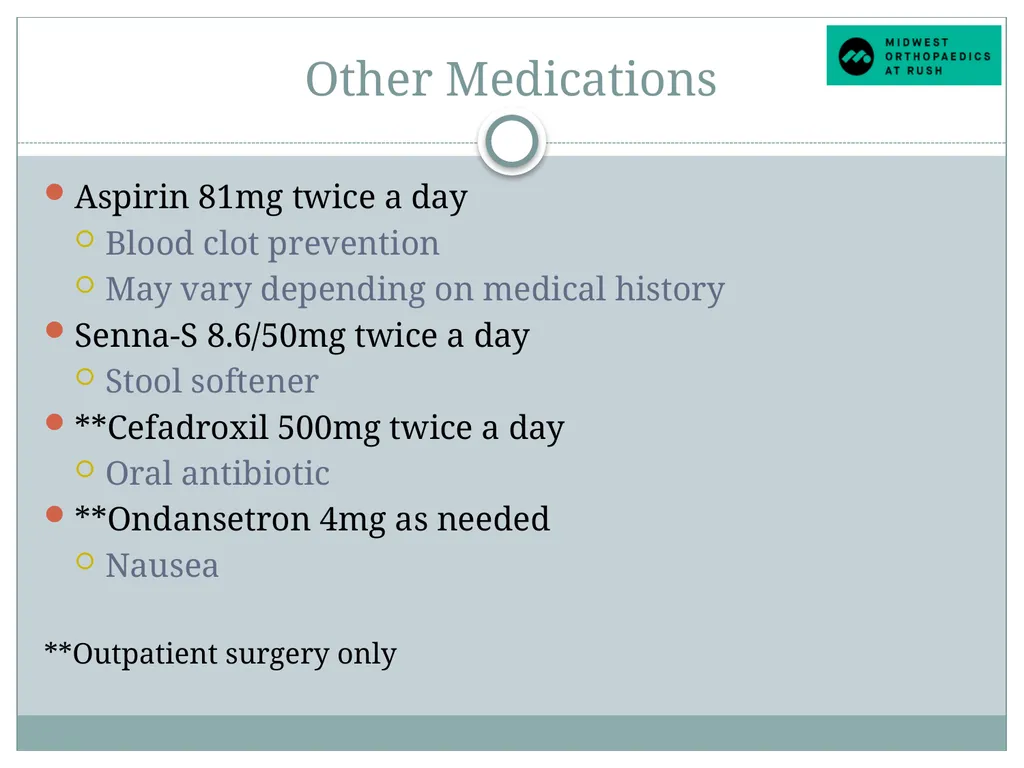
Other Medications Aspirin 81mg twice a day
Blood clot prevention
May vary depending on medical history
Senna-S 8.6/50mg twice a day
Stool softener
**Cefadroxil 500mg twice a day
Oral antibiotic
**Ondansetron 4mg as needed
Nausea
**Outpatient surgery only<br>
Blood clot prevention
May vary depending on medical history
Senna-S 8.6/50mg twice a day
Stool softener
**Cefadroxil 500mg twice a day
Oral antibiotic
**Ondansetron 4mg as needed
Nausea
**Outpatient surgery only<br>
25
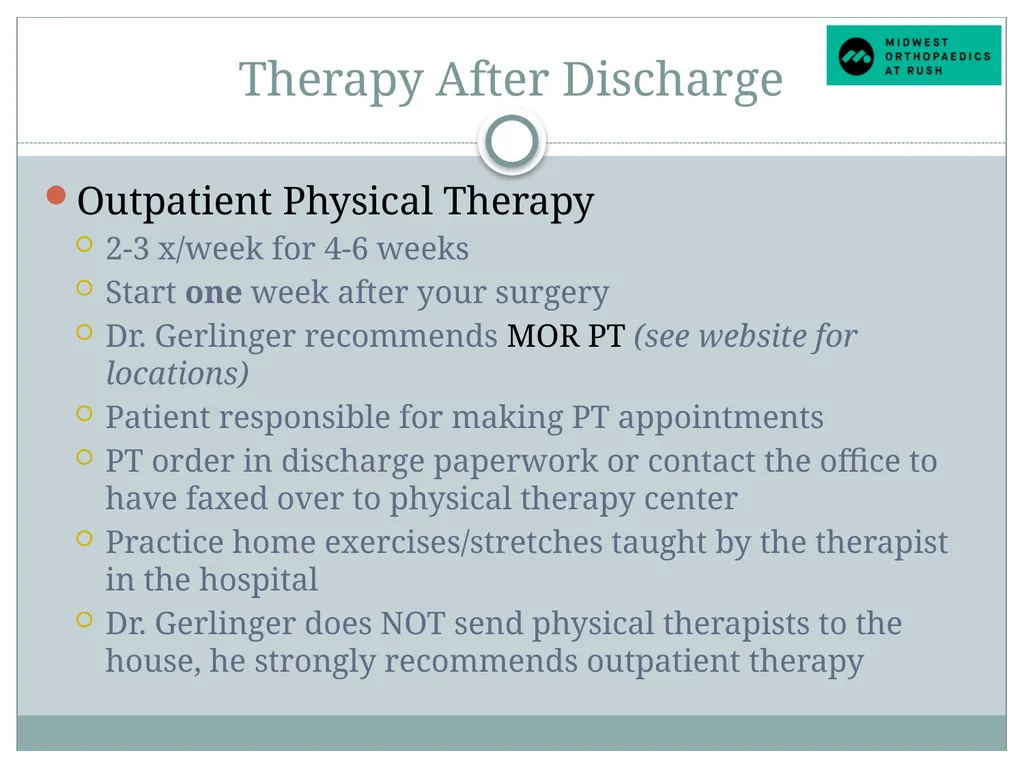
Therapy After Discharge Outpatient Physical Therapy
2-3 x/week for 4-6 weeks
Start one week after your surgery
Dr. Gerlinger recommends MOR PT (see website for locations)
Patient responsible for making PT appointments
PT order in discharge paperwork or contact the office to have faxed over to physical therapy center
Practice home exercises/stretches taught by the therapist in the hospital
Dr. Gerlinger does NOT send physical therapists to the house, he strongly recommends outpatient therapy<br>
2-3 x/week for 4-6 weeks
Start one week after your surgery
Dr. Gerlinger recommends MOR PT (see website for locations)
Patient responsible for making PT appointments
PT order in discharge paperwork or contact the office to have faxed over to physical therapy center
Practice home exercises/stretches taught by the therapist in the hospital
Dr. Gerlinger does NOT send physical therapists to the house, he strongly recommends outpatient therapy<br>
26
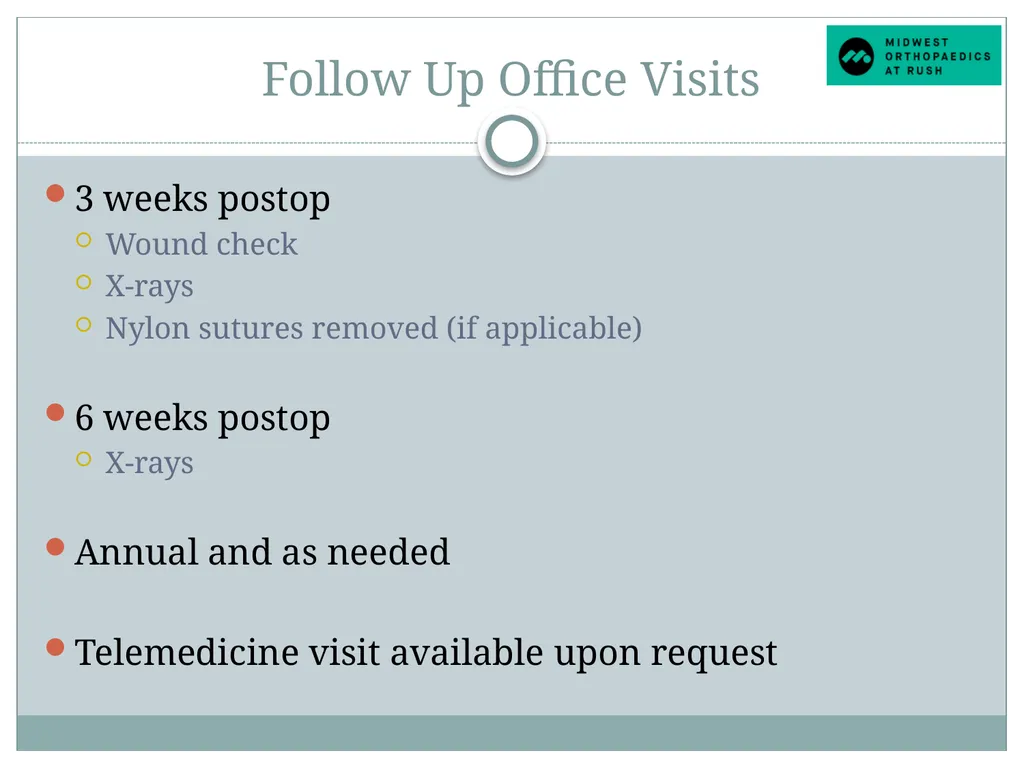
Follow Up Office Visits 3 weeks postop
Wound check
X-rays
Nylon sutures removed (if applicable)
6 weeks postop
X-rays
Annual and as needed
Telemedicine visit available upon request<br>
Wound check
X-rays
Nylon sutures removed (if applicable)
6 weeks postop
X-rays
Annual and as needed
Telemedicine visit available upon request<br>
27
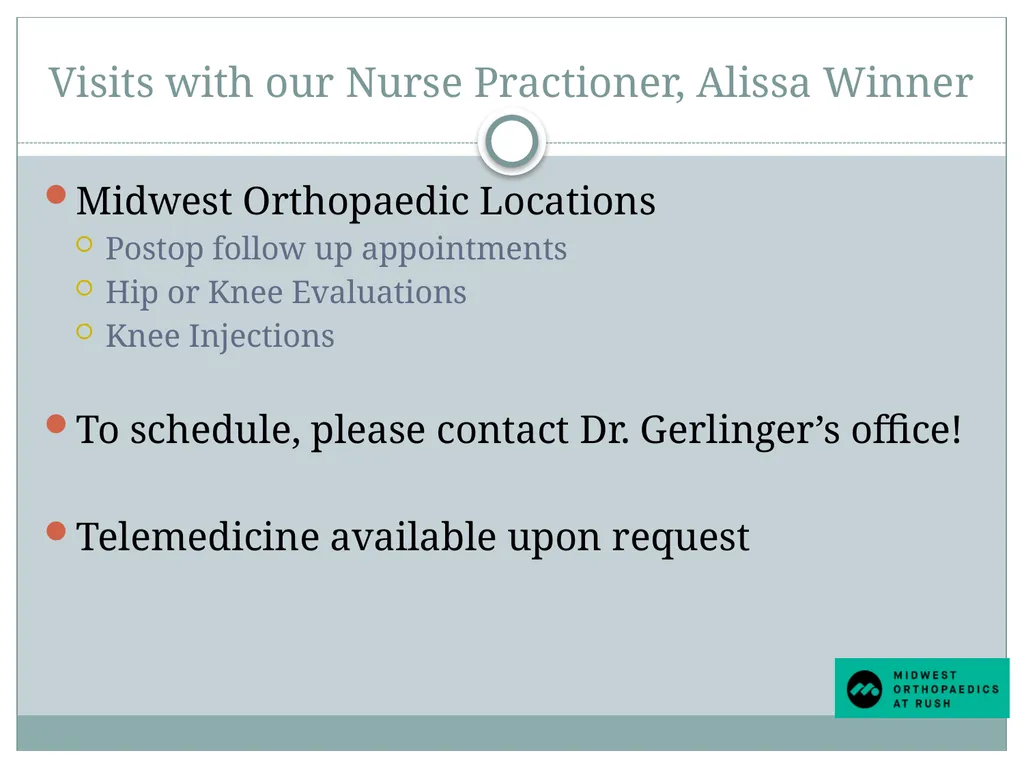
Visits with our Nurse Practioner, Alissa Winner Midwest Orthopaedic Locations
Postop follow up appointments
Hip or Knee Evaluations
Knee Injections
To schedule, please contact Dr. Gerlinger’s office!
Telemedicine available upon request<br>
Postop follow up appointments
Hip or Knee Evaluations
Knee Injections
To schedule, please contact Dr. Gerlinger’s office!
Telemedicine available upon request<br>
28
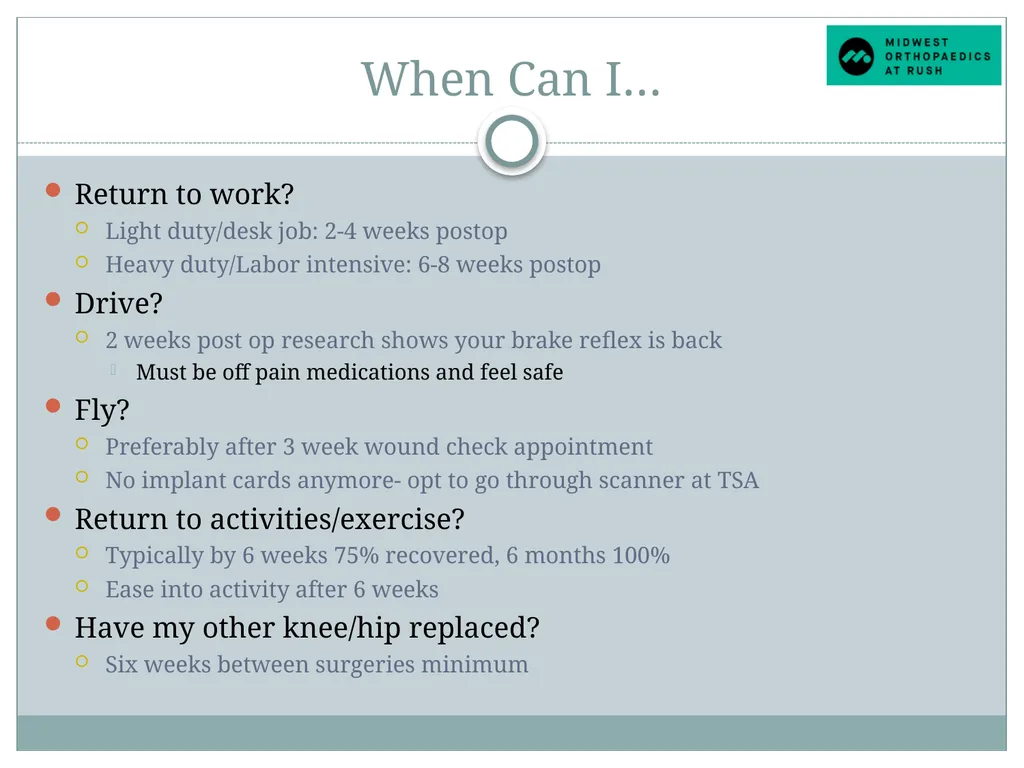
When Can I… Return to work?
Light duty/desk job: 2-4 weeks postop
Heavy duty/Labor intensive: 6-8 weeks postop
Drive?
2 weeks post op research shows your brake reflex is back
Must be off pain medications and feel safe
Fly?
Preferably after 3 week wound check appointment
No implant cards anymore- opt to go through scanner at TSA
Return to activities/exercise?
Typically by 6 weeks 75% recovered, 6 months 100%
Ease into activity after 6 weeks
Have my other knee/hip replaced?
Six weeks between surgeries minimum<br>
Light duty/desk job: 2-4 weeks postop
Heavy duty/Labor intensive: 6-8 weeks postop
Drive?
2 weeks post op research shows your brake reflex is back
Must be off pain medications and feel safe
Fly?
Preferably after 3 week wound check appointment
No implant cards anymore- opt to go through scanner at TSA
Return to activities/exercise?
Typically by 6 weeks 75% recovered, 6 months 100%
Ease into activity after 6 weeks
Have my other knee/hip replaced?
Six weeks between surgeries minimum<br>
29
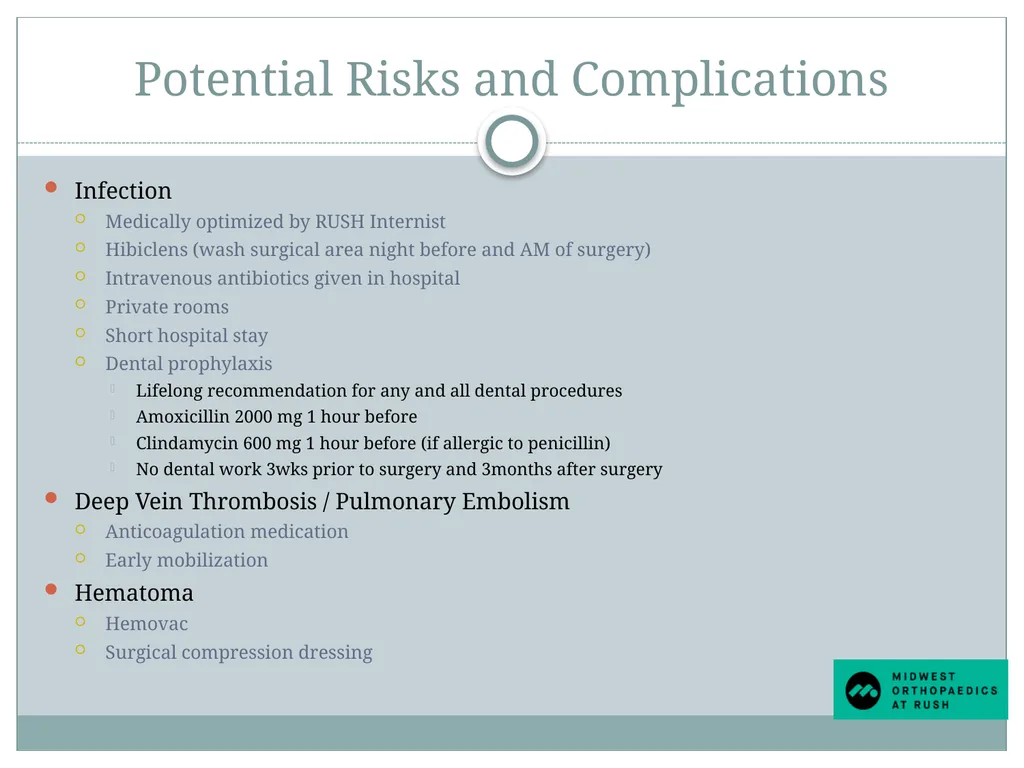
Potential Risks and Complications Infection
Medically optimized by RUSH Internist
Hibiclens (wash surgical area night before and AM of surgery)
Intravenous antibiotics given in hospital
Private rooms
Short hospital stay
Dental prophylaxis
Lifelong recommendation for any and all dental procedures
Amoxicillin 2000 mg 1 hour before
Clindamycin 600 mg 1 hour before (if allergic to penicillin)
No dental work 3wks prior to surgery and 3months after surgery
Deep Vein Thrombosis / Pulmonary Embolism
Anticoagulation medication
Early mobilization
Hematoma
Hemovac
Surgical compression dressing<br>
Medically optimized by RUSH Internist
Hibiclens (wash surgical area night before and AM of surgery)
Intravenous antibiotics given in hospital
Private rooms
Short hospital stay
Dental prophylaxis
Lifelong recommendation for any and all dental procedures
Amoxicillin 2000 mg 1 hour before
Clindamycin 600 mg 1 hour before (if allergic to penicillin)
No dental work 3wks prior to surgery and 3months after surgery
Deep Vein Thrombosis / Pulmonary Embolism
Anticoagulation medication
Early mobilization
Hematoma
Hemovac
Surgical compression dressing<br>
30
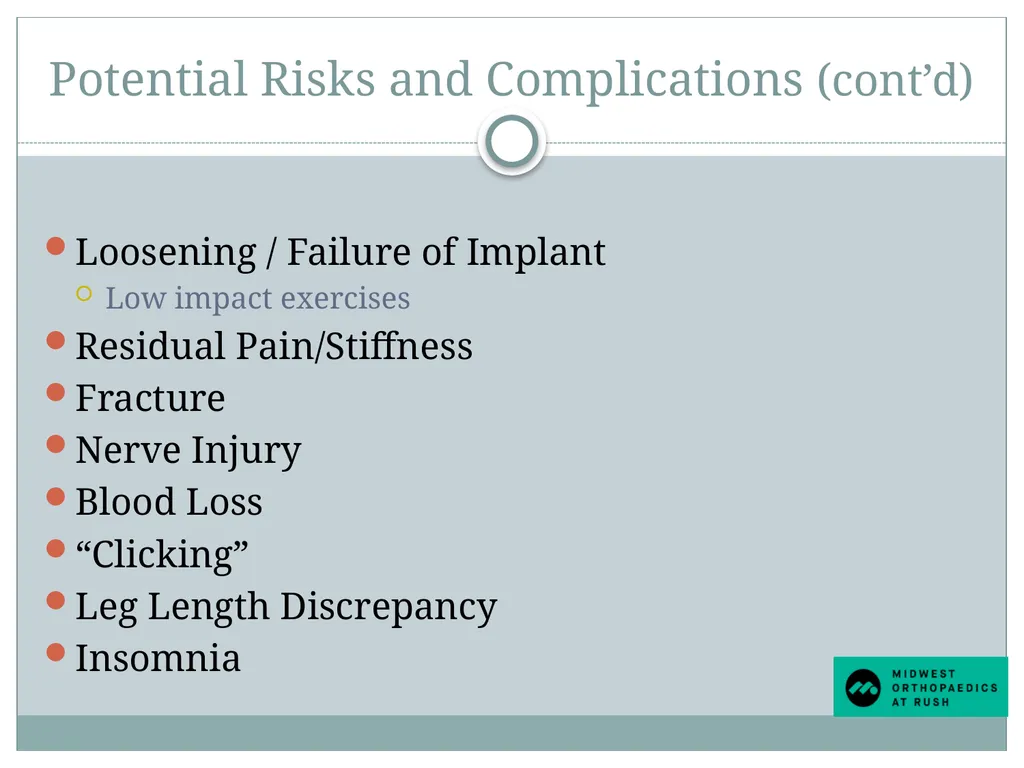
Potential Risks and Complications (cont’d) Loosening / Failure of Implant
Low impact exercises
Residual Pain/Stiffness
Fracture
Nerve Injury
Blood Loss
“Clicking”
Leg Length Discrepancy
Insomnia<br>
Low impact exercises
Residual Pain/Stiffness
Fracture
Nerve Injury
Blood Loss
“Clicking”
Leg Length Discrepancy
Insomnia<br>
31
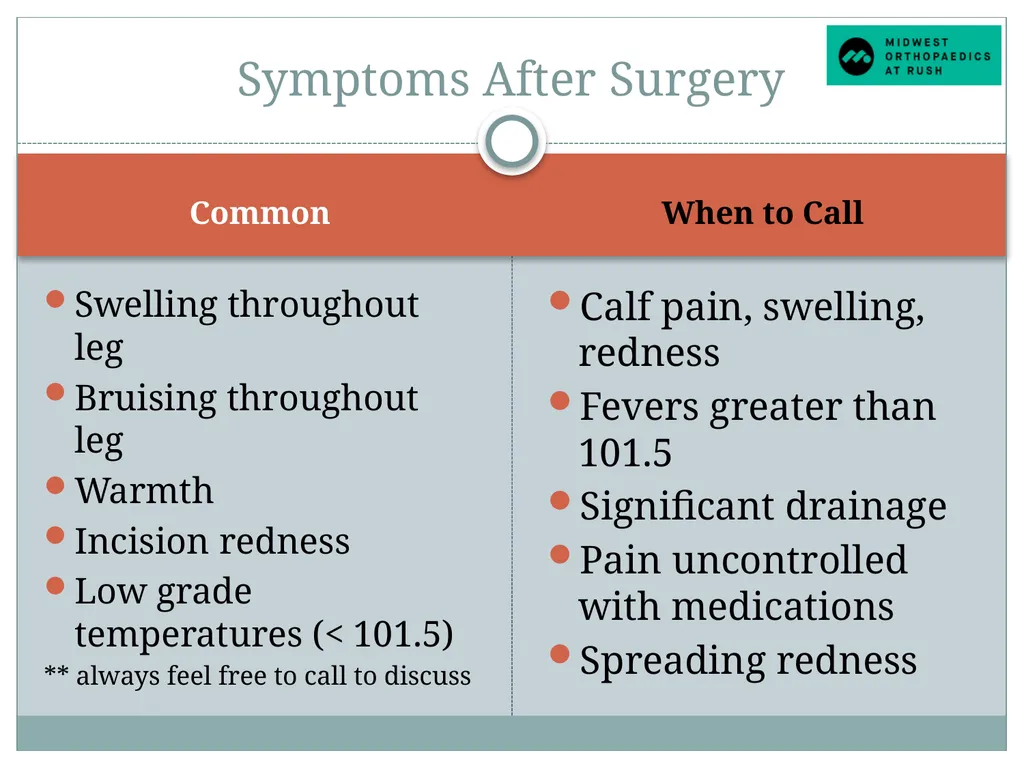
Common When to Call Swelling throughout leg
Bruising throughout leg
Warmth
Incision redness
Low grade temperatures (< 101.5)
** always feel free to call to discuss Calf pain, swelling, redness
Fevers greater than 101.5
Significant drainage
Pain uncontrolled with medications
Spreading redness Symptoms After Surgery<br>
Bruising throughout leg
Warmth
Incision redness
Low grade temperatures (< 101.5)
** always feel free to call to discuss Calf pain, swelling, redness
Fevers greater than 101.5
Significant drainage
Pain uncontrolled with medications
Spreading redness Symptoms After Surgery<br>
32
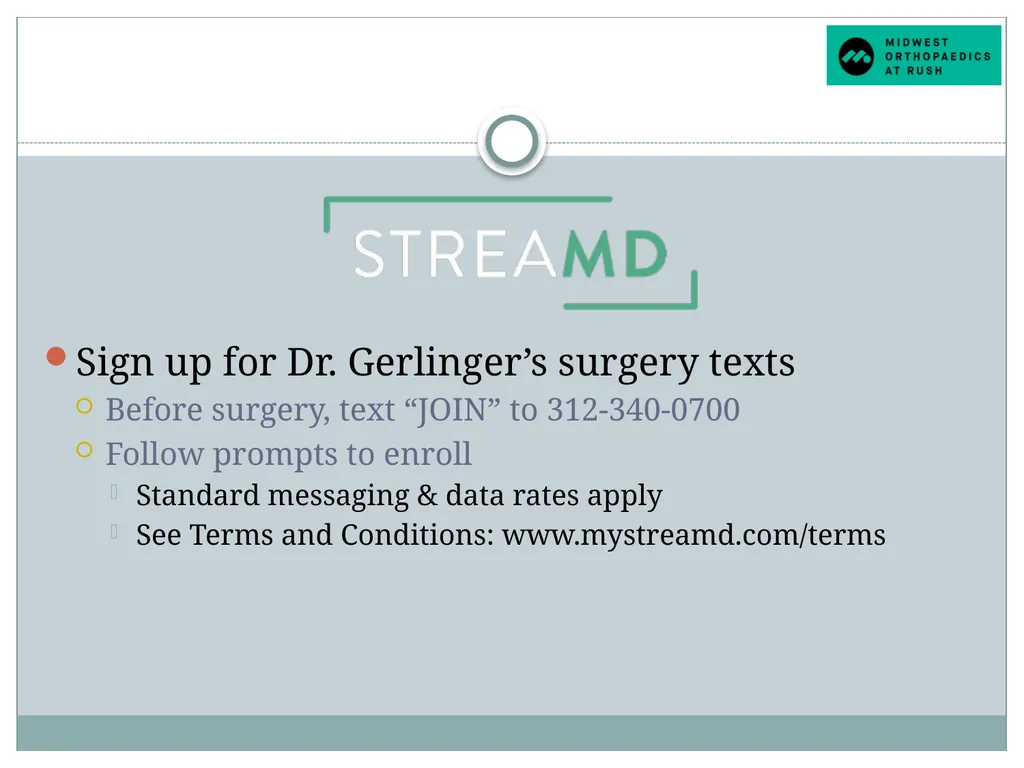
Sign up for Dr. Gerlinger’s surgery texts
Before surgery, text “JOIN” to 312-340-0700
Follow prompts to enroll
Standard messaging & data rates apply
See Terms and Conditions: www.mystreamd.com/terms<br>
Before surgery, text “JOIN” to 312-340-0700
Follow prompts to enroll
Standard messaging & data rates apply
See Terms and Conditions: www.mystreamd.com/terms<br>
33
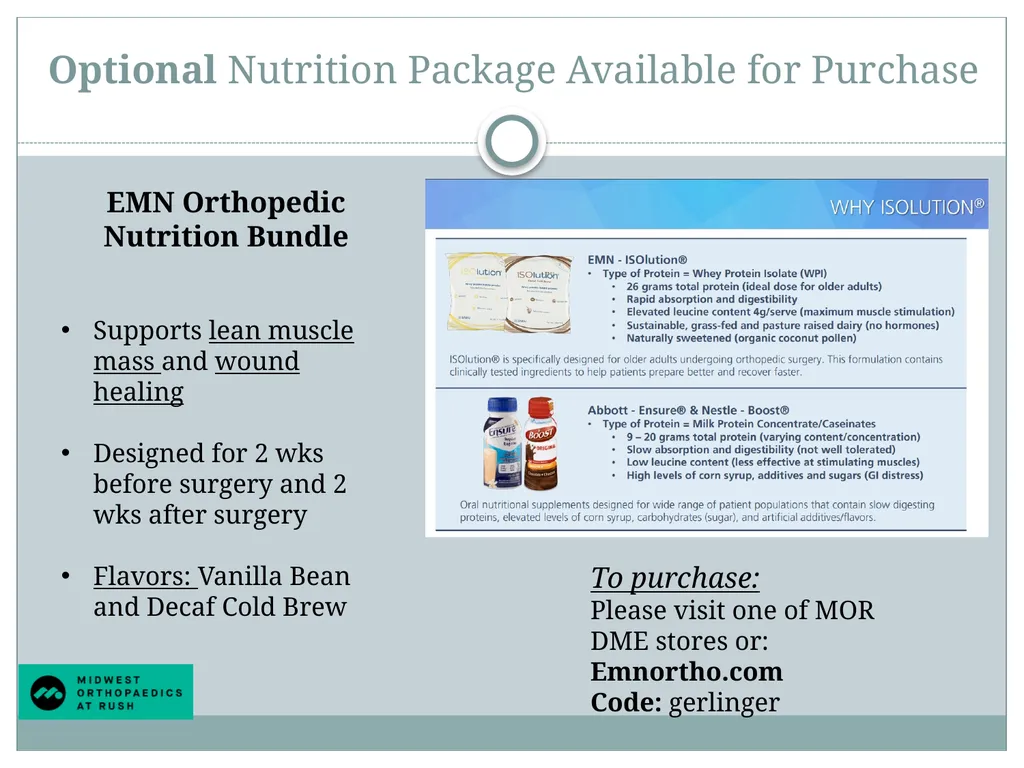
Optional Nutrition Package Available for Purchase EMN Orthopedic Nutrition Bundle
Supports lean muscle mass and wound healing
Designed for 2 wks before surgery and 2 wks after surgery
Flavors: Vanilla Bean and Decaf Cold Brew To purchase:
Please visit one of MOR DME stores or:
Emnortho.com
Code: gerlinger<br>
Supports lean muscle mass and wound healing
Designed for 2 wks before surgery and 2 wks after surgery
Flavors: Vanilla Bean and Decaf Cold Brew To purchase:
Please visit one of MOR DME stores or:
Emnortho.com
Code: gerlinger<br>
34
What do I do now?
How to prepare for your surgery Stop medications as directed by your RUSH Internist
Prepare living arrangements as necessary
Sign up for surgical texts
Start protein supplement (optional)
Schedule physical therapy to begin 1 week after surgery
Wash surgical area with Hibiclens
Stay well hydrated and eat nutritious meals
Relax and know you that you are in good hands!<br>
Prepare living arrangements as necessary
Sign up for surgical texts
Start protein supplement (optional)
Schedule physical therapy to begin 1 week after surgery
Wash surgical area with Hibiclens
Stay well hydrated and eat nutritious meals
Relax and know you that you are in good hands!<br>
35
Thank You Please reach out with any questions!
Kelly Murray, RN
Alissa Winner, DNP
Jomary Santana, Admin
Ilene Vazquez, Admin Gerlinger Office
312-432-2429<br>
Kelly Murray, RN
Alissa Winner, DNP
Jomary Santana, Admin
Ilene Vazquez, Admin Gerlinger Office
312-432-2429<br>