
Year 7: Food Technology Project: Time for Lunch
AS
Published · 33 slides · 0 views

1 / 1


Description
Year 7: Food Technology Project: Time for Lunch Overview of Project With a focus on products that are suitable for your lunchbox, Food Technology in year 7 looks at developing your basic cooking skills, along with your awareness of
Related Topics
Share
Embed code
Download this presentation From Below
"Year 7: Food Technology Project: Time for Lunch" is the property of its rightful owner. Permission is granted to download and print the materials on this website for personal, non-commercial use only, and to display it on your personal computer provided you do not modify the materials and that you retain all copyright notices contained in the materials. By downloading content from our website, you accept the terms of this agreement.
Presentation Transcript
01
Year 7: Food Technology Project: Time for Lunch<br>
02
Overview of Project
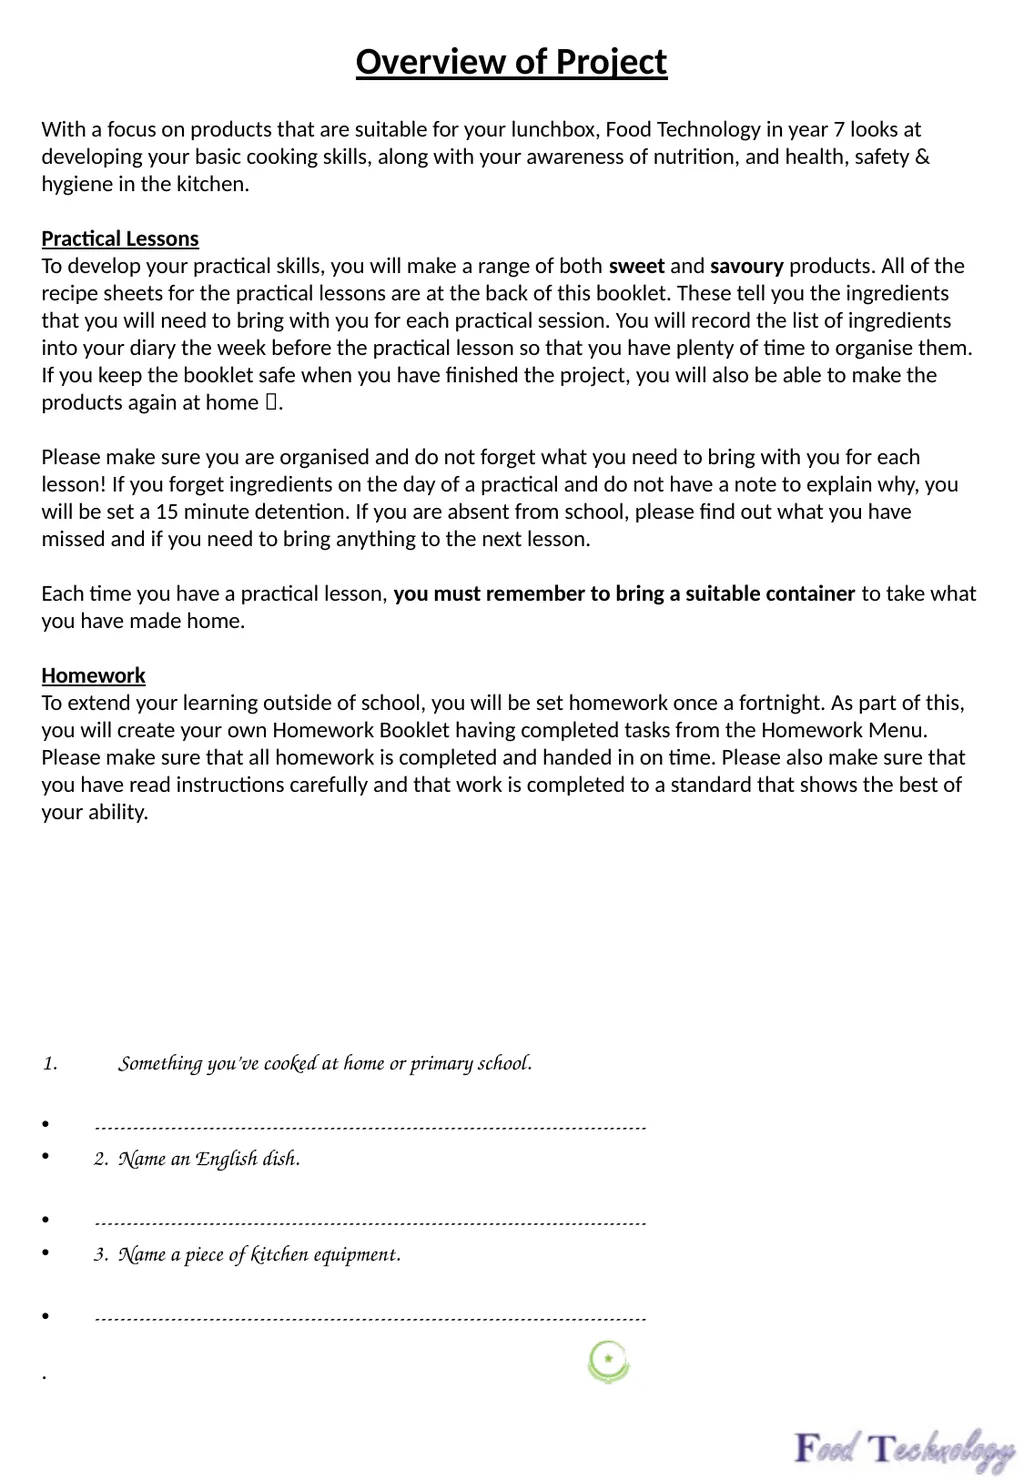
With a focus on products that are suitable for your lunchbox, Food Technology in year 7 looks at developing your basic cooking skills, along with your awareness of nutrition, and health, safety & hygiene in the kitchen.
Practical Lessons
To develop your practical skills, you will make a range of both sweet and savoury products. All of the recipe sheets for the practical lessons are at the back of this booklet. These tell you the ingredients that you will need to bring with you for each practical session. You will record the list of ingredients into your diary the week before the practical lesson so that you have plenty of time to organise them. If you keep the booklet safe when you have finished the project, you will also be able to make the products again at home .
Please make sure you are organised and do not forget what you need to bring with you for each lesson! If you forget ingredients on the day of a practical and do not have a note to explain why, you will be set a 15 minute detention. If you are absent from school, please find out what you have missed and if you need to bring anything to the next lesson.
Each time you have a practical lesson, you must remember to bring a suitable container to take what you have made home.
Homework
To extend your learning outside of school, you will be set homework once a fortnight. As part of this, you will create your own Homework Booklet having completed tasks from the Homework Menu. Please make sure that all homework is completed and handed in on time. Please also make sure that you have read instructions carefully and that work is completed to a standard that shows the best of your ability.
Something you’ve cooked at home or primary school.
---------------------------------------------------------------------------------------
2. Name an English dish.
---------------------------------------------------------------------------------------
3. Name a piece of kitchen equipment.
---------------------------------------------------------------------------------------
.<br>
With a focus on products that are suitable for your lunchbox, Food Technology in year 7 looks at developing your basic cooking skills, along with your awareness of nutrition, and health, safety & hygiene in the kitchen.
Practical Lessons
To develop your practical skills, you will make a range of both sweet and savoury products. All of the recipe sheets for the practical lessons are at the back of this booklet. These tell you the ingredients that you will need to bring with you for each practical session. You will record the list of ingredients into your diary the week before the practical lesson so that you have plenty of time to organise them. If you keep the booklet safe when you have finished the project, you will also be able to make the products again at home .
Please make sure you are organised and do not forget what you need to bring with you for each lesson! If you forget ingredients on the day of a practical and do not have a note to explain why, you will be set a 15 minute detention. If you are absent from school, please find out what you have missed and if you need to bring anything to the next lesson.
Each time you have a practical lesson, you must remember to bring a suitable container to take what you have made home.
Homework
To extend your learning outside of school, you will be set homework once a fortnight. As part of this, you will create your own Homework Booklet having completed tasks from the Homework Menu. Please make sure that all homework is completed and handed in on time. Please also make sure that you have read instructions carefully and that work is completed to a standard that shows the best of your ability.
Something you’ve cooked at home or primary school.
---------------------------------------------------------------------------------------
2. Name an English dish.
---------------------------------------------------------------------------------------
3. Name a piece of kitchen equipment.
---------------------------------------------------------------------------------------
.<br>
03
My Practical Learning Journey
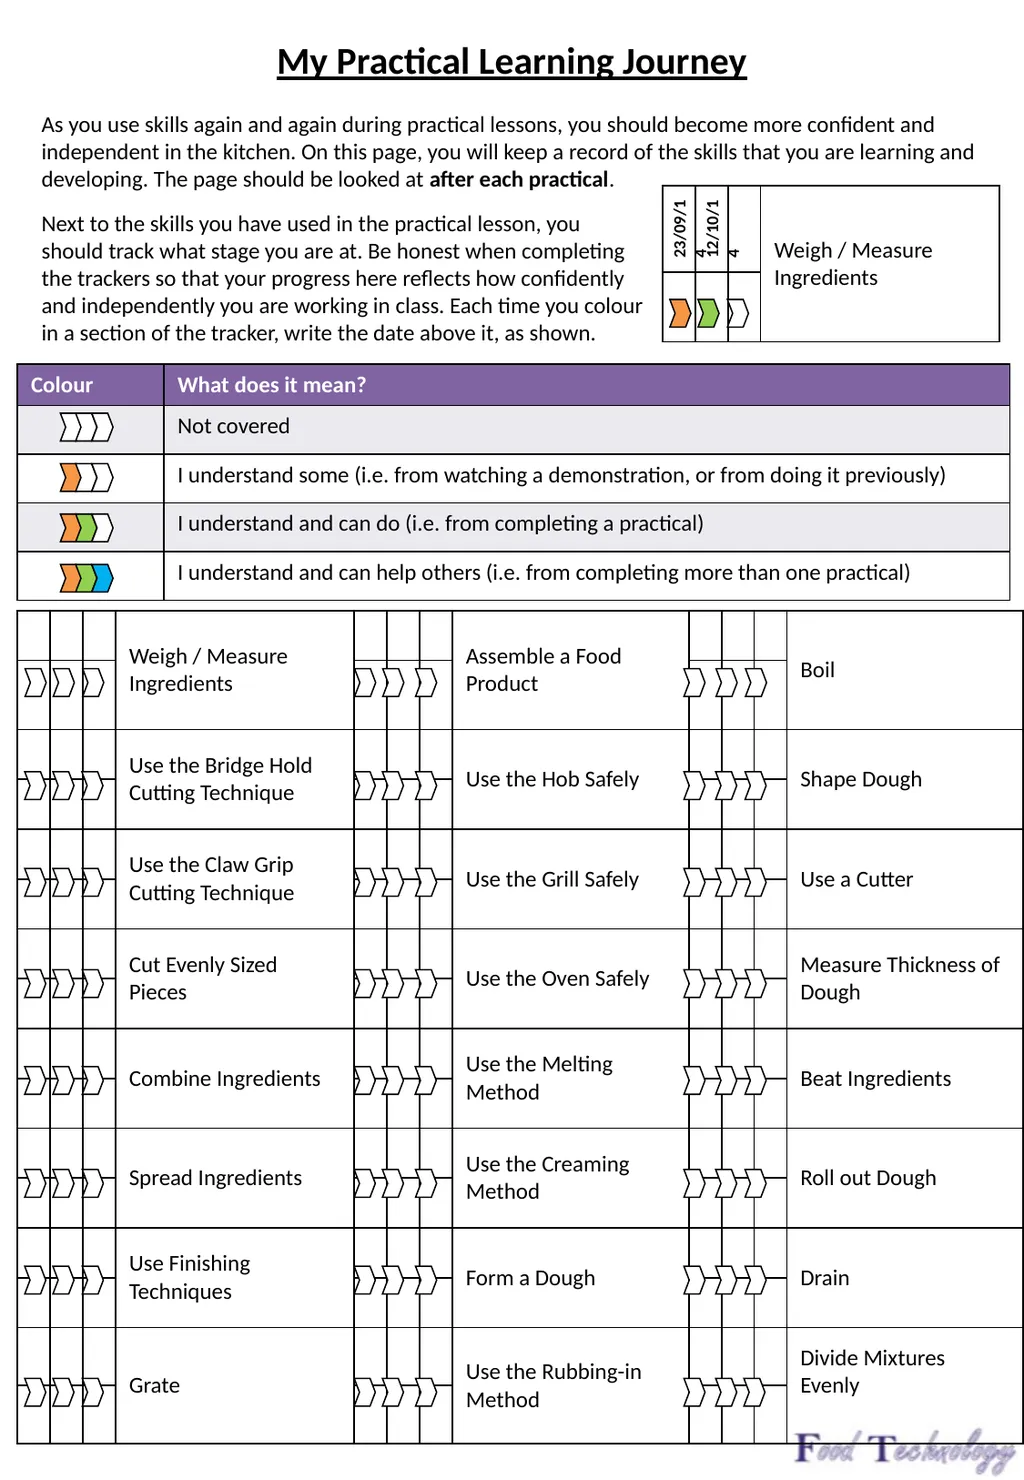
As you use skills again and again during practical lessons, you should become more confident and independent in the kitchen. On this page, you will keep a record of the skills that you are learning and developing. The page should be looked at after each practical. Next to the skills you have used in the practical lesson, you should track what stage you are at. Be honest when completing the trackers so that your progress here reflects how confidently and independently you are working in class. Each time you colour in a section of the tracker, write the date above it, as shown.<br>
As you use skills again and again during practical lessons, you should become more confident and independent in the kitchen. On this page, you will keep a record of the skills that you are learning and developing. The page should be looked at after each practical. Next to the skills you have used in the practical lesson, you should track what stage you are at. Be honest when completing the trackers so that your progress here reflects how confidently and independently you are working in class. Each time you colour in a section of the tracker, write the date above it, as shown.<br>
04
Lesson Procedures: Rules and Expectations
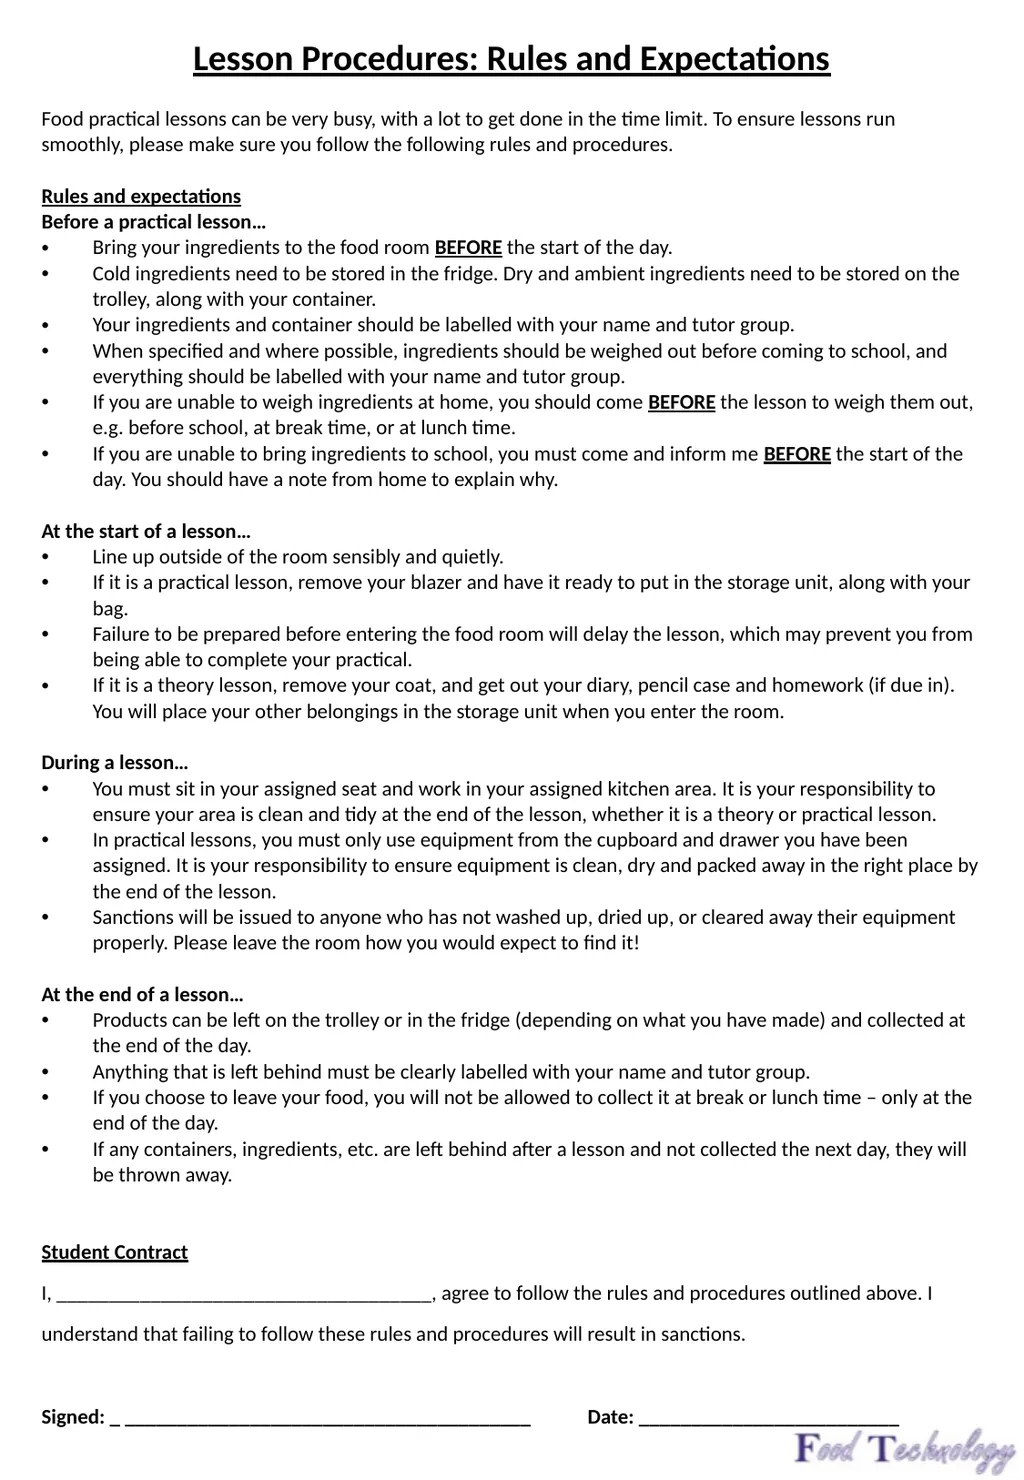
Food practical lessons can be very busy, with a lot to get done in the time limit. To ensure lessons run smoothly, please make sure you follow the following rules and procedures.
Rules and expectations
Before a practical lesson…
Bring your ingredients to the food room BEFORE the start of the day.
Cold ingredients need to be stored in the fridge. Dry and ambient ingredients need to be stored on the trolley, along with your container.
Your ingredients and container should be labelled with your name and tutor group.
When specified and where possible, ingredients should be weighed out before coming to school, and everything should be labelled with your name and tutor group.
If you are unable to weigh ingredients at home, you should come BEFORE the lesson to weigh them out, e.g. before school, at break time, or at lunch time.
If you are unable to bring ingredients to school, you must come and inform me BEFORE the start of the day. You should have a note from home to explain why.
At the start of a lesson…
Line up outside of the room sensibly and quietly.
If it is a practical lesson, remove your blazer and have it ready to put in the storage unit, along with your bag.
Failure to be prepared before entering the food room will delay the lesson, which may prevent you from being able to complete your practical.
If it is a theory lesson, remove your coat, and get out your diary, pencil case and homework (if due in). You will place your other belongings in the storage unit when you enter the room.
During a lesson…
You must sit in your assigned seat and work in your assigned kitchen area. It is your responsibility to ensure your area is clean and tidy at the end of the lesson, whether it is a theory or practical lesson.
In practical lessons, you must only use equipment from the cupboard and drawer you have been assigned. It is your responsibility to ensure equipment is clean, dry and packed away in the right place by the end of the lesson.
Sanctions will be issued to anyone who has not washed up, dried up, or cleared away their equipment properly. Please leave the room how you would expect to find it!
At the end of a lesson…
Products can be left on the trolley or in the fridge (depending on what you have made) and collected at the end of the day.
Anything that is left behind must be clearly labelled with your name and tutor group.
If you choose to leave your food, you will not be allowed to collect it at break or lunch time – only at the end of the day.
If any containers, ingredients, etc. are left behind after a lesson and not collected the next day, they will be thrown away.
Student Contract
I, ____________________________________, agree to follow the rules and procedures outlined above. I understand that failing to follow these rules and procedures will result in sanctions.
Signed: _ _______________________________________ Date: _________________________<br>
Food practical lessons can be very busy, with a lot to get done in the time limit. To ensure lessons run smoothly, please make sure you follow the following rules and procedures.
Rules and expectations
Before a practical lesson…
Bring your ingredients to the food room BEFORE the start of the day.
Cold ingredients need to be stored in the fridge. Dry and ambient ingredients need to be stored on the trolley, along with your container.
Your ingredients and container should be labelled with your name and tutor group.
When specified and where possible, ingredients should be weighed out before coming to school, and everything should be labelled with your name and tutor group.
If you are unable to weigh ingredients at home, you should come BEFORE the lesson to weigh them out, e.g. before school, at break time, or at lunch time.
If you are unable to bring ingredients to school, you must come and inform me BEFORE the start of the day. You should have a note from home to explain why.
At the start of a lesson…
Line up outside of the room sensibly and quietly.
If it is a practical lesson, remove your blazer and have it ready to put in the storage unit, along with your bag.
Failure to be prepared before entering the food room will delay the lesson, which may prevent you from being able to complete your practical.
If it is a theory lesson, remove your coat, and get out your diary, pencil case and homework (if due in). You will place your other belongings in the storage unit when you enter the room.
During a lesson…
You must sit in your assigned seat and work in your assigned kitchen area. It is your responsibility to ensure your area is clean and tidy at the end of the lesson, whether it is a theory or practical lesson.
In practical lessons, you must only use equipment from the cupboard and drawer you have been assigned. It is your responsibility to ensure equipment is clean, dry and packed away in the right place by the end of the lesson.
Sanctions will be issued to anyone who has not washed up, dried up, or cleared away their equipment properly. Please leave the room how you would expect to find it!
At the end of a lesson…
Products can be left on the trolley or in the fridge (depending on what you have made) and collected at the end of the day.
Anything that is left behind must be clearly labelled with your name and tutor group.
If you choose to leave your food, you will not be allowed to collect it at break or lunch time – only at the end of the day.
If any containers, ingredients, etc. are left behind after a lesson and not collected the next day, they will be thrown away.
Student Contract
I, ____________________________________, agree to follow the rules and procedures outlined above. I understand that failing to follow these rules and procedures will result in sanctions.
Signed: _ _______________________________________ Date: _________________________<br>
05
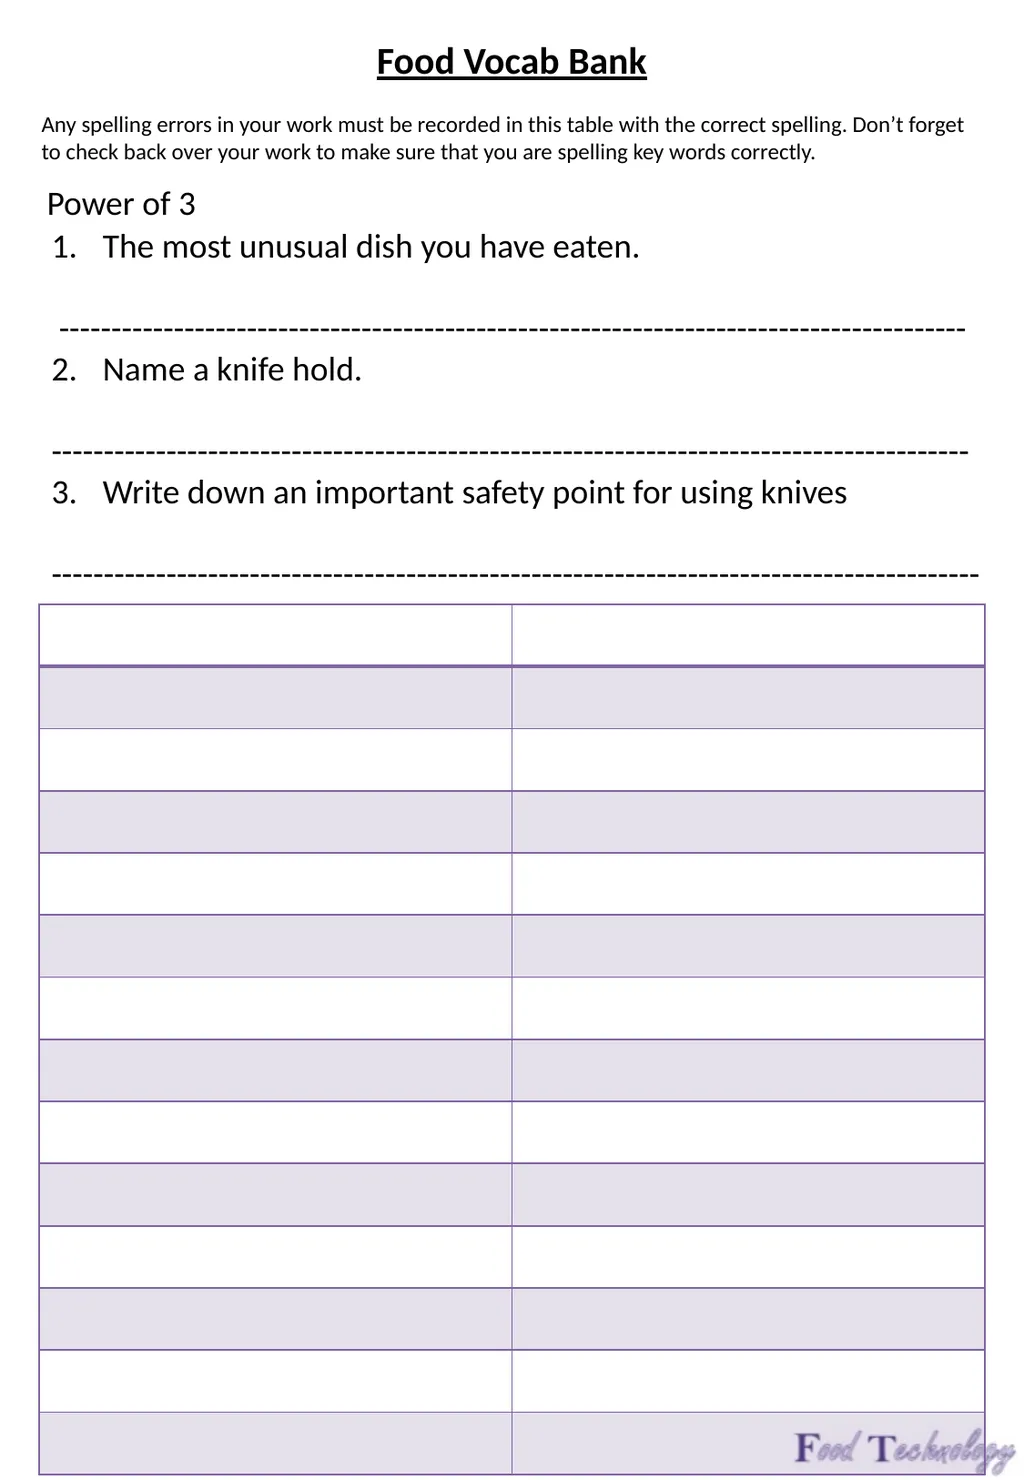
Food Vocab Bank
Any spelling errors in your work must be recorded in this table with the correct spelling. Don’t forget to check back over your work to make sure that you are spelling key words correctly. The most unusual dish you have eaten.
---------------------------------------------------------------------------------------
Name a knife hold.
----------------------------------------------------------------------------------------
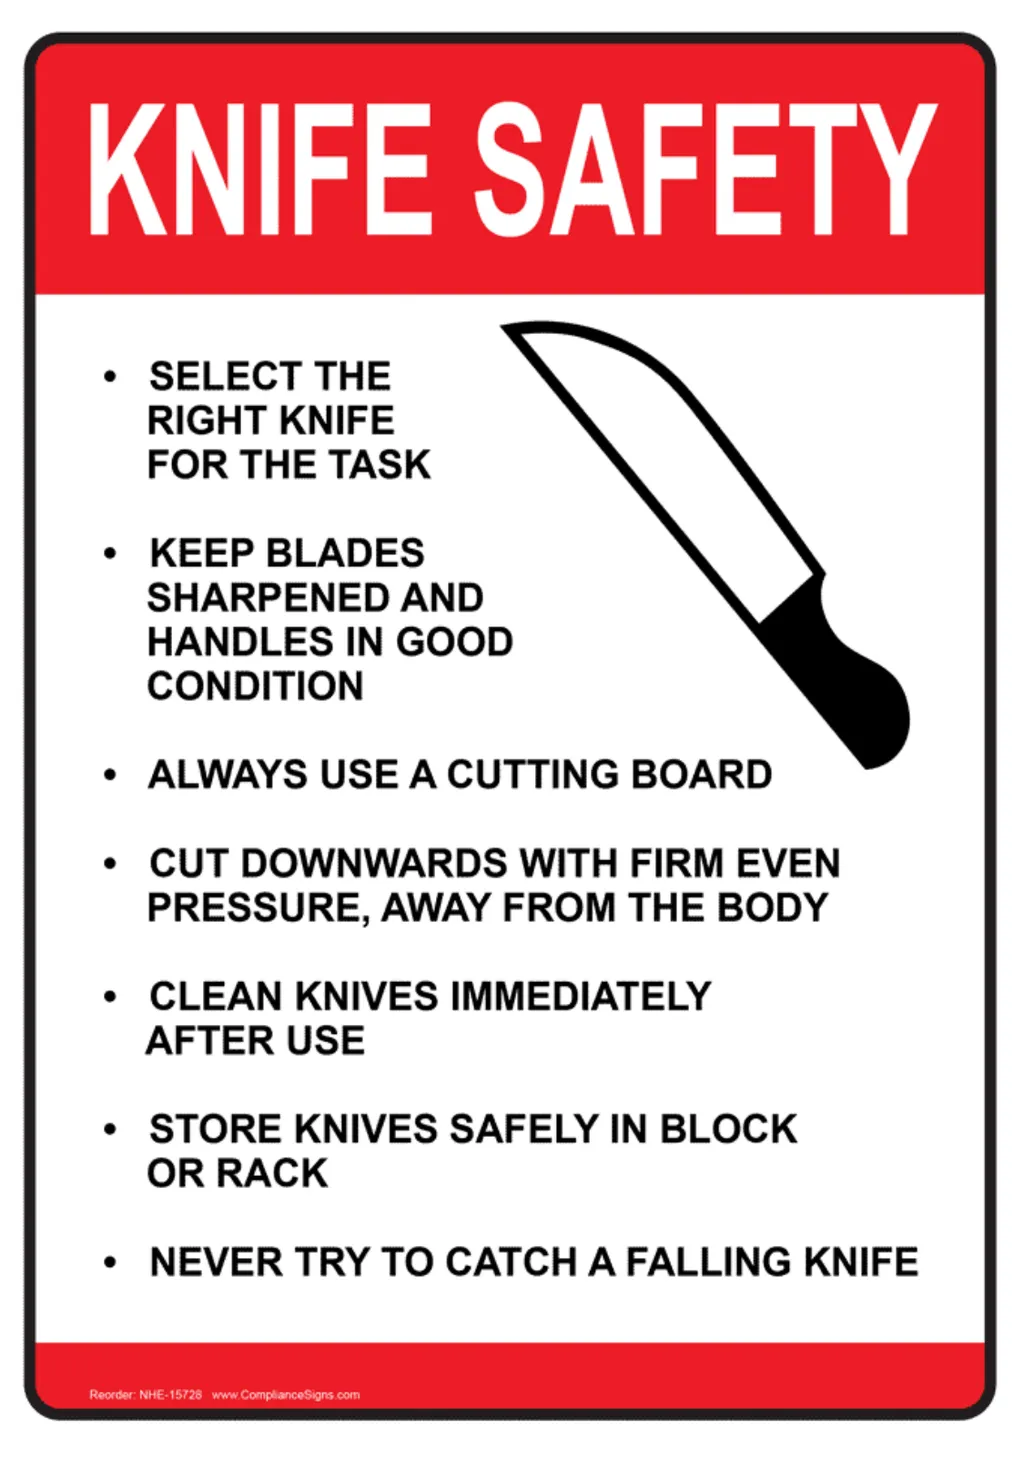
Write down an important safety point for using knives
----------------------------------------------------------------------------------------- Power of 3<br>
Any spelling errors in your work must be recorded in this table with the correct spelling. Don’t forget to check back over your work to make sure that you are spelling key words correctly. The most unusual dish you have eaten.
---------------------------------------------------------------------------------------
Name a knife hold.
----------------------------------------------------------------------------------------
Write down an important safety point for using knives
----------------------------------------------------------------------------------------- Power of 3<br>
06
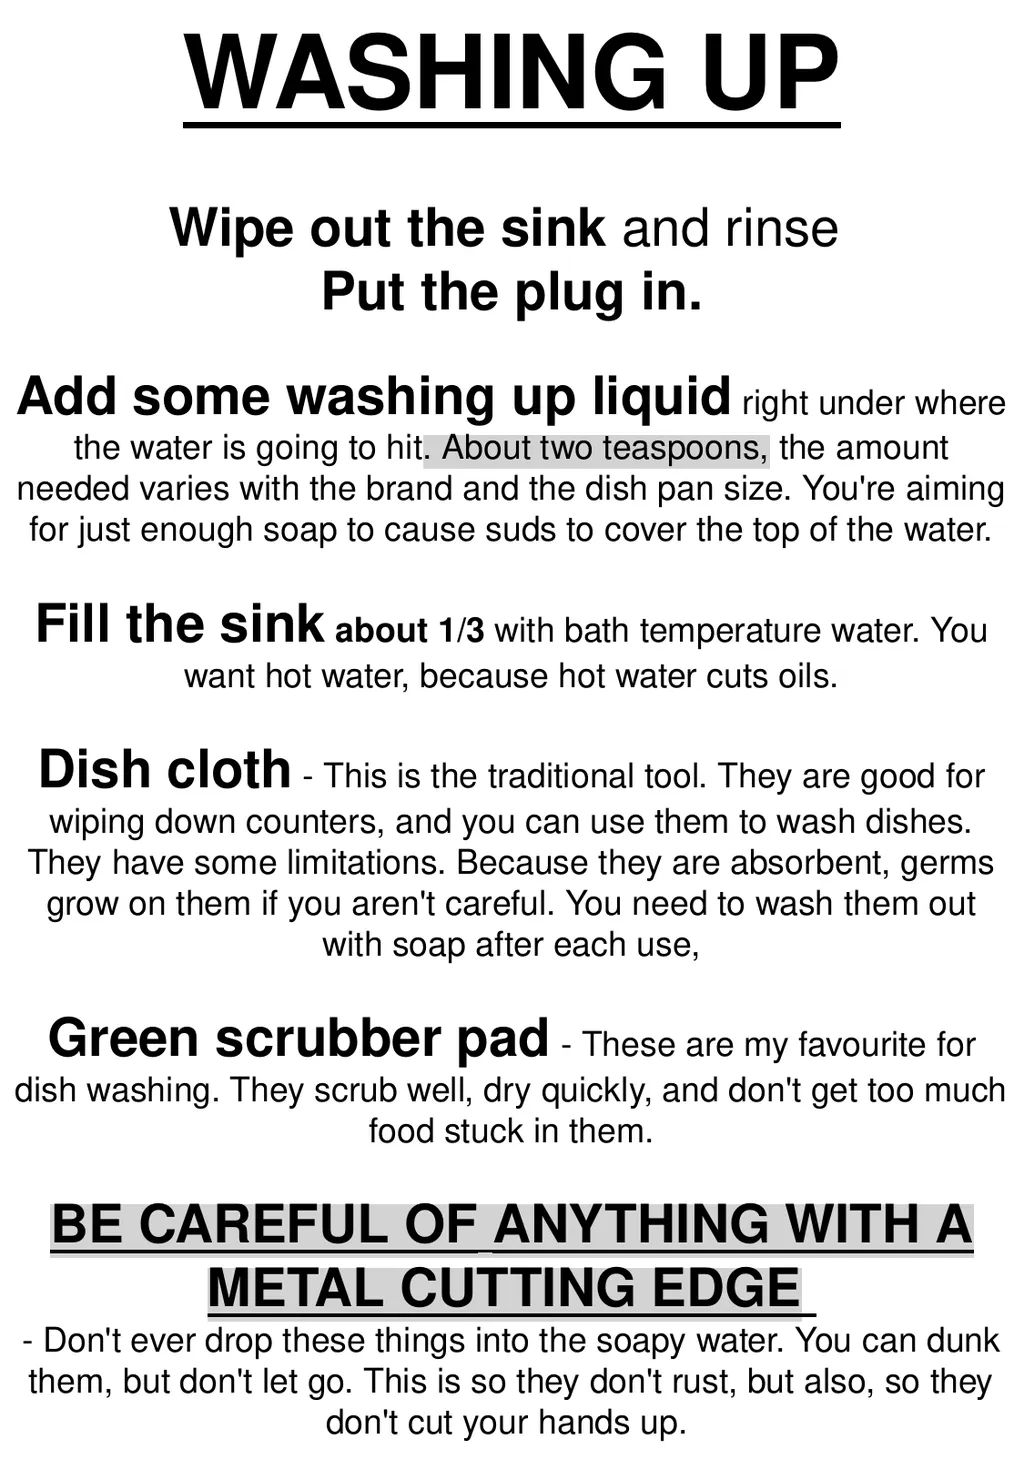
WASHING UP
Wipe out the sink and rinse
Put the plug in.
Add some washing up liquid right under where the water is going to hit. About two teaspoons, the amount needed varies with the brand and the dish pan size. You're aiming for just enough soap to cause suds to cover the top of the water.
Fill the sink about 1/3 with bath temperature water. You want hot water, because hot water cuts oils.
Dish cloth - This is the traditional tool. They are good for wiping down counters, and you can use them to wash dishes. They have some limitations. Because they are absorbent, germs grow on them if you aren't careful. You need to wash them out with soap after each use,
Green scrubber pad - These are my favourite for dish washing. They scrub well, dry quickly, and don't get too much food stuck in them.
BE CAREFUL OF ANYTHING WITH A METAL CUTTING EDGE
- Don't ever drop these things into the soapy water. You can dunk them, but don't let go. This is so they don't rust, but also, so they don't cut your hands up.<br>
Wipe out the sink and rinse
Put the plug in.
Add some washing up liquid right under where the water is going to hit. About two teaspoons, the amount needed varies with the brand and the dish pan size. You're aiming for just enough soap to cause suds to cover the top of the water.
Fill the sink about 1/3 with bath temperature water. You want hot water, because hot water cuts oils.
Dish cloth - This is the traditional tool. They are good for wiping down counters, and you can use them to wash dishes. They have some limitations. Because they are absorbent, germs grow on them if you aren't careful. You need to wash them out with soap after each use,
Green scrubber pad - These are my favourite for dish washing. They scrub well, dry quickly, and don't get too much food stuck in them.
BE CAREFUL OF ANYTHING WITH A METAL CUTTING EDGE
- Don't ever drop these things into the soapy water. You can dunk them, but don't let go. This is so they don't rust, but also, so they don't cut your hands up.<br>
07
Health and Safety in the Kitchen
Today’s Learning Objectives: (Tick each objective once you think you have met it during the lesson)
To understand hazards and risks that may occur in a kitchen
To understand the importance of following health, safety and hygiene procedures when working with food
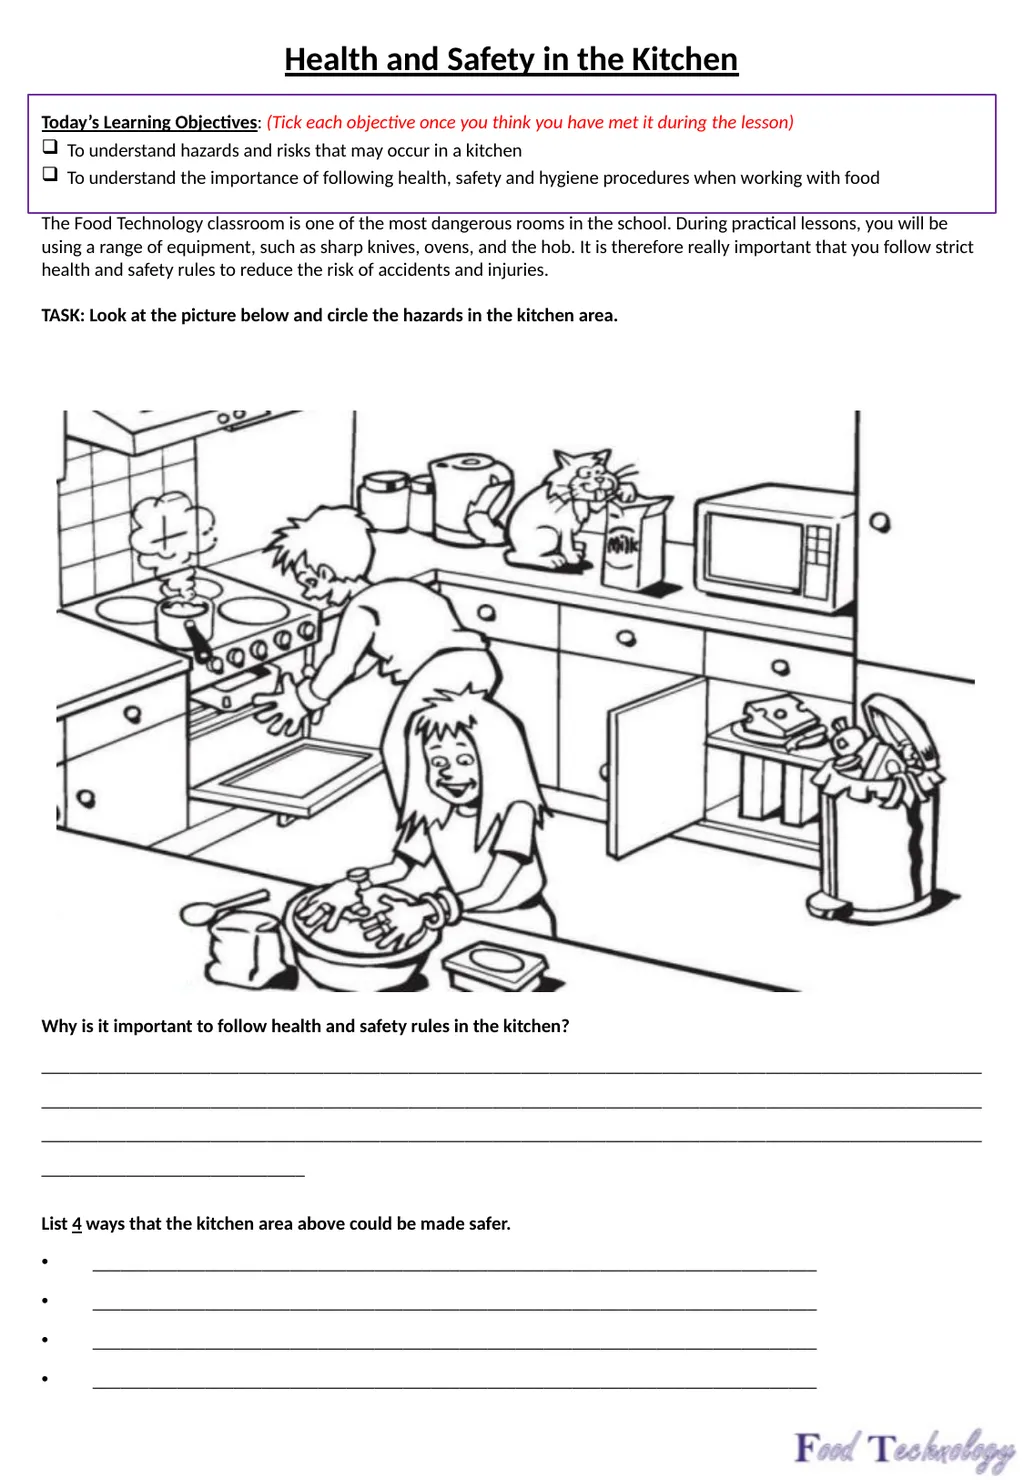
The Food Technology classroom is one of the most dangerous rooms in the school. During practical lessons, you will be using a range of equipment, such as sharp knives, ovens, and the hob. It is therefore really important that you follow strict health and safety rules to reduce the risk of accidents and injuries.
TASK: Look at the picture below and circle the hazards in the kitchen area.
Why is it important to follow health and safety rules in the kitchen?
________________________________________________________________________________________________________________________________________________________________________________________________________________________________________________________________________________________________________________________________________
List 4 ways that the kitchen area above could be made safer.
_____________________________________________________________________________
_____________________________________________________________________________
_____________________________________________________________________________
_____________________________________________________________________________<br>
Today’s Learning Objectives: (Tick each objective once you think you have met it during the lesson)
To understand hazards and risks that may occur in a kitchen
To understand the importance of following health, safety and hygiene procedures when working with food
The Food Technology classroom is one of the most dangerous rooms in the school. During practical lessons, you will be using a range of equipment, such as sharp knives, ovens, and the hob. It is therefore really important that you follow strict health and safety rules to reduce the risk of accidents and injuries.
TASK: Look at the picture below and circle the hazards in the kitchen area.
Why is it important to follow health and safety rules in the kitchen?
________________________________________________________________________________________________________________________________________________________________________________________________________________________________________________________________________________________________________________________________________
List 4 ways that the kitchen area above could be made safer.
_____________________________________________________________________________
_____________________________________________________________________________
_____________________________________________________________________________
_____________________________________________________________________________<br>
08
Hygiene and Lesson Procedures
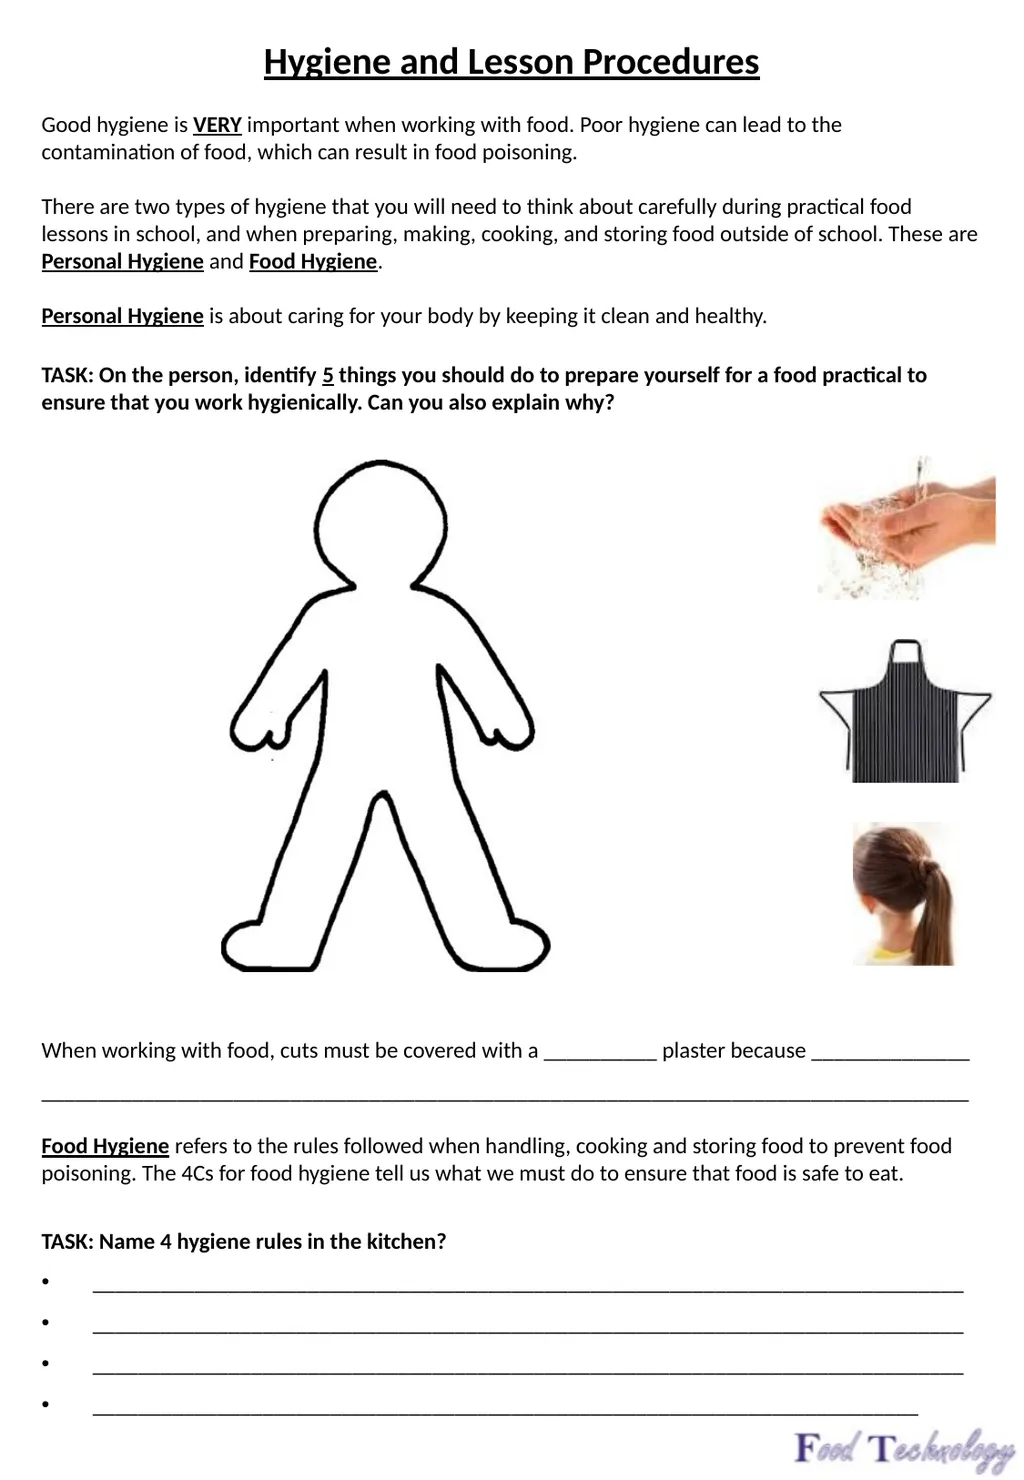
Good hygiene is VERY important when working with food. Poor hygiene can lead to the contamination of food, which can result in food poisoning.
There are two types of hygiene that you will need to think about carefully during practical food lessons in school, and when preparing, making, cooking, and storing food outside of school. These are Personal Hygiene and Food Hygiene.
Personal Hygiene is about caring for your body by keeping it clean and healthy.
TASK: On the person, identify 5 things you should do to prepare yourself for a food practical to ensure that you work hygienically. Can you also explain why?
When working with food, cuts must be covered with a __________ plaster because ______________
__________________________________________________________________________________
Food Hygiene refers to the rules followed when handling, cooking and storing food to prevent food poisoning. The 4Cs for food hygiene tell us what we must do to ensure that food is safe to eat.
TASK: Name 4 hygiene rules in the kitchen?
_____________________________________________________________________________
_____________________________________________________________________________
_____________________________________________________________________________
_________________________________________________________________________<br>
Good hygiene is VERY important when working with food. Poor hygiene can lead to the contamination of food, which can result in food poisoning.
There are two types of hygiene that you will need to think about carefully during practical food lessons in school, and when preparing, making, cooking, and storing food outside of school. These are Personal Hygiene and Food Hygiene.
Personal Hygiene is about caring for your body by keeping it clean and healthy.
TASK: On the person, identify 5 things you should do to prepare yourself for a food practical to ensure that you work hygienically. Can you also explain why?
When working with food, cuts must be covered with a __________ plaster because ______________
__________________________________________________________________________________
Food Hygiene refers to the rules followed when handling, cooking and storing food to prevent food poisoning. The 4Cs for food hygiene tell us what we must do to ensure that food is safe to eat.
TASK: Name 4 hygiene rules in the kitchen?
_____________________________________________________________________________
_____________________________________________________________________________
_____________________________________________________________________________
_________________________________________________________________________<br>
09
Healthy Eating
Today’s Learning Objectives: (Tick each objective once you think you have met it during the lesson)
To understand what a balanced diet is.
To be able to identify the five key nutrients.
On a daily basis, it is important that we eat the right types of foods and in the right quantities to enable us to stay healthy. As well as eating healthily, we should also do regular exercise to help us stay fit. If we don’t, health conditions can impact our lives.
What health conditions can having a poor diet cause / contribute to? ________________________
____________________________________________________________________________________________________________________________________________________________________
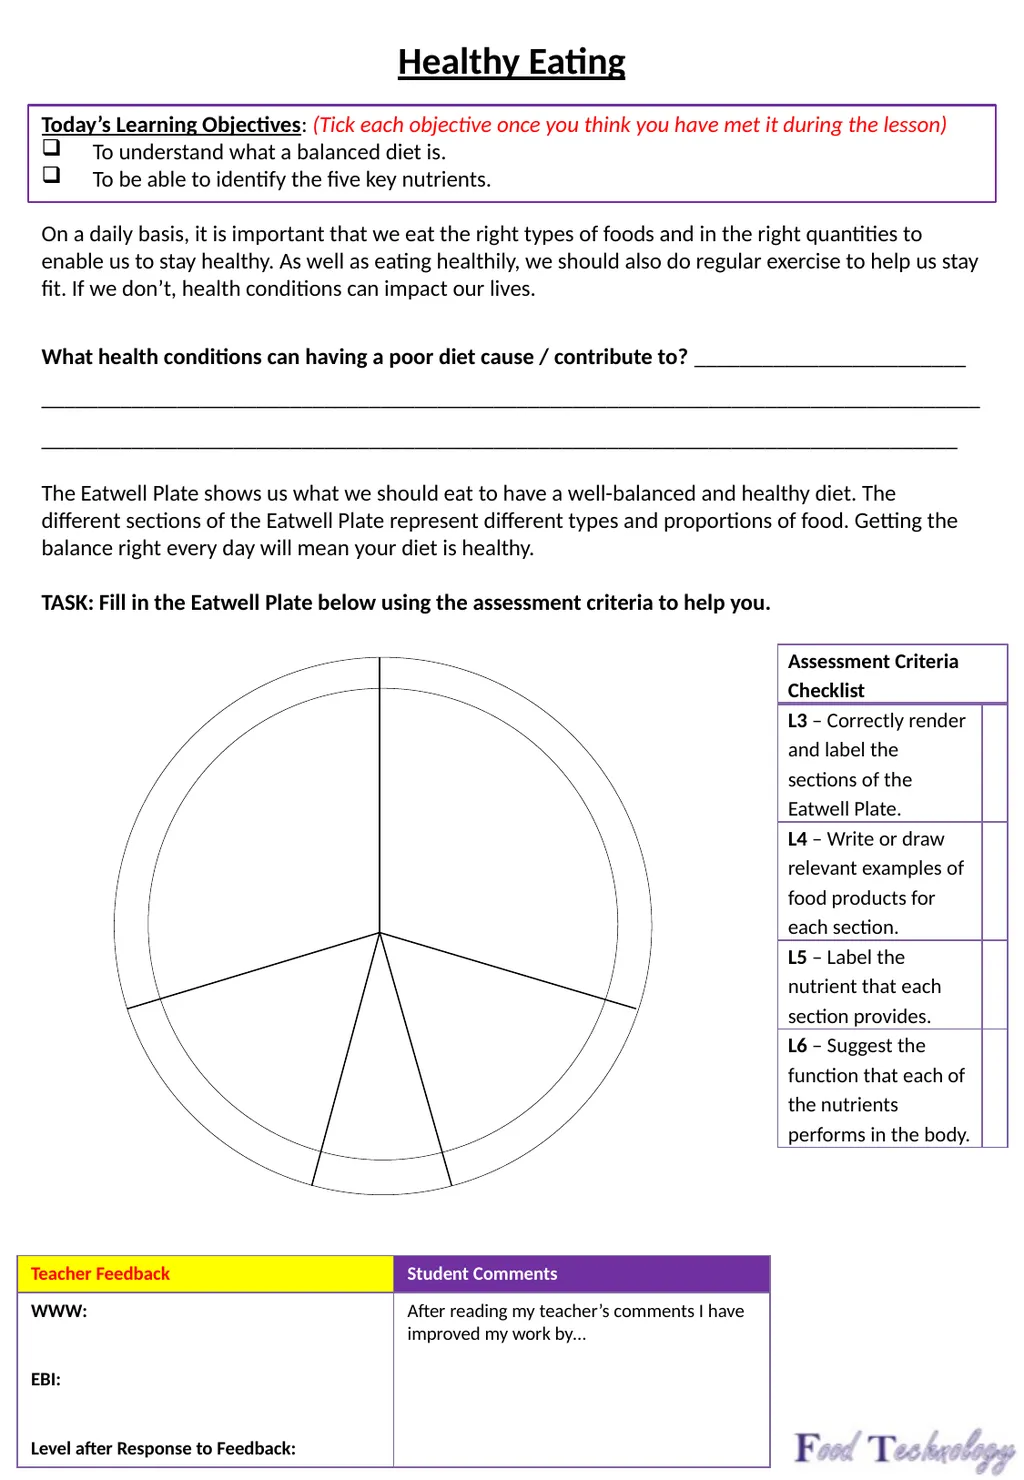
The Eatwell Plate shows us what we should eat to have a well-balanced and healthy diet. The different sections of the Eatwell Plate represent different types and proportions of food. Getting the balance right every day will mean your diet is healthy.
TASK: Fill in the Eatwell Plate below using the assessment criteria to help you.<br>
Today’s Learning Objectives: (Tick each objective once you think you have met it during the lesson)
To understand what a balanced diet is.
To be able to identify the five key nutrients.
On a daily basis, it is important that we eat the right types of foods and in the right quantities to enable us to stay healthy. As well as eating healthily, we should also do regular exercise to help us stay fit. If we don’t, health conditions can impact our lives.
What health conditions can having a poor diet cause / contribute to? ________________________
____________________________________________________________________________________________________________________________________________________________________
The Eatwell Plate shows us what we should eat to have a well-balanced and healthy diet. The different sections of the Eatwell Plate represent different types and proportions of food. Getting the balance right every day will mean your diet is healthy.
TASK: Fill in the Eatwell Plate below using the assessment criteria to help you.<br>
10
Nutrients
All foods are made up of chemical substances called nutrients. Nutrients are needed by the body to perform different functions.
The five key nutrients are Carbohydrate, Fat, Protein, Vitamins and Minerals. You can remember these by using your hand.
TASK: Draw round your hand in the space below, and label your thumb and fingers as different nutrients. Can you also label what functions the different nutrients perform in the body?
1. What is this vegetable called?
--------------------------------------------------------------------------
2. Why do we tie our hair back? (give two reasons)
--------------------------------------------------------------------------
3. Where should you store raw chicken?
--------------------------------------------------------------------------
TASK: In the table below, link each nutrient to the relevant section of the Eatwell Plate, and provide an example of a food that is high in that nutrient. Power of 3<br>
All foods are made up of chemical substances called nutrients. Nutrients are needed by the body to perform different functions.
The five key nutrients are Carbohydrate, Fat, Protein, Vitamins and Minerals. You can remember these by using your hand.
TASK: Draw round your hand in the space below, and label your thumb and fingers as different nutrients. Can you also label what functions the different nutrients perform in the body?
1. What is this vegetable called?
--------------------------------------------------------------------------
2. Why do we tie our hair back? (give two reasons)
--------------------------------------------------------------------------
3. Where should you store raw chicken?
--------------------------------------------------------------------------
TASK: In the table below, link each nutrient to the relevant section of the Eatwell Plate, and provide an example of a food that is high in that nutrient. Power of 3<br>
11
Power of 3
1 – name an Italian dish?
---------------------------------------------------------------------------------------------------
2 – what colour board would you use for preparing a carrot for coleslaw?
---------------------------------------------------------------------------------------------------
3 – what is the safe cooking temperature?
----------------------------------------------------------------------------------------------------
Task: complete medal task
Gold: Complete all tasks up to this point in your book
Silver: understand nutrition and the Eatwell guide
Bronze: show a good understanding of personal hygiene in the kitchen
Level up:<br>
1 – name an Italian dish?
---------------------------------------------------------------------------------------------------
2 – what colour board would you use for preparing a carrot for coleslaw?
---------------------------------------------------------------------------------------------------
3 – what is the safe cooking temperature?
----------------------------------------------------------------------------------------------------
Task: complete medal task
Gold: Complete all tasks up to this point in your book
Silver: understand nutrition and the Eatwell guide
Bronze: show a good understanding of personal hygiene in the kitchen
Level up:<br>
12
Weighing and Measuring
Today’s Learning Objectives: (Tick each objective once you think you have met it during the lesson)
To understand what equipment can be used to weigh and measure ingredients.
To be able to weigh and measure ingredients accurately.
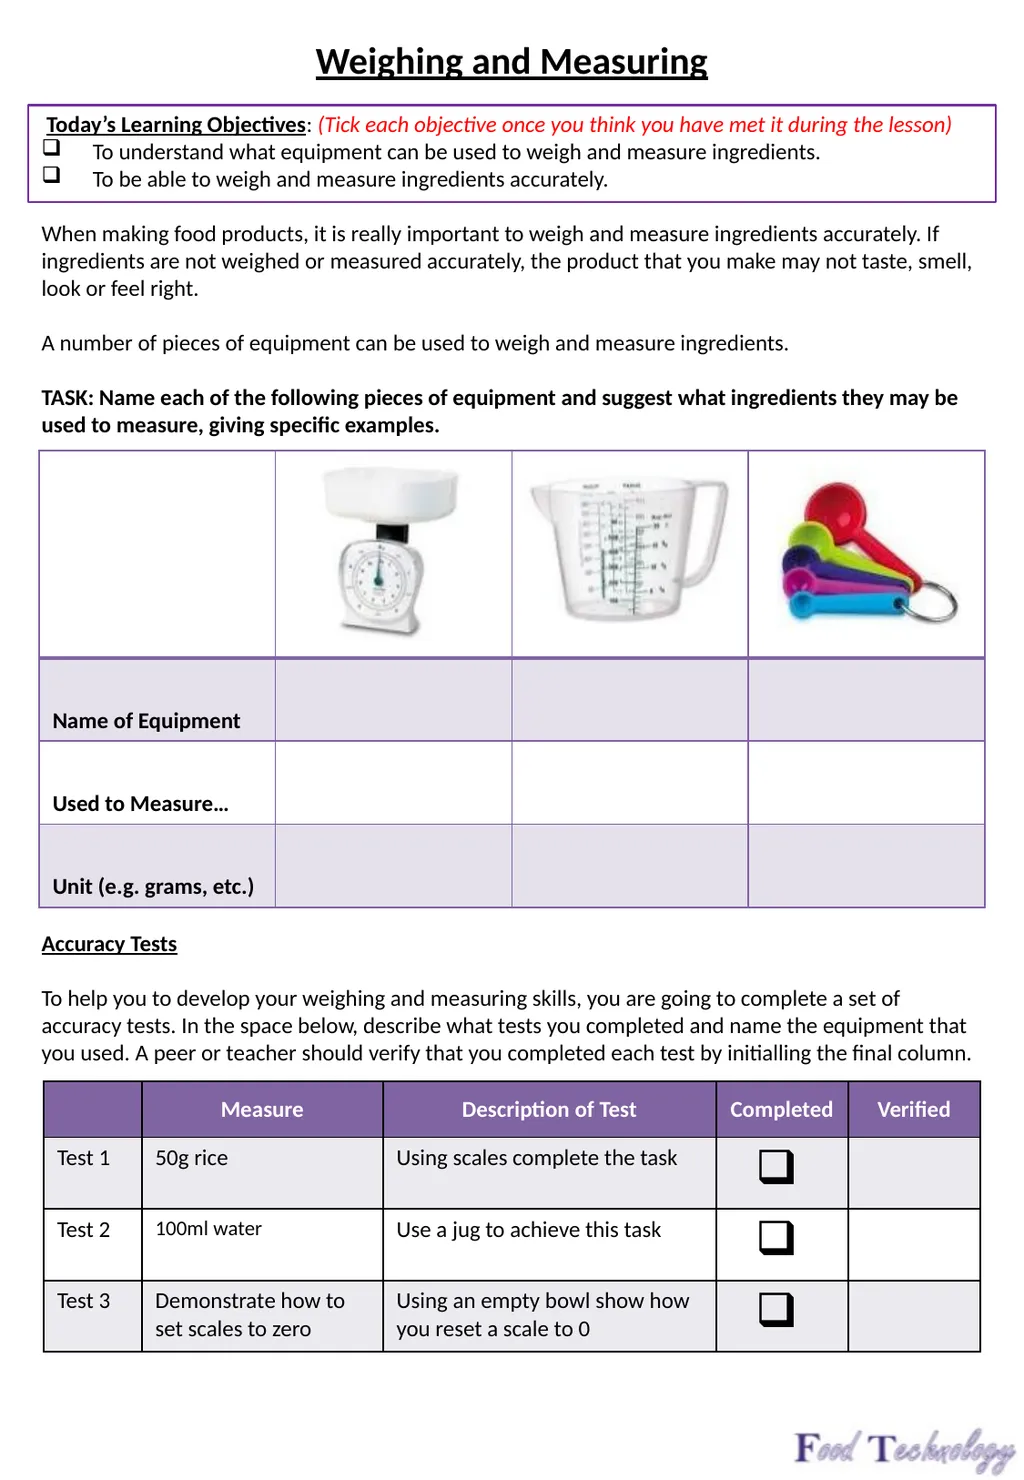
When making food products, it is really important to weigh and measure ingredients accurately. If ingredients are not weighed or measured accurately, the product that you make may not taste, smell, look or feel right.
A number of pieces of equipment can be used to weigh and measure ingredients.
TASK: Name each of the following pieces of equipment and suggest what ingredients they may be used to measure, giving specific examples.
Accuracy Tests
To help you to develop your weighing and measuring skills, you are going to complete a set of accuracy tests. In the space below, describe what tests you completed and name the equipment that you used. A peer or teacher should verify that you completed each test by initialling the final column.<br>
Today’s Learning Objectives: (Tick each objective once you think you have met it during the lesson)
To understand what equipment can be used to weigh and measure ingredients.
To be able to weigh and measure ingredients accurately.
When making food products, it is really important to weigh and measure ingredients accurately. If ingredients are not weighed or measured accurately, the product that you make may not taste, smell, look or feel right.
A number of pieces of equipment can be used to weigh and measure ingredients.
TASK: Name each of the following pieces of equipment and suggest what ingredients they may be used to measure, giving specific examples.
Accuracy Tests
To help you to develop your weighing and measuring skills, you are going to complete a set of accuracy tests. In the space below, describe what tests you completed and name the equipment that you used. A peer or teacher should verify that you completed each test by initialling the final column.<br>
13
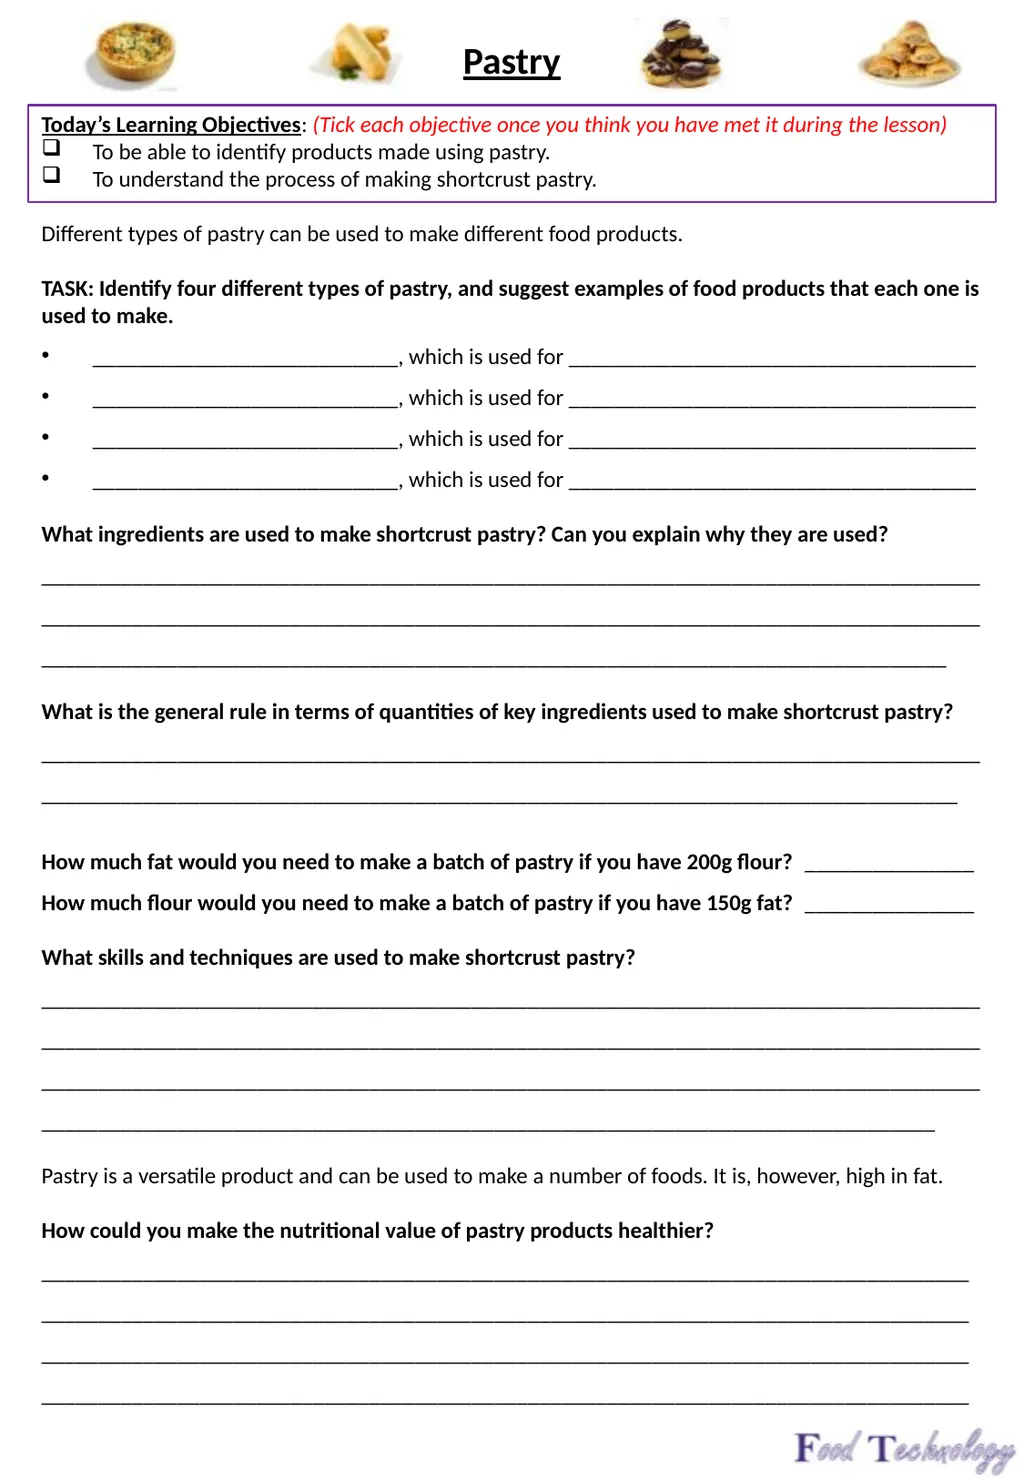
Pastry
Today’s Learning Objectives: (Tick each objective once you think you have met it during the lesson)
To be able to identify products made using pastry.
To understand the process of making shortcrust pastry.
Different types of pastry can be used to make different food products.
TASK: Identify four different types of pastry, and suggest examples of food products that each one is used to make.
___________________________, which is used for ____________________________________
___________________________, which is used for ____________________________________
___________________________, which is used for ____________________________________
___________________________, which is used for ____________________________________
What ingredients are used to make shortcrust pastry? Can you explain why they are used?
______________________________________________________________________________________________________________________________________________________________________________________________________________________________________________________
What is the general rule in terms of quantities of key ingredients used to make shortcrust pastry?
____________________________________________________________________________________________________________________________________________________________________
How much fat would you need to make a batch of pastry if you have 200g flour? _______________
How much flour would you need to make a batch of pastry if you have 150g fat? _______________
What skills and techniques are used to make shortcrust pastry?
________________________________________________________________________________________________________________________________________________________________________________________________________________________________________________________________________________________________________________________________________
Pastry is a versatile product and can be used to make a number of foods. It is, however, high in fat.
How could you make the nutritional value of pastry products healthier?
__________________________________________________________________________________
__________________________________________________________________________________
__________________________________________________________________________________
__________________________________________________________________________________<br>
Today’s Learning Objectives: (Tick each objective once you think you have met it during the lesson)
To be able to identify products made using pastry.
To understand the process of making shortcrust pastry.
Different types of pastry can be used to make different food products.
TASK: Identify four different types of pastry, and suggest examples of food products that each one is used to make.
___________________________, which is used for ____________________________________
___________________________, which is used for ____________________________________
___________________________, which is used for ____________________________________
___________________________, which is used for ____________________________________
What ingredients are used to make shortcrust pastry? Can you explain why they are used?
______________________________________________________________________________________________________________________________________________________________________________________________________________________________________________________
What is the general rule in terms of quantities of key ingredients used to make shortcrust pastry?
____________________________________________________________________________________________________________________________________________________________________
How much fat would you need to make a batch of pastry if you have 200g flour? _______________
How much flour would you need to make a batch of pastry if you have 150g fat? _______________
What skills and techniques are used to make shortcrust pastry?
________________________________________________________________________________________________________________________________________________________________________________________________________________________________________________________________________________________________________________________________________
Pastry is a versatile product and can be used to make a number of foods. It is, however, high in fat.
How could you make the nutritional value of pastry products healthier?
__________________________________________________________________________________
__________________________________________________________________________________
__________________________________________________________________________________
__________________________________________________________________________________<br>
14
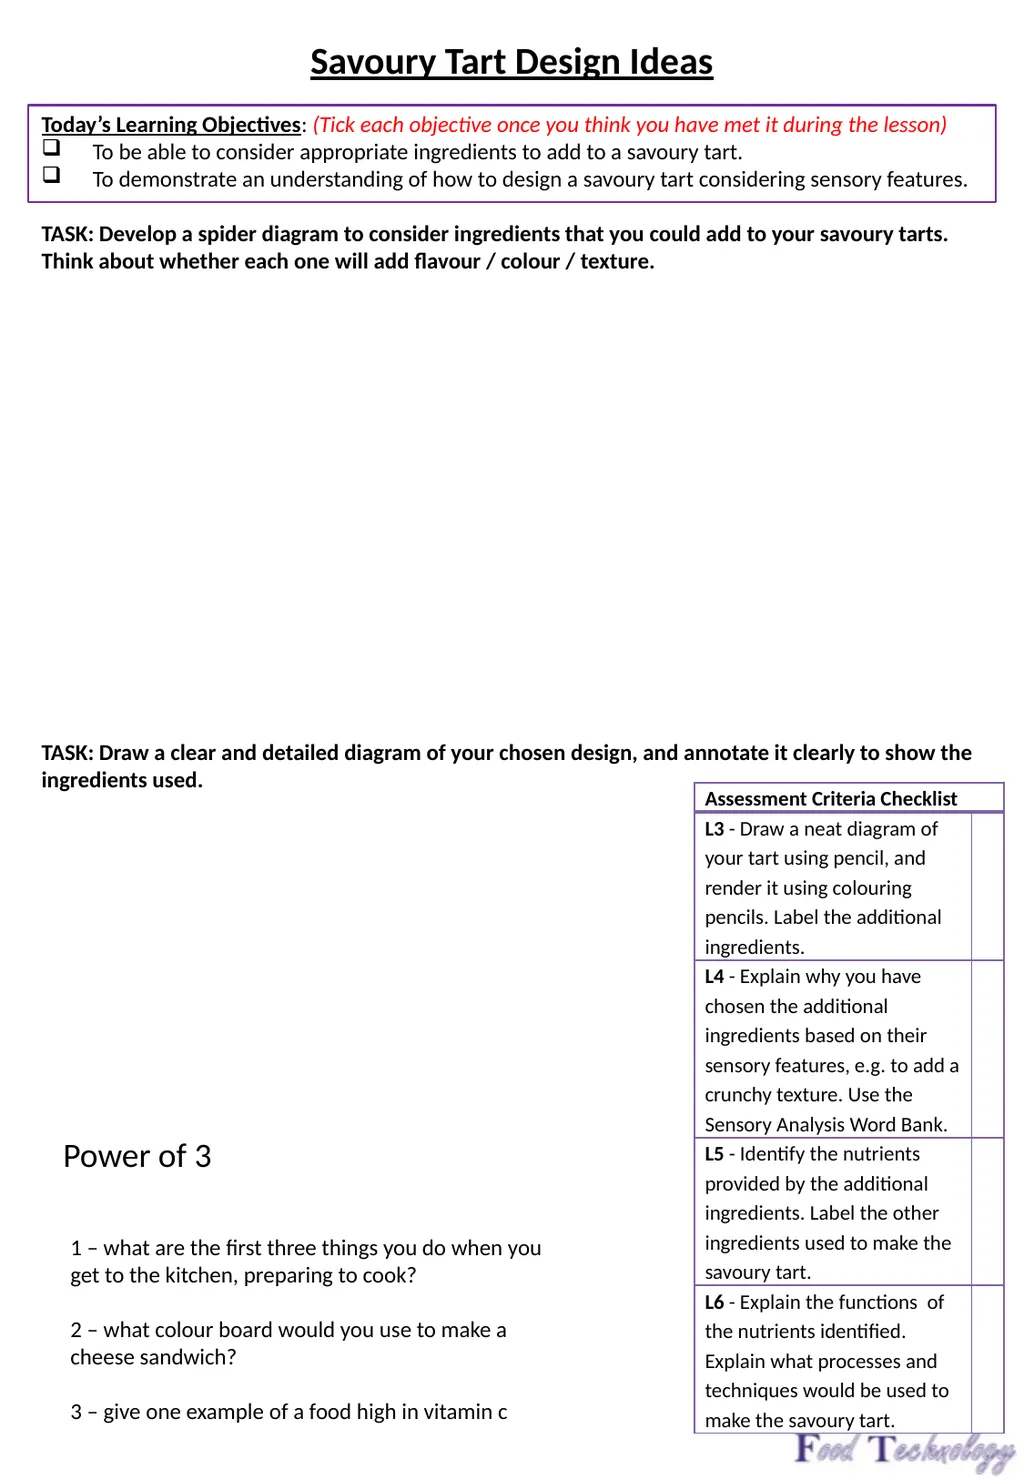
Savoury Tart Design Ideas
Today’s Learning Objectives: (Tick each objective once you think you have met it during the lesson)
To be able to consider appropriate ingredients to add to a savoury tart.
To demonstrate an understanding of how to design a savoury tart considering sensory features.
TASK: Develop a spider diagram to consider ingredients that you could add to your savoury tarts. Think about whether each one will add flavour / colour / texture.
TASK: Draw a clear and detailed diagram of your chosen design, and annotate it clearly to show the ingredients used. 1 – what are the first three things you do when you get to the kitchen, preparing to cook?
2 – what colour board would you use to make a cheese sandwich?
3 – give one example of a food high in vitamin c Power of 3<br>
Today’s Learning Objectives: (Tick each objective once you think you have met it during the lesson)
To be able to consider appropriate ingredients to add to a savoury tart.
To demonstrate an understanding of how to design a savoury tart considering sensory features.
TASK: Develop a spider diagram to consider ingredients that you could add to your savoury tarts. Think about whether each one will add flavour / colour / texture.
TASK: Draw a clear and detailed diagram of your chosen design, and annotate it clearly to show the ingredients used. 1 – what are the first three things you do when you get to the kitchen, preparing to cook?
2 – what colour board would you use to make a cheese sandwich?
3 – give one example of a food high in vitamin c Power of 3<br>
15
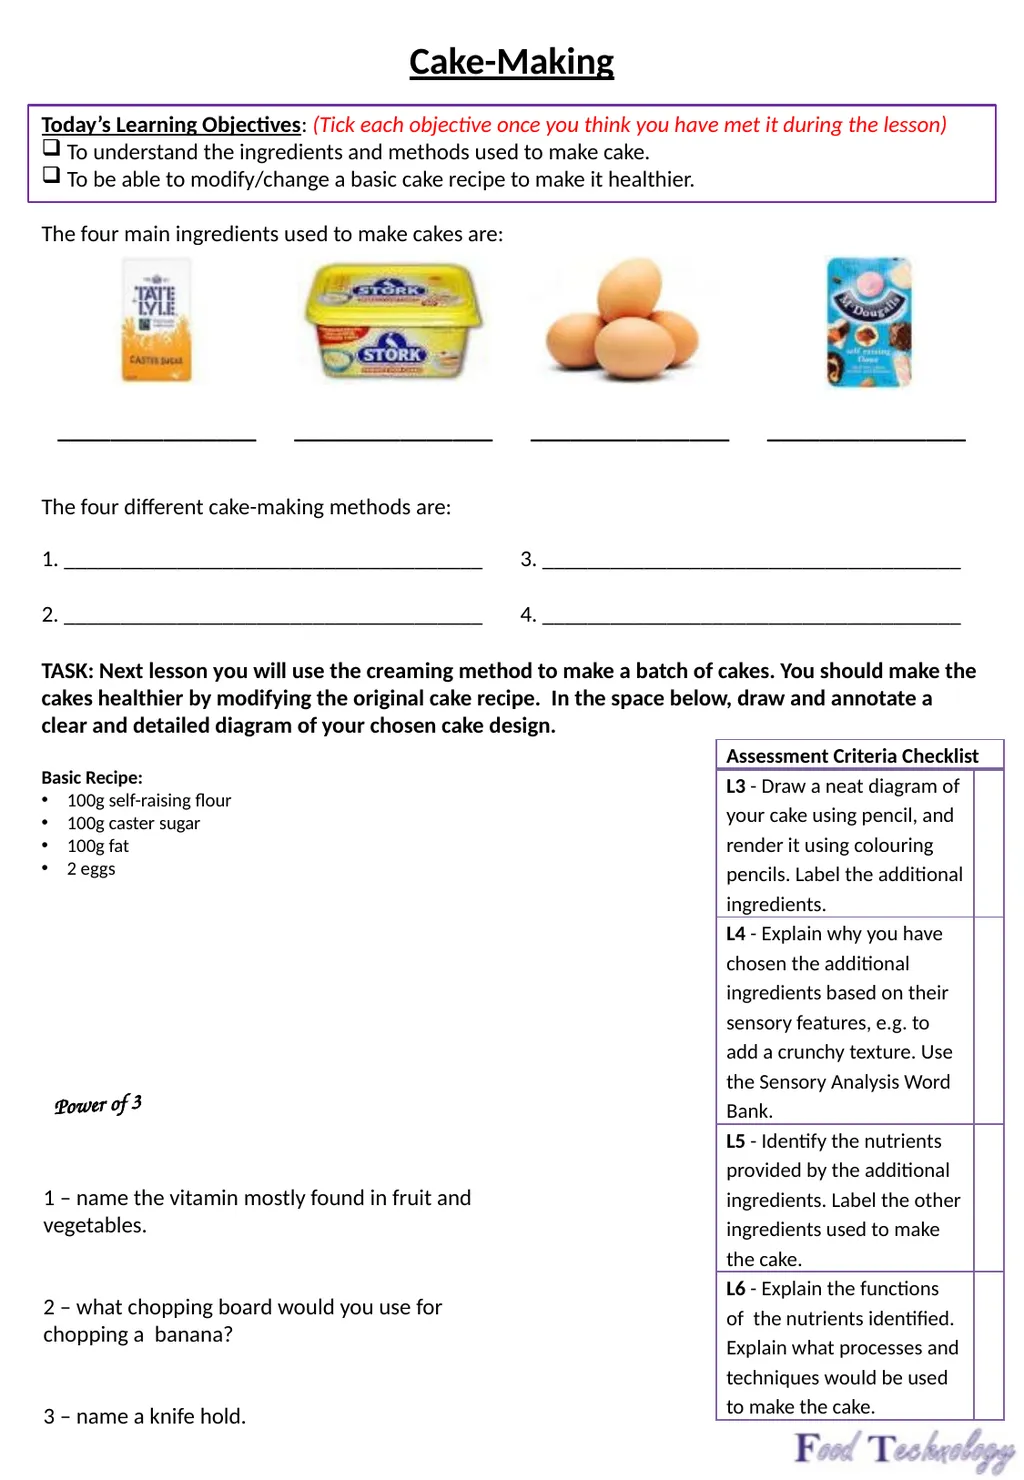
Cake-Making
Today’s Learning Objectives: (Tick each objective once you think you have met it during the lesson)
To understand the ingredients and methods used to make cake.
To be able to modify/change a basic cake recipe to make it healthier.
The four main ingredients used to make cakes are:
The four different cake-making methods are:
TASK: Next lesson you will use the creaming method to make a batch of cakes. You should make the cakes healthier by modifying the original cake recipe. In the space below, draw and annotate a clear and detailed diagram of your chosen cake design.
Basic Recipe:
100g self-raising flour
100g caster sugar
100g fat
2 eggs Power of 3 1 – name the vitamin mostly found in fruit and vegetables.
2 – what chopping board would you use for chopping a banana?
3 – name a knife hold.<br>
Today’s Learning Objectives: (Tick each objective once you think you have met it during the lesson)
To understand the ingredients and methods used to make cake.
To be able to modify/change a basic cake recipe to make it healthier.
The four main ingredients used to make cakes are:
The four different cake-making methods are:
TASK: Next lesson you will use the creaming method to make a batch of cakes. You should make the cakes healthier by modifying the original cake recipe. In the space below, draw and annotate a clear and detailed diagram of your chosen cake design.
Basic Recipe:
100g self-raising flour
100g caster sugar
100g fat
2 eggs Power of 3 1 – name the vitamin mostly found in fruit and vegetables.
2 – what chopping board would you use for chopping a banana?
3 – name a knife hold.<br>
16
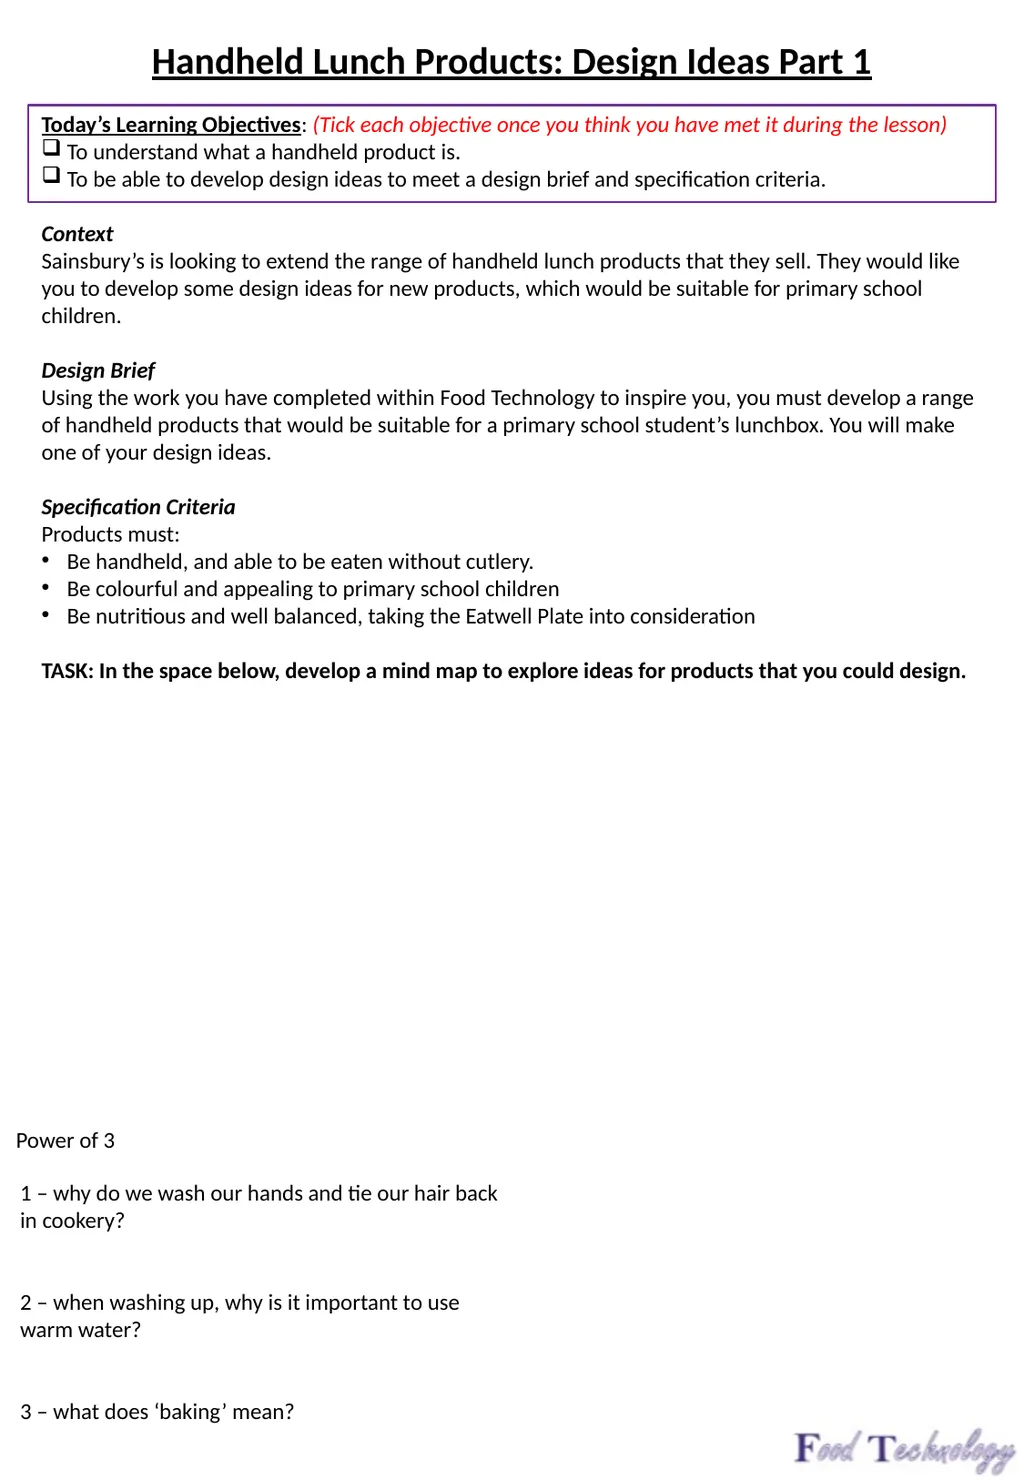
Handheld Lunch Products: Design Ideas Part 1
Today’s Learning Objectives: (Tick each objective once you think you have met it during the lesson)
To understand what a handheld product is.
To be able to develop design ideas to meet a design brief and specification criteria.
Context
Sainsbury’s is looking to extend the range of handheld lunch products that they sell. They would like you to develop some design ideas for new products, which would be suitable for primary school children.
Design Brief
Using the work you have completed within Food Technology to inspire you, you must develop a range of handheld products that would be suitable for a primary school student’s lunchbox. You will make one of your design ideas.
Specification Criteria
Products must:
Be handheld, and able to be eaten without cutlery.
Be colourful and appealing to primary school children
Be nutritious and well balanced, taking the Eatwell Plate into consideration
TASK: In the space below, develop a mind map to explore ideas for products that you could design. Power of 3 1 – why do we wash our hands and tie our hair back in cookery?
2 – when washing up, why is it important to use warm water?
3 – what does ‘baking’ mean?<br>
Today’s Learning Objectives: (Tick each objective once you think you have met it during the lesson)
To understand what a handheld product is.
To be able to develop design ideas to meet a design brief and specification criteria.
Context
Sainsbury’s is looking to extend the range of handheld lunch products that they sell. They would like you to develop some design ideas for new products, which would be suitable for primary school children.
Design Brief
Using the work you have completed within Food Technology to inspire you, you must develop a range of handheld products that would be suitable for a primary school student’s lunchbox. You will make one of your design ideas.
Specification Criteria
Products must:
Be handheld, and able to be eaten without cutlery.
Be colourful and appealing to primary school children
Be nutritious and well balanced, taking the Eatwell Plate into consideration
TASK: In the space below, develop a mind map to explore ideas for products that you could design. Power of 3 1 – why do we wash our hands and tie our hair back in cookery?
2 – when washing up, why is it important to use warm water?
3 – what does ‘baking’ mean?<br>
17
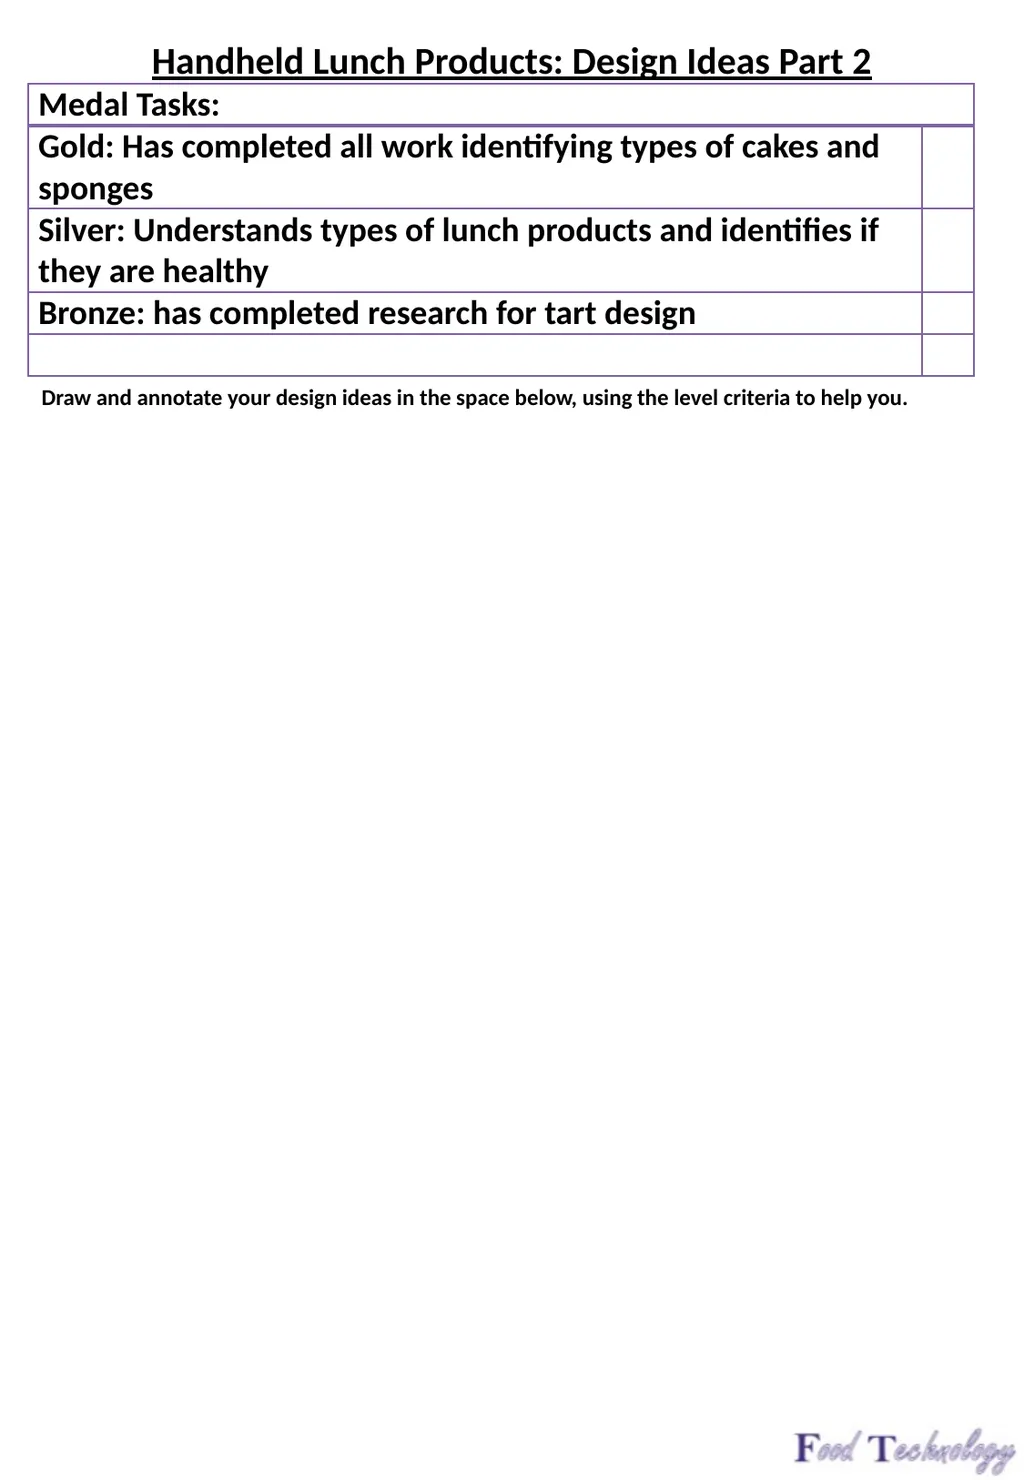
Handheld Lunch Products: Design Ideas Part 2
Draw and annotate your design ideas in the space below, using the level criteria to help you.<br>
Draw and annotate your design ideas in the space below, using the level criteria to help you.<br>
18
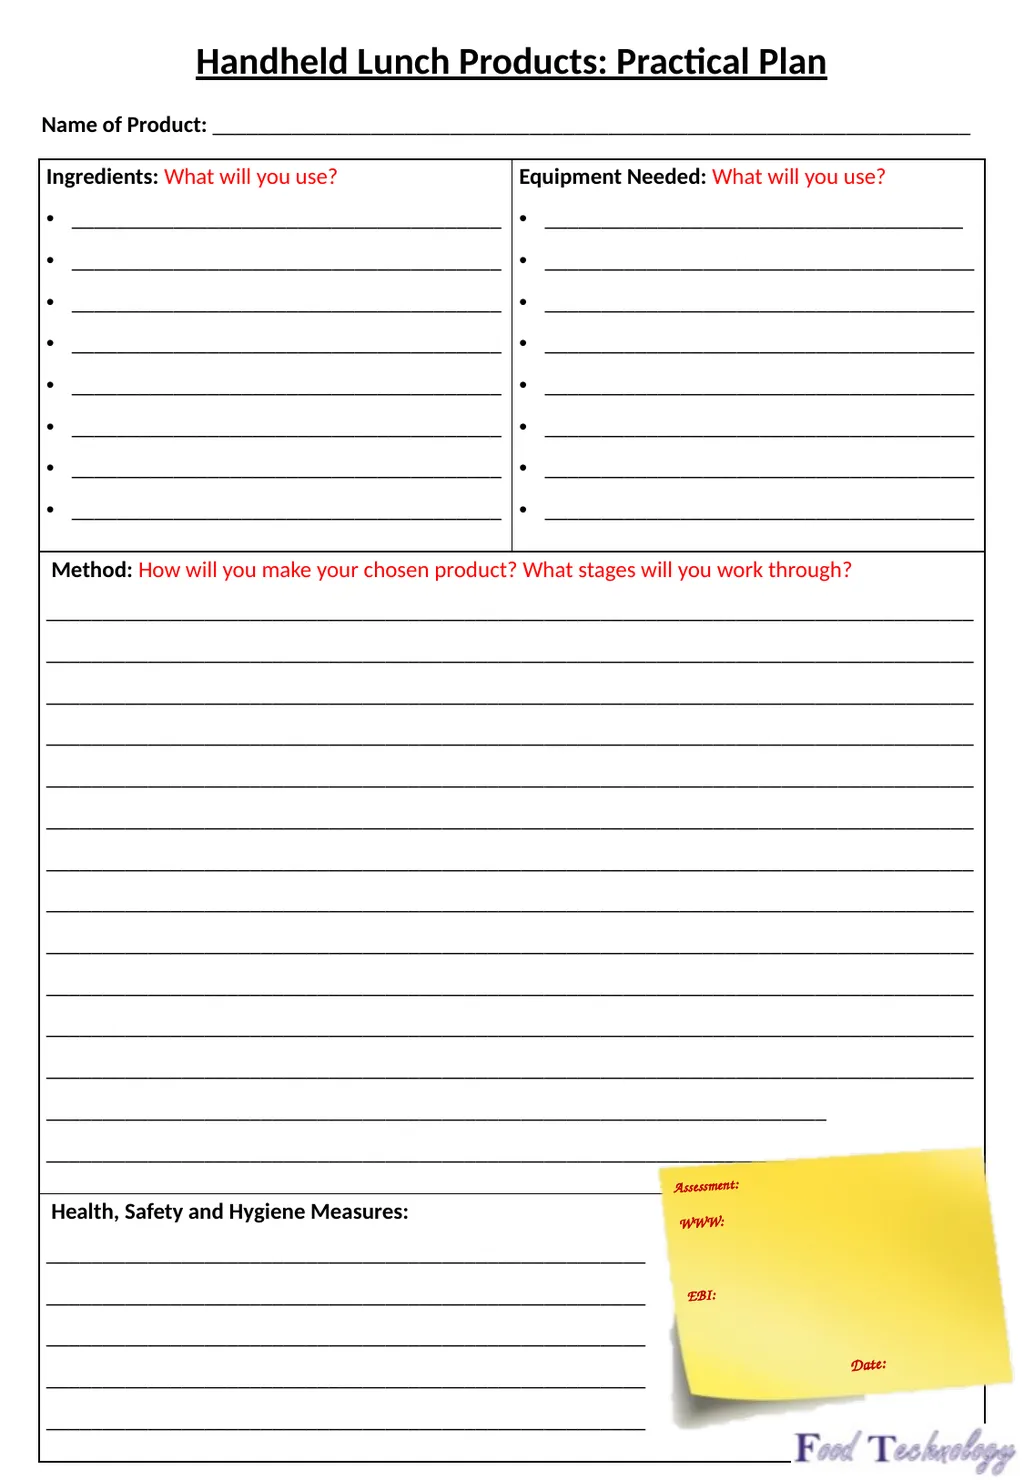
Handheld Lunch Products: Practical Plan
Name of Product: ___________________________________________________________________ Assessment:
WWW:
EBI: Date:<br>
Name of Product: ___________________________________________________________________ Assessment:
WWW:
EBI: Date:<br>
19
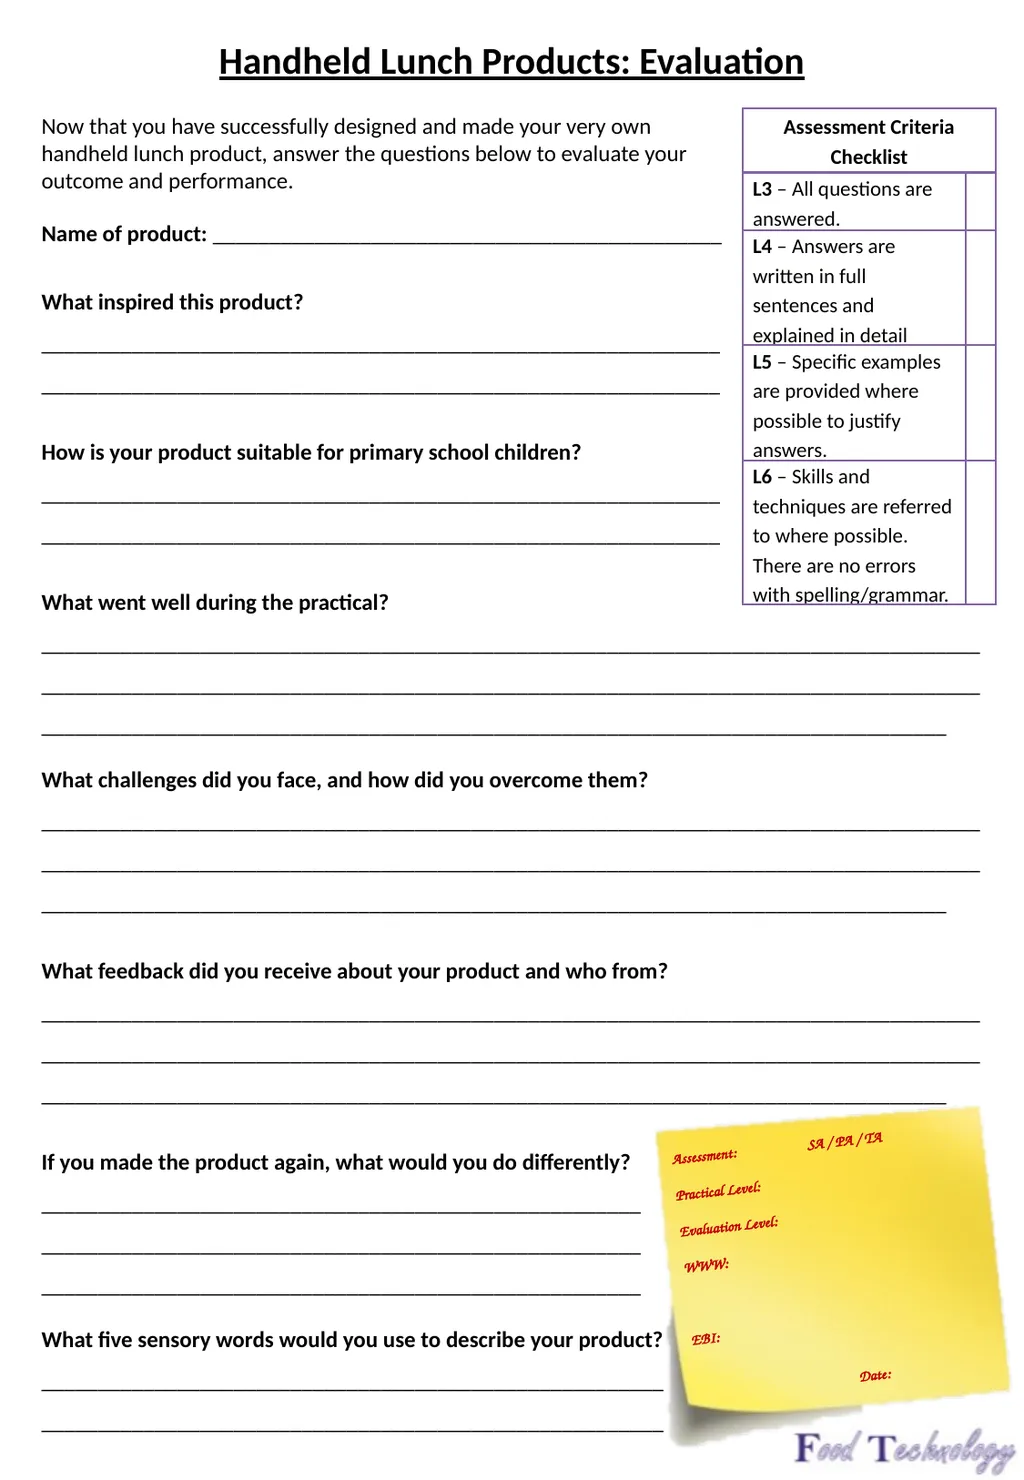
Handheld Lunch Products: Evaluation
Name of product: _____________________________________________
What inspired this product?
____________________________________________________________
____________________________________________________________
How is your product suitable for primary school children?
____________________________________________________________
____________________________________________________________
What went well during the practical? ______________________________________________________________________________________________________________________________________________________________________________________________________________________________________________________
What challenges did you face, and how did you overcome them?
______________________________________________________________________________________________________________________________________________________________________________________________________________________________________________________
What feedback did you receive about your product and who from?
______________________________________________________________________________________________________________________________________________________________________________________________________________________________________________________
If you made the product again, what would you do differently? _____________________________________________________
_____________________________________________________
_____________________________________________________
What five sensory words would you use to describe your product?
_______________________________________________________
_______________________________________________________ Now that you have successfully designed and made your very own
handheld lunch product, answer the questions below to evaluate your outcome and performance. Assessment: SA / PA / TA
Practical Level:
Evaluation Level:
WWW:
EBI:
Date:<br>
Name of product: _____________________________________________
What inspired this product?
____________________________________________________________
____________________________________________________________
How is your product suitable for primary school children?
____________________________________________________________
____________________________________________________________
What went well during the practical? ______________________________________________________________________________________________________________________________________________________________________________________________________________________________________________________
What challenges did you face, and how did you overcome them?
______________________________________________________________________________________________________________________________________________________________________________________________________________________________________________________
What feedback did you receive about your product and who from?
______________________________________________________________________________________________________________________________________________________________________________________________________________________________________________________
If you made the product again, what would you do differently? _____________________________________________________
_____________________________________________________
_____________________________________________________
What five sensory words would you use to describe your product?
_______________________________________________________
_______________________________________________________ Now that you have successfully designed and made your very own
handheld lunch product, answer the questions below to evaluate your outcome and performance. Assessment: SA / PA / TA
Practical Level:
Evaluation Level:
WWW:
EBI:
Date:<br>
20
Fruit and Vegetables
Can you name all of the different types of fruit and vegetables below?<br>
Can you name all of the different types of fruit and vegetables below?<br>
21
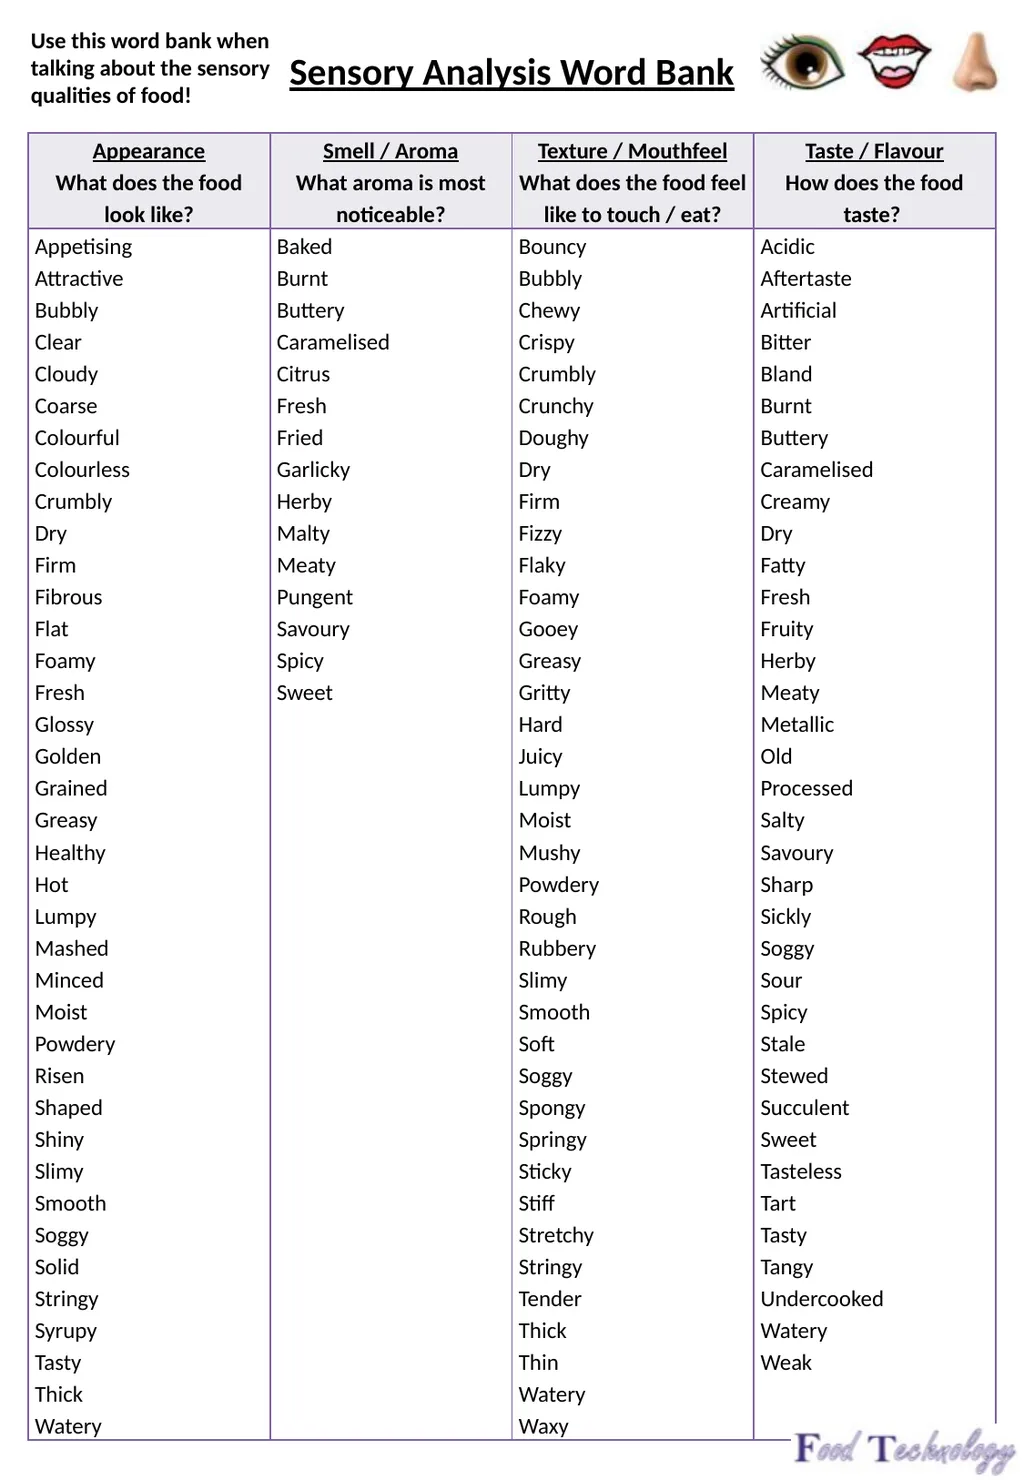
Use this word bank when talking about the sensory qualities of food! Sensory Analysis Word Bank<br>
22
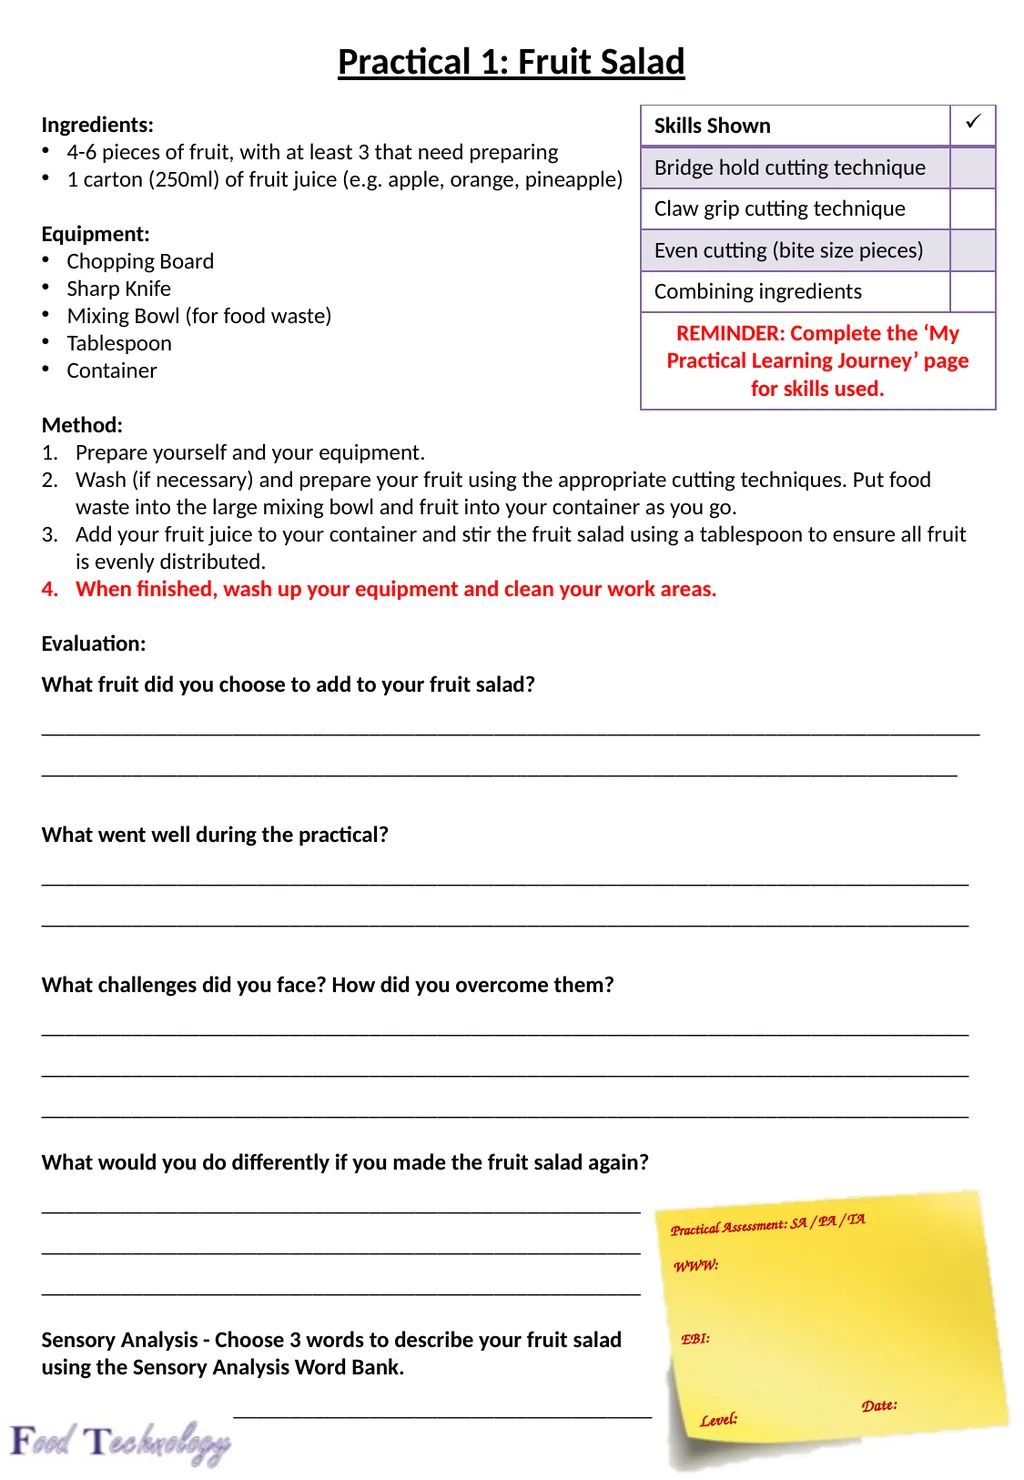
Practical 1: Fruit Salad
Ingredients:
4-6 pieces of fruit, with at least 3 that need preparing
1 carton (250ml) of fruit juice (e.g. apple, orange, pineapple)
Equipment:
Chopping Board
Sharp Knife
Mixing Bowl (for food waste)
Tablespoon
Container
Method:
Prepare yourself and your equipment.
Wash (if necessary) and prepare your fruit using the appropriate cutting techniques. Put food waste into the large mixing bowl and fruit into your container as you go.
Add your fruit juice to your container and stir the fruit salad using a tablespoon to ensure all fruit is evenly distributed.
When finished, wash up your equipment and clean your work areas.
Evaluation:
What fruit did you choose to add to your fruit salad? ____________________________________________________________________________________________________________________________________________________________________
What went well during the practical? __________________________________________________________________________________
__________________________________________________________________________________
What challenges did you face? How did you overcome them? __________________________________________________________________________________ __________________________________________________________________________________
__________________________________________________________________________________
What would you do differently if you made the fruit salad again?
_____________________________________________________
_____________________________________________________
_____________________________________________________
Sensory Analysis - Choose 3 words to describe your fruit salad
using the Sensory Analysis Word Bank.
______________________________________________________ Level: Date: Practical Assessment: SA / PA / TA
WWW:
EBI:<br>
Ingredients:
4-6 pieces of fruit, with at least 3 that need preparing
1 carton (250ml) of fruit juice (e.g. apple, orange, pineapple)
Equipment:
Chopping Board
Sharp Knife
Mixing Bowl (for food waste)
Tablespoon
Container
Method:
Prepare yourself and your equipment.
Wash (if necessary) and prepare your fruit using the appropriate cutting techniques. Put food waste into the large mixing bowl and fruit into your container as you go.
Add your fruit juice to your container and stir the fruit salad using a tablespoon to ensure all fruit is evenly distributed.
When finished, wash up your equipment and clean your work areas.
Evaluation:
What fruit did you choose to add to your fruit salad? ____________________________________________________________________________________________________________________________________________________________________
What went well during the practical? __________________________________________________________________________________
__________________________________________________________________________________
What challenges did you face? How did you overcome them? __________________________________________________________________________________ __________________________________________________________________________________
__________________________________________________________________________________
What would you do differently if you made the fruit salad again?
_____________________________________________________
_____________________________________________________
_____________________________________________________
Sensory Analysis - Choose 3 words to describe your fruit salad
using the Sensory Analysis Word Bank.
______________________________________________________ Level: Date: Practical Assessment: SA / PA / TA
WWW:
EBI:<br>
23
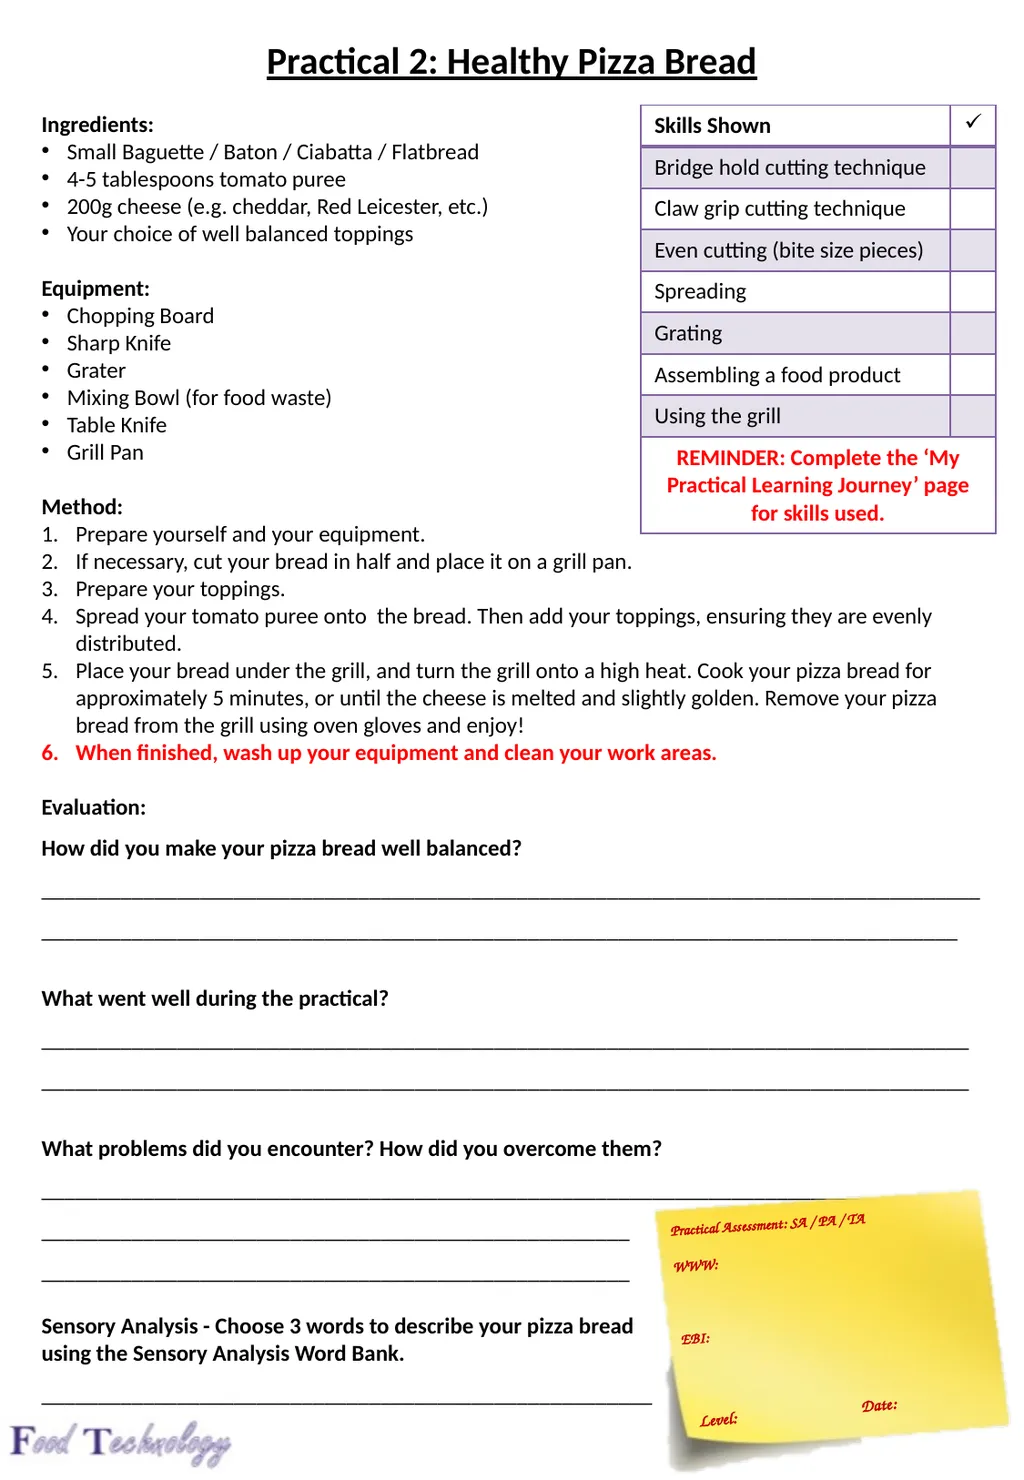
Practical 2: Healthy Pizza Bread
Ingredients:
Small Baguette / Baton / Ciabatta / Flatbread
4-5 tablespoons tomato puree
200g cheese (e.g. cheddar, Red Leicester, etc.)
Your choice of well balanced toppings
Equipment:
Chopping Board
Sharp Knife
Grater
Mixing Bowl (for food waste)
Table Knife
Grill Pan
Method:
Prepare yourself and your equipment.
If necessary, cut your bread in half and place it on a grill pan.
Prepare your toppings.
Spread your tomato puree onto the bread. Then add your toppings, ensuring they are evenly distributed.
Place your bread under the grill, and turn the grill onto a high heat. Cook your pizza bread for approximately 5 minutes, or until the cheese is melted and slightly golden. Remove your pizza bread from the grill using oven gloves and enjoy!
When finished, wash up your equipment and clean your work areas.
Evaluation:
How did you make your pizza bread well balanced? ____________________________________________________________________________________________________________________________________________________________________
What went well during the practical? __________________________________________________________________________________
__________________________________________________________________________________
What problems did you encounter? How did you overcome them? __________________________________________________________________________________ ____________________________________________________
____________________________________________________
Sensory Analysis - Choose 3 words to describe your pizza bread
using the Sensory Analysis Word Bank.
______________________________________________________ Practical Assessment: SA / PA / TA
WWW:
EBI: Level: Date:<br>
Ingredients:
Small Baguette / Baton / Ciabatta / Flatbread
4-5 tablespoons tomato puree
200g cheese (e.g. cheddar, Red Leicester, etc.)
Your choice of well balanced toppings
Equipment:
Chopping Board
Sharp Knife
Grater
Mixing Bowl (for food waste)
Table Knife
Grill Pan
Method:
Prepare yourself and your equipment.
If necessary, cut your bread in half and place it on a grill pan.
Prepare your toppings.
Spread your tomato puree onto the bread. Then add your toppings, ensuring they are evenly distributed.
Place your bread under the grill, and turn the grill onto a high heat. Cook your pizza bread for approximately 5 minutes, or until the cheese is melted and slightly golden. Remove your pizza bread from the grill using oven gloves and enjoy!
When finished, wash up your equipment and clean your work areas.
Evaluation:
How did you make your pizza bread well balanced? ____________________________________________________________________________________________________________________________________________________________________
What went well during the practical? __________________________________________________________________________________
__________________________________________________________________________________
What problems did you encounter? How did you overcome them? __________________________________________________________________________________ ____________________________________________________
____________________________________________________
Sensory Analysis - Choose 3 words to describe your pizza bread
using the Sensory Analysis Word Bank.
______________________________________________________ Practical Assessment: SA / PA / TA
WWW:
EBI: Level: Date:<br>
24
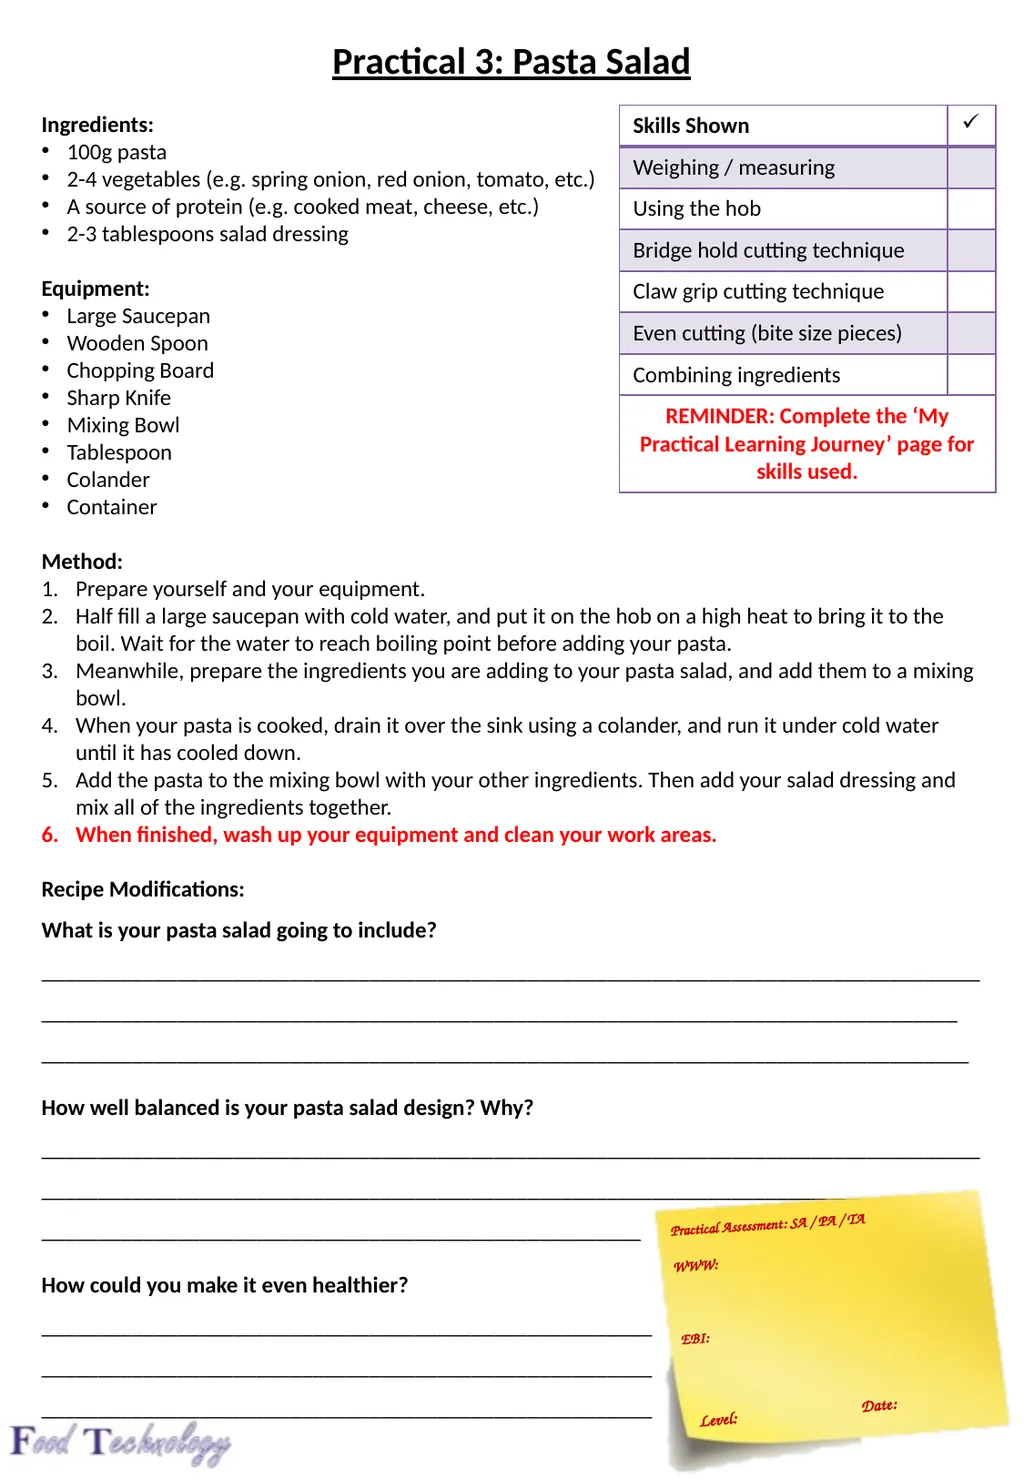
Practical 3: Pasta Salad
Ingredients:
100g pasta
2-4 vegetables (e.g. spring onion, red onion, tomato, etc.)
A source of protein (e.g. cooked meat, cheese, etc.)
2-3 tablespoons salad dressing
Equipment:
Large Saucepan
Wooden Spoon
Chopping Board
Sharp Knife
Mixing Bowl
Tablespoon
Colander
Container
Method:
Prepare yourself and your equipment.
Half fill a large saucepan with cold water, and put it on the hob on a high heat to bring it to the boil. Wait for the water to reach boiling point before adding your pasta.
Meanwhile, prepare the ingredients you are adding to your pasta salad, and add them to a mixing bowl.
When your pasta is cooked, drain it over the sink using a colander, and run it under cold water until it has cooled down.
Add the pasta to the mixing bowl with your other ingredients. Then add your salad dressing and mix all of the ingredients together.
When finished, wash up your equipment and clean your work areas.
Recipe Modifications:
What is your pasta salad going to include? ____________________________________________________________________________________________________________________________________________________________________
__________________________________________________________________________________
How well balanced is your pasta salad design? Why?
____________________________________________________________________________________________________________________________________________________________________
_____________________________________________________
How could you make it even healthier?
______________________________________________________
______________________________________________________
______________________________________________________ Level: Date: Practical Assessment: SA / PA / TA
WWW:
EBI:<br>
Ingredients:
100g pasta
2-4 vegetables (e.g. spring onion, red onion, tomato, etc.)
A source of protein (e.g. cooked meat, cheese, etc.)
2-3 tablespoons salad dressing
Equipment:
Large Saucepan
Wooden Spoon
Chopping Board
Sharp Knife
Mixing Bowl
Tablespoon
Colander
Container
Method:
Prepare yourself and your equipment.
Half fill a large saucepan with cold water, and put it on the hob on a high heat to bring it to the boil. Wait for the water to reach boiling point before adding your pasta.
Meanwhile, prepare the ingredients you are adding to your pasta salad, and add them to a mixing bowl.
When your pasta is cooked, drain it over the sink using a colander, and run it under cold water until it has cooled down.
Add the pasta to the mixing bowl with your other ingredients. Then add your salad dressing and mix all of the ingredients together.
When finished, wash up your equipment and clean your work areas.
Recipe Modifications:
What is your pasta salad going to include? ____________________________________________________________________________________________________________________________________________________________________
__________________________________________________________________________________
How well balanced is your pasta salad design? Why?
____________________________________________________________________________________________________________________________________________________________________
_____________________________________________________
How could you make it even healthier?
______________________________________________________
______________________________________________________
______________________________________________________ Level: Date: Practical Assessment: SA / PA / TA
WWW:
EBI:<br>
25
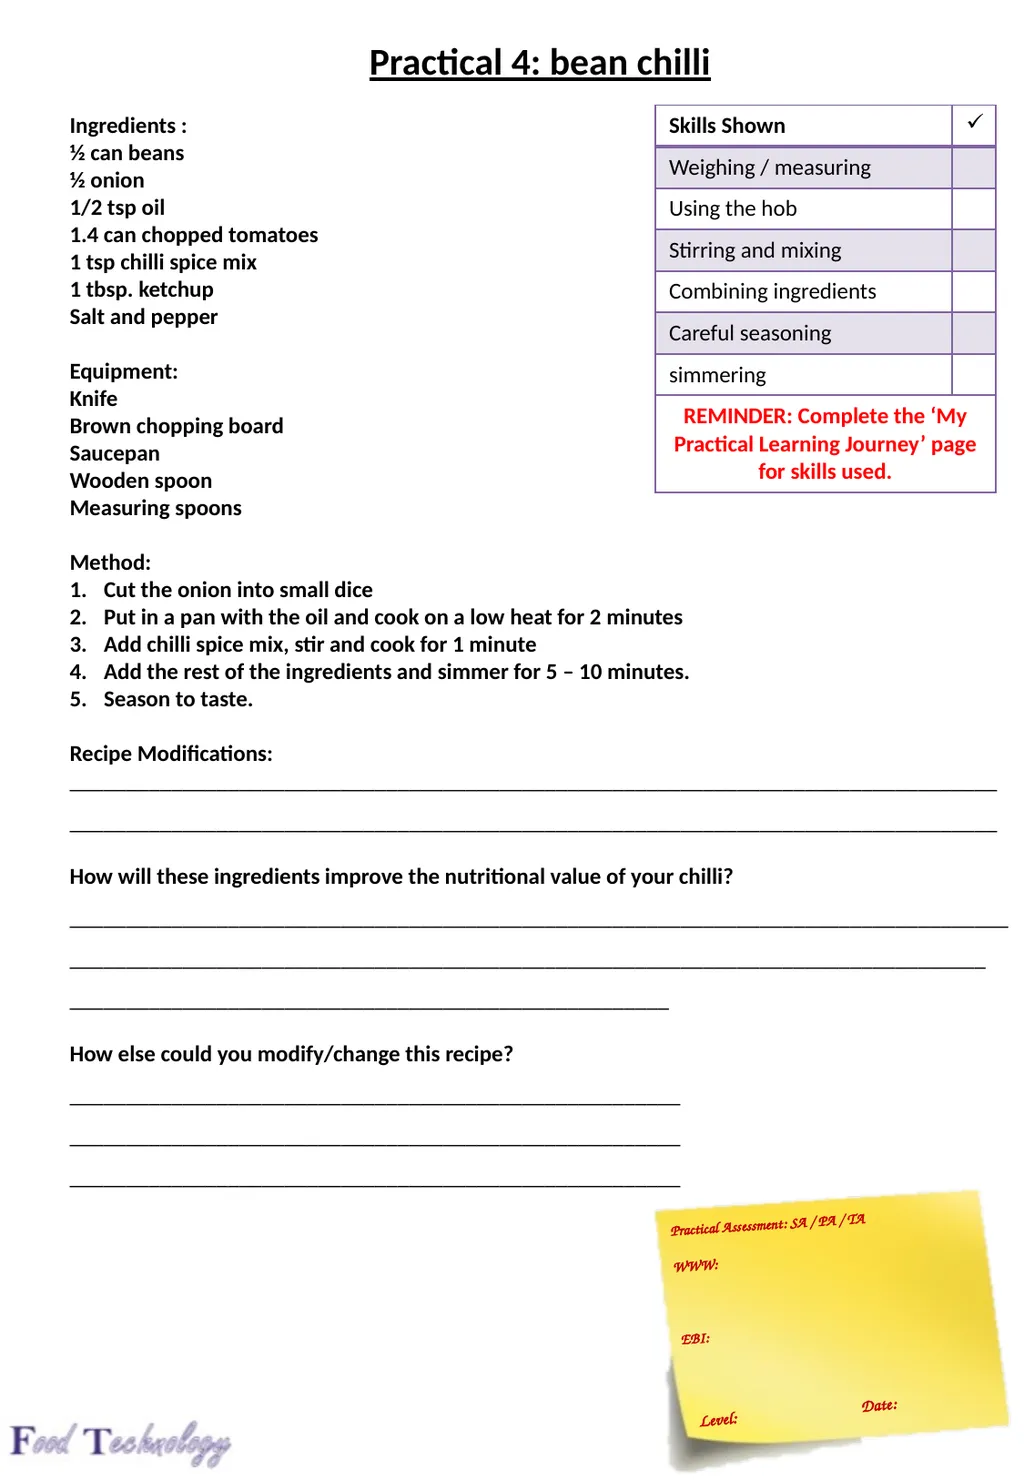
Practical 4: bean chilli
Ingredients :
½ can beans
½ onion
1/2 tsp oil
1.4 can chopped tomatoes
1 tsp chilli spice mix
1 tbsp. ketchup
Salt and pepper
Equipment:
Knife
Brown chopping board
Saucepan
Wooden spoon
Measuring spoons
Method:
Cut the onion into small dice
Put in a pan with the oil and cook on a low heat for 2 minutes
Add chilli spice mix, stir and cook for 1 minute
Add the rest of the ingredients and simmer for 5 – 10 minutes.
Season to taste.
Recipe Modifications:
__________________________________________________________________________________
__________________________________________________________________________________
How will these ingredients improve the nutritional value of your chilli?
____________________________________________________________________________________________________________________________________________________________________
_____________________________________________________
How else could you modify/change this recipe?
______________________________________________________
______________________________________________________
______________________________________________________ Level: Date: Practical Assessment: SA / PA / TA
WWW:
EBI:<br>
Ingredients :
½ can beans
½ onion
1/2 tsp oil
1.4 can chopped tomatoes
1 tsp chilli spice mix
1 tbsp. ketchup
Salt and pepper
Equipment:
Knife
Brown chopping board
Saucepan
Wooden spoon
Measuring spoons
Method:
Cut the onion into small dice
Put in a pan with the oil and cook on a low heat for 2 minutes
Add chilli spice mix, stir and cook for 1 minute
Add the rest of the ingredients and simmer for 5 – 10 minutes.
Season to taste.
Recipe Modifications:
__________________________________________________________________________________
__________________________________________________________________________________
How will these ingredients improve the nutritional value of your chilli?
____________________________________________________________________________________________________________________________________________________________________
_____________________________________________________
How else could you modify/change this recipe?
______________________________________________________
______________________________________________________
______________________________________________________ Level: Date: Practical Assessment: SA / PA / TA
WWW:
EBI:<br>
26
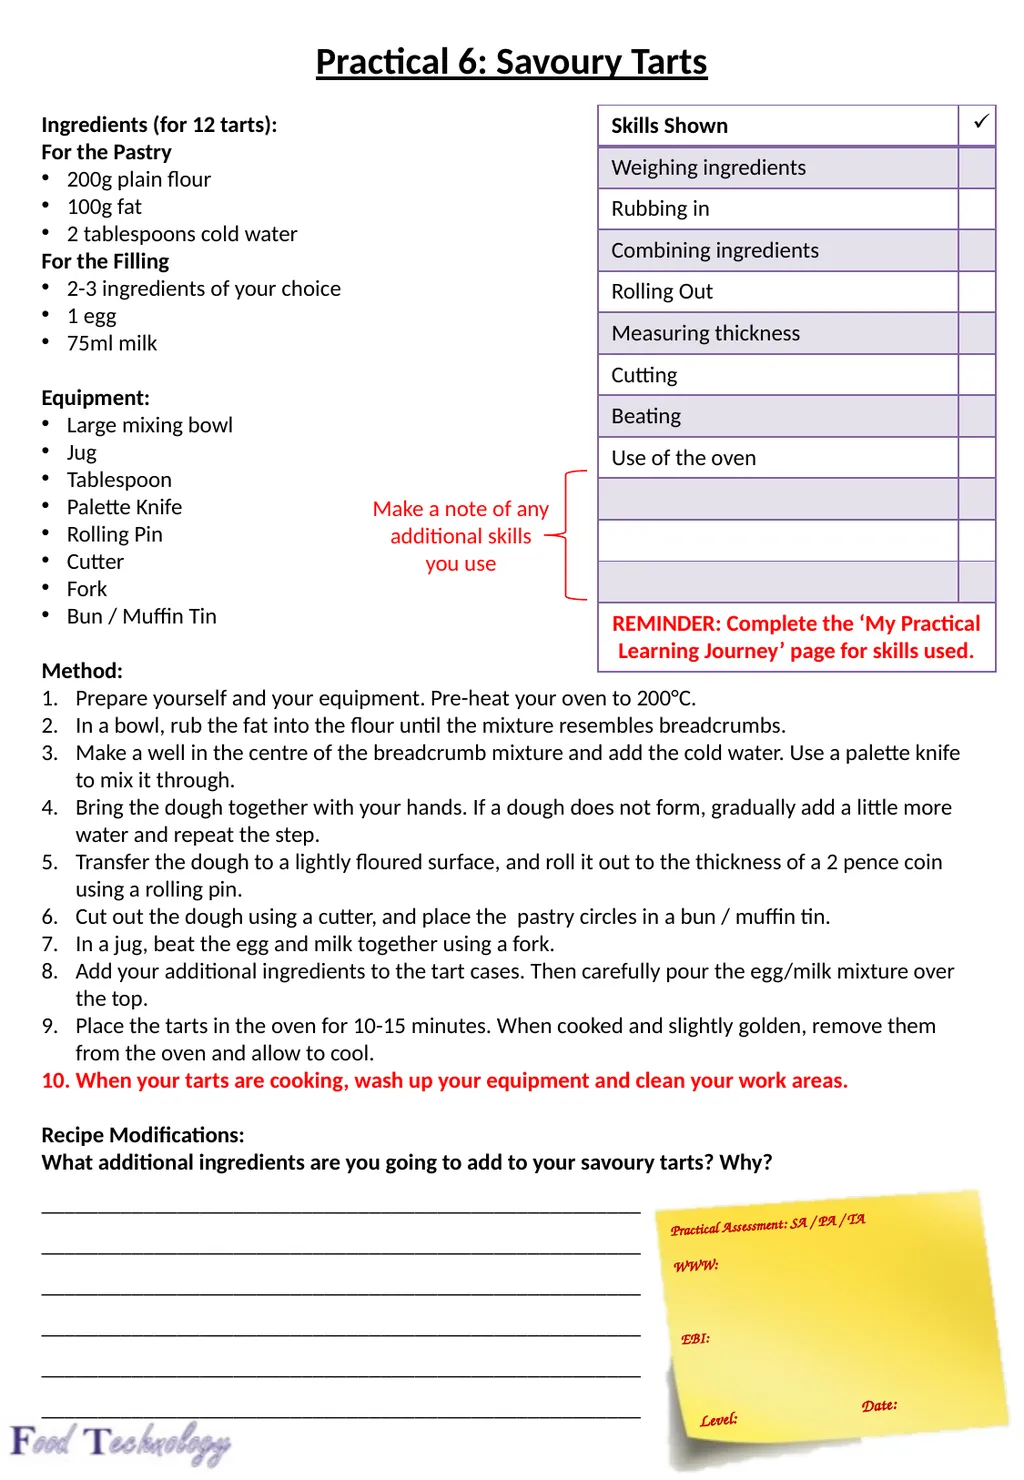
Practical 6: Savoury Tarts
Ingredients (for 12 tarts):
For the Pastry
200g plain flour
100g fat
2 tablespoons cold water
For the Filling
2-3 ingredients of your choice
1 egg
75ml milk
Equipment:
Large mixing bowl
Jug
Tablespoon
Palette Knife
Rolling Pin
Cutter
Fork
Bun / Muffin Tin
Method:
Prepare yourself and your equipment. Pre-heat your oven to 200°C.
In a bowl, rub the fat into the flour until the mixture resembles breadcrumbs.
Make a well in the centre of the breadcrumb mixture and add the cold water. Use a palette knife to mix it through.
Bring the dough together with your hands. If a dough does not form, gradually add a little more water and repeat the step.
Transfer the dough to a lightly floured surface, and roll it out to the thickness of a 2 pence coin using a rolling pin.
Cut out the dough using a cutter, and place the pastry circles in a bun / muffin tin.
In a jug, beat the egg and milk together using a fork.
Add your additional ingredients to the tart cases. Then carefully pour the egg/milk mixture over the top.
Place the tarts in the oven for 10-15 minutes. When cooked and slightly golden, remove them from the oven and allow to cool.
When your tarts are cooking, wash up your equipment and clean your work areas.
Recipe Modifications:
What additional ingredients are you going to add to your savoury tarts? Why?
_____________________________________________________
_____________________________________________________
_____________________________________________________
_____________________________________________________
_____________________________________________________
_____________________________________________________ Make a note of any additional skills you use Level: Date: Practical Assessment: SA / PA / TA
WWW:
EBI:<br>
Ingredients (for 12 tarts):
For the Pastry
200g plain flour
100g fat
2 tablespoons cold water
For the Filling
2-3 ingredients of your choice
1 egg
75ml milk
Equipment:
Large mixing bowl
Jug
Tablespoon
Palette Knife
Rolling Pin
Cutter
Fork
Bun / Muffin Tin
Method:
Prepare yourself and your equipment. Pre-heat your oven to 200°C.
In a bowl, rub the fat into the flour until the mixture resembles breadcrumbs.
Make a well in the centre of the breadcrumb mixture and add the cold water. Use a palette knife to mix it through.
Bring the dough together with your hands. If a dough does not form, gradually add a little more water and repeat the step.
Transfer the dough to a lightly floured surface, and roll it out to the thickness of a 2 pence coin using a rolling pin.
Cut out the dough using a cutter, and place the pastry circles in a bun / muffin tin.
In a jug, beat the egg and milk together using a fork.
Add your additional ingredients to the tart cases. Then carefully pour the egg/milk mixture over the top.
Place the tarts in the oven for 10-15 minutes. When cooked and slightly golden, remove them from the oven and allow to cool.
When your tarts are cooking, wash up your equipment and clean your work areas.
Recipe Modifications:
What additional ingredients are you going to add to your savoury tarts? Why?
_____________________________________________________
_____________________________________________________
_____________________________________________________
_____________________________________________________
_____________________________________________________
_____________________________________________________ Make a note of any additional skills you use Level: Date: Practical Assessment: SA / PA / TA
WWW:
EBI:<br>
27
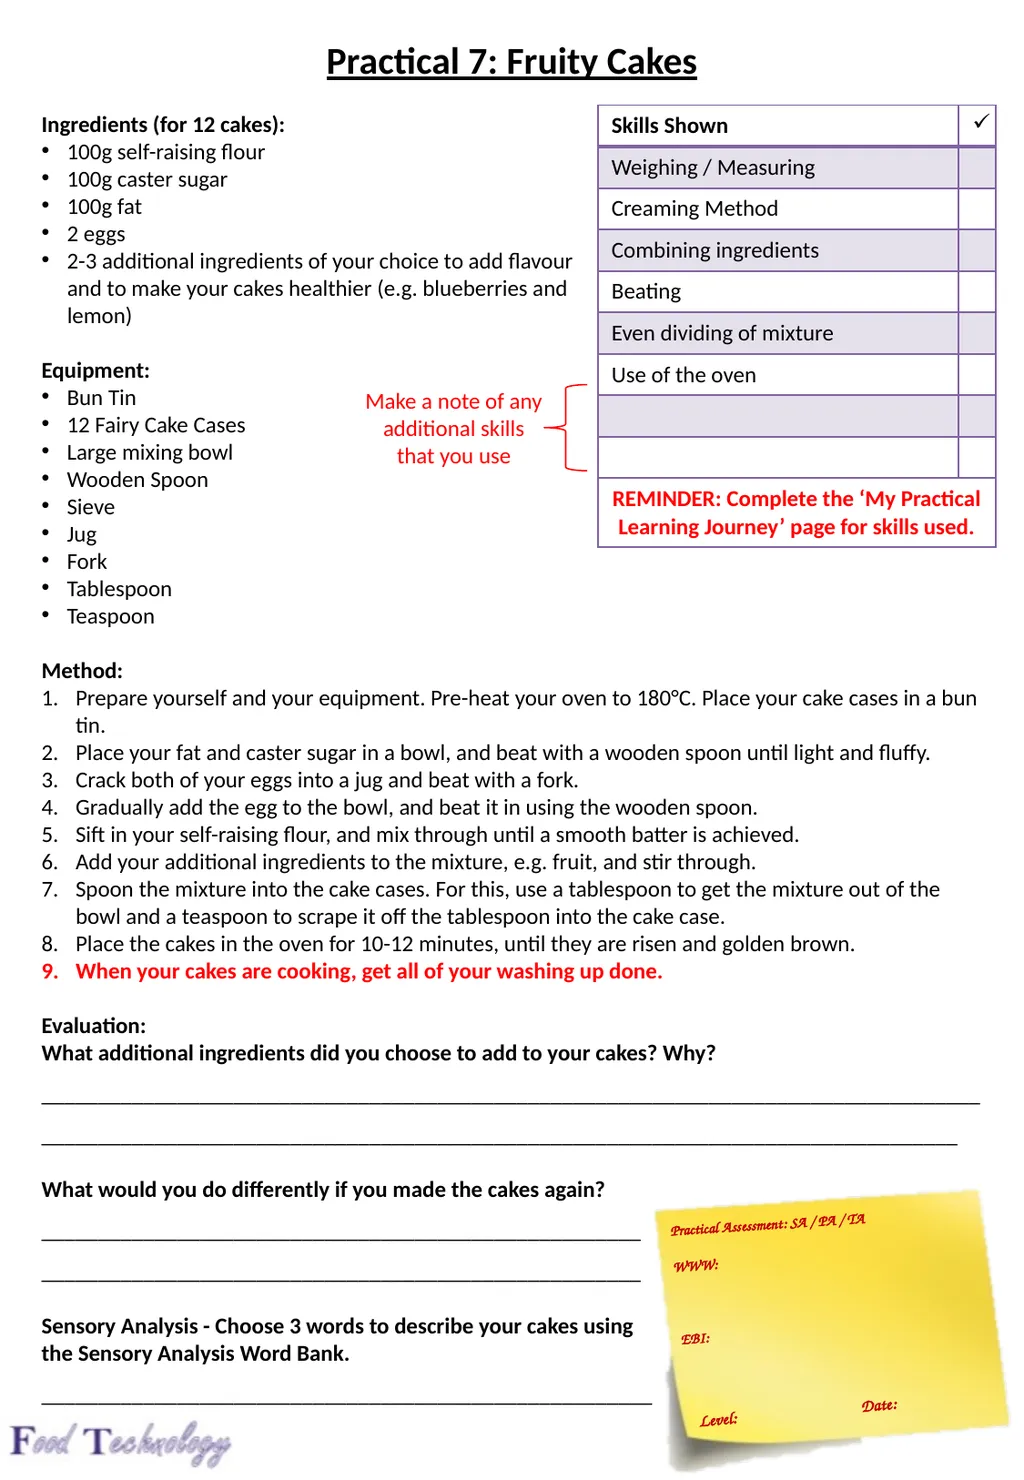
Practical 7: Fruity Cakes
Ingredients (for 12 cakes):
100g self-raising flour
100g caster sugar
100g fat
2 eggs
2-3 additional ingredients of your choice to add flavour
and to make your cakes healthier (e.g. blueberries and
lemon)
Equipment:
Bun Tin
12 Fairy Cake Cases
Large mixing bowl
Wooden Spoon
Sieve
Jug
Fork
Tablespoon
Teaspoon
Method:
Prepare yourself and your equipment. Pre-heat your oven to 180°C. Place your cake cases in a bun tin.
Place your fat and caster sugar in a bowl, and beat with a wooden spoon until light and fluffy.
Crack both of your eggs into a jug and beat with a fork.
Gradually add the egg to the bowl, and beat it in using the wooden spoon.
Sift in your self-raising flour, and mix through until a smooth batter is achieved.
Add your additional ingredients to the mixture, e.g. fruit, and stir through.
Spoon the mixture into the cake cases. For this, use a tablespoon to get the mixture out of the bowl and a teaspoon to scrape it off the tablespoon into the cake case.
Place the cakes in the oven for 10-12 minutes, until they are risen and golden brown.
When your cakes are cooking, get all of your washing up done.
Evaluation:
What additional ingredients did you choose to add to your cakes? Why?
____________________________________________________________________________________________________________________________________________________________________
What would you do differently if you made the cakes again?
_____________________________________________________
_____________________________________________________
Sensory Analysis - Choose 3 words to describe your cakes using
the Sensory Analysis Word Bank.
______________________________________________________ Make a note of any additional skills that you use Level: Date: Practical Assessment: SA / PA / TA
WWW:
EBI:<br>
Ingredients (for 12 cakes):
100g self-raising flour
100g caster sugar
100g fat
2 eggs
2-3 additional ingredients of your choice to add flavour
and to make your cakes healthier (e.g. blueberries and
lemon)
Equipment:
Bun Tin
12 Fairy Cake Cases
Large mixing bowl
Wooden Spoon
Sieve
Jug
Fork
Tablespoon
Teaspoon
Method:
Prepare yourself and your equipment. Pre-heat your oven to 180°C. Place your cake cases in a bun tin.
Place your fat and caster sugar in a bowl, and beat with a wooden spoon until light and fluffy.
Crack both of your eggs into a jug and beat with a fork.
Gradually add the egg to the bowl, and beat it in using the wooden spoon.
Sift in your self-raising flour, and mix through until a smooth batter is achieved.
Add your additional ingredients to the mixture, e.g. fruit, and stir through.
Spoon the mixture into the cake cases. For this, use a tablespoon to get the mixture out of the bowl and a teaspoon to scrape it off the tablespoon into the cake case.
Place the cakes in the oven for 10-12 minutes, until they are risen and golden brown.
When your cakes are cooking, get all of your washing up done.
Evaluation:
What additional ingredients did you choose to add to your cakes? Why?
____________________________________________________________________________________________________________________________________________________________________
What would you do differently if you made the cakes again?
_____________________________________________________
_____________________________________________________
Sensory Analysis - Choose 3 words to describe your cakes using
the Sensory Analysis Word Bank.
______________________________________________________ Make a note of any additional skills that you use Level: Date: Practical Assessment: SA / PA / TA
WWW:
EBI:<br>
28
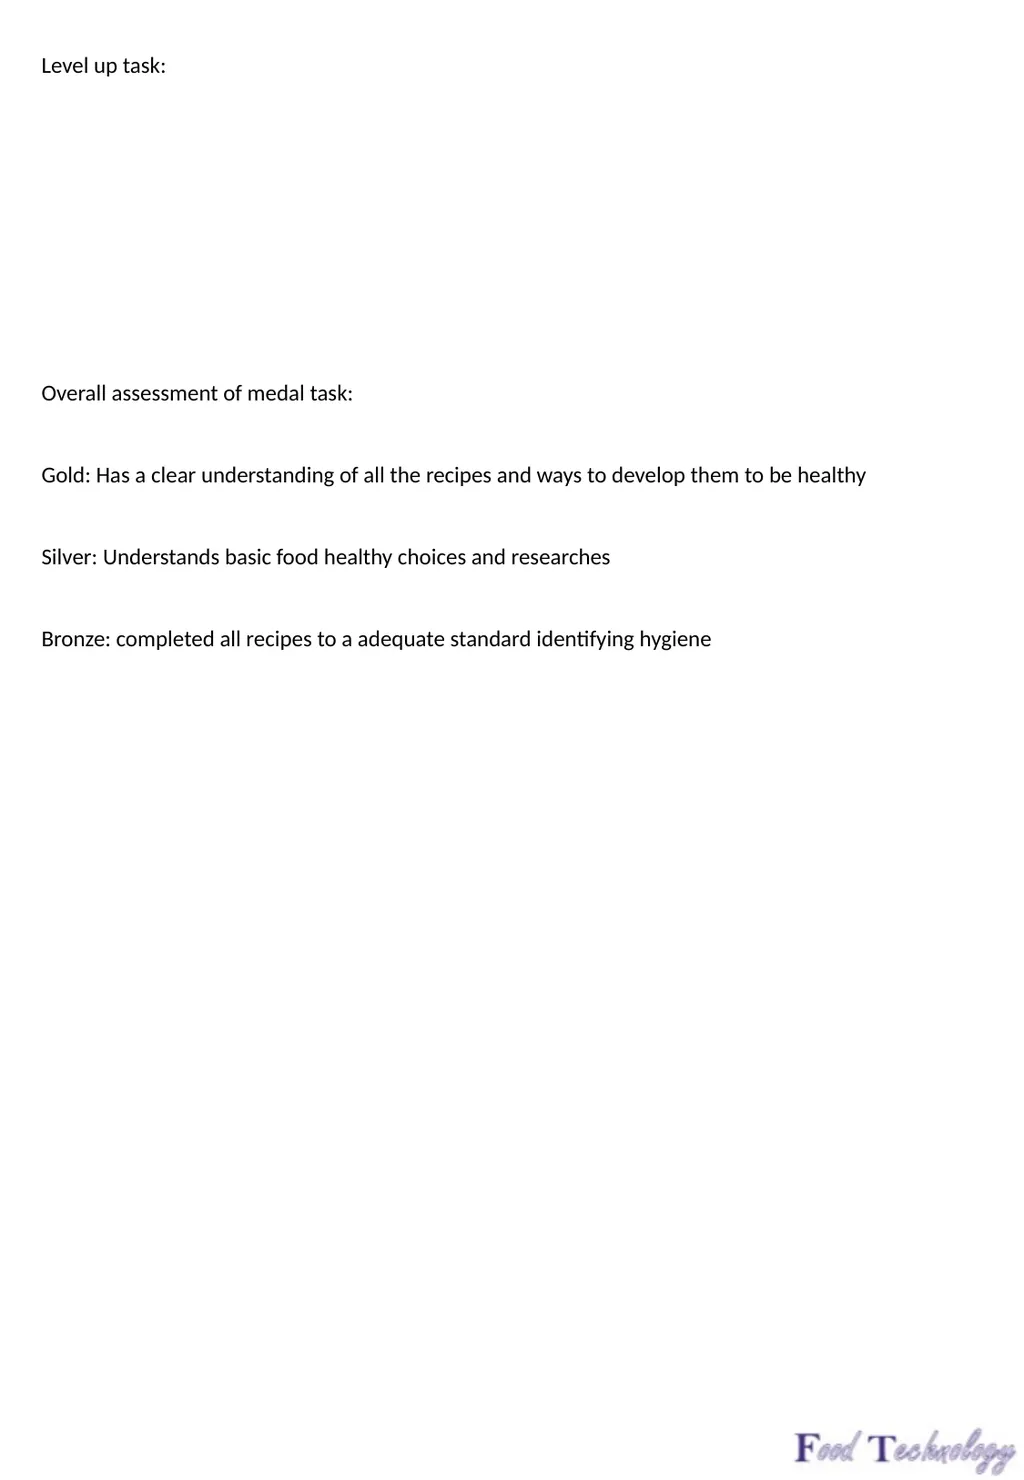
Level up task:
Overall assessment of medal task:
Gold: Has a clear understanding of all the recipes and ways to develop them to be healthy
Silver: Understands basic food healthy choices and researches
Bronze: completed all recipes to a adequate standard identifying hygiene<br>
Overall assessment of medal task:
Gold: Has a clear understanding of all the recipes and ways to develop them to be healthy
Silver: Understands basic food healthy choices and researches
Bronze: completed all recipes to a adequate standard identifying hygiene<br>
29
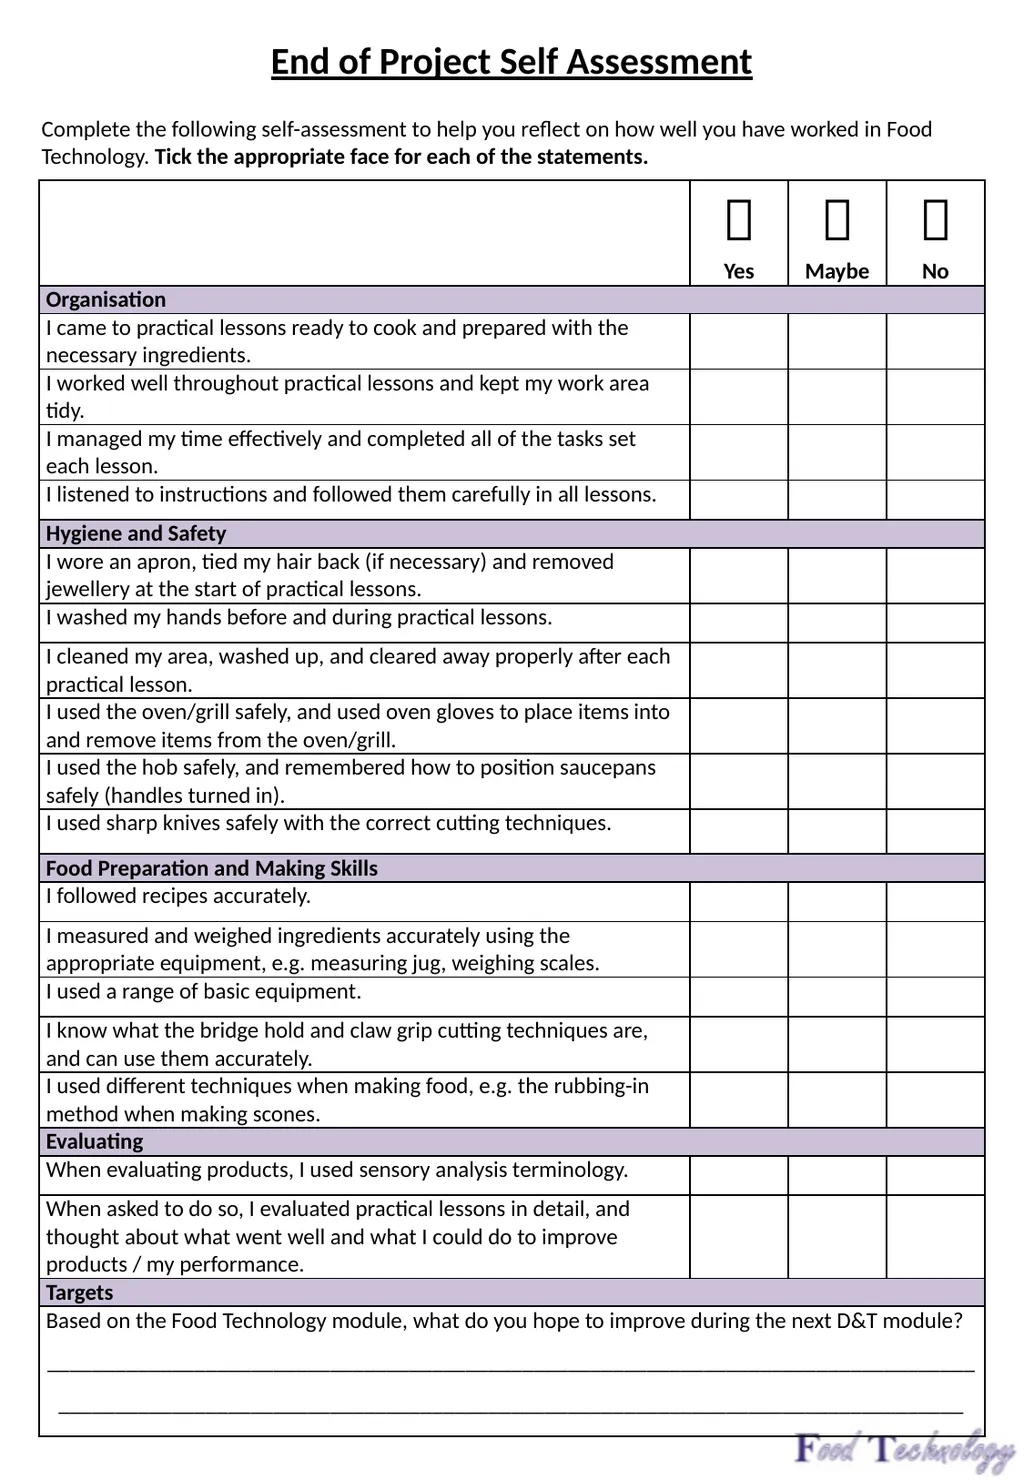
End of Project Self Assessment
Complete the following self-assessment to help you reflect on how well you have worked in Food Technology. Tick the appropriate face for each of the statements.<br>
Complete the following self-assessment to help you reflect on how well you have worked in Food Technology. Tick the appropriate face for each of the statements.<br>
30
End of Project Survey
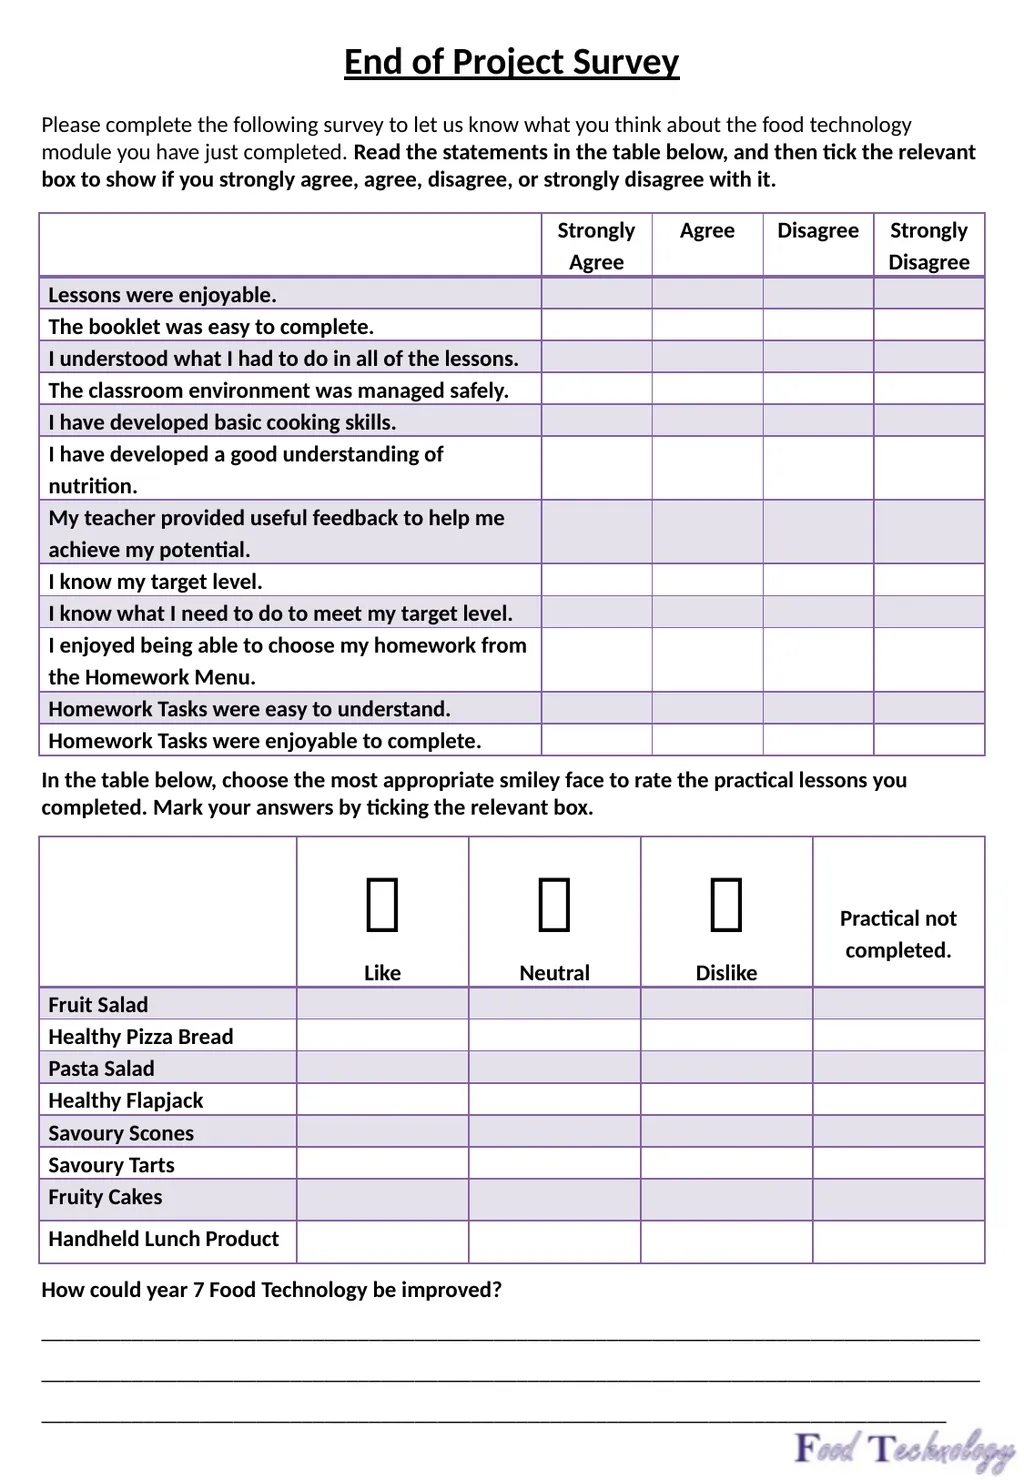
Please complete the following survey to let us know what you think about the food technology module you have just completed. Read the statements in the table below, and then tick the relevant box to show if you strongly agree, agree, disagree, or strongly disagree with it.
In the table below, choose the most appropriate smiley face to rate the practical lessons you completed. Mark your answers by ticking the relevant box.
How could year 7 Food Technology be improved? ______________________________________________________________________________________________________________________________________________________________________________________________________________________________________________________<br>
Please complete the following survey to let us know what you think about the food technology module you have just completed. Read the statements in the table below, and then tick the relevant box to show if you strongly agree, agree, disagree, or strongly disagree with it.
In the table below, choose the most appropriate smiley face to rate the practical lessons you completed. Mark your answers by ticking the relevant box.
How could year 7 Food Technology be improved? ______________________________________________________________________________________________________________________________________________________________________________________________________________________________________________________<br>
31
Environmental impacts around the world
Complete a poster of plastics, how this is effecting the planet, what we can do to help it, research what is being done now and in the future
Complete a spider graph of ideas on how you will complete your homework<br>
Complete a poster of plastics, how this is effecting the planet, what we can do to help it, research what is being done now and in the future
Complete a spider graph of ideas on how you will complete your homework<br>