PPT-Geometric Dimensioning and Tolerancing

Author : kittie-lecroy | Published Date : 2016-07-20

Chapter 6 Form Orientation Profile and Runout Tolerances Geometric Characteristics 2 Form Orientation Profile and Runout Tolerances Straightness Straightness can

Presentation Embed Code

Download Presentation

Download Presentation The PPT/PDF document "Geometric Dimensioning and Tolerancing" is the property of its rightful owner. Permission is granted to download and print the materials on this website for personal, non-commercial use only, and to display it on your personal computer provided you do not modify the materials and that you retain all copyright notices contained in the materials. By downloading content from our website, you accept the terms of this agreement.

Geometric Dimensioning and Tolerancing: Transcript


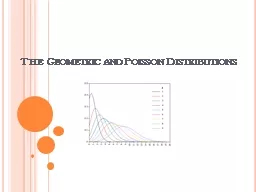
Chapter 6 Form Orientation Profile and Runout Tolerances Geometric Characteristics 2 Form Orientation Profile and Runout Tolerances Straightness Straightness can be applied to a surface either flat or cylindrical. Other geometric tolerances:. profile. runout. & total . runout. flatness. angularity. perpendicularity. parallelism. Geometric Characteristics. 2. Form, Orientation, Profile, and . Runout. Tolerances. Unit 1 – Introduction, Symbols, and Terms. 2. Everyone should have a workbook to follow along. . It contains necessary reference information along with class exercises.. Page numbers in yellow on the slides match pages in the workbook.. Objective. : . To solve multistep probability tasks with the concept of geometric distributions. CHS Statistics. A . Geometric probability model. . tells us the probability for a random variable that counts the number of . unit 5, product plans & virtual condition. chapter . 7, . virtual . c. ondition. Introduction. Chapter introduces an important concept related to the mating of parts in an assembly.. Interchangeability of parts and assemblies can only be ensured when parts are accepted at virtual condition or better.. 1. Dimensions should NOT be duplicated, nor should the same information be given in two different ways.. Incorrect. 1. Dimensions should NOT be duplicated, nor should the same information be given in two different ways.. Anthony Bonato. Ryerson University. East Coast Combinatorics Conference. co-author. talk. post-doc. Into the infinite. R. Infinite random geometric graphs. 111. 110. 101. 011. 100. 010. 001. 000. Some properties. Making things fit. General rules of dimensioning (1). Dimensions . should NOT be duplicated, or the same information be given in two different . ways.. No . unnecessary dimensions should be used - only those needed to produce or inspect the . Michael . Drabkin. MD. Lauren Senior, Uma Kanth, Allison Rubin MD, Steven Lev MD. ASNR 2015 Annual . Meeting. eEdE. #: eEdE-85. Control #: 772 . Disclosures. Nothing to disclose.. Purpose. To provide the radiologist with a pattern approach to head CT interpretation based on templates of interconnected geometric shapes. The viewer is encouraged to think from general to specific and consider spatial relationships. Cases will demonstrate the utility of this framework to everyday practice.. Will Durfee & Tim . Kowalewski. Department of Mechanical Engineering. University of Minnesota. Opening comments. Engineering graphics is the method for documenting a . design. Mechanical engineering students must be familiar with standards of engineering graphics as it is expected in industry. Describe the purpose of conventional tolerancing and its limitations. Use standard tables to specify an appropriate fit between two mating parts. Explain the advantages of using geometric dimensioning and tolerancing (GD&T) over conventional tolerancing. You used proportional relationships of corresponding angle bisectors, altitudes, and medians of similar triangles. . Find the geometric mean between two numbers.. Solve problems involving relationships between parts of a right triangle and the altitude to its hypotenuse.. Delta On-Time Performance at Hartsfield-Jackson Atlanta International (June, 2003 - June, 2015). http://www.transtats.bts.gov/OT_Delay/ot_delaycause1.asp?display=data&pn=1. Data / Model. Total Operations: 2,278,897. Unit 2 – Limits of Size. Overview of Rules. There are four general rules. Taylor’s rule. Limits of size. . Regardless of Feature Size (RFS) is the default.. Pitch cylinder axis is reference for thread and screws.. The Geometric and Poisson Distributions Geometric Distribution – A geometric distribution shows the number of trials needed until a success is achieved. Example: When shooting baskets, what is the probability that the first time you make the basket will be the fourth time you shoot the ball?

Download Document

Here is the link to download the presentation.
"Geometric Dimensioning and Tolerancing"The content belongs to its owner. You may download and print it for personal use, without modification, and keep all copyright notices. By downloading, you agree to these terms.

Related Documents