PDF-Designer: Martina Landhed
Author : pamella-moone | Published Date : 2016-04-29
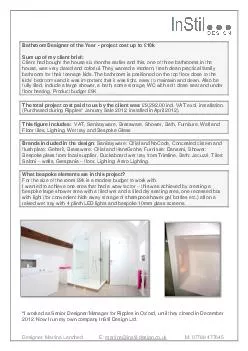
E martinainstil designcouk M 07788 477645 Bathroom Designer of the Year project cost up to
Presentation Embed Code
Download Presentation
Download Presentation The PPT/PDF document "Designer: Martina Landhed" is the property of its rightful owner. Permission is granted to download and print the materials on this website for personal, non-commercial use only, and to display it on your personal computer provided you do not modify the materials and that you retain all copyright notices contained in the materials. By downloading content from our website, you accept the terms of this agreement.
Designer: Martina Landhed: Transcript
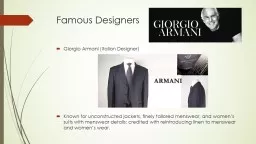
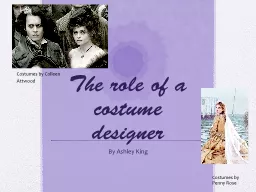
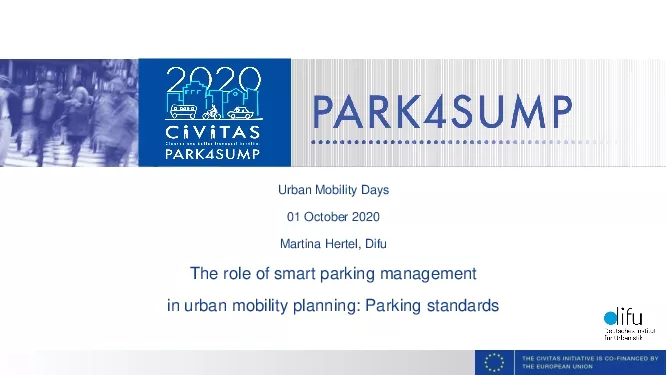
E martinainstil designcouk M 07788 477645 Bathroom Designer of the Year project cost up to. Lily Direct has women's perfume and men's cologne at wholesale prices. As we offer the lowest prices anywhere on designer fragrances. We sell hundreds of designer brands and we add new fragrances every week. Gibson Design Group approaches commercial design differently than most firms. When we design for commercial clients, we view the design as marketing as much as it is interior design. Lily Direct has women's perfume and men's cologne at wholesale prices. As we offer the lowest prices anywhere on designer fragrances. We sell hundreds of designer brands and we add new fragrances every week. Designer drugs. Designer drugs refers to the compounds produced in underground laboratories . Designer drugs refers to the alterations of existing drugs whose chemical structure is modified to mimic the effect of the parent drug. . Joe McShea. Owner/Software Architect. IntelliPoint Solutions LLC. Who Am I?. Joe McShea. IntelliPoint. Solutions LLC. Owner/Software Architect. Over 20 years as a software developer/architect. Focused on the Microsoft stack and SharePoint/Office 365 since 2007. Giorgio Armani (Italian Designer). Known for unconstructed jackets, finely tailored menswear, and women’s suits with menswear details; credited with reintroducing linen to menswear and women’s wear.. By Ashley King. Costumes by Colleen Attwood. . Costumes by Penny Rose . The Role of a Costume designer. The role of a costume designer is to supply the clothing of actors to wear on set. These costumes must contain there own individual story, they must set the era for each character, the personality and provide a visually interesting scene for the viewer. . Want to look super stylish and stunning on a special party? Check out the amazing collection of beautiful bollywood replica designer sarees online offered by Salwartales. Refresh your mood and get ready to Buy Designer Sarees Online from our pretty collection. The appealing collection of bollywood designer sarees is available in various flairs and styles, we provide free delivery at your door step in no time. 01 October2020Martina Hertel DifuThe role of smart parking management in urban mobility planning Parking standards2One of the fields of activities within the Park4SUMP Projectparking standards Urban m kindly visit us at www.examsdump.com. Prepare your certification exams with real time Certification Questions & Answers verified by experienced professionals! We make your certification journey easier as we provide you learning materials to help you to pass your exams from the first try. Professionally researched by Certified Trainers,our preparation materials contribute to industryshighest-99.6% pass rate among our customers. kindly visit us at www.examsdump.com. Prepare your certification exams with real time Certification Questions & Answers verified by experienced professionals! We make your certification journey easier as we provide you learning materials to help you to pass your exams from the first try. Professionally researched by Certified Trainers,our preparation materials contribute to industryshighest-99.6% pass rate among our customers. kindly visit us at www.examsdump.com. Prepare your certification exams with real time Certification Questions & Answers verified by experienced professionals! We make your certification journey easier as we provide you learning materials to help you to pass your exams from the first try. Professionally researched by Certified Trainers,our preparation materials contribute to industryshighest-99.6% pass rate among our customers. kindly visit us at www.examsdump.com. Prepare your certification exams with real time Certification Questions & Answers verified by experienced professionals! We make your certification journey easier as we provide you learning materials to help you to pass your exams from the first try. Professionally researched by Certified Trainers,our preparation materials contribute to industryshighest-99.6% pass rate among our customers. kindly visit us at www.examsdump.com. Prepare your certification exams with real time Certification Questions & Answers verified by experienced professionals! We make your certification journey easier as we provide you learning materials to help you to pass your exams from the first try. Professionally researched by Certified Trainers,our preparation materials contribute to industryshighest-99.6% pass rate among our customers.
Download Rules Of Document
"Designer: Martina Landhed"The content belongs to its owner. You may download and print it for personal use, without modification, and keep all copyright notices. By downloading, you agree to these terms.
Related Documents