/
Austerlitz Austerlitz

Austerlitz - PowerPoint Presentation

trish-goza
trish-goza . @trish-goza
Follow
369 views
Uploaded On 2017-04-22

Austerlitz - PPT Presentation

December 2 1805 Strategic Context In early 1805 Austria and Russian join the Third Coalition to help Britain and Sweden defeat Napoleonic France Napoleon Bonaparte acts quickly before the Coalition can concentrate its forces or entice Prussia to join them Bonaparte marches east pouncing ID: 540229

troops french allied bonaparte french troops bonaparte allied pratzen attack goldbach advance heights kutusov north allies left soult buxhowden

Share:

Link:

Embed:

Download Presentation from below link

Download Presentation The PPT/PDF document "Austerlitz" is the property of its rightful owner. Permission is granted to download and print the materials on this web site for personal, non-commercial use only, and to display it on your personal computer provided you do not modify the materials and that you retain all copyright notices contained in the materials. By downloading content from our website, you accept the terms of this agreement.


Presentation Transcript

Slide1

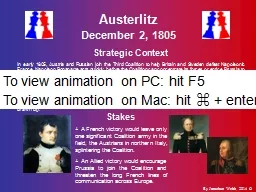
Austerlitz December 2, 1805

Strategic Context

In early 1805, Austria and Russian join the Third Coalition to help Britain and Sweden defeat Napoleonic France. Napoleon Bonaparte acts quickly, before the Coalition can concentrate its forces or entice Prussia to join them. Bonaparte marches east, pouncing on and destroying an Austrian army at Ulm before the Russian army arrives in theater. Bonaparte continues his rapid advance to destroy the Russian army, nominally commanded by Tsar Alexander I but in practice by Mikhail Kutusov, but settles for occupying Vienna as Kutusov escapes his trap. Kutusov urges a fighting withdrawal to weaken Bonaparte but Alexander favours a battle. Bonaparte feigns weakness, requesting a truce, appearing nervous, even ceding the Pratzen Heights, key terrain between the two armies. This only confirms Alexander’s intent to fight, and so an attack plan is drawn up.

Stakes

+ A French victory would leave only one significant Coalition army in the field, the Austrians in northern Italy, splintering the Coalition.+ An Allied victory would encourage Prussia to join the Coalition and threaten the long French lines of communication across Europe.

By Jonathan Webb, 2014 ©

To view animation on PC: hit F5

To view animation on Mac: hit

+ enterSlide2

Austerlitz, 1805Strength

Grande Armée

Well

Allies

Well

Napoleon Bonaparte

77,100

74,500

Alexander I

By Jonathan Webb, 2014 ©

Mikhail Kutusov

318 guns

157 gunsSlide3

Europe c.1807Slide4

Grande Armée

(Bonaparte)

Allies

(Alexander/Kutusov)

Turas

Wazan

Sokolnitz

Boesnitz

Lapanz Markt

Bellowitz

Latein

Kobelnitz

Puntowitz

Holubnitz

Telnitz

Augezd

Pratzen

Jirschikowitz

Blasowitz

Hostieradek

Walspitz

Austerlitz

Krzenowitz

Kritschen

Olmutz Road

Pratzen Heights

Goldbach Creek

Stary Vinogrady

Satschan Pond

The battlefield is relatively open but the many gentle slopes can obscure visibility. The most prominent high features are the centrally located Pratzen Heights and the steeper but considerably smaller Santon Hill in the north. The lowest areas are near the water features, the most prominent being the Goldbach Creek and the Littawa River. The water features are largely frozen although the Goldbach is still a significant obstacle with its rough, marshy ground, and bridges covered by towns. Small towns dot the battlefield with the largest being Lapanz Market in the northwest, Sokolnitz along the Goldbach in the south, and Austerlitz itself in the east.

Littawa River

Santon Hill

0

1

2 kmSlide5

Murat

Bernadotte

Soult

Davout

Lannes

Bessieres

Buxhowden

Kollowrath

Constantine

Bagration

Lichtenstein

Lichtenstein

Bernadotte

Soult

Buxhowden

Kollowrath

Lannes/ Murat

Bessieres

Constantine

Buxhowden

Bernadotte

Soult

Landmarks

Allies

(Alexander/Kutusov)

Turas

Wazan

Sokolnitz

Boesnitz

Lapanz Markt

Bellowitz

Latein

Kobelnitz

Puntowitz

Holubnitz

Telnitz

Augezd

Pratzen

Jirschikowitz

Blasowitz

Hostieradek

Walspitz

Austerlitz

Krzenowitz

Kritschen

Olmutz Road

Pratzen Heights

Goldbach Creek

Stary Vinogrady

Satschan Pond

Littawa River

Santon Hill

Symbol guide

Grande Armée

(Bonaparte)

French Allies

Infantry Infantry

Cavalry Cavalry

Grande Armée

(Napoleon Bonaparte)

74,500

The battlefield is relatively open but the many gentle slopes can obscure visibility. The most prominent high features are the centrally located Pratzen Heights and the steeper but considerably smaller Santon Hill in the north. The lowest areas are near the water features, the most prominent being the Goldbach Creek and the Littawa River. The water features are largely frozen although the Goldbach is still a significant obstacle with its rough, marshy ground, and bridges covered by towns. Small towns dot the battlefield with the largest being Lapanz Market in the northwest, Sokolnitz along the Goldbach in the south, and Austerlitz itself in the east.

The Allies deploy according to the Weyrother plan, an Austrian staff officer, with Kutusov tasked with carrying out the plan he cares little for. The Allies plan to use a strong left wing of to defeat the French right wing along the Goldbach and swing north, severing lines of communication with Vienna and encircling the French army. Buxhowden commands the powerful Allied left wing of 35,000, with Kollowrath leading its second wave, comprised of 15,000 exhausted Russian troops and Austrian raw recruits. While Buxhowden attacks, Constantine’s elite Russian Imperial Guard is to occupy the Pratzen Heights and hold the Allied center, Bagration is to hold the Allied right, Lichtenstein is to link the center and right, but deploys too far south. Unfortunately, the plan is only translated for the mainly Russian subordinates just before the battle begins, and is only vaguely understood.

Kutusov gives the order to advance. Buxhowden’s advance guard (under Kienmayer) advances on Tellnitz in the south; this attack gradually escalates although the French hold firm. Buxhowden’s first column (under Dokhturov) also advances but is slowed; Lichtenstein, realizing he has deployed in the wrong location, begins to march north, disrupting Dokhturov’s advance and delaying the rest of Buxhowden’s columns.

Lichtenstein finally extricates himself from the Allied left, allowing Buxhowden’s columns to advance. Dokhturov arrives to help Kienmayer take Tellnitz, forcing the French across the Goldbach as Allied cavalry pour through the gap to engage the French cavalry. Buxhowden’s second and third columns (under Langeron and Przhebishevsky) advance to storm Sokolnitz and Kobelnitz, but most of the Allied troops are jammed in the few crossings across the Goldbach. Davout and his reinforcements also arrive just in time, although not without incident: one of his units is fired upon by French troops mistaking them for Allied troops.

In the center, Soult’s takes control of the Pratzen Heights as Kollowrath’s troops begin to break. Bernadotte retakes Blasowitz with Lannes’ support as the battle to the north becomes general. Bagration attempts to turn Lannes’ left and assaults the French position on Santon Hill. Lannes counterattacks against Lichtenstein, prompting an all-out Allied cavalry attack.

Bonaparte deploys his army expecting the Allies to attack his purposefully weak right wing, commanded by the talented Davout when he arrives with reinforcements. Davout is to hold the Goldbach at all costs while the main attack force under Soult, concealed by rolling hills and fog at the center, storms the Pratzen Heights and encircles the deeply committed Allied left. Bernadotte is to support the main attack and occupy the Pratzen Heights when Soult strikes south. Lannes is to launch a secondary attack in the north to pin the Russian right, while Murat links the French left and center. Bonaparte’s reserve consists of the elite French Imperial Guard under Bessieres and a division under Oudinot.

Despite facing only 10,000 French with 35,000 Allied troops, Buxhowden’s attack slows as many of these troops are still stuck trying to cross the Goldbach. Langeron captures Sokolnitz while Dokhturov briefly loses Tellnitz to a counter-attack by Davout. In the center, Lichtenstein finally reaches his ordered position beside Bagration. Alexander meanwhile pressures Kutusov to order Kollowrath’s column to begin advancing. Bonaparte instructs Soult to prepare his troops but to wait for the Allied columns, delayed by Lichtenstein’s mistake, to abandon the Pratzen Heights.

As the Pratzen Heights empty of Allied troops and the Allied left deeply committed against Davout along the Goldbach, Bonaparte orders Soult to advance with Bernadotte in support. Soult’s advance is rapid and only checked on his extreme right, where St. Hilaire’s division is surprised by Allied troops in the valley around Pratzen. Only Langeron senses the danger and detaches troops to his rear while Kutusov turns what few troops he can to meet the French. Constantine moves up the Guard, unaware his unit is now in the frontline.

Buxhowden’s attack stalls although fierce combat continues along the Goldbach as French troops storm Zokolnitz and Bonaparte sends his reserve under Oudinot to shore up Davout. Soult’s attack also hangs in the balance as his troops face stiff resistance by Kollowrath’s troops. Soult’s right division under St. Hilaire is hit on three sides by Allied troops, but St. Hilaire orders a prompt bayonet attack, ending the threat. Further north, Constantine seizes Blasowitz from Bernadotte with part of the Guard. Lannes and Bagration also cautiously advance against each other while Lichtenstein enters the battle with an attack on Lannes.

Bonaparte orders Soult to quarter turn right but wait for the battle in the north to develop before advancing any further. Kollowrath begins to retreat regardless. Constantine takes advantage of this lull to hit Soult’s left division (under Vandamme) as it turns. Fortunately for the French, there are no Allied reserves to exploit this success. In the north, Lannes and Murat repel Bagration and Lichtenstein’s attack. Bonaparte prepares for the final advance by ordering Bessieres to move the Guard up. In the north, Bagration realizes his attack has failed and retreats, pursued by Lannes and Murat.

Buxhowden fails to exercise any positive control as the Allies rout; the French capture 12,000 prisoners and 180 guns in the rout. Some troops flee across the frozen Satschan Pond only to have French artillery break the ice, drowning up to 2,000. Buxhowden’s subordinates thereafter direct their troops to retreat southeast across the Littawa; Dokhturov and Keinmayer cover the retreat of the few remaining troops. Bagration and Constantine also withdraw east.

Bessiere’s Guard cavalry engages Constantine’s Guard cavalry until Bernadotte belatedly shows up to occupy the Pratzen Heights and support Soult’s advance south. Bonaparte orders Soult to advance south while Davout counterattacks along the front a final time. Soult’s advance is rapid as Vandamme on his left takes Augezd, isolating the Allied left from the rest of the army. Buxhowden’s subordinates try to extricate their troops as the French advance on their rear but collapse and flee south as best they can. In the north, Bagration withdraws unimpeded.

Allies

(Alexander I/Mikhail Kutusov)

77,100

0

1

2 kmSlide6

Austerlitz, 1805Casualties & Aftermath

French:

Allies:

8,800or12%

27,000or35%

By Jonathan Webb, 2014 ©

The French victory was decisive, at least temporarily. The Austrians immediately sought peace, giving up a large war indemnity and much of northern Italy in the Treaty of Pressburg, while the Third Coalition collapsed. France and Prussia even agreed to a treaty of alliance but it did not last. Prussia began mobilizing in August 1806, soon to be joined by Britain, Russia and Sweden in the Fourth Coalition against France. Bonaparte again convincingly defeated the Allies in 1806-1807. Austerlitz did not even keep the Austrians down for long: in 1809, the Austrians joined Britain in the Fifth Coalition, winning brief glory against Bonaparte at the Battle of Aspern-Wessling before being defeated at the Battle of Wagram.Slide7

The Art of Battle:

Animated Battle Maps

http://www.theartofbattle.com

By Jonathan Webb, 2014 ©

Related Contents


Next Show more