
ATMO5332 WRF-ARW Tutorial 0.01” Overview of WRF
GB
Published · 83 slides · 0 views

1 / 1

Description
ATMO5332 WRF-ARW Tutorial 0.01 Overview of WRF Modeling System A bare-bones WRF run involves 4 major steps: 1) WRF Preprocessing System (WPS) 2) Initialization (real) 3) Numerical integration (WRF) 4) Visualization Overview of WRF Modeling
Related Topics
Share
Embed code
Download this presentation From Below
"ATMO5332 WRF-ARW Tutorial 0.01” Overview of WRF" is the property of its rightful owner. Permission is granted to download and print the materials on this website for personal, non-commercial use only, and to display it on your personal computer provided you do not modify the materials and that you retain all copyright notices contained in the materials. By downloading content from our website, you accept the terms of this agreement.
Presentation Transcript
01
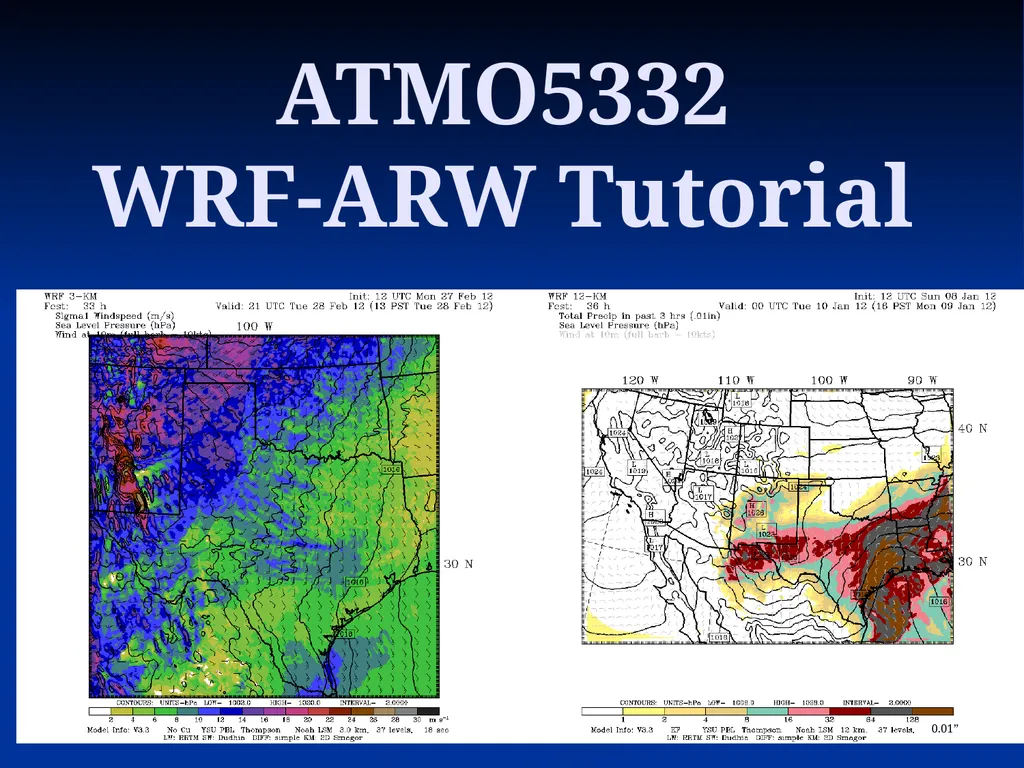
ATMO5332
WRF-ARW Tutorial 0.01”<br>
02
Overview of WRF Modeling System A bare-bones WRF run involves 4 major steps:
1) WRF Preprocessing System (WPS)
2) Initialization (real)
3) Numerical integration (WRF)
4) Visualization<br>
1) WRF Preprocessing System (WPS)
2) Initialization (real)
3) Numerical integration (WRF)
4) Visualization<br>
03
Overview of WRF Modeling System A bare-bones WRF run involves 4 major steps:
1) WRF Preprocessing System (WPS)
2) Initialization (real)
3) Numerical integration (WRF)
4) Visualization
Most steps above are capable of running
in parallel mode using multiple CPUs<br>
1) WRF Preprocessing System (WPS)
2) Initialization (real)
3) Numerical integration (WRF)
4) Visualization
Most steps above are capable of running
in parallel mode using multiple CPUs<br>
04
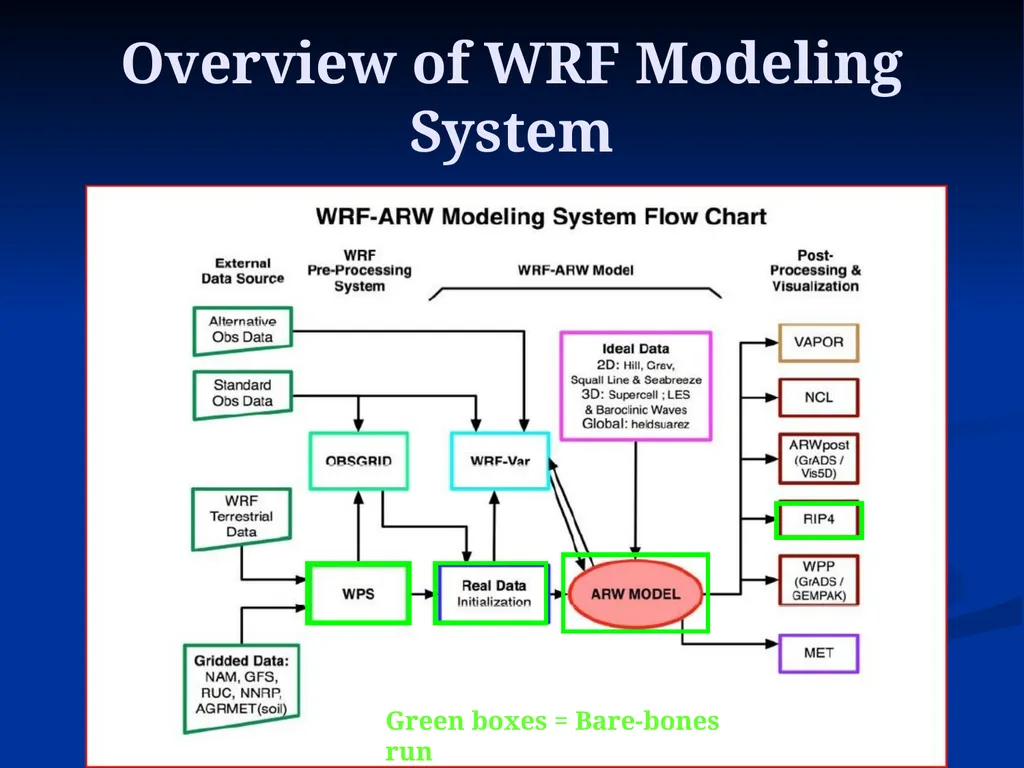
Overview of WRF Modeling System Green boxes = Bare-bones run<br>
05
WPS WPS performs all preprocessing of data needed for a WRF numerical integration (define domains, get initial conditions…)<br>
06
WPS WPS performs all preprocessing of data needed for a WRF numerical integration (define domains, get initial conditions…)
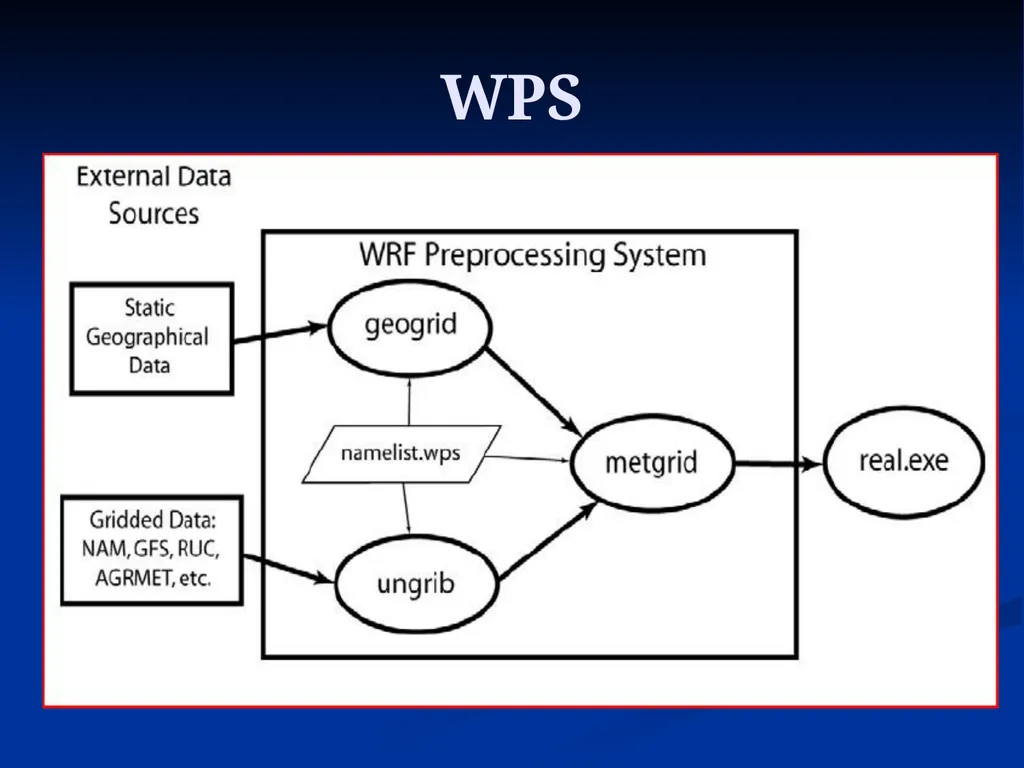
WPS is controlled through a user-defined namelist called namelist.wps<br>
WPS is controlled through a user-defined namelist called namelist.wps<br>
07
WPS WPS performs all preprocessing of data needed for a WRF numerical integration (define domains, get initial conditions…)
WPS is controlled through a user-defined namelist called namelist.wps
WPS is composed of three programs:
1) geogrid
2) ungrib
3) metgrid<br>
WPS is controlled through a user-defined namelist called namelist.wps
WPS is composed of three programs:
1) geogrid
2) ungrib
3) metgrid<br>
08
WPS<br>
09
WPS - geogrid Geogrid has the following purposes:
1) Define simulation domain (size, location,
horizontal resolution)<br>
1) Define simulation domain (size, location,
horizontal resolution)<br>
10
WPS - geogrid Geogrid has the following purposes:
1) Define simulation domain (size, location,
horizontal resolution)
2) Indicate which geographical data will be
used (30-second, 2-minute)<br>
1) Define simulation domain (size, location,
horizontal resolution)
2) Indicate which geographical data will be
used (30-second, 2-minute)<br>
11
WPS - geogrid Geogrid has the following purposes:
1) Define simulation domain (size, location,
horizontal resolution)
2) Indicate which geographical data will be
used (30-second, 2-minute)
3) Choose map projection (lambert
conformal, polar stereographic,
mercator, lat/lon)<br>
1) Define simulation domain (size, location,
horizontal resolution)
2) Indicate which geographical data will be
used (30-second, 2-minute)
3) Choose map projection (lambert
conformal, polar stereographic,
mercator, lat/lon)<br>
12
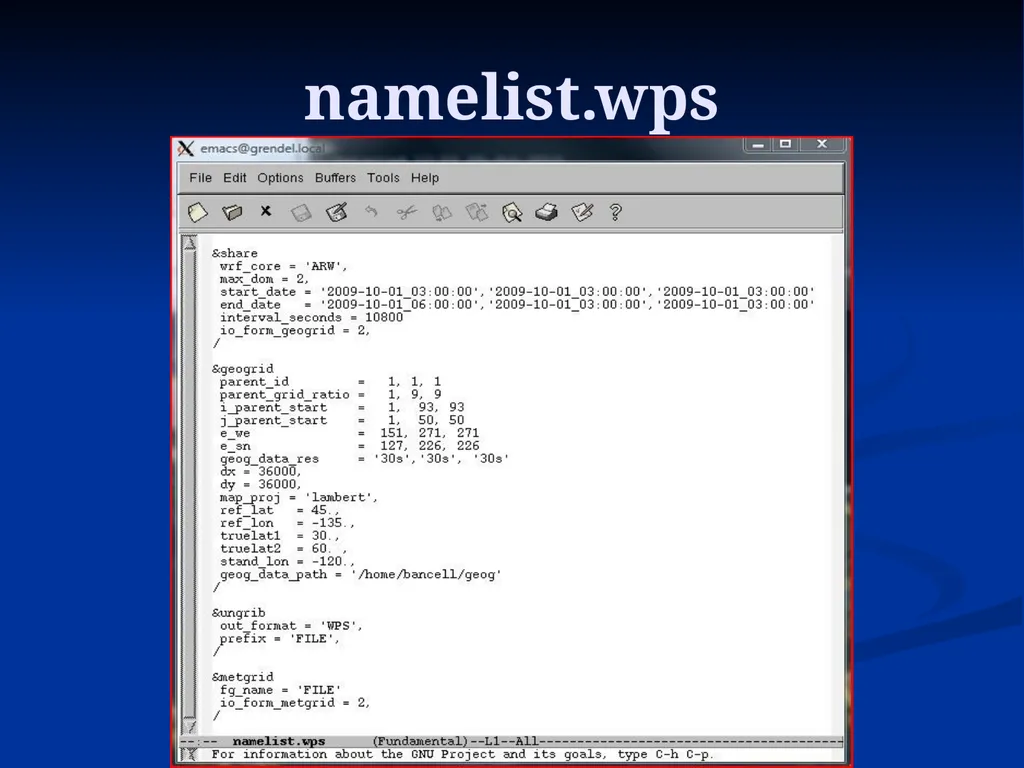
namelist.wps<br>
13
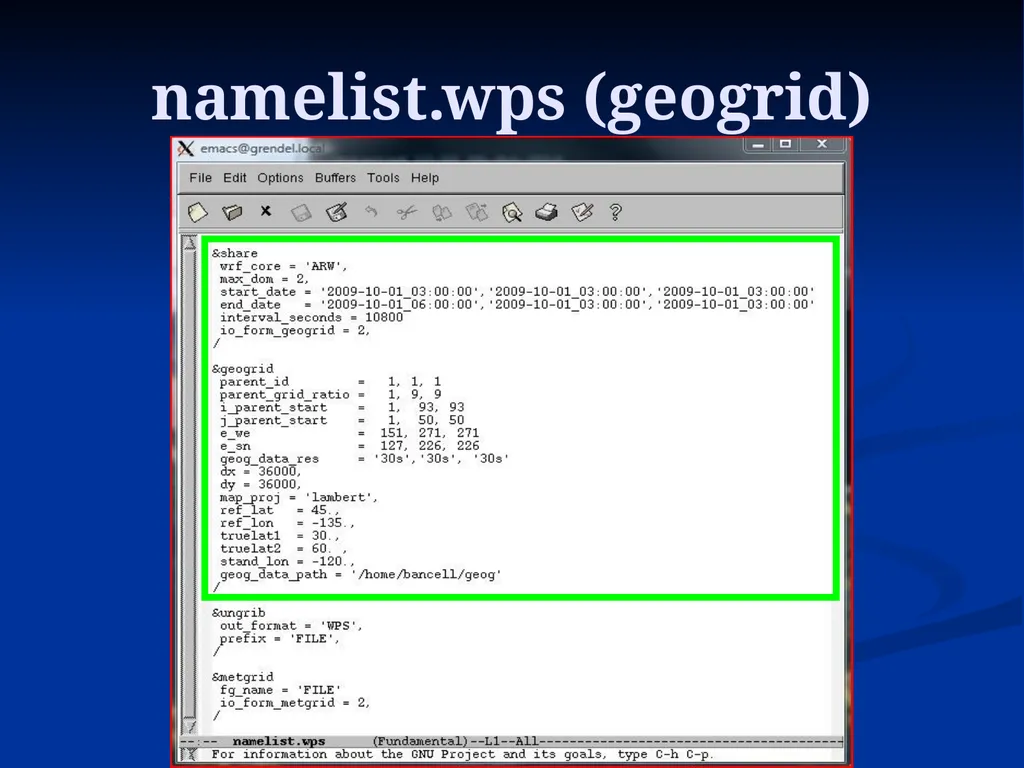
namelist.wps (geogrid)<br>
14
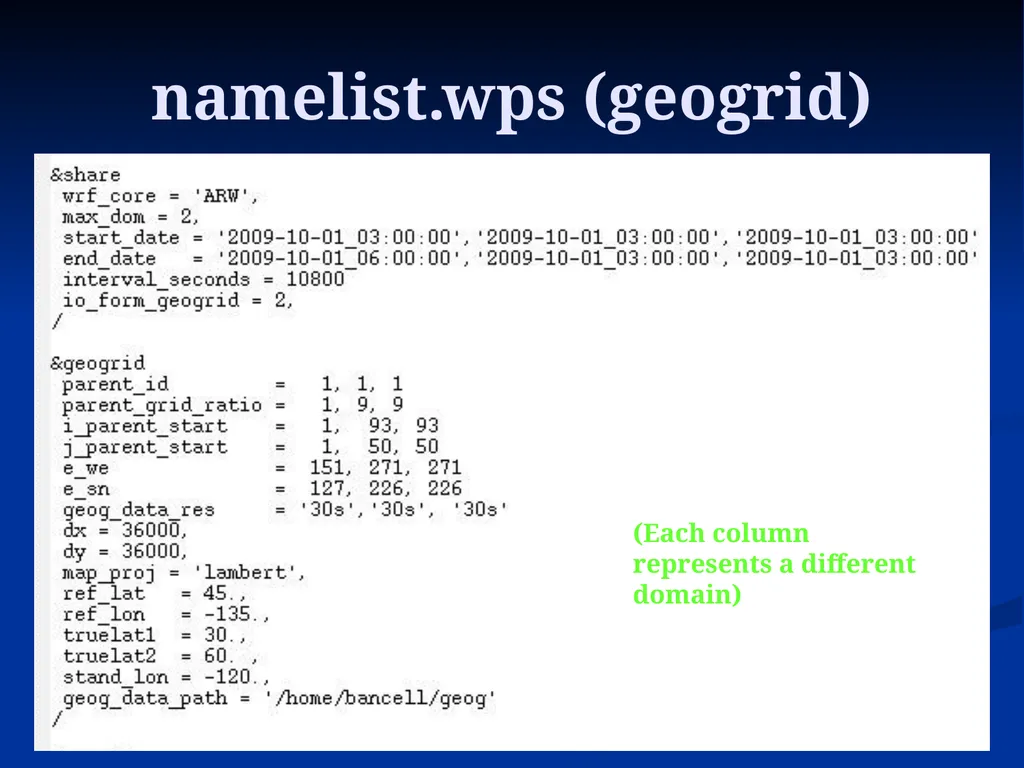
namelist.wps (geogrid) (Each column represents a different domain)<br>
15
WPS - geogrid Input files needed to run geogrid:
1) Geographical data
(/lustre/research/bancell/geogV4/WPS_GEOG)
2) namelist.wps<br>
1) Geographical data
(/lustre/research/bancell/geogV4/WPS_GEOG)
2) namelist.wps<br>
16
WPS - geogrid Input files needed to run geogrid:
1) Geographical data
(/lustre/research/bancell/geogV4/WPS_GEOG)
2) namelist.wps
Output from geogrid:
1) geo_em.d01.nc (would also have
geo_em.d02.nc for 2nd domain…)
2) geogrid.log files<br>
1) Geographical data
(/lustre/research/bancell/geogV4/WPS_GEOG)
2) namelist.wps
Output from geogrid:
1) geo_em.d01.nc (would also have
geo_em.d02.nc for 2nd domain…)
2) geogrid.log files<br>
17
WPS - geogrid Final Notes on geogrid
geogrid only needs to be run once for the same domain
Like most of the WRF system output, geo_em.d0X.nc files are netcdf files
Nest parameters must be carefully set in namelist.wps for geogrid<br>
geogrid only needs to be run once for the same domain
Like most of the WRF system output, geo_em.d0X.nc files are netcdf files
Nest parameters must be carefully set in namelist.wps for geogrid<br>
18
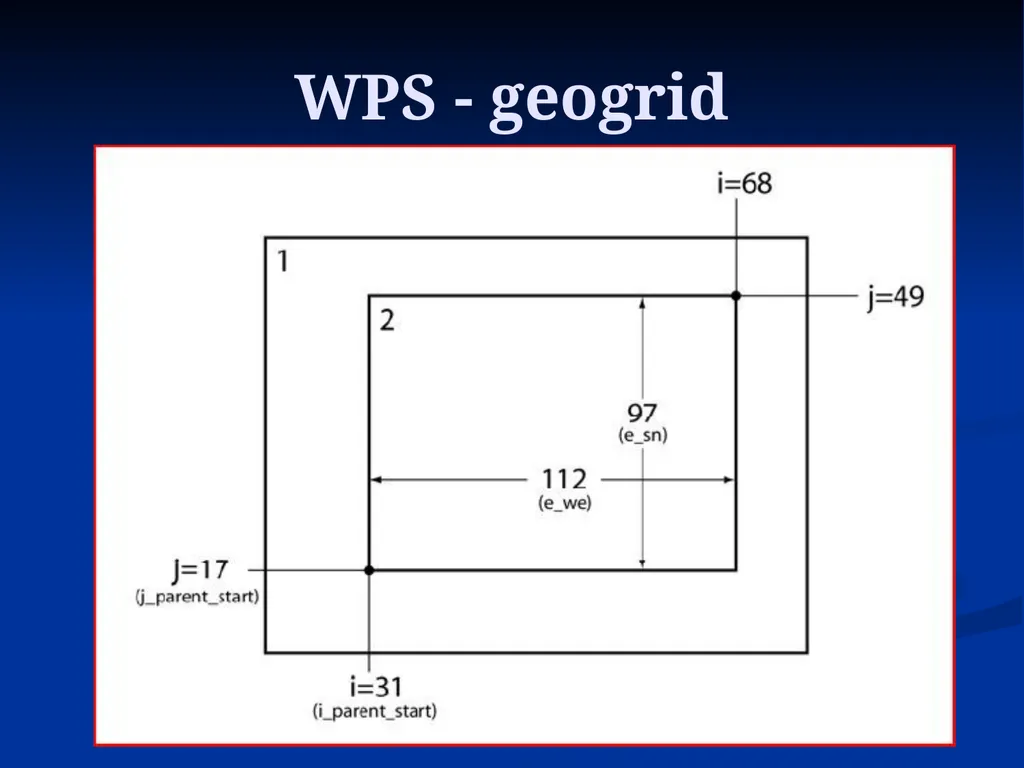
WPS - geogrid<br>
19
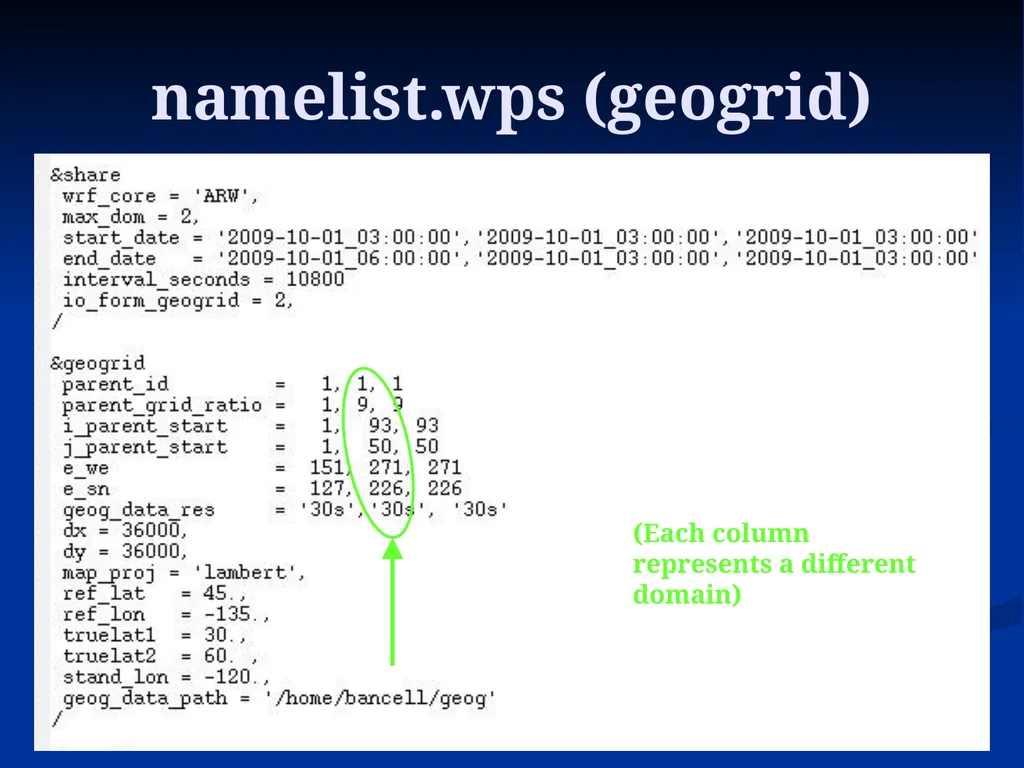
namelist.wps (geogrid) (Each column represents a different domain)<br>
20
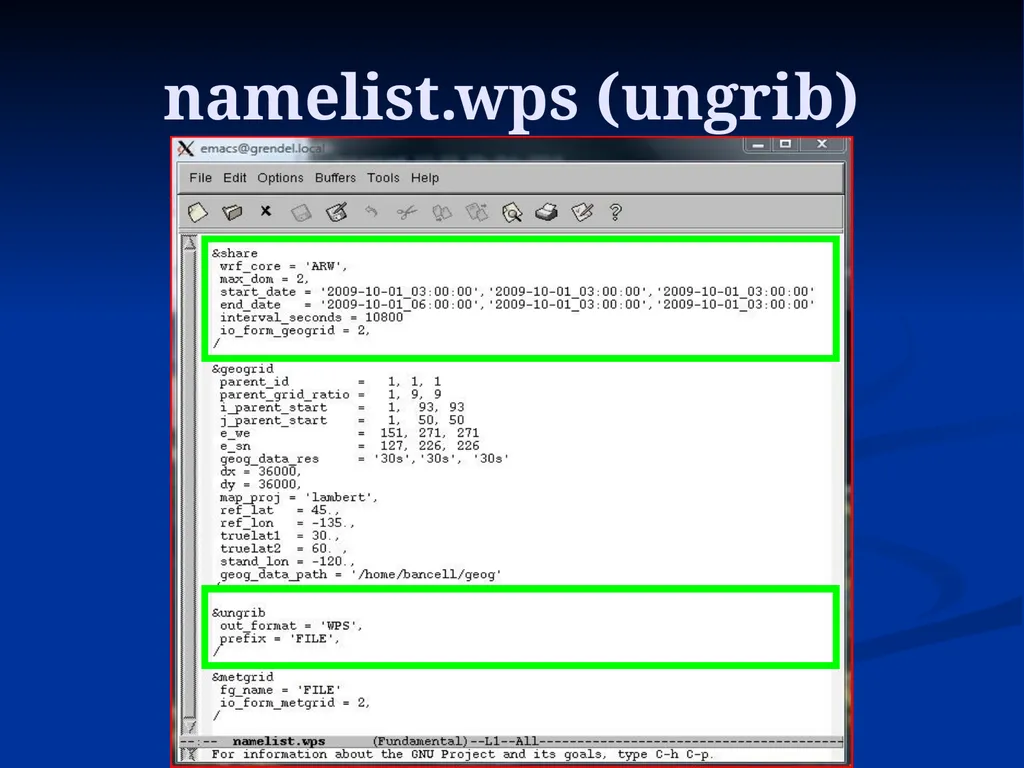
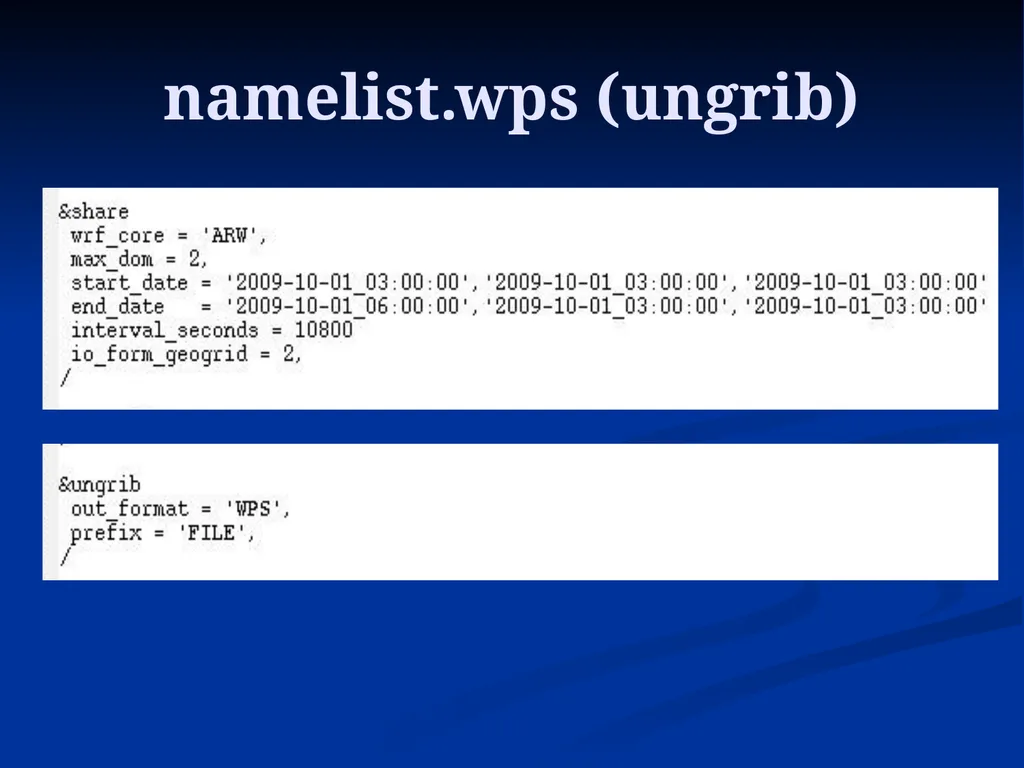
WPS - ungrib ungrib has the following purpose:
1) Extract fields from external grib files
(such as a GFS forecast) and write this
information to WPS file format<br>
1) Extract fields from external grib files
(such as a GFS forecast) and write this
information to WPS file format<br>
21
namelist.wps (ungrib)<br>
22
namelist.wps (ungrib)<br>
23
WPS - ungrib Input files needed to run ungrib:
1) External grib files
2) namelist.wps
3) A file called Vtable (instructs ungrib to
pull specific variables from various grib files)<br>
1) External grib files
2) namelist.wps
3) A file called Vtable (instructs ungrib to
pull specific variables from various grib files)<br>
24
WPS - ungrib Input files needed to run ungrib:
1) External grib files
2) namelist.wps
3) A file called Vtable (instructs ungrib to
pull specific variables from various grib files)
Output from ungrib:
1) WPS format files called FILE:date
2) ungrib.log file<br>
1) External grib files
2) namelist.wps
3) A file called Vtable (instructs ungrib to
pull specific variables from various grib files)
Output from ungrib:
1) WPS format files called FILE:date
2) ungrib.log file<br>
25
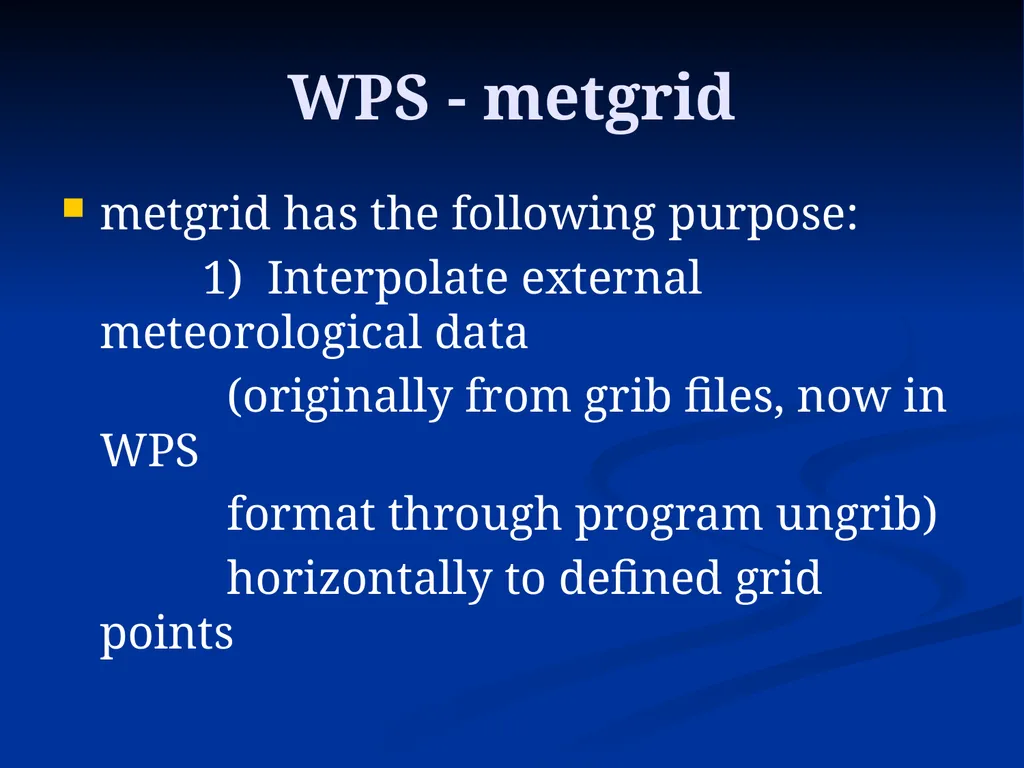
WPS - metgrid metgrid has the following purpose:
1) Interpolate external meteorological data
(originally from grib files, now in WPS
format through program ungrib)
horizontally to defined grid points<br>
1) Interpolate external meteorological data
(originally from grib files, now in WPS
format through program ungrib)
horizontally to defined grid points<br>
26
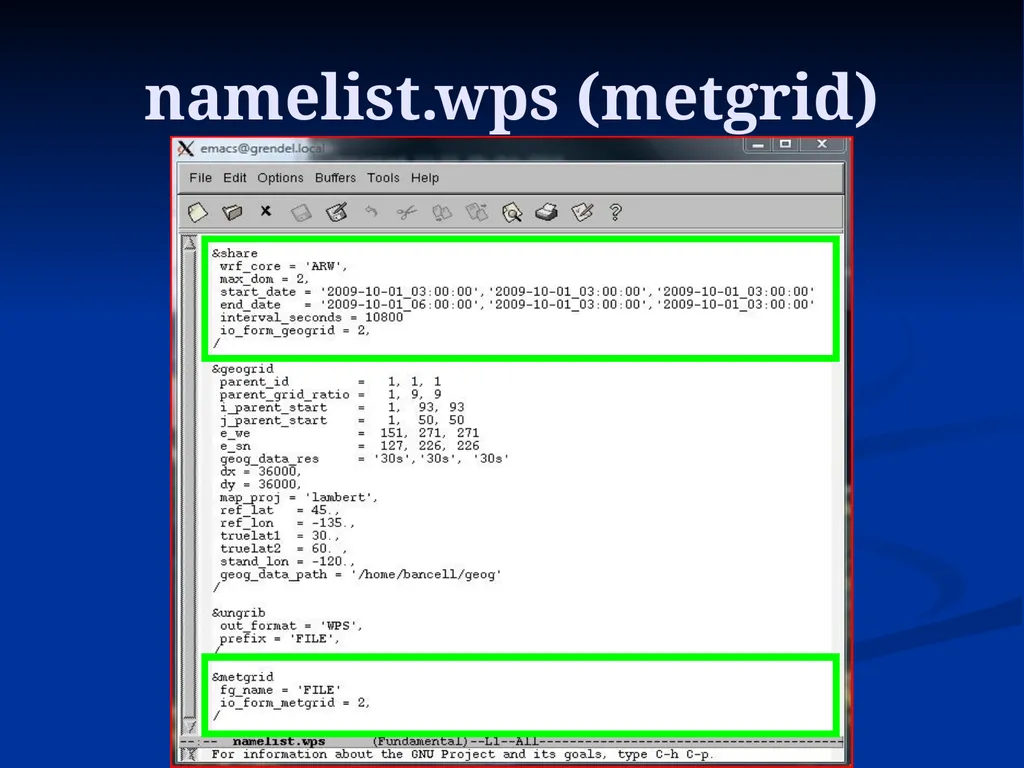
namelist.wps (metgrid)<br>
27
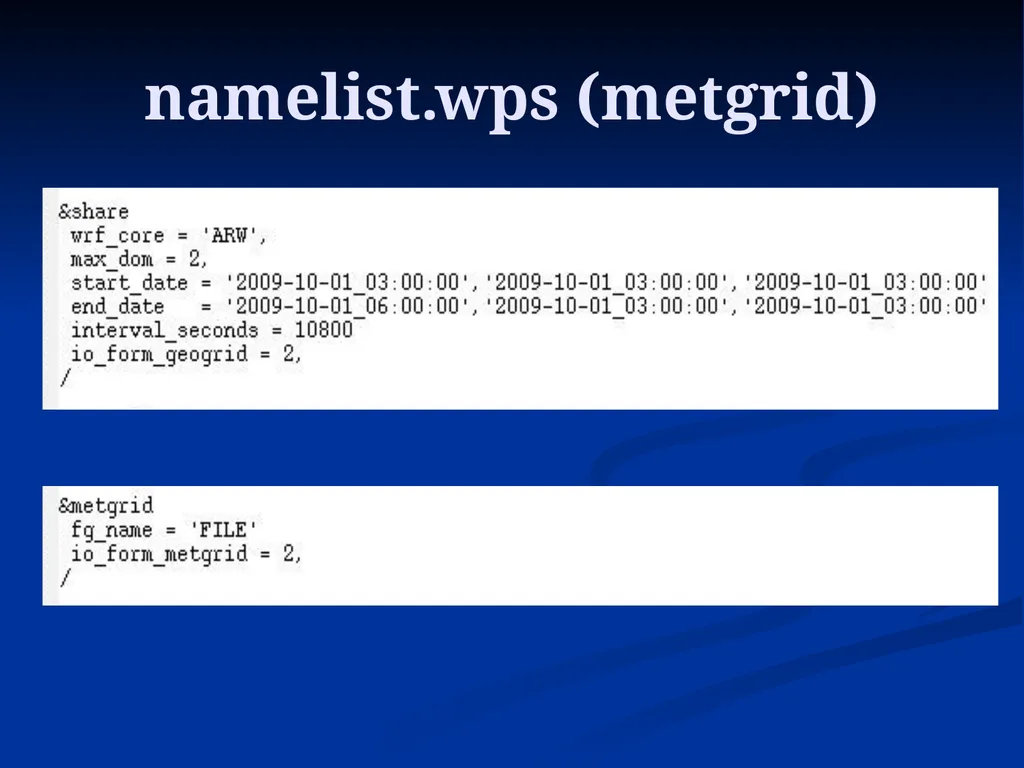
namelist.wps (metgrid)<br>
28
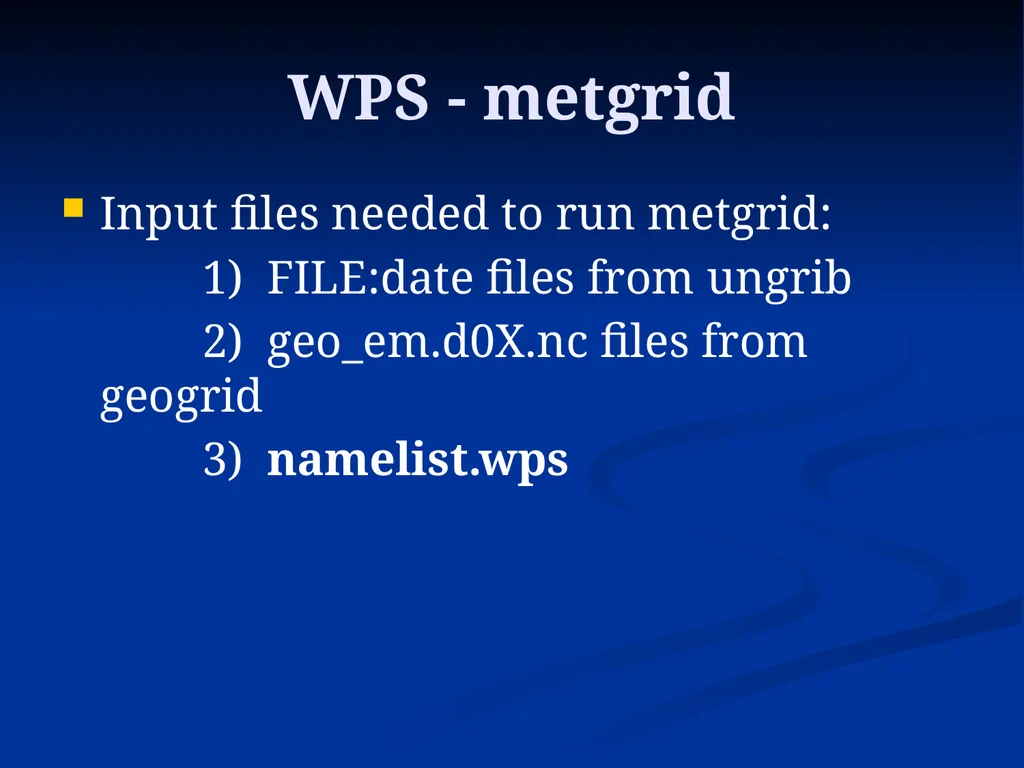
WPS - metgrid Input files needed to run metgrid:
1) FILE:date files from ungrib
2) geo_em.d0X.nc files from geogrid
3) namelist.wps<br>
1) FILE:date files from ungrib
2) geo_em.d0X.nc files from geogrid
3) namelist.wps<br>
29
WPS - metgrid Input files needed to run metgrid:
1) FILE:date files from ungrib
2) geo_em.d0X.nc files from geogrid
3) namelist.wps
Output from metgrid:
1) A set of files called met_em.d01.date.nc
(and met_em.d0X for nests)
2) metgrid.log files<br>
1) FILE:date files from ungrib
2) geo_em.d0X.nc files from geogrid
3) namelist.wps
Output from metgrid:
1) A set of files called met_em.d01.date.nc
(and met_em.d0X for nests)
2) metgrid.log files<br>
30
WPS - metgrid Final Notes on metgrid and WPS
met_em.d0X.date.nc files are netcdf files
All 3 WPS programs are run in the same directory (/lustre/work/your_userID/WPSV4)
Make sure to clean up files before each new WPS run<br>
met_em.d0X.date.nc files are netcdf files
All 3 WPS programs are run in the same directory (/lustre/work/your_userID/WPSV4)
Make sure to clean up files before each new WPS run<br>
31
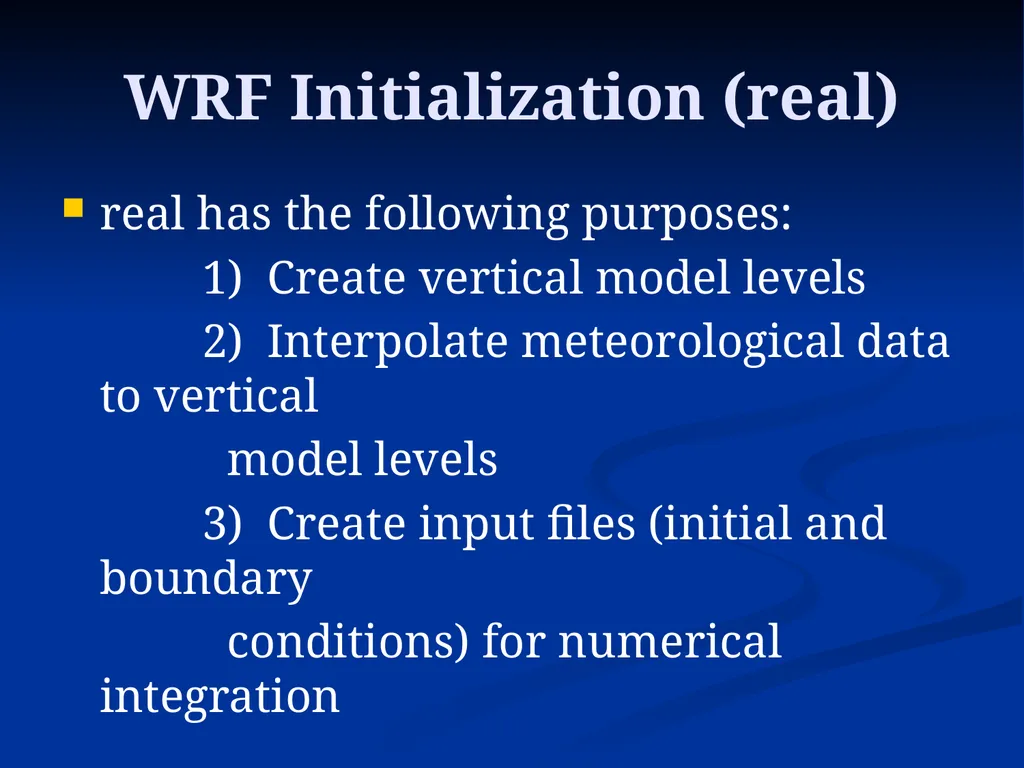
WRF Initialization (real) real has the following purposes:
1) Create vertical model levels<br>
1) Create vertical model levels<br>
32
WRF Initialization (real) real has the following purposes:
1) Create vertical model levels
2) Interpolate meteorological data to vertical
model levels<br>
1) Create vertical model levels
2) Interpolate meteorological data to vertical
model levels<br>
33
WRF Initialization (real) real has the following purposes:
1) Create vertical model levels
2) Interpolate meteorological data to vertical
model levels
3) Create input files (initial and boundary
conditions) for numerical integration<br>
1) Create vertical model levels
2) Interpolate meteorological data to vertical
model levels
3) Create input files (initial and boundary
conditions) for numerical integration<br>
34
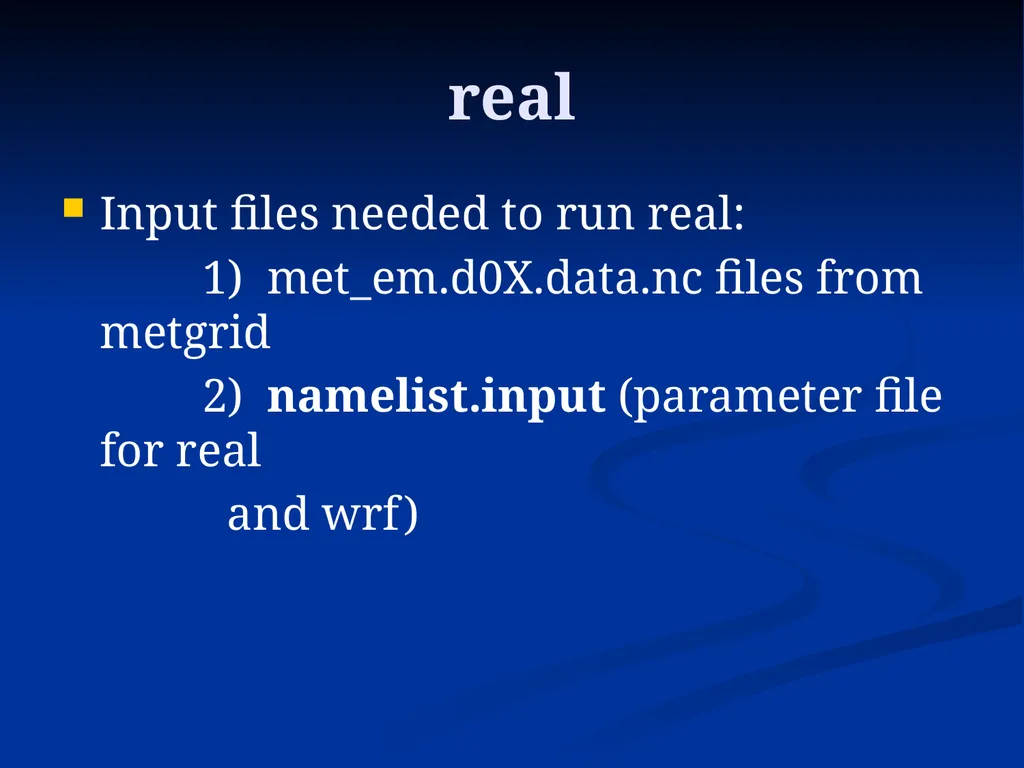
real Input files needed to run real:
1) met_em.d0X.data.nc files from metgrid
2) namelist.input (parameter file for real
and wrf)<br>
1) met_em.d0X.data.nc files from metgrid
2) namelist.input (parameter file for real
and wrf)<br>
35
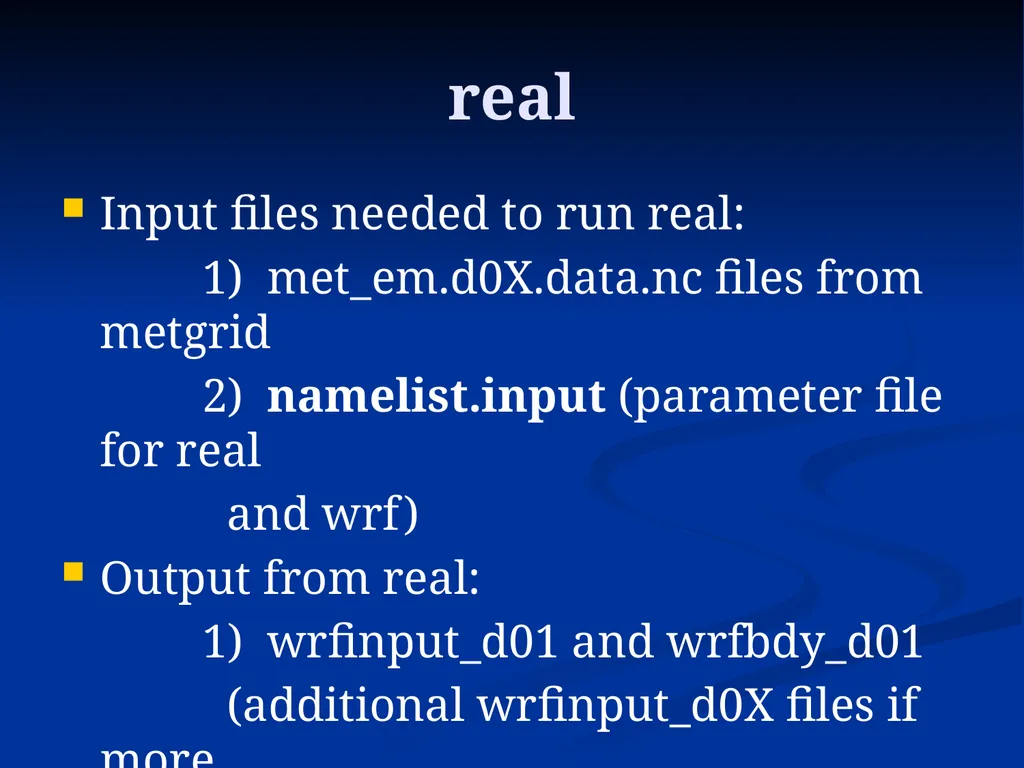
real Input files needed to run real:
1) met_em.d0X.data.nc files from metgrid
2) namelist.input (parameter file for real
and wrf)
Output from real:
1) wrfinput_d01 and wrfbdy_d01
(additional wrfinput_d0X files if more
than 1 domain)
2) Log files (rsl.out.XXXX, rsl.error.XXXX)<br>
1) met_em.d0X.data.nc files from metgrid
2) namelist.input (parameter file for real
and wrf)
Output from real:
1) wrfinput_d01 and wrfbdy_d01
(additional wrfinput_d0X files if more
than 1 domain)
2) Log files (rsl.out.XXXX, rsl.error.XXXX)<br>
36
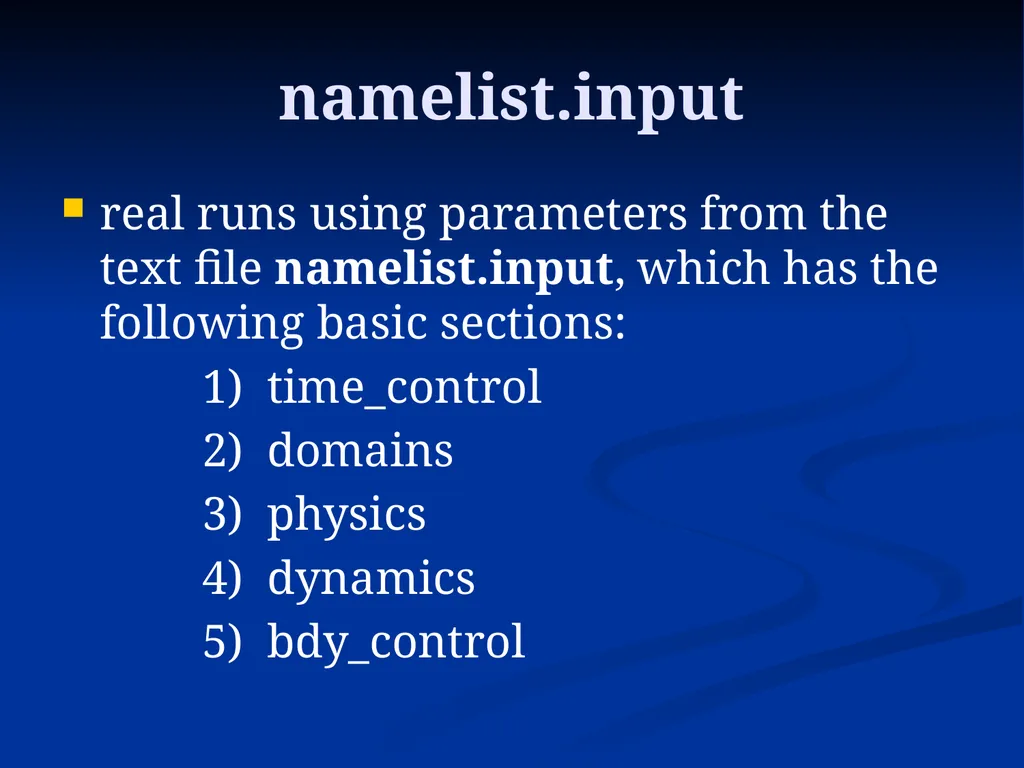
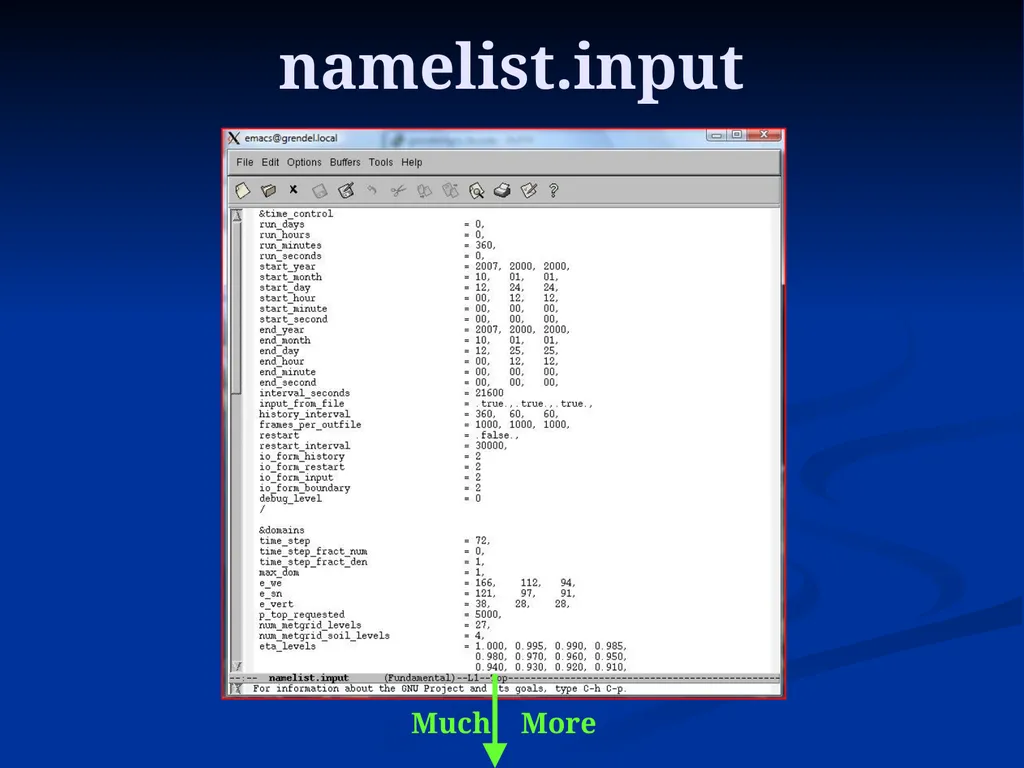
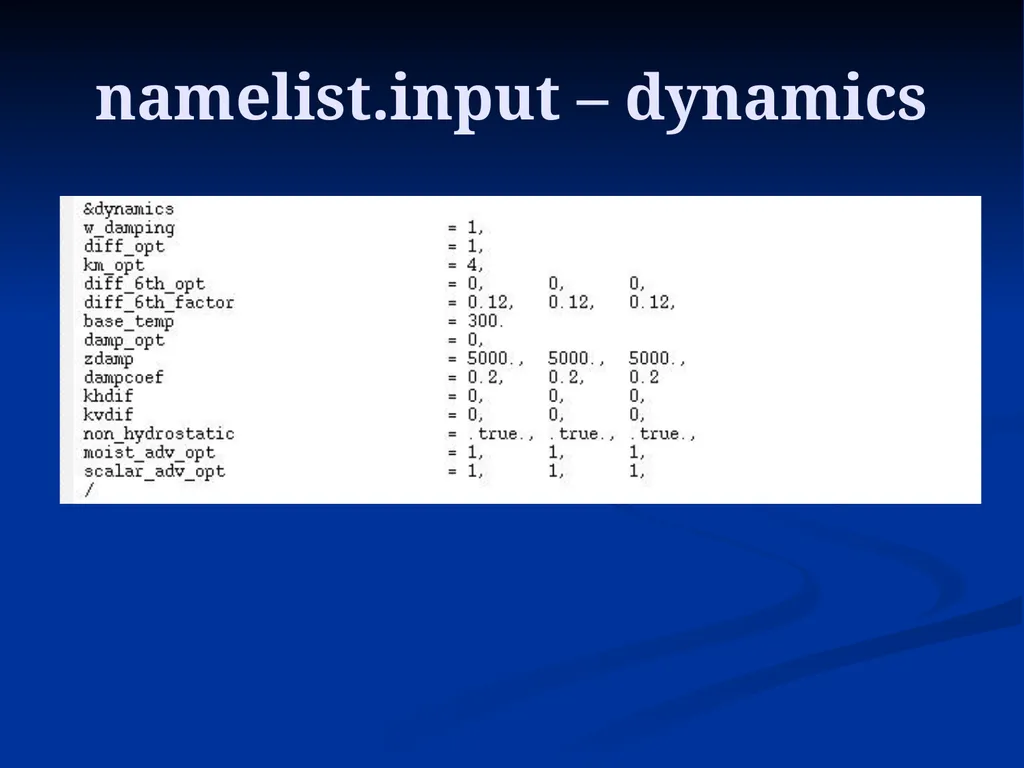
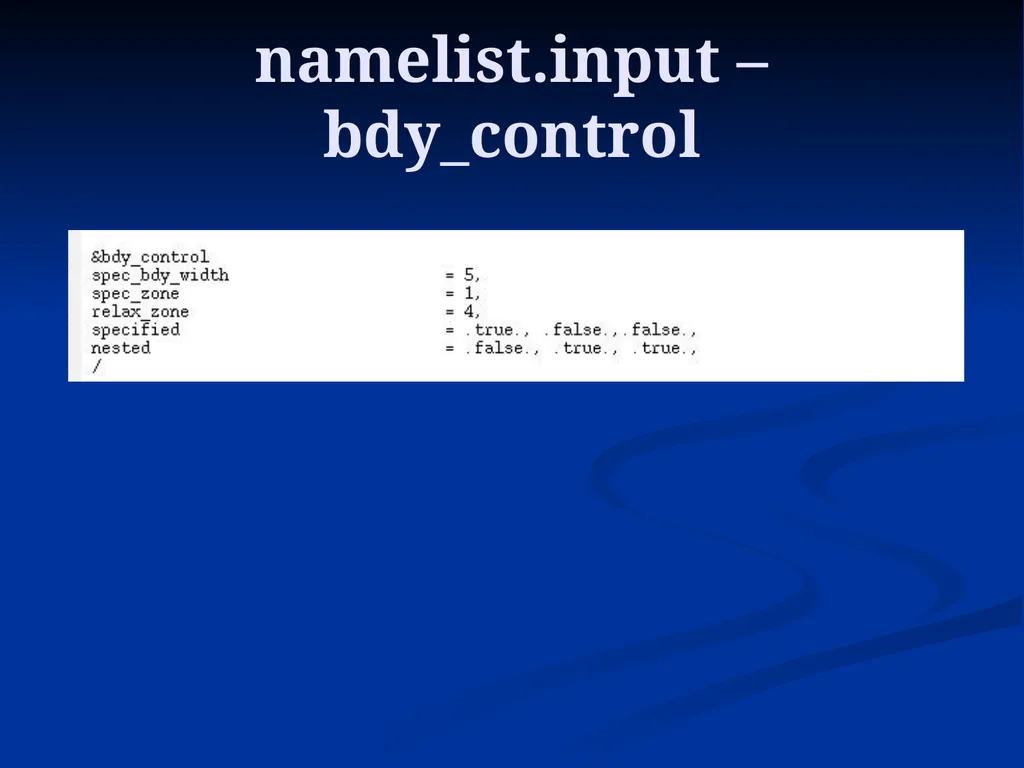
namelist.input real runs using parameters from the text file namelist.input, which has the following basic sections:
1) time_control
2) domains
3) physics
4) dynamics
5) bdy_control<br>
1) time_control
2) domains
3) physics
4) dynamics
5) bdy_control<br>
37
namelist.input Much More<br>
38
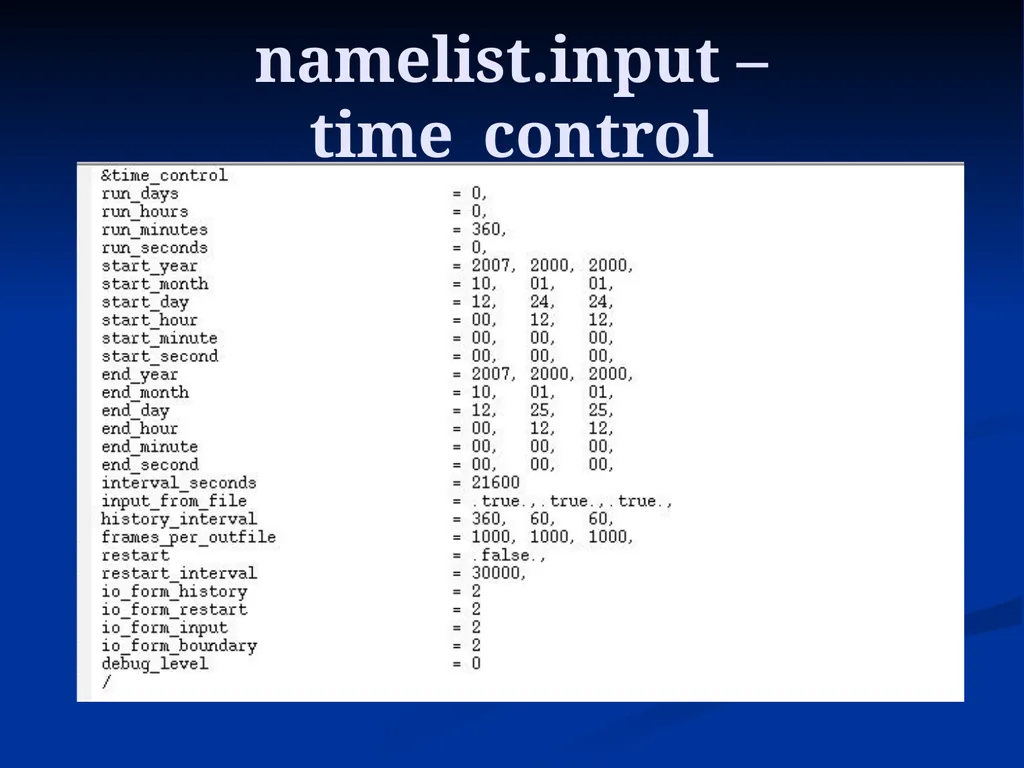
namelist.input – time_control<br>
39
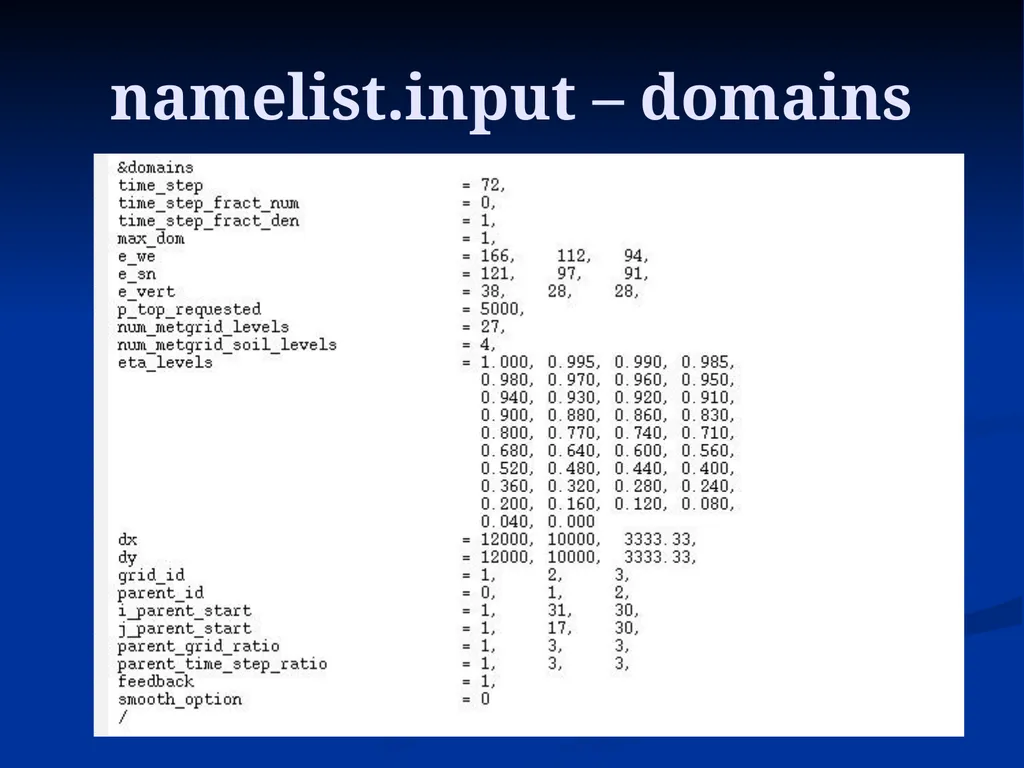
namelist.input – domains<br>
40
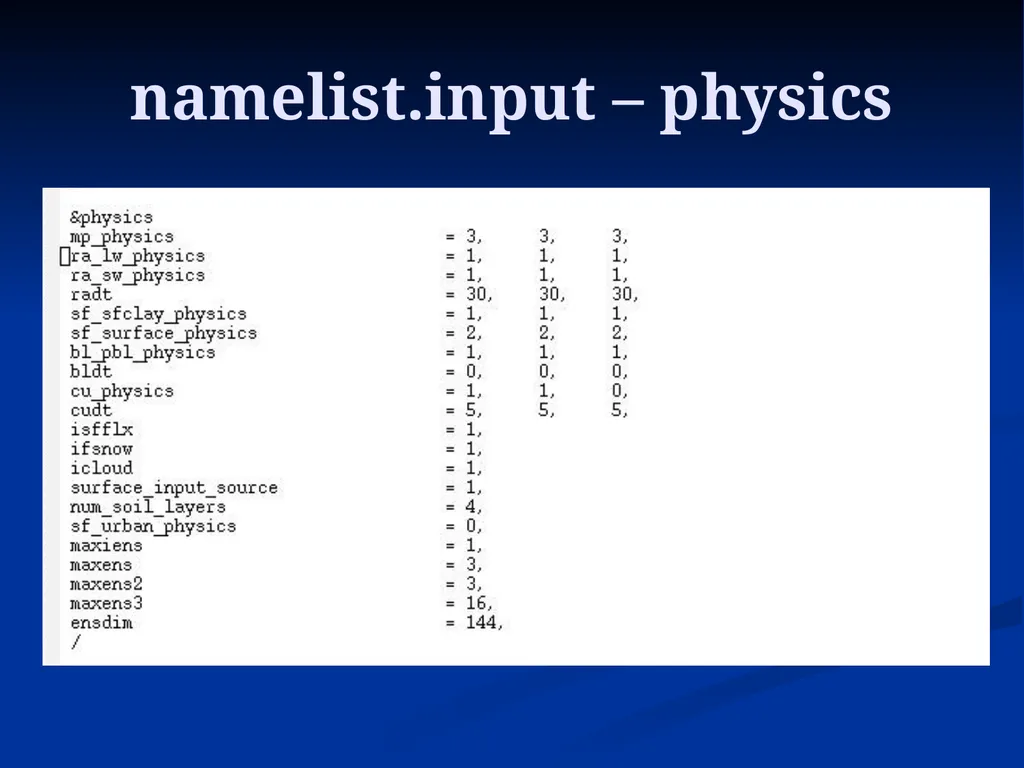
namelist.input – physics<br>
41
namelist.input – dynamics<br>
42
namelist.input – bdy_control<br>
43
WRF Numerical Integration (wrf) wrf has the following purpose:
1) Numerically approximate the solutions to
the model equations to produce a
forecast!!!! Finally!!!!<br>
1) Numerically approximate the solutions to
the model equations to produce a
forecast!!!! Finally!!!!<br>
44
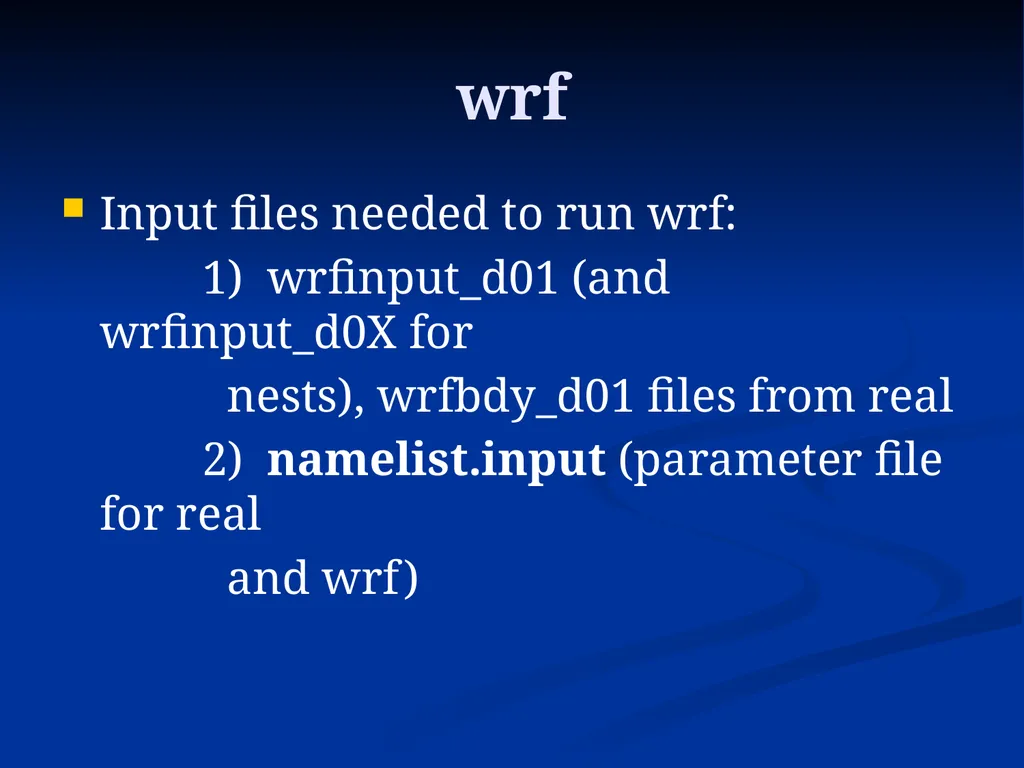
wrf Input files needed to run wrf:
1) wrfinput_d01 (and wrfinput_d0X for
nests), wrfbdy_d01 files from real
2) namelist.input (parameter file for real
and wrf)<br>
1) wrfinput_d01 (and wrfinput_d0X for
nests), wrfbdy_d01 files from real
2) namelist.input (parameter file for real
and wrf)<br>
45
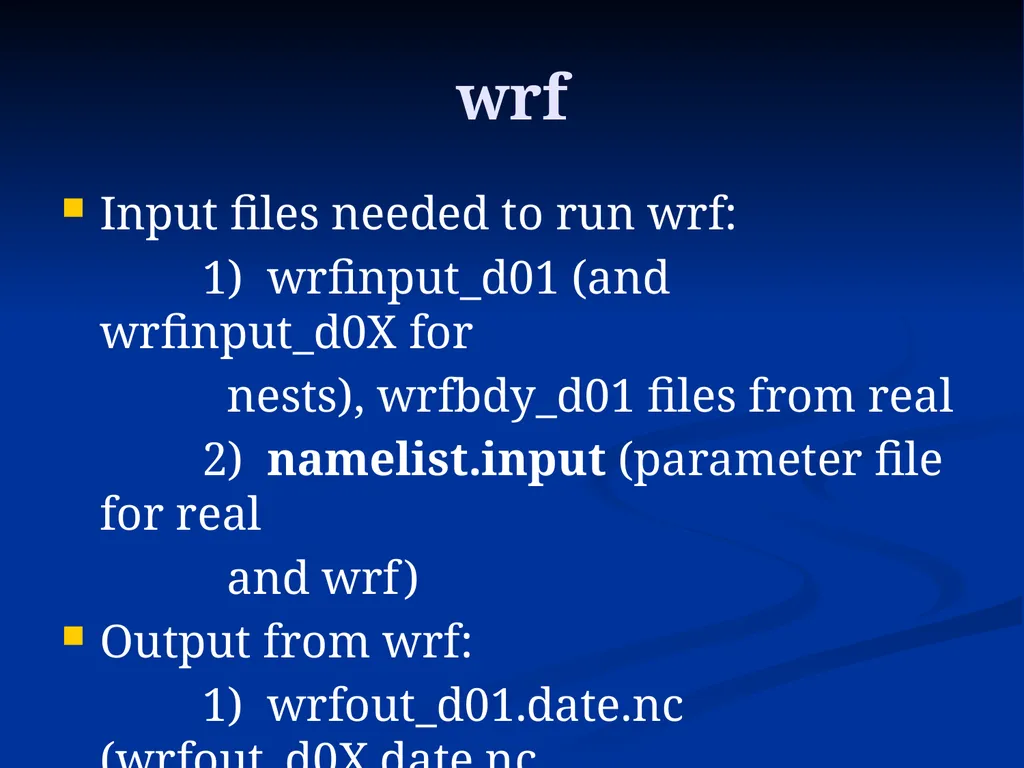
wrf Input files needed to run wrf:
1) wrfinput_d01 (and wrfinput_d0X for
nests), wrfbdy_d01 files from real
2) namelist.input (parameter file for real
and wrf)
Output from wrf:
1) wrfout_d01.date.nc (wrfout_d0X.date.nc
for more than one domain)
2) Log files (rsl.out.XXXX, rsl.error.XXXX)<br>
1) wrfinput_d01 (and wrfinput_d0X for
nests), wrfbdy_d01 files from real
2) namelist.input (parameter file for real
and wrf)
Output from wrf:
1) wrfout_d01.date.nc (wrfout_d0X.date.nc
for more than one domain)
2) Log files (rsl.out.XXXX, rsl.error.XXXX)<br>
46
real and wrf Final Notes on real and wrf
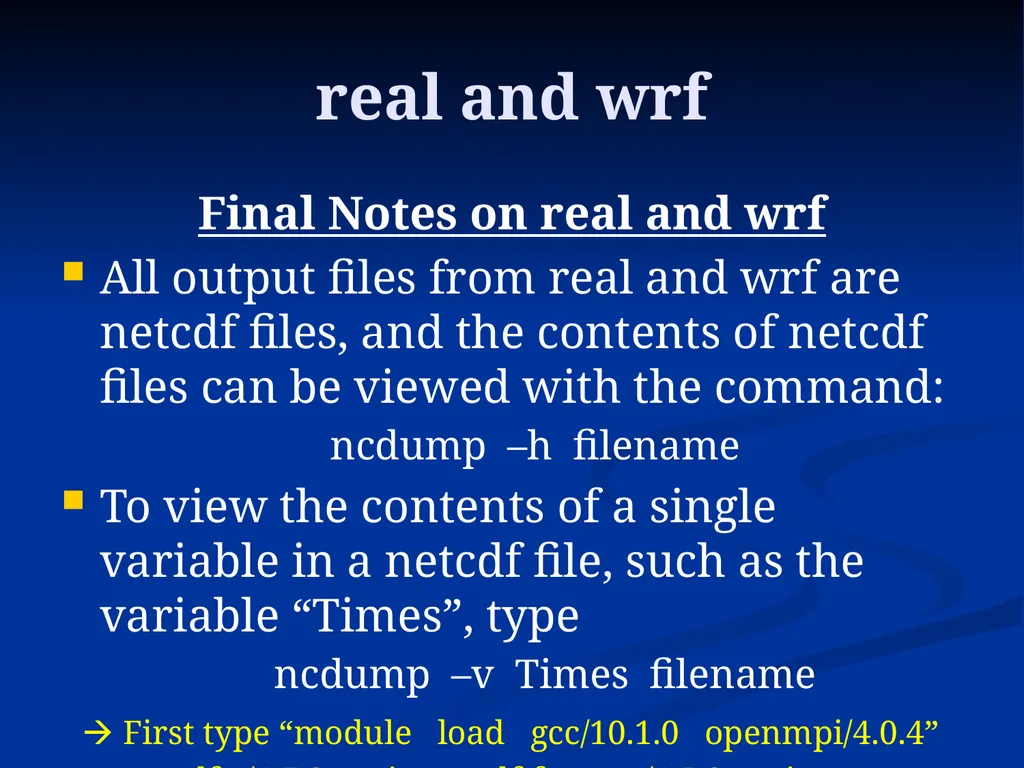
All output files from real and wrf are netcdf files, and the contents of netcdf files can be viewed with the command:
ncdump –h filename
To view the contents of a single variable in a netcdf file, such as the variable “Times”, type
ncdump –v Times filename
First type “module load gcc/10.1.0 openmpi/4.0.4”
netcdf-c/4.7.3-mpi netcdf-fortran/4.5.2-mpi hdf5/1.10.6-mpi”<br>
All output files from real and wrf are netcdf files, and the contents of netcdf files can be viewed with the command:
ncdump –h filename
To view the contents of a single variable in a netcdf file, such as the variable “Times”, type
ncdump –v Times filename
First type “module load gcc/10.1.0 openmpi/4.0.4”
netcdf-c/4.7.3-mpi netcdf-fortran/4.5.2-mpi hdf5/1.10.6-mpi”<br>
47
real and wrf Final Notes on real and wrf
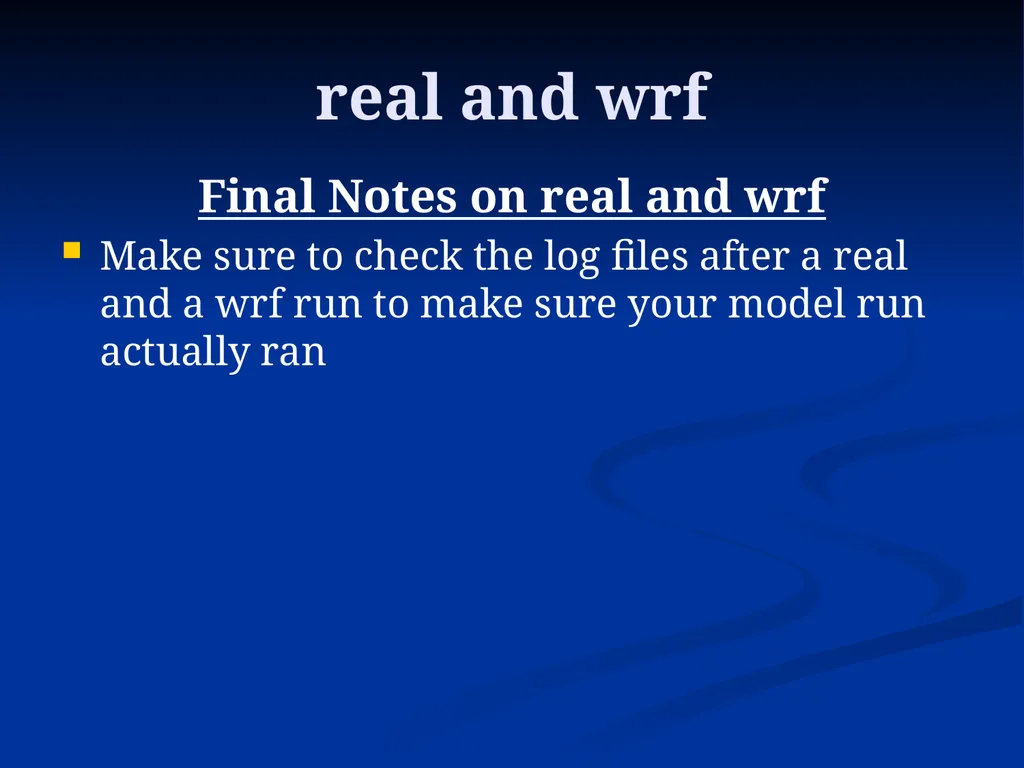
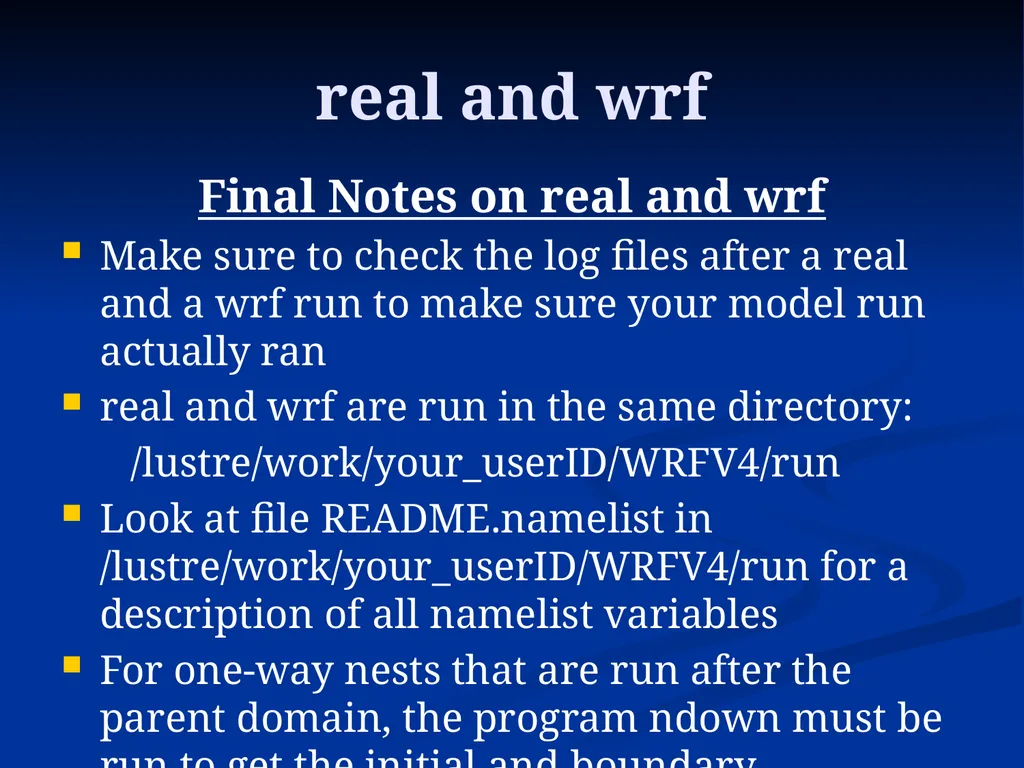
Make sure to check the log files after a real and a wrf run to make sure your model run actually ran<br>
Make sure to check the log files after a real and a wrf run to make sure your model run actually ran<br>
48
real and wrf Final Notes on real and wrf
Make sure to check the log files after a real and a wrf run to make sure your model run actually ran
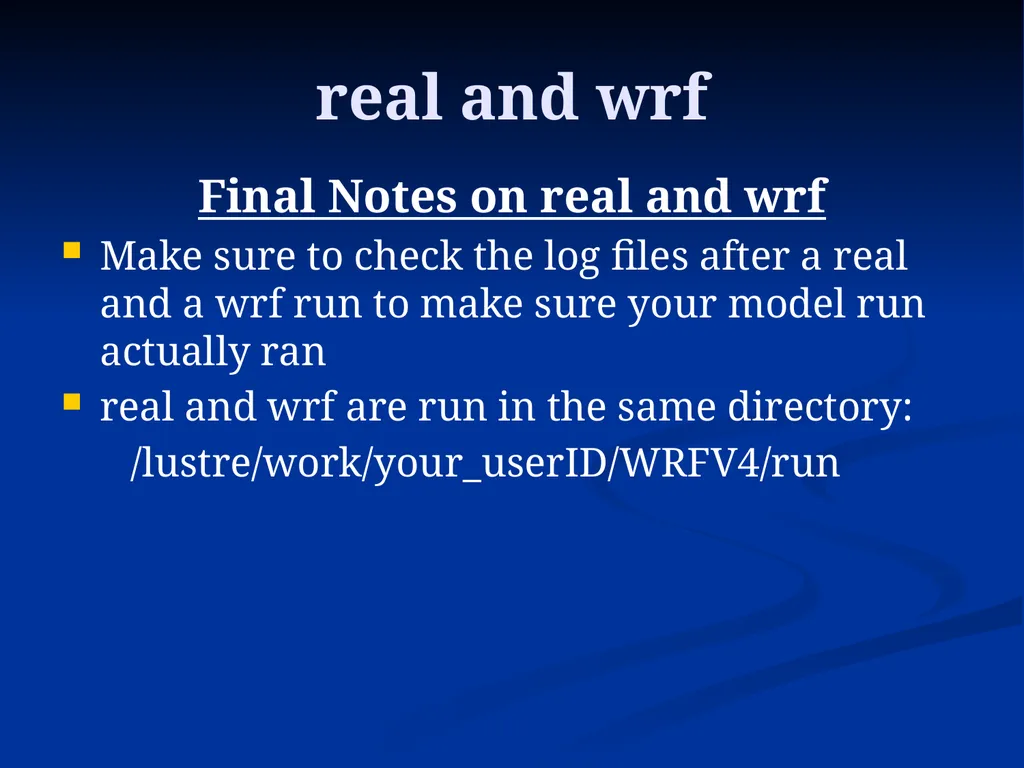
real and wrf are run in the same directory:
/lustre/work/your_userID/WRFV4/run<br>
Make sure to check the log files after a real and a wrf run to make sure your model run actually ran
real and wrf are run in the same directory:
/lustre/work/your_userID/WRFV4/run<br>
49
real and wrf Final Notes on real and wrf
Make sure to check the log files after a real and a wrf run to make sure your model run actually ran
real and wrf are run in the same directory:
/lustre/work/your_userID/WRFV4/run
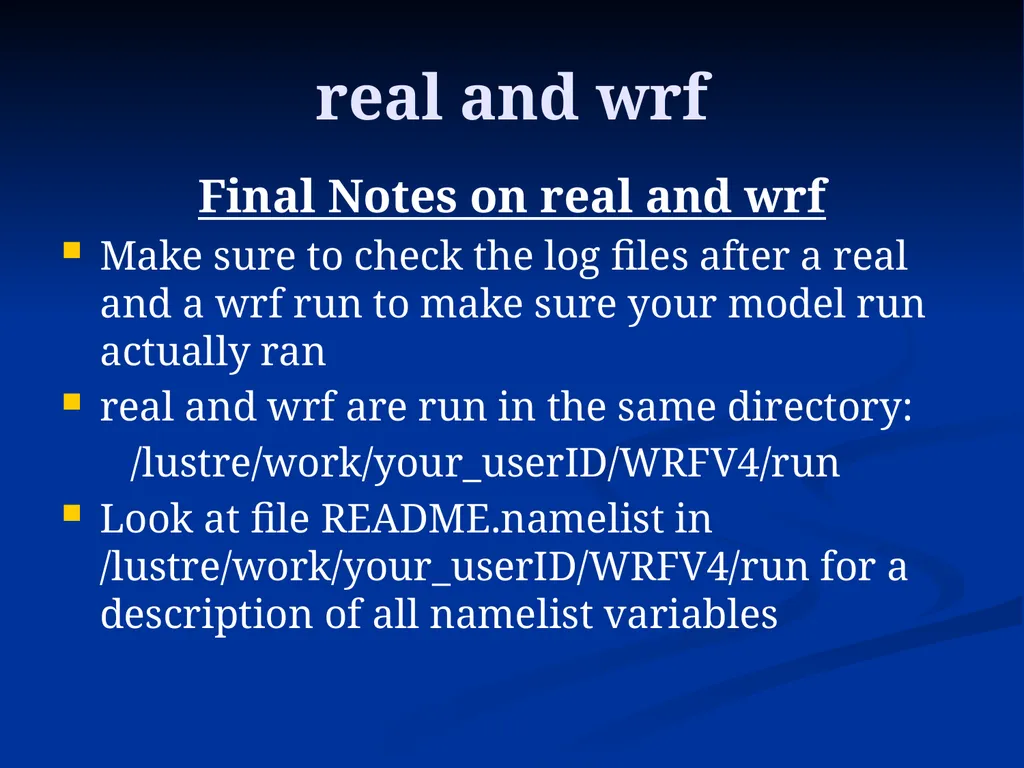
Look at file README.namelist in /lustre/work/your_userID/WRFV4/run for a description of all namelist variables<br>
Make sure to check the log files after a real and a wrf run to make sure your model run actually ran
real and wrf are run in the same directory:
/lustre/work/your_userID/WRFV4/run
Look at file README.namelist in /lustre/work/your_userID/WRFV4/run for a description of all namelist variables<br>
50
real and wrf Final Notes on real and wrf
Make sure to check the log files after a real and a wrf run to make sure your model run actually ran
real and wrf are run in the same directory:
/lustre/work/your_userID/WRFV4/run
Look at file README.namelist in /lustre/work/your_userID/WRFV4/run for a description of all namelist variables
For one-way nests that are run after the parent domain, the program ndown must be run to get the initial and boundary conditions for a nested run…<br>
Make sure to check the log files after a real and a wrf run to make sure your model run actually ran
real and wrf are run in the same directory:
/lustre/work/your_userID/WRFV4/run
Look at file README.namelist in /lustre/work/your_userID/WRFV4/run for a description of all namelist variables
For one-way nests that are run after the parent domain, the program ndown must be run to get the initial and boundary conditions for a nested run…<br>
51
Visualization (RIP) RIP has the following purpose:
1) Forecasts have been made, now we have
to look at them – RIP produces plots of
desired forecast variables<br>
1) Forecasts have been made, now we have
to look at them – RIP produces plots of
desired forecast variables<br>
52
Visualization (RIP) RIP has the following purpose:
1) Forecasts have been made, now we have
to look at them – RIP produces plots of
desired forecast variables
RIP runs using 2 programs:
1) ripdp_wrfarw – data preparation
2) rip - plotting<br>
1) Forecasts have been made, now we have
to look at them – RIP produces plots of
desired forecast variables
RIP runs using 2 programs:
1) ripdp_wrfarw – data preparation
2) rip - plotting<br>
53
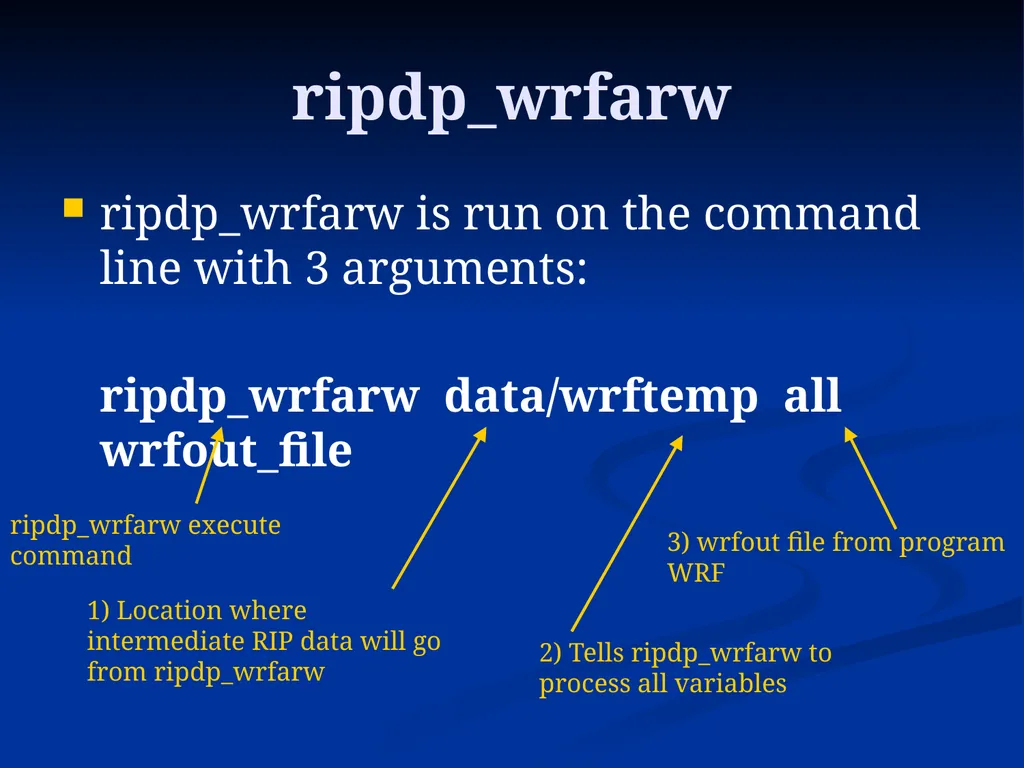
ripdp_wrfarw ripdp_wrfarw is run on the command line with 3 arguments:
ripdp_wrfarw data/wrftemp all wrfout_file ripdp_wrfarw execute command 2) Tells ripdp_wrfarw to process all variables 1) Location where intermediate RIP data will go from ripdp_wrfarw 3) wrfout file from program WRF<br>
ripdp_wrfarw data/wrftemp all wrfout_file ripdp_wrfarw execute command 2) Tells ripdp_wrfarw to process all variables 1) Location where intermediate RIP data will go from ripdp_wrfarw 3) wrfout file from program WRF<br>
54
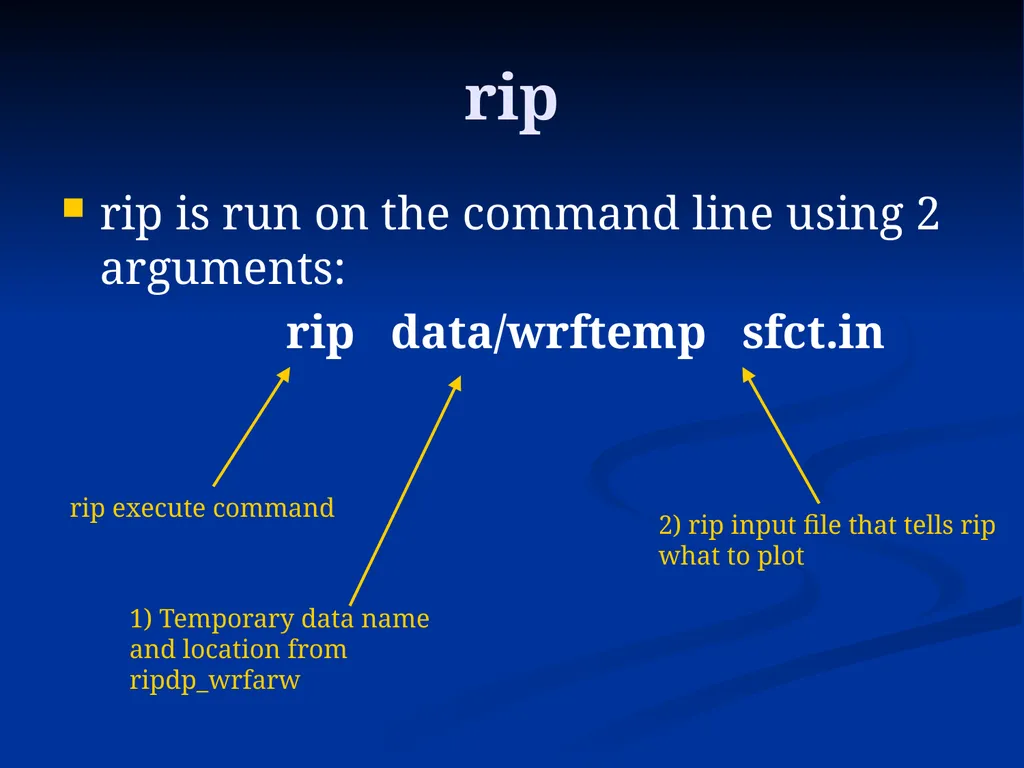
rip rip is run on the command line using 2 arguments:
rip data/wrftemp sfct.in rip execute command 1) Temporary data name and location from ripdp_wrfarw 2) rip input file that tells rip what to plot<br>
rip data/wrftemp sfct.in rip execute command 1) Temporary data name and location from ripdp_wrfarw 2) rip input file that tells rip what to plot<br>
55
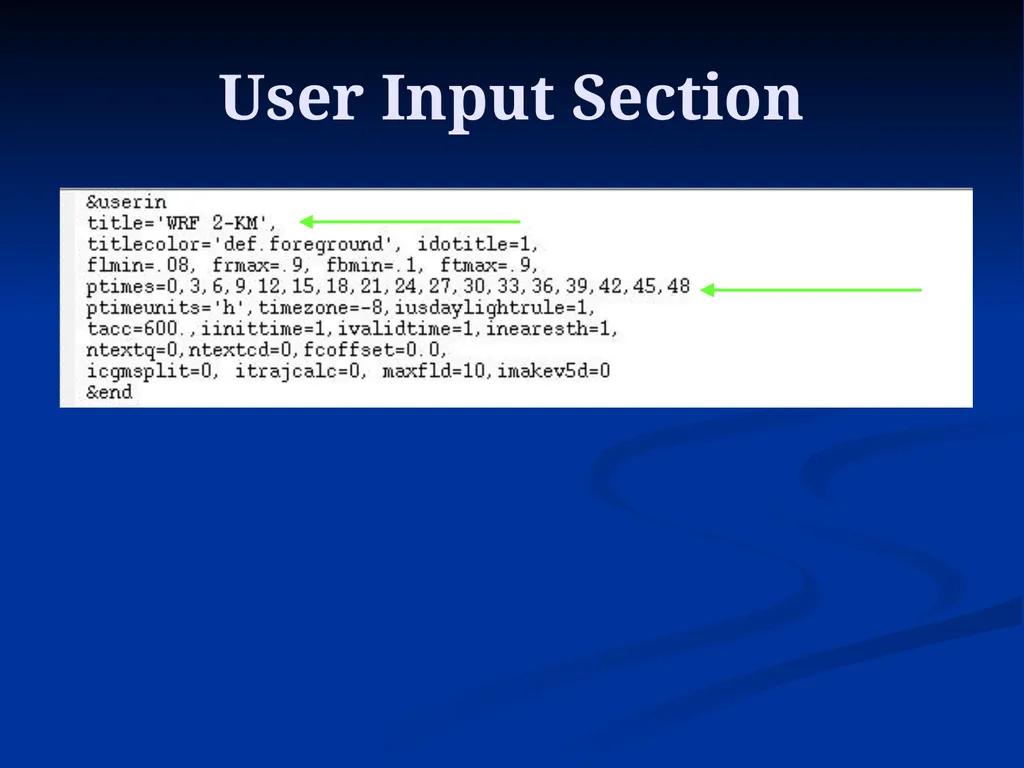
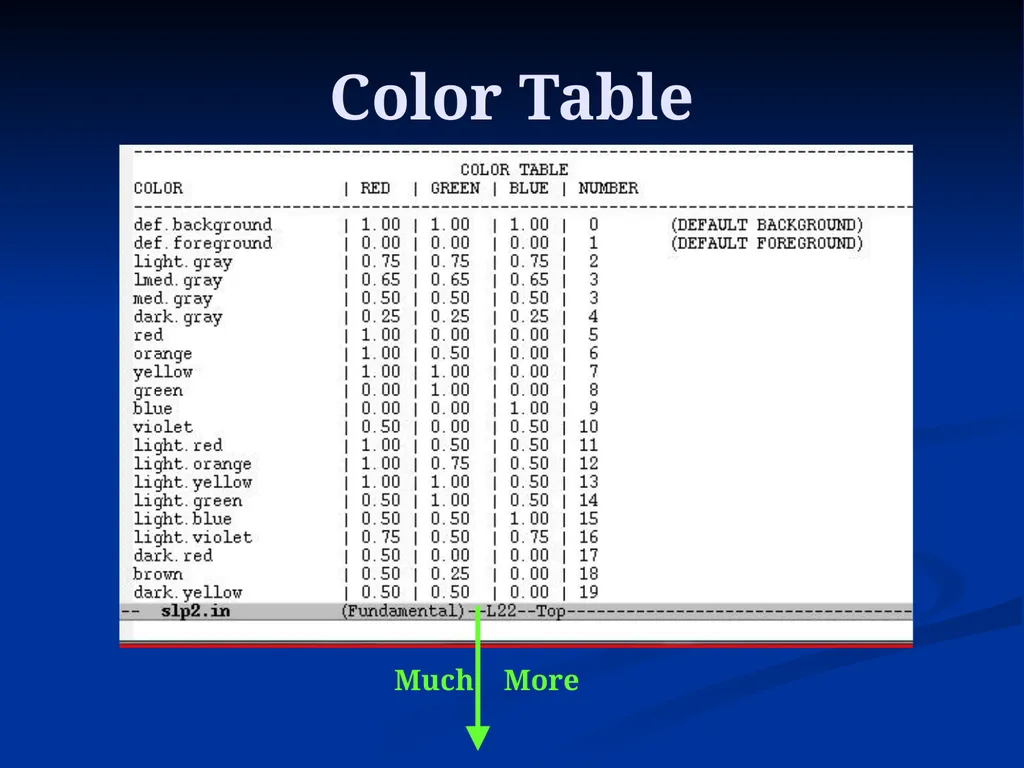
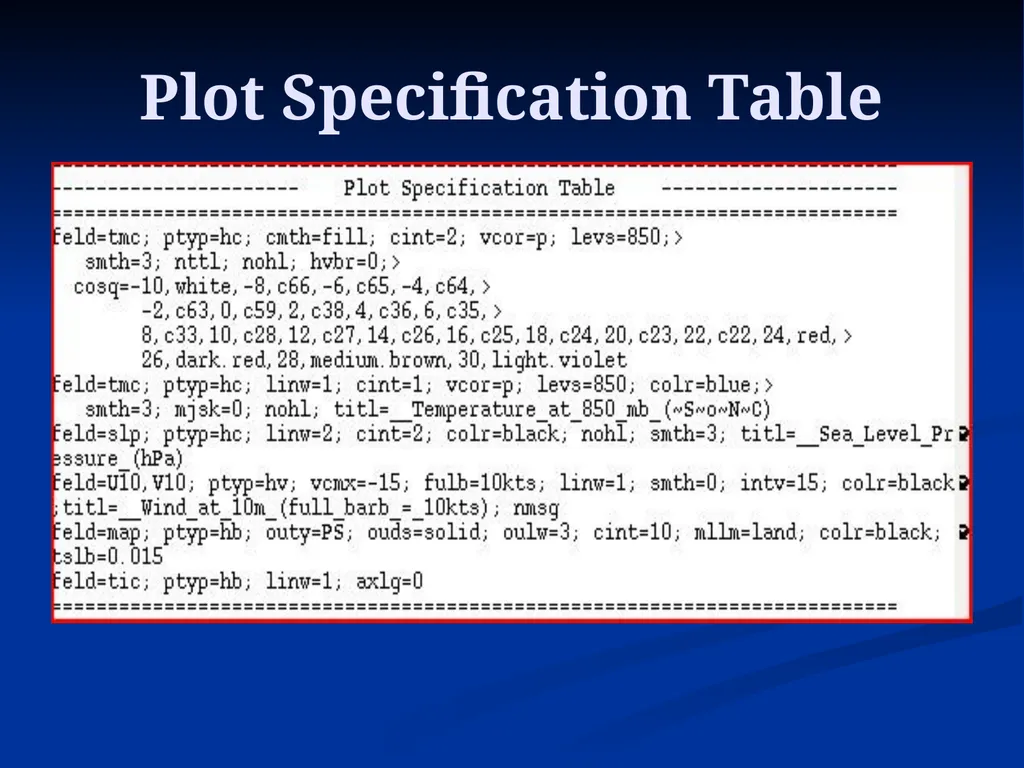
The rip input file A formatted file with the “.in” extension (e.g. slp.in) tells rip what to plot and how to plot it<br>
56
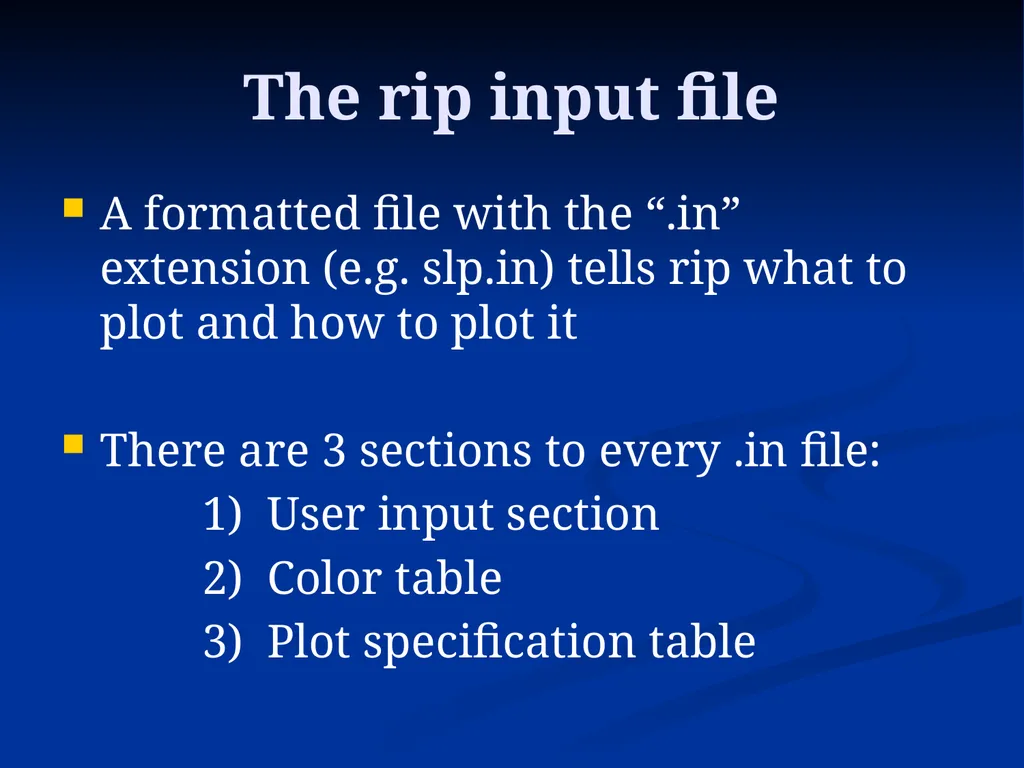
The rip input file A formatted file with the “.in” extension (e.g. slp.in) tells rip what to plot and how to plot it
There are 3 sections to every .in file:
1) User input section
2) Color table
3) Plot specification table<br>
There are 3 sections to every .in file:
1) User input section
2) Color table
3) Plot specification table<br>
57
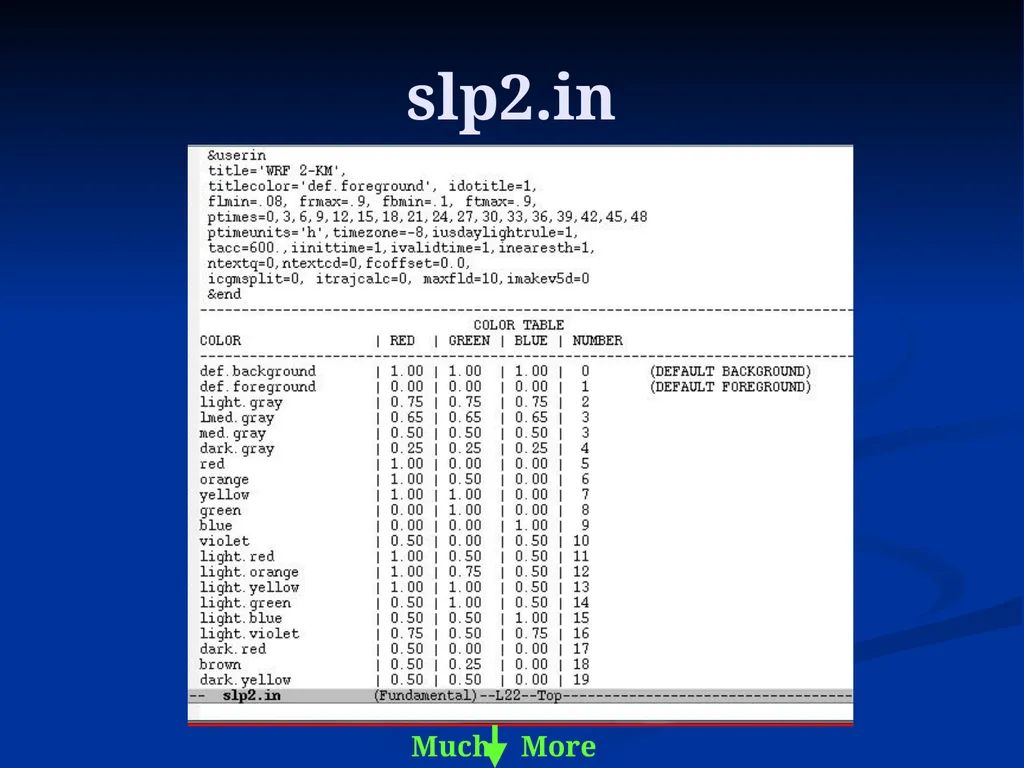
slp2.in Much More<br>
58
User Input Section<br>
59
Color Table Much More<br>
60
Plot Specification Table<br>
61
rip Output from rip is a computer graphics metafile (file with extenstion “.cgm”) that can be viewed with the idt image display tool or converted into .gif image files<br>
62
Running WPS/WRF/RIP Running WPS, real, WRF, and RIP requires a variety of scripts that must be submitted to the quanah queue at the HPCC to run<br>
63
Running WPS/WRF/RIP Running WPS, real, WRF, and RIP requires a variety of scripts that must be submitted to the quanah queue at the HPCC to run
The following is a step-by-step guide on how to setup the required directories, get the required files, and run WPS/real/WRF/RIP from your own directory<br>
The following is a step-by-step guide on how to setup the required directories, get the required files, and run WPS/real/WRF/RIP from your own directory<br>
64
Required WPS Directory Go to directory /lustre/work/your_userID
Type
“cp –r /lustre/research/bancell/atmo5332/WPSV4 ./WPSV4”
- This copies the WPS directory structure to
your work directory
- This is where you will run the WPS programs
(in /lustre/work/your_userID/WPSV4)<br>
Type
“cp –r /lustre/research/bancell/atmo5332/WPSV4 ./WPSV4”
- This copies the WPS directory structure to
your work directory
- This is where you will run the WPS programs
(in /lustre/work/your_userID/WPSV4)<br>
65
Required real/WRF Directory Go to directory /lustre/work/your_userID
Type
“cp –r /lustre/research/bancell/atmo5332/WRFV4 ./WRFV4”
- This copies the real and WRF directory structure to your work directory
- This is where you will run real and wrf
(in /lustre/work/your_userID/WRFV4/run)<br>
Type
“cp –r /lustre/research/bancell/atmo5332/WRFV4 ./WRFV4”
- This copies the real and WRF directory structure to your work directory
- This is where you will run real and wrf
(in /lustre/work/your_userID/WRFV4/run)<br>
66
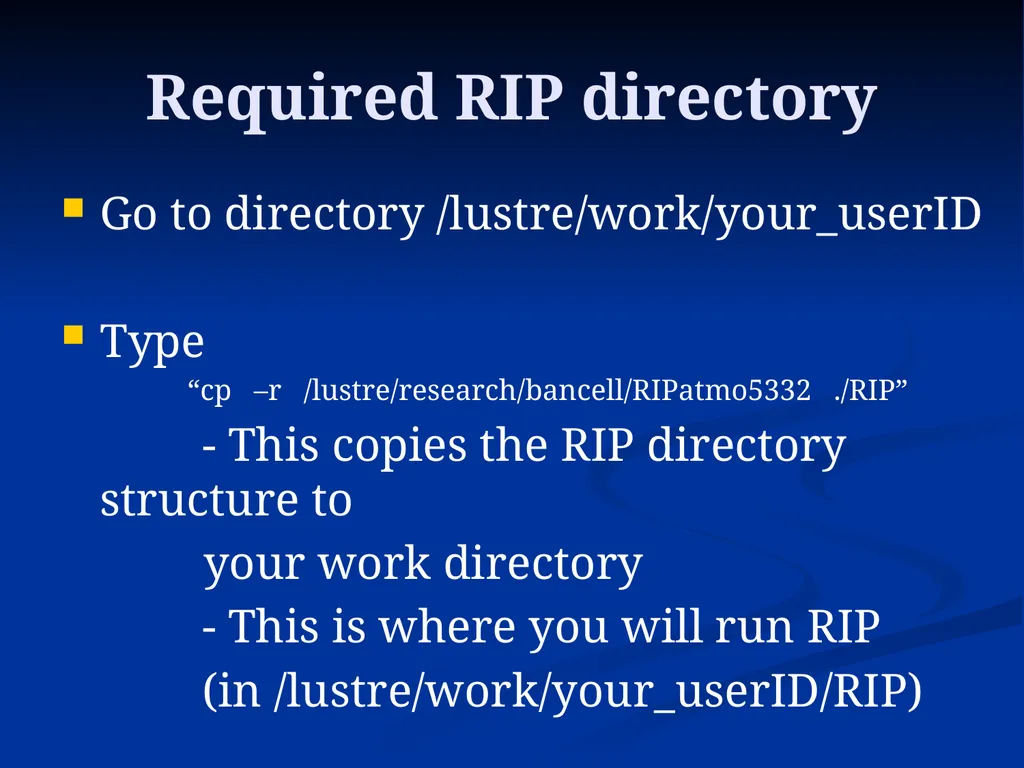
Required RIP directory Go to directory /lustre/work/your_userID
Type
“cp –r /lustre/research/bancell/RIPatmo5332 ./RIP”
- This copies the RIP directory structure to
your work directory
- This is where you will run RIP
(in /lustre/work/your_userID/RIP)<br>
Type
“cp –r /lustre/research/bancell/RIPatmo5332 ./RIP”
- This copies the RIP directory structure to
your work directory
- This is where you will run RIP
(in /lustre/work/your_userID/RIP)<br>
67
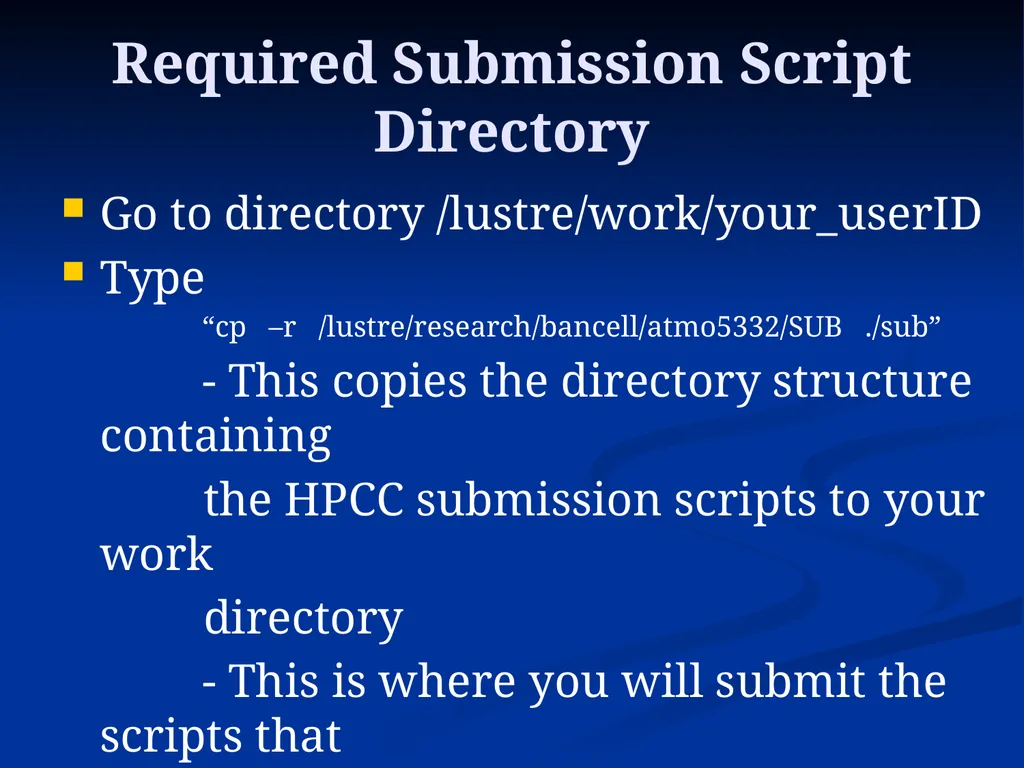
Required Submission Script Directory Go to directory /lustre/work/your_userID
Type
“cp –r /lustre/research/bancell/atmo5332/SUB ./sub”
- This copies the directory structure containing
the HPCC submission scripts to your work
directory
- This is where you will submit the scripts that
run the MPI WPS programs, real, and wrf (in
/lustre/work/your_userID/sub)<br>
Type
“cp –r /lustre/research/bancell/atmo5332/SUB ./sub”
- This copies the directory structure containing
the HPCC submission scripts to your work
directory
- This is where you will submit the scripts that
run the MPI WPS programs, real, and wrf (in
/lustre/work/your_userID/sub)<br>
68
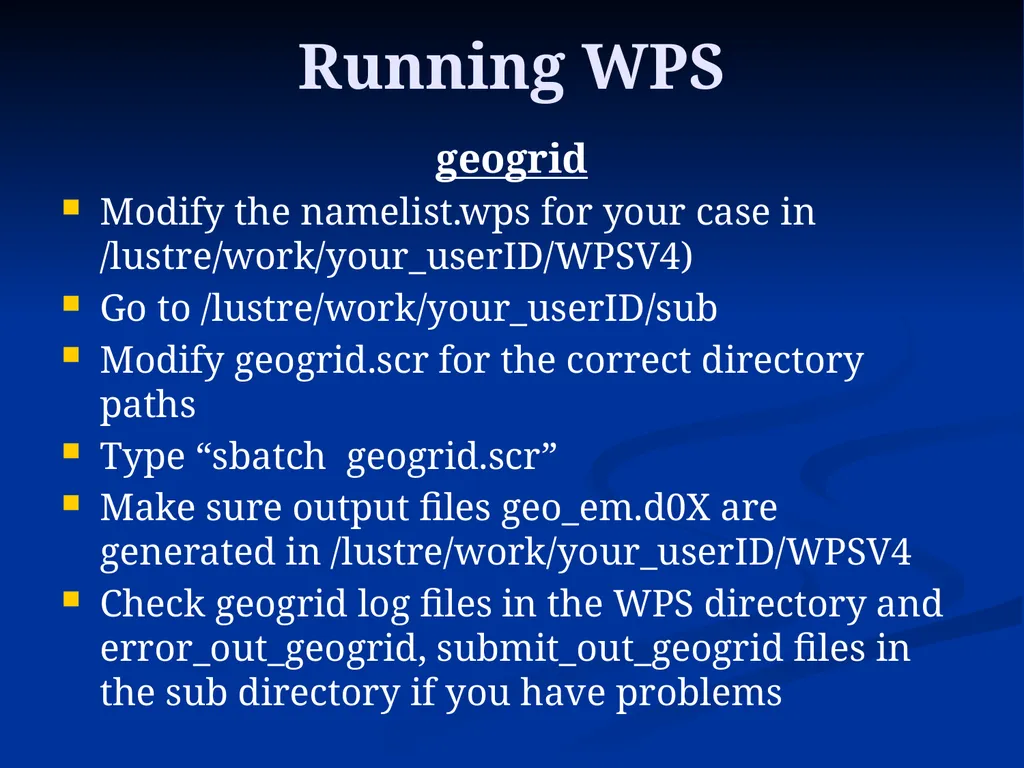
Running WPS geogrid
Modify the namelist.wps for your case in /lustre/work/your_userID/WPSV4)
Go to /lustre/work/your_userID/sub
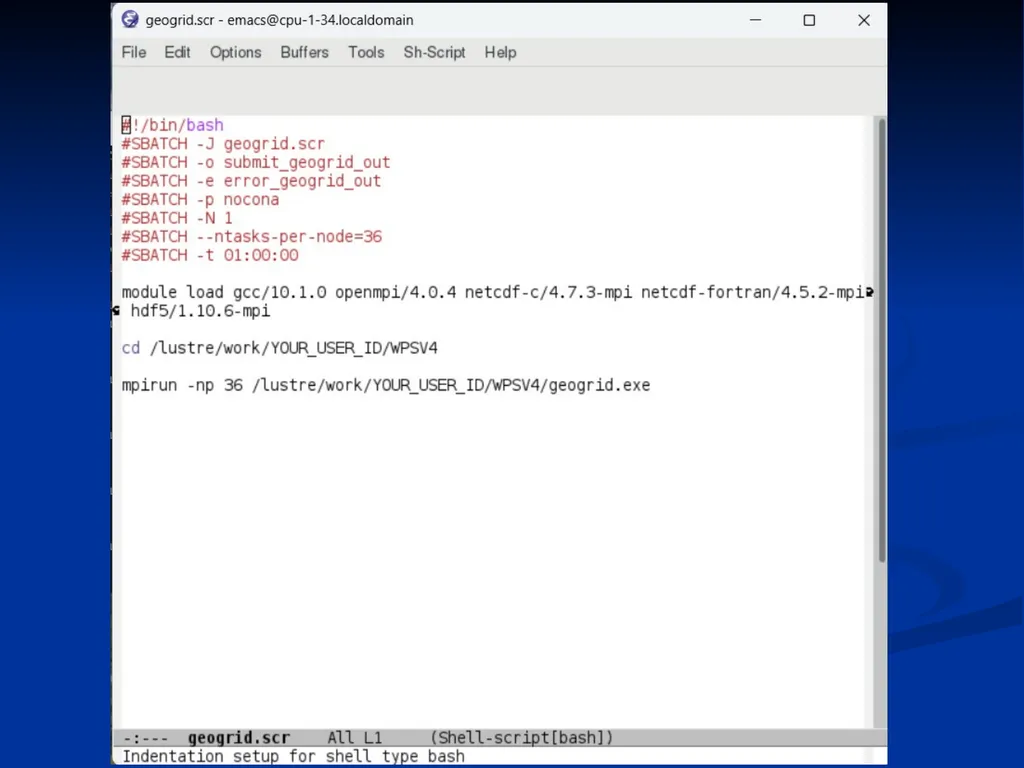
Modify geogrid.scr for the correct directory paths
Type “sbatch geogrid.scr”
Make sure output files geo_em.d0X are generated in /lustre/work/your_userID/WPSV4
Check geogrid log files in the WPS directory and error_out_geogrid, submit_out_geogrid files in the sub directory if you have problems<br>
Modify the namelist.wps for your case in /lustre/work/your_userID/WPSV4)
Go to /lustre/work/your_userID/sub
Modify geogrid.scr for the correct directory paths
Type “sbatch geogrid.scr”
Make sure output files geo_em.d0X are generated in /lustre/work/your_userID/WPSV4
Check geogrid log files in the WPS directory and error_out_geogrid, submit_out_geogrid files in the sub directory if you have problems<br>
69
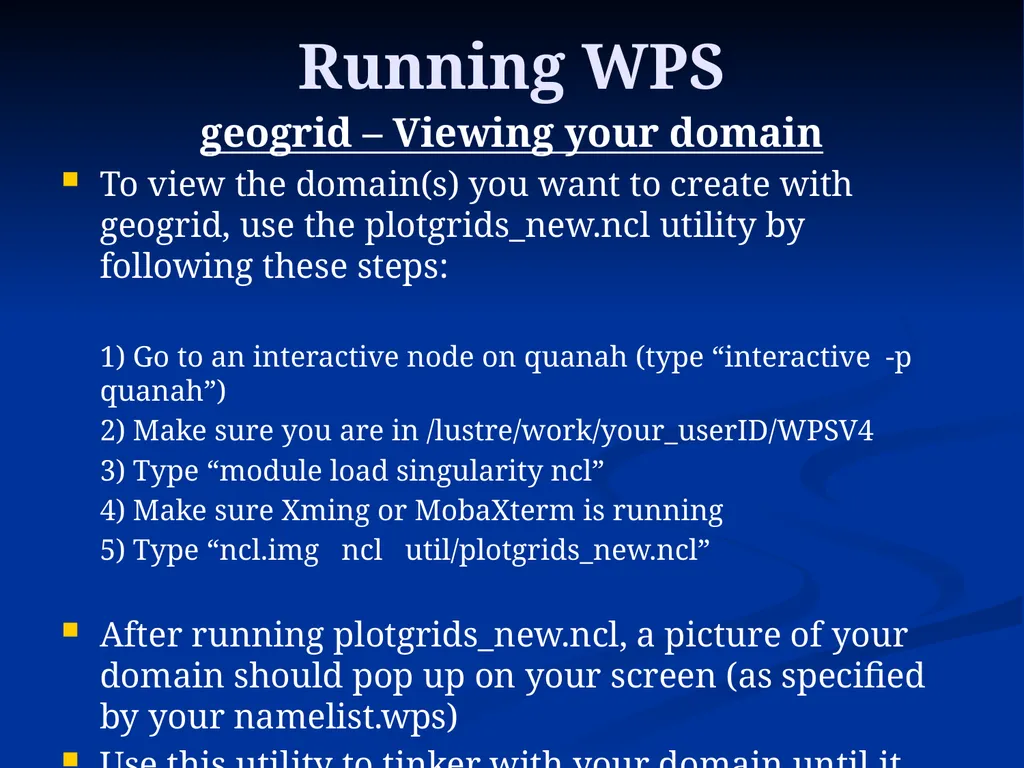
Running WPS geogrid – Viewing your domain
To view the domain(s) you want to create with geogrid, use the plotgrids_new.ncl utility by following these steps:
1) Go to an interactive node on quanah (type “interactive -p quanah”)
2) Make sure you are in /lustre/work/your_userID/WPSV4
3) Type “module load singularity ncl”
4) Make sure Xming or MobaXterm is running
5) Type “ncl.img ncl util/plotgrids_new.ncl”
After running plotgrids_new.ncl, a picture of your domain should pop up on your screen (as specified by your namelist.wps)
Use this utility to tinker with your domain until it looks how you want it to look, then run geogrid.exe<br>
To view the domain(s) you want to create with geogrid, use the plotgrids_new.ncl utility by following these steps:
1) Go to an interactive node on quanah (type “interactive -p quanah”)
2) Make sure you are in /lustre/work/your_userID/WPSV4
3) Type “module load singularity ncl”
4) Make sure Xming or MobaXterm is running
5) Type “ncl.img ncl util/plotgrids_new.ncl”
After running plotgrids_new.ncl, a picture of your domain should pop up on your screen (as specified by your namelist.wps)
Use this utility to tinker with your domain until it looks how you want it to look, then run geogrid.exe<br>
70
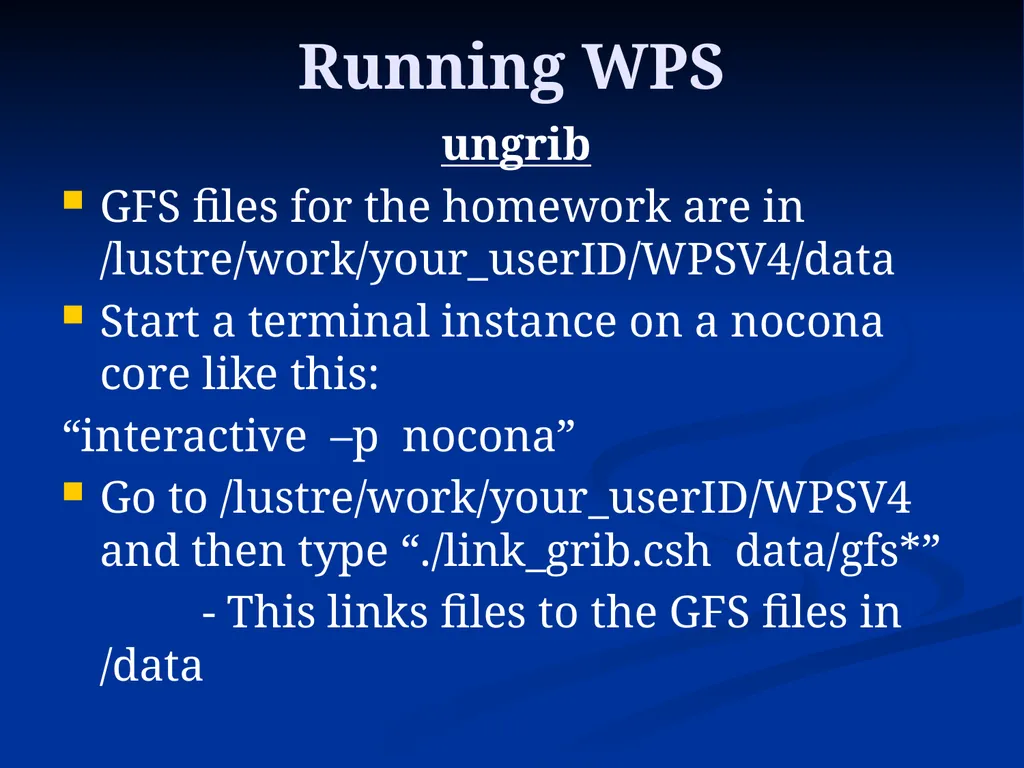
Running WPS ungrib
GFS files for the homework are in /lustre/work/your_userID/WPSV4/data
Start a terminal instance on a nocona core like this:
“interactive –p nocona”
Go to /lustre/work/your_userID/WPSV4 and then type “./link_grib.csh data/gfs*”
- This links files to the GFS files in /data<br>
GFS files for the homework are in /lustre/work/your_userID/WPSV4/data
Start a terminal instance on a nocona core like this:
“interactive –p nocona”
Go to /lustre/work/your_userID/WPSV4 and then type “./link_grib.csh data/gfs*”
- This links files to the GFS files in /data<br>
71
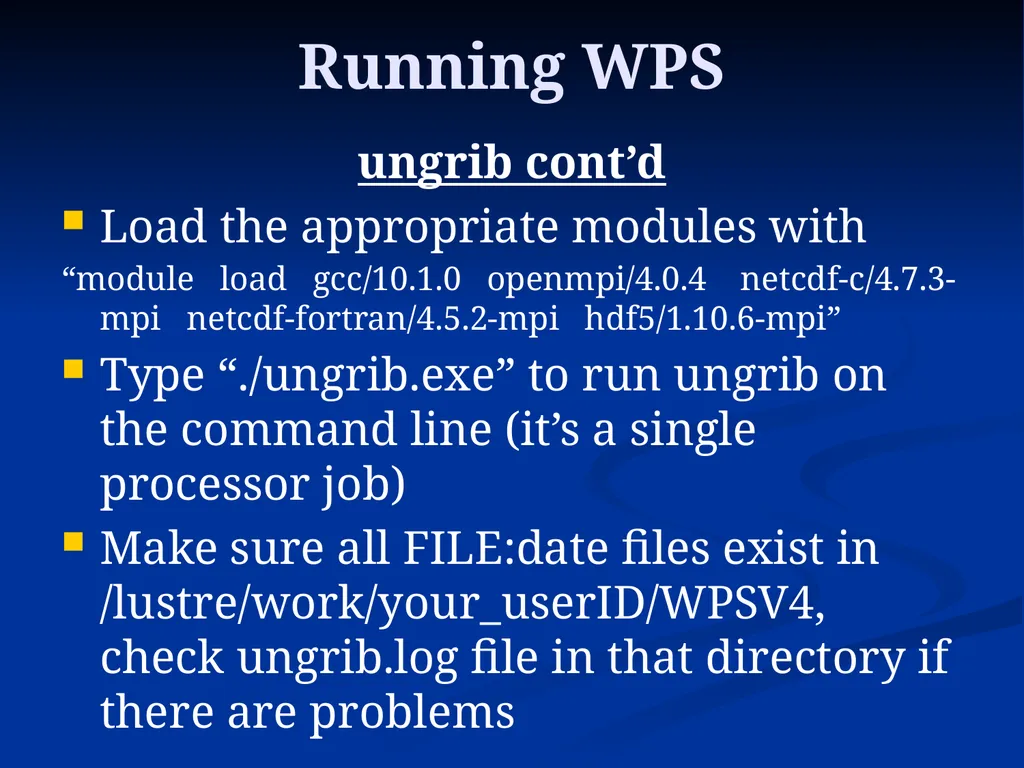
Running WPS ungrib cont’d
Load the appropriate modules with
“module load gcc/10.1.0 openmpi/4.0.4 netcdf-c/4.7.3-mpi netcdf-fortran/4.5.2-mpi hdf5/1.10.6-mpi”
Type “./ungrib.exe” to run ungrib on the command line (it’s a single processor job)
Make sure all FILE:date files exist in /lustre/work/your_userID/WPSV4, check ungrib.log file in that directory if there are problems<br>
Load the appropriate modules with
“module load gcc/10.1.0 openmpi/4.0.4 netcdf-c/4.7.3-mpi netcdf-fortran/4.5.2-mpi hdf5/1.10.6-mpi”
Type “./ungrib.exe” to run ungrib on the command line (it’s a single processor job)
Make sure all FILE:date files exist in /lustre/work/your_userID/WPSV4, check ungrib.log file in that directory if there are problems<br>
72
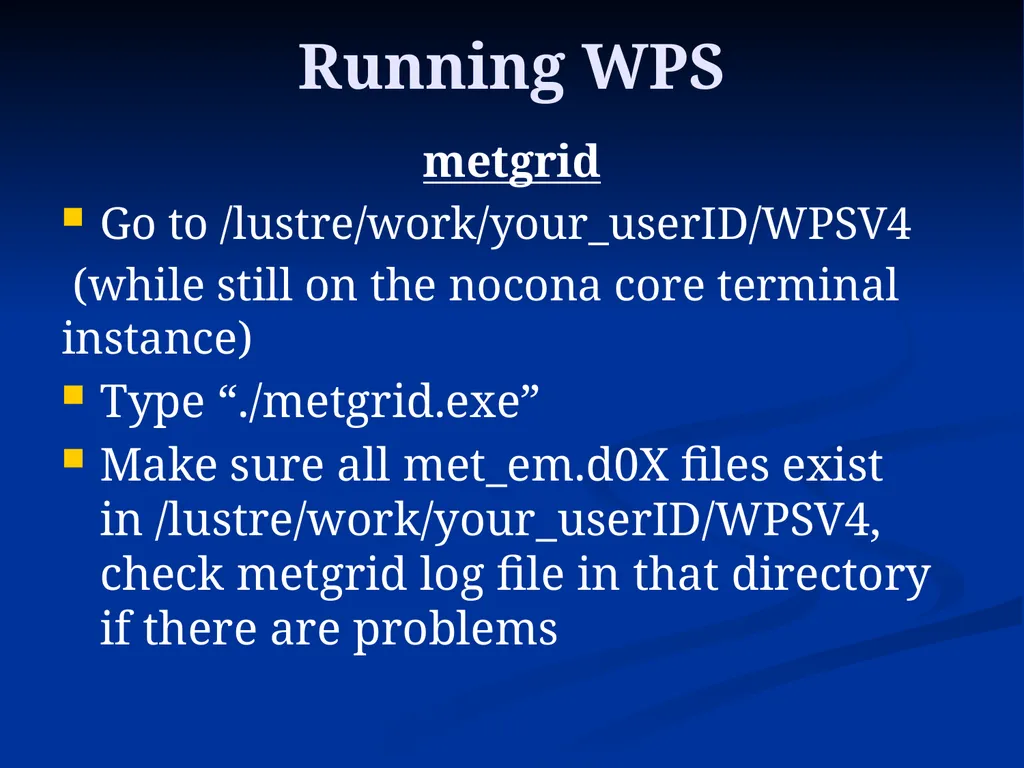
Running WPS metgrid
Go to /lustre/work/your_userID/WPSV4
(while still on the nocona core terminal instance)
Type “./metgrid.exe”
Make sure all met_em.d0X files exist in /lustre/work/your_userID/WPSV4, check metgrid log file in that directory if there are problems<br>
Go to /lustre/work/your_userID/WPSV4
(while still on the nocona core terminal instance)
Type “./metgrid.exe”
Make sure all met_em.d0X files exist in /lustre/work/your_userID/WPSV4, check metgrid log file in that directory if there are problems<br>
73
Running real Exit the terminal instance (it’s no longer needed)
Go to /lustre/work/your_userID/WRFV4/run
Copy all met_em.d0X files from the WPS directory to the above WRF directory
Modify the file namelist.input for your case
Go to /lustre/work/your_userID/sub
Modify real.scr for the correct directory paths
Type “sbatch real.scr”<br>
Go to /lustre/work/your_userID/WRFV4/run
Copy all met_em.d0X files from the WPS directory to the above WRF directory
Modify the file namelist.input for your case
Go to /lustre/work/your_userID/sub
Modify real.scr for the correct directory paths
Type “sbatch real.scr”<br>
74
Running real cont’d Make sure the files wrfinput_d0X and wrfbdy_d01 exist in /lustre/work/your_userID/WRFV4/run, check rsl log files in that directory as well as submit_out_real, error_out_real log files in the sub directory if you have problems<br>
75
Running wrf Go to /lustre/work/your_userID/sub
Modify wrf.scr for the correct directory paths
Type “sbatch wrf.scr”
Make sure the file wrfout_d0X.date.nc exists in /lustre/work/your_userID/WRFV4/run, check rsl log files in that directory as well as submit_out_wrf, error_out_wrf log files in the sub directory if you have problems
Make sure your run finished by looking at the end of the rsl.out.0000 file in the WRF directory<br>
Modify wrf.scr for the correct directory paths
Type “sbatch wrf.scr”
Make sure the file wrfout_d0X.date.nc exists in /lustre/work/your_userID/WRFV4/run, check rsl log files in that directory as well as submit_out_wrf, error_out_wrf log files in the sub directory if you have problems
Make sure your run finished by looking at the end of the rsl.out.0000 file in the WRF directory<br>
76
Running RIP RIP will be run on a terminal instance on quanah
(type “interactive -p quanah”)
Go to /lustre/work/your_userID/RIP
Load the following modules by typing
“module load intel netcdf-serial xanim”
Set the following environmental variables by typing the following three commands:
“export RIP_ROOT=.”
“export NCARG_ROOT=/home/bancell/ncl_ncarg”
“export LD_LIBRARY_PATH=/home/bancell/netpbm/lib:$LD_LIBRARY_PATH<br>
(type “interactive -p quanah”)
Go to /lustre/work/your_userID/RIP
Load the following modules by typing
“module load intel netcdf-serial xanim”
Set the following environmental variables by typing the following three commands:
“export RIP_ROOT=.”
“export NCARG_ROOT=/home/bancell/ncl_ncarg”
“export LD_LIBRARY_PATH=/home/bancell/netpbm/lib:$LD_LIBRARY_PATH<br>
77
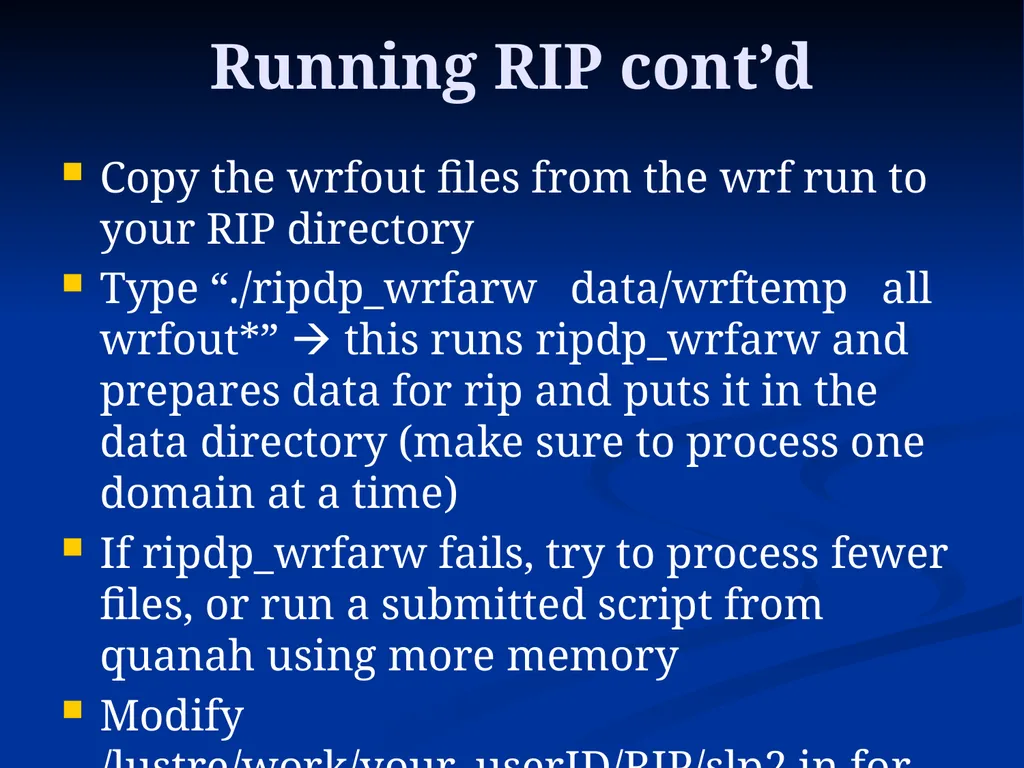
Running RIP cont’d Copy the wrfout files from the wrf run to your RIP directory
Type “./ripdp_wrfarw data/wrftemp all wrfout*” this runs ripdp_wrfarw and prepares data for rip and puts it in the data directory (make sure to process one domain at a time)
If ripdp_wrfarw fails, try to process fewer files, or run a submitted script from quanah using more memory
Modify /lustre/work/your_userID/RIP/slp2.in for your desired plot<br>
Type “./ripdp_wrfarw data/wrftemp all wrfout*” this runs ripdp_wrfarw and prepares data for rip and puts it in the data directory (make sure to process one domain at a time)
If ripdp_wrfarw fails, try to process fewer files, or run a submitted script from quanah using more memory
Modify /lustre/work/your_userID/RIP/slp2.in for your desired plot<br>
78
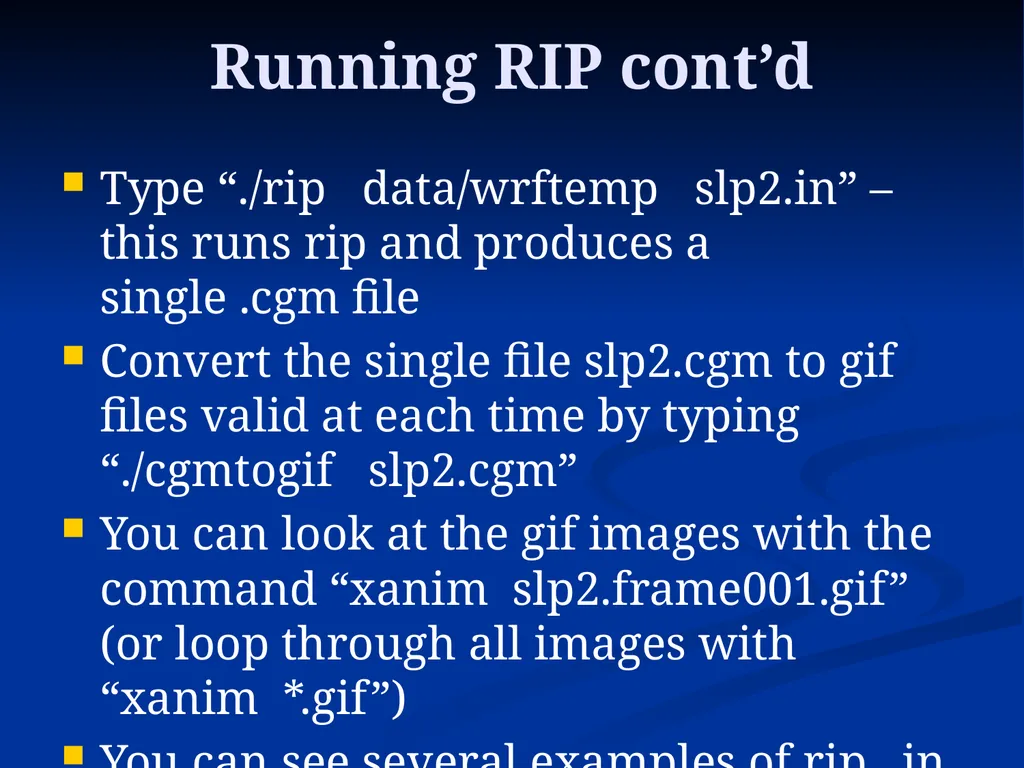
Running RIP cont’d Type “./rip data/wrftemp slp2.in” – this runs rip and produces a single .cgm file
Convert the single file slp2.cgm to gif files valid at each time by typing “./cgmtogif slp2.cgm”
You can look at the gif images with the command “xanim slp2.frame001.gif” (or loop through all images with “xanim *.gif”)
You can see several examples of rip .in files in the /exampleripfiles directory of your RIP directory<br>
Convert the single file slp2.cgm to gif files valid at each time by typing “./cgmtogif slp2.cgm”
You can look at the gif images with the command “xanim slp2.frame001.gif” (or loop through all images with “xanim *.gif”)
You can see several examples of rip .in files in the /exampleripfiles directory of your RIP directory<br>
79
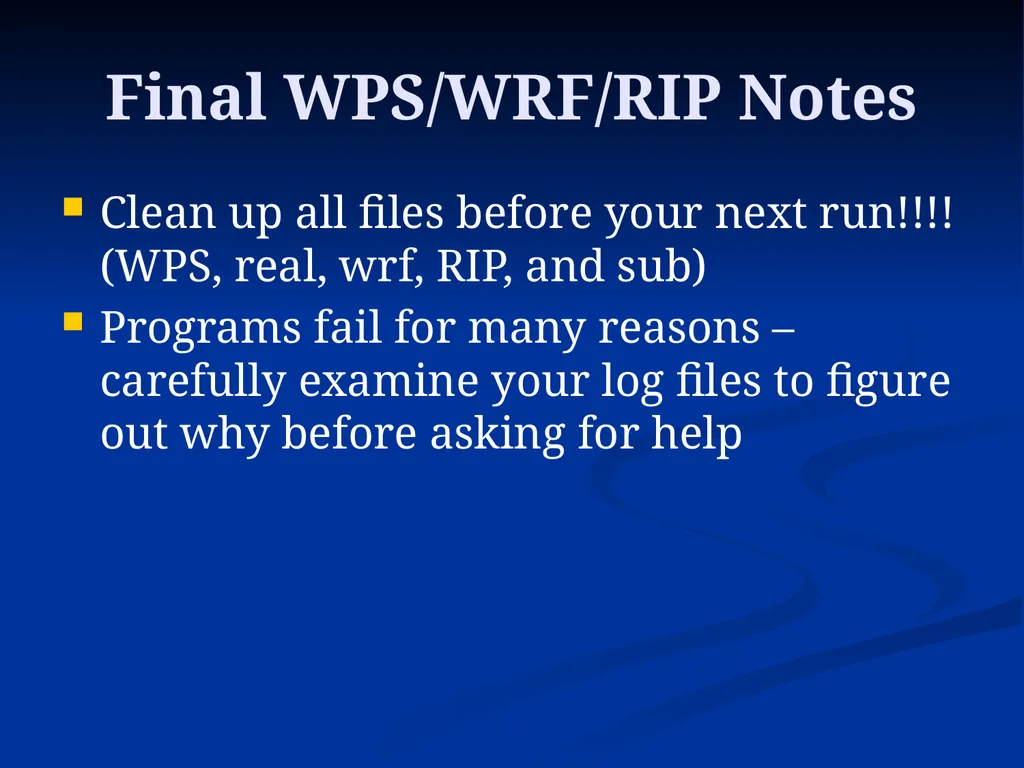
Final WPS/WRF/RIP Notes Clean up all files before your next run!!!! (WPS, real, wrf, RIP, and sub)
Programs fail for many reasons – carefully examine your log files to figure out why before asking for help<br>
Programs fail for many reasons – carefully examine your log files to figure out why before asking for help<br>
80
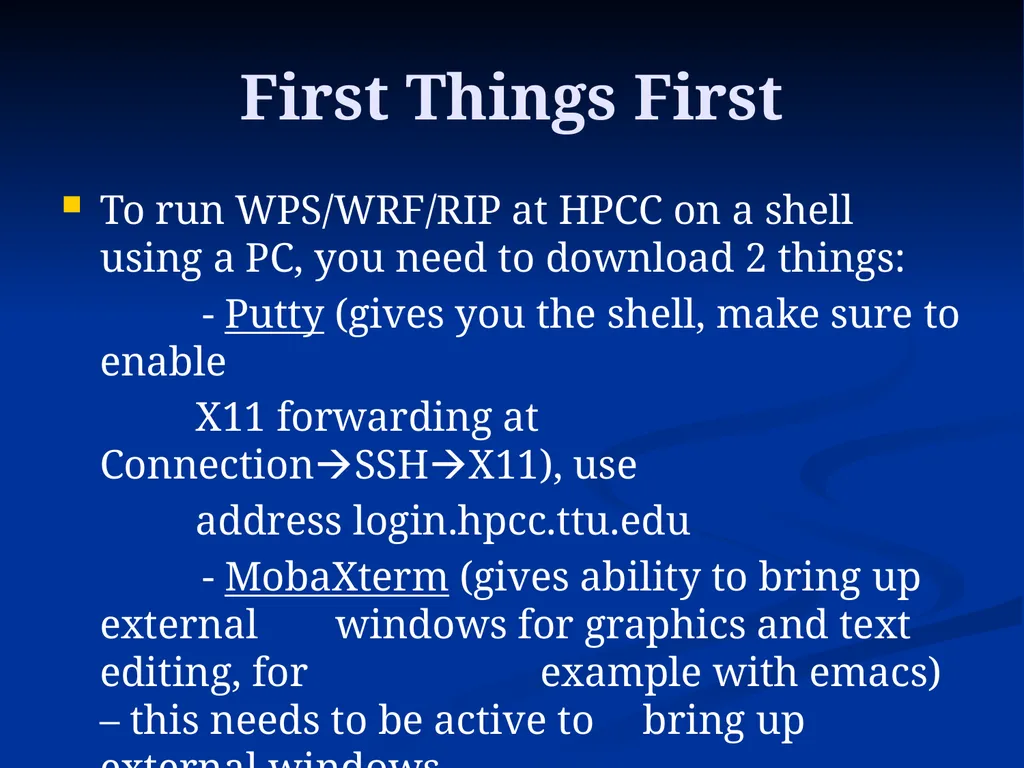
First Things First To run WPS/WRF/RIP at HPCC on a shell using a PC, you need to download 2 things:
- Putty (gives you the shell, make sure to enable
X11 forwarding at ConnectionSSHX11), use
address login.hpcc.ttu.edu
- MobaXterm (gives ability to bring up external windows for graphics and text editing, for example with emacs) – this needs to be active to bring up external windows<br>
- Putty (gives you the shell, make sure to enable
X11 forwarding at ConnectionSSHX11), use
address login.hpcc.ttu.edu
- MobaXterm (gives ability to bring up external windows for graphics and text editing, for example with emacs) – this needs to be active to bring up external windows<br>
81
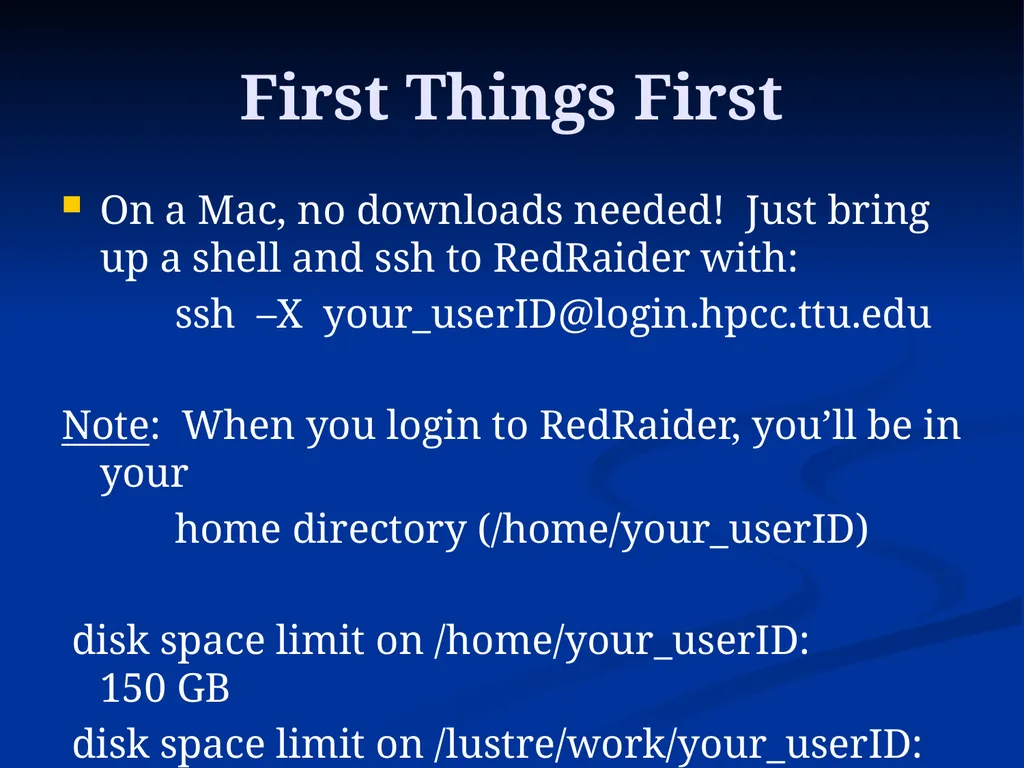
First Things First On a Mac, no downloads needed! Just bring up a shell and ssh to RedRaider with:
ssh –X your_userID@login.hpcc.ttu.edu
Note: When you login to RedRaider, you’ll be in your
home directory (/home/your_userID)
disk space limit on /home/your_userID: 150 GB
disk space limit on /lustre/work/your_userID: 700 GB<br>
ssh –X your_userID@login.hpcc.ttu.edu
Note: When you login to RedRaider, you’ll be in your
home directory (/home/your_userID)
disk space limit on /home/your_userID: 150 GB
disk space limit on /lustre/work/your_userID: 700 GB<br>
82
First Things First A common problem is the display variable for new users, if your plotgrids program does not work or if you can’t enable external windows (e.g. with emacs), contact hpccsupport@ttu.edu right away!<br>