
Auto Extrication FFDSD ACADEMY ORIENTATION 16 1



Description: Auto Extrication FFDSD ACADEMY ORIENTATION 16 1 Auto Extrication Definition Vehicle Anatomy Basic Vehicle Components Batteries Struts High Strength Steel 2 Auto Extrication Vehicle Supplemental Restraint Systems (SRS) Airbag-Equipped
Related Topics
Download Presentation
"Auto Extrication FFDSD ACADEMY ORIENTATION 16 1" is the property of its rightful owner. Permission is granted to download and print the materials on this website for personal, non-commercial use only, and to display it on your personal computer provided you do not modify the materials and that you retain all copyright notices contained in the materials. By downloading content from our website, you accept the terms of this agreement.
Presentation Transcript
slide1. Auto Extrication FFDSD ACADEMY ORIENTATION 16 1<br>
slide2. Auto Extrication Definition
Vehicle Anatomy
Basic Vehicle Components
Batteries
Struts
High Strength Steel 2<br>
slide3. Auto Extrication Vehicle Supplemental Restraint Systems (SRS)
Airbag-Equipped Vehicles
Seat Belt Pretensioners
Passive Roll Bar Systems
Extrication Tools 3<br>
slide4. Auto Extrication Vehicle Stabilization
Vehicle Extrication
Alternative Fuel Vehicles 4<br>
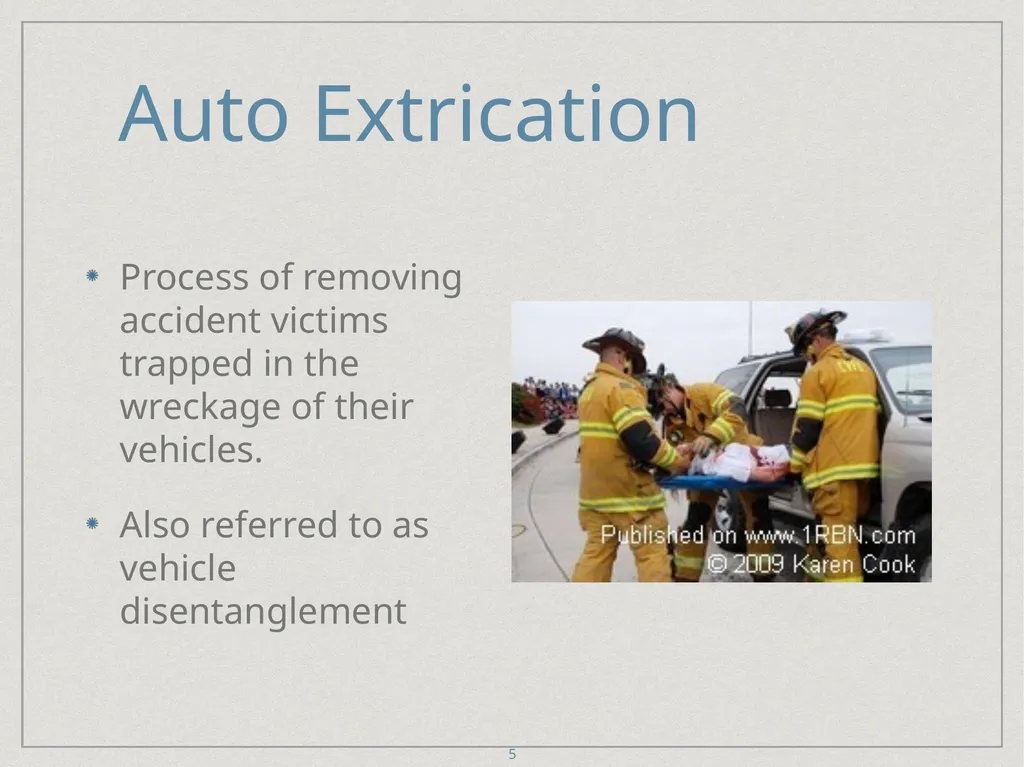
slide5. Auto Extrication Process of removing accident victims trapped in the wreckage of their vehicles.
Also referred to as vehicle disentanglement 5<br>
slide6. Auto Extrication “Golden Hour”
Extrication of victim within 15 minutes is ideal
Sole responsibility of Fire service to extricate trauma patients from their vehicles in a timely and safe manner
Cause no further harm 6<br>
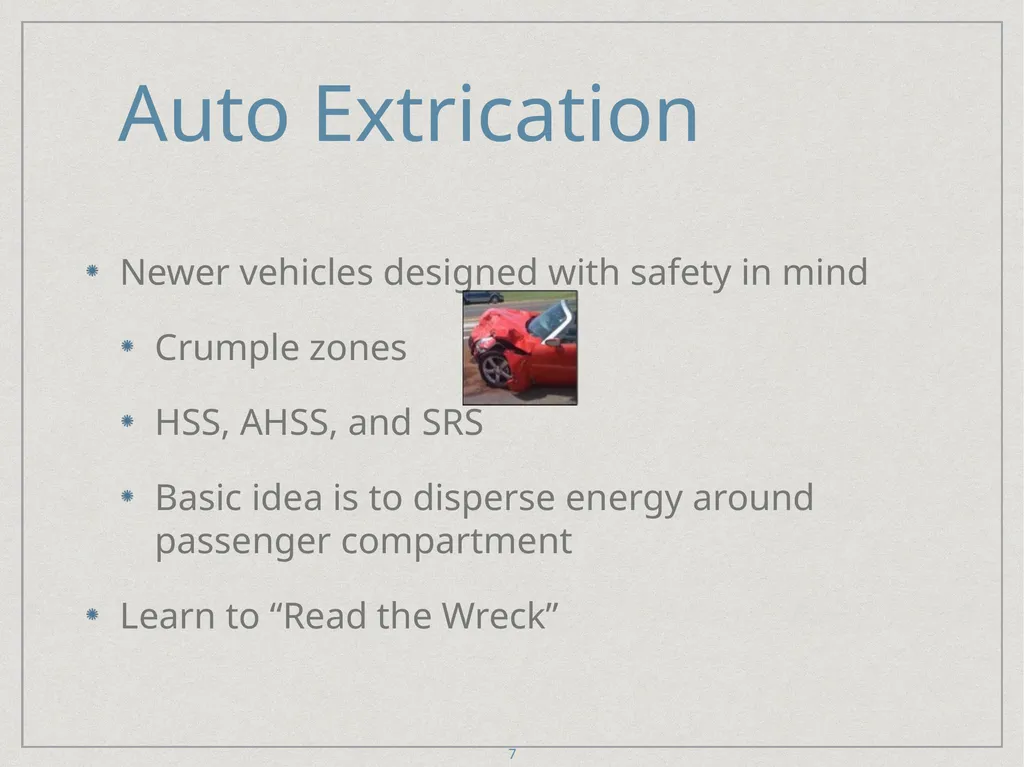
slide7. Auto Extrication Newer vehicles designed with safety in mind
Crumple zones
HSS, AHSS, and SRS
Basic idea is to disperse energy around passenger compartment
Learn to “Read the Wreck” 7<br>
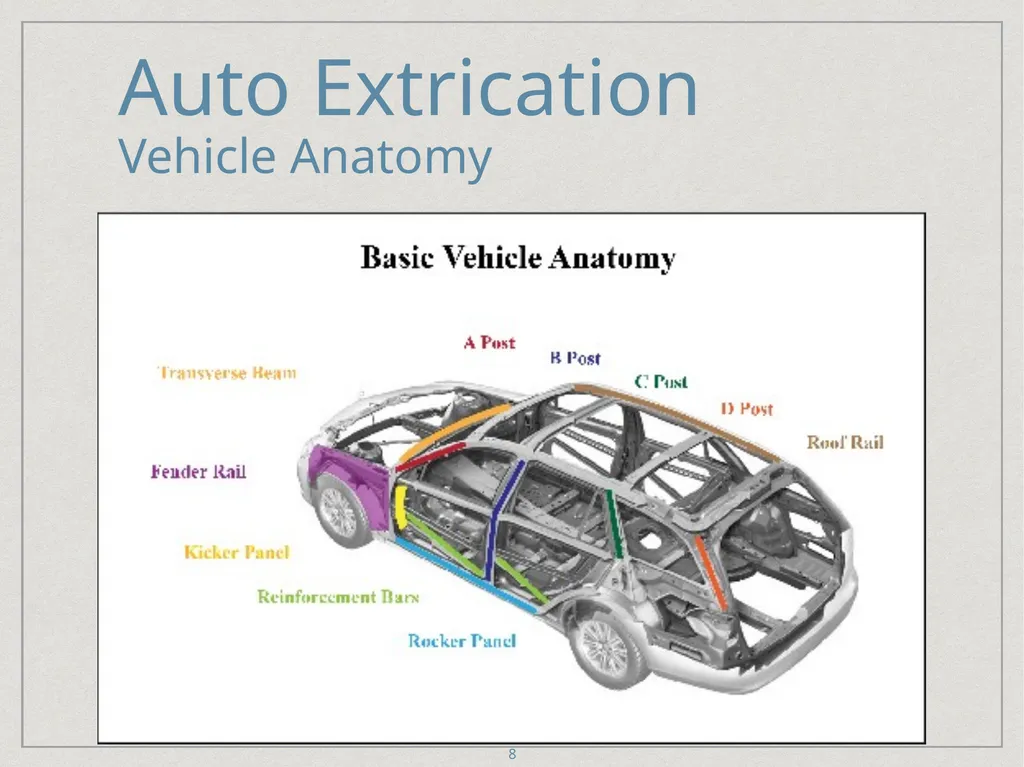
slide8. Auto Extrication
Vehicle Anatomy 8<br>
slide9. Auto Extrication
Vehicle Anatomy Top
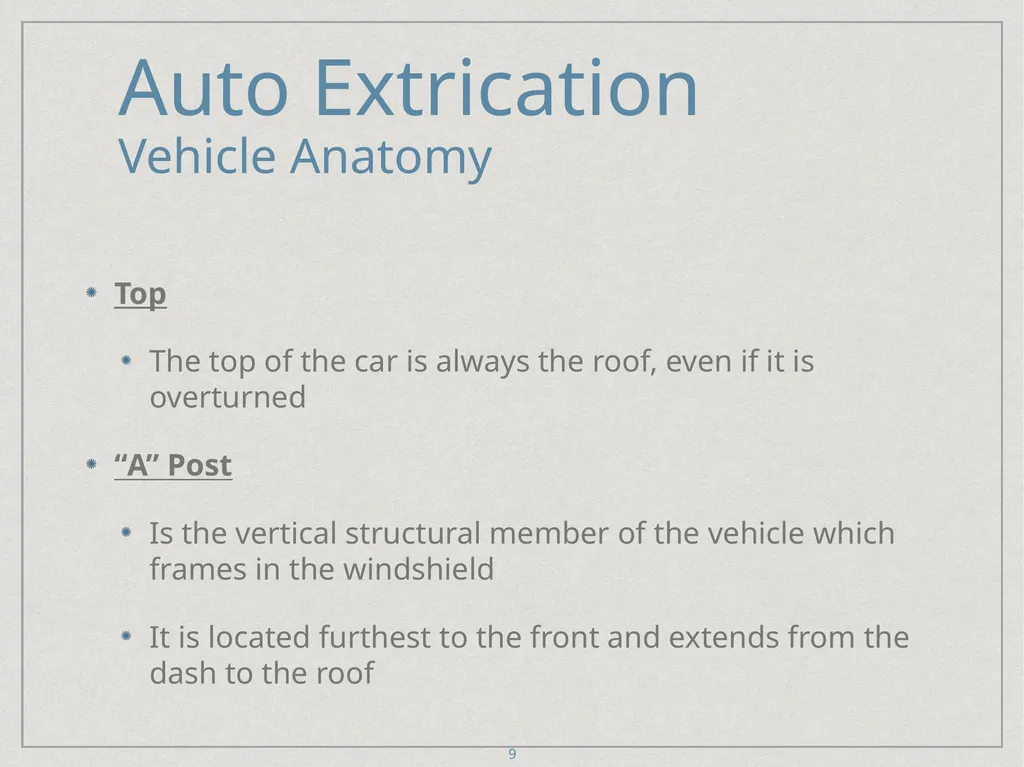
The top of the car is always the roof, even if it is overturned
“A” Post
Is the vertical structural member of the vehicle which frames in the windshield
It is located furthest to the front and extends from the dash to the roof 9<br>
slide10. Auto Extrication
Vehicle Anatomy “B” Post
Is the vertical structural member of the vehicle which extends from the rocker panel to the roof of the car
The “B” post is located one post to the rear of the “A” post and provides latching point for front door
“C” Post etc...
Is the vertical structural member of the vehicle which may frame in the rear window of the vehicle
On larger vehicles may serve the purpose similar to the “B” post
As vehicles get larger, so do the number of vertical posts encountered on the vehicle 10<br>
slide11. Auto Extrication
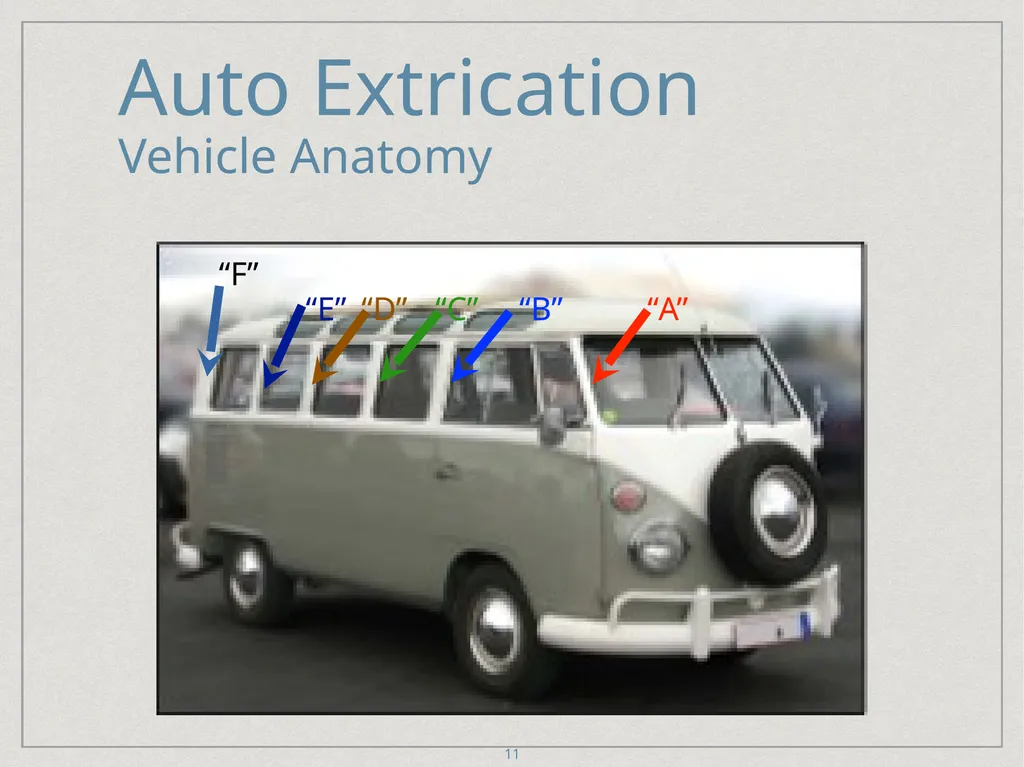
Vehicle Anatomy 11 “A” “B” “C” “D” “E” “F”<br>
slide12. Auto Extrication
Vehicle Anatomy Roof Rail
The beam that runs perpendicular to, and connects the “A,” “B” and C” Posts
Rocker panel
The rocker panel is the rigid area of a vehicle between the bottom of the “A” and “B” posts
Fuel lines run through the rocker panel in some vehicles 12<br>
slide13. Auto Extrication
Vehicle Anatomy Fender Rail
Area that runs the top outside edge between the front of the vehicle and the “A” post
This area is also referred to as the “quarter panel”
Kick Panel
Area of the vehicle just below the “A” post and forms the rear edge of the quarter panel or fender rail 13<br>
slide14. Auto Extrication
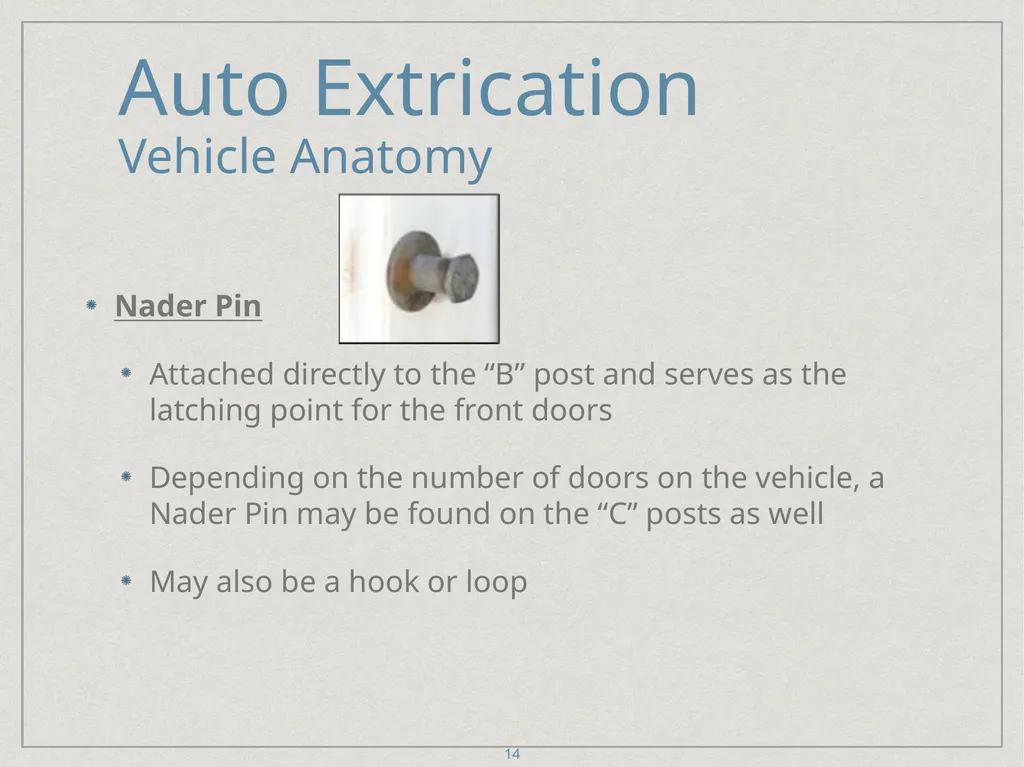
Vehicle Anatomy Nader Pin
Attached directly to the “B” post and serves as the latching point for the front doors
Depending on the number of doors on the vehicle, a Nader Pin may be found on the “C” posts as well
May also be a hook or loop 14<br>
slide15. Auto Extrication
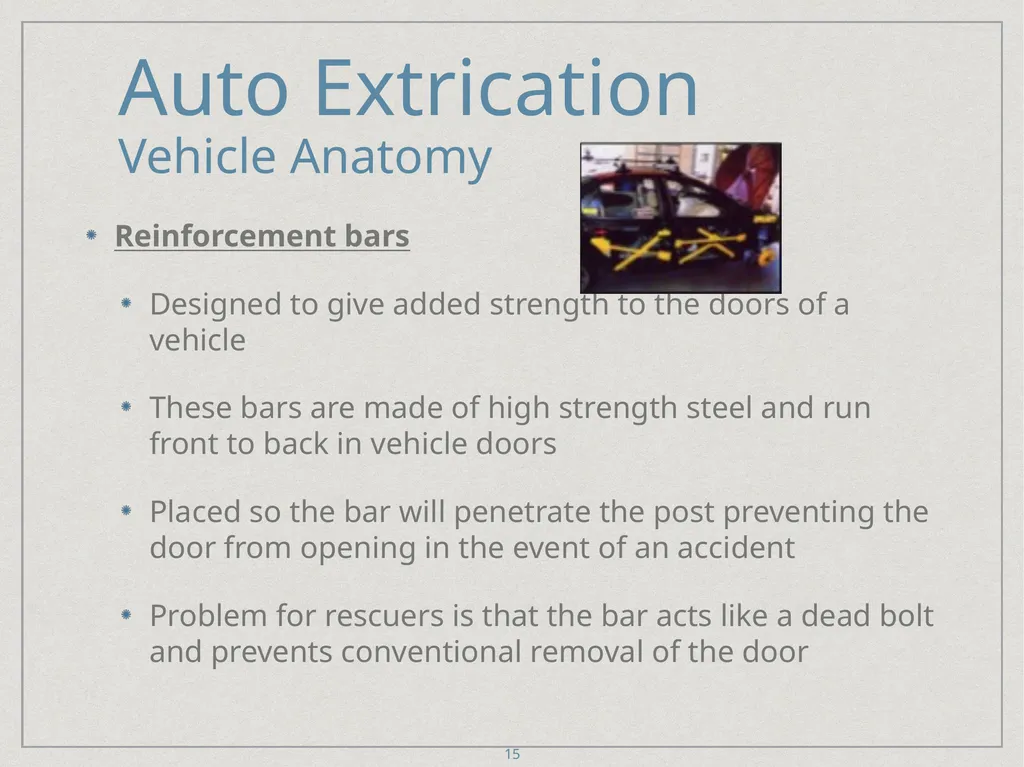
Vehicle Anatomy Reinforcement bars
Designed to give added strength to the doors of a vehicle
These bars are made of high strength steel and run front to back in vehicle doors
Placed so the bar will penetrate the post preventing the door from opening in the event of an accident
Problem for rescuers is that the bar acts like a dead bolt and prevents conventional removal of the door 15<br>
slide16. Auto Extrication
Vehicle Anatomy Transverse Beam (Magnesium)
Solid structure found inside the dash board designed to provide lateral (side-to-side) strength of the passenger compartment
It is also where dashboard components are mounted
Transverse beam is commonly made of magnesium and can present additional hazards if fire is involved 16<br>
slide17. Auto Extrication
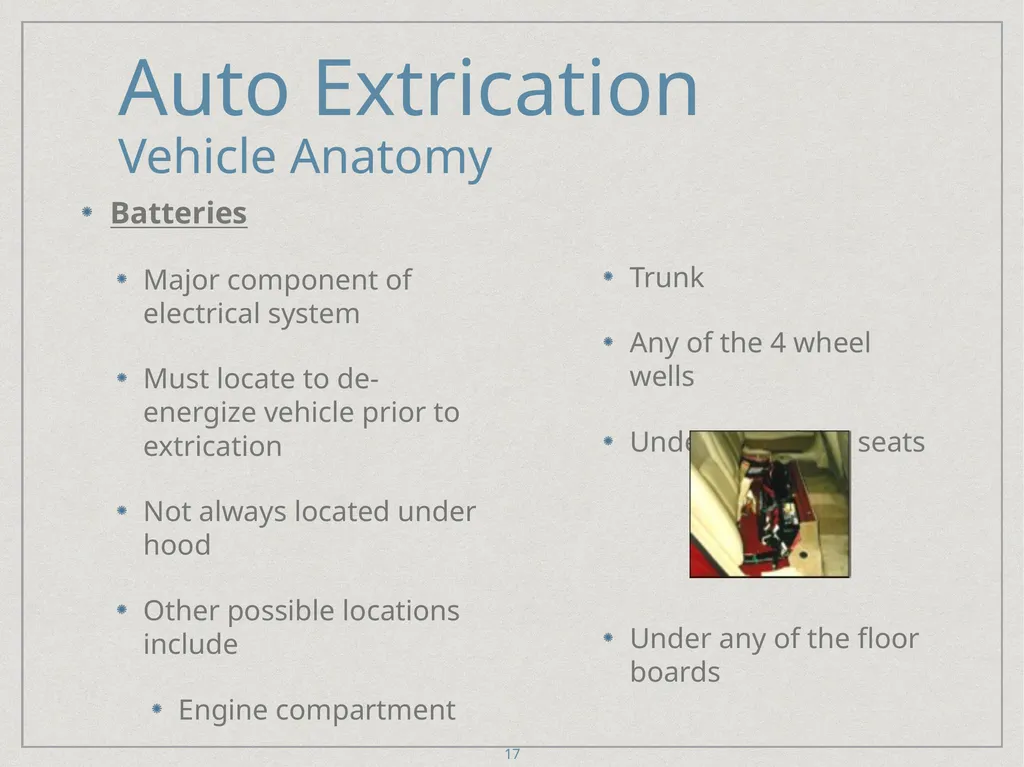
Vehicle Anatomy Batteries
Major component of electrical system
Must locate to de-energize vehicle prior to extrication
Not always located under hood
Other possible locations include
Engine compartment
Trunk
Any of the 4 wheel wells
Under any of the seats
Under any of the floor boards 17<br>
slide18. Auto Extrication
Vehicle Anatomy Struts
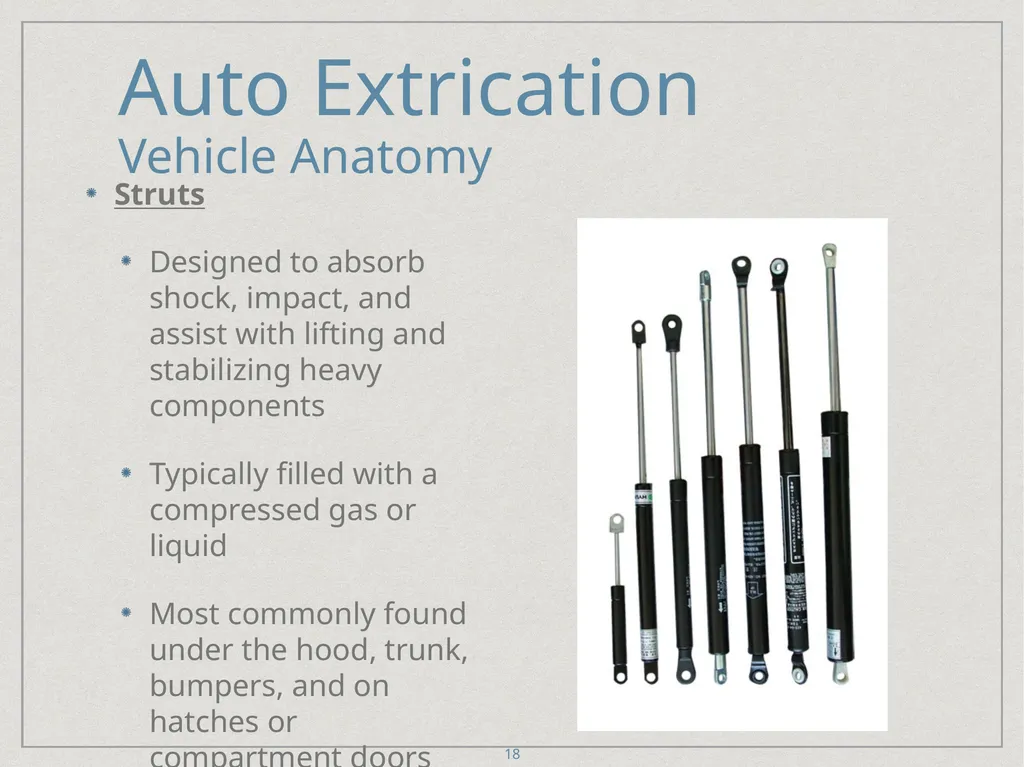
Designed to absorb shock, impact, and assist with lifting and stabilizing heavy components
Typically filled with a compressed gas or liquid
Most commonly found under the hood, trunk, bumpers, and on hatches or compartment doors 18<br>
slide19. Auto Extrication
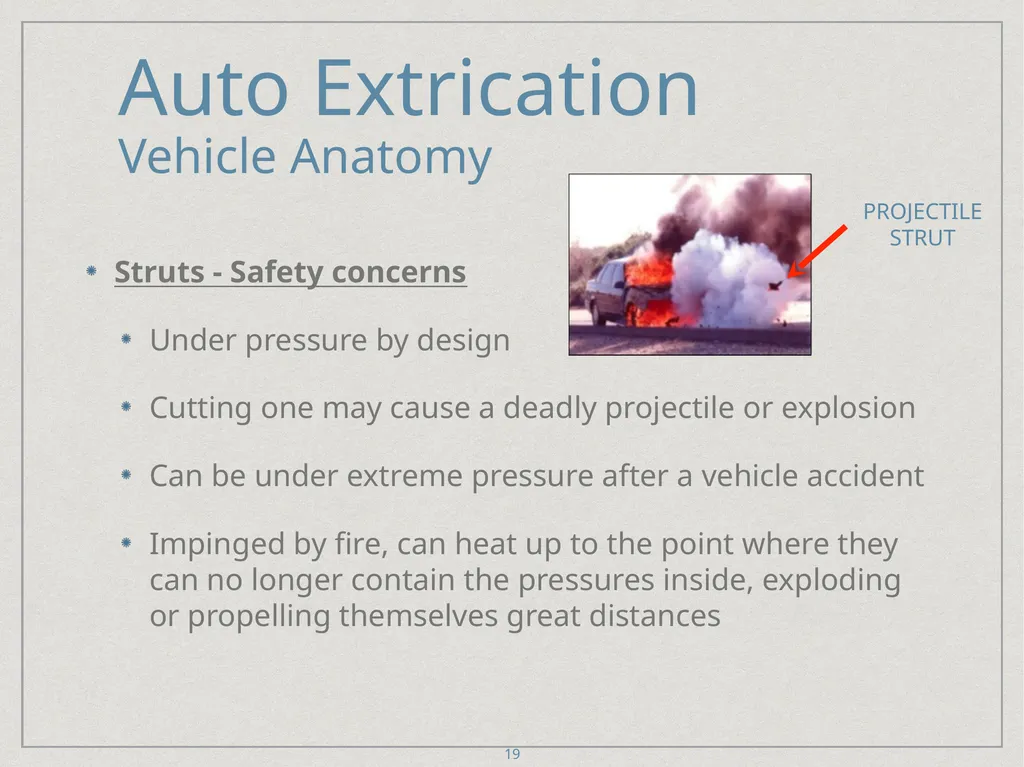
Vehicle Anatomy Struts - Safety concerns
Under pressure by design
Cutting one may cause a deadly projectile or explosion
Can be under extreme pressure after a vehicle accident
Impinged by fire, can heat up to the point where they can no longer contain the pressures inside, exploding or propelling themselves great distances 19 Projectile Strut<br>
slide20. Auto Extrication
Vehicle Anatomy Struts
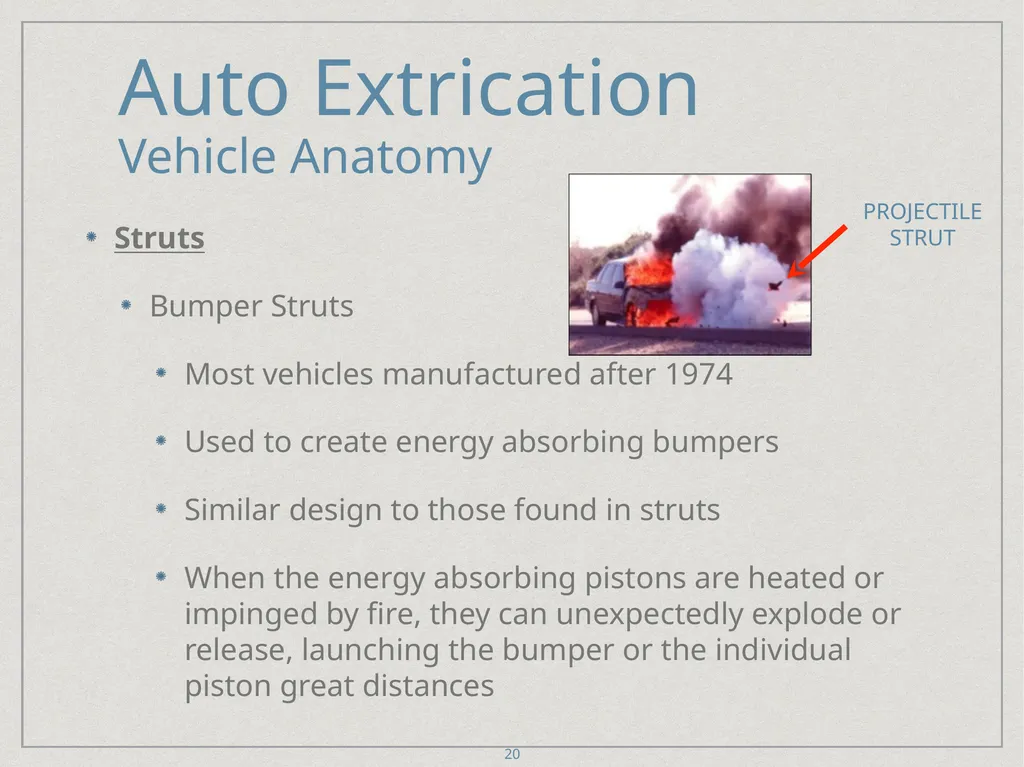
Bumper Struts
Most vehicles manufactured after 1974
Used to create energy absorbing bumpers
Similar design to those found in struts
When the energy absorbing pistons are heated or impinged by fire, they can unexpectedly explode or release, launching the bumper or the individual piston great distances 20 Projectile Strut<br>
slide21. Auto Extrication
Vehicle Anatomy Struts
Bumper Struts
Should always approach vehicles at a 45° to 90° degree angle from the front or back
Keep clear of a potential bumper release during vehicle fires or extrication 21<br>
slide22. Auto Extrication
Vehicle Anatomy Vehicle Frames
Two basic frame types
“Body Over Frame”
“Unibody”
Both designs employ plastic components, including plastic skins
Makes it difficult to gain a purchase 22<br>
slide23. Auto Extrication
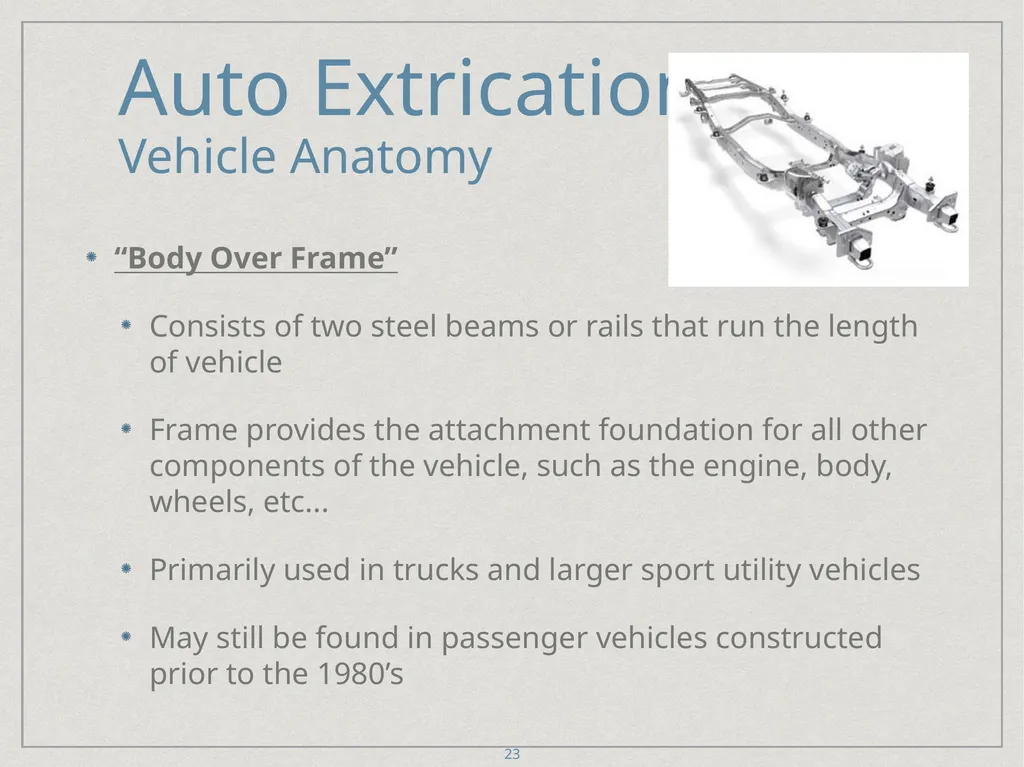
Vehicle Anatomy “Body Over Frame”
Consists of two steel beams or rails that run the length of vehicle
Frame provides the attachment foundation for all other components of the vehicle, such as the engine, body, wheels, etc...
Primarily used in trucks and larger sport utility vehicles
May still be found in passenger vehicles constructed prior to the 1980’s 23<br>
slide24. Auto Extrication
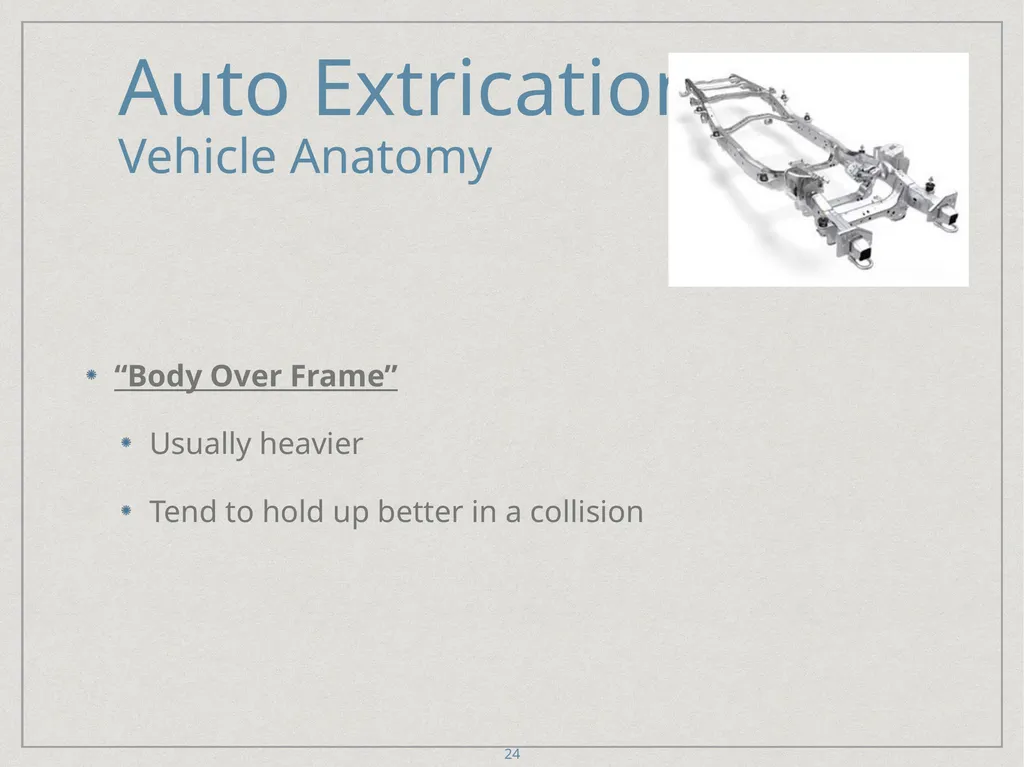
Vehicle Anatomy “Body Over Frame”
Usually heavier
Tend to hold up better in a collision 24<br>
slide25. Auto Extrication
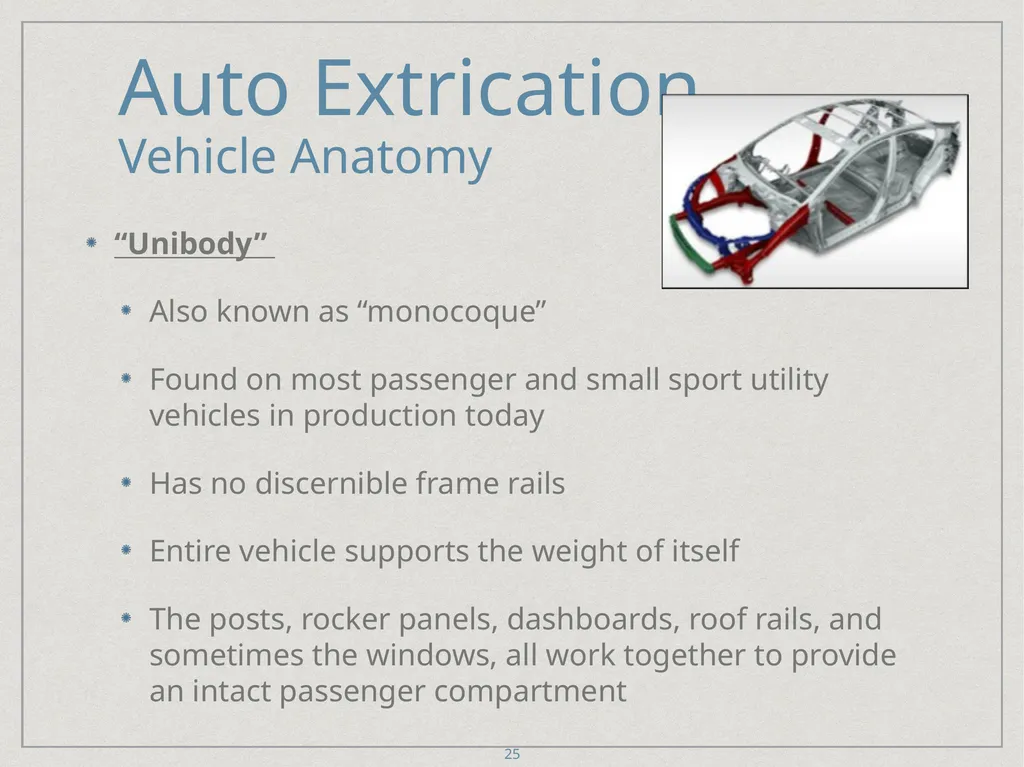
Vehicle Anatomy “Unibody”
Also known as “monocoque”
Found on most passenger and small sport utility vehicles in production today
Has no discernible frame rails
Entire vehicle supports the weight of itself
The posts, rocker panels, dashboards, roof rails, and sometimes the windows, all work together to provide an intact passenger compartment 25<br>
slide26. Auto Extrication
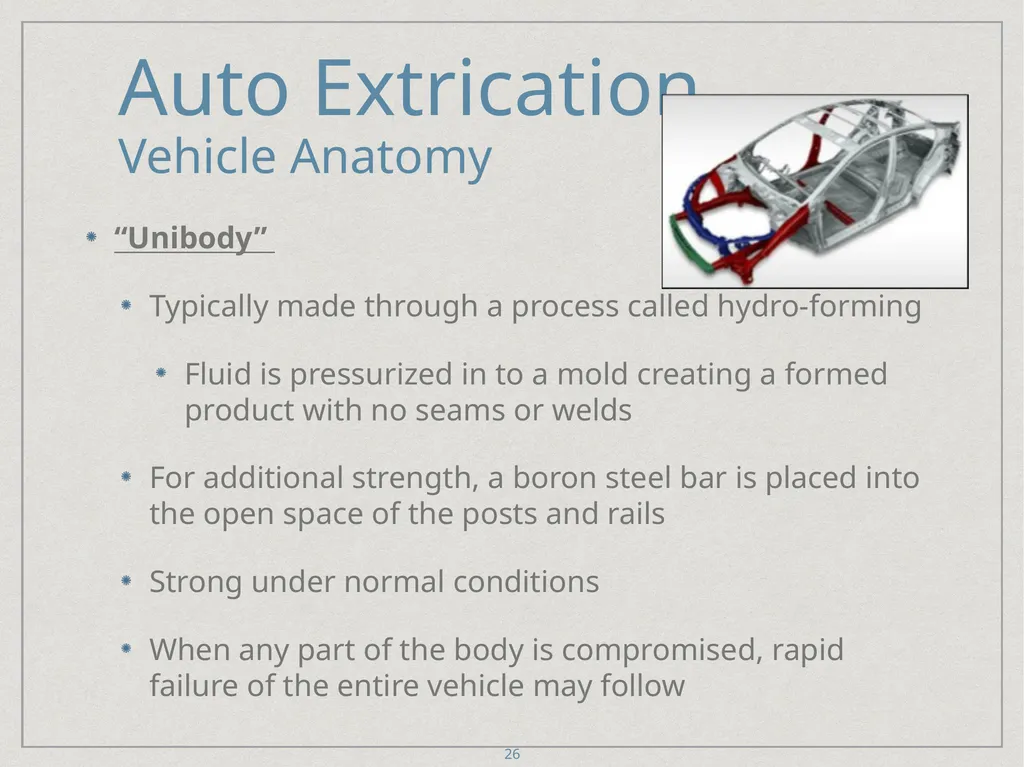
Vehicle Anatomy “Unibody”
Typically made through a process called hydro-forming
Fluid is pressurized in to a mold creating a formed product with no seams or welds
For additional strength, a boron steel bar is placed into the open space of the posts and rails
Strong under normal conditions
When any part of the body is compromised, rapid failure of the entire vehicle may follow 26<br>
slide27. Auto Extrication
Vehicle Anatomy (HSS)High Strength Steel
Used to decrease weight and increase strength
Poses a challenge for rescuers because hydraulic tools may not be able to cut, bend or push some of these metals 27<br>
slide28. Auto Extrication
Vehicle Anatomy (HSS)High Strength Steel - Types
Mild Steel, MS
(36,000 lbs of tensile strength) This material is within the limits of all our rescue tools and is normally found in fenders, floor panels, quarter panels and rocker panels
High Strength Steel, HSS
(50,000 lbs of tensile strength) Also within the limits of our tools and found in hoods, door skins and quarter panels 28<br>
slide29. Auto Extrication
Vehicle Anatomy (HSS)High Strength Steel - Types
High Strength Low Alloy, HSLA
(87,000 lbs of tensile strength) Outside the max force provided by most hydraulic tools. Found in posts, side members, rail strut supports and crumple zones
Ultra High Strength Steel, UHSS
(116,000 lbs of tensile strength) This material is outside the working range of most of our tools. These materials are used for posts, reinforcement bars (found in doors) and dash boards of most new vehicles 29<br>
slide30. Auto Extrication
Vehicle Anatomy (HSS)High Strength Steel - Types
Advanced High Strength Steel, AHSS
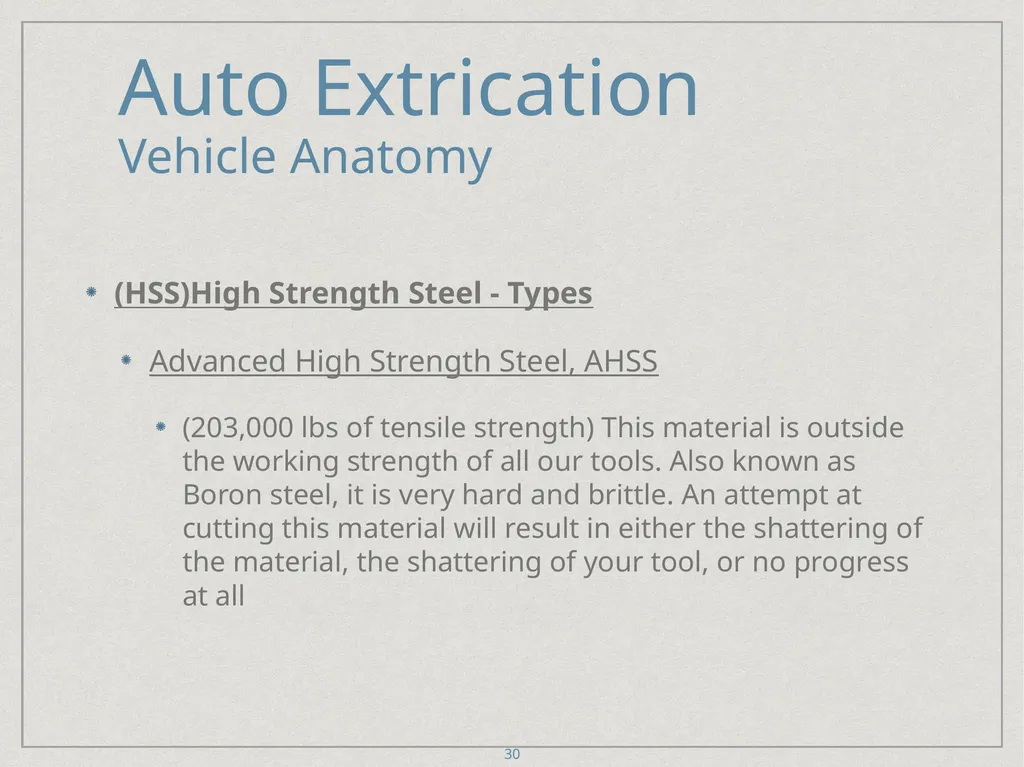
(203,000 lbs of tensile strength) This material is outside the working strength of all our tools. Also known as Boron steel, it is very hard and brittle. An attempt at cutting this material will result in either the shattering of the material, the shattering of your tool, or no progress at all 30<br>
slide31. Auto Extrication
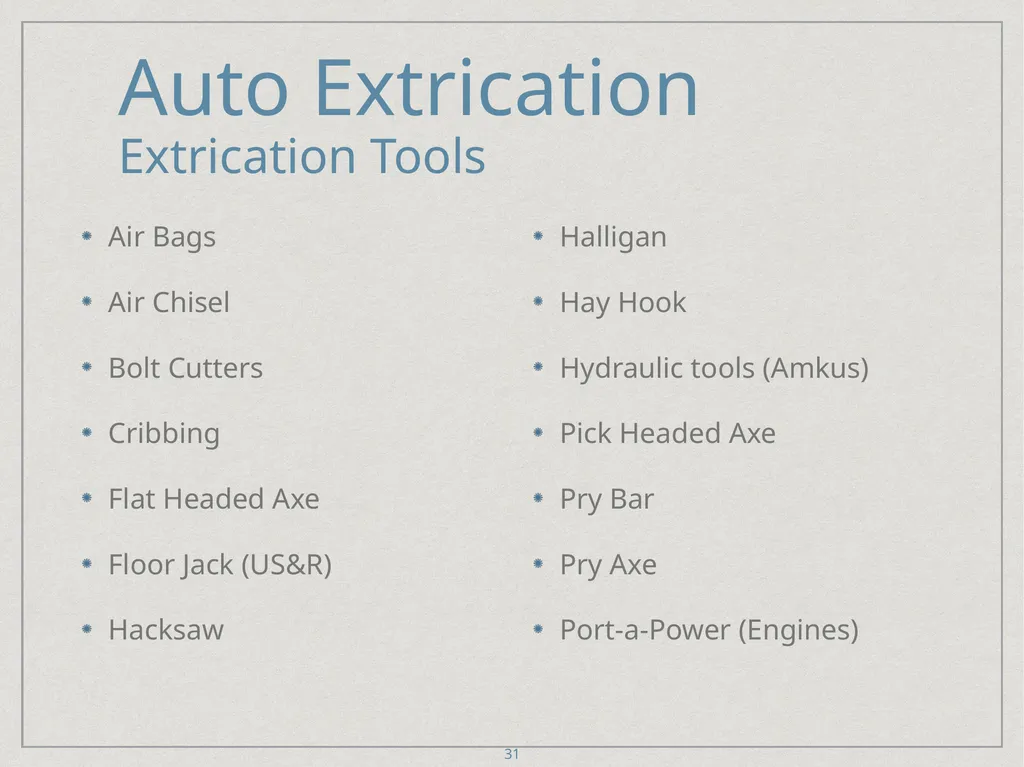
Extrication Tools Air Bags
Air Chisel
Bolt Cutters
Cribbing
Flat Headed Axe
Floor Jack (US&R)
Hacksaw
Halligan
Hay Hook
Hydraulic tools (Amkus)
Pick Headed Axe
Pry Bar
Pry Axe
Port-a-Power (Engines) 31<br>
slide32. Auto Extrication
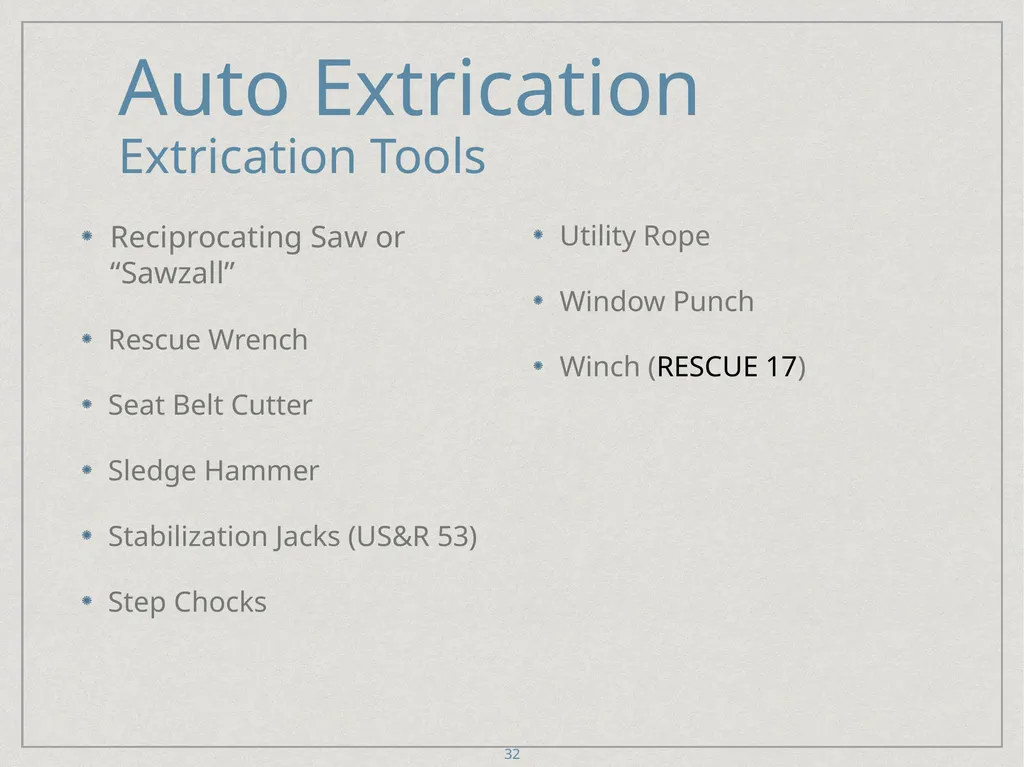
Extrication Tools Reciprocating Saw or “Sawzall”
Rescue Wrench
Seat Belt Cutter
Sledge Hammer
Stabilization Jacks (US&R 53)
Step Chocks
Utility Rope
Window Punch
Winch (RESCUE 17) 32<br>
slide33. Auto Extrication
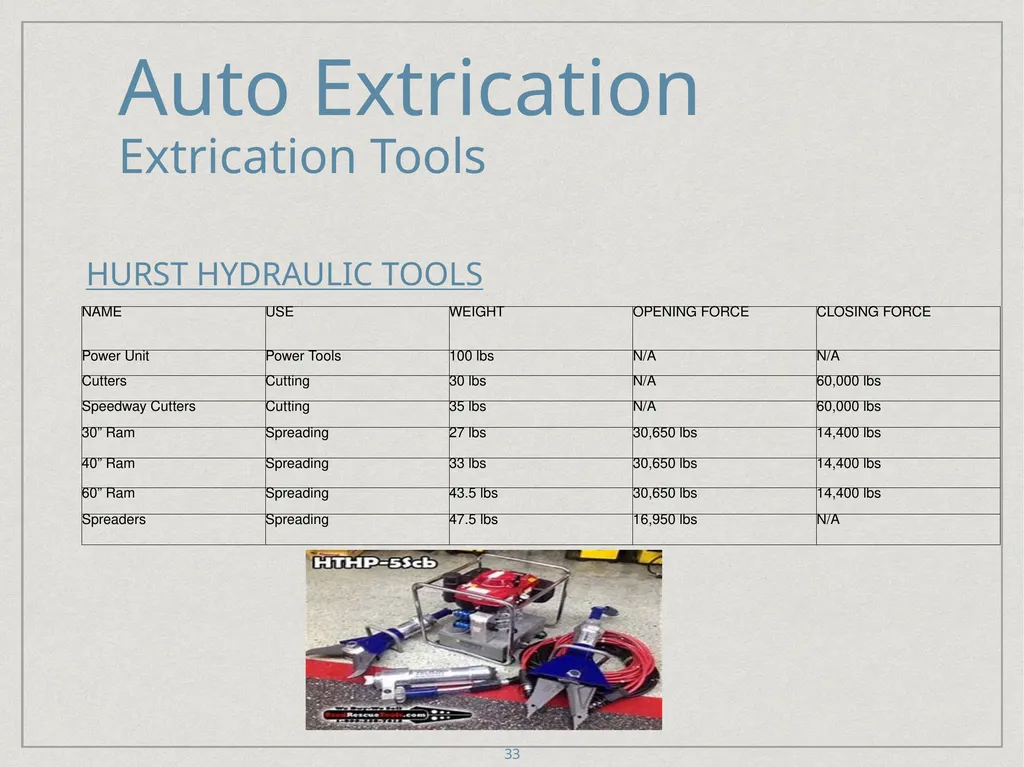
Extrication Tools 33 HURST Hydraulic tools<br>
slide34. Auto Extrication
Supplemental Restraint Systems (SRS) Adds safety to occupants
Adds potential danger to rescuers
1988 1st driver side air bags appeared in passenger cars
2011 some vehicles boast up to 16 airbags 34<br>
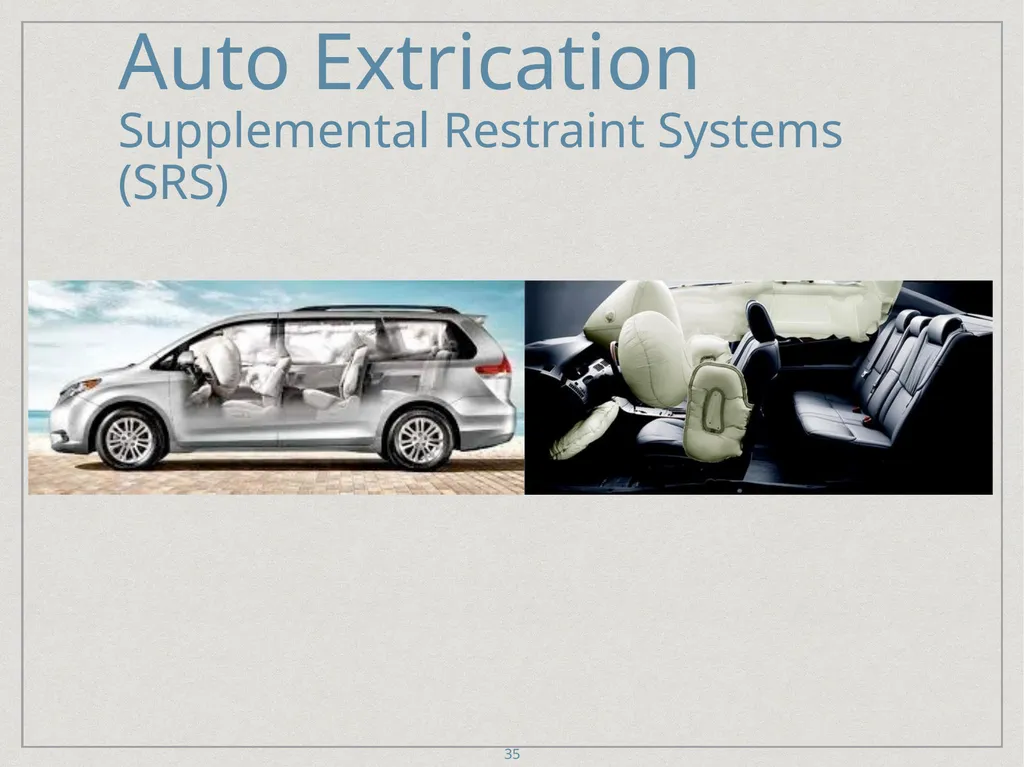
slide35. Auto Extrication
Supplemental Restraint Systems (SRS) 35<br>
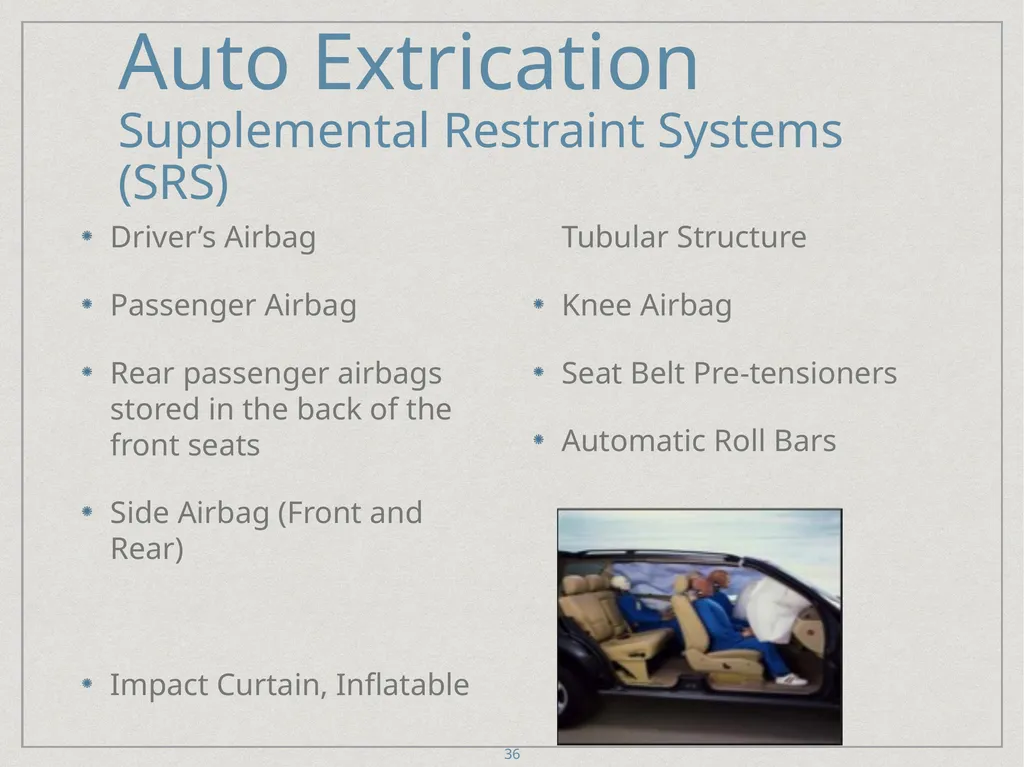
slide36. Auto Extrication
Supplemental Restraint Systems (SRS) 36 Driver’s Airbag
Passenger Airbag
Rear passenger airbags stored in the back of the front seats
Side Airbag (Front and Rear)
Impact Curtain, Inflatable Tubular Structure
Knee Airbag
Seat Belt Pre-tensioners
Automatic Roll Bars<br>
slide37. Auto Extrication
Supplemental Restraint Systems (SRS)
Airbag-Equipped Vehicles Identifiable by:
Steering wheel hub
Verbage:
“Supplemental Inflatable Restraint”
“SIR”
“Air Bag”
“SRS”
Vehicle identification number (VIN)
Placards under hood or on driver’s side windshield pillar
If unable to determine, always err on the side of safety. 37<br>
slide38. Auto Extrication
Supplemental Restraint Systems (SRS)
Airbag-Equipped Vehicles Rescue with Undeployed Air-bag
Unlikely to deploy after a crash on its own
Three things must happen for airbags to deploy
The vehicle must have speed or be moving. They will not deploy if vehicle is stopped
There must be an impact on the airbag sensors
The airbag sensors must detect rapid vehicle deceleration 38<br>
slide39. Auto Extrication
Supplemental Restraint Systems (SRS)
Airbag-Equipped Vehicles Rescue with Undeployed Air-bag
Even with the aforementioned prerequisites for the activation of air bags, there have been rare cases of inadvertent airbag deployment.
Can cause severe injury or death
Employ the “5-10-20” rule 39<br>
slide40. Auto Extrication
Supplemental Restraint Systems (SRS)
Airbag-Equipped Vehicles Rescue with Undeployed Air-bag
“5-10-20” Rule
Keep all personnel and equipment
5 inches from the door
10 inches from the steering wheel
20 inches from the passenger side dash board 40<br>
slide41. Auto Extrication
Supplemental Restraint Systems (SRS)
Airbag-Equipped Vehicles Rescue with Undeployed Air-bag
STABILIZE
DE-ENERGIZE
EXTRICATE 41<br>
slide42. Auto Extrication
Supplemental Restraint Systems (SRS)
Airbag-Equipped Vehicles Rescue with Undeployed Air-bag
Stabilize vehicle
De-energize vehicle
Disconnect battery cables, negative first
Cut battery cables, negative first
Remove about an inch or more
Extricate 42<br>
slide43. Auto Extrication
Supplemental Restraint Systems (SRS)
Airbag-Equipped Vehicles Rescue with Undeployed Air-bag
De-energizing
Roll down windows, move seat back, unlock doors, etc. before de-energizing vehicle
Turn on 4-ways
When 4-ways go out, battery is disconnected
Some capacitors will continue to hold a charge 43<br>
slide44. Auto Extrication
Supplemental Restraint Systems (SRS)
Airbag-Equipped Vehicles Rescue with Undeployed Air-bag
Peel and peek
Airbags, compressed gas cylinders, or other SRS components may be dispersed in various locations
No standard for placement of SRS components
Peel back plastic and fabric to expose metal frame of vehicle 44<br>
slide45. Auto Extrication
Supplemental Restraint Systems (SRS)
Airbag-Equipped Vehicles Rescue with Deployed Airbags
Approached as if undeployed airbags until proven otherwise
STABILIZE, DE-ENERGIZE, EXTRICATE
“5-10-20” rule
Victim may have burns on face from airbag deployment 45<br>
slide46. Auto Extrication
Supplemental Restraint Systems (SRS)
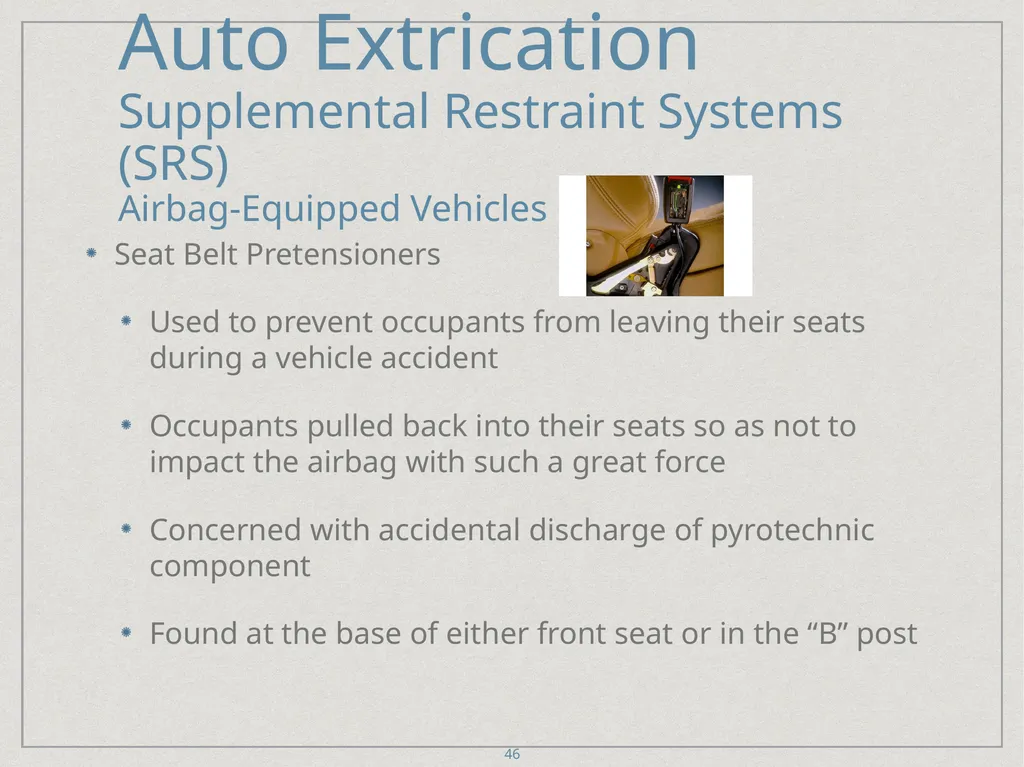
Airbag-Equipped Vehicles Seat Belt Pretensioners
Used to prevent occupants from leaving their seats during a vehicle accident
Occupants pulled back into their seats so as not to impact the airbag with such a great force
Concerned with accidental discharge of pyrotechnic component
Found at the base of either front seat or in the “B” post 46<br>
slide47. Auto Extrication
Supplemental Restraint Systems (SRS)
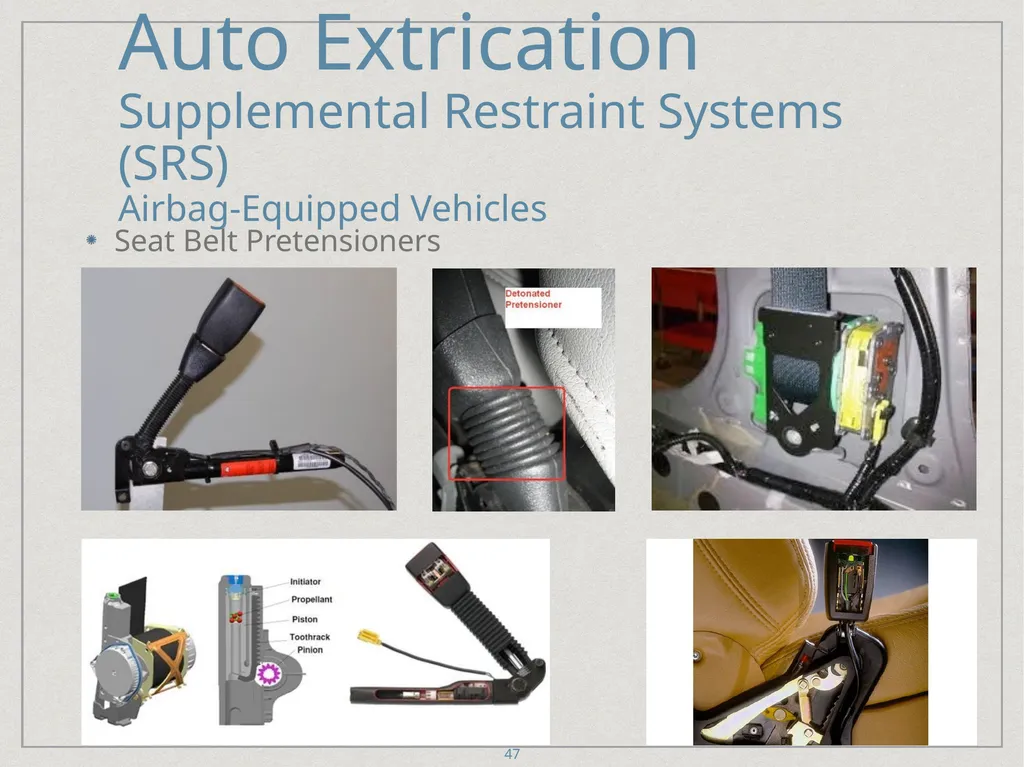
Airbag-Equipped Vehicles Seat Belt Pretensioners 47<br>
slide48. Auto Extrication
Supplemental Restraint Systems (SRS)
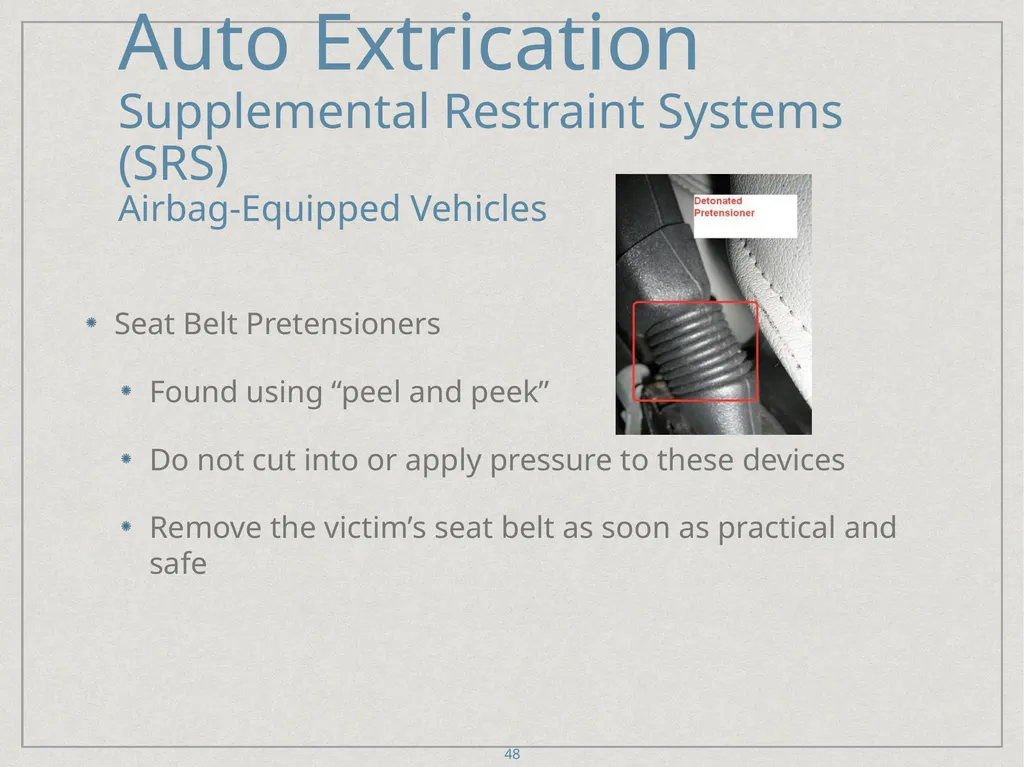
Airbag-Equipped Vehicles Seat Belt Pretensioners
Found using “peel and peek”
Do not cut into or apply pressure to these devices
Remove the victim’s seat belt as soon as practical and safe 48<br>
slide49. Auto Extrication
Supplemental Restraint Systems (SRS) Passive Roll Bar Systems
Some convertible vehicles have been designed with hidden roll bars
Will deploy in a fraction of a second when the vehicle senses a roll past 51° degrees from horizontal
Most bars will either shoot straight out or hinge up
Peel and peek, look for markings, may reveal the presence of a passive roll bar system 49<br>
slide50. Auto Extrication
Scene Management
Arrival at Scene Common considerations
Stabilize
Utilize vehicle power
De-energize
Patient Care
Peel and Peek
Extricate 50<br>
slide51. Auto Extrication
Scene Management
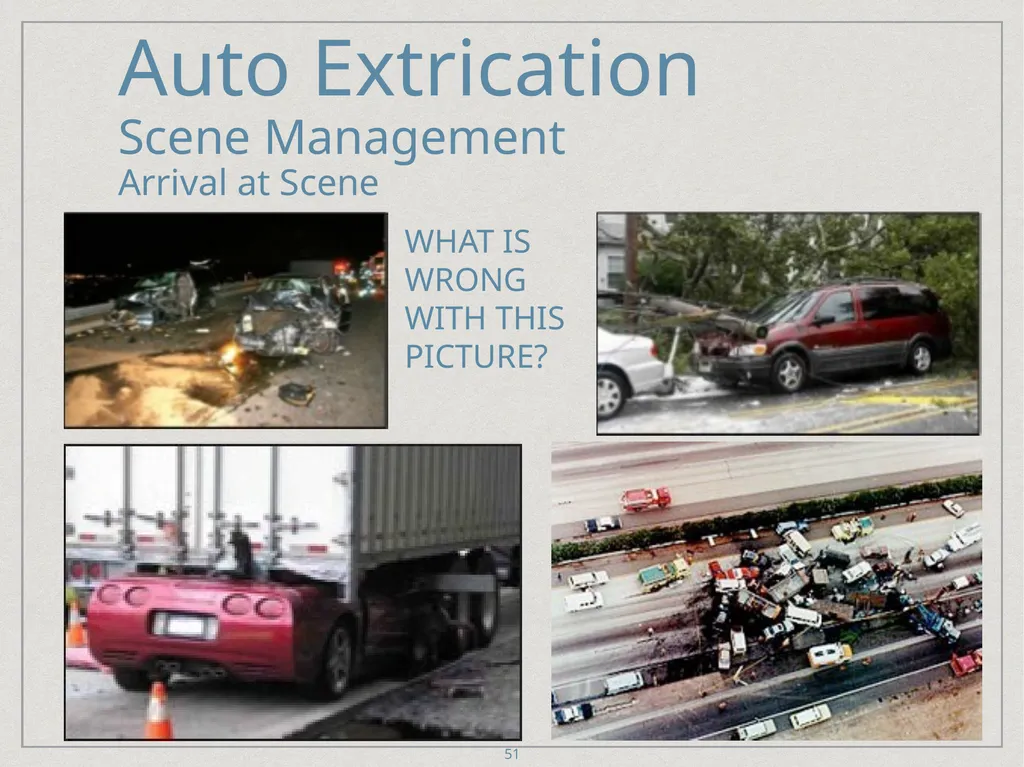
Arrival at Scene 51 What is wrong with this picture?<br>
slide52. Auto Extrication
Scene Management
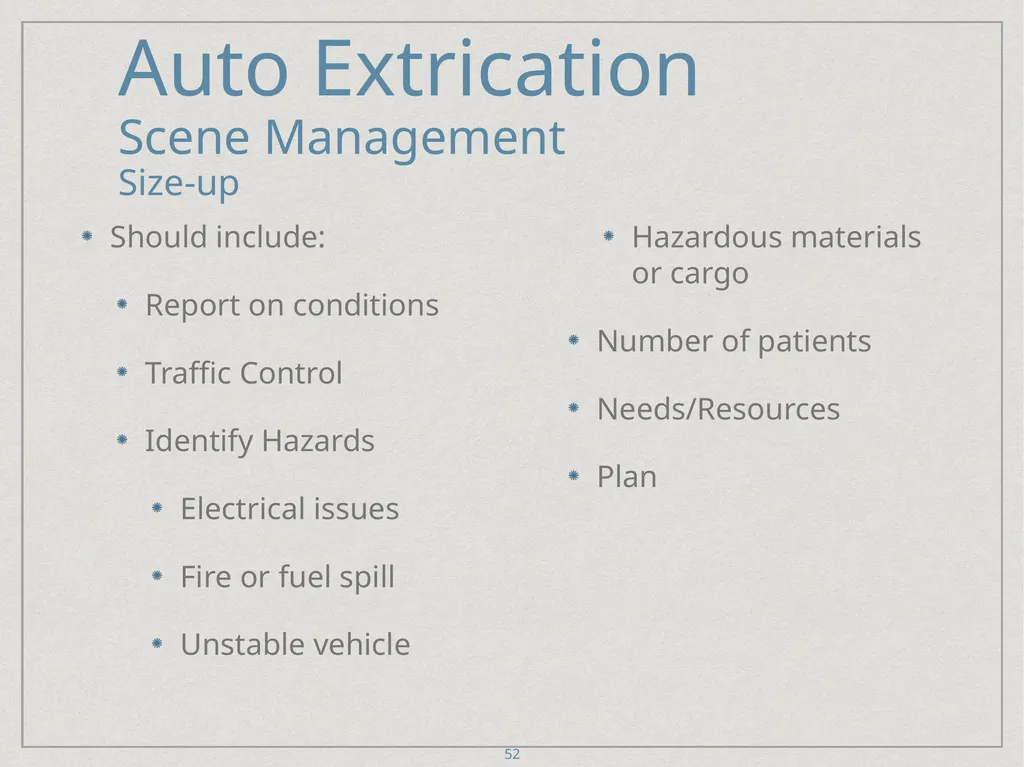
Size-up Should include:
Report on conditions
Traffic Control
Identify Hazards
Electrical issues
Fire or fuel spill
Unstable vehicle
Hazardous materials or cargo
Number of patients
Needs/Resources
Plan 52<br>
slide53. Auto Extrication
Scene Management
Special Considerations At Night
Illumination is paramount
Common for unrestrained accident victims to be ejected
Can be thrown considerable distances
Search area thoroughly
Consider using a TIC
Account for occupants 53<br>
slide54. Auto Extrication
Scene Management
Special Considerations Scene Protection
Attempt to exit apparatus on the non-traffic side
Never turn your back to traffic
Look-outs or Safety officers are helpful if you can’t keep an eye on traffic
Use caution when using flares
25 foot Hot Zone (Exclusion Zone) around the vehicle should be maintained
Only necessary personnel in full PPE 54<br>
slide55. Auto Extrication
Scene Management
Special Considerations Flammable Liquid Control
Attempt to stop or control any leaking flammable liquids
Warn personnel about sparks and fire danger prior to beginning extrication
Have Dry Chemical Extinguisher at the ready
If it is a large spill request Haz Mat
“Hot Zone” must be increased to 100 feet when flammable liquids are a factor 55<br>
slide56. Auto Extrication
Scene Management
Special Considerations Electrical Hazards
Always be assumed to be energized or “hot” when electrical boxes and downed wires are involved.
Do not attempt to make any extrication attempts, or move any downed power lines
Wait until confirmation that power is shut down
Focus on calming the patient and giving them instructions to stay in the vehicle until deemed safe by SDGE or the IC 56<br>
slide57. Auto Extrication
Scene Management
Special Considerations Electrical Hazards
Vehicle itself can be an electrical hazard
Part of the initial actions (STABILIZE, DE-ENERGIZE, EXTRICATE)
Use vehicle power for necessary functions before...
Vehicle ignition should be turned off
Batteries disconnected starting with the negative terminal (black) 57<br>
slide58. Auto Extrication 58 Operations<br>
slide59. Auto Extrication
Operations
Stabilization Second only to scene size-up
Two reasons for Stabilization
Keep vehicle from moving and further injuring patients or rescuers
Creates solid platform to perform rescue and extrication operations
Brick vs. Beachball
Bring vehicle off of Suspension by letting air out of tires 59<br>
slide60. Auto Extrication
Operations
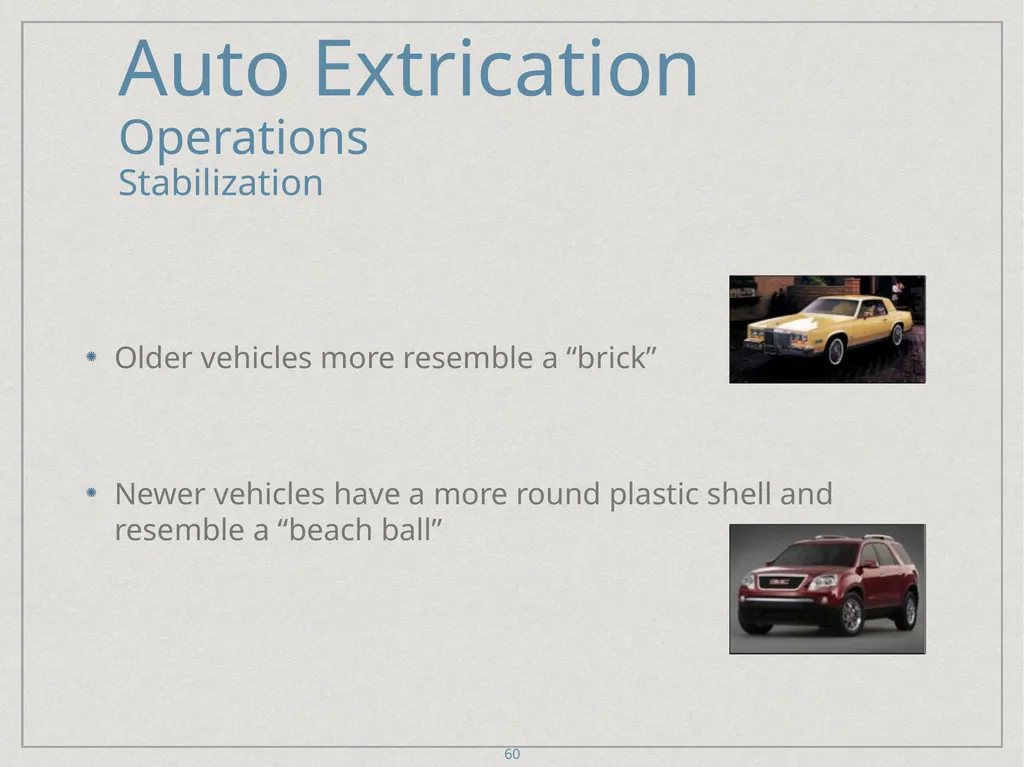
Stabilization Older vehicles more resemble a “brick”
Newer vehicles have a more round plastic shell and resemble a “beach ball” 60<br>
slide61. Auto Extrication
Operations
Stabilization “Bricks”
Square or rectangular surfaces
Hard exterior shell
“Beach Ball”
Aerodynamic design
Rounded
Easily warped and malleable plastic shells 61<br>
slide62. Auto Extrication
Operations
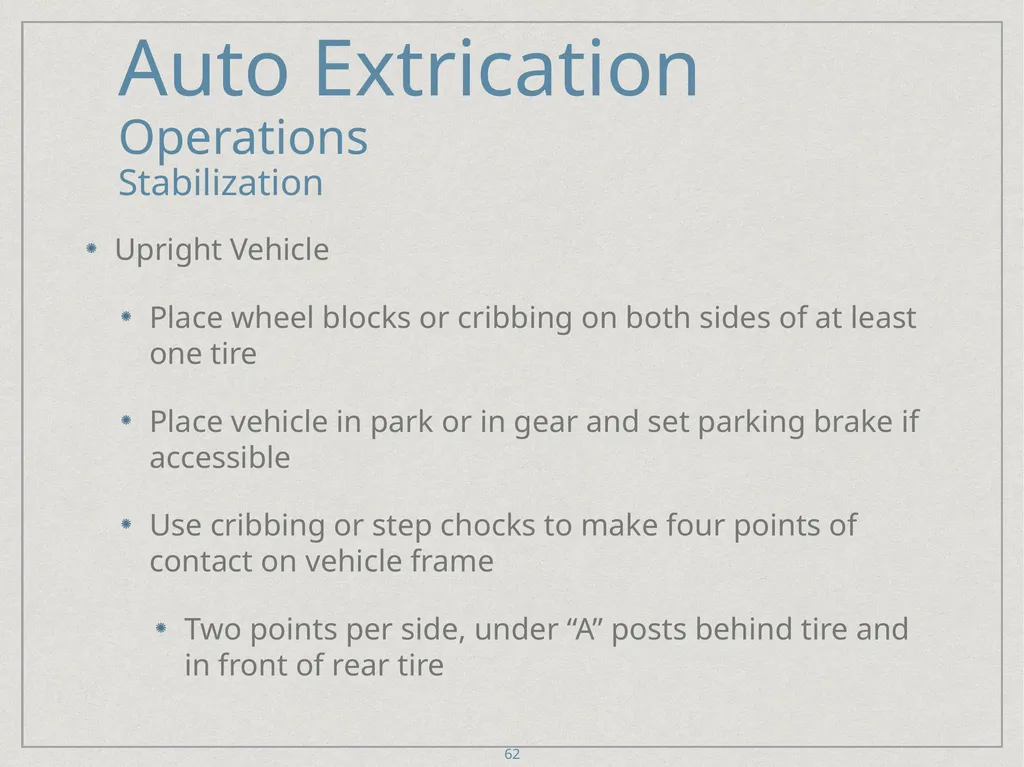
Stabilization Upright Vehicle
Place wheel blocks or cribbing on both sides of at least one tire
Place vehicle in park or in gear and set parking brake if accessible
Use cribbing or step chocks to make four points of contact on vehicle frame
Two points per side, under “A” posts behind tire and in front of rear tire 62<br>
slide63. Auto Extrication
Operations
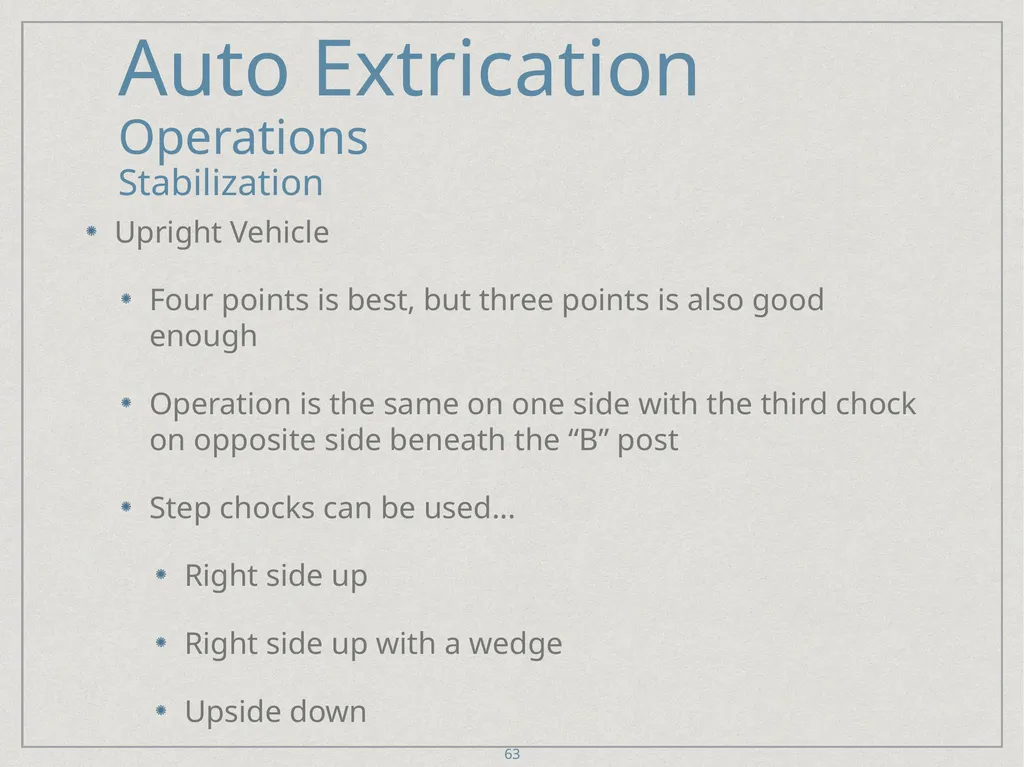
Stabilization Upright Vehicle
Four points is best, but three points is also good enough
Operation is the same on one side with the third chock on opposite side beneath the “B” post
Step chocks can be used...
Right side up
Right side up with a wedge
Upside down 63<br>
slide64. Auto Extrication
Operations
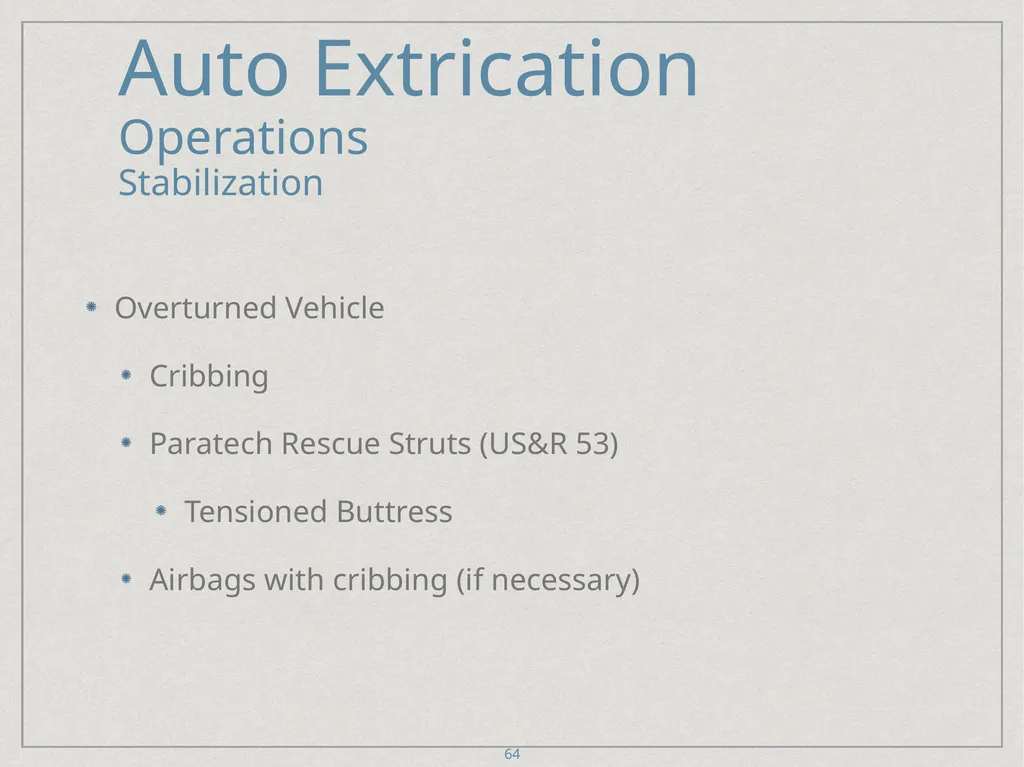
Stabilization Overturned Vehicle
Cribbing
Paratech Rescue Struts (US&R 53)
Tensioned Buttress
Airbags with cribbing (if necessary) 64<br>
slide65. Auto Extrication
Operations
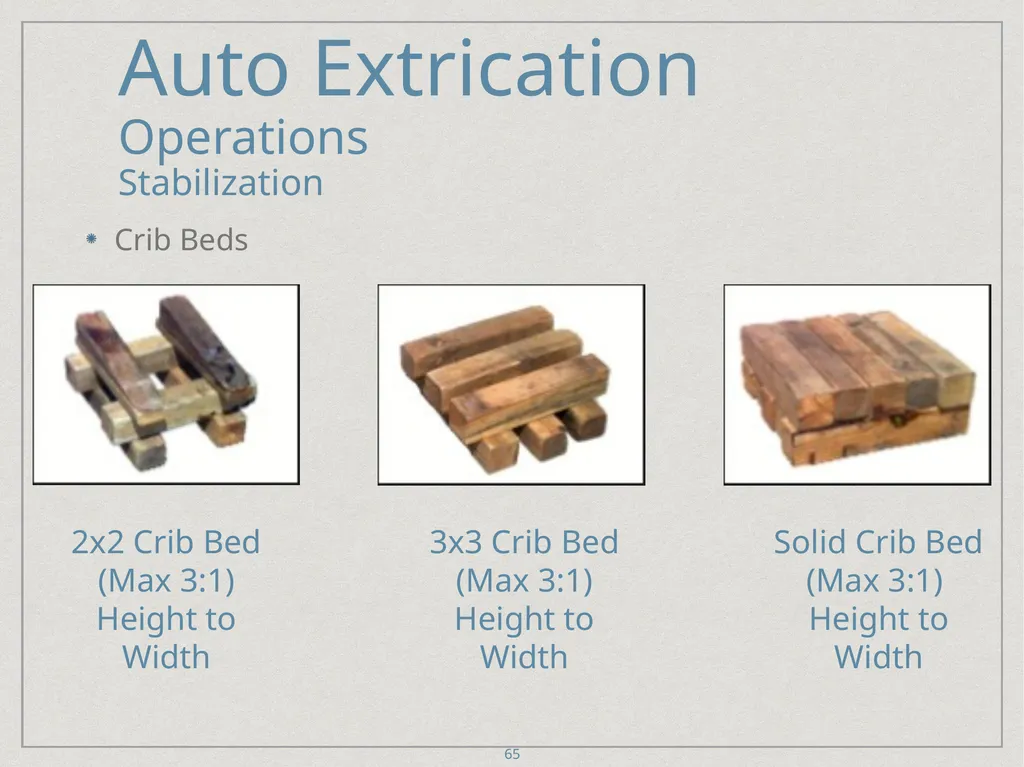
Stabilization Crib Beds 65 2x2 Crib Bed
(Max 3:1)
Height to Width 3x3 Crib Bed
(Max 3:1)
Height to Width Solid Crib Bed
(Max 3:1)
Height to Width<br>
slide66. Auto Extrication
Operations
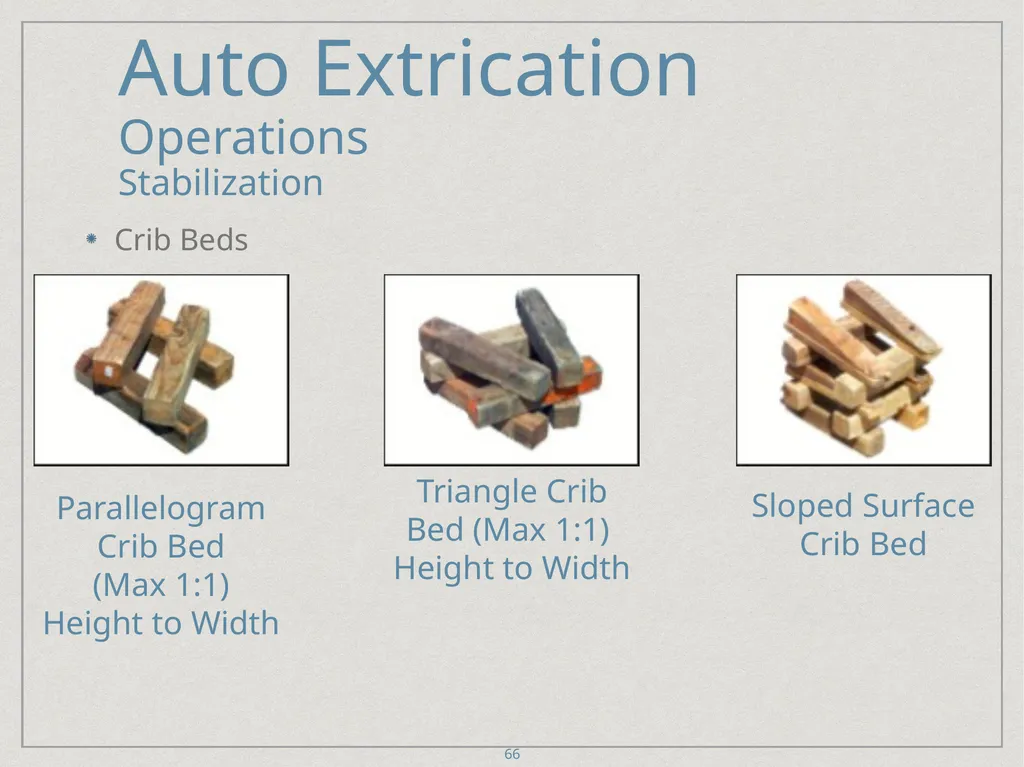
Stabilization 66 Crib Beds Parallelogram Crib Bed
(Max 1:1)
Height to Width Triangle Crib Bed (Max 1:1)
Height to Width Sloped Surface Crib Bed<br>
slide67. Auto Extrication
Operations
Stabilization Crib Beds
4” x 4” dimensional cribbing has a load capacity of 6000 lbs. at each load point
6” x 6” dimensional cribbing has a load capacity of 15,000 lbs. at each load point
Crib height is limited to 3 times the width of the crib base or 3:1 67<br>
slide68. Auto Extrication
Operations
Stabilization Crib Beds
Cribbing corners/load points should overlap by 4” to assure a slow crush type failure
Bottom layer of crib should be solid when used on soil or asphalt paving to spread the load evenly 68<br>
slide69. Auto Extrication
Operations
Stabilization Vehicles off the Roadway
Creative cribbing or shoring techniques
Consider the use of ropes, chains, or winch (US&R 53) 69<br>
slide70. Auto Extrication
Operations
Opening/Removing Doors Try before you pry
Remove Glass
De-energize
Can try to use hand tools, like a Halligan first
Don’t spend too much time on hand tools
If hand tools don’t work, switch to power tools 70<br>
slide71. Auto Extrication
Operations
Opening/Removing Doors Removing Glass
Laminated Glass
Windshields
Tempered Glass
Side and Rear windows 71<br>
slide72. Auto Extrication
Operations
Opening/Removing Doors Removing Glass
Windshields
Various methods
Axe, Pry Axe, Sawzall, Windshield Saw, Halligan
Protect patient
Can remove completely or fold down onto the hood 72<br>
slide73. Auto Extrication
Operations
Opening/Removing Doors Removing Glass
Tempered Glass
Various Methods/tools
Roll Down Window, Rescue Wrench, Window Punch, Halligan, Sledgehammer
Protect Patient
Clear glass completely 73<br>
slide74. Auto Extrication
Operations
Opening/Removing Doors Create a Purchase
Use of Hand tools
Vertical Lift
Fender Crush
Enlarging existing purchase 74<br>
slide75. Auto Extrication
Operations
Opening/Removing Doors Create a Purchase
Hand Tools
Sledgehammer
Halligan
These two tools are primarily used to pound in metal or pry metal out to create a purchase point 75<br>
slide76. Auto Extrication
Operations
Opening/Removing Doors Create a Purchase
Vertical Lift
Insert tips of the spreaders between top and bottom of the window frame and spread
If done over the handle area of the door you should end up with a small opening or purchase point around the area of the Nader pin 76<br>
slide77. Auto Extrication
Operations
Opening/Removing Doors Create a Purchase
Fender Crush
Utilized to create a purchase point when attacking the hinges of the front doors
Use spreaders, pinch the area on the front quarter panel, behind the fender strut housing next to the door hinges
Crushing movement will create both a purchase point around the upper door hinge and a relief area for a dash roll 77<br>
slide78. Auto Extrication
Operations
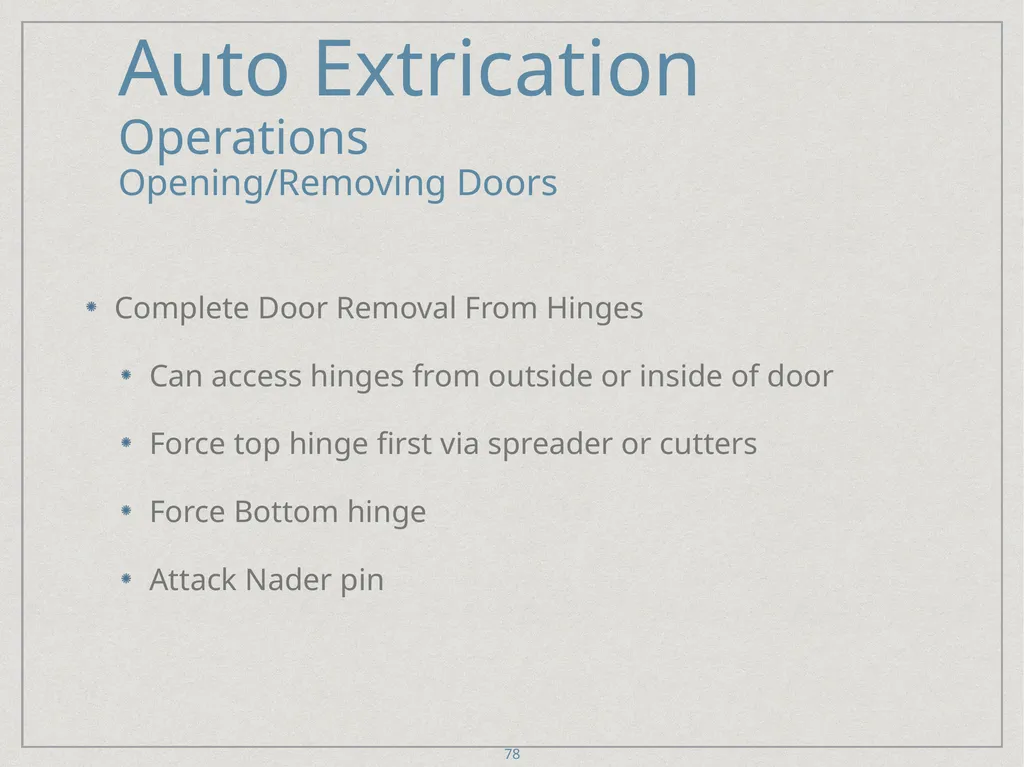
Opening/Removing Doors Complete Door Removal From Hinges
Can access hinges from outside or inside of door
Force top hinge first via spreader or cutters
Force Bottom hinge
Attack Nader pin 78<br>
slide79. Auto Extrication
Operations
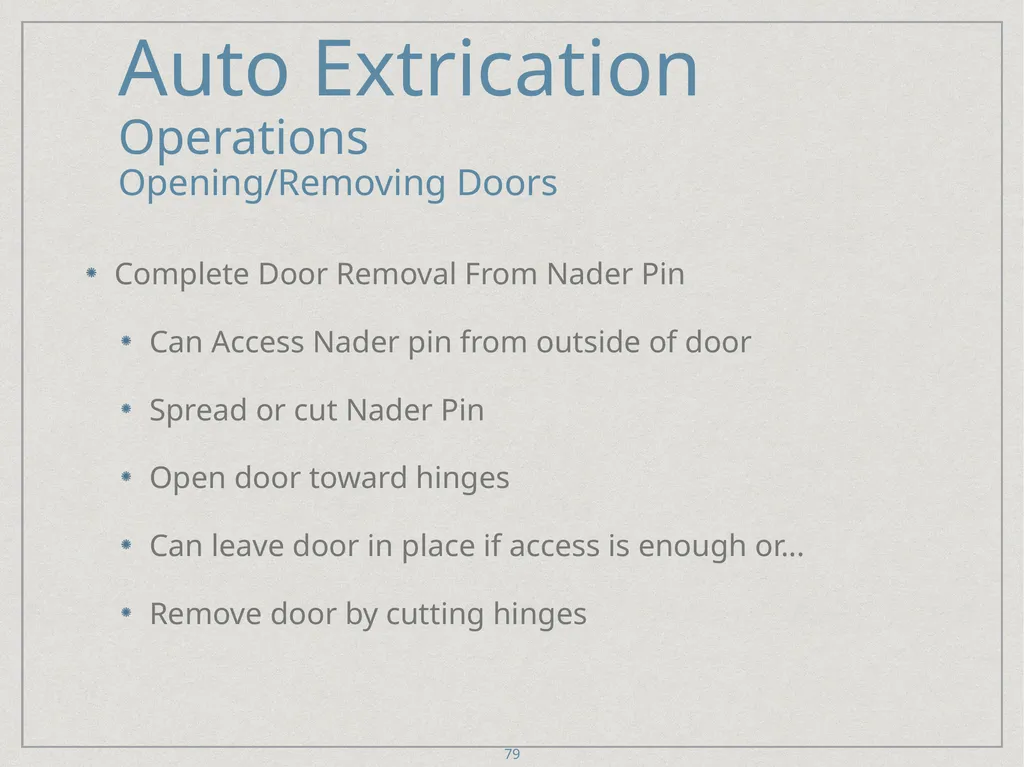
Opening/Removing Doors Complete Door Removal From Nader Pin
Can Access Nader pin from outside of door
Spread or cut Nader Pin
Open door toward hinges
Can leave door in place if access is enough or...
Remove door by cutting hinges 79<br>
slide80. Auto Extrication
Operations
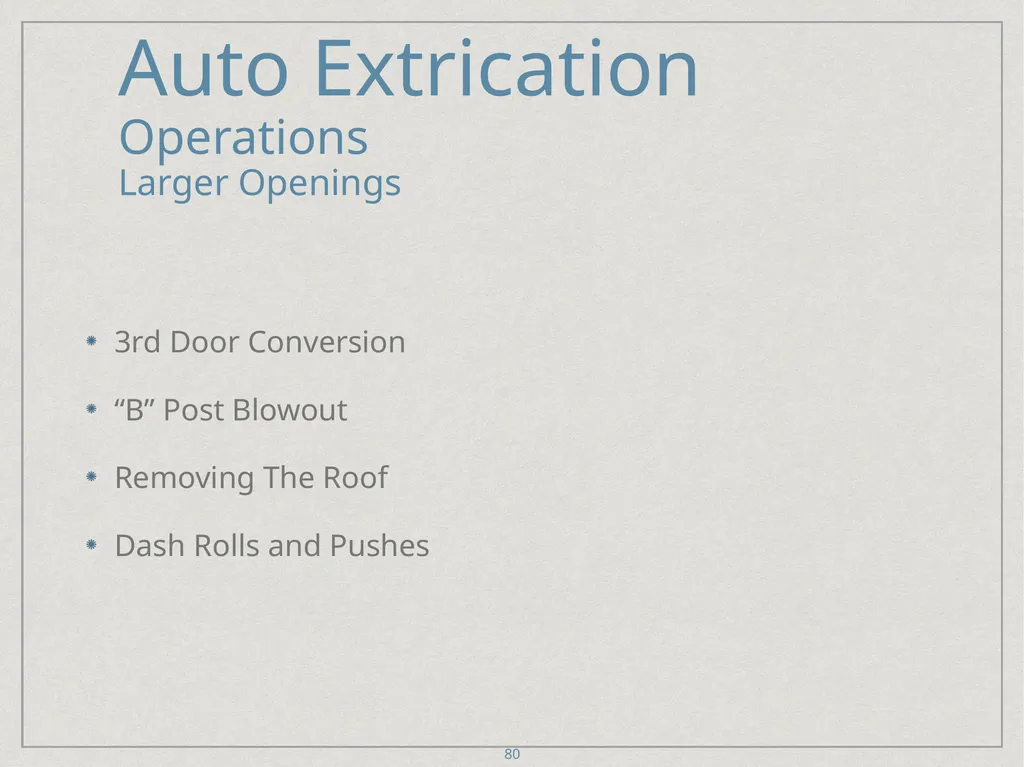
Larger Openings 3rd Door Conversion
“B” Post Blowout
Removing The Roof
Dash Rolls and Pushes 80<br>
slide81. Auto Extrication
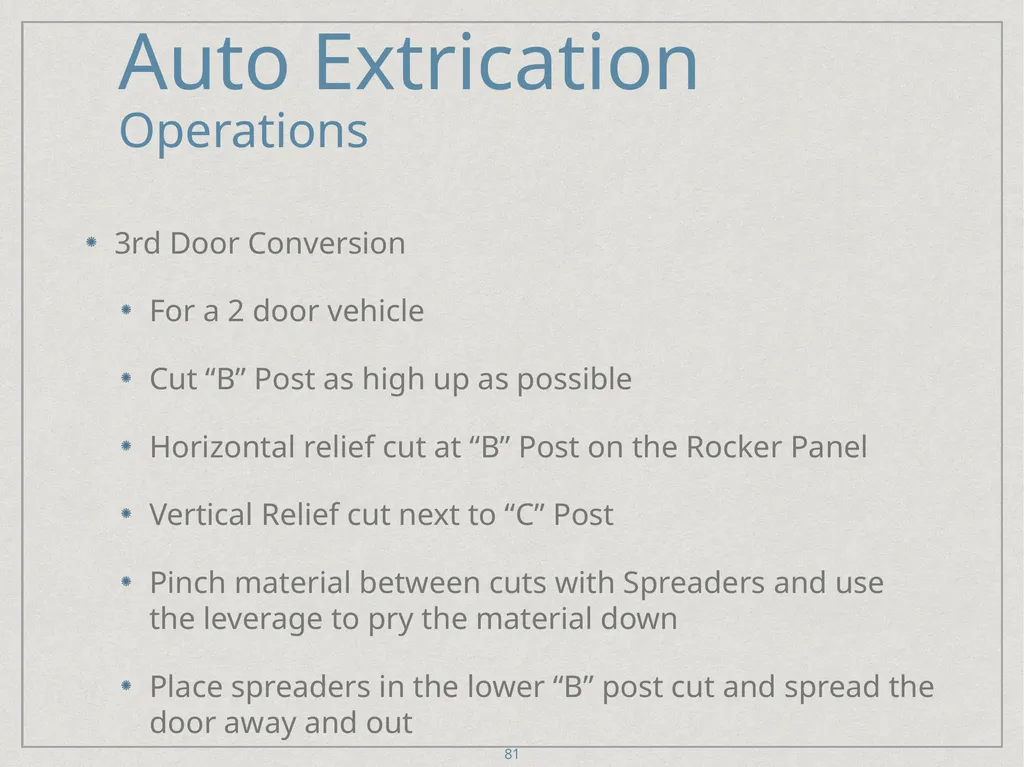
Operations 3rd Door Conversion
For a 2 door vehicle
Cut “B” Post as high up as possible
Horizontal relief cut at “B” Post on the Rocker Panel
Vertical Relief cut next to “C” Post
Pinch material between cuts with Spreaders and use the leverage to pry the material down
Place spreaders in the lower “B” post cut and spread the door away and out 81<br>
slide82. Auto Extrication
Operations “B” Post Blowout
Used to make a larger workspace in a vehicle
Two methods 82 Auto Extrication
Operations<br>
slide83. Auto Extrication
Operations “B” Post Blowout
Method 1
Done after the front and rear doors and roof have been removed
Cut the base of the “B” post to remove it 83 Auto Extrication
Operations<br>
slide84. Auto Extrication
Operations “B” Post Blowout
Method 2
Used if anticipation of removing the “B” post from the beginning of extrication
Open/pop rear door with the spreaders or cutters
Cut the “B” post low with the front door still attached and closed
Place the spreaders in this relief cut and spread the post up and away from the rocker panel 84 Auto Extrication
Operations<br>
slide85. Auto Extrication
Operations “B” Post Blowout
Method 2 cont.
Cut the “B” post as high as possible
This will now allow you to open the entire side of the car (“B” post, front door, and possibly the rear door) hinging on the front doors hinges
Lean into the door or use a piece of webbing attached to the door to pull it forward
If more space is needed remove front door hinges 85 Auto Extrication
Operations<br>
slide86. Auto Extrication
Operations
Larger Openings Removing the Roof
Remove Windshield and Glass
Remove or cut seat belts
Peel and peek
Cut both the “A” posts first, then work towards the rear posts
Cut as low as possible on “A” post 86<br>
slide87. Auto Extrication
Operations
Larger Openings Removing the Roof
Make sure to avoid any pyrotechnics, air bags or seat belt brackets
Cut high on “B” Post
Can make a Horizontal or pie cut high on “B” Post
Cut as low as possible on “C” or last Post
After all the posts are cut, lift the roof off the car 87<br>
slide88. Auto Extrication
Operations
Larger Openings Roof Fold
Peel and Peek
Cut both “A” posts avoiding any SRS
Pie cut or cut “B” Posts avoiding any SRS
Vertical Relief cut in front of “C” Post
Use pry bar to make crease on roof
Have Firefighters fold roof back along crease 88<br>
slide89. Auto Extrication
Operations
Larger Openings Roof Removal, Vehicle on its Side
Can use a variety of tools
Hydraulic cutters, Air Chisel, Sawzall
Make sure to Stabilize, De-Energize, Extricate
Remove glass in affected areas
Protect Patient 89<br>
slide90. Auto Extrication
Operations
Larger Openings Roof Removal, Vehicle on its Side
Hydraulic Cutters
Similar process to roof fold
Cut “A” Post high near roof line, work towards rear of vehicle
Make horizontal Relief cuts in roof near ground
Fold down 90<br>
slide91. Auto Extrication
Operations
Larger Openings Roof Removal, Vehicle on its Side
Air Chisel, Sawzall
Make purchase into metal
Cut through sheet metal
Round Edges
May have to use cutters to cut through roof supports
Fold down “skin” 91<br>
slide92. Auto Extrication
Operations
Larger Openings Dash Roll/Push
Used when victim has become entangled in the dash and/or the steering wheel
Remove the roof
Make relief cut in the kick panel, between the hinges, to allow dash to move
Do not cut the rocker panel, fuel lines may run through there 92<br>
slide93. Auto Extrication
Operations
Larger Openings Dash Roll/Push cont.
Place a second relief cut on the quarter panel just behind the fender strut
Place the bottom end of the ram into the lower rear corner of the door opening
While relief cuts are made cut dash strap (usually located in center of vehicle under dash)
Crib under the base of the ram below the “B” post so the force is directed into the ground and you do not lose any gain by bending the rocker panel 93<br>
slide94. Auto Extrication
Operations
Larger Openings Dash Roll/Push cont.
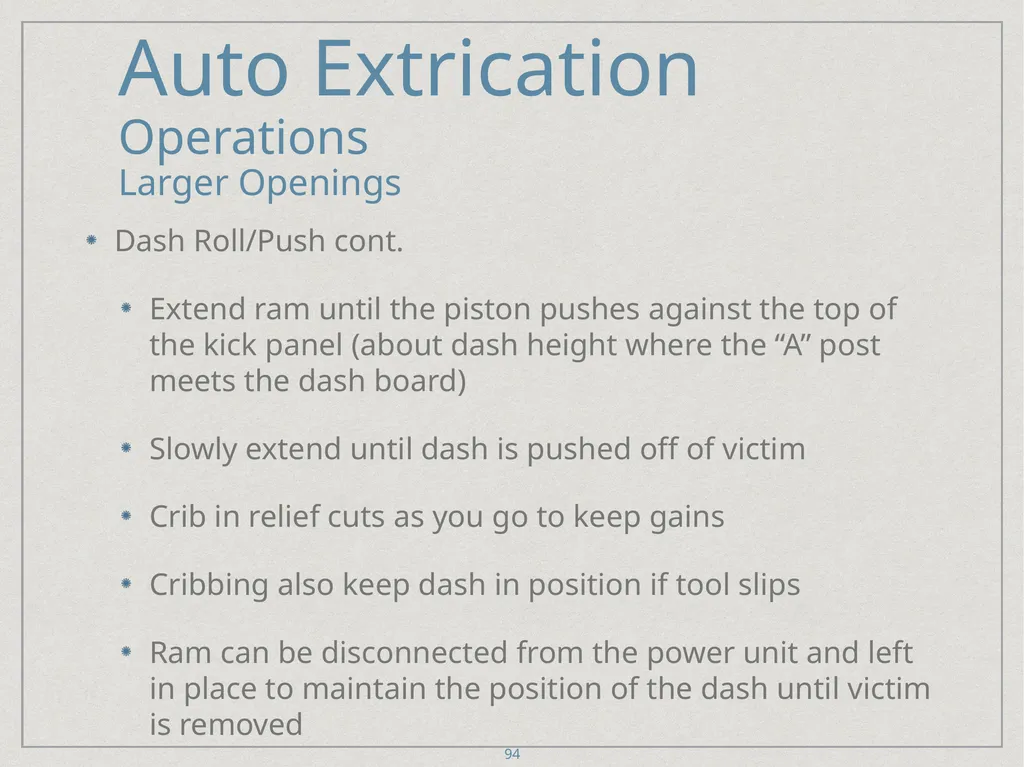
Extend ram until the piston pushes against the top of the kick panel (about dash height where the “A” post meets the dash board)
Slowly extend until dash is pushed off of victim
Crib in relief cuts as you go to keep gains
Cribbing also keep dash in position if tool slips
Ram can be disconnected from the power unit and left in place to maintain the position of the dash until victim is removed 94<br>
slide95. Auto Extrication
Operations
Larger Openings Dash Jack
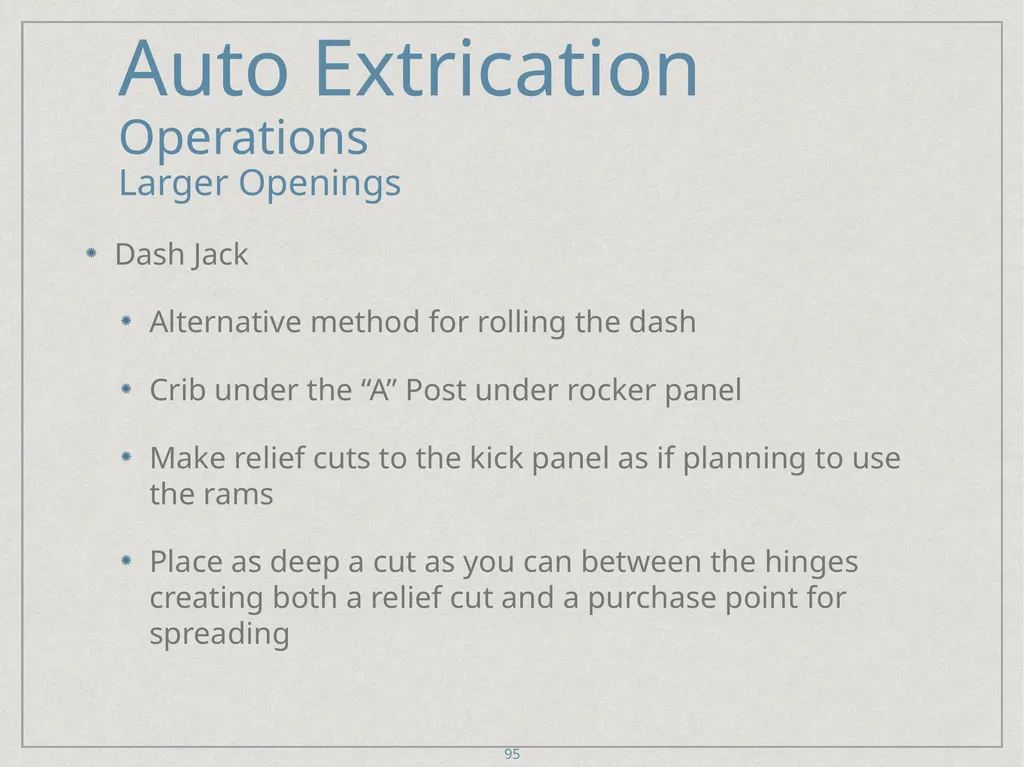
Alternative method for rolling the dash
Crib under the “A” Post under rocker panel
Make relief cuts to the kick panel as if planning to use the rams
Place as deep a cut as you can between the hinges creating both a relief cut and a purchase point for spreading 95<br>
slide96. Auto Extrication
Operations
Larger Openings Dash Jack cont.
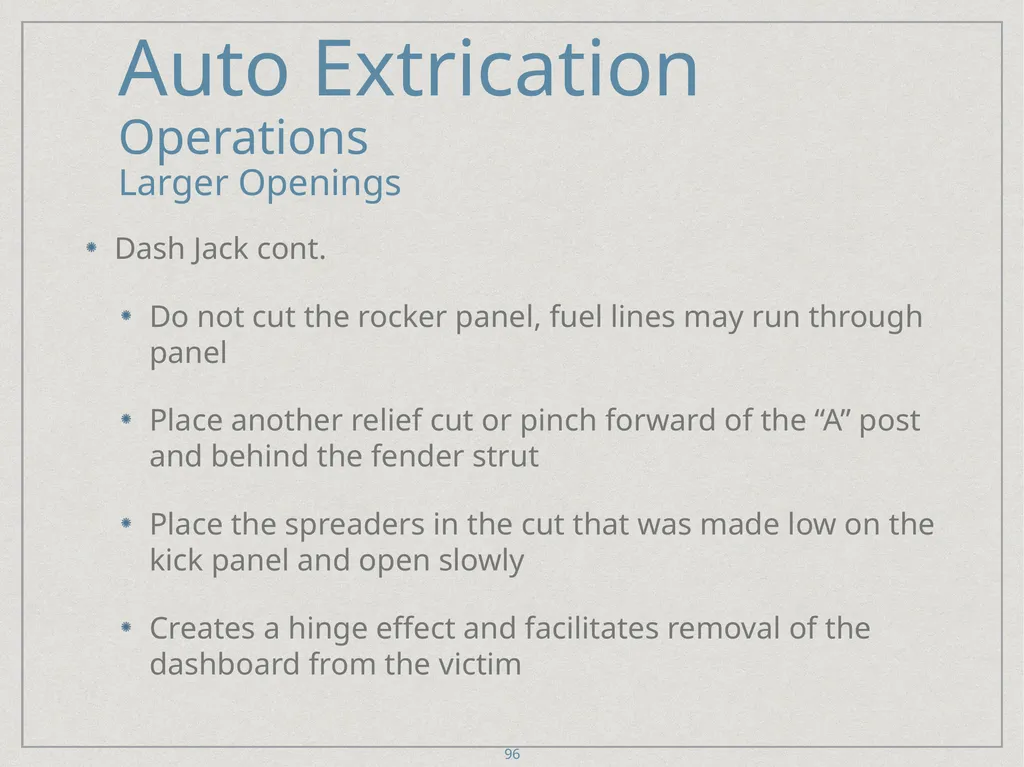
Do not cut the rocker panel, fuel lines may run through panel
Place another relief cut or pinch forward of the “A” post and behind the fender strut
Place the spreaders in the cut that was made low on the kick panel and open slowly
Creates a hinge effect and facilitates removal of the dashboard from the victim 96<br>
slide97. Auto Extrication
Operations
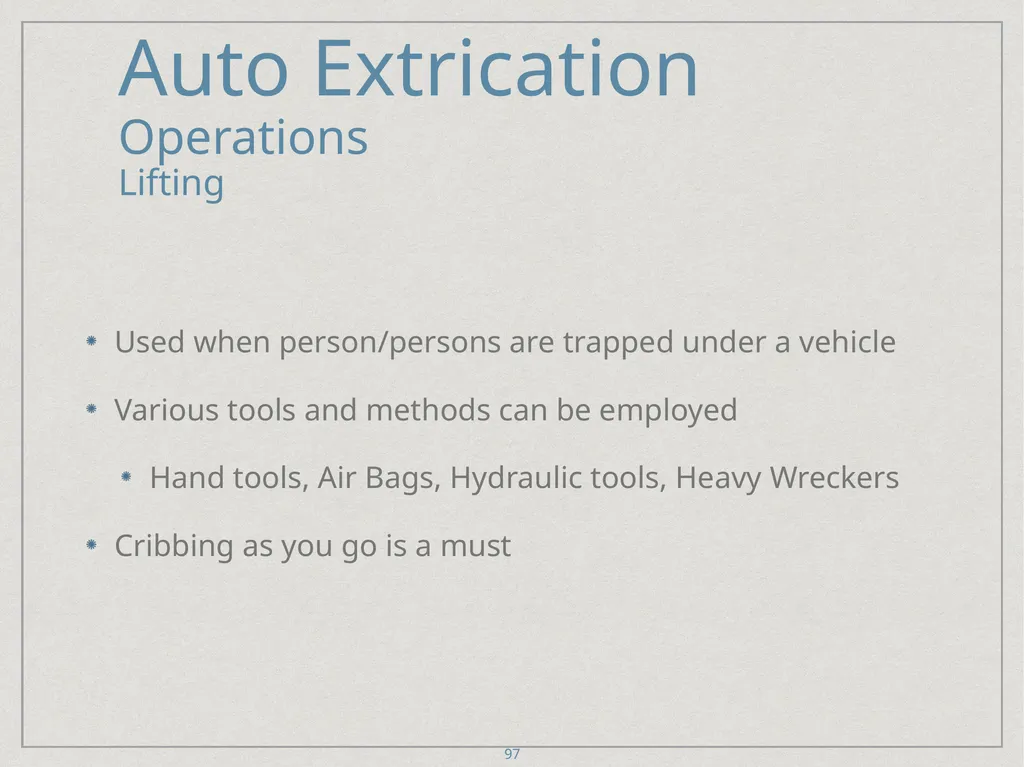
Lifting Used when person/persons are trapped under a vehicle
Various tools and methods can be employed
Hand tools, Air Bags, Hydraulic tools, Heavy Wreckers
Cribbing as you go is a must 97<br>
slide98. Auto Extrication
Operations
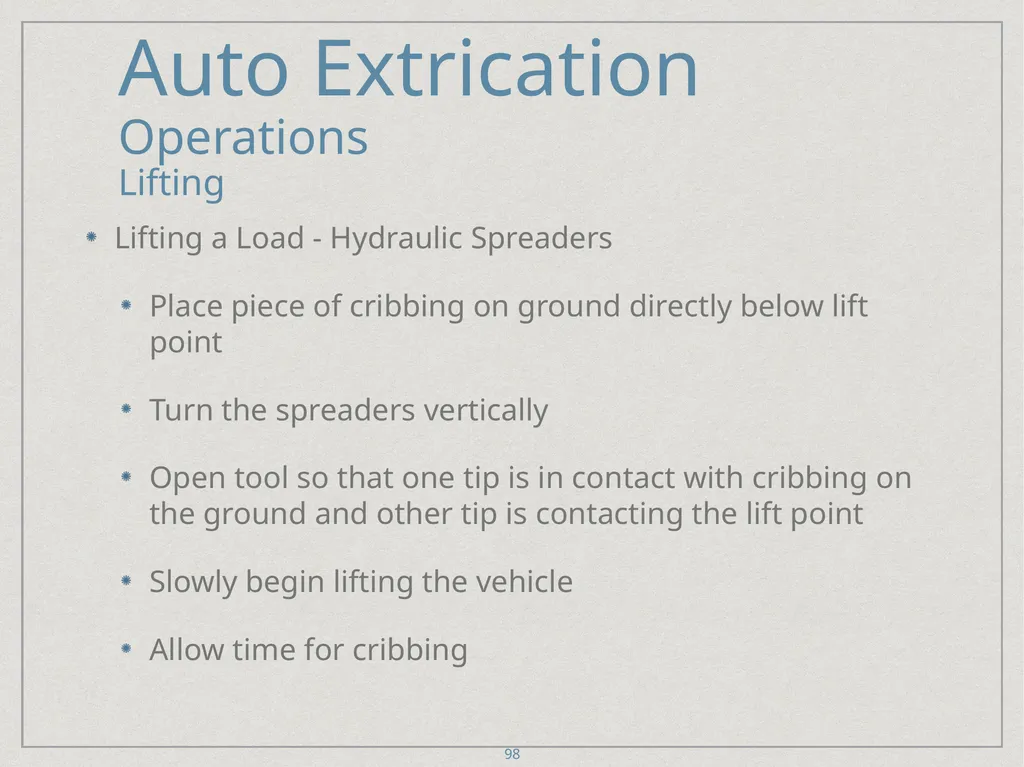
Lifting Lifting a Load - Hydraulic Spreaders
Place piece of cribbing on ground directly below lift point
Turn the spreaders vertically
Open tool so that one tip is in contact with cribbing on the ground and other tip is contacting the lift point
Slowly begin lifting the vehicle
Allow time for cribbing 98<br>
slide99. Auto Extrication
Operations
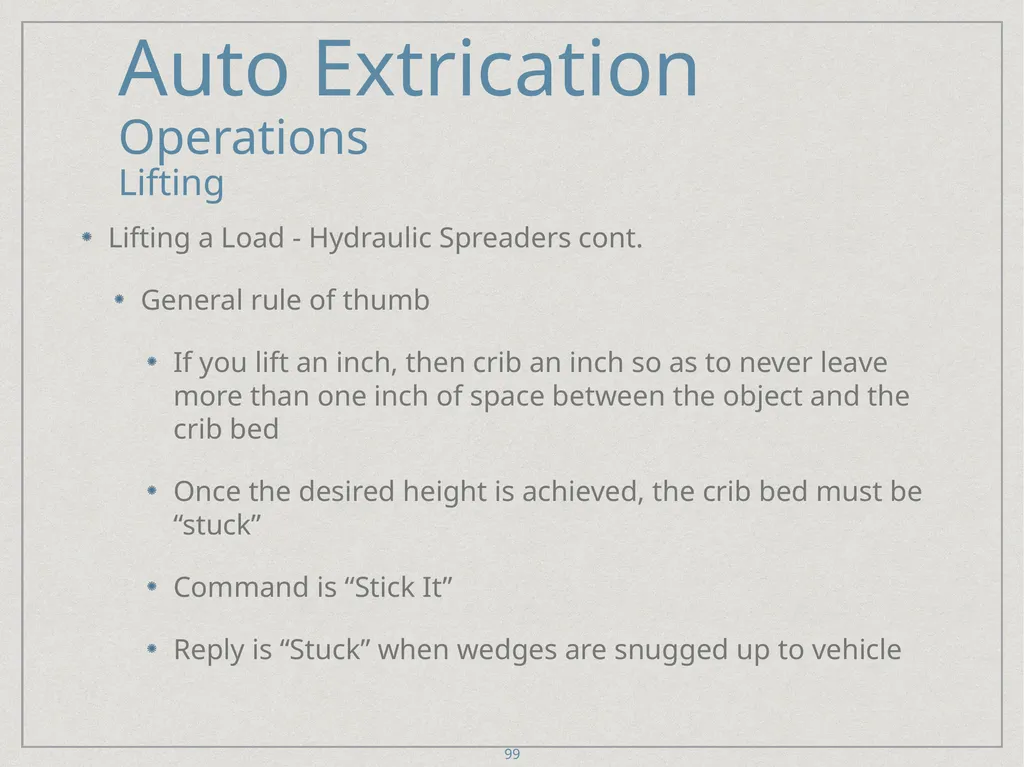
Lifting Lifting a Load - Hydraulic Spreaders cont.
General rule of thumb
If you lift an inch, then crib an inch so as to never leave more than one inch of space between the object and the crib bed
Once the desired height is achieved, the crib bed must be “stuck”
Command is “Stick It”
Reply is “Stuck” when wedges are snugged up to vehicle 99<br>
slide100. Auto Extrication
Operations
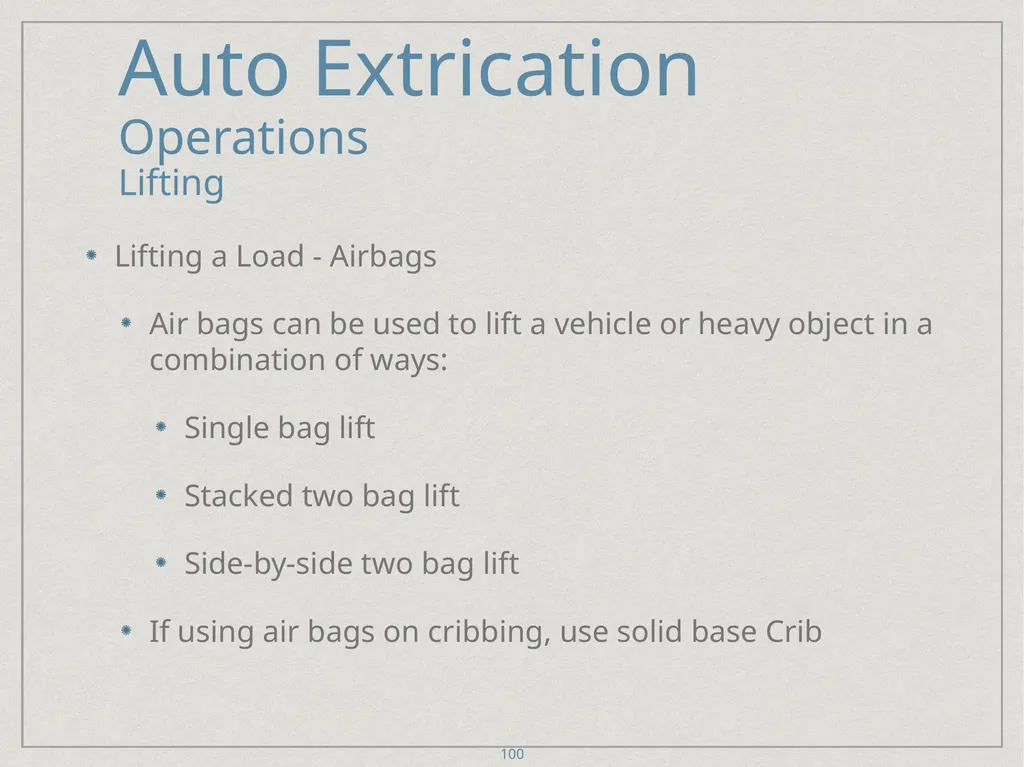
Lifting Lifting a Load - Airbags
Air bags can be used to lift a vehicle or heavy object in a combination of ways:
Single bag lift
Stacked two bag lift
Side-by-side two bag lift
If using air bags on cribbing, use solid base Crib 100<br>
slide101. Auto Extrication
Operations
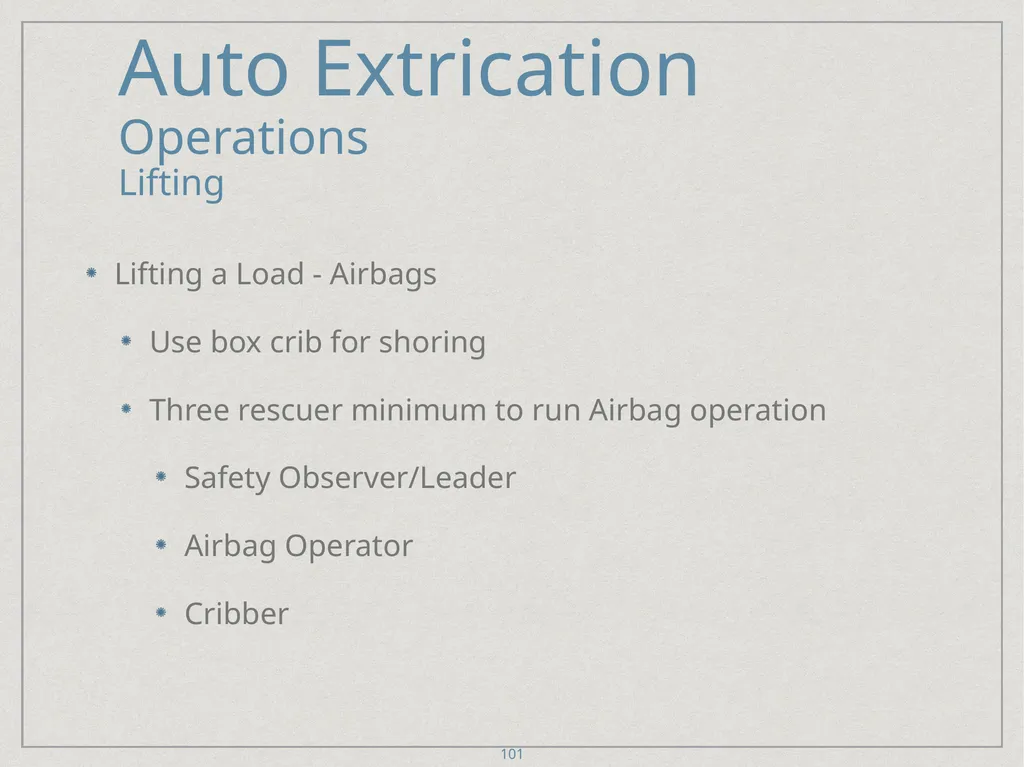
Lifting Lifting a Load - Airbags
Use box crib for shoring
Three rescuer minimum to run Airbag operation
Safety Observer/Leader
Airbag Operator
Cribber 101<br>
slide102. Auto Extrication
Operations
Lifting Lifting a Load - Airbags
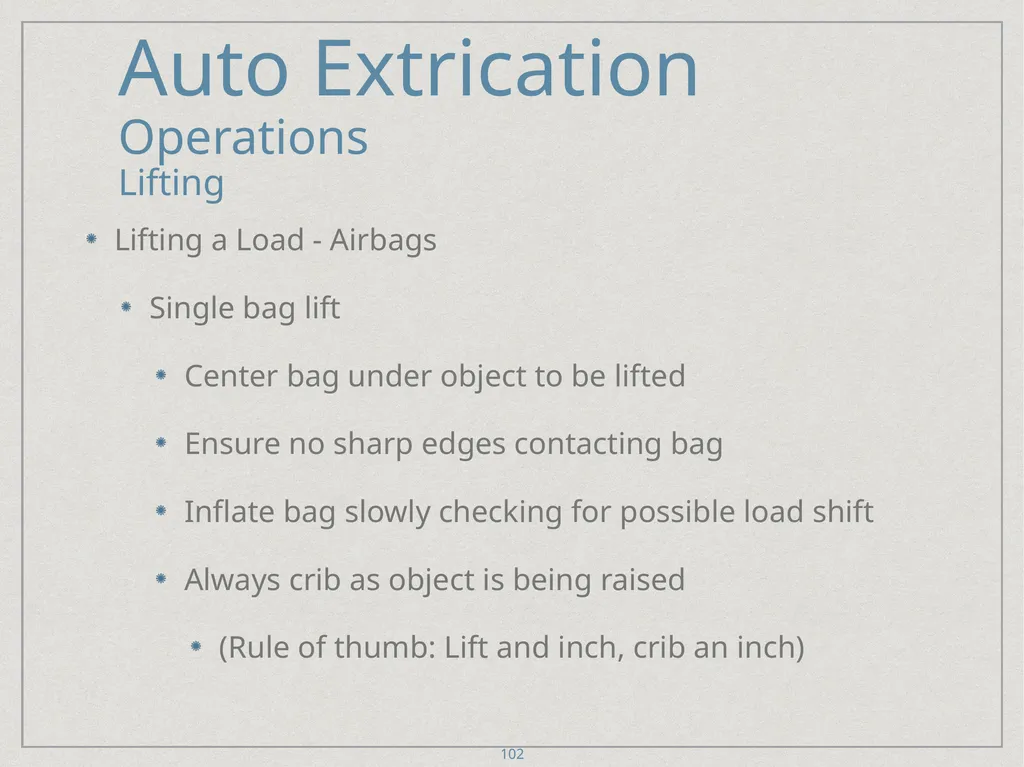
Single bag lift
Center bag under object to be lifted
Ensure no sharp edges contacting bag
Inflate bag slowly checking for possible load shift
Always crib as object is being raised
(Rule of thumb: Lift and inch, crib an inch) 102<br>
slide103. Auto Extrication
Operations
Lifting Lifting a Load - Airbags
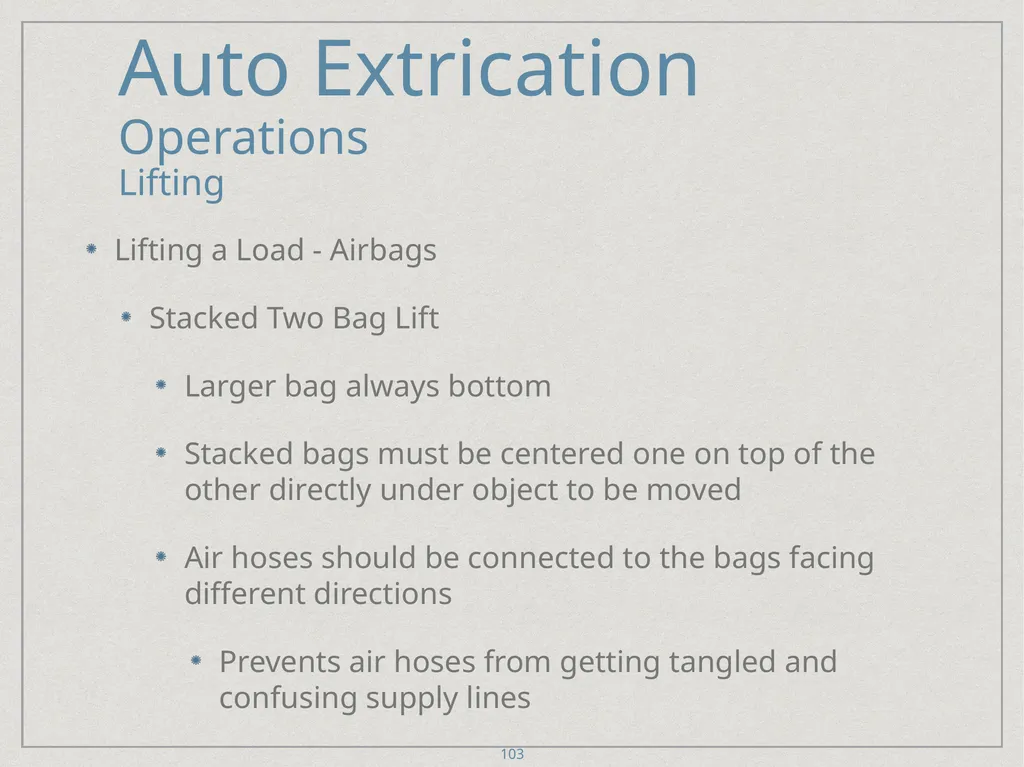
Stacked Two Bag Lift
Larger bag always bottom
Stacked bags must be centered one on top of the other directly under object to be moved
Air hoses should be connected to the bags facing different directions
Prevents air hoses from getting tangled and confusing supply lines 103<br>
slide104. Auto Extrication
Operations
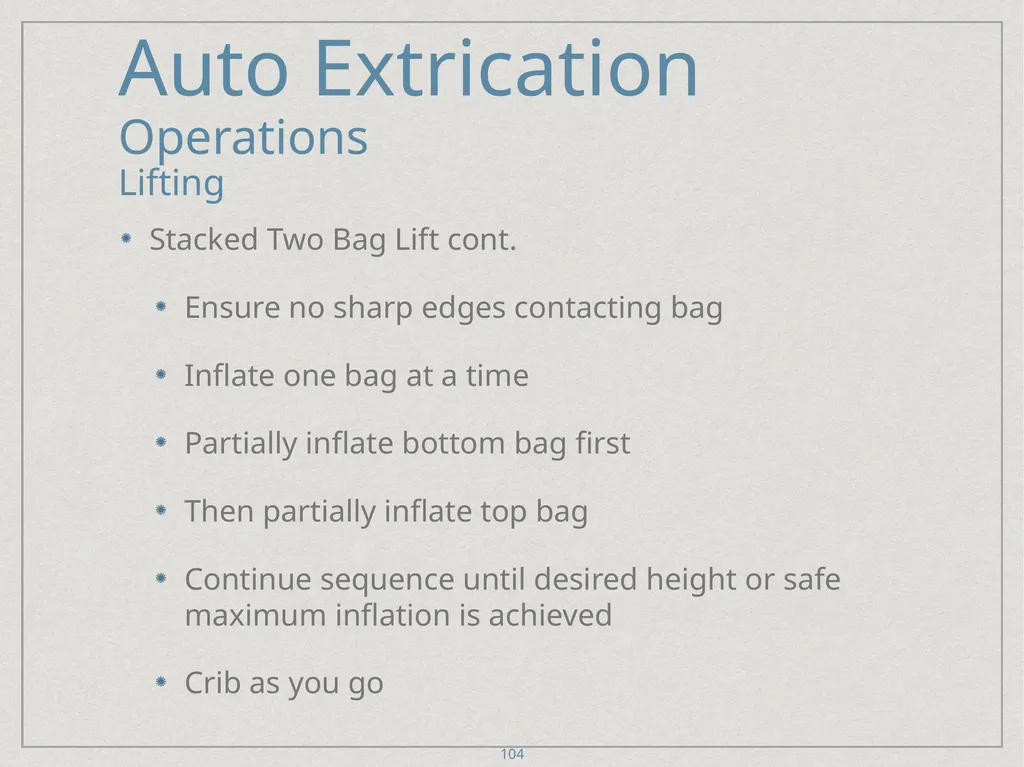
Lifting Stacked Two Bag Lift cont.
Ensure no sharp edges contacting bag
Inflate one bag at a time
Partially inflate bottom bag first
Then partially inflate top bag
Continue sequence until desired height or safe maximum inflation is achieved
Crib as you go 104<br>
slide105. Auto Extrication
Operations
Lifting Lifting a Load - Airbags
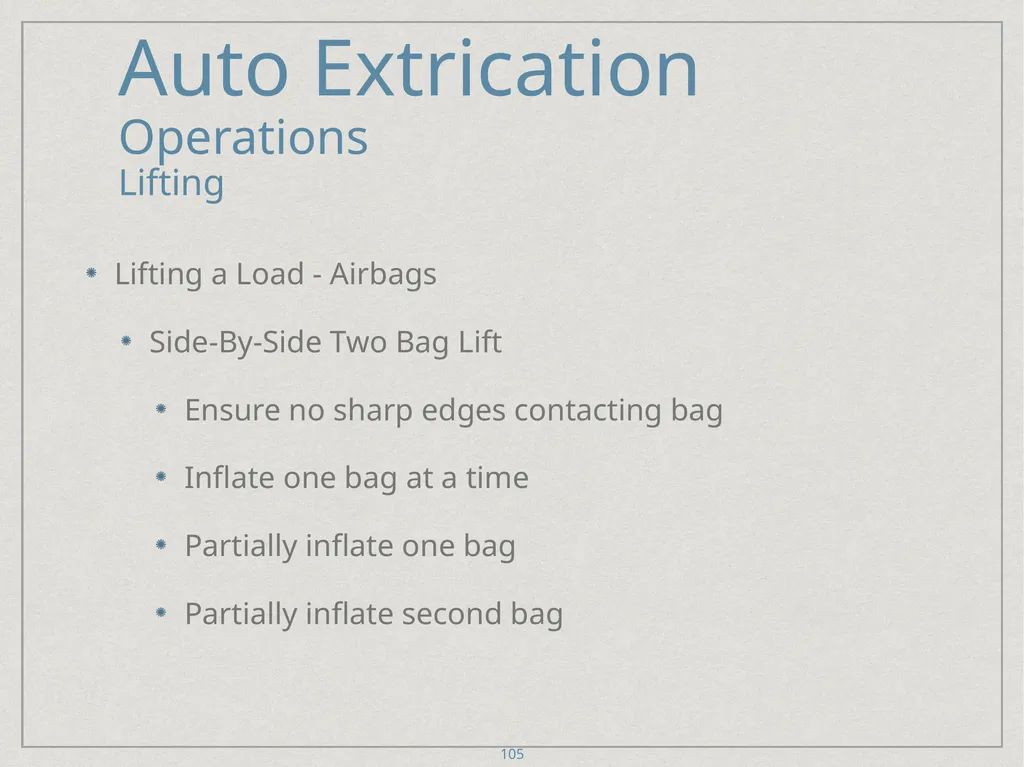
Side-By-Side Two Bag Lift
Ensure no sharp edges contacting bag
Inflate one bag at a time
Partially inflate one bag
Partially inflate second bag 105<br>
slide106. Auto Extrication
Operations
Lifting Side-By-Side Two Bag Lift
Continue sequence until desired height or safe maximum inflation is achieved
Crib as you go
Uneven surfaces should always be cribbed until parallel
Always crib up to the surface until you can just get bag in
Retains maximum lift of the bag 106<br>
slide107. Auto Extrication
Operations
Lifting Floor Jack (RESCUE 17)
Located in belly compartment
Large throw
One person to operate
One person to crib
Very effective for quick operation
Limited weight capacity 107<br>
slide108. Auto Extrication
Operations
Lifting Pry Bars
Last resort (another option)
Takes manpower
Coordination is key
Limited Throw
Crib as you go 108<br>
slide109. Auto Extrication
Operations
Alternative Fuel Vehicles Vehicle that runs on a fuel other than “traditional” petroleum fuels (gasoline or diesel)
Fuels include ethanol, bio-diesel, natural gas (LNG, CNG), propane, hydrogen, and electricity
Also refers to any technology powering an engine that does not involve solely petroleum
Hybrid
Electric vehicles 109<br>
slide110. Auto Extrication
Operations
Alternative Fuel Vehicles Can be used for any number of purposes
Buses
Street Sweepers
Trash Trucks
Long and Short Haul Trucks
Fire Engines
Personel Vehicles 110<br>
slide111. Auto Extrication
Operations
Alternative Fuel Vehicles New Challenges posed
Noise levels
Auto-stop function
Electric Vehicles 111 Auto Extrication
Operations
Alternative Fuel Vehicles<br>
slide112. Auto Extrication
Operations
Alternative Fuel Vehicles Noise levels
Very quiet when stopped
Electric vehicles especially
May fool rescuers into false sense that vehicle is shut down 112<br>
slide113. Auto Extrication
Operations
Alternative Fuel Vehicles Auto Stop
Shuts down the combustion motor when there is no demand applied to it
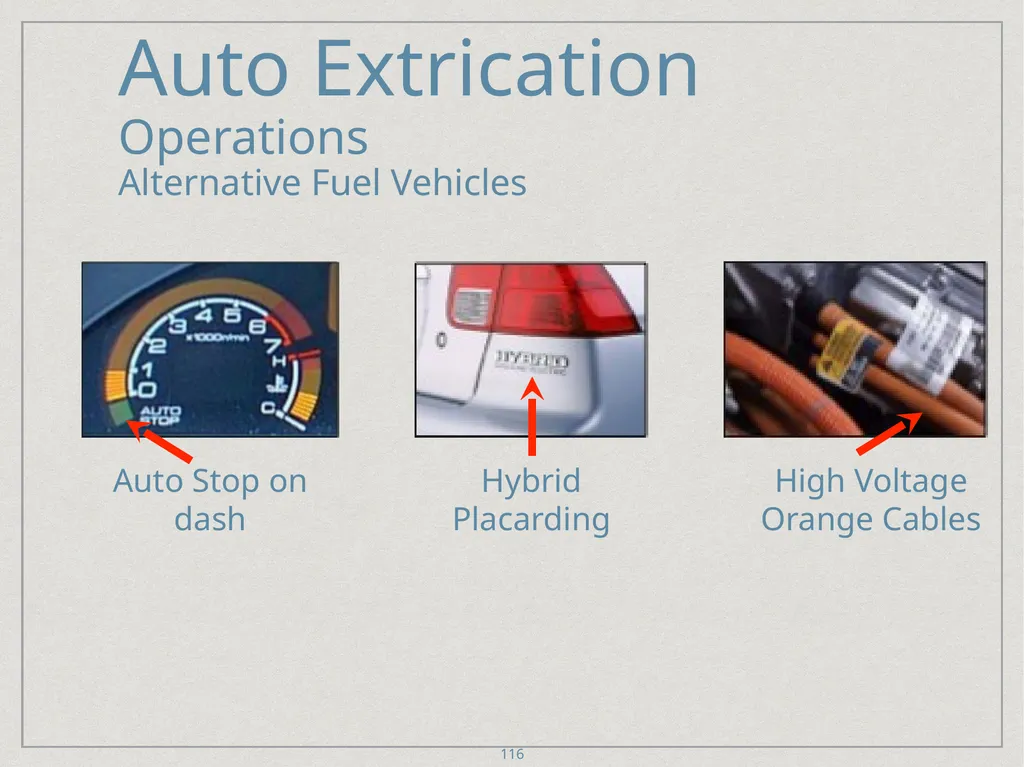
When stopped the words “Auto Stop” should be illuminated on dashboard
There will be no running motor, no exhaust and no noise
Any inadvertent push gas pedal will result in the vehicle’s motor engaging and movement
Properly shut-down prior to patient care or extrication 113<br>
slide114. Auto Extrication
Operations
Alternative Fuel Vehicles Shutting Down a Hybrid Vehicle
Stabilize Vehicle
Identify vehicle as potential hybrid
Place gear shift into PARK
Set parking brake
Turn off and remove key
Remove Smart Keys at least 20 feet from vehicle
Ensure “Ready” light or “Auto Stop” light is OFF on dashboard
When “on” and waiting for input from the gas pedal, a light on the dash reads “READY” 114<br>
slide115. Auto Extrication
Operations
Alternative Fuel Vehicles Shutting Down a Hybrid Vehicle
Ensure that “READY” light is not on before extrication
De-energize by disconnecting 12 volt DC battery
Negative terminal first
Ensure the two battery leads do not recontact battery
If unable to disconnect battery, remove all fuses from the fuse box
Attempt to locate the battery disconnect switch for the High Voltage batteries 115<br>
slide116. Auto Extrication
Operations
Alternative Fuel Vehicles 116 Auto Stop on dash Hybrid Placarding High Voltage Orange Cables<br>
slide117. Can approach in similar fashion as standard fuel vehicles
STABILIZE - DE-ENERGIZE - EXTRICATE
Stabilize - keep the vehicle from moving
Bring off of suspension
De-Energize - Shut down the power/brain of the vehicle to its systems
Extricate - Read the wreck
Stay within the “Golden Hour” for patient care 117 Auto Extrication
Operations
Alternative Fuel Vehicles<br>
slide118. Many types of vehicles on the road and they are always evolving
Many different types of vehicle rescues you will encounter
Safety on approach of vehicle
Full PPE
STABILIZE - DE-ENERGIZE - EXTRICATE
Read the wreck, do enough to access the patient 118 Auto Extrication
Key points<br>
slide119. Do not make the situation worse
Protect the patient
Talk to the patient
Try to get the patient transported to the appropriate facility within the “Golden Hour”
Always keep safety of crews as a priority 119 Auto Extrication
Key Points<br>
slide120. Auto Extrication
Summary Vehicle rescue incidents requires an individual evaluation and decision on strategy and tactics
No two events will be alike
Consider the incident under control when all victims requiring medical aid have been transported to the hospital
Incident may very well be a crime scene and it is imperative that we disrupt as little as possible
In extrication the experience and training of the crew is paramount to a successful rescue 120<br>
slide121. Auto Extrication
Summary Train
Train
Train
Try various techniques
Train with various companies and apparatus
Be Safe 121<br>
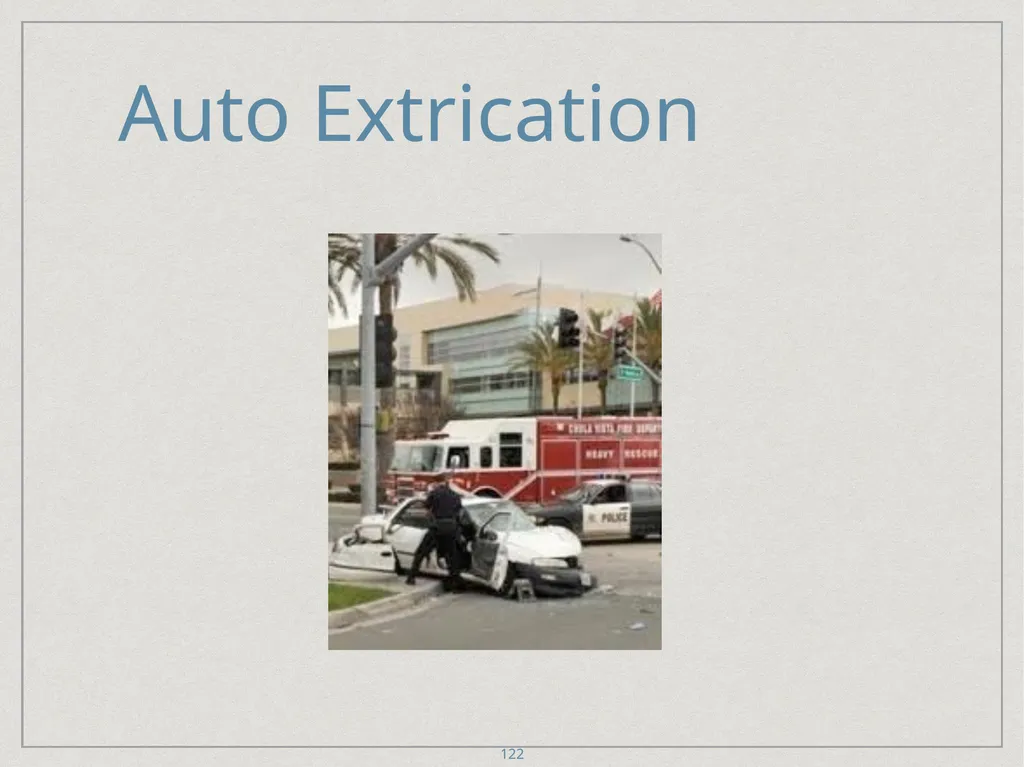
slide122. Auto Extrication 122<br>
slide2. Auto Extrication Definition
Vehicle Anatomy
Basic Vehicle Components
Batteries
Struts
High Strength Steel 2<br>
slide3. Auto Extrication Vehicle Supplemental Restraint Systems (SRS)
Airbag-Equipped Vehicles
Seat Belt Pretensioners
Passive Roll Bar Systems
Extrication Tools 3<br>
slide4. Auto Extrication Vehicle Stabilization
Vehicle Extrication
Alternative Fuel Vehicles 4<br>
slide5. Auto Extrication Process of removing accident victims trapped in the wreckage of their vehicles.
Also referred to as vehicle disentanglement 5<br>
slide6. Auto Extrication “Golden Hour”
Extrication of victim within 15 minutes is ideal
Sole responsibility of Fire service to extricate trauma patients from their vehicles in a timely and safe manner
Cause no further harm 6<br>
slide7. Auto Extrication Newer vehicles designed with safety in mind
Crumple zones
HSS, AHSS, and SRS
Basic idea is to disperse energy around passenger compartment
Learn to “Read the Wreck” 7<br>
slide8. Auto Extrication
Vehicle Anatomy 8<br>
slide9. Auto Extrication
Vehicle Anatomy Top
The top of the car is always the roof, even if it is overturned
“A” Post
Is the vertical structural member of the vehicle which frames in the windshield
It is located furthest to the front and extends from the dash to the roof 9<br>
slide10. Auto Extrication
Vehicle Anatomy “B” Post
Is the vertical structural member of the vehicle which extends from the rocker panel to the roof of the car
The “B” post is located one post to the rear of the “A” post and provides latching point for front door
“C” Post etc...
Is the vertical structural member of the vehicle which may frame in the rear window of the vehicle
On larger vehicles may serve the purpose similar to the “B” post
As vehicles get larger, so do the number of vertical posts encountered on the vehicle 10<br>
slide11. Auto Extrication
Vehicle Anatomy 11 “A” “B” “C” “D” “E” “F”<br>
slide12. Auto Extrication
Vehicle Anatomy Roof Rail
The beam that runs perpendicular to, and connects the “A,” “B” and C” Posts
Rocker panel
The rocker panel is the rigid area of a vehicle between the bottom of the “A” and “B” posts
Fuel lines run through the rocker panel in some vehicles 12<br>
slide13. Auto Extrication
Vehicle Anatomy Fender Rail
Area that runs the top outside edge between the front of the vehicle and the “A” post
This area is also referred to as the “quarter panel”
Kick Panel
Area of the vehicle just below the “A” post and forms the rear edge of the quarter panel or fender rail 13<br>
slide14. Auto Extrication
Vehicle Anatomy Nader Pin
Attached directly to the “B” post and serves as the latching point for the front doors
Depending on the number of doors on the vehicle, a Nader Pin may be found on the “C” posts as well
May also be a hook or loop 14<br>
slide15. Auto Extrication
Vehicle Anatomy Reinforcement bars
Designed to give added strength to the doors of a vehicle
These bars are made of high strength steel and run front to back in vehicle doors
Placed so the bar will penetrate the post preventing the door from opening in the event of an accident
Problem for rescuers is that the bar acts like a dead bolt and prevents conventional removal of the door 15<br>
slide16. Auto Extrication
Vehicle Anatomy Transverse Beam (Magnesium)
Solid structure found inside the dash board designed to provide lateral (side-to-side) strength of the passenger compartment
It is also where dashboard components are mounted
Transverse beam is commonly made of magnesium and can present additional hazards if fire is involved 16<br>
slide17. Auto Extrication
Vehicle Anatomy Batteries
Major component of electrical system
Must locate to de-energize vehicle prior to extrication
Not always located under hood
Other possible locations include
Engine compartment
Trunk
Any of the 4 wheel wells
Under any of the seats
Under any of the floor boards 17<br>
slide18. Auto Extrication
Vehicle Anatomy Struts
Designed to absorb shock, impact, and assist with lifting and stabilizing heavy components
Typically filled with a compressed gas or liquid
Most commonly found under the hood, trunk, bumpers, and on hatches or compartment doors 18<br>
slide19. Auto Extrication
Vehicle Anatomy Struts - Safety concerns
Under pressure by design
Cutting one may cause a deadly projectile or explosion
Can be under extreme pressure after a vehicle accident
Impinged by fire, can heat up to the point where they can no longer contain the pressures inside, exploding or propelling themselves great distances 19 Projectile Strut<br>
slide20. Auto Extrication
Vehicle Anatomy Struts
Bumper Struts
Most vehicles manufactured after 1974
Used to create energy absorbing bumpers
Similar design to those found in struts
When the energy absorbing pistons are heated or impinged by fire, they can unexpectedly explode or release, launching the bumper or the individual piston great distances 20 Projectile Strut<br>
slide21. Auto Extrication
Vehicle Anatomy Struts
Bumper Struts
Should always approach vehicles at a 45° to 90° degree angle from the front or back
Keep clear of a potential bumper release during vehicle fires or extrication 21<br>
slide22. Auto Extrication
Vehicle Anatomy Vehicle Frames
Two basic frame types
“Body Over Frame”
“Unibody”
Both designs employ plastic components, including plastic skins
Makes it difficult to gain a purchase 22<br>
slide23. Auto Extrication
Vehicle Anatomy “Body Over Frame”
Consists of two steel beams or rails that run the length of vehicle
Frame provides the attachment foundation for all other components of the vehicle, such as the engine, body, wheels, etc...
Primarily used in trucks and larger sport utility vehicles
May still be found in passenger vehicles constructed prior to the 1980’s 23<br>
slide24. Auto Extrication
Vehicle Anatomy “Body Over Frame”
Usually heavier
Tend to hold up better in a collision 24<br>
slide25. Auto Extrication
Vehicle Anatomy “Unibody”
Also known as “monocoque”
Found on most passenger and small sport utility vehicles in production today
Has no discernible frame rails
Entire vehicle supports the weight of itself
The posts, rocker panels, dashboards, roof rails, and sometimes the windows, all work together to provide an intact passenger compartment 25<br>
slide26. Auto Extrication
Vehicle Anatomy “Unibody”
Typically made through a process called hydro-forming
Fluid is pressurized in to a mold creating a formed product with no seams or welds
For additional strength, a boron steel bar is placed into the open space of the posts and rails
Strong under normal conditions
When any part of the body is compromised, rapid failure of the entire vehicle may follow 26<br>
slide27. Auto Extrication
Vehicle Anatomy (HSS)High Strength Steel
Used to decrease weight and increase strength
Poses a challenge for rescuers because hydraulic tools may not be able to cut, bend or push some of these metals 27<br>
slide28. Auto Extrication
Vehicle Anatomy (HSS)High Strength Steel - Types
Mild Steel, MS
(36,000 lbs of tensile strength) This material is within the limits of all our rescue tools and is normally found in fenders, floor panels, quarter panels and rocker panels
High Strength Steel, HSS
(50,000 lbs of tensile strength) Also within the limits of our tools and found in hoods, door skins and quarter panels 28<br>
slide29. Auto Extrication
Vehicle Anatomy (HSS)High Strength Steel - Types
High Strength Low Alloy, HSLA
(87,000 lbs of tensile strength) Outside the max force provided by most hydraulic tools. Found in posts, side members, rail strut supports and crumple zones
Ultra High Strength Steel, UHSS
(116,000 lbs of tensile strength) This material is outside the working range of most of our tools. These materials are used for posts, reinforcement bars (found in doors) and dash boards of most new vehicles 29<br>
slide30. Auto Extrication
Vehicle Anatomy (HSS)High Strength Steel - Types
Advanced High Strength Steel, AHSS
(203,000 lbs of tensile strength) This material is outside the working strength of all our tools. Also known as Boron steel, it is very hard and brittle. An attempt at cutting this material will result in either the shattering of the material, the shattering of your tool, or no progress at all 30<br>
slide31. Auto Extrication
Extrication Tools Air Bags
Air Chisel
Bolt Cutters
Cribbing
Flat Headed Axe
Floor Jack (US&R)
Hacksaw
Halligan
Hay Hook
Hydraulic tools (Amkus)
Pick Headed Axe
Pry Bar
Pry Axe
Port-a-Power (Engines) 31<br>
slide32. Auto Extrication
Extrication Tools Reciprocating Saw or “Sawzall”
Rescue Wrench
Seat Belt Cutter
Sledge Hammer
Stabilization Jacks (US&R 53)
Step Chocks
Utility Rope
Window Punch
Winch (RESCUE 17) 32<br>
slide33. Auto Extrication
Extrication Tools 33 HURST Hydraulic tools<br>
slide34. Auto Extrication
Supplemental Restraint Systems (SRS) Adds safety to occupants
Adds potential danger to rescuers
1988 1st driver side air bags appeared in passenger cars
2011 some vehicles boast up to 16 airbags 34<br>
slide35. Auto Extrication
Supplemental Restraint Systems (SRS) 35<br>
slide36. Auto Extrication
Supplemental Restraint Systems (SRS) 36 Driver’s Airbag
Passenger Airbag
Rear passenger airbags stored in the back of the front seats
Side Airbag (Front and Rear)
Impact Curtain, Inflatable Tubular Structure
Knee Airbag
Seat Belt Pre-tensioners
Automatic Roll Bars<br>
slide37. Auto Extrication
Supplemental Restraint Systems (SRS)
Airbag-Equipped Vehicles Identifiable by:
Steering wheel hub
Verbage:
“Supplemental Inflatable Restraint”
“SIR”
“Air Bag”
“SRS”
Vehicle identification number (VIN)
Placards under hood or on driver’s side windshield pillar
If unable to determine, always err on the side of safety. 37<br>
slide38. Auto Extrication
Supplemental Restraint Systems (SRS)
Airbag-Equipped Vehicles Rescue with Undeployed Air-bag
Unlikely to deploy after a crash on its own
Three things must happen for airbags to deploy
The vehicle must have speed or be moving. They will not deploy if vehicle is stopped
There must be an impact on the airbag sensors
The airbag sensors must detect rapid vehicle deceleration 38<br>
slide39. Auto Extrication
Supplemental Restraint Systems (SRS)
Airbag-Equipped Vehicles Rescue with Undeployed Air-bag
Even with the aforementioned prerequisites for the activation of air bags, there have been rare cases of inadvertent airbag deployment.
Can cause severe injury or death
Employ the “5-10-20” rule 39<br>
slide40. Auto Extrication
Supplemental Restraint Systems (SRS)
Airbag-Equipped Vehicles Rescue with Undeployed Air-bag
“5-10-20” Rule
Keep all personnel and equipment
5 inches from the door
10 inches from the steering wheel
20 inches from the passenger side dash board 40<br>
slide41. Auto Extrication
Supplemental Restraint Systems (SRS)
Airbag-Equipped Vehicles Rescue with Undeployed Air-bag
STABILIZE
DE-ENERGIZE
EXTRICATE 41<br>
slide42. Auto Extrication
Supplemental Restraint Systems (SRS)
Airbag-Equipped Vehicles Rescue with Undeployed Air-bag
Stabilize vehicle
De-energize vehicle
Disconnect battery cables, negative first
Cut battery cables, negative first
Remove about an inch or more
Extricate 42<br>
slide43. Auto Extrication
Supplemental Restraint Systems (SRS)
Airbag-Equipped Vehicles Rescue with Undeployed Air-bag
De-energizing
Roll down windows, move seat back, unlock doors, etc. before de-energizing vehicle
Turn on 4-ways
When 4-ways go out, battery is disconnected
Some capacitors will continue to hold a charge 43<br>
slide44. Auto Extrication
Supplemental Restraint Systems (SRS)
Airbag-Equipped Vehicles Rescue with Undeployed Air-bag
Peel and peek
Airbags, compressed gas cylinders, or other SRS components may be dispersed in various locations
No standard for placement of SRS components
Peel back plastic and fabric to expose metal frame of vehicle 44<br>
slide45. Auto Extrication
Supplemental Restraint Systems (SRS)
Airbag-Equipped Vehicles Rescue with Deployed Airbags
Approached as if undeployed airbags until proven otherwise
STABILIZE, DE-ENERGIZE, EXTRICATE
“5-10-20” rule
Victim may have burns on face from airbag deployment 45<br>
slide46. Auto Extrication
Supplemental Restraint Systems (SRS)
Airbag-Equipped Vehicles Seat Belt Pretensioners
Used to prevent occupants from leaving their seats during a vehicle accident
Occupants pulled back into their seats so as not to impact the airbag with such a great force
Concerned with accidental discharge of pyrotechnic component
Found at the base of either front seat or in the “B” post 46<br>
slide47. Auto Extrication
Supplemental Restraint Systems (SRS)
Airbag-Equipped Vehicles Seat Belt Pretensioners 47<br>
slide48. Auto Extrication
Supplemental Restraint Systems (SRS)
Airbag-Equipped Vehicles Seat Belt Pretensioners
Found using “peel and peek”
Do not cut into or apply pressure to these devices
Remove the victim’s seat belt as soon as practical and safe 48<br>
slide49. Auto Extrication
Supplemental Restraint Systems (SRS) Passive Roll Bar Systems
Some convertible vehicles have been designed with hidden roll bars
Will deploy in a fraction of a second when the vehicle senses a roll past 51° degrees from horizontal
Most bars will either shoot straight out or hinge up
Peel and peek, look for markings, may reveal the presence of a passive roll bar system 49<br>
slide50. Auto Extrication
Scene Management
Arrival at Scene Common considerations
Stabilize
Utilize vehicle power
De-energize
Patient Care
Peel and Peek
Extricate 50<br>
slide51. Auto Extrication
Scene Management
Arrival at Scene 51 What is wrong with this picture?<br>
slide52. Auto Extrication
Scene Management
Size-up Should include:
Report on conditions
Traffic Control
Identify Hazards
Electrical issues
Fire or fuel spill
Unstable vehicle
Hazardous materials or cargo
Number of patients
Needs/Resources
Plan 52<br>
slide53. Auto Extrication
Scene Management
Special Considerations At Night
Illumination is paramount
Common for unrestrained accident victims to be ejected
Can be thrown considerable distances
Search area thoroughly
Consider using a TIC
Account for occupants 53<br>
slide54. Auto Extrication
Scene Management
Special Considerations Scene Protection
Attempt to exit apparatus on the non-traffic side
Never turn your back to traffic
Look-outs or Safety officers are helpful if you can’t keep an eye on traffic
Use caution when using flares
25 foot Hot Zone (Exclusion Zone) around the vehicle should be maintained
Only necessary personnel in full PPE 54<br>
slide55. Auto Extrication
Scene Management
Special Considerations Flammable Liquid Control
Attempt to stop or control any leaking flammable liquids
Warn personnel about sparks and fire danger prior to beginning extrication
Have Dry Chemical Extinguisher at the ready
If it is a large spill request Haz Mat
“Hot Zone” must be increased to 100 feet when flammable liquids are a factor 55<br>
slide56. Auto Extrication
Scene Management
Special Considerations Electrical Hazards
Always be assumed to be energized or “hot” when electrical boxes and downed wires are involved.
Do not attempt to make any extrication attempts, or move any downed power lines
Wait until confirmation that power is shut down
Focus on calming the patient and giving them instructions to stay in the vehicle until deemed safe by SDGE or the IC 56<br>
slide57. Auto Extrication
Scene Management
Special Considerations Electrical Hazards
Vehicle itself can be an electrical hazard
Part of the initial actions (STABILIZE, DE-ENERGIZE, EXTRICATE)
Use vehicle power for necessary functions before...
Vehicle ignition should be turned off
Batteries disconnected starting with the negative terminal (black) 57<br>
slide58. Auto Extrication 58 Operations<br>
slide59. Auto Extrication
Operations
Stabilization Second only to scene size-up
Two reasons for Stabilization
Keep vehicle from moving and further injuring patients or rescuers
Creates solid platform to perform rescue and extrication operations
Brick vs. Beachball
Bring vehicle off of Suspension by letting air out of tires 59<br>
slide60. Auto Extrication
Operations
Stabilization Older vehicles more resemble a “brick”
Newer vehicles have a more round plastic shell and resemble a “beach ball” 60<br>
slide61. Auto Extrication
Operations
Stabilization “Bricks”
Square or rectangular surfaces
Hard exterior shell
“Beach Ball”
Aerodynamic design
Rounded
Easily warped and malleable plastic shells 61<br>
slide62. Auto Extrication
Operations
Stabilization Upright Vehicle
Place wheel blocks or cribbing on both sides of at least one tire
Place vehicle in park or in gear and set parking brake if accessible
Use cribbing or step chocks to make four points of contact on vehicle frame
Two points per side, under “A” posts behind tire and in front of rear tire 62<br>
slide63. Auto Extrication
Operations
Stabilization Upright Vehicle
Four points is best, but three points is also good enough
Operation is the same on one side with the third chock on opposite side beneath the “B” post
Step chocks can be used...
Right side up
Right side up with a wedge
Upside down 63<br>
slide64. Auto Extrication
Operations
Stabilization Overturned Vehicle
Cribbing
Paratech Rescue Struts (US&R 53)
Tensioned Buttress
Airbags with cribbing (if necessary) 64<br>
slide65. Auto Extrication
Operations
Stabilization Crib Beds 65 2x2 Crib Bed
(Max 3:1)
Height to Width 3x3 Crib Bed
(Max 3:1)
Height to Width Solid Crib Bed
(Max 3:1)
Height to Width<br>
slide66. Auto Extrication
Operations
Stabilization 66 Crib Beds Parallelogram Crib Bed
(Max 1:1)
Height to Width Triangle Crib Bed (Max 1:1)
Height to Width Sloped Surface Crib Bed<br>
slide67. Auto Extrication
Operations
Stabilization Crib Beds
4” x 4” dimensional cribbing has a load capacity of 6000 lbs. at each load point
6” x 6” dimensional cribbing has a load capacity of 15,000 lbs. at each load point
Crib height is limited to 3 times the width of the crib base or 3:1 67<br>
slide68. Auto Extrication
Operations
Stabilization Crib Beds
Cribbing corners/load points should overlap by 4” to assure a slow crush type failure
Bottom layer of crib should be solid when used on soil or asphalt paving to spread the load evenly 68<br>
slide69. Auto Extrication
Operations
Stabilization Vehicles off the Roadway
Creative cribbing or shoring techniques
Consider the use of ropes, chains, or winch (US&R 53) 69<br>
slide70. Auto Extrication
Operations
Opening/Removing Doors Try before you pry
Remove Glass
De-energize
Can try to use hand tools, like a Halligan first
Don’t spend too much time on hand tools
If hand tools don’t work, switch to power tools 70<br>
slide71. Auto Extrication
Operations
Opening/Removing Doors Removing Glass
Laminated Glass
Windshields
Tempered Glass
Side and Rear windows 71<br>
slide72. Auto Extrication
Operations
Opening/Removing Doors Removing Glass
Windshields
Various methods
Axe, Pry Axe, Sawzall, Windshield Saw, Halligan
Protect patient
Can remove completely or fold down onto the hood 72<br>
slide73. Auto Extrication
Operations
Opening/Removing Doors Removing Glass
Tempered Glass
Various Methods/tools
Roll Down Window, Rescue Wrench, Window Punch, Halligan, Sledgehammer
Protect Patient
Clear glass completely 73<br>
slide74. Auto Extrication
Operations
Opening/Removing Doors Create a Purchase
Use of Hand tools
Vertical Lift
Fender Crush
Enlarging existing purchase 74<br>
slide75. Auto Extrication
Operations
Opening/Removing Doors Create a Purchase
Hand Tools
Sledgehammer
Halligan
These two tools are primarily used to pound in metal or pry metal out to create a purchase point 75<br>
slide76. Auto Extrication
Operations
Opening/Removing Doors Create a Purchase
Vertical Lift
Insert tips of the spreaders between top and bottom of the window frame and spread
If done over the handle area of the door you should end up with a small opening or purchase point around the area of the Nader pin 76<br>
slide77. Auto Extrication
Operations
Opening/Removing Doors Create a Purchase
Fender Crush
Utilized to create a purchase point when attacking the hinges of the front doors
Use spreaders, pinch the area on the front quarter panel, behind the fender strut housing next to the door hinges
Crushing movement will create both a purchase point around the upper door hinge and a relief area for a dash roll 77<br>
slide78. Auto Extrication
Operations
Opening/Removing Doors Complete Door Removal From Hinges
Can access hinges from outside or inside of door
Force top hinge first via spreader or cutters
Force Bottom hinge
Attack Nader pin 78<br>
slide79. Auto Extrication
Operations
Opening/Removing Doors Complete Door Removal From Nader Pin
Can Access Nader pin from outside of door
Spread or cut Nader Pin
Open door toward hinges
Can leave door in place if access is enough or...
Remove door by cutting hinges 79<br>
slide80. Auto Extrication
Operations
Larger Openings 3rd Door Conversion
“B” Post Blowout
Removing The Roof
Dash Rolls and Pushes 80<br>
slide81. Auto Extrication
Operations 3rd Door Conversion
For a 2 door vehicle
Cut “B” Post as high up as possible
Horizontal relief cut at “B” Post on the Rocker Panel
Vertical Relief cut next to “C” Post
Pinch material between cuts with Spreaders and use the leverage to pry the material down
Place spreaders in the lower “B” post cut and spread the door away and out 81<br>
slide82. Auto Extrication
Operations “B” Post Blowout
Used to make a larger workspace in a vehicle
Two methods 82 Auto Extrication
Operations<br>
slide83. Auto Extrication
Operations “B” Post Blowout
Method 1
Done after the front and rear doors and roof have been removed
Cut the base of the “B” post to remove it 83 Auto Extrication
Operations<br>
slide84. Auto Extrication
Operations “B” Post Blowout
Method 2
Used if anticipation of removing the “B” post from the beginning of extrication
Open/pop rear door with the spreaders or cutters
Cut the “B” post low with the front door still attached and closed
Place the spreaders in this relief cut and spread the post up and away from the rocker panel 84 Auto Extrication
Operations<br>
slide85. Auto Extrication
Operations “B” Post Blowout
Method 2 cont.
Cut the “B” post as high as possible
This will now allow you to open the entire side of the car (“B” post, front door, and possibly the rear door) hinging on the front doors hinges
Lean into the door or use a piece of webbing attached to the door to pull it forward
If more space is needed remove front door hinges 85 Auto Extrication
Operations<br>
slide86. Auto Extrication
Operations
Larger Openings Removing the Roof
Remove Windshield and Glass
Remove or cut seat belts
Peel and peek
Cut both the “A” posts first, then work towards the rear posts
Cut as low as possible on “A” post 86<br>
slide87. Auto Extrication
Operations
Larger Openings Removing the Roof
Make sure to avoid any pyrotechnics, air bags or seat belt brackets
Cut high on “B” Post
Can make a Horizontal or pie cut high on “B” Post
Cut as low as possible on “C” or last Post
After all the posts are cut, lift the roof off the car 87<br>
slide88. Auto Extrication
Operations
Larger Openings Roof Fold
Peel and Peek
Cut both “A” posts avoiding any SRS
Pie cut or cut “B” Posts avoiding any SRS
Vertical Relief cut in front of “C” Post
Use pry bar to make crease on roof
Have Firefighters fold roof back along crease 88<br>
slide89. Auto Extrication
Operations
Larger Openings Roof Removal, Vehicle on its Side
Can use a variety of tools
Hydraulic cutters, Air Chisel, Sawzall
Make sure to Stabilize, De-Energize, Extricate
Remove glass in affected areas
Protect Patient 89<br>
slide90. Auto Extrication
Operations
Larger Openings Roof Removal, Vehicle on its Side
Hydraulic Cutters
Similar process to roof fold
Cut “A” Post high near roof line, work towards rear of vehicle
Make horizontal Relief cuts in roof near ground
Fold down 90<br>
slide91. Auto Extrication
Operations
Larger Openings Roof Removal, Vehicle on its Side
Air Chisel, Sawzall
Make purchase into metal
Cut through sheet metal
Round Edges
May have to use cutters to cut through roof supports
Fold down “skin” 91<br>
slide92. Auto Extrication
Operations
Larger Openings Dash Roll/Push
Used when victim has become entangled in the dash and/or the steering wheel
Remove the roof
Make relief cut in the kick panel, between the hinges, to allow dash to move
Do not cut the rocker panel, fuel lines may run through there 92<br>
slide93. Auto Extrication
Operations
Larger Openings Dash Roll/Push cont.
Place a second relief cut on the quarter panel just behind the fender strut
Place the bottom end of the ram into the lower rear corner of the door opening
While relief cuts are made cut dash strap (usually located in center of vehicle under dash)
Crib under the base of the ram below the “B” post so the force is directed into the ground and you do not lose any gain by bending the rocker panel 93<br>
slide94. Auto Extrication
Operations
Larger Openings Dash Roll/Push cont.
Extend ram until the piston pushes against the top of the kick panel (about dash height where the “A” post meets the dash board)
Slowly extend until dash is pushed off of victim
Crib in relief cuts as you go to keep gains
Cribbing also keep dash in position if tool slips
Ram can be disconnected from the power unit and left in place to maintain the position of the dash until victim is removed 94<br>
slide95. Auto Extrication
Operations
Larger Openings Dash Jack
Alternative method for rolling the dash
Crib under the “A” Post under rocker panel
Make relief cuts to the kick panel as if planning to use the rams
Place as deep a cut as you can between the hinges creating both a relief cut and a purchase point for spreading 95<br>
slide96. Auto Extrication
Operations
Larger Openings Dash Jack cont.
Do not cut the rocker panel, fuel lines may run through panel
Place another relief cut or pinch forward of the “A” post and behind the fender strut
Place the spreaders in the cut that was made low on the kick panel and open slowly
Creates a hinge effect and facilitates removal of the dashboard from the victim 96<br>
slide97. Auto Extrication
Operations
Lifting Used when person/persons are trapped under a vehicle
Various tools and methods can be employed
Hand tools, Air Bags, Hydraulic tools, Heavy Wreckers
Cribbing as you go is a must 97<br>
slide98. Auto Extrication
Operations
Lifting Lifting a Load - Hydraulic Spreaders
Place piece of cribbing on ground directly below lift point
Turn the spreaders vertically
Open tool so that one tip is in contact with cribbing on the ground and other tip is contacting the lift point
Slowly begin lifting the vehicle
Allow time for cribbing 98<br>
slide99. Auto Extrication
Operations
Lifting Lifting a Load - Hydraulic Spreaders cont.
General rule of thumb
If you lift an inch, then crib an inch so as to never leave more than one inch of space between the object and the crib bed
Once the desired height is achieved, the crib bed must be “stuck”
Command is “Stick It”
Reply is “Stuck” when wedges are snugged up to vehicle 99<br>
slide100. Auto Extrication
Operations
Lifting Lifting a Load - Airbags
Air bags can be used to lift a vehicle or heavy object in a combination of ways:
Single bag lift
Stacked two bag lift
Side-by-side two bag lift
If using air bags on cribbing, use solid base Crib 100<br>
slide101. Auto Extrication
Operations
Lifting Lifting a Load - Airbags
Use box crib for shoring
Three rescuer minimum to run Airbag operation
Safety Observer/Leader
Airbag Operator
Cribber 101<br>
slide102. Auto Extrication
Operations
Lifting Lifting a Load - Airbags
Single bag lift
Center bag under object to be lifted
Ensure no sharp edges contacting bag
Inflate bag slowly checking for possible load shift
Always crib as object is being raised
(Rule of thumb: Lift and inch, crib an inch) 102<br>
slide103. Auto Extrication
Operations
Lifting Lifting a Load - Airbags
Stacked Two Bag Lift
Larger bag always bottom
Stacked bags must be centered one on top of the other directly under object to be moved
Air hoses should be connected to the bags facing different directions
Prevents air hoses from getting tangled and confusing supply lines 103<br>
slide104. Auto Extrication
Operations
Lifting Stacked Two Bag Lift cont.
Ensure no sharp edges contacting bag
Inflate one bag at a time
Partially inflate bottom bag first
Then partially inflate top bag
Continue sequence until desired height or safe maximum inflation is achieved
Crib as you go 104<br>
slide105. Auto Extrication
Operations
Lifting Lifting a Load - Airbags
Side-By-Side Two Bag Lift
Ensure no sharp edges contacting bag
Inflate one bag at a time
Partially inflate one bag
Partially inflate second bag 105<br>
slide106. Auto Extrication
Operations
Lifting Side-By-Side Two Bag Lift
Continue sequence until desired height or safe maximum inflation is achieved
Crib as you go
Uneven surfaces should always be cribbed until parallel
Always crib up to the surface until you can just get bag in
Retains maximum lift of the bag 106<br>
slide107. Auto Extrication
Operations
Lifting Floor Jack (RESCUE 17)
Located in belly compartment
Large throw
One person to operate
One person to crib
Very effective for quick operation
Limited weight capacity 107<br>
slide108. Auto Extrication
Operations
Lifting Pry Bars
Last resort (another option)
Takes manpower
Coordination is key
Limited Throw
Crib as you go 108<br>
slide109. Auto Extrication
Operations
Alternative Fuel Vehicles Vehicle that runs on a fuel other than “traditional” petroleum fuels (gasoline or diesel)
Fuels include ethanol, bio-diesel, natural gas (LNG, CNG), propane, hydrogen, and electricity
Also refers to any technology powering an engine that does not involve solely petroleum
Hybrid
Electric vehicles 109<br>
slide110. Auto Extrication
Operations
Alternative Fuel Vehicles Can be used for any number of purposes
Buses
Street Sweepers
Trash Trucks
Long and Short Haul Trucks
Fire Engines
Personel Vehicles 110<br>
slide111. Auto Extrication
Operations
Alternative Fuel Vehicles New Challenges posed
Noise levels
Auto-stop function
Electric Vehicles 111 Auto Extrication
Operations
Alternative Fuel Vehicles<br>
slide112. Auto Extrication
Operations
Alternative Fuel Vehicles Noise levels
Very quiet when stopped
Electric vehicles especially
May fool rescuers into false sense that vehicle is shut down 112<br>
slide113. Auto Extrication
Operations
Alternative Fuel Vehicles Auto Stop
Shuts down the combustion motor when there is no demand applied to it
When stopped the words “Auto Stop” should be illuminated on dashboard
There will be no running motor, no exhaust and no noise
Any inadvertent push gas pedal will result in the vehicle’s motor engaging and movement
Properly shut-down prior to patient care or extrication 113<br>
slide114. Auto Extrication
Operations
Alternative Fuel Vehicles Shutting Down a Hybrid Vehicle
Stabilize Vehicle
Identify vehicle as potential hybrid
Place gear shift into PARK
Set parking brake
Turn off and remove key
Remove Smart Keys at least 20 feet from vehicle
Ensure “Ready” light or “Auto Stop” light is OFF on dashboard
When “on” and waiting for input from the gas pedal, a light on the dash reads “READY” 114<br>
slide115. Auto Extrication
Operations
Alternative Fuel Vehicles Shutting Down a Hybrid Vehicle
Ensure that “READY” light is not on before extrication
De-energize by disconnecting 12 volt DC battery
Negative terminal first
Ensure the two battery leads do not recontact battery
If unable to disconnect battery, remove all fuses from the fuse box
Attempt to locate the battery disconnect switch for the High Voltage batteries 115<br>
slide116. Auto Extrication
Operations
Alternative Fuel Vehicles 116 Auto Stop on dash Hybrid Placarding High Voltage Orange Cables<br>
slide117. Can approach in similar fashion as standard fuel vehicles
STABILIZE - DE-ENERGIZE - EXTRICATE
Stabilize - keep the vehicle from moving
Bring off of suspension
De-Energize - Shut down the power/brain of the vehicle to its systems
Extricate - Read the wreck
Stay within the “Golden Hour” for patient care 117 Auto Extrication
Operations
Alternative Fuel Vehicles<br>
slide118. Many types of vehicles on the road and they are always evolving
Many different types of vehicle rescues you will encounter
Safety on approach of vehicle
Full PPE
STABILIZE - DE-ENERGIZE - EXTRICATE
Read the wreck, do enough to access the patient 118 Auto Extrication
Key points<br>
slide119. Do not make the situation worse
Protect the patient
Talk to the patient
Try to get the patient transported to the appropriate facility within the “Golden Hour”
Always keep safety of crews as a priority 119 Auto Extrication
Key Points<br>
slide120. Auto Extrication
Summary Vehicle rescue incidents requires an individual evaluation and decision on strategy and tactics
No two events will be alike
Consider the incident under control when all victims requiring medical aid have been transported to the hospital
Incident may very well be a crime scene and it is imperative that we disrupt as little as possible
In extrication the experience and training of the crew is paramount to a successful rescue 120<br>
slide121. Auto Extrication
Summary Train
Train
Train
Try various techniques
Train with various companies and apparatus
Be Safe 121<br>
slide122. Auto Extrication 122<br>