
CHAPTER 24 Vehicle Rescue and Extrication
OM
Published · 82 slides · 0 views

1 / 1




Description
CHAPTER 24 Vehicle Rescue and Extrication Knowledge Objectives Describe a vehicles anatomy. List the hazards to look for when arriving on the scene of a vehicle extrication situation. List the hazards to look for when stabilizing the scene
Related Topics
Share
Embed code
Download this presentation From Below
"CHAPTER 24 Vehicle Rescue and Extrication" is the property of its rightful owner. Permission is granted to download and print the materials on this website for personal, non-commercial use only, and to display it on your personal computer provided you do not modify the materials and that you retain all copyright notices contained in the materials. By downloading content from our website, you accept the terms of this agreement.
Presentation Transcript
01
CHAPTER 24 Vehicle Rescue and Extrication<br>
02
Knowledge Objectives Describe a vehicle’s anatomy.
List the hazards to look for when arriving on the scene of a vehicle extrication situation.
List the hazards to look for when stabilizing the scene of a vehicle extrication situation.
Describe cribbing.
Describe rescue-lift air bags.<br>
List the hazards to look for when arriving on the scene of a vehicle extrication situation.
List the hazards to look for when stabilizing the scene of a vehicle extrication situation.
Describe cribbing.
Describe rescue-lift air bags.<br>
03
Knowledge Objectives Describe how to gain access to a victim of a motor vehicle accident.
Describe how to disentangle a victim of a motor vehicle accident.
Describe how to remove and transport victims of a motor vehicle accident.<br>
Describe how to disentangle a victim of a motor vehicle accident.
Describe how to remove and transport victims of a motor vehicle accident.<br>
04
Skills Objectives Disable the electrical system of an electric drive vehicle.
Perform scene size-up at a motor vehicle accident.
Mitigate the hazards at a motor vehicle accident.
Stabilize a vehicle following a motor vehicle accident.
Break tempered glass.<br>
Perform scene size-up at a motor vehicle accident.
Mitigate the hazards at a motor vehicle accident.
Stabilize a vehicle following a motor vehicle accident.
Break tempered glass.<br>
05
Skills Objectives Gain access to a vehicle following a motor vehicle accident.
Force a vehicle door.
Gain access and provide medical care to a victim in a vehicle.
Displace the dashboard of a vehicle by performing the dash roll or the dash lift.
Remove the roof of a vehicle.<br>
Force a vehicle door.
Gain access and provide medical care to a victim in a vehicle.
Displace the dashboard of a vehicle by performing the dash roll or the dash lift.
Remove the roof of a vehicle.<br>
06
Introduction Motor vehicle accidents (MVAs), also referred to as motor vehicle collisions (MVCs), are a common
In most Canadian jurisdictions, extricating victims is the responsibility of the fire service
Worst-case scenarios can be emotionally challenging.
You should be familiar with basic vehicle extrication operations.<br>
In most Canadian jurisdictions, extricating victims is the responsibility of the fire service
Worst-case scenarios can be emotionally challenging.
You should be familiar with basic vehicle extrication operations.<br>
07
Vehicle Anatomy Use standard terms when referring to parts of a vehicle.
The left side of the vehicle on your left as you sit in the vehicle
The right side of the vehicle is where the passenger’s seat is located.
Always refer to left and right as they relate to the vehicle.<br>
The left side of the vehicle on your left as you sit in the vehicle
The right side of the vehicle is where the passenger’s seat is located.
Always refer to left and right as they relate to the vehicle.<br>
08
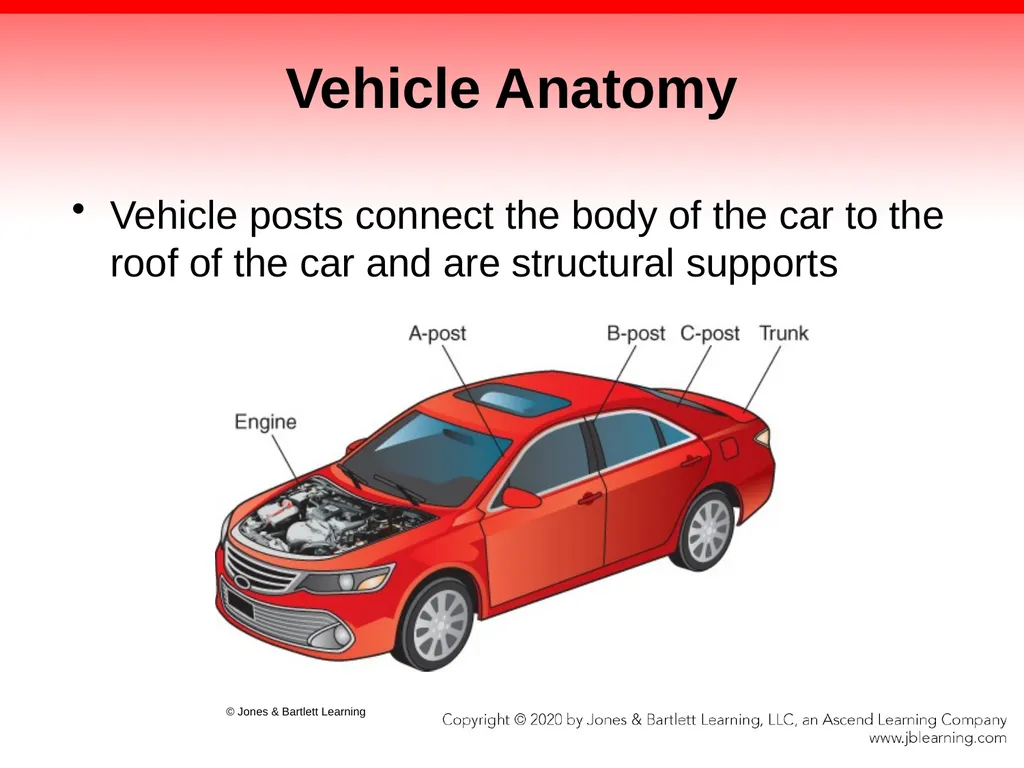
Vehicle Anatomy Vehicles consist of three main compartments.
The front of the vehicle travels down the road first.
The structure that divides the engine compartment from the passenger compartment is the bulkhead (firewall).
The passenger compartment includes the front and back seats.
The rear of the car is where the trunk sits and goes down the road last.<br>
The front of the vehicle travels down the road first.
The structure that divides the engine compartment from the passenger compartment is the bulkhead (firewall).
The passenger compartment includes the front and back seats.
The rear of the car is where the trunk sits and goes down the road last.<br>
09
Vehicle Anatomy Vehicle posts connect the body of the car to the roof of the car and are structural supports © Jones & Bartlett Learning<br>
10
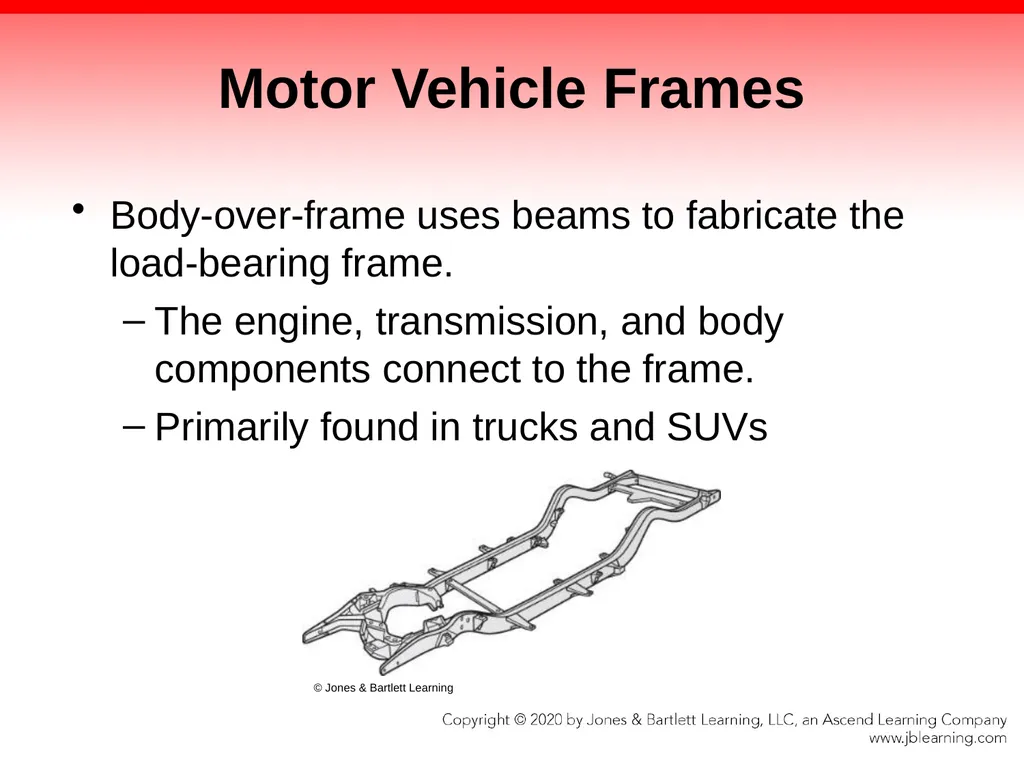
Motor Vehicle Frames Body-over-frame uses beams to fabricate the load-bearing frame.
The engine, transmission, and body components connect to the frame.
Primarily found in trucks and SUVs © Jones & Bartlett Learning<br>
The engine, transmission, and body components connect to the frame.
Primarily found in trucks and SUVs © Jones & Bartlett Learning<br>
11
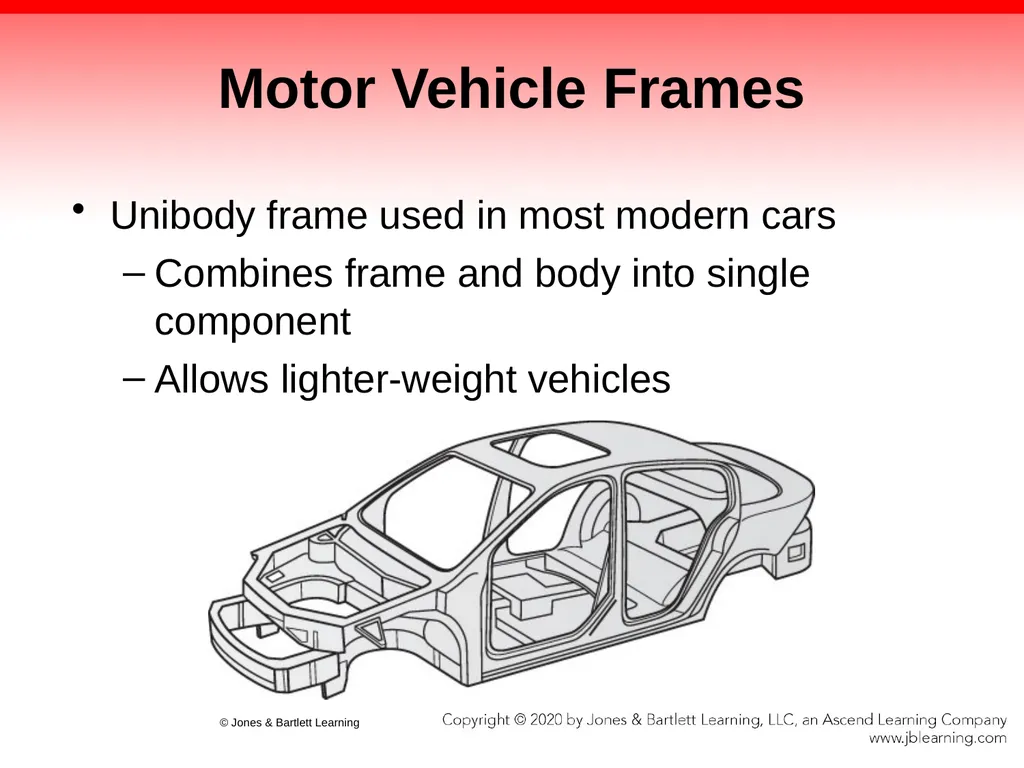
Motor Vehicle Frames Unibody frame used in most modern cars
Combines frame and body into single component
Allows lighter-weight vehicles © Jones & Bartlett Learning<br>
Combines frame and body into single component
Allows lighter-weight vehicles © Jones & Bartlett Learning<br>
12
Supplemental Restraint Systems Found in most passenger vehicles
Commonly includes a series of air bags and seat belts.
Identifying the location of these components is critical to avoiding hazards.
Airbags can be found in many locations.
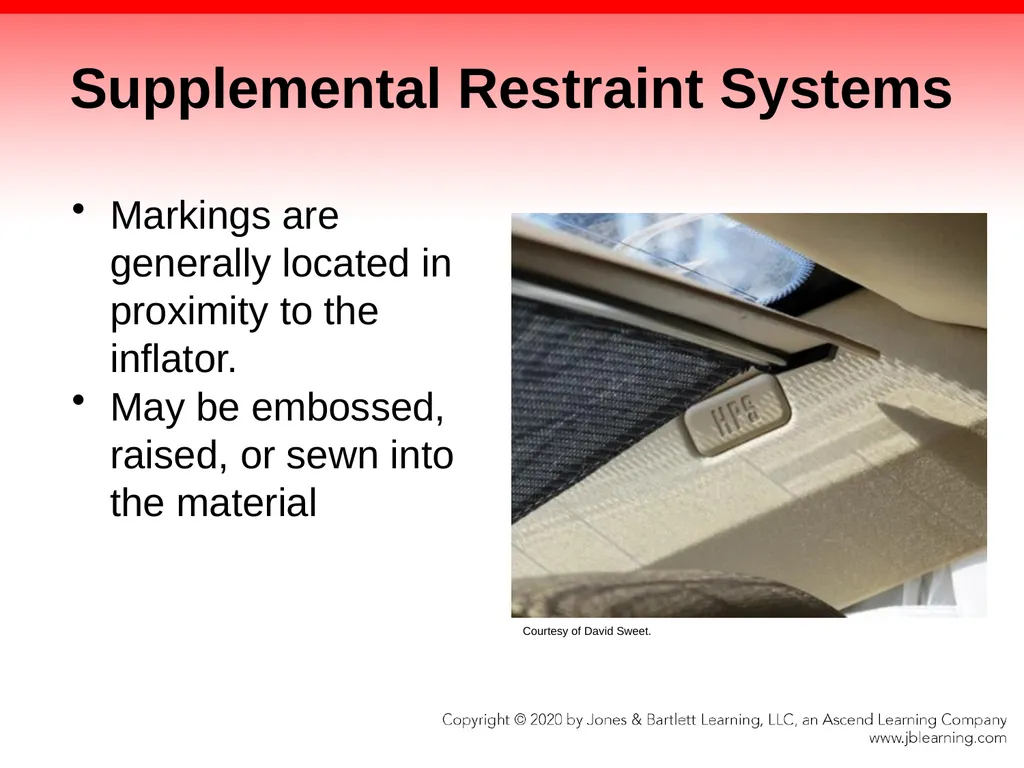
Identified by markings such as SRS, SIR, HPS, SIPS, and AIR BAG<br>
Commonly includes a series of air bags and seat belts.
Identifying the location of these components is critical to avoiding hazards.
Airbags can be found in many locations.
Identified by markings such as SRS, SIR, HPS, SIPS, and AIR BAG<br>
13
Supplemental Restraint Systems Markings are generally located in proximity to the inflator.
May be embossed, raised, or sewn into the material Courtesy of David Sweet.<br>
May be embossed, raised, or sewn into the material Courtesy of David Sweet.<br>
14
Seat Belt Pretensioning System Designed to reduce slack in the seat belt when an accident is detected
Can be activated separately or with the air bags
Operates either at the belt buckle or anchor attachment
Can be housed in any post or column, under the seats, or in the center console<br>
Can be activated separately or with the air bags
Operates either at the belt buckle or anchor attachment
Can be housed in any post or column, under the seats, or in the center console<br>
15
Roll-Over Protection Systems Usually found in convertibles
Consist of deployable roll bars that are concealed until activated by sensors
Can extend up to 50.8 cm (20 in.)<br>
Consist of deployable roll bars that are concealed until activated by sensors
Can extend up to 50.8 cm (20 in.)<br>
16
Supplemental Restraint Systems You should be familiar with these devices.
Unexpected deployment during extrication can cause series injuries to occupants and rescuers.
As part of size-up, be aware of undeployed air bags or roll-over protection systems (ROPS).
Rescuers should remove trim around the vehicle’s doors and posts to identify the presence of these supplemental restraint system (SRS) components.<br>
Unexpected deployment during extrication can cause series injuries to occupants and rescuers.
As part of size-up, be aware of undeployed air bags or roll-over protection systems (ROPS).
Rescuers should remove trim around the vehicle’s doors and posts to identify the presence of these supplemental restraint system (SRS) components.<br>
17
Alternative-Fuel Vehicles Uses anything other than a petroleum-based motor fuel to propel the vehicle
Alternative fuels
Electricity
Combination fuel and electricity
A crash or fire involving these types of vehicles presents hazards not typically encountered in conventional vehicles.<br>
Alternative fuels
Electricity
Combination fuel and electricity
A crash or fire involving these types of vehicles presents hazards not typically encountered in conventional vehicles.<br>
18
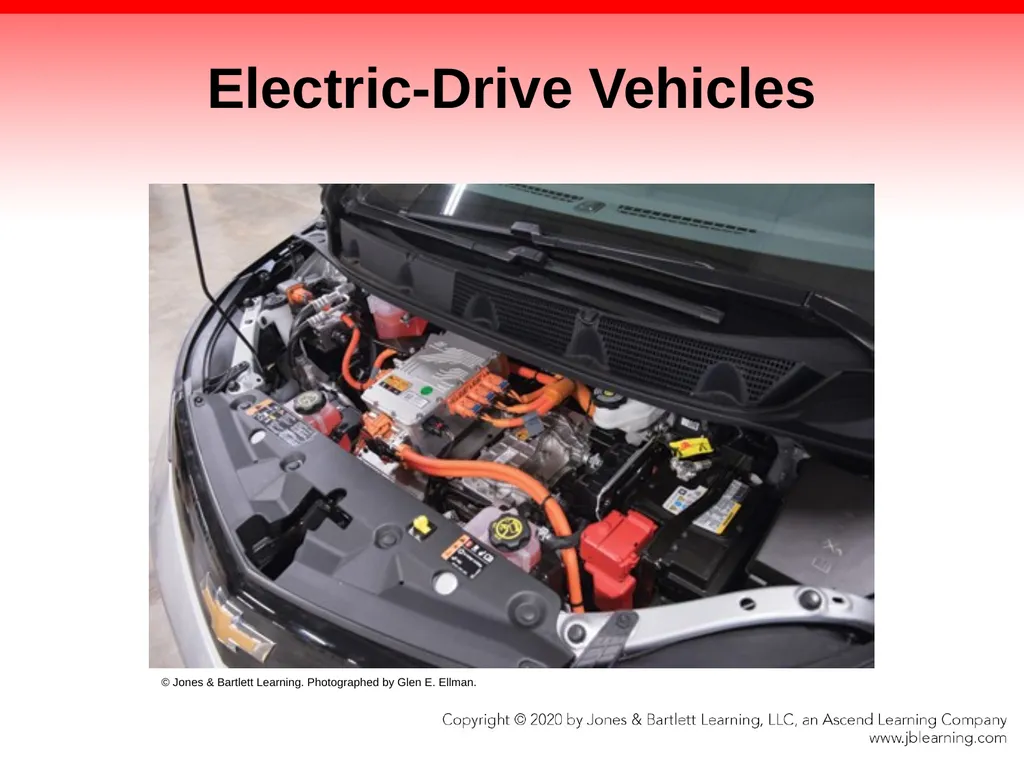
Electric-Drive Vehicles Especially hazardous because of their powerful batteries and high-voltage electrical systems.
One of the first priorities should be disable the electrical system.
Avoid touching or cutting brightly colored high-voltage cables.
Alternative disabling methods involve removing fuses.
Review the manufacturer’s manual regularly.<br>
One of the first priorities should be disable the electrical system.
Avoid touching or cutting brightly colored high-voltage cables.
Alternative disabling methods involve removing fuses.
Review the manufacturer’s manual regularly.<br>
19
Electric-Drive Vehicles © Jones & Bartlett Learning. Photographed by Glen E. Ellman.<br>
20
Arrival and Size-Up First step in the extrication process is size-up.
Assess
Hazards present
Types of vehicles involved
Scope of the incident
Number and severity of injuries
Need for additional resources
MVA management – stabilize scene, vehicle and patient<br>
Assess
Hazards present
Types of vehicles involved
Scope of the incident
Number and severity of injuries
Need for additional resources
MVA management – stabilize scene, vehicle and patient<br>
21
Arrival and Size-Up: Traffic Hazards Determine where to locate your vehicle.
Take into account the safety of emergency personnel, the victims, and the motorists.
Apparatus should be positioned to protect scene from traffic.
Maintain traffic flow, however there may be times when the road will need to be closed.
Use large emergency vehicles to provide a barrier for motorists who fail to heed emergency warning lights.<br>
Take into account the safety of emergency personnel, the victims, and the motorists.
Apparatus should be positioned to protect scene from traffic.
Maintain traffic flow, however there may be times when the road will need to be closed.
Use large emergency vehicles to provide a barrier for motorists who fail to heed emergency warning lights.<br>
22
Arrival and Size-Up:
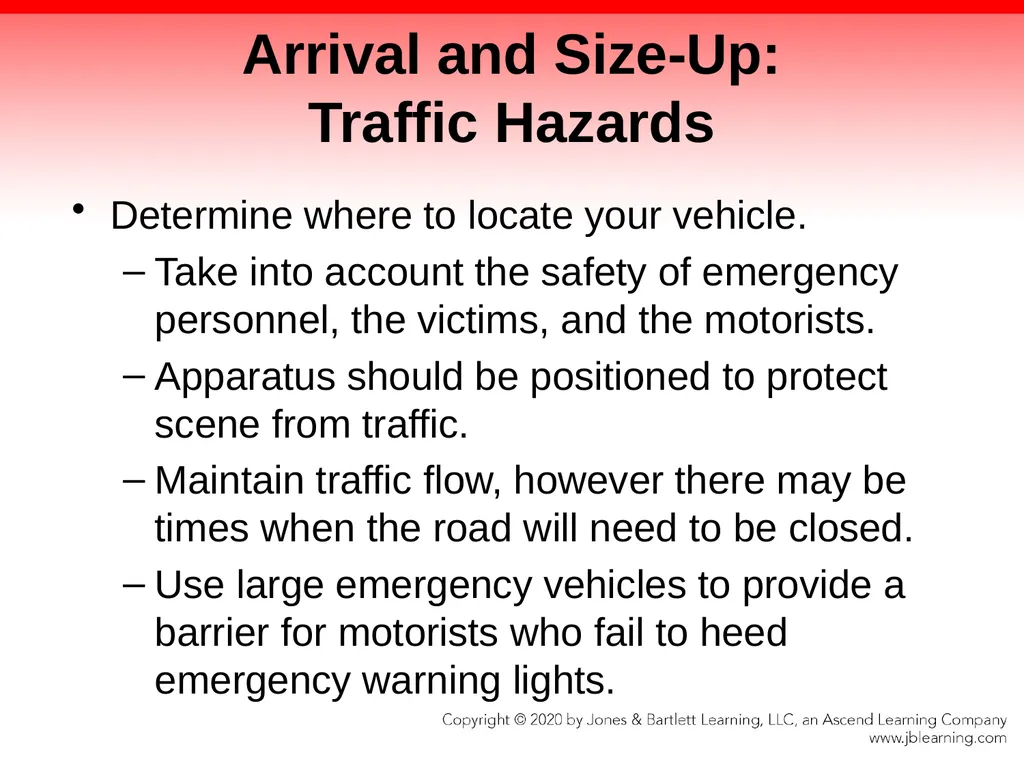
Traffic Hazards Place apparatus at an angle to the crash.
This position helps to push the apparatus to the side of the crash in the event that it is struck from behind. © Jones & Bartlett Learning. Photographed by Glen E. Ellman.<br>
This position helps to push the apparatus to the side of the crash in the event that it is struck from behind. © Jones & Bartlett Learning. Photographed by Glen E. Ellman.<br>
23
Arrival and Size-Up:
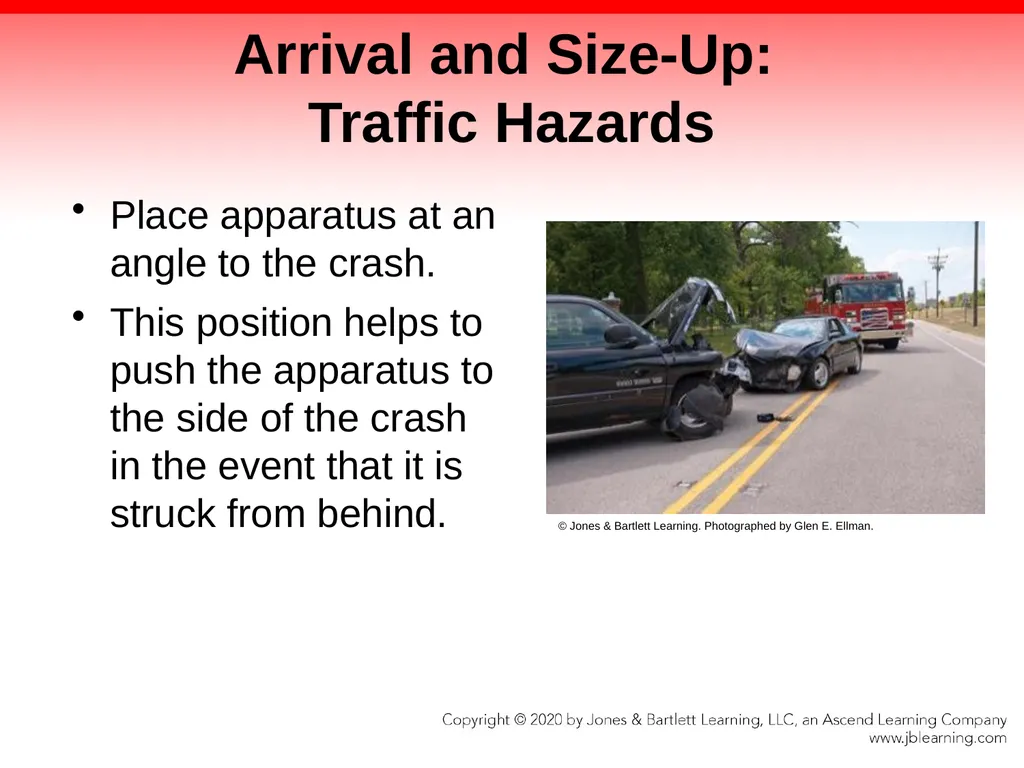
Traffic Hazards Traffic cones or flares can be placed to direct motorists away from the crash. Courtesy of David Jackson, Saginaw Township Fire Department<br>
24
Arrival and Size-Up:
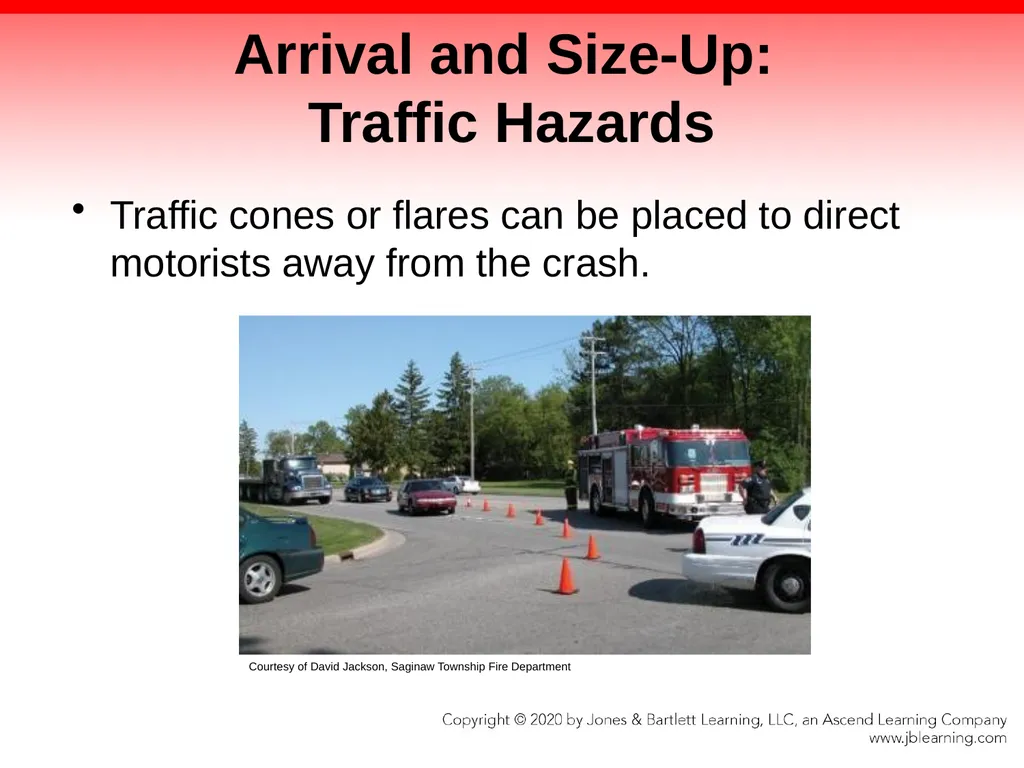
Traffic Hazards Personal protective equipment (PPE) must be worn at all MVAs.
Wear clothing that meets the CSA Standard Z96-15 High-Visibility Safety Apparel (CCOHS, 2018) © Jones & Bartlett Learning. Photographed by Glen E. Ellman.<br>
Wear clothing that meets the CSA Standard Z96-15 High-Visibility Safety Apparel (CCOHS, 2018) © Jones & Bartlett Learning. Photographed by Glen E. Ellman.<br>
25
Arrival and Size-Up:
Traffic Hazards Be alert for any vehicles that might cause you injury.
Do not assume that motorists will always heed your warning lights.
Let law enforcement personnel coordinate traffic control.
The incident commander (IC) should perform a size-up by walking a complete circle around the emergency scene to determine its magnitude and by locating other hazards or victims.<br>
Do not assume that motorists will always heed your warning lights.
Let law enforcement personnel coordinate traffic control.
The incident commander (IC) should perform a size-up by walking a complete circle around the emergency scene to determine its magnitude and by locating other hazards or victims.<br>
26
Arrival and Size-Up:
Fire Hazards Look for spilled fuels and other flammable hazards.
Look for the presence of fire.
Fire may trap the vehicle occupants and require suppression.<br>
Look for the presence of fire.
Fire may trap the vehicle occupants and require suppression.<br>
27
Arrival and Size-Up:
Electrical Hazards Look for downed or damaged power lines.
Determine whether the MVA has damaged any electrical power poles.
Energized objects create a deadly hazard.
Do not approach the scene until electrical power has been disconnected.
Do not touch the electric components of electric-drive vehicles.<br>
Determine whether the MVA has damaged any electrical power poles.
Energized objects create a deadly hazard.
Do not approach the scene until electrical power has been disconnected.
Do not touch the electric components of electric-drive vehicles.<br>
28
Arrival and Size-Up:
Other Hazards Rain, sleet, ice, or snow
Hazardous materials
Infectious bodily fluids
Sharp edges and objects
Violent behavior by vehicle occupants
Family pets<br>
Hazardous materials
Infectious bodily fluids
Sharp edges and objects
Violent behavior by vehicle occupants
Family pets<br>
29
Stabilization: Traffic Hazards Need to be handled quickly
Prevent additional MVAs
Most critical action is slowing or stopping traffic.
Best handled by law enforcement agency
If not on scene, verify that they have been dispatched.<br>
Prevent additional MVAs
Most critical action is slowing or stopping traffic.
Best handled by law enforcement agency
If not on scene, verify that they have been dispatched.<br>
30
Stabilization: Fire Hazards Advance a charged hose line close to a damaged vehicle.
May require additional resources
Small spills can be handled by using an absorbent material.<br>
May require additional resources
Small spills can be handled by using an absorbent material.<br>
31
Stabilization: Electrical Hazards Disconnecting the vehicle’s power source should be done following your local standard operating procedure (SOP).
Weigh disconnecting the electrical system against operating electrically powered components of the vehicle.
Downed power lines should be handled by the power company.
Do not approach or let a victim leave the vehicle until the electricity has been controlled.<br>
Weigh disconnecting the electrical system against operating electrically powered components of the vehicle.
Downed power lines should be handled by the power company.
Do not approach or let a victim leave the vehicle until the electricity has been controlled.<br>
32
Stabilization: Other Hazards Heat and cold
Lighting at night
Wet and icy surfaces
Sharp objects
Infectious bodily fluids
Animals<br>
Lighting at night
Wet and icy surfaces
Sharp objects
Infectious bodily fluids
Animals<br>
33
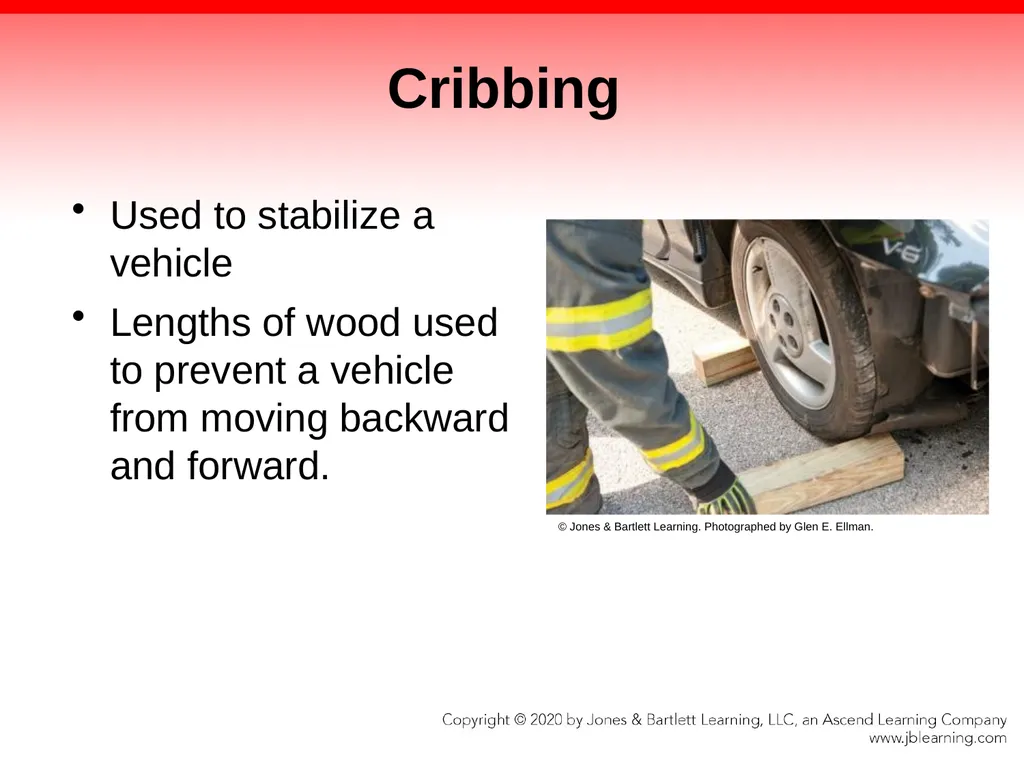
Cribbing Used to stabilize a vehicle
Lengths of wood used to prevent a vehicle from moving backward and forward. © Jones & Bartlett Learning. Photographed by Glen E. Ellman.<br>
Lengths of wood used to prevent a vehicle from moving backward and forward. © Jones & Bartlett Learning. Photographed by Glen E. Ellman.<br>
34
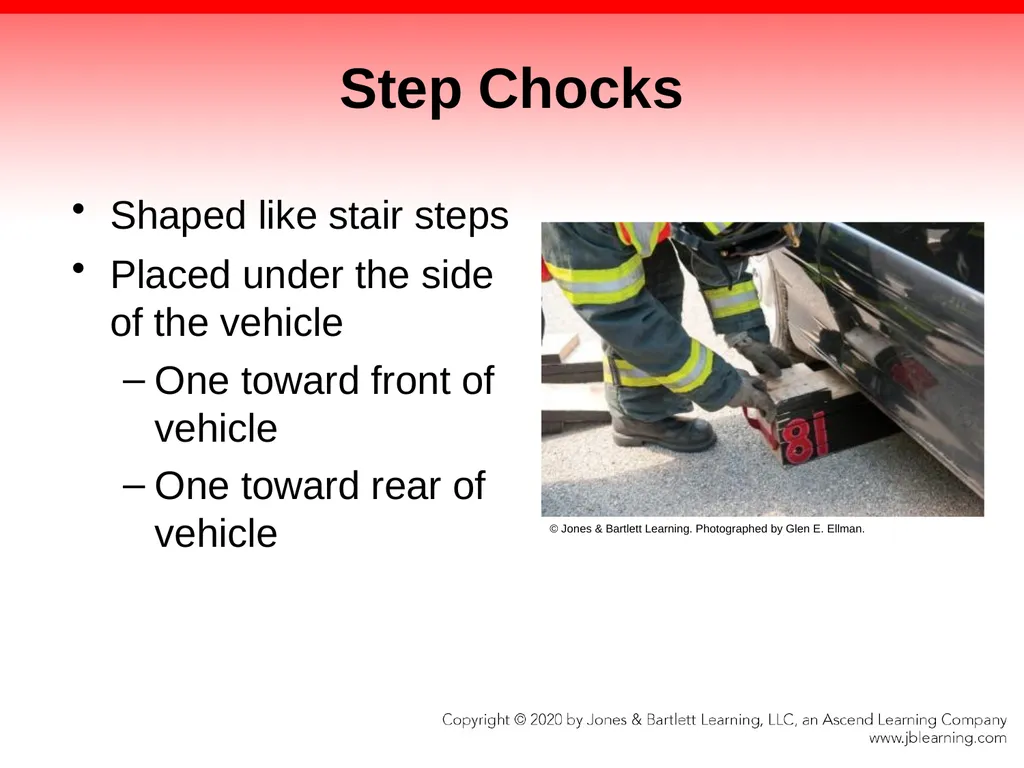
Step Chocks Shaped like stair steps
Placed under the side of the vehicle
One toward front of vehicle
One toward rear of vehicle © Jones & Bartlett Learning. Photographed by Glen E. Ellman.<br>
Placed under the side of the vehicle
One toward front of vehicle
One toward rear of vehicle © Jones & Bartlett Learning. Photographed by Glen E. Ellman.<br>
35
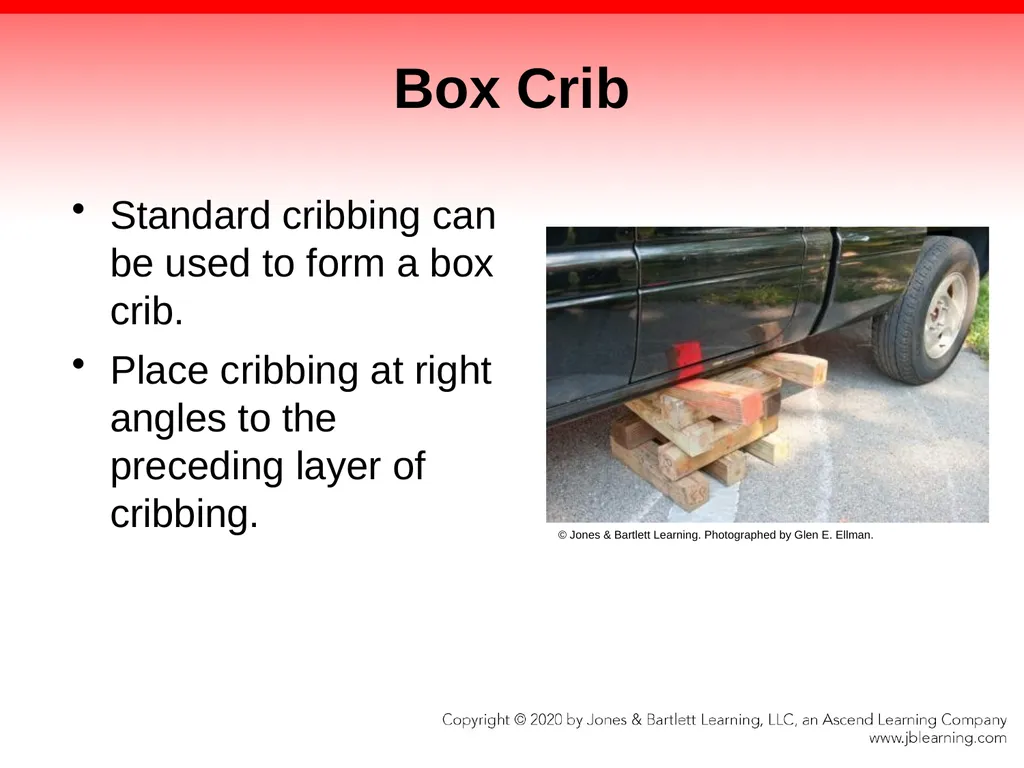
Box Crib Standard cribbing can be used to form a box crib.
Place cribbing at right angles to the preceding layer of cribbing. © Jones & Bartlett Learning. Photographed by Glen E. Ellman.<br>
Place cribbing at right angles to the preceding layer of cribbing. © Jones & Bartlett Learning. Photographed by Glen E. Ellman.<br>
36
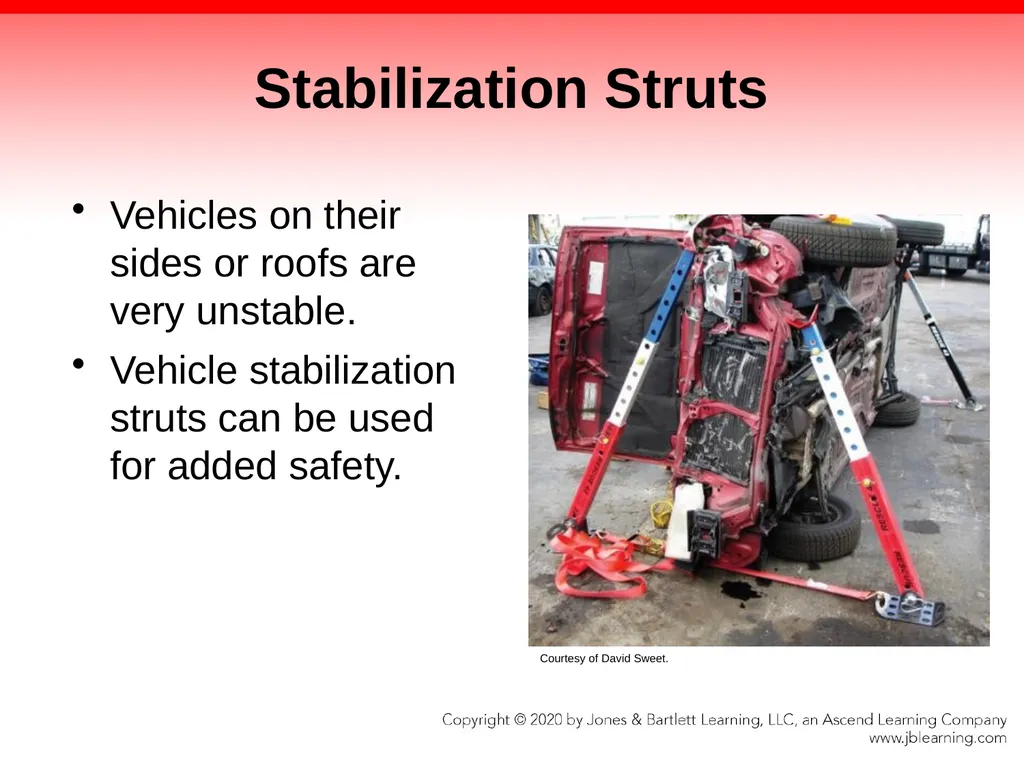
Stabilization Struts Vehicles on their sides or roofs are very unstable.
Vehicle stabilization struts can be used for added safety. Courtesy of David Sweet.<br>
Vehicle stabilization struts can be used for added safety. Courtesy of David Sweet.<br>
37
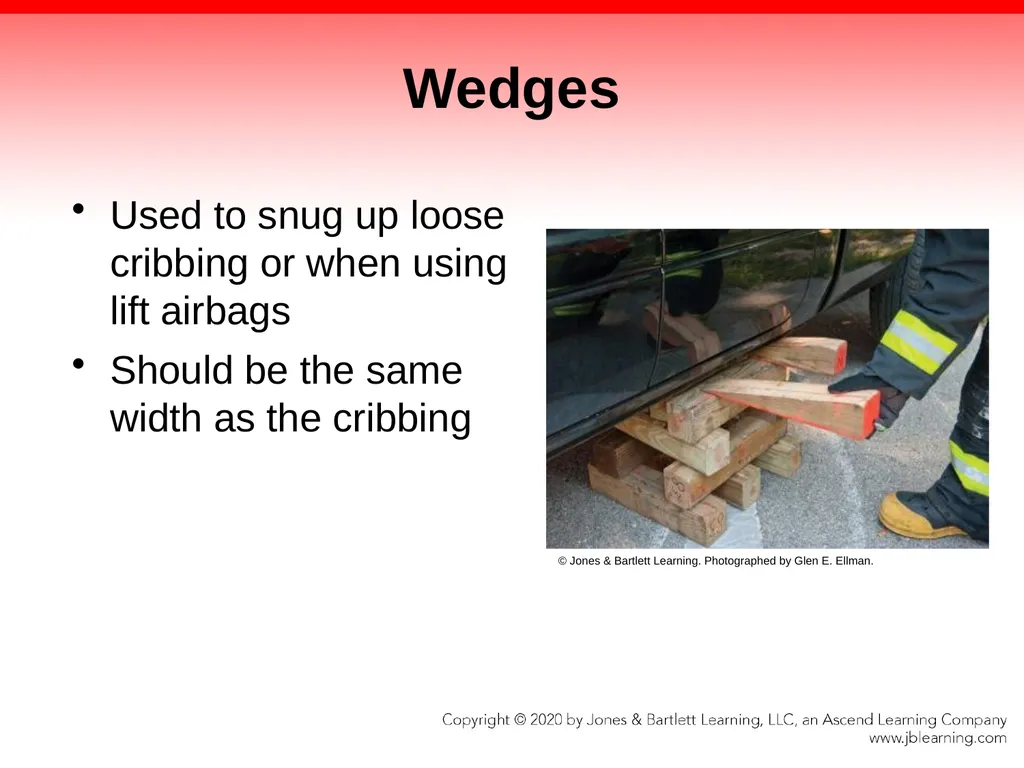
Wedges Used to snug up loose cribbing or when using lift airbags
Should be the same width as the cribbing © Jones & Bartlett Learning. Photographed by Glen E. Ellman.<br>
Should be the same width as the cribbing © Jones & Bartlett Learning. Photographed by Glen E. Ellman.<br>
38
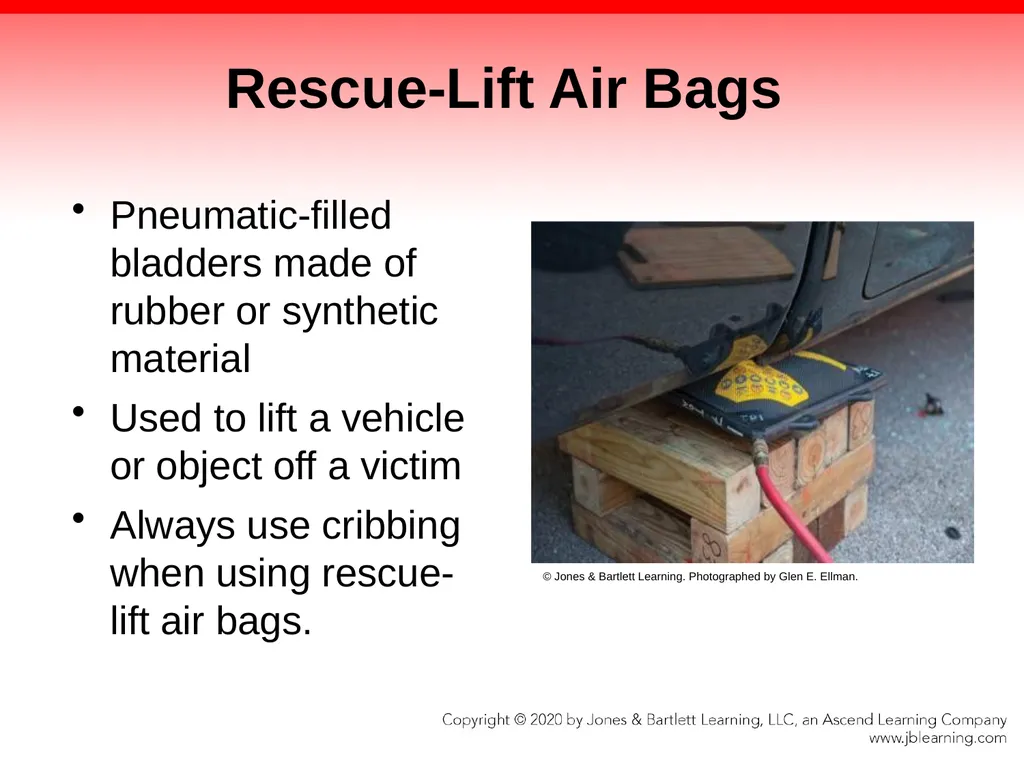
Rescue-Lift Air Bags Pneumatic-filled bladders made of rubber or synthetic material
Used to lift a vehicle or object off a victim
Always use cribbing when using rescue- lift air bags. © Jones & Bartlett Learning. Photographed by Glen E. Ellman.<br>
Used to lift a vehicle or object off a victim
Always use cribbing when using rescue- lift air bags. © Jones & Bartlett Learning. Photographed by Glen E. Ellman.<br>
39
Rescue-Lift Air Bags Three types are in common use today: low pressure, medium, and high.
No rescue-lift air bag should be used without first properly blocking the wheels opposite the lift air bag and cribbing the vehicle or object as it is lifted.
Rescue-lift air bags can fail as they age.
They should be tested according to manufacturer’s recommendations.
10-year shelf life<br>
No rescue-lift air bag should be used without first properly blocking the wheels opposite the lift air bag and cribbing the vehicle or object as it is lifted.
Rescue-lift air bags can fail as they age.
They should be tested according to manufacturer’s recommendations.
10-year shelf life<br>
40
Low-Pressure Rescue-Lift Air Bags Often used in recovery operations
Sometimes used for vehicle rescue operations
Come in many shapes and sizes
Can be less stable until fully inflated<br>
Sometimes used for vehicle rescue operations
Come in many shapes and sizes
Can be less stable until fully inflated<br>
41
Medium-Pressure Rescue-Lift Air Bags Have either two or three cells inside their design
Not appropriate for general vehicle rescue
Best when used in aircraft or truck rescue<br>
Not appropriate for general vehicle rescue
Best when used in aircraft or truck rescue<br>
42
High-Pressure Rescue-Lift Air Bags Most common air bags used by the fire service for rescue work
Heavily constructed
Generally made of vulcanized rubber mats reinforced by steel<br>
Heavily constructed
Generally made of vulcanized rubber mats reinforced by steel<br>
43
Gaining Access to the Victim Open the door.
Easiest and simplest way to gain access
Try all doors.
Try the outside and inside handles at the same time if possible.<br>
Easiest and simplest way to gain access
Try all doors.
Try the outside and inside handles at the same time if possible.<br>
44
Gaining Access to the Victim Break tempered glass.
Do not try to break through windshield.
Side and rear windows will easily break.
If possible, break a window away from the victim.
Cover the victim.<br>
Do not try to break through windshield.
Side and rear windows will easily break.
If possible, break a window away from the victim.
Cover the victim.<br>
45
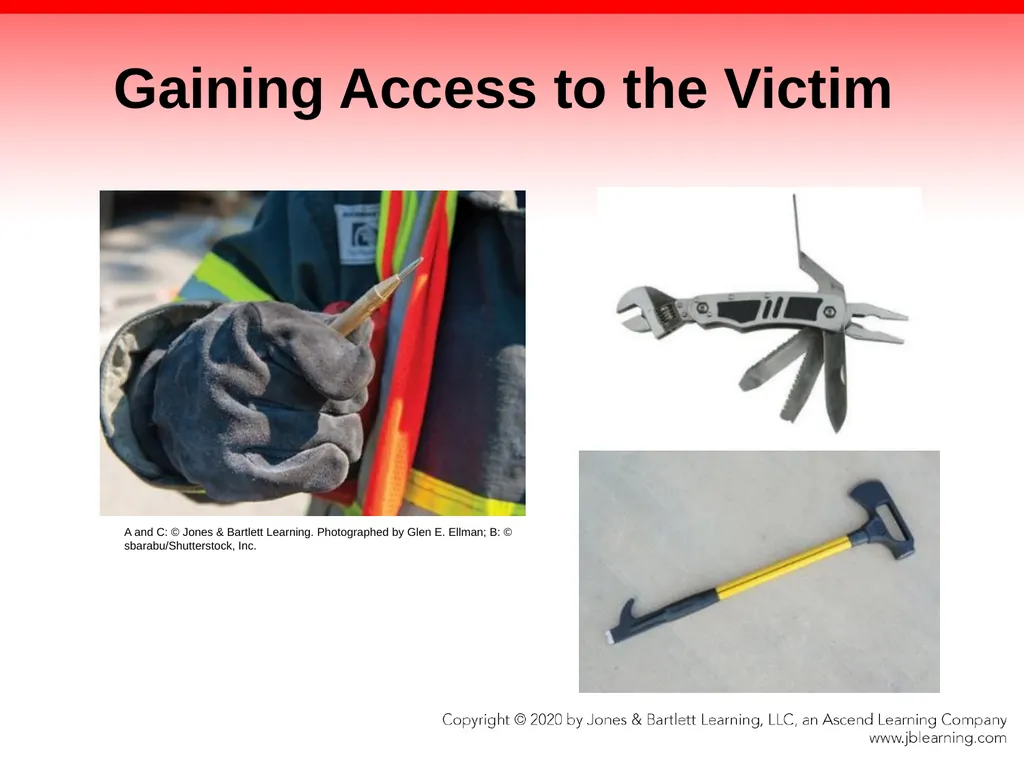
Gaining Access to the Victim A and C: © Jones & Bartlett Learning. Photographed by Glen E. Ellman; B: © sbarabu/Shutterstock, Inc.<br>
46
Gaining Access to the Victim Break tempered glass (cont).
Use a gloved hand to remove as much of the broken glass as possible to avoid injuring rescuers.
When glass is removed, try to unlock door.
Breaking the rear window will sometimes provide an opening large enough to gain access to the victim.<br>
Use a gloved hand to remove as much of the broken glass as possible to avoid injuring rescuers.
When glass is removed, try to unlock door.
Breaking the rear window will sometimes provide an opening large enough to gain access to the victim.<br>
47
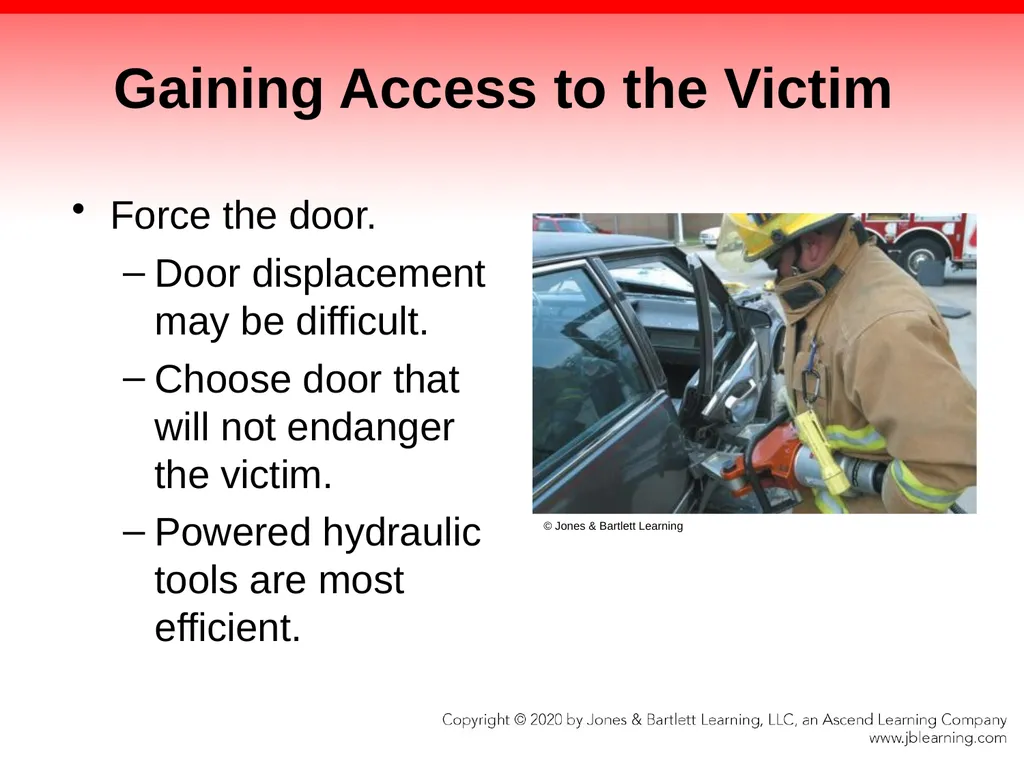
Gaining Access to the Victim Force the door.
Door displacement may be difficult.
Choose door that will not endanger the victim.
Powered hydraulic tools are most efficient. © Jones & Bartlett Learning<br>
Door displacement may be difficult.
Choose door that will not endanger the victim.
Powered hydraulic tools are most efficient. © Jones & Bartlett Learning<br>
48
Gaining Access to the Victim Doors can be released from either the latch or hinge side.
Create a purchase point.
Place the spreader in a position so that it is not in the pathway the door will take when the hinges or latches break.
Do not stand in a position that might put you in danger.<br>
Create a purchase point.
Place the spreader in a position so that it is not in the pathway the door will take when the hinges or latches break.
Do not stand in a position that might put you in danger.<br>
49
Gaining Access to the Victim Activate the hydraulic tool to push apart the outer sheet metal skin of the vehicle to expose the hinges or door latch.
Insert the closed tips onto the inner skin of the door and the doorjamb just above the latch or above the hinges.
Activate the spreader to spread the tips until the latch or hinge breaks.<br>
Insert the closed tips onto the inner skin of the door and the doorjamb just above the latch or above the hinges.
Activate the spreader to spread the tips until the latch or hinge breaks.<br>
50
Gaining Access to the Victim When separating a door at the latch side, place a 101.60 mm x 101.60 mm (4 in. × 4 in.) cribbing.
Some hydraulic tools can cut door hinges.
When separating a door from hinge side, place the spreader on top of the bottom hinge and separate door from hinge.
Once hinges have separated, place 101.60 mm x 101.60 mm (4 in. × 4 in.) cribbing while you work on latch side of the door.<br>
Some hydraulic tools can cut door hinges.
When separating a door from hinge side, place the spreader on top of the bottom hinge and separate door from hinge.
Once hinges have separated, place 101.60 mm x 101.60 mm (4 in. × 4 in.) cribbing while you work on latch side of the door.<br>
51
Provide Initial Medical Care As soon as you have secured access, begin to provide emergency medical care.
Provide emotional and physical care until extrication is complete.
Care can be provided while extrication is taking place.
Work toward the goal of getting the victim stabilized and removed from the vehicle as quickly and safely as possible.<br>
Provide emotional and physical care until extrication is complete.
Care can be provided while extrication is taking place.
Work toward the goal of getting the victim stabilized and removed from the vehicle as quickly and safely as possible.<br>
52
Disentangling the Victim Remove the parts of the vehicle that are trapping the victim, not the other way around.
Use these techniques:
Stabilize
Bend, distort, or displace
Cut or sever
Disassemble<br>
Use these techniques:
Stabilize
Bend, distort, or displace
Cut or sever
Disassemble<br>
53
Disentangling the Victim Ask: What is trapping the victim in the vehicle?
Perform only those procedures that are necessary to remove the victim safely.
The order in which these procedures are performed is dictated by the scene.
Protect the victim at all times.
Use backboards and blankets to shield victim.
Explain procedures and reassure them.<br>
Perform only those procedures that are necessary to remove the victim safely.
The order in which these procedures are performed is dictated by the scene.
Protect the victim at all times.
Use backboards and blankets to shield victim.
Explain procedures and reassure them.<br>
54
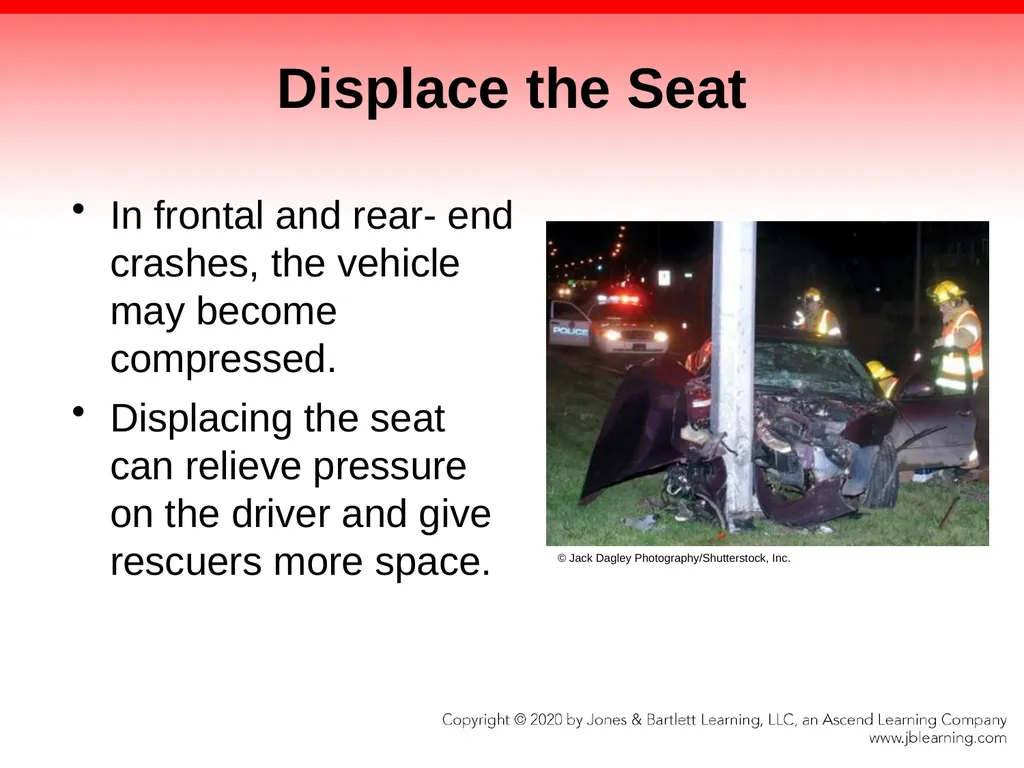
Displace the Seat In frontal and rear- end crashes, the vehicle may become compressed.
Displacing the seat can relieve pressure on the driver and give rescuers more space. © Jack Dagley Photography/Shutterstock, Inc.<br>
Displacing the seat can relieve pressure on the driver and give rescuers more space. © Jack Dagley Photography/Shutterstock, Inc.<br>
55
Displace the Seat Attempt simplest steps first.
Attempt to move seat back on its track either manually or by engaging power seats.
Attempt to lower adjustable seat.
As a last resort, use a manual hydraulic spreader or a powered hydraulic tool to move the seat back.
In some cases, it may be helpful to remove the back of the seat.<br>
Attempt to move seat back on its track either manually or by engaging power seats.
Attempt to lower adjustable seat.
As a last resort, use a manual hydraulic spreader or a powered hydraulic tool to move the seat back.
In some cases, it may be helpful to remove the back of the seat.<br>
56
Remove the Glass Removing windows provides better communication between personnel inside and outside the vehicle.
Try to roll down windows first.
When roof needs to be removed, remove all glass first.
Side and rear windows are tempered glass that can be removed by striking in a lower corner.
Protect victims from glass by covering them.<br>
Try to roll down windows first.
When roof needs to be removed, remove all glass first.
Side and rear windows are tempered glass that can be removed by striking in a lower corner.
Protect victims from glass by covering them.<br>
57
Remove the Glass Windshields are made of laminated glass and cannot be broken by spring-loaded center punches.
It is necessary to remove the windshield in one large piece.
Windshield must be removed with a special glass saw, reciprocating saw, or by carefully using an axe.
Can create a significant amount of glass dust (inhalation hazard)<br>
It is necessary to remove the windshield in one large piece.
Windshield must be removed with a special glass saw, reciprocating saw, or by carefully using an axe.
Can create a significant amount of glass dust (inhalation hazard)<br>
58
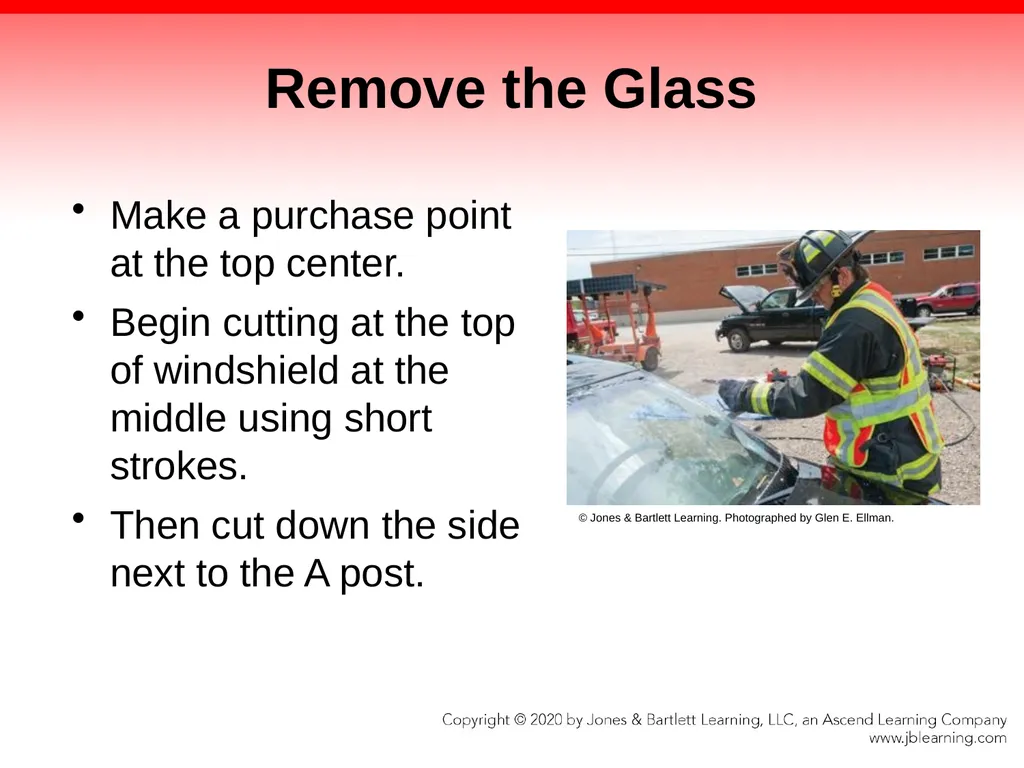
Remove the Glass Make a purchase point at the top center.
Begin cutting at the top of windshield at the middle using short strokes.
Then cut down the side next to the A post. © Jones & Bartlett Learning. Photographed by Glen E. Ellman.<br>
Begin cutting at the top of windshield at the middle using short strokes.
Then cut down the side next to the A post. © Jones & Bartlett Learning. Photographed by Glen E. Ellman.<br>
59
Remove the Glass Finish by cutting the bottom of the windshield.
Stabilize the half of the windshield that has been cut free.
A second rescuer starts at the top of the windshield where the initial cuts were made and cuts the second half of the windshield.
When the second rescuer is finished, lift window out of the frame and place it in a safe area, such as under the vehicle.<br>
Stabilize the half of the windshield that has been cut free.
A second rescuer starts at the top of the windshield where the initial cuts were made and cuts the second half of the windshield.
When the second rescuer is finished, lift window out of the frame and place it in a safe area, such as under the vehicle.<br>
60
Remove the Steering Wheel Any compression of the vehicle front may cause the steering wheel to be pushed back into the victim’s abdomen or chest
Possible using hand or power tools
One method is to cut the spokes as close to the hub as possible.
Second method is to cut the hoop or ring.
Can be removed completely or by section<br>
Possible using hand or power tools
One method is to cut the spokes as close to the hub as possible.
Second method is to cut the hoop or ring.
Can be removed completely or by section<br>
61
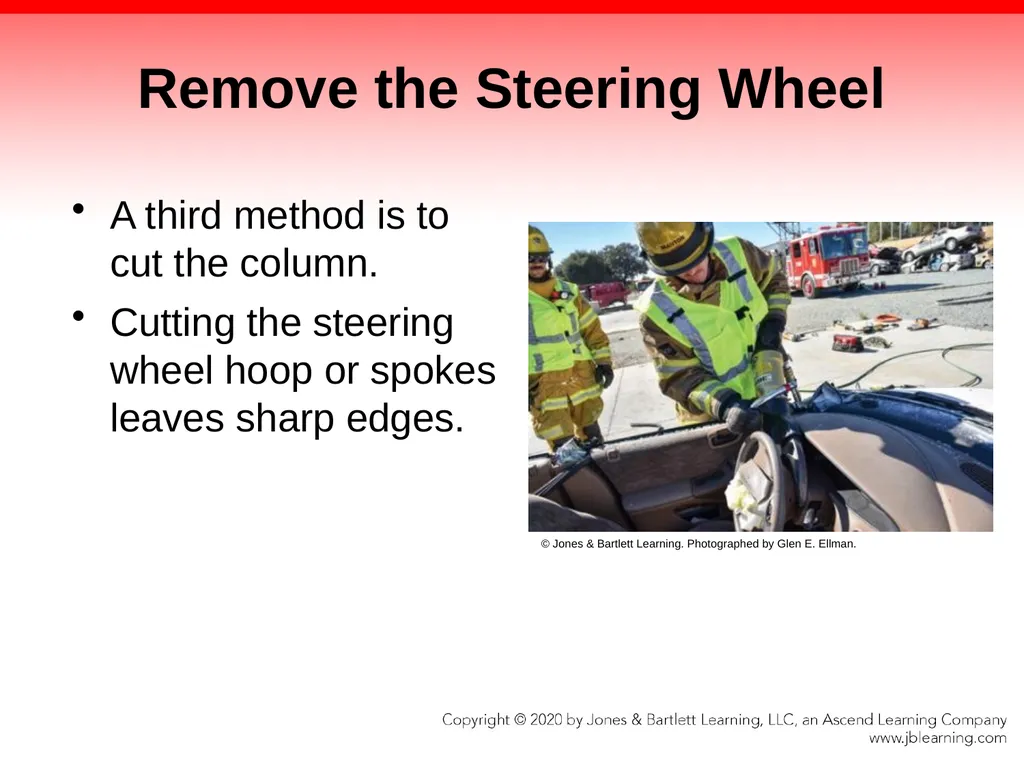
Remove the Steering Wheel A third method is to cut the column.
Cutting the steering wheel hoop or spokes leaves sharp edges. © Jones & Bartlett Learning. Photographed by Glen E. Ellman.<br>
Cutting the steering wheel hoop or spokes leaves sharp edges. © Jones & Bartlett Learning. Photographed by Glen E. Ellman.<br>
62
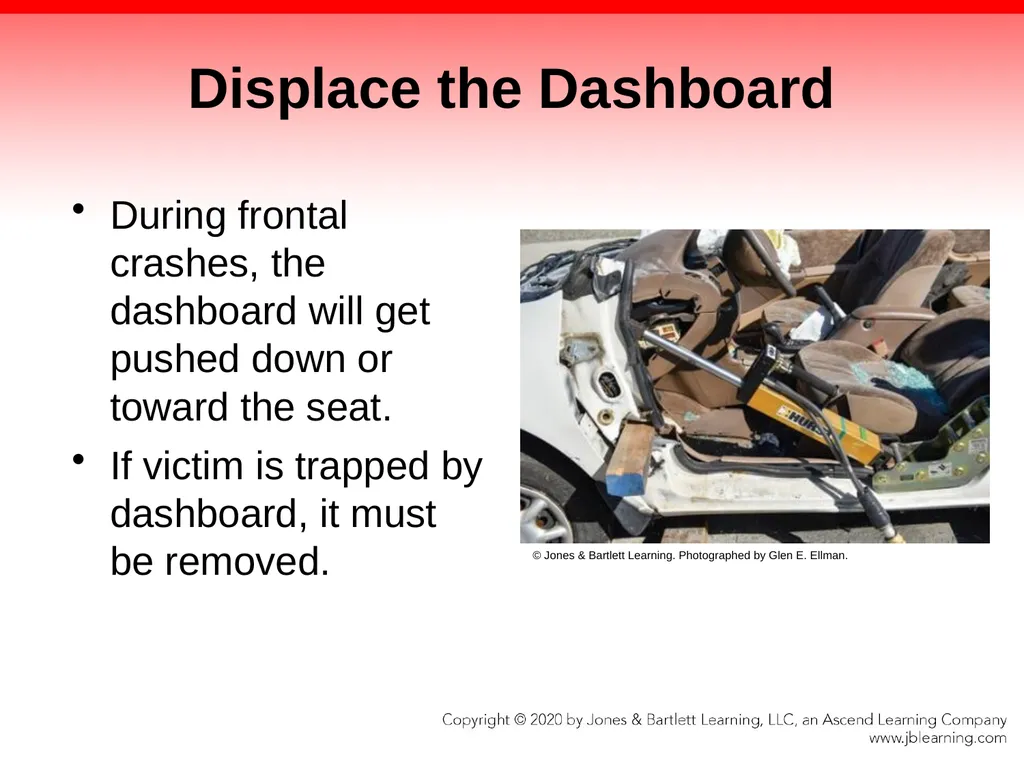
Displace the Dashboard During frontal crashes, the dashboard will get pushed down or toward the seat.
If victim is trapped by dashboard, it must be removed. © Jones & Bartlett Learning. Photographed by Glen E. Ellman.<br>
If victim is trapped by dashboard, it must be removed. © Jones & Bartlett Learning. Photographed by Glen E. Ellman.<br>
63
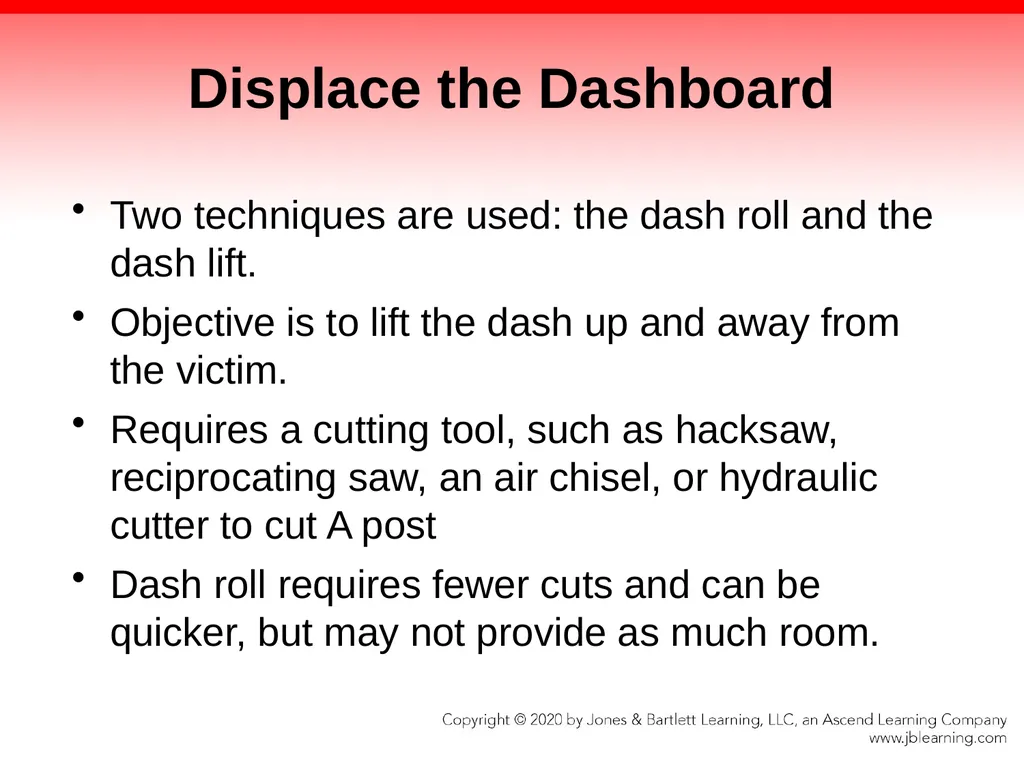
Displace the Dashboard Two techniques are used: the dash roll and the dash lift.
Objective is to lift the dash up and away from the victim.
Requires a cutting tool, such as hacksaw, reciprocating saw, an air chisel, or hydraulic cutter to cut A post
Dash roll requires fewer cuts and can be quicker, but may not provide as much room.<br>
Objective is to lift the dash up and away from the victim.
Requires a cutting tool, such as hacksaw, reciprocating saw, an air chisel, or hydraulic cutter to cut A post
Dash roll requires fewer cuts and can be quicker, but may not provide as much room.<br>
64
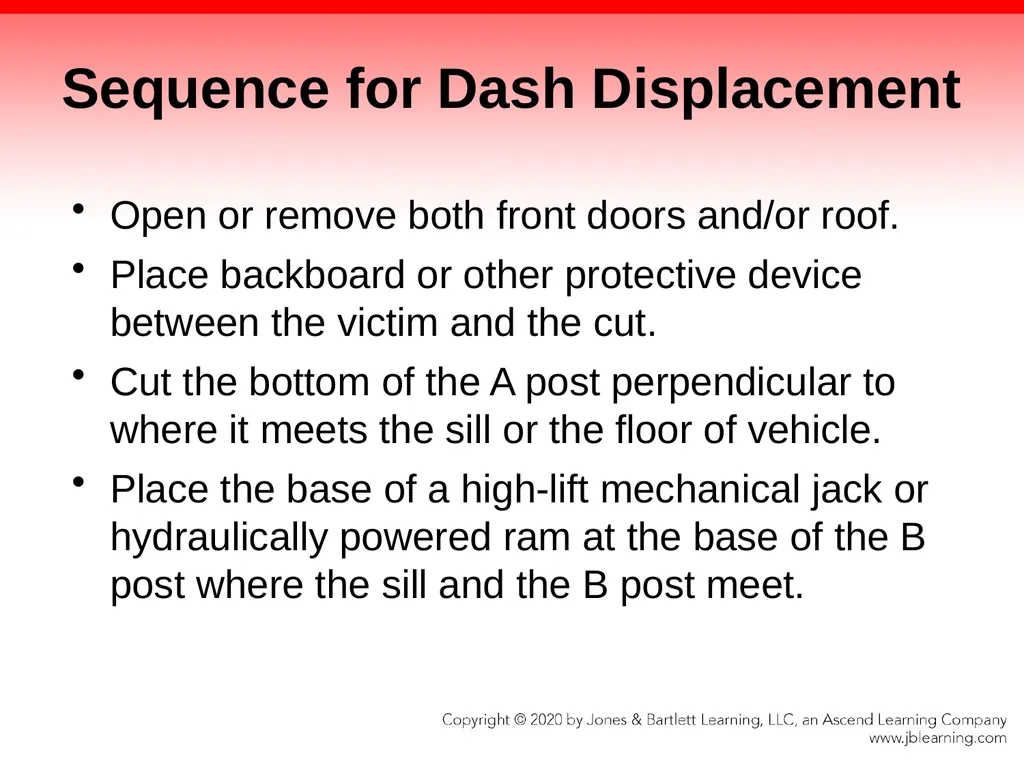
Sequence for Dash Displacement Open or remove both front doors and/or roof.
Place backboard or other protective device between the victim and the cut.
Cut the bottom of the A post perpendicular to where it meets the sill or the floor of vehicle.
Place the base of a high-lift mechanical jack or hydraulically powered ram at the base of the B post where the sill and the B post meet.<br>
Place backboard or other protective device between the victim and the cut.
Cut the bottom of the A post perpendicular to where it meets the sill or the floor of vehicle.
Place the base of a high-lift mechanical jack or hydraulically powered ram at the base of the B post where the sill and the B post meet.<br>
65
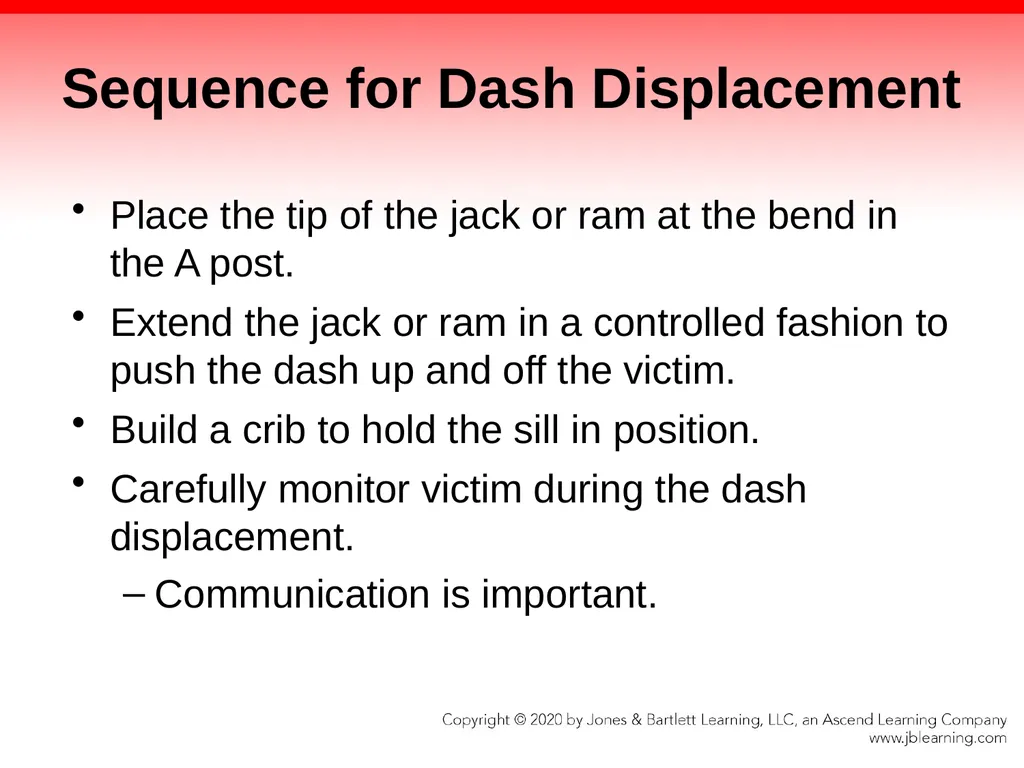
Sequence for Dash Displacement Place the tip of the jack or ram at the bend in the A post.
Extend the jack or ram in a controlled fashion to push the dash up and off the victim.
Build a crib to hold the sill in position.
Carefully monitor victim during the dash displacement.
Communication is important.<br>
Extend the jack or ram in a controlled fashion to push the dash up and off the victim.
Build a crib to hold the sill in position.
Carefully monitor victim during the dash displacement.
Communication is important.<br>
66
Displace the Roof Advantages
Equipment can be passed to the provider.
Increases the amount of space available
Visibility and fresh air supply are improved.
Helps reduce feeling of panic
Provides a large exit route for the victim<br>
Equipment can be passed to the provider.
Increases the amount of space available
Visibility and fresh air supply are improved.
Helps reduce feeling of panic
Provides a large exit route for the victim<br>
67
Displace the Roof © Jones & Bartlett Learning. Photographed by Glen E. Ellman.<br>
68
Displace the Roof One method is to cut the A posts and fold the roof back.
Takes the same amount of time as removing the entire roof
Can be accomplished with hand tools and power tools
Most new vehicles contain additional reinforcement beams.<br>
Takes the same amount of time as removing the entire roof
Can be accomplished with hand tools and power tools
Most new vehicles contain additional reinforcement beams.<br>
69
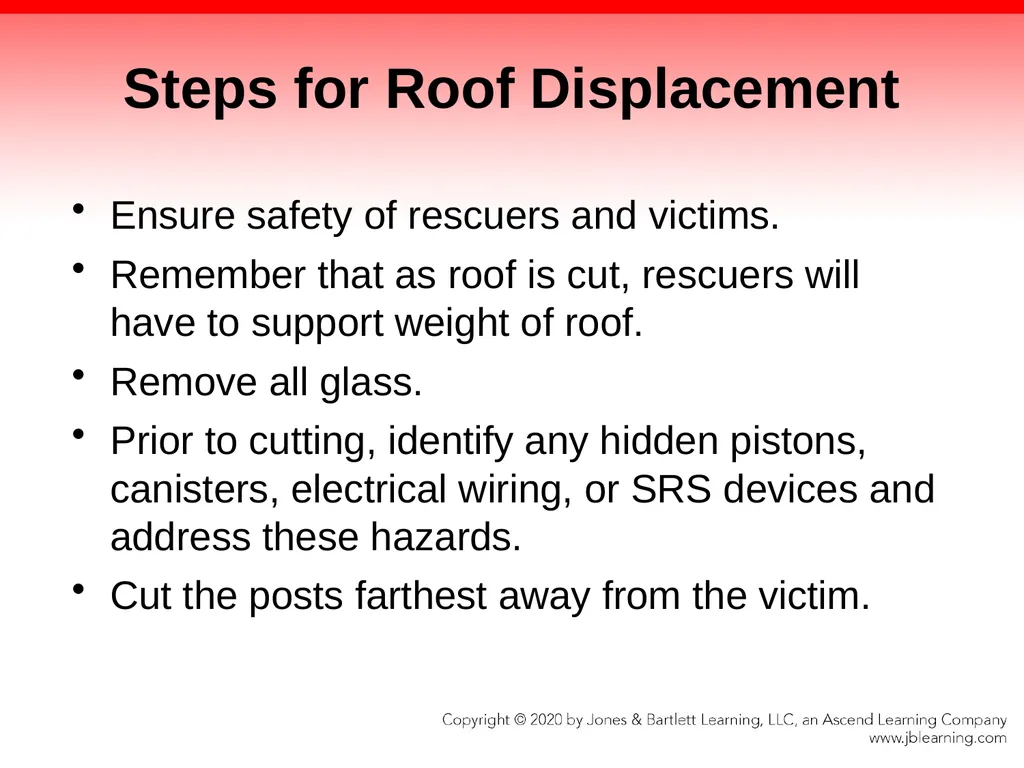
Steps for Roof Displacement Ensure safety of rescuers and victims.
Remember that as roof is cut, rescuers will have to support weight of roof.
Remove all glass.
Prior to cutting, identify any hidden pistons, canisters, electrical wiring, or SRS devices and address these hazards.
Cut the posts farthest away from the victim.<br>
Remember that as roof is cut, rescuers will have to support weight of roof.
Remove all glass.
Prior to cutting, identify any hidden pistons, canisters, electrical wiring, or SRS devices and address these hazards.
Cut the posts farthest away from the victim.<br>
70
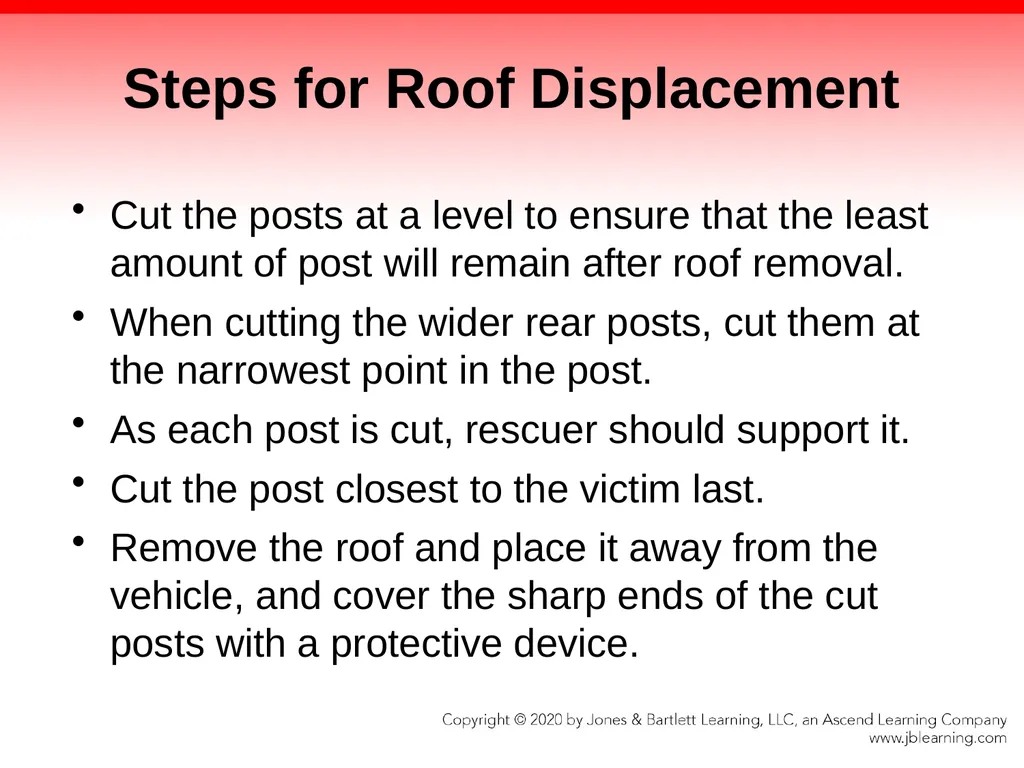
Steps for Roof Displacement Cut the posts at a level to ensure that the least amount of post will remain after roof removal.
When cutting the wider rear posts, cut them at the narrowest point in the post.
As each post is cut, rescuer should support it.
Cut the post closest to the victim last.
Remove the roof and place it away from the vehicle, and cover the sharp ends of the cut posts with a protective device.<br>
When cutting the wider rear posts, cut them at the narrowest point in the post.
As each post is cut, rescuer should support it.
Cut the post closest to the victim last.
Remove the roof and place it away from the vehicle, and cover the sharp ends of the cut posts with a protective device.<br>
71
Removing and Transporting
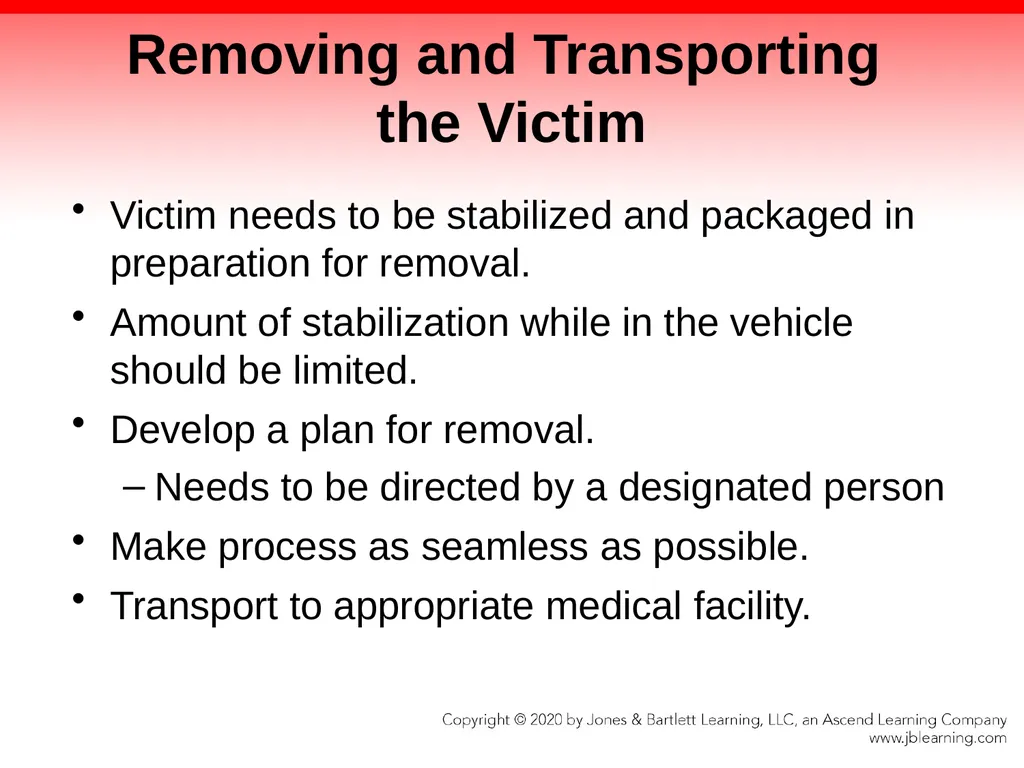
the Victim Victim needs to be stabilized and packaged in preparation for removal.
Amount of stabilization while in the vehicle should be limited.
Develop a plan for removal.
Needs to be directed by a designated person
Make process as seamless as possible.
Transport to appropriate medical facility.<br>
Amount of stabilization while in the vehicle should be limited.
Develop a plan for removal.
Needs to be directed by a designated person
Make process as seamless as possible.
Transport to appropriate medical facility.<br>
72
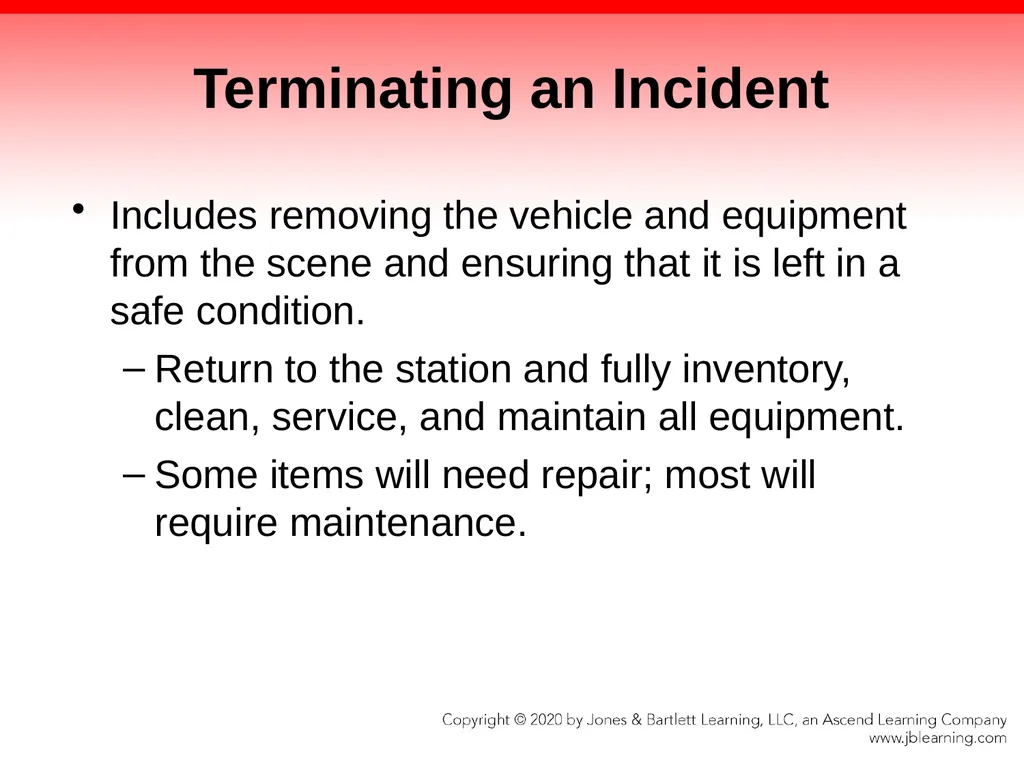
Terminating an Incident Includes removing the vehicle and equipment from the scene and ensuring that it is left in a safe condition.
Return to the station and fully inventory, clean, service, and maintain all equipment.
Some items will need repair; most will require maintenance.<br>
Return to the station and fully inventory, clean, service, and maintain all equipment.
Some items will need repair; most will require maintenance.<br>
73
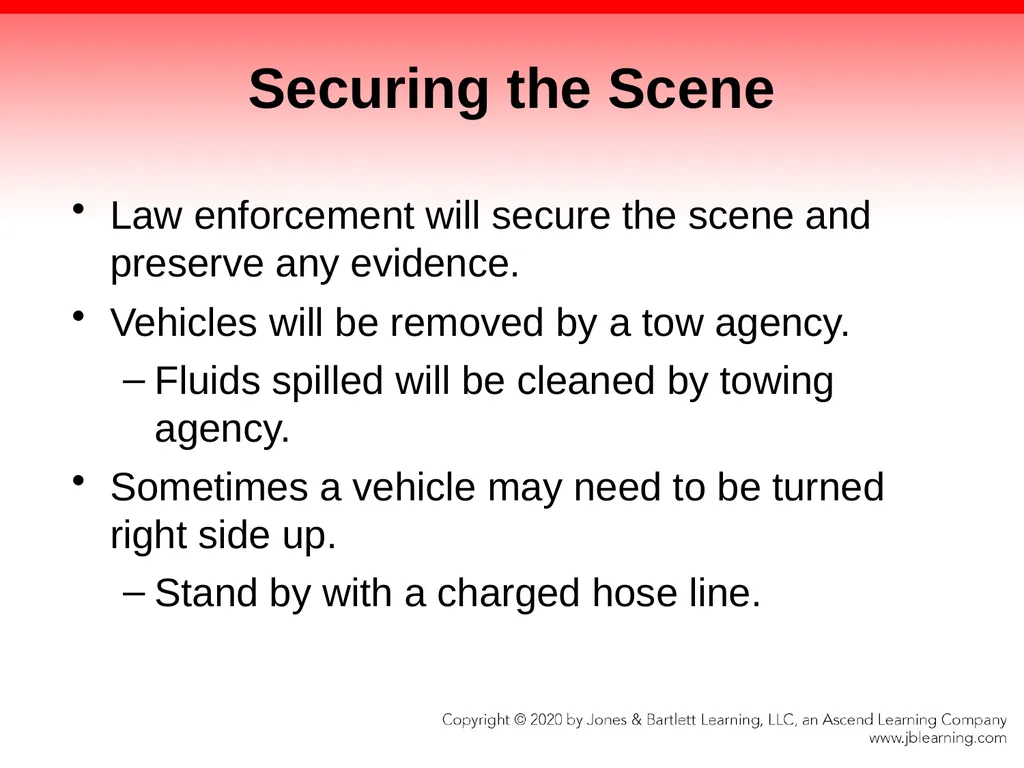
Securing the Scene Law enforcement will secure the scene and preserve any evidence.
Vehicles will be removed by a tow agency.
Fluids spilled will be cleaned by towing agency.
Sometimes a vehicle may need to be turned right side up.
Stand by with a charged hose line.<br>
Vehicles will be removed by a tow agency.
Fluids spilled will be cleaned by towing agency.
Sometimes a vehicle may need to be turned right side up.
Stand by with a charged hose line.<br>
74
Summary The design of motor vehicles is constantly evolving. As a fire fighter, you need to keep up to date on the design of motor vehicles.
Most vehicles on the road today are conventional vehicles, which use internal combustion engines that burn gasoline or diesel fuel. Alternative-fuel vehicles may be powered by electricity, propane, natural gas, methanol, or hydrogen. The hazards posed by these vehicles include fuel fires.<br>
Most vehicles on the road today are conventional vehicles, which use internal combustion engines that burn gasoline or diesel fuel. Alternative-fuel vehicles may be powered by electricity, propane, natural gas, methanol, or hydrogen. The hazards posed by these vehicles include fuel fires.<br>
75
Summary Battery electric vehicles use an electric motor that is powered by batteries. These vehicles pose electrical hazards due to the large number of batteries needed to power the engine.
Hybrid electric vehicles use both a battery-powered electric motor and a liquid-fueled engine. As a consequence, these vehicles pose both electrical hazards and fuel fire hazards.<br>
Hybrid electric vehicles use both a battery-powered electric motor and a liquid-fueled engine. As a consequence, these vehicles pose both electrical hazards and fuel fire hazards.<br>
76
Summary Know the following vehicle components:
A, B, and C posts
The bulkhead divides the engine compartment from the passenger compartment.
The passenger compartment includes the front and back seats.
The two common types of vehicle frames are the body-over-frame and the unibody.<br>
A, B, and C posts
The bulkhead divides the engine compartment from the passenger compartment.
The passenger compartment includes the front and back seats.
The two common types of vehicle frames are the body-over-frame and the unibody.<br>
77
Summary Identifying the location of supplemental restraint systems, such as air bags and seat belts, is critical to avoid the hazards they present.
Extrication should follow a series of logical steps:
Arrive and size up the scene.
Stabilize the scene.
Access the victim.
Disentangle the victim.<br>
Extrication should follow a series of logical steps:
Arrive and size up the scene.
Stabilize the scene.
Access the victim.
Disentangle the victim.<br>
78
Summary After arriving at the scene, assess the hazards present and determine the types of vehicles involved, the scope of the incident, the number and severity of injuries, and the need for additional resources.
Stabilizing the scene consists of reducing, removing, or mitigating the hazards at the scene.
Use cribbing and associated materials to stabilize the vehicle and other unstable objects.<br>
Stabilizing the scene consists of reducing, removing, or mitigating the hazards at the scene.
Use cribbing and associated materials to stabilize the vehicle and other unstable objects.<br>
79
Summary To gain access to the victim, the following techniques are used:
Open the door.
Break a window.
Force open the door.<br>
Open the door.
Break a window.
Force open the door.<br>
80
Summary To disentangle the victim from the vehicle, the following techniques are used:
Displace the seat.
Remove the windshield.
Remove the steering wheel.
Displace the dashboard.
Displace the roof.<br>
Displace the seat.
Remove the windshield.
Remove the steering wheel.
Displace the dashboard.
Displace the roof.<br>
81
Summary The final phase of the extrication process consists of removing and transporting the victim to the hospital.
During this phase, the victim is stabilized, packaged, removed from the vehicle, and transported to a medical facility.<br>
During this phase, the victim is stabilized, packaged, removed from the vehicle, and transported to a medical facility.<br>
82
Summary Terminating an incident includes securing the scene by removing the damaged vehicle and equipment and ensuring that the scene is left in a safe condition.
Once a scene has been released by law enforcement, the removal of vehicles will be coordinated with a tow agency.<br>
Once a scene has been released by law enforcement, the removal of vehicles will be coordinated with a tow agency.<br>