
Chapter 9 Patient Assessment National EMS
PM
Published · 177 slides · 0 views

1 / 1







Description
Chapter 9 Patient Assessment National EMS Education Standard Competencies (1 of 10) Assessment Applies scene information and patient assessment findings (scene size-up, primary and secondary assessment, patient history, and reassessment) to
Related Topics
Share
Embed code
Download this presentation From Below
"Chapter 9 Patient Assessment National EMS" is the property of its rightful owner. Permission is granted to download and print the materials on this website for personal, non-commercial use only, and to display it on your personal computer provided you do not modify the materials and that you retain all copyright notices contained in the materials. By downloading content from our website, you accept the terms of this agreement.
Presentation Transcript
01
Chapter 9
Patient Assessment<br>
Patient Assessment<br>
02
National EMS Education
Standard Competencies (1 of 10) Assessment
Applies scene information and patient assessment findings (scene size-up, primary and secondary assessment, patient history, and reassessment) to guide emergency management.<br>
Applies scene information and patient assessment findings (scene size-up, primary and secondary assessment, patient history, and reassessment) to guide emergency management.<br>
03
National EMS Education
Standard Competencies (2 of 10) Scene Size-up
Scene safety
Scene management
Impact of the environment on patient care
Addressing hazards
Violence<br>
Scene safety
Scene management
Impact of the environment on patient care
Addressing hazards
Violence<br>
04
Scene Size-up (cont’d)
Scene Management (cont’d)
Need for additional or specialized resources
Standard precautions
Multiple-patient situations National EMS Education Standard Competencies (3 of 10)<br>
Scene Management (cont’d)
Need for additional or specialized resources
Standard precautions
Multiple-patient situations National EMS Education Standard Competencies (3 of 10)<br>
05
Primary Assessment
Primary assessment for all patient situations
Level of consciousness
ABCs
Identifying life threats
Assessment of vital functions
Initial general impression National EMS Education Standard Competencies (4 of 10)<br>
Primary assessment for all patient situations
Level of consciousness
ABCs
Identifying life threats
Assessment of vital functions
Initial general impression National EMS Education Standard Competencies (4 of 10)<br>
06
National EMS Education
Standard Competencies (5 of 10) Primary Assessment (cont’d)
Begin interventions needed to preserve life
Integration of treatment/procedures needed to preserve life<br>
Begin interventions needed to preserve life
Integration of treatment/procedures needed to preserve life<br>
07
History Taking
Determining the chief complaint
Mechanism of injury/nature of illness
Associated signs and symptoms
Investigation of the chief complaint
Past medical history
Pertinent negatives National EMS Education Standard Competencies (6 of 10)<br>
Determining the chief complaint
Mechanism of injury/nature of illness
Associated signs and symptoms
Investigation of the chief complaint
Past medical history
Pertinent negatives National EMS Education Standard Competencies (6 of 10)<br>
08
National EMS Education
Standard Competencies (7 of 10) Secondary Assessment
Performing a rapid full-body scan
Focused assessment of pain
Assessment of vital signs
Techniques of physical examination
Respiratory system
Presence of breath sounds<br>
Performing a rapid full-body scan
Focused assessment of pain
Assessment of vital signs
Techniques of physical examination
Respiratory system
Presence of breath sounds<br>
09
Secondary Assessment (cont’d)
Techniques of physical examination (cont’d)
Cardiovascular system
Neurologic system
Musculoskeletal system
All anatomic regions National EMS Education Standard Competencies (8 of 10)<br>
Techniques of physical examination (cont’d)
Cardiovascular system
Neurologic system
Musculoskeletal system
All anatomic regions National EMS Education Standard Competencies (8 of 10)<br>
10
Monitoring Devices
Obtaining and using information from patient monitoring devices including (but not limited to):
Pulse oximetry
Noninvasive blood pressure National EMS Education Standard Competencies (9 of 10)<br>
Obtaining and using information from patient monitoring devices including (but not limited to):
Pulse oximetry
Noninvasive blood pressure National EMS Education Standard Competencies (9 of 10)<br>
11
Reassessment
How and when to reassess patients
How and when to perform a reassessment for all patient situations National EMS Education Standard Competencies (10 of 10)<br>
How and when to reassess patients
How and when to perform a reassessment for all patient situations National EMS Education Standard Competencies (10 of 10)<br>
12
Introduction (1 of 3) Patient assessment is very important.
EMTs must master the patient assessment process.
Patient assessment is used, to some degree, in every patient encounter.<br>
EMTs must master the patient assessment process.
Patient assessment is used, to some degree, in every patient encounter.<br>
13
Introduction (2 of 3) Five main parts:
Scene size-up
Primary assessment
History taking
Secondary assessment
Reassessment<br>
Scene size-up
Primary assessment
History taking
Secondary assessment
Reassessment<br>
14
Introduction (3 of 3) Rarely does one sign or symptom show you the patient’s status or underlying problem.
Symptom: subjective condition the patient feels and tells you about
Sign: objective condition you can observe about the patient<br>
Symptom: subjective condition the patient feels and tells you about
Sign: objective condition you can observe about the patient<br>
15
Scene Size-up Your evaluation of the conditions in which you will be operating
Maintain situational awareness
Scene size-up combines:
An understanding of the situation and conditions prior to responding
Dispatcher’s basic information
Observation of the scene<br>
Maintain situational awareness
Scene size-up combines:
An understanding of the situation and conditions prior to responding
Dispatcher’s basic information
Observation of the scene<br>
16
Ensure Scene Safety (1 of 3) Issues can range from minor difficulties to major dangers.
Do not enter until the scene is safe for you and your team.
Typically, the way you enter an area is the way you will leave.
Wear a high-visibility safety vest on roadways.<br>
Do not enter until the scene is safe for you and your team.
Typically, the way you enter an area is the way you will leave.
Wear a high-visibility safety vest on roadways.<br>
17
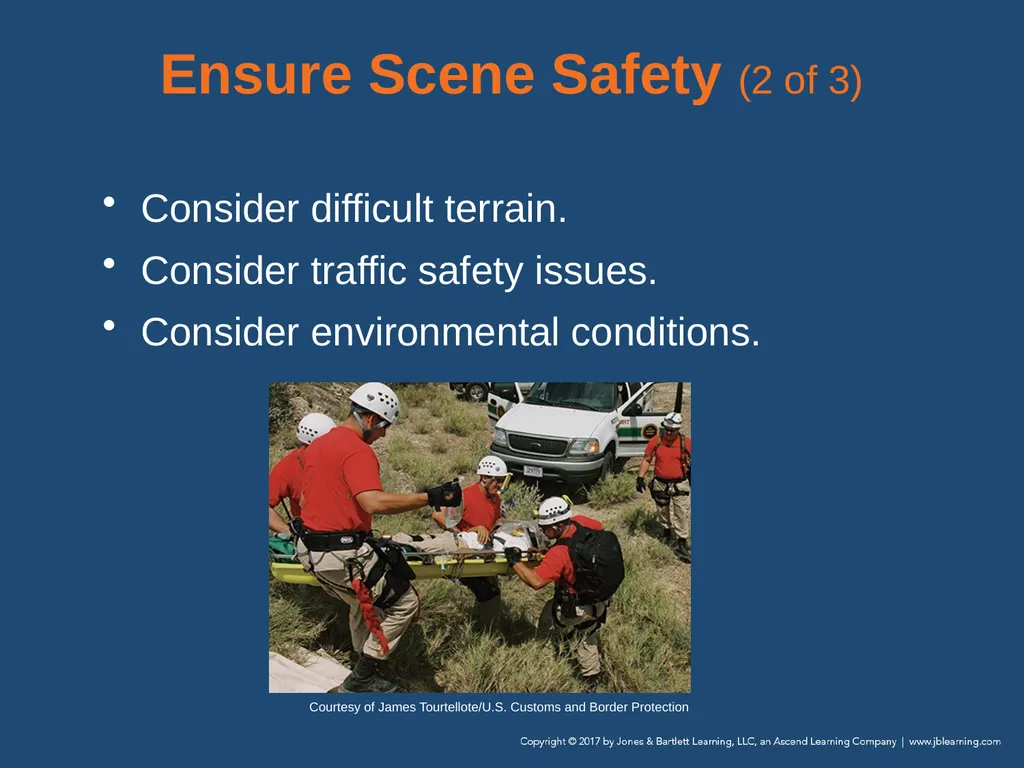
Ensure Scene Safety (2 of 3) Consider difficult terrain.
Consider traffic safety issues.
Consider environmental conditions. Courtesy of James Tourtellote/U.S. Customs and Border Protection<br>
Consider traffic safety issues.
Consider environmental conditions. Courtesy of James Tourtellote/U.S. Customs and Border Protection<br>
18
Ensure Scene Safety (3 of 3) If appropriate, help protect bystanders from becoming patients.
Hazards range from extreme weather conditions to the threat of physical violence.
An emergency scene is a dynamically changing environment.
If the scene is unsafe, make it safe if possible.
If this is not possible, move to a safe location.<br>
Hazards range from extreme weather conditions to the threat of physical violence.
An emergency scene is a dynamically changing environment.
If the scene is unsafe, make it safe if possible.
If this is not possible, move to a safe location.<br>
19
Determine Mechanism of Injury/Nature of Illness (1 of 5) Calls for assistance can be categorized as medical conditions, traumatic injuries, or both.
A medical problem can lead to a traumatic injury.
Mechanism of injury (MOI)
Type or amount of force
How long it was applied
Where it was applied to the body<br>
A medical problem can lead to a traumatic injury.
Mechanism of injury (MOI)
Type or amount of force
How long it was applied
Where it was applied to the body<br>
20
Determine Mechanism of Injury/Nature of Illness (2 of 5) Fragile and easily injured areas include the brain, spinal cord, and eyes.
Blunt trauma
The force occurs over a broad area.
Skin is usually not broken.
Tissues and organs below the area of impact may be damaged.<br>
Blunt trauma
The force occurs over a broad area.
Skin is usually not broken.
Tissues and organs below the area of impact may be damaged.<br>
21
Determine Mechanism of Injury/Nature of Illness (3 of 5) Penetrating trauma
The force of the injury occurs at a small point of contact between the skin and the object.
Open wound with high potential for infection<br>
The force of the injury occurs at a small point of contact between the skin and the object.
Open wound with high potential for infection<br>
22
Determine Mechanism of Injury/Nature of Illness (4 of 5) For medical patients, determine the nature of illness (NOI).
Similarities between MOI and NOI
Both require you to search for clues.
Talk with the patient, family, or bystanders.
Use your senses to check for clues.<br>
Similarities between MOI and NOI
Both require you to search for clues.
Talk with the patient, family, or bystanders.
Use your senses to check for clues.<br>
23
Determine Mechanism of Injury/Nature of Illness (5 of 5) Be aware of scenes with more than one patient with similar signs or symptoms.
Example: carbon monoxide poisoning
Could indicate an unsafe scene for the EMT as well<br>
Example: carbon monoxide poisoning
Could indicate an unsafe scene for the EMT as well<br>
24
Importance of MOI and NOI Considering the MOI or NOI early can be of value in preparing to care for the patient.
You may be tempted to categorize the patient immediately as either trauma or medical.
Fundamentals of good patient assessment are the same.<br>
You may be tempted to categorize the patient immediately as either trauma or medical.
Fundamentals of good patient assessment are the same.<br>
25
Take Standard Precautions
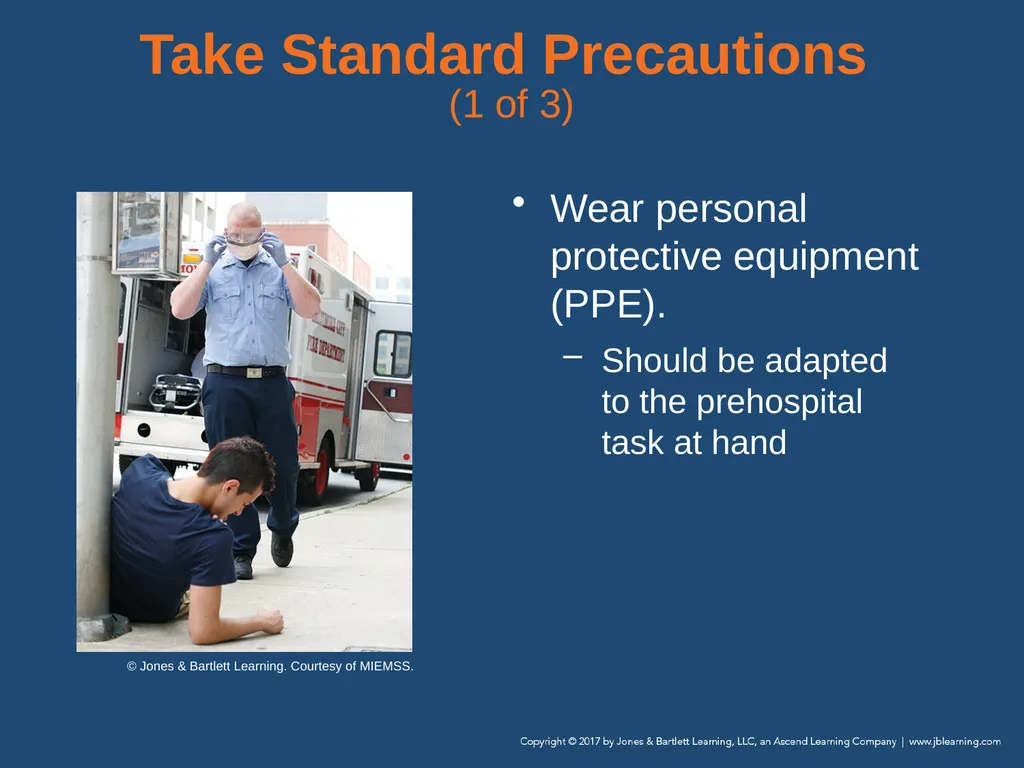
(1 of 3) Wear personal protective equipment (PPE).
Should be adapted to the prehospital task at hand © Jones & Bartlett Learning. Courtesy of MIEMSS.<br>
Should be adapted to the prehospital task at hand © Jones & Bartlett Learning. Courtesy of MIEMSS.<br>
26
Take Standard Precautions
(2 of 3) Standard precautions have been recommended for use in dealing with:
Objects
Blood
Body fluids
Other potential exposure risks of communicable disease<br>
Objects
Blood
Body fluids
Other potential exposure risks of communicable disease<br>
27
Take Standard Precautions
(3 of 3) When you step out of the EMS vehicle, standard precautions must have been already taken or initiated.
At a minimum, gloves must be in place.
Consider glasses and a mask.<br>
At a minimum, gloves must be in place.
Consider glasses and a mask.<br>
28
Determine Number of Patients (1 of 2) During scene size-up, accurately identify the total number of patients.
Critical in determining the need for additional resources
When there are multiple patients, use the incident command system, identify the number of patients, and then begin triage.<br>
Critical in determining the need for additional resources
When there are multiple patients, use the incident command system, identify the number of patients, and then begin triage.<br>
29
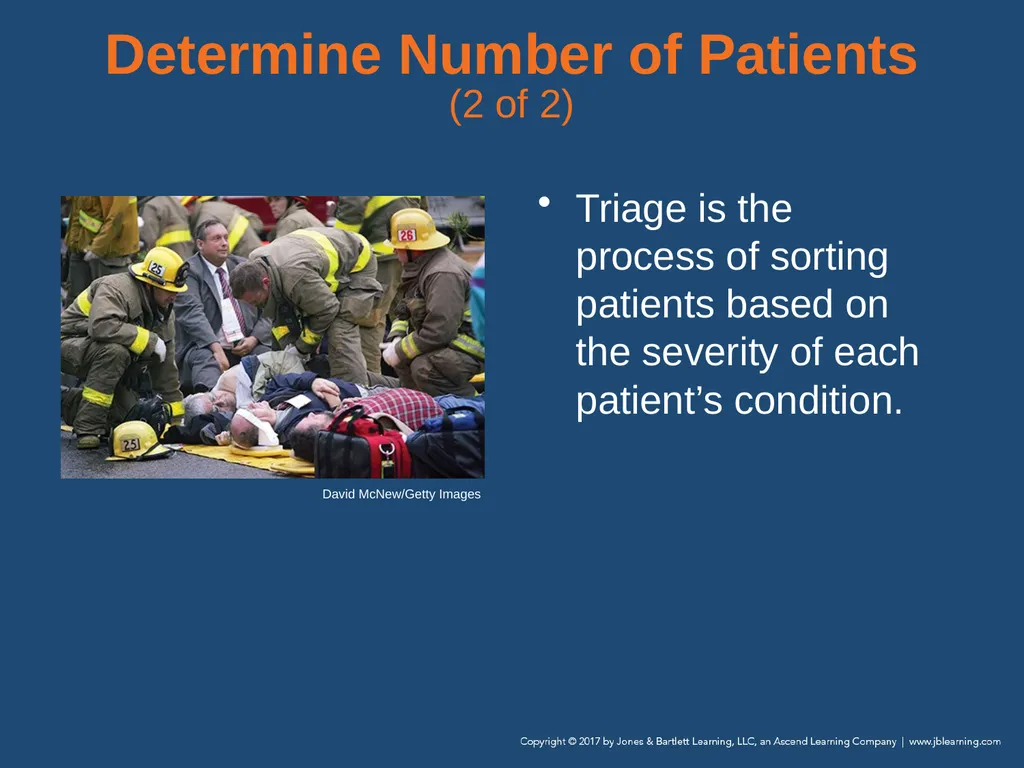
Determine Number of Patients (2 of 2) Triage is the process of sorting patients based on the severity of each patient’s condition. David McNew/Getty Images<br>
30
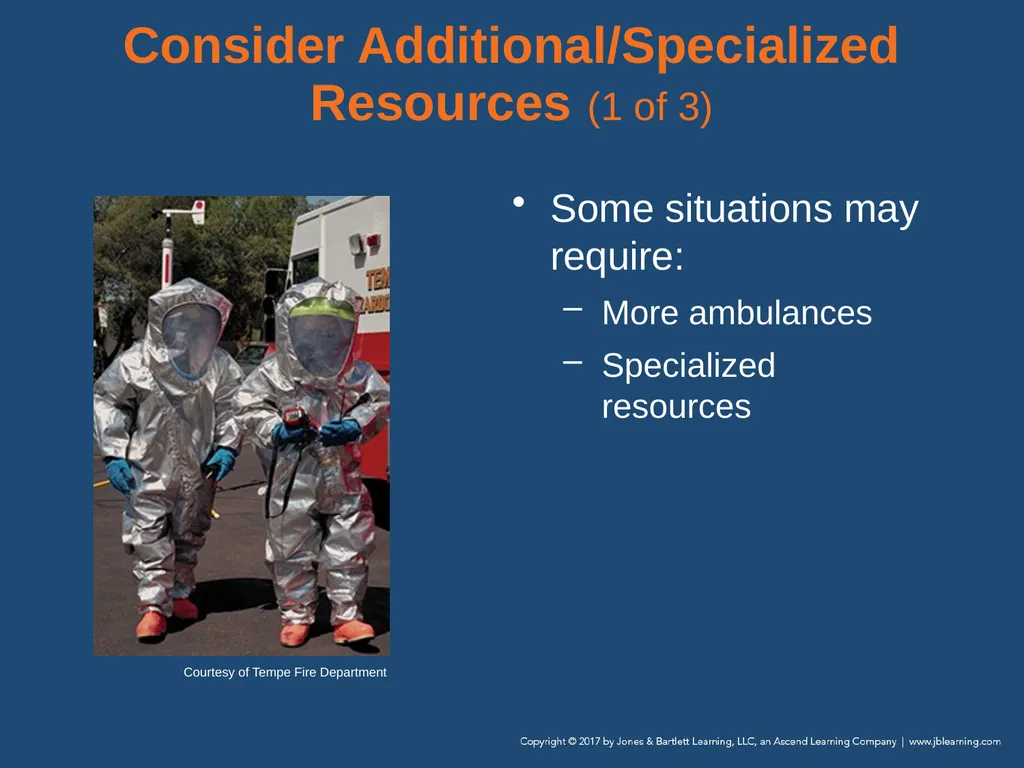
Some situations may require:
More ambulances
Specialized resources Courtesy of Tempe Fire Department Consider Additional/Specialized Resources (1 of 3)<br>
More ambulances
Specialized resources Courtesy of Tempe Fire Department Consider Additional/Specialized Resources (1 of 3)<br>
31
Consider Additional/Specialized Resources (2 of 3) Specialized resources include:
Advanced life support (ALS)
Air medical support
Fire departments, who may handle high-angle rescue, hazardous materials, or water rescue
Law enforcement<br>
Advanced life support (ALS)
Air medical support
Fire departments, who may handle high-angle rescue, hazardous materials, or water rescue
Law enforcement<br>
32
Consider Additional/Specialized Resources (3 of 3) To determine if you require additional resources, ask yourself:
Does the scene pose a threat to me, my patient, or others?
How many patients are there?
Do we have the resources to respond to their conditions?<br>
Does the scene pose a threat to me, my patient, or others?
How many patients are there?
Do we have the resources to respond to their conditions?<br>
33
Primary Assessment Begins when you greet your patient
The goal is to identify and initiate treatment of immediate or potential life threats.
Physically examine the patient and assess:
LOC
ABCs<br>
The goal is to identify and initiate treatment of immediate or potential life threats.
Physically examine the patient and assess:
LOC
ABCs<br>
34
Form a General Impression
(1 of 3) Formed to determine the priority of care
First part of primary assessment
Make a note of the person’s:
Age, sex, and race
Level of distress
Overall appearance<br>
First part of primary assessment
Make a note of the person’s:
Age, sex, and race
Level of distress
Overall appearance<br>
35
Form a General Impression
(2 of 3) Note the patient’s position.
Avoid standing over the patient.
Address the patient by name.
Introduce yourself.
Ask about the chief complaint.
Address life-threats immediately.<br>
Avoid standing over the patient.
Address the patient by name.
Introduce yourself.
Ask about the chief complaint.
Address life-threats immediately.<br>
36
Form a General Impression
(3 of 3) Determine if the patient’s condition is:
Stable
Stable but potentially unstable
Unstable<br>
Stable
Stable but potentially unstable
Unstable<br>
37
Assess Level of Consciousness (1 of 8) The level of consciousness (LOC) can tell you a great deal about the patient’s neurologic and physiologic status.<br>
38
Assess Level of Consciousness (2 of 8) Categories:
Unconscious
Conscious with an altered LOC
Conscious with an unaltered LOC<br>
Unconscious
Conscious with an altered LOC
Conscious with an unaltered LOC<br>
39
Assess Level of Consciousness (3 of 8) Assessment of an unconscious patient focuses on airway, breathing, and circulation.
Sustained unconsciousness should warn you of a critical respiratory, circulatory, or central nervous system problem.<br>
Sustained unconsciousness should warn you of a critical respiratory, circulatory, or central nervous system problem.<br>
40
Assess Level of Consciousness (4 of 8) Conscious with an altered LOC may be due to inadequate perfusion.
Perfusion is the circulation of blood within an organ or tissue.
Could also be caused by medications, drugs, alcohol, or poisoning<br>
Perfusion is the circulation of blood within an organ or tissue.
Could also be caused by medications, drugs, alcohol, or poisoning<br>
41
Assess Level of Consciousness (5 of 8) To assess for responsiveness, use the mnemonic AVPU:
Awake and alert
Responsive to Verbal stimuli
Responsive to Pain
Unresponsive<br>
Awake and alert
Responsive to Verbal stimuli
Responsive to Pain
Unresponsive<br>
42
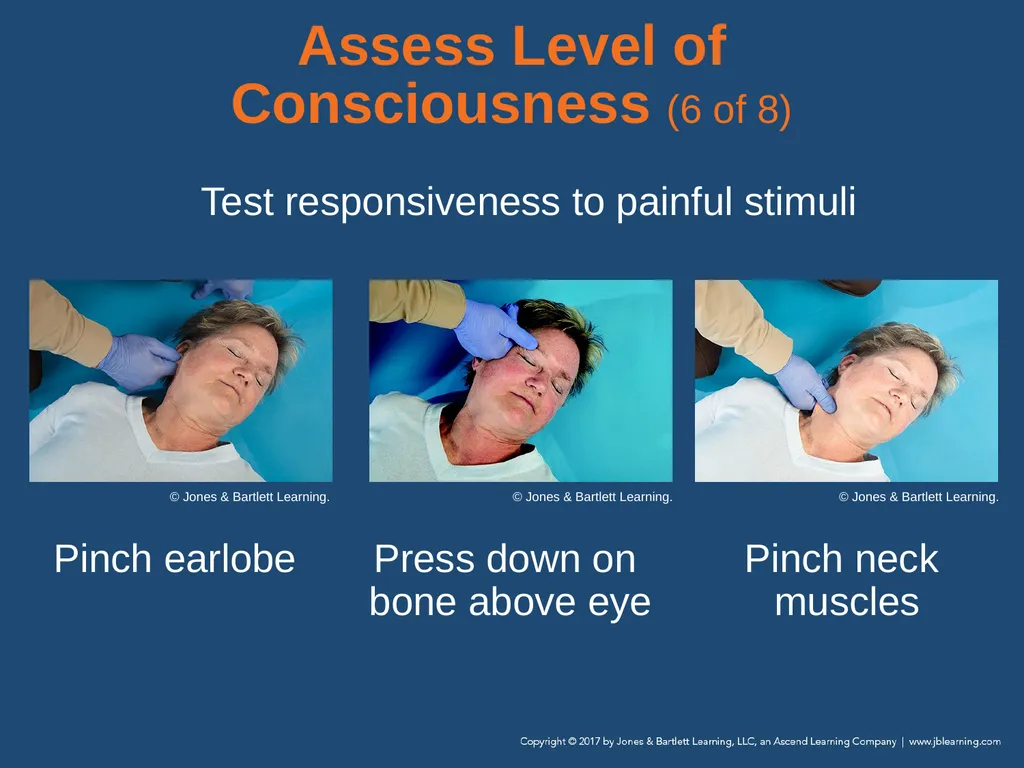
Assess Level of Consciousness (6 of 8) Test responsiveness to painful stimuli Pinch earlobe Press down on
bone above eye Pinch neck
muscles © Jones & Bartlett Learning. © Jones & Bartlett Learning. © Jones & Bartlett Learning.<br>
muscles © Jones & Bartlett Learning. © Jones & Bartlett Learning. © Jones & Bartlett Learning.<br>
43
Assess Level of Consciousness (7 of 8) Orientation tests mental status.
Evaluates a patient’s ability to remember:
Person
Place
Time
Event<br>
Evaluates a patient’s ability to remember:
Person
Place
Time
Event<br>
44
Assess Level of Consciousness (8 of 8) Evaluates long-term memory, intermediate-term memory, and short-term memory
Altered mental status
Any deviation from alert and oriented to person, place, time, and event
Any deviation from the patient’s normal baseline<br>
Altered mental status
Any deviation from alert and oriented to person, place, time, and event
Any deviation from the patient’s normal baseline<br>
45
Identify and Treat Life-Threats (1 of 2) Conditions that cause sudden death:
Airway obstruction
Respiratory failure
Respiratory arrest
Shock
Severe bleeding
Primary cardiac arrest<br>
Airway obstruction
Respiratory failure
Respiratory arrest
Shock
Severe bleeding
Primary cardiac arrest<br>
46
Identify and Treat Life-Threats (2 of 2) In most cases, begin with airway, followed by breathing and circulation (ABC).
In some cases, it may be appropriate to address life threats to circulation first (CAB).<br>
In some cases, it may be appropriate to address life threats to circulation first (CAB).<br>
47
Assess the Airway (1 of 4) Moving through the primary assessment, stay alert for signs of airway obstruction.
Ensure the airway remains open (patent) and adequate.<br>
Ensure the airway remains open (patent) and adequate.<br>
48
Assess the Airway (2 of 4) Responsive patients
Patients who are talking or crying have an open airway.
Watch and listen to how patients speak.
If you identify an airway problem, stop the assessment and work to clear the patient’s airway.<br>
Patients who are talking or crying have an open airway.
Watch and listen to how patients speak.
If you identify an airway problem, stop the assessment and work to clear the patient’s airway.<br>
49
Assess the Airway (3 of 4) Unresponsive patients
Immediately assess the airway.
Use the jaw-thrust technique when necessary.
Use the head tilt–chin lift technique when necessary.
Relaxation of the tongue muscles is a cause of airway obstruction.<br>
Immediately assess the airway.
Use the jaw-thrust technique when necessary.
Use the head tilt–chin lift technique when necessary.
Relaxation of the tongue muscles is a cause of airway obstruction.<br>
50
Assess the Airway (4 of 4) Signs of obstruction in an unconscious patient:
Obvious trauma, blood, or obstruction
Noisy breathing (snoring, bubbling, gurgling, crowing, abnormal sounds)
Extremely shallow or absent breathing<br>
Obvious trauma, blood, or obstruction
Noisy breathing (snoring, bubbling, gurgling, crowing, abnormal sounds)
Extremely shallow or absent breathing<br>
51
Assess Breathing (1 of 5) Make sure the patient’s airway is open.
Make sure the patient’s breathing is present and adequate.
Ask yourself:
Is the patient breathing?
Is the patient breathing adequately?
Is the patient hypoxic?<br>
Make sure the patient’s breathing is present and adequate.
Ask yourself:
Is the patient breathing?
Is the patient breathing adequately?
Is the patient hypoxic?<br>
52
Assess Breathing (2 of 5) Consider providing positive-pressure ventilations with an airway adjunct when:
Respirations exceed 28 breaths/min
Respirations are fewer than 8 breaths/min
The goal for oxygenation for most patients is an oxygen saturation of approximately 94% to 99%.<br>
Respirations exceed 28 breaths/min
Respirations are fewer than 8 breaths/min
The goal for oxygenation for most patients is an oxygen saturation of approximately 94% to 99%.<br>
53
Assess Breathing (3 of 5) Observe how much effort is required for the patient to breathe:
Retractions
Use of accessory muscles
Nasal flaring
Two-to-three-word dyspnea
Tripod position
Sniffing position
Labored breathing<br>
Retractions
Use of accessory muscles
Nasal flaring
Two-to-three-word dyspnea
Tripod position
Sniffing position
Labored breathing<br>
54
Assess Breathing (4 of 5) Respiratory distress
Increased work of breathing
Increased effort and rate<br>
Increased work of breathing
Increased effort and rate<br>
55
Assess Breathing (5 of 5) Respiratory failure
Occurs when the blood is inadequately oxygenated or ventilation is inadequate to meeting the oxygen demands of the body
The ultimate result of respiratory failure if it is not corrected<br>
Occurs when the blood is inadequately oxygenated or ventilation is inadequate to meeting the oxygen demands of the body
The ultimate result of respiratory failure if it is not corrected<br>
56
Assess Circulation (1 of 11) Assess:
Mental status
Pulse
Skin condition<br>
Mental status
Pulse
Skin condition<br>
57
Assess Circulation (2 of 11) Assess pulse
The pulse is the pressure wave that occurs as each heartbeat causes a surge in the blood circulating through the arteries.
Palpate (feel) the pulse.
If you cannot palpate a pulse in an unresponsive patient, begin CPR.<br>
The pulse is the pressure wave that occurs as each heartbeat causes a surge in the blood circulating through the arteries.
Palpate (feel) the pulse.
If you cannot palpate a pulse in an unresponsive patient, begin CPR.<br>
58
Assess Circulation (3 of 11) Skin condition
Evaluate the patient’s skin color, temperature, moisture, and capillary refill.
A normally functioning circulatory system perfuses the skin with oxygenated blood<br>
Evaluate the patient’s skin color, temperature, moisture, and capillary refill.
A normally functioning circulatory system perfuses the skin with oxygenated blood<br>
59
Assess Circulation (4 of 11) Skin color
Determined by the blood circulating through vessels and the amount and type of pigment present in the skin
Poor circulation will cause the skin to appear pale, white, ashen, or gray.<br>
Determined by the blood circulating through vessels and the amount and type of pigment present in the skin
Poor circulation will cause the skin to appear pale, white, ashen, or gray.<br>
60
Assess Circulation (5 of 11) Skin color (cont’d)
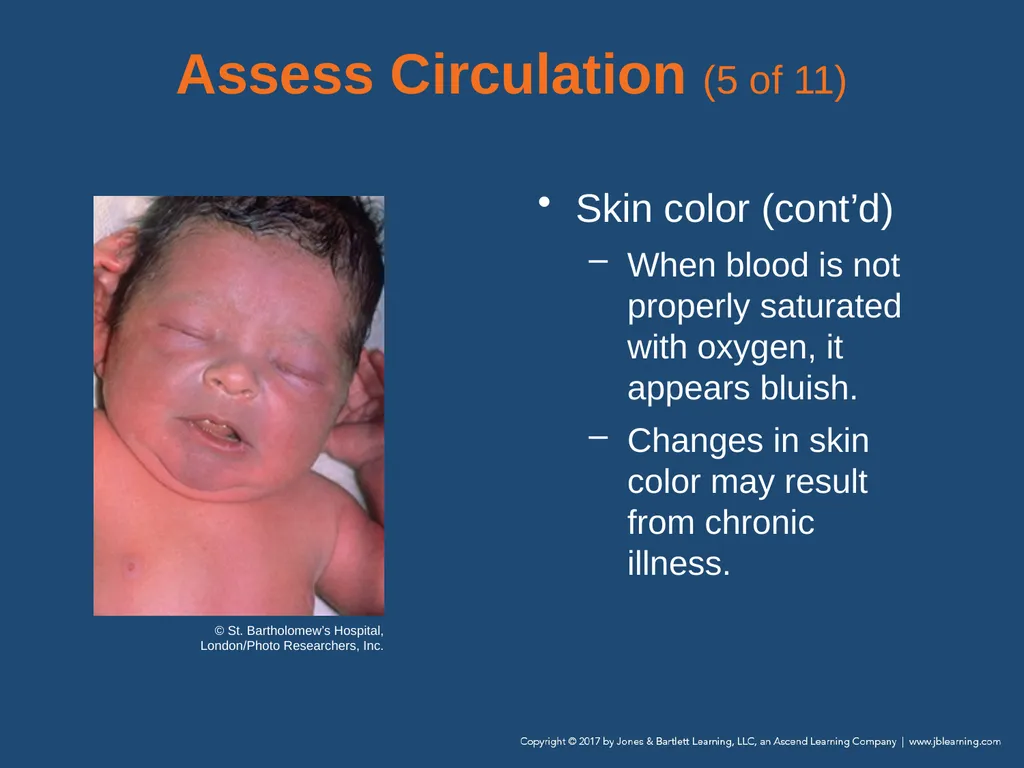
When blood is not properly saturated with oxygen, it appears bluish.
Changes in skin color may result from chronic illness. © St. Bartholomew’s Hospital, London/Photo Researchers, Inc.<br>
When blood is not properly saturated with oxygen, it appears bluish.
Changes in skin color may result from chronic illness. © St. Bartholomew’s Hospital, London/Photo Researchers, Inc.<br>
61
Assess Circulation (6 of 11) Skin temperature
Normal skin will be warm to the touch (98.6°F).
Abnormal skin temperatures are hot, cool, cold, and clammy.<br>
Normal skin will be warm to the touch (98.6°F).
Abnormal skin temperatures are hot, cool, cold, and clammy.<br>
62
Assess Circulation (7 of 11) Skin moisture
Dry skin is normal.
Skin that is wet, moist, or excessively dry and hot suggests a problem.<br>
Dry skin is normal.
Skin that is wet, moist, or excessively dry and hot suggests a problem.<br>
63
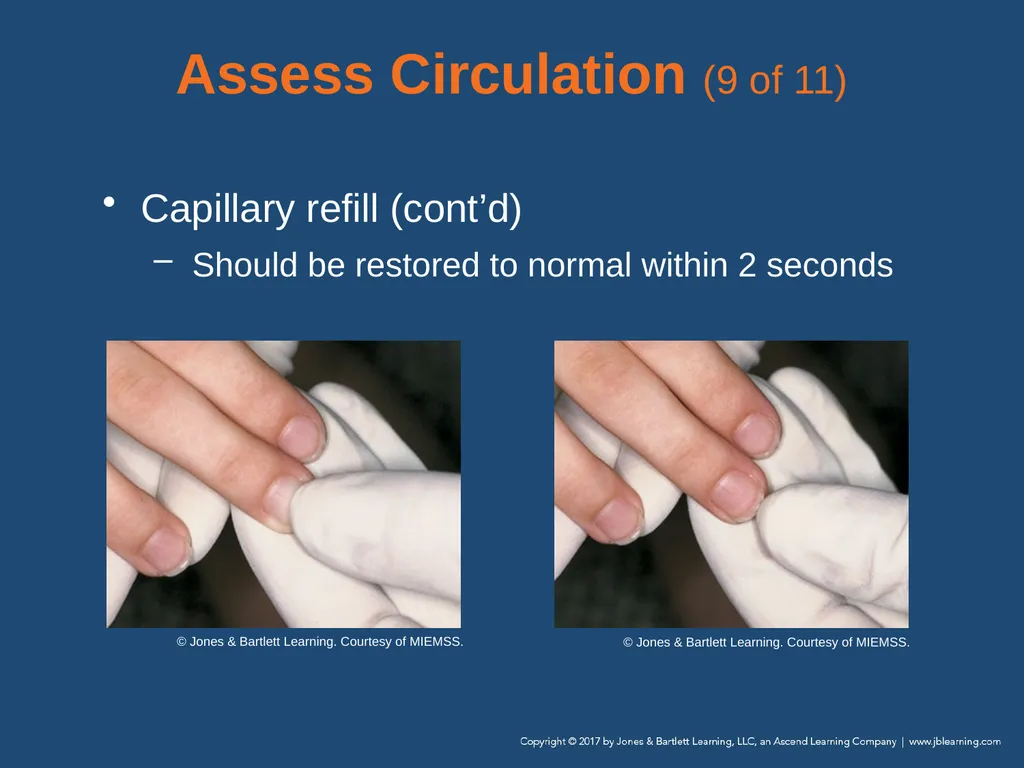
Assess Circulation (8 of 11) Capillary refill
Evaluated to assess the ability of the circulatory system to restore blood to the capillary system
Press on the patient’s fingernail.
Remove the pressure.
The nail bed should restore to its normal pink color.<br>
Evaluated to assess the ability of the circulatory system to restore blood to the capillary system
Press on the patient’s fingernail.
Remove the pressure.
The nail bed should restore to its normal pink color.<br>
64
Assess Circulation (9 of 11) Capillary refill (cont’d)
Should be restored to normal within 2 seconds © Jones & Bartlett Learning. Courtesy of MIEMSS. © Jones & Bartlett Learning. Courtesy of MIEMSS.<br>
Should be restored to normal within 2 seconds © Jones & Bartlett Learning. Courtesy of MIEMSS. © Jones & Bartlett Learning. Courtesy of MIEMSS.<br>
65
Assess Circulation (10 of 11) Assess and control external bleeding in trauma patients.
Should occur before addressing airway or breathing concerns.
Bleeding from a large vein is characterized by a steady flow of blood.
Bleeding from an artery is characterized by a spurting flow of blood.<br>
Should occur before addressing airway or breathing concerns.
Bleeding from a large vein is characterized by a steady flow of blood.
Bleeding from an artery is characterized by a spurting flow of blood.<br>
66
Assess Circulation (11 of 11) Controlling external bleeding can be simple.
Apply direct pressure.
Apply a tourniquet if:
Direct pressure is not quickly successful
Obvious arterial hemorrhage of an extremity<br>
Apply direct pressure.
Apply a tourniquet if:
Direct pressure is not quickly successful
Obvious arterial hemorrhage of an extremity<br>
67
Perform a Rapid Scan Scan the body to identify injuries that must be managed or protected before the patient is transported.
Take 60 to 90 seconds to perform.
Not a systematic or focused physical examination<br>
Take 60 to 90 seconds to perform.
Not a systematic or focused physical examination<br>
68
Determine Priority of Patient Care and Transport (1 of 5) Primary assessment assists in determining transport priority.
High-priority patients include those with any of the following conditions:
Unresponsive
Poor general impression
Difficulty breathing<br>
High-priority patients include those with any of the following conditions:
Unresponsive
Poor general impression
Difficulty breathing<br>
69
Determine Priority of Patient Care and Transport (2 of 5) High-priority patients (cont’d):
Uncontrolled bleeding
Responsive but unable to follow commands
Severe chest pain
Pale skin or other signs of poor perfusion
Complicated childbirth
Severe pain in any area of the body<br>
Uncontrolled bleeding
Responsive but unable to follow commands
Severe chest pain
Pale skin or other signs of poor perfusion
Complicated childbirth
Severe pain in any area of the body<br>
70
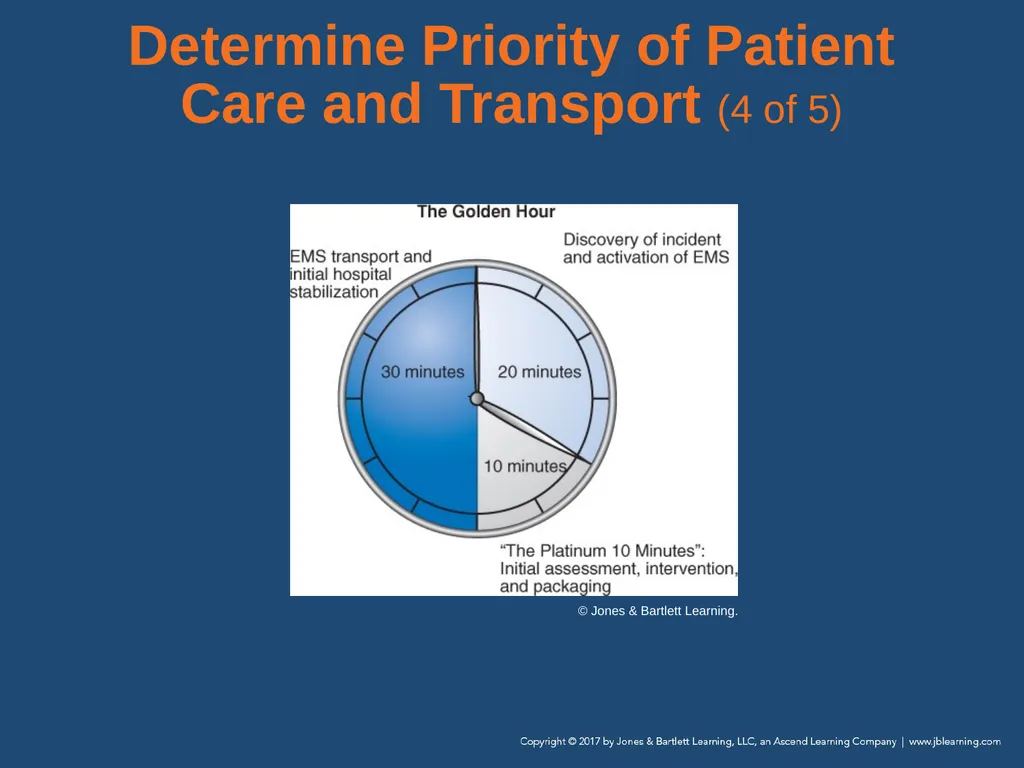
Determine Priority of Patient Care and Transport (3 of 5) The Golden Hour (The Golden Period) is the time from injury to definitive care.
Treatment of shock and traumatic injuries should occur.
Aim to assess, stabilize, package, and begin transport to the appropriate facility within 10 minutes after arrival on scene (“Platinum 10”).<br>
Treatment of shock and traumatic injuries should occur.
Aim to assess, stabilize, package, and begin transport to the appropriate facility within 10 minutes after arrival on scene (“Platinum 10”).<br>
71
Determine Priority of Patient Care and Transport (4 of 5) © Jones & Bartlett Learning.<br>
72
Determine Priority of Patient Care and Transport (5 of 5) Transport decisions should be made at this point, based on:
Patient’s condition
Availability of advanced care
Distance of transport
Local protocols<br>
Patient’s condition
Availability of advanced care
Distance of transport
Local protocols<br>
73
History Taking (1 of 4) Provides detail about the chief complaint and the patient’s signs and symptoms
Includes demographic information:
Date of the incident
Patient’s age, gender, race, past medical history, and current health status<br>
Includes demographic information:
Date of the incident
Patient’s age, gender, race, past medical history, and current health status<br>
74
History Taking (2 of 4) Investigate the chief complaint.
Make introductions, make the patient feel comfortable, and obtain permission to treat.
Ask a few simple and direct questions.
Refer to the patient as Mr., Ms., or Mrs., using the patient’s last name.
Ask open-ended questions.<br>
Make introductions, make the patient feel comfortable, and obtain permission to treat.
Ask a few simple and direct questions.
Refer to the patient as Mr., Ms., or Mrs., using the patient’s last name.
Ask open-ended questions.<br>
75
History Taking (3 of 4) If the patient is unresponsive, patient information and clues about the incident may be obtained from:
Family members present
A person who may have witnessed the situation
Bystanders
Medical alert jewelry
Other patient medical history documentation<br>
Family members present
A person who may have witnessed the situation
Bystanders
Medical alert jewelry
Other patient medical history documentation<br>
76
History Taking (4 of 4) Use the OPQRST mnemonic to assess symptoms.
Onset
Provocation or palliation
Quality
Region/radiation
Severity
Timing
Identify pertinent negatives.<br>
Onset
Provocation or palliation
Quality
Region/radiation
Severity
Timing
Identify pertinent negatives.<br>
77
Obtain a SAMPLE History Use the mnemonic SAMPLE to obtain the following information:
Signs and symptoms
Allergies
Medications
Pertinent past medical history
Last oral intake
Events leading up to the injury/illness<br>
Signs and symptoms
Allergies
Medications
Pertinent past medical history
Last oral intake
Events leading up to the injury/illness<br>
78
Critical Thinking in Assessment Gathering
Seeking facts
Evaluating
Considering what the information means
Synthesizing
Putting the information together to plan scene management and patient care<br>
Seeking facts
Evaluating
Considering what the information means
Synthesizing
Putting the information together to plan scene management and patient care<br>
79
Alcohol and drugs
Signs may be confusing, hidden, or disguised.
Patient may deny having any problems.
History gathered may be unreliable.
Do not judge the patient.
Be professional in your approach. Taking History on Sensitive Topics (1 of 3)<br>
Signs may be confusing, hidden, or disguised.
Patient may deny having any problems.
History gathered may be unreliable.
Do not judge the patient.
Be professional in your approach. Taking History on Sensitive Topics (1 of 3)<br>
80
Taking History on Sensitive Topics (2 of 3) Physical abuse or violence
Report all physical abuse or domestic violence to the appropriate authorities.
Follow local protocols.
Do not accuse; instead, immediately involve law enforcement.<br>
Report all physical abuse or domestic violence to the appropriate authorities.
Follow local protocols.
Do not accuse; instead, immediately involve law enforcement.<br>
81
Taking History on Sensitive Topics (3 of 3) Sexual history
Consider all female patients of childbearing age who report lower abdominal pain to be pregnant.
Inquire about urinary symptoms with male patients.
When appropriate, ask all patients about the potential for sexually transmitted diseases.<br>
Consider all female patients of childbearing age who report lower abdominal pain to be pregnant.
Inquire about urinary symptoms with male patients.
When appropriate, ask all patients about the potential for sexually transmitted diseases.<br>
82
Special Challenges in Obtaining Patient History (1 of 14) Silence
Patience is extremely important.
Use a close-ended question that requires a simple yes or no answer.
Consider whether the silence is a clue to the patient’s chief complaint.<br>
Patience is extremely important.
Use a close-ended question that requires a simple yes or no answer.
Consider whether the silence is a clue to the patient’s chief complaint.<br>
83
Special Challenges in Obtaining Patient History (2 of 14) Overly talkative
Reasons why a patient may be overly talkative:
Excessive caffeine consumption
Nervousness
Ingestion of cocaine, crack, or methamphetamines
Underlying psychologic issue<br>
Reasons why a patient may be overly talkative:
Excessive caffeine consumption
Nervousness
Ingestion of cocaine, crack, or methamphetamines
Underlying psychologic issue<br>
84
Special Challenges in Obtaining Patient History (3 of 14) Multiple symptoms
Often true of older patients
Prioritize the patient’s complaints as you would in triage.
Start with the most serious and end with the least serious.<br>
Often true of older patients
Prioritize the patient’s complaints as you would in triage.
Start with the most serious and end with the least serious.<br>
85
Special Challenges in Obtaining Patient History (4 of 14) Anxiety
Some anxious patients show signs of psychological shock:
Pallor
Diaphoresis
Shortness of breath
Numbness in the hands and feet
Dizziness or light-headedness
Loss of consciousness<br>
Some anxious patients show signs of psychological shock:
Pallor
Diaphoresis
Shortness of breath
Numbness in the hands and feet
Dizziness or light-headedness
Loss of consciousness<br>
86
Special Challenges in Obtaining Patient History (5 of 14) Anger and hostility
Friends, family, or bystanders may direct their anger and rage toward you.
Remain calm, reassuring, and gentle.
If the scene is not safe or secured, get it secured.<br>
Friends, family, or bystanders may direct their anger and rage toward you.
Remain calm, reassuring, and gentle.
If the scene is not safe or secured, get it secured.<br>
87
Special Challenges in Obtaining Patient History (6 of 14) Intoxication
Do not put an intoxicated patient in a position where he or she feels threatened.
Potential for violence and a physical confrontation is high.
Alcohol dulls a patient’s senses.<br>
Do not put an intoxicated patient in a position where he or she feels threatened.
Potential for violence and a physical confrontation is high.
Alcohol dulls a patient’s senses.<br>
88
Special Challenges in Obtaining Patient History (7 of 14) Crying
A patient who cries may be sad, in pain, or emotionally overwhelmed.
Remain calm; be patient, reassuring, and confident; and maintain a soft voice.<br>
A patient who cries may be sad, in pain, or emotionally overwhelmed.
Remain calm; be patient, reassuring, and confident; and maintain a soft voice.<br>
89
Special Challenges in Obtaining Patient History (8 of 14) Depression
Among the leading causes of disability worldwide
Symptoms include sadness, hopelessness, restlessness, irritability, sleeping and eating disorders, and a decreased energy level.
Be a good listener.<br>
Among the leading causes of disability worldwide
Symptoms include sadness, hopelessness, restlessness, irritability, sleeping and eating disorders, and a decreased energy level.
Be a good listener.<br>
90
Special Challenges in Obtaining Patient History (9 of 14) Confusing behavior or history
Conditions such as hypoxia, stroke, diabetes, trauma, medications, and other drugs could alter a patient’s explanation of events.
Older patients could have dementia, delirium, or Alzheimer’s disease.<br>
Conditions such as hypoxia, stroke, diabetes, trauma, medications, and other drugs could alter a patient’s explanation of events.
Older patients could have dementia, delirium, or Alzheimer’s disease.<br>
91
Special Challenges in Obtaining Patient History (10 of 14) Limited cognitive abilities
Keep your questions simple, and limit the use of medical terms.
Be alert for partial answers and keep asking questions.
Rely on the presence of family, caregivers, and friends to supply answers.<br>
Keep your questions simple, and limit the use of medical terms.
Be alert for partial answers and keep asking questions.
Rely on the presence of family, caregivers, and friends to supply answers.<br>
92
Cultural challenges
Do not use medical language.
Patients may prefer to speak with health care providers of the same gender.
Gain the assistance of the patient’s friends or family members.
Enlist the help of health care providers of the same culture or background, if possible. Special Challenges in Obtaining Patient History (11 of 14)<br>
Do not use medical language.
Patients may prefer to speak with health care providers of the same gender.
Gain the assistance of the patient’s friends or family members.
Enlist the help of health care providers of the same culture or background, if possible. Special Challenges in Obtaining Patient History (11 of 14)<br>
93
Language barriers
Find an interpreter, if possible.
If not, determine if the patient understands who you are.
Keep questions straightforward and brief.
Use hand gestures.
Be aware of the language diversity in your community. Special Challenges in Obtaining Patient History (12 of 14)<br>
Find an interpreter, if possible.
If not, determine if the patient understands who you are.
Keep questions straightforward and brief.
Use hand gestures.
Be aware of the language diversity in your community. Special Challenges in Obtaining Patient History (12 of 14)<br>
94
Special Challenges in Obtaining Patient History (13 of 14) Hearing problems
Ask questions slowly and clearly.
Use a stethoscope to function as a hearing aid.
Learn simple sign language to help with communication.
Use a pencil and paper.<br>
Ask questions slowly and clearly.
Use a stethoscope to function as a hearing aid.
Learn simple sign language to help with communication.
Use a pencil and paper.<br>
95
Special Challenges in Obtaining Patient History (14 of 14) Visual impairments
Identify yourself verbally when you enter the scene.
Return any items that have been moved to their previous positions.
Explain to the patient what is happening in each step of the vital signs assessment.<br>
Identify yourself verbally when you enter the scene.
Return any items that have been moved to their previous positions.
Explain to the patient what is happening in each step of the vital signs assessment.<br>
96
Secondary Assessment (1 of 4) May be performed on-scene, in the back of the ambulance en route to the hospital, or not at all
Purpose is to perform a systematic physical examination of the patient
May be a systematic head-to-toe secondary assessment or an assessment that focuses on a certain area or system of the body<br>
Purpose is to perform a systematic physical examination of the patient
May be a systematic head-to-toe secondary assessment or an assessment that focuses on a certain area or system of the body<br>
97
Secondary Assessment (2 of 4) How and what to assess:
Inspection—Look at the patient for abnormalities.
Palpation—Touch or feel the patient for abnormalities.
Auscultation—Listen to the sounds a body makes by using a stethoscope.<br>
Inspection—Look at the patient for abnormalities.
Palpation—Touch or feel the patient for abnormalities.
Auscultation—Listen to the sounds a body makes by using a stethoscope.<br>
98
Secondary Assessment (3 of 4) Use the mnemonic DCAP-BTLS.
Compare findings on one side of the body with the other side when possible.<br>
Compare findings on one side of the body with the other side when possible.<br>
99
Secondary Assessment (4 of 4) Systematically assess the patient—secondary assessment
Goal is to identify hidden injuries or identify causes missed during 60- to 90-second exam during primary assessment.<br>
Goal is to identify hidden injuries or identify causes missed during 60- to 90-second exam during primary assessment.<br>
100
Focused Assessment Performed on patients who have sustained nonsignificant MOIs or on responsive medical patients
Typically based on the chief complaint
Goal is to focus your attention on the body part or systems affected by the priority problems<br>
Typically based on the chief complaint
Goal is to focus your attention on the body part or systems affected by the priority problems<br>
101
Expose the patient’s chest.
Look for signs of airway obstruction.
Inspect for symmetry.
Listen to breath sounds.
Measure the respiratory rate.
Look for retractions and increased work of breathing. Respiratory System (1 of 7)<br>
Look for signs of airway obstruction.
Inspect for symmetry.
Listen to breath sounds.
Measure the respiratory rate.
Look for retractions and increased work of breathing. Respiratory System (1 of 7)<br>
102
Respiratory System (2 of 7) Respiratory rate
A normal rate in adults ranges from 12 to 20 breaths/min.
Children breathe at even faster rates.
Count the number of breaths in a 30-second period and multiply by two.<br>
A normal rate in adults ranges from 12 to 20 breaths/min.
Children breathe at even faster rates.
Count the number of breaths in a 30-second period and multiply by two.<br>
103
Respiratory System (3 of 7) Respiratory rhythm
Regular
The time from one peak chest rise to the next is fairly consistent
Irregular
The respirations vary or the rate changes frequently<br>
Regular
The time from one peak chest rise to the next is fairly consistent
Irregular
The respirations vary or the rate changes frequently<br>
104
Respiratory System (4 of 7) Quality of breathing
Normal breathing is silent.
Breathing accompanied by other sounds may indicate a significant respiratory problem.<br>
Normal breathing is silent.
Breathing accompanied by other sounds may indicate a significant respiratory problem.<br>
105
Respiratory System (5 of 7) Depth of breathing
Amount of air the patient exchanges depends on the rate and tidal volume
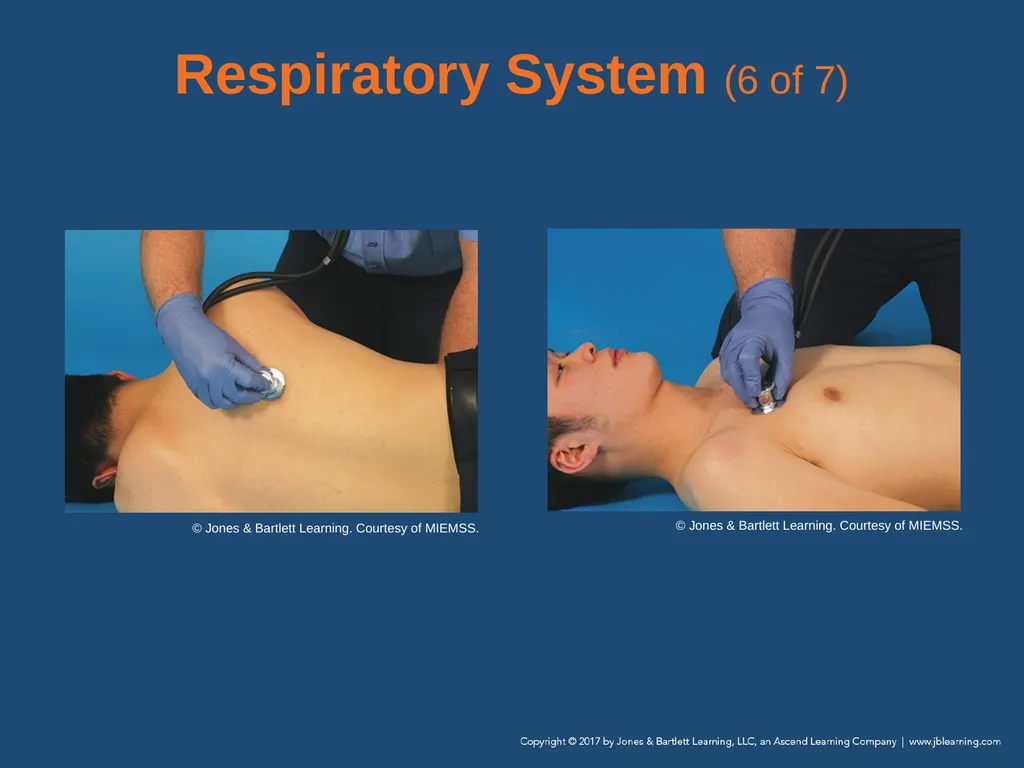
Breath sounds
You can almost always hear breath sounds better from the patient’s back.<br>
Amount of air the patient exchanges depends on the rate and tidal volume
Breath sounds
You can almost always hear breath sounds better from the patient’s back.<br>
106
Respiratory System (6 of 7) © Jones & Bartlett Learning. Courtesy of MIEMSS. © Jones & Bartlett Learning. Courtesy of MIEMSS.<br>
107
Respiratory System (7 of 7) What are you listening for?
Normal breath sounds
Snoring breath sounds
Wheezing breath sounds
Crackles
Rhonchi
Stridor<br>
Normal breath sounds
Snoring breath sounds
Wheezing breath sounds
Crackles
Rhonchi
Stridor<br>
108
Cardiovascular System (1 of 10) Look for trauma to the chest and listen for breath sounds.
Consider the pulse, respiratory rate, and blood pressure.
Pay attention to rate, quality, and rhythm.<br>
Consider the pulse, respiratory rate, and blood pressure.
Pay attention to rate, quality, and rhythm.<br>
109
Cardiovascular System (2 of 10) Consider your findings when assessing the skin.
Check and compare distal pulses.
Consider auscultation for abnormal heart sounds.<br>
Check and compare distal pulses.
Consider auscultation for abnormal heart sounds.<br>
110
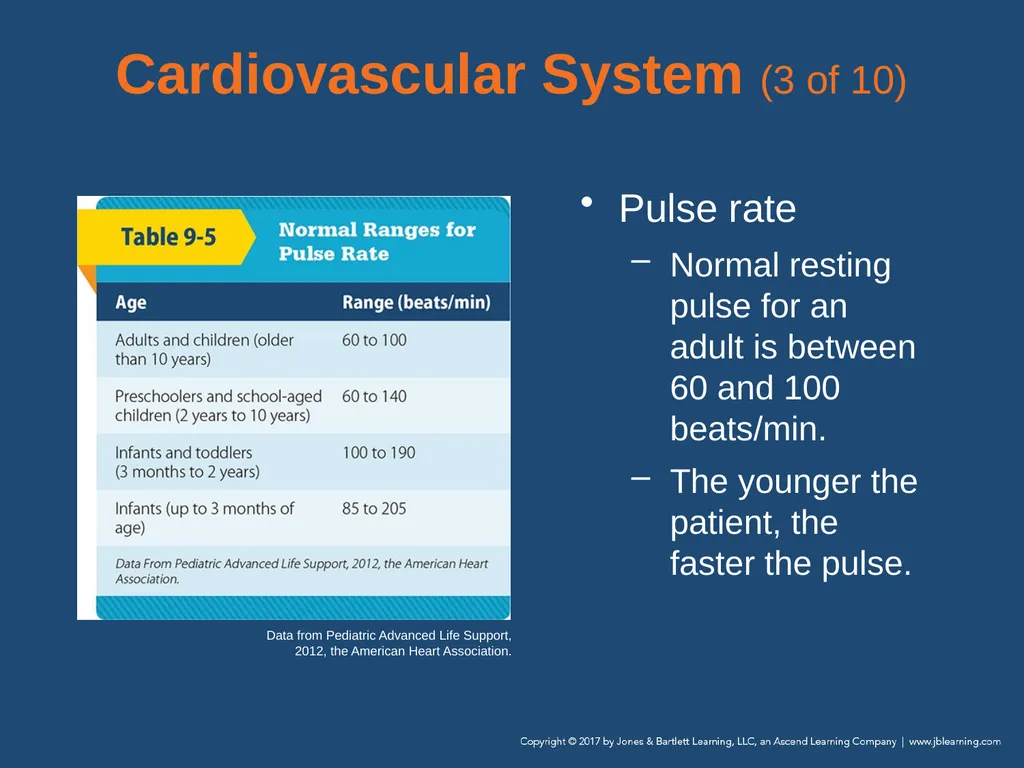
Cardiovascular System (3 of 10) Pulse rate
Normal resting pulse for an adult is between 60 and 100 beats/min.
The younger the patient, the faster the pulse. Data from Pediatric Advanced Life Support, 2012, the American Heart Association.<br>
Normal resting pulse for an adult is between 60 and 100 beats/min.
The younger the patient, the faster the pulse. Data from Pediatric Advanced Life Support, 2012, the American Heart Association.<br>
111
Cardiovascular System (4 of 10) Pulse quality
Describe a stronger than normal pulse as “bounding.”
A pulse that is weak and difficult to feel is described as “weak” or “thready.”<br>
Describe a stronger than normal pulse as “bounding.”
A pulse that is weak and difficult to feel is described as “weak” or “thready.”<br>
112
Cardiovascular System (5 of 10) Pulse rhythm
Regular
The interval between each contraction should be the same
The pulse should occur at a constant, regular rhythm
Irregular
If the heart periodically has an early or late beat
If a pulse beat is missed<br>
Regular
The interval between each contraction should be the same
The pulse should occur at a constant, regular rhythm
Irregular
If the heart periodically has an early or late beat
If a pulse beat is missed<br>
113
Cardiovascular System (6 of 10) Blood pressure
Pressure of circulating blood against the walls of the arteries
A drop in blood pressure may indicate:
A loss of blood or fluid components
A loss of vascular tone and sufficient arterial constriction
A cardiac pumping problem<br>
Pressure of circulating blood against the walls of the arteries
A drop in blood pressure may indicate:
A loss of blood or fluid components
A loss of vascular tone and sufficient arterial constriction
A cardiac pumping problem<br>
114
Cardiovascular System (7 of 10) Blood pressure (cont’d)
Decreased blood pressure is a late sign of shock.
Abnormally high blood pressure may result in a rupture or other critical damage in the arterial system.<br>
Decreased blood pressure is a late sign of shock.
Abnormally high blood pressure may result in a rupture or other critical damage in the arterial system.<br>
115
Cardiovascular System (8 of 10) A blood pressure cuff with gauge contains the following components:
A wide outer cuff
An inflatable wide bladder
A ball-pump with a one-way valve
A pressure gauge<br>
A wide outer cuff
An inflatable wide bladder
A ball-pump with a one-way valve
A pressure gauge<br>
116
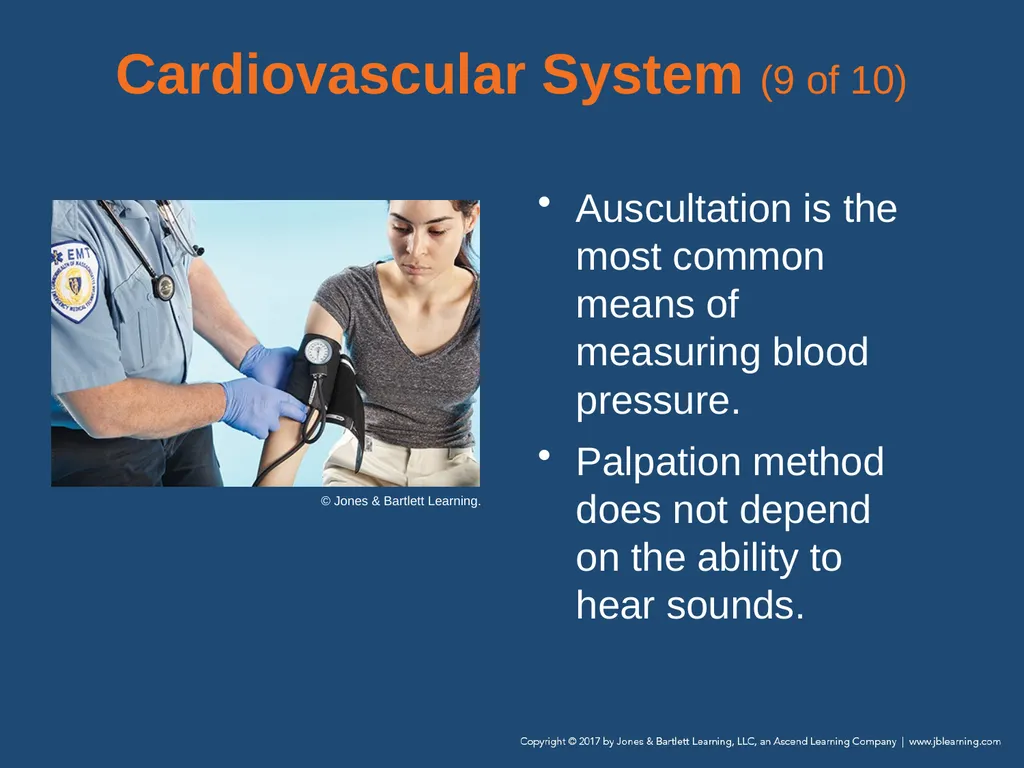
Cardiovascular System (9 of 10) Auscultation is the most common means of measuring blood pressure.
Palpation method does not depend on the ability to hear sounds. © Jones & Bartlett Learning.<br>
Palpation method does not depend on the ability to hear sounds. © Jones & Bartlett Learning.<br>
117
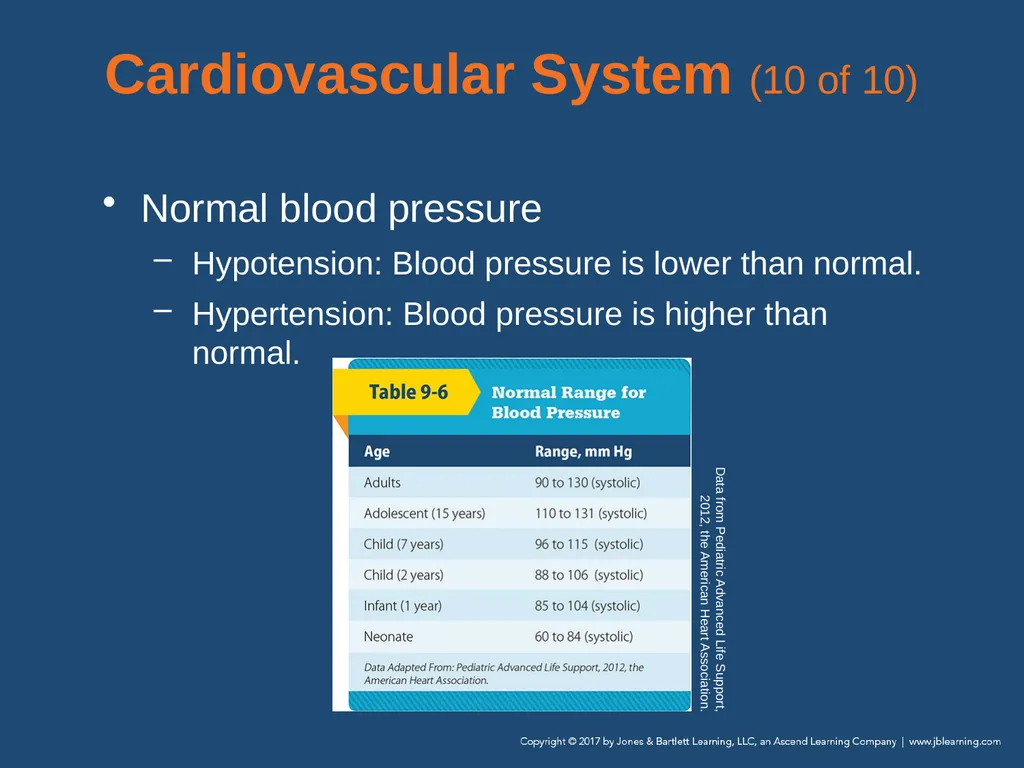
Cardiovascular System (10 of 10) Normal blood pressure
Hypotension: Blood pressure is lower than normal.
Hypertension: Blood pressure is higher than normal. Data from Pediatric Advanced Life Support, 2012, the American Heart Association.<br>
Hypotension: Blood pressure is lower than normal.
Hypertension: Blood pressure is higher than normal. Data from Pediatric Advanced Life Support, 2012, the American Heart Association.<br>
118
Neurologic System (1 of 2) Neurologic assessment
Should be performed with any patient who has:
Changes in mental status
A possible head injury
Stupor
Dizziness/drowsiness
Syncope<br>
Should be performed with any patient who has:
Changes in mental status
A possible head injury
Stupor
Dizziness/drowsiness
Syncope<br>
119
Neurologic System (2 of 2) Neurologic assessment (cont’d)
Evaluate the level of consciousness and orientation.
Use the AVPU scale if appropriate.
The Glasgow Coma Scale (GCS) can be helpful in providing additional information.<br>
Evaluate the level of consciousness and orientation.
Use the AVPU scale if appropriate.
The Glasgow Coma Scale (GCS) can be helpful in providing additional information.<br>
120
Pupils (1 of 4) The pupil is the black center portion of the eye.
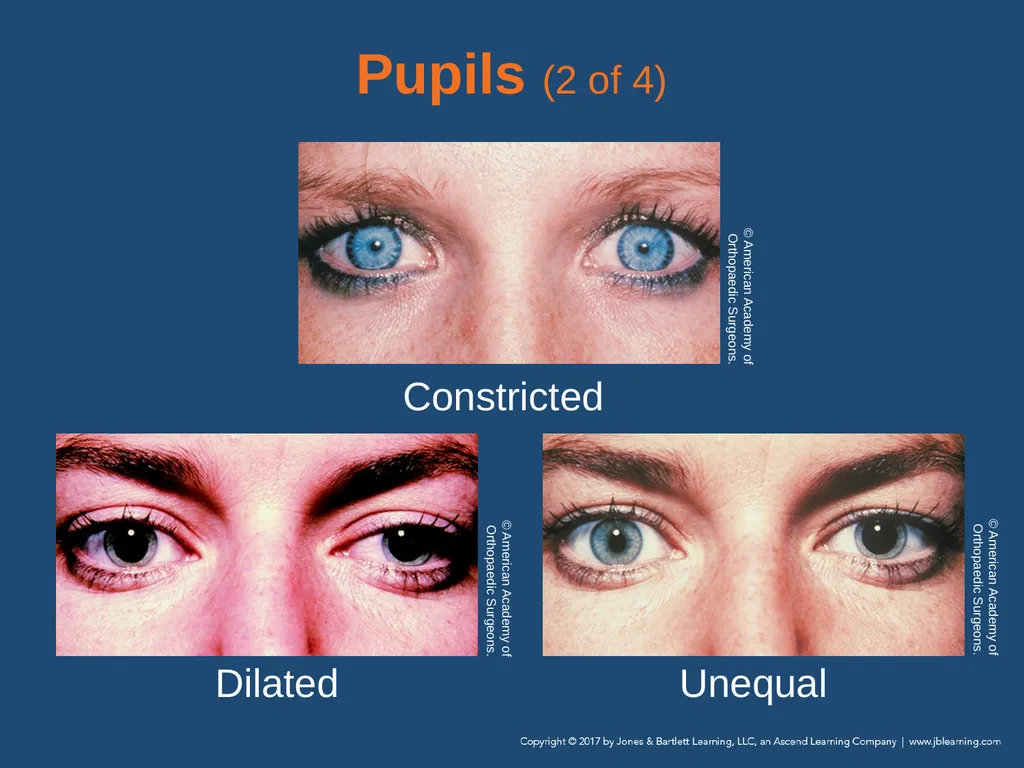
The pupils are normally round and of approximately equal size.
In the absence of any light, the pupils will become fully relaxed and dilated.<br>
The pupils are normally round and of approximately equal size.
In the absence of any light, the pupils will become fully relaxed and dilated.<br>
121
Pupils (2 of 4) Constricted Dilated Unequal © American Academy of Orthopaedic Surgeons. © American Academy of Orthopaedic Surgeons. © American Academy of Orthopaedic Surgeons.<br>
122
Pupils (3 of 4) A small number of the population exhibit unequal pupils (anisocoria).
Causes of depressed brain function:
Injury of the brain or brain stem
Trauma or stroke
Brain tumor
Inadequate oxygenation or perfusion
Drugs or toxins<br>
Causes of depressed brain function:
Injury of the brain or brain stem
Trauma or stroke
Brain tumor
Inadequate oxygenation or perfusion
Drugs or toxins<br>
123
Pupils (4 of 4) PEARRL is a useful assessment guide:
Pupils
Equal
And
Round
Regular in size
React to Light<br>
Pupils
Equal
And
Round
Regular in size
React to Light<br>
124
Neurovascular Status Check for bilateral muscle strength and weakness.
Complete a thorough sensory assessment.
Test for pain, sensations, and position.
Compare distal and proximal sensory and motor responses and one side with the other.<br>
Complete a thorough sensory assessment.
Test for pain, sensations, and position.
Compare distal and proximal sensory and motor responses and one side with the other.<br>
125
Anatomic Regions (1 of 6) Head, neck, and cervical spine
Palpate the scalp and skull.
Check the patient’s eyes.
Check the color of the sclera.
Assess the patient’s cheekbones.
Check the patient’s ears and nose for fluid.<br>
Palpate the scalp and skull.
Check the patient’s eyes.
Check the color of the sclera.
Assess the patient’s cheekbones.
Check the patient’s ears and nose for fluid.<br>
126
Anatomic Regions (2 of 6) Head, neck, and cervical spine (cont’d)
Check the upper (maxillae) and lower (mandible) jaw.
Open the patient’s mouth and look for any broken or missing teeth.
Note any unusual odors in the mouth.<br>
Check the upper (maxillae) and lower (mandible) jaw.
Open the patient’s mouth and look for any broken or missing teeth.
Note any unusual odors in the mouth.<br>
127
Anatomic Regions (3 of 6) Chest
Inspect, visualize, and palpate.
Watch for both sides of the chest to rise and fall together with normal breathing.
Observe for abnormal breathing signs.<br>
Inspect, visualize, and palpate.
Watch for both sides of the chest to rise and fall together with normal breathing.
Observe for abnormal breathing signs.<br>
128
Anatomic Regions (4 of 6) Abdomen
Palpate for tenderness, rigidity, and patient guarding.
Four quadrants:
Left upper quadrant (LUQ)
Left lower quadrant (LLQ)
Right upper quadrant (RUQ)
Right lower quadrant (RLQ)<br>
Palpate for tenderness, rigidity, and patient guarding.
Four quadrants:
Left upper quadrant (LUQ)
Left lower quadrant (LLQ)
Right upper quadrant (RUQ)
Right lower quadrant (RLQ)<br>
129
Anatomic Regions (5 of 6) Pelvis
Inspect for symmetry and any obvious signs of injury, bleeding, and deformity.
Extremities
Inspect for symmetry, cuts, bruises, swelling, obvious injuries, and bleeding.
Palpate for deformities.
Check for pulses and motor and sensory functions.<br>
Inspect for symmetry and any obvious signs of injury, bleeding, and deformity.
Extremities
Inspect for symmetry, cuts, bruises, swelling, obvious injuries, and bleeding.
Palpate for deformities.
Check for pulses and motor and sensory functions.<br>
130
Anatomic Regions (6 of 6) Posterior body
Inspect the back for DCAP-BTLS, symmetry, and open wounds
Palpate the spine from the neck to the pelvis for tenderness and deformity.<br>
Inspect the back for DCAP-BTLS, symmetry, and open wounds
Palpate the spine from the neck to the pelvis for tenderness and deformity.<br>
131
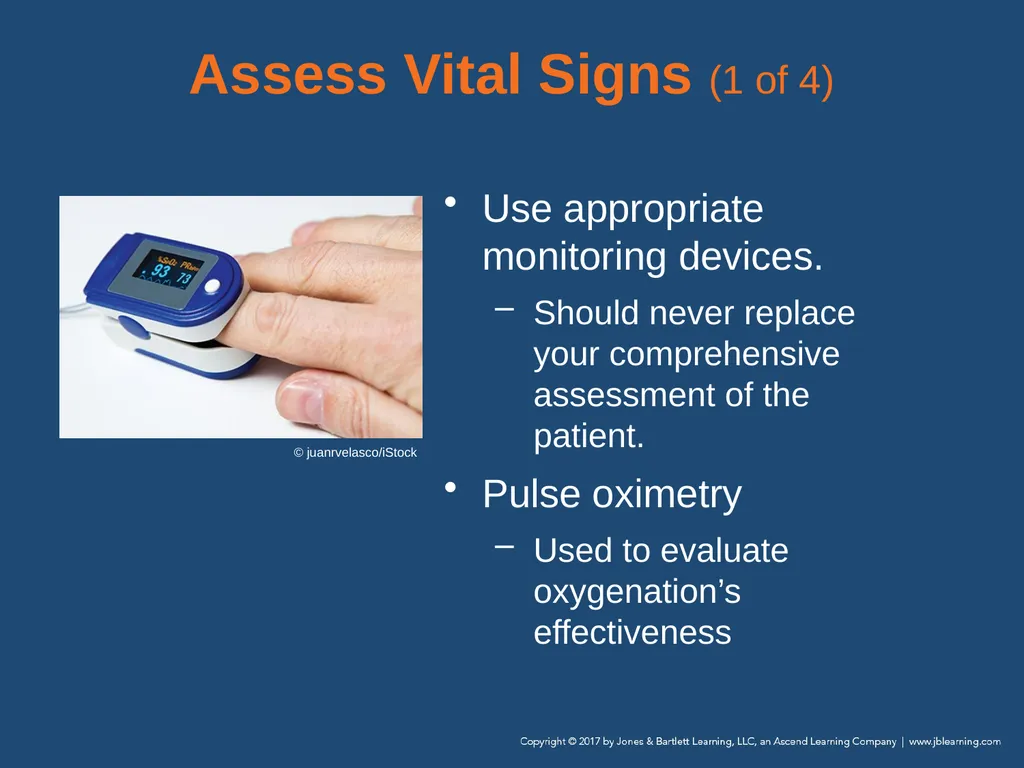
Assess Vital Signs (1 of 4) Use appropriate monitoring devices.
Should never replace your comprehensive assessment of the patient.
Pulse oximetry
Used to evaluate oxygenation’s effectiveness © juanrvelasco/iStock<br>
Should never replace your comprehensive assessment of the patient.
Pulse oximetry
Used to evaluate oxygenation’s effectiveness © juanrvelasco/iStock<br>
132
Assess Vital Signs (2 of 4) Pulse oximetry (cont’d)
Measures the oxygen saturation of hemoglobin in the capillary beds
Patients with difficulty breathing should receive oxygen regardless of their pulse oximetry value.<br>
Measures the oxygen saturation of hemoglobin in the capillary beds
Patients with difficulty breathing should receive oxygen regardless of their pulse oximetry value.<br>
133
Assess Vital Signs (3 of 4) Capnography
Can quickly provide information on a patient’s ventilation, circulation, and metabolism
Blood glucometry
Measures the level of glucose in the bloodstream<br>
Can quickly provide information on a patient’s ventilation, circulation, and metabolism
Blood glucometry
Measures the level of glucose in the bloodstream<br>
134
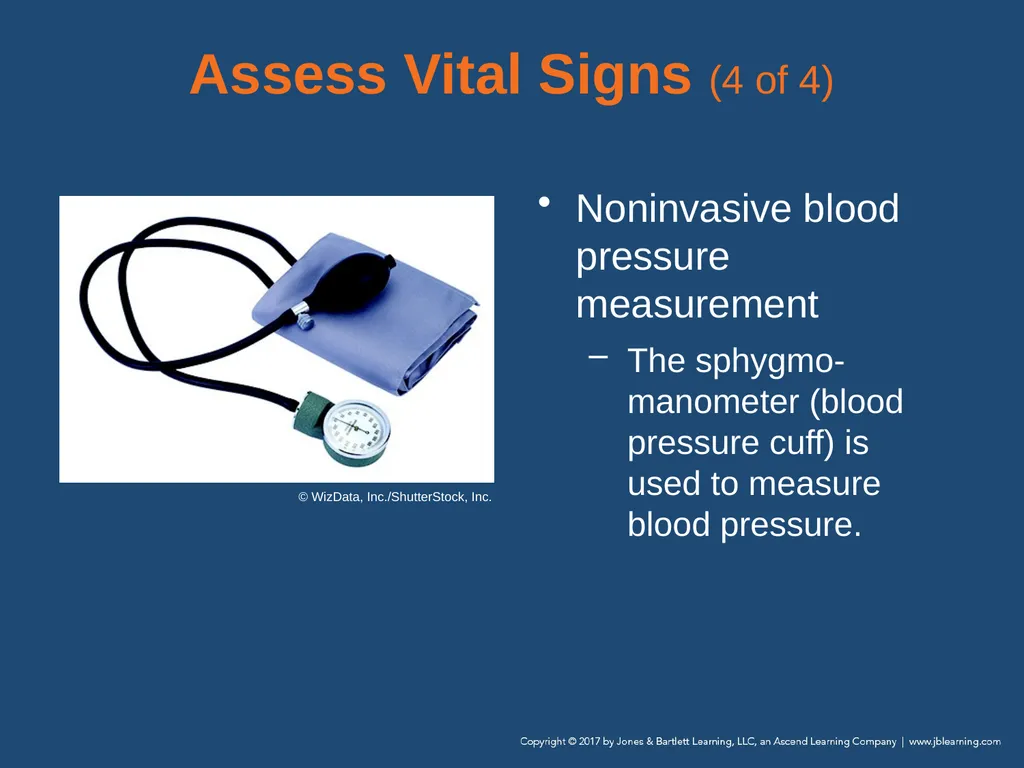
Assess Vital Signs (4 of 4) Noninvasive blood pressure measurement
The sphygmo-manometer (blood pressure cuff) is used to measure blood pressure. © WizData, Inc./ShutterStock, Inc.<br>
The sphygmo-manometer (blood pressure cuff) is used to measure blood pressure. © WizData, Inc./ShutterStock, Inc.<br>
135
Reassessment (1 of 4) Perform at regular intervals during the assessment process
Repeat the primary assessment.
Reassess vital signs.
Compare with the baseline vital signs obtained during the primary assessment.
Look for trends.<br>
Repeat the primary assessment.
Reassess vital signs.
Compare with the baseline vital signs obtained during the primary assessment.
Look for trends.<br>
136
Reassessment (2 of 4) Reassess the chief complaint.
Ask and answer the following questions:
Is the current treatment improving the patient’s condition?
Has an already identified problem gotten better?
Has an already identified problem gotten worse?
What is the nature of any newly identified problems?<br>
Ask and answer the following questions:
Is the current treatment improving the patient’s condition?
Has an already identified problem gotten better?
Has an already identified problem gotten worse?
What is the nature of any newly identified problems?<br>
137
Reassessment (3 of 4) Recheck interventions.
Check all interventions.
Most important are the patient’s ABCs.
Ensure management of bleeding.
Ensure adequacy of other interventions, and consider the need for new interventions.<br>
Check all interventions.
Most important are the patient’s ABCs.
Ensure management of bleeding.
Ensure adequacy of other interventions, and consider the need for new interventions.<br>
138
Reassessment (4 of 4) Identify and treat changes in the patient’s condition.
Document any changes, whether positive or negative.
Reassess the patient.
Unstable patients: approximately every 5 minutes
Stable patients: approximately every 15 minutes<br>
Document any changes, whether positive or negative.
Reassess the patient.
Unstable patients: approximately every 5 minutes
Stable patients: approximately every 15 minutes<br>
139
Review During the scene size-up, you should routinely determine all of the following, EXCEPT:
the mechanism of injury or nature of illness.
the ratio of pediatric patients to adult patients.
whether or not additional resources are needed.
if there are any hazards that will jeopardize safety.<br>
the mechanism of injury or nature of illness.
the ratio of pediatric patients to adult patients.
whether or not additional resources are needed.
if there are any hazards that will jeopardize safety.<br>
140
Review Answer: B
Rationale: Components of the scene size-up—after taking standard precautions—include determining if the scene is safe for entry, determining the mechanism of injury or nature of illness, determining the number of patients, and determining if additional resources are needed at the scene.<br>
Rationale: Components of the scene size-up—after taking standard precautions—include determining if the scene is safe for entry, determining the mechanism of injury or nature of illness, determining the number of patients, and determining if additional resources are needed at the scene.<br>
141
Review During the scene size-up, you should routinely determine all of the following, EXCEPT:
the mechanism of injury or nature of illness. Rationale: This is part of the scene size-up.
the ratio of pediatric patients to adult patients. Rationale: Correct answer
whether or not additional resources are needed. Rationale: This is part of the scene size-up.
if there are any hazards that will jeopardize safety. Rationale: This is part of the scene size-up.<br>
the mechanism of injury or nature of illness. Rationale: This is part of the scene size-up.
the ratio of pediatric patients to adult patients. Rationale: Correct answer
whether or not additional resources are needed. Rationale: This is part of the scene size-up.
if there are any hazards that will jeopardize safety. Rationale: This is part of the scene size-up.<br>
142
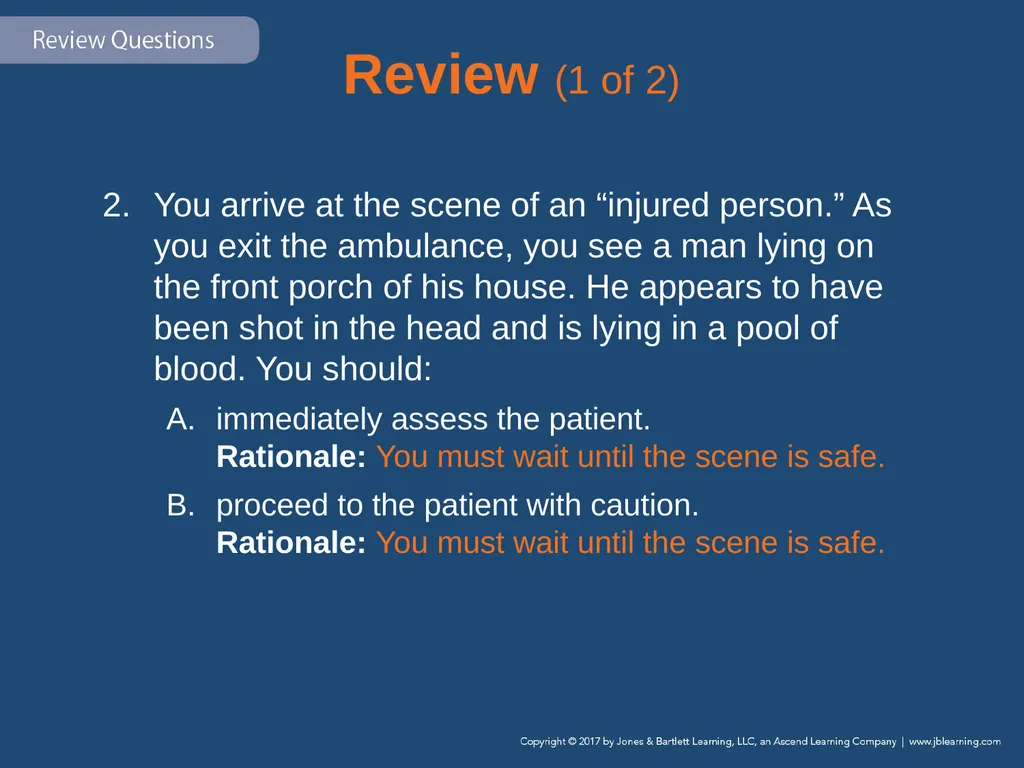
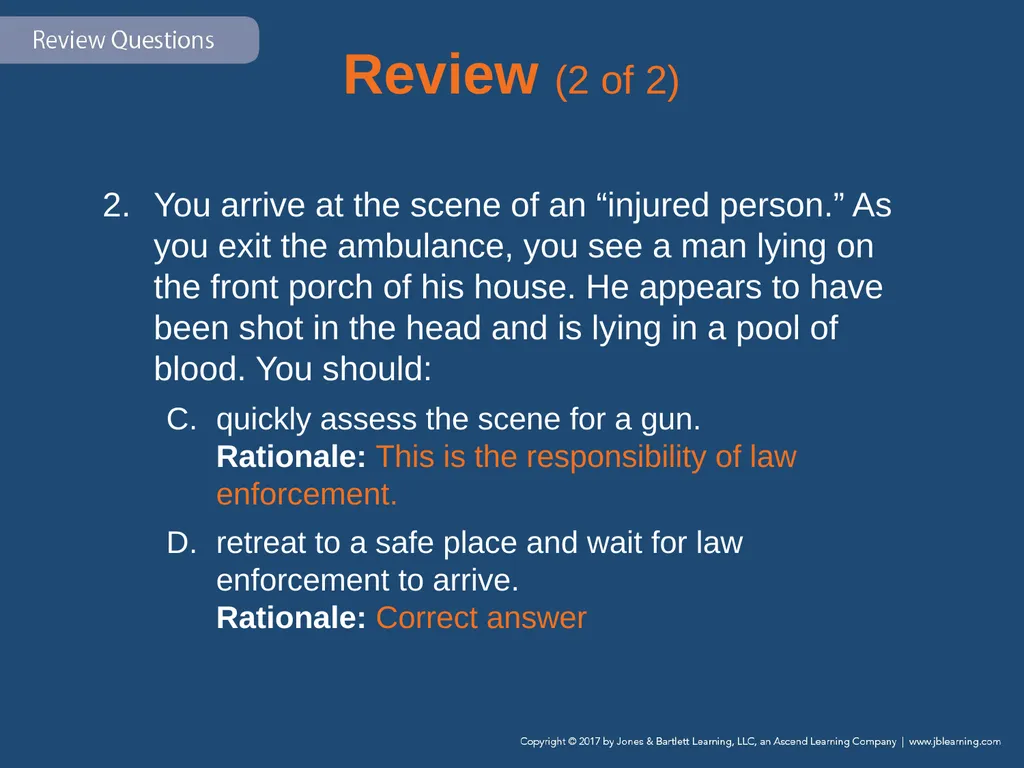
Review You arrive at the scene of an “injured person.” As you exit the ambulance, you see a man lying on the front porch of his house. He appears to have been shot in the head and is lying in a pool of blood. You should:
immediately assess the patient.
proceed to the patient with caution.
quickly assess the scene for a gun.
retreat to a safe place and wait for law enforcement to arrive.<br>
immediately assess the patient.
proceed to the patient with caution.
quickly assess the scene for a gun.
retreat to a safe place and wait for law enforcement to arrive.<br>
143
Review Answer: D
Rationale: Your primary responsibility as an EMT is to protect yourself. Prior to entering any scene, you must assess for potential dangers. In cases where violence has occurred, you must retreat to a safe place and wait for law enforcement personnel to arrive.<br>
Rationale: Your primary responsibility as an EMT is to protect yourself. Prior to entering any scene, you must assess for potential dangers. In cases where violence has occurred, you must retreat to a safe place and wait for law enforcement personnel to arrive.<br>
144
Review (1 of 2) You arrive at the scene of an “injured person.” As you exit the ambulance, you see a man lying on the front porch of his house. He appears to have been shot in the head and is lying in a pool of blood. You should:
immediately assess the patient. Rationale: You must wait until the scene is safe.
proceed to the patient with caution. Rationale: You must wait until the scene is safe.<br>
immediately assess the patient. Rationale: You must wait until the scene is safe.
proceed to the patient with caution. Rationale: You must wait until the scene is safe.<br>
145
Review (2 of 2) You arrive at the scene of an “injured person.” As you exit the ambulance, you see a man lying on the front porch of his house. He appears to have been shot in the head and is lying in a pool of blood. You should:
quickly assess the scene for a gun. Rationale: This is the responsibility of law enforcement.
retreat to a safe place and wait for law enforcement to arrive. Rationale: Correct answer<br>
quickly assess the scene for a gun. Rationale: This is the responsibility of law enforcement.
retreat to a safe place and wait for law enforcement to arrive. Rationale: Correct answer<br>
146
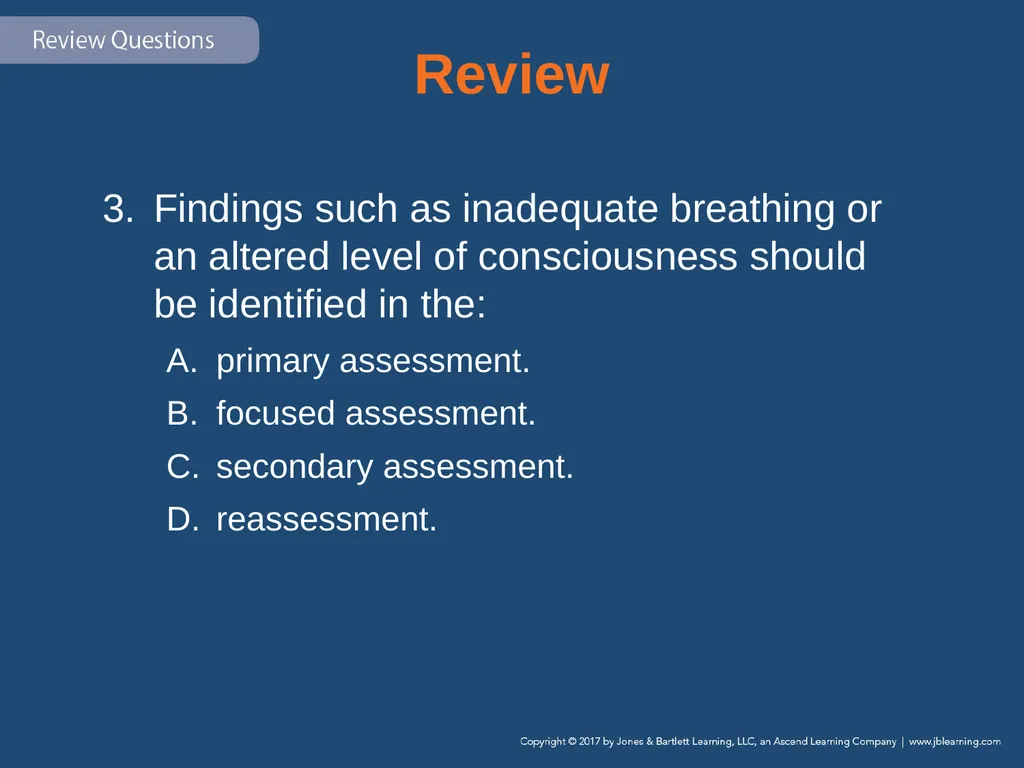
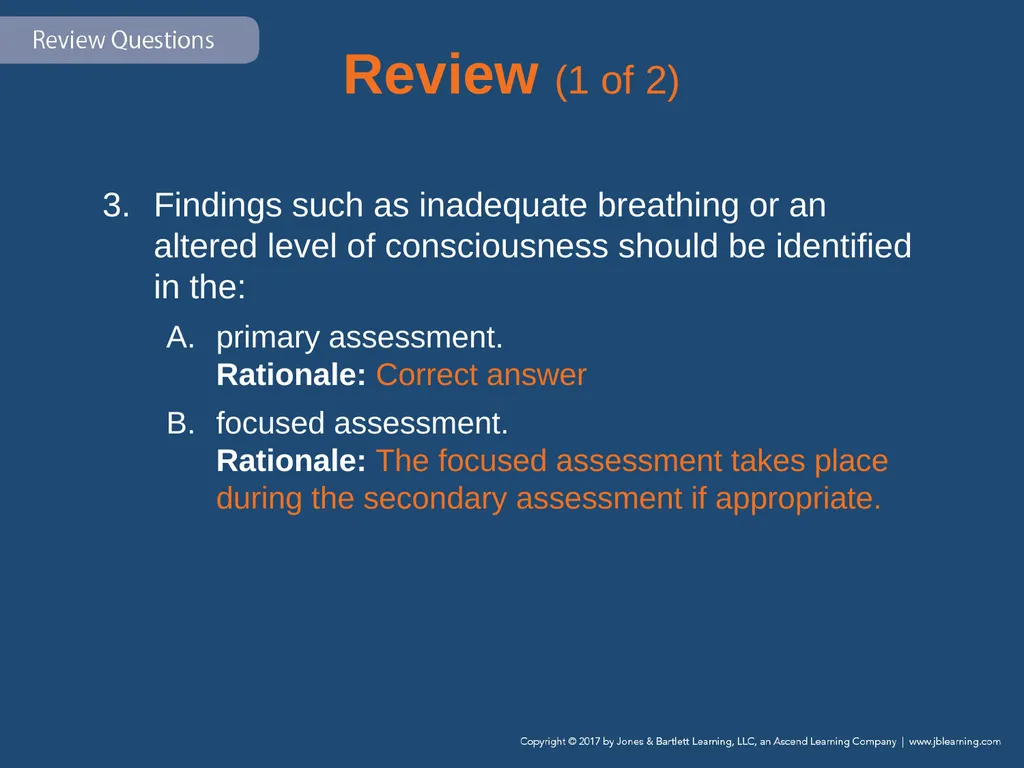
Review Findings such as inadequate breathing or an altered level of consciousness should be identified in the:
primary assessment.
focused assessment.
secondary assessment.
reassessment.<br>
primary assessment.
focused assessment.
secondary assessment.
reassessment.<br>
147
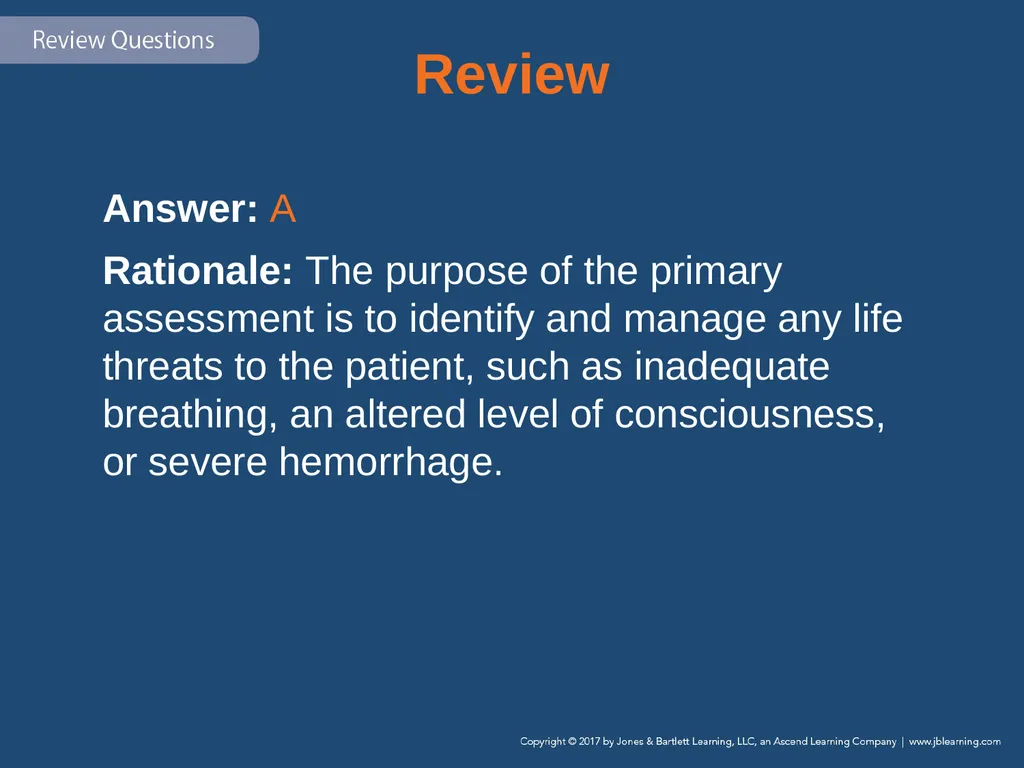
Review Answer: A
Rationale: The purpose of the primary assessment is to identify and manage any life threats to the patient, such as inadequate breathing, an altered level of consciousness, or severe hemorrhage.<br>
Rationale: The purpose of the primary assessment is to identify and manage any life threats to the patient, such as inadequate breathing, an altered level of consciousness, or severe hemorrhage.<br>
148
Review (1 of 2) Findings such as inadequate breathing or an altered level of consciousness should be identified in the:
primary assessment. Rationale: Correct answer
focused assessment. Rationale: The focused assessment takes place during the secondary assessment if appropriate.<br>
primary assessment. Rationale: Correct answer
focused assessment. Rationale: The focused assessment takes place during the secondary assessment if appropriate.<br>
149
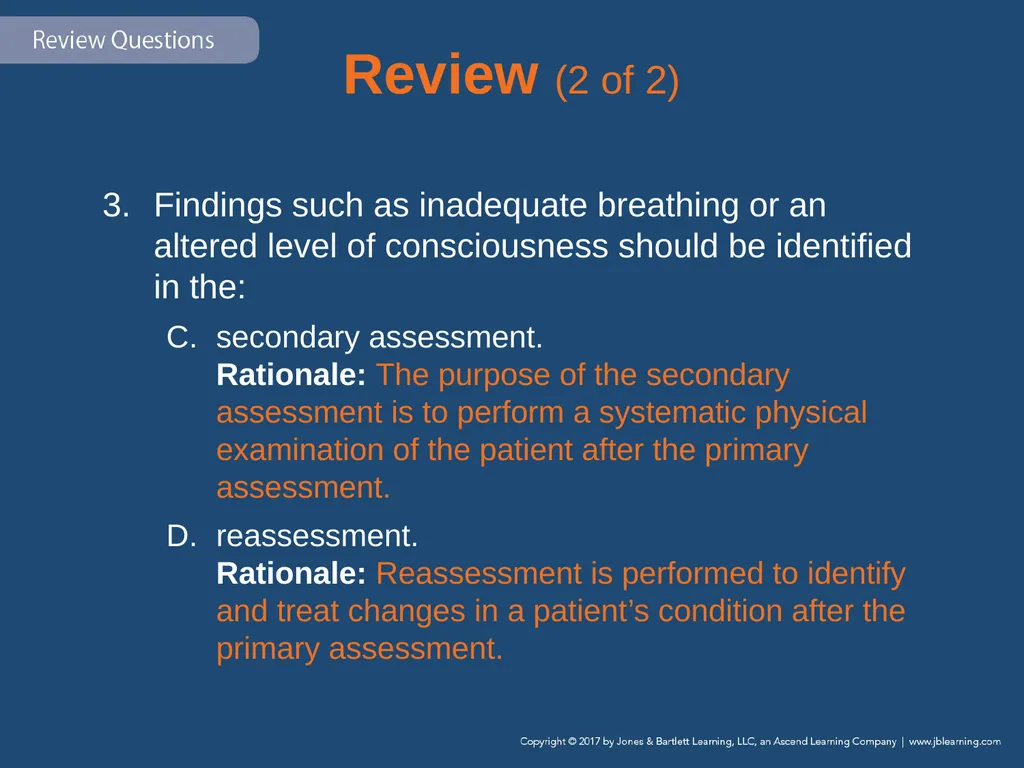
Review (2 of 2) Findings such as inadequate breathing or an altered level of consciousness should be identified in the:
secondary assessment. Rationale: The purpose of the secondary assessment is to perform a systematic physical examination of the patient after the primary assessment.
reassessment. Rationale: Reassessment is performed to identify and treat changes in a patient’s condition after the primary assessment.<br>
secondary assessment. Rationale: The purpose of the secondary assessment is to perform a systematic physical examination of the patient after the primary assessment.
reassessment. Rationale: Reassessment is performed to identify and treat changes in a patient’s condition after the primary assessment.<br>
150
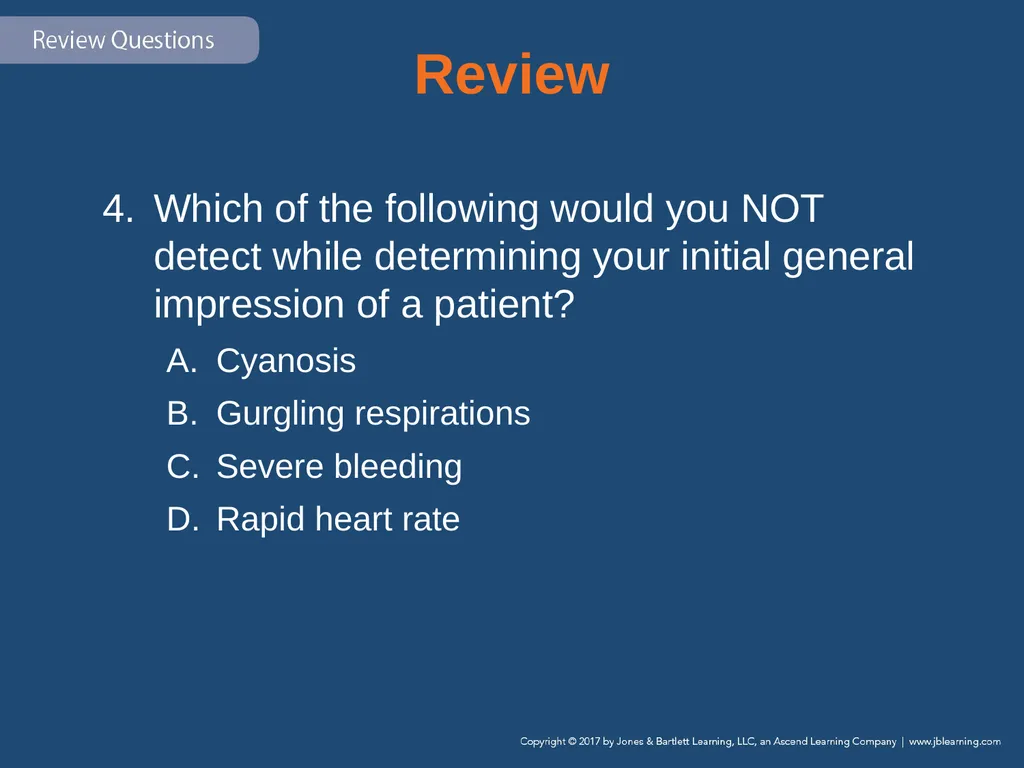
Review Which of the following would you NOT detect while determining your initial general impression of a patient?
Cyanosis
Gurgling respirations
Severe bleeding
Rapid heart rate<br>
Cyanosis
Gurgling respirations
Severe bleeding
Rapid heart rate<br>
151
Review Answer: D
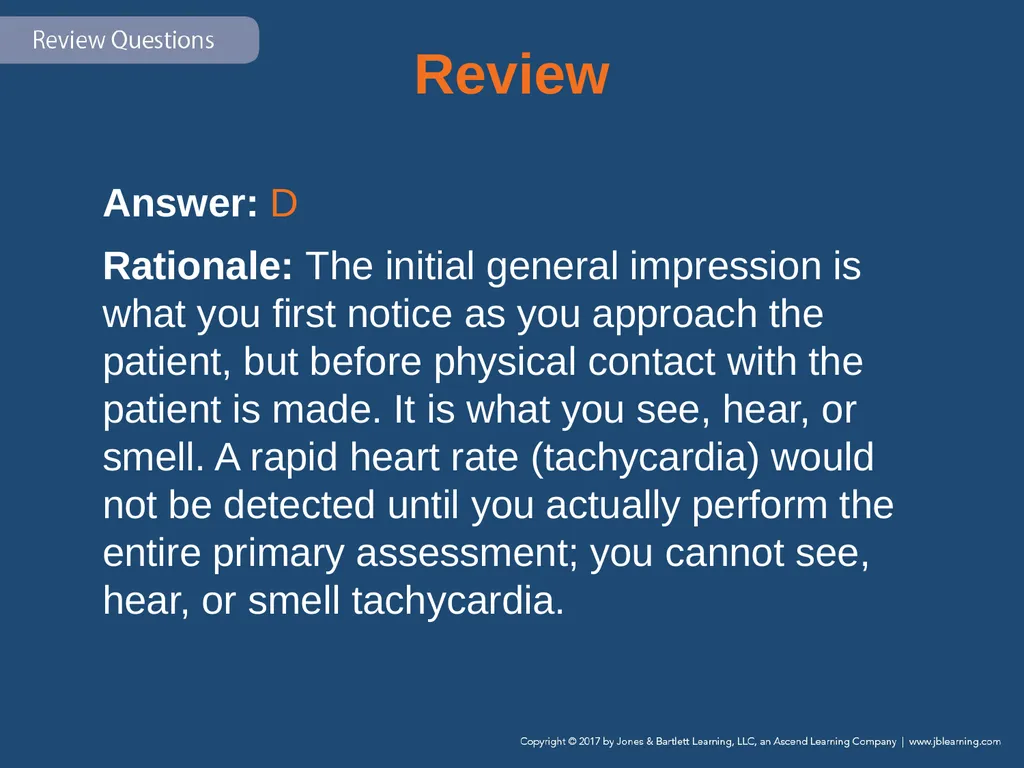
Rationale: The initial general impression is what you first notice as you approach the patient, but before physical contact with the patient is made. It is what you see, hear, or smell. A rapid heart rate (tachycardia) would not be detected until you actually perform the entire primary assessment; you cannot see, hear, or smell tachycardia.<br>
Rationale: The initial general impression is what you first notice as you approach the patient, but before physical contact with the patient is made. It is what you see, hear, or smell. A rapid heart rate (tachycardia) would not be detected until you actually perform the entire primary assessment; you cannot see, hear, or smell tachycardia.<br>
152
Review (1 of 2) Which of the following would you NOT detect while determining your initial general impression of a patient?
Cyanosis Rationale: You can see cyanosis while determining your initial general impression.
Gurgling respirations Rationale: You can hear gurgling while determining your initial general impression.<br>
Cyanosis Rationale: You can see cyanosis while determining your initial general impression.
Gurgling respirations Rationale: You can hear gurgling while determining your initial general impression.<br>
153
Review (2 of 2) Which of the following would you NOT detect while determining your initial general impression of a patient?
Severe bleeding Rationale: You can see bleeding while determining your initial general impression.
Rapid heart rate Rationale: Correct answer<br>
Severe bleeding Rationale: You can see bleeding while determining your initial general impression.
Rapid heart rate Rationale: Correct answer<br>
154
Review Your primary assessment of an elderly woman who fell reveals an altered level of consciousness and a large hematoma to her forehead. After protecting her spine and administering oxygen, you should:
reassess your interventions.
perform a rapid exam.
transport the patient immediately.
perform a focused assessment of her head.<br>
reassess your interventions.
perform a rapid exam.
transport the patient immediately.
perform a focused assessment of her head.<br>
155
Review Answer: B
Rationale: If any life-threatening problems are discovered in the primary assessment, they should be addressed immediately. The EMT should then perform a rapid exam to look for other potentially life-threatening injuries or conditions.<br>
Rationale: If any life-threatening problems are discovered in the primary assessment, they should be addressed immediately. The EMT should then perform a rapid exam to look for other potentially life-threatening injuries or conditions.<br>
156
Review (1 of 2) Your primary assessment of an elderly woman who fell reveals an altered level of consciousness and a large hematoma to her forehead. After protecting her spine and administering oxygen, you should:
reassess your interventions. Rationale: This is the last step of the patient assessment process.
perform a rapid exam. Rationale: Correct answer<br>
reassess your interventions. Rationale: This is the last step of the patient assessment process.
perform a rapid exam. Rationale: Correct answer<br>
157
Review (2 of 2) Your primary assessment of an elderly woman who fell reveals an altered level of consciousness and a large hematoma to her forehead. After protecting her spine and administering oxygen, you should:
transport the patient immediately. Rationale: This is determined after the completion of a rapid exam.
perform a focused assessment of her head. Rationale: This performed during the secondary assessment.<br>
transport the patient immediately. Rationale: This is determined after the completion of a rapid exam.
perform a focused assessment of her head. Rationale: This performed during the secondary assessment.<br>
158
Review A semiconscious patient pushes your
hand away when you pinch his earlobe. You should describe his level of consciousness as:
alert.
unresponsive.
responsive to painful stimuli.
responsive to verbal stimuli.<br>
alert.
unresponsive.
responsive to painful stimuli.
responsive to verbal stimuli.<br>
159
Review Answer: C
Rationale: Semiconscious patients are not alert, nor are they unresponsive. The fact that the patient pushes your hand away when you pinch his earlobe indicates that he is responsive to painful stimuli. If he opens his eyes or responds when you speak to him, he would be described as being responsive to verbal stimuli.<br>
Rationale: Semiconscious patients are not alert, nor are they unresponsive. The fact that the patient pushes your hand away when you pinch his earlobe indicates that he is responsive to painful stimuli. If he opens his eyes or responds when you speak to him, he would be described as being responsive to verbal stimuli.<br>
160
Review (1 of 2) A semiconscious patient pushes your hand away when you pinch his earlobe. You should describe his level of consciousness as:
alert. Rationale: This is when the patient’s eyes open spontaneously as you approach.
unresponsive. Rationale: This is when the patient does not respond to any stimulus.<br>
alert. Rationale: This is when the patient’s eyes open spontaneously as you approach.
unresponsive. Rationale: This is when the patient does not respond to any stimulus.<br>
161
Review (2 of 2) A semiconscious patient pushes your hand away when you pinch his earlobe. You should describe his level of consciousness as:
responsive to painful stimuli. Rationale: Correct answer
responsive to verbal stimuli. Rationale: This is when the patient’s eyes open with verbal stimuli and he or she tries to respond.<br>
responsive to painful stimuli. Rationale: Correct answer
responsive to verbal stimuli. Rationale: This is when the patient’s eyes open with verbal stimuli and he or she tries to respond.<br>
162
Review Assessment of an unconscious patient’s breathing begins by:
inserting an oral airway.
manually positioning the head.
assessing respiratory rate and depth.
clearing the mouth with suction as needed.<br>
inserting an oral airway.
manually positioning the head.
assessing respiratory rate and depth.
clearing the mouth with suction as needed.<br>
163
Review Answer: B
Rationale: You cannot assess or treat an unconscious patient’s breathing until the airway is patent—that is, open and free of obstructions. Manually open the patient’s airway (eg, head tilt–chin lift, jaw-thrust), use suction as needed to clear the airway of blood or other liquids, insert an airway adjunct to assist in maintaining airway patency, and then assess the patient’s respiratory effort.<br>
Rationale: You cannot assess or treat an unconscious patient’s breathing until the airway is patent—that is, open and free of obstructions. Manually open the patient’s airway (eg, head tilt–chin lift, jaw-thrust), use suction as needed to clear the airway of blood or other liquids, insert an airway adjunct to assist in maintaining airway patency, and then assess the patient’s respiratory effort.<br>
164
Review (1 of 2) Assessment of an unconscious patient’s breathing begins by:
inserting an oral airway. Rationale: You insert an airway adjunct to assist in maintaining airway patency after the head tilt–chin lift.
manually positioning the head. Rationale: Correct answer<br>
inserting an oral airway. Rationale: You insert an airway adjunct to assist in maintaining airway patency after the head tilt–chin lift.
manually positioning the head. Rationale: Correct answer<br>
165
Review (2 of 2) Assessment of an unconscious patient’s breathing begins by:
assessing respiratory rate and depth. Rationale: After the airway is opened and suctioned, then determine the patient’s respiratory effort by assessing the respiratory rate and depth.
clearing the mouth with suction as needed. Rationale: This is done after attempting to open the airway with proper positioning.<br>
assessing respiratory rate and depth. Rationale: After the airway is opened and suctioned, then determine the patient’s respiratory effort by assessing the respiratory rate and depth.
clearing the mouth with suction as needed. Rationale: This is done after attempting to open the airway with proper positioning.<br>
166
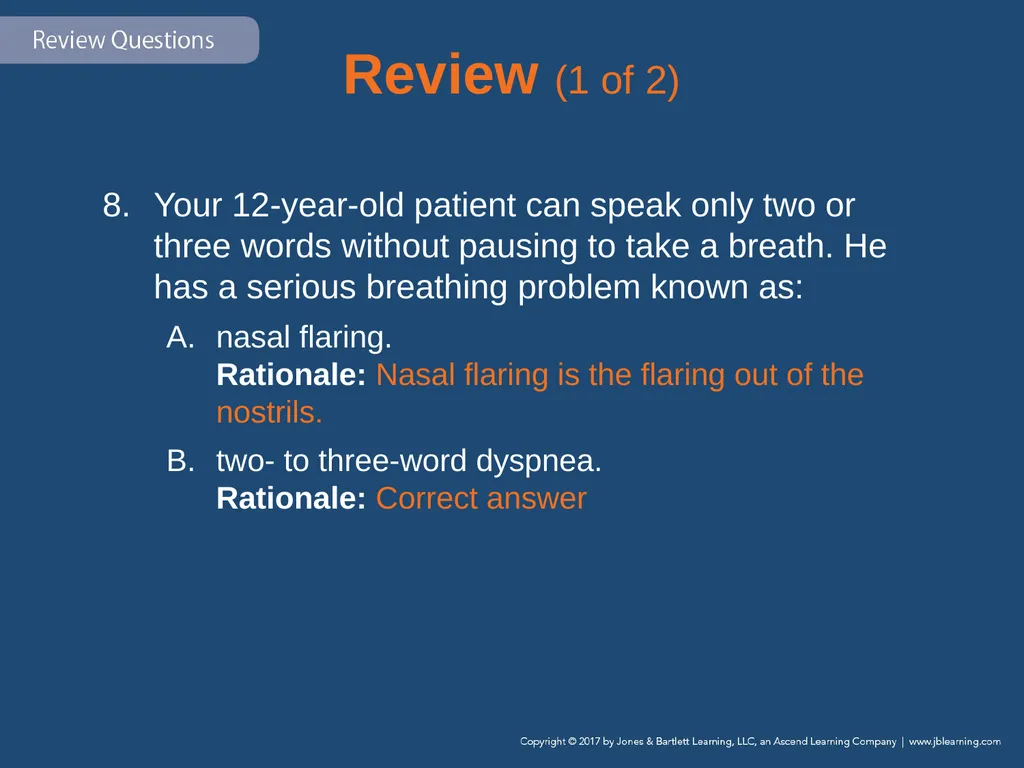
Review Your 12-year-old patient can speak only two or three words without pausing to take a breath. He has a serious breathing problem known as:
nasal flaring.
two- to three-word dyspnea.
labored breathing.
shallow respirations.<br>
nasal flaring.
two- to three-word dyspnea.
labored breathing.
shallow respirations.<br>
167
Review Answer: B
Rationale: Two- to three-word dyspnea is a severe breathing problem in which a patient can speak only two to three words at a time without pausing to take a breath.<br>
Rationale: Two- to three-word dyspnea is a severe breathing problem in which a patient can speak only two to three words at a time without pausing to take a breath.<br>
168
Review (1 of 2) Your 12-year-old patient can speak only two or three words without pausing to take a breath. He has a serious breathing problem known as:
nasal flaring. Rationale: Nasal flaring is the flaring out of the nostrils.
two- to three-word dyspnea. Rationale: Correct answer<br>
nasal flaring. Rationale: Nasal flaring is the flaring out of the nostrils.
two- to three-word dyspnea. Rationale: Correct answer<br>
169
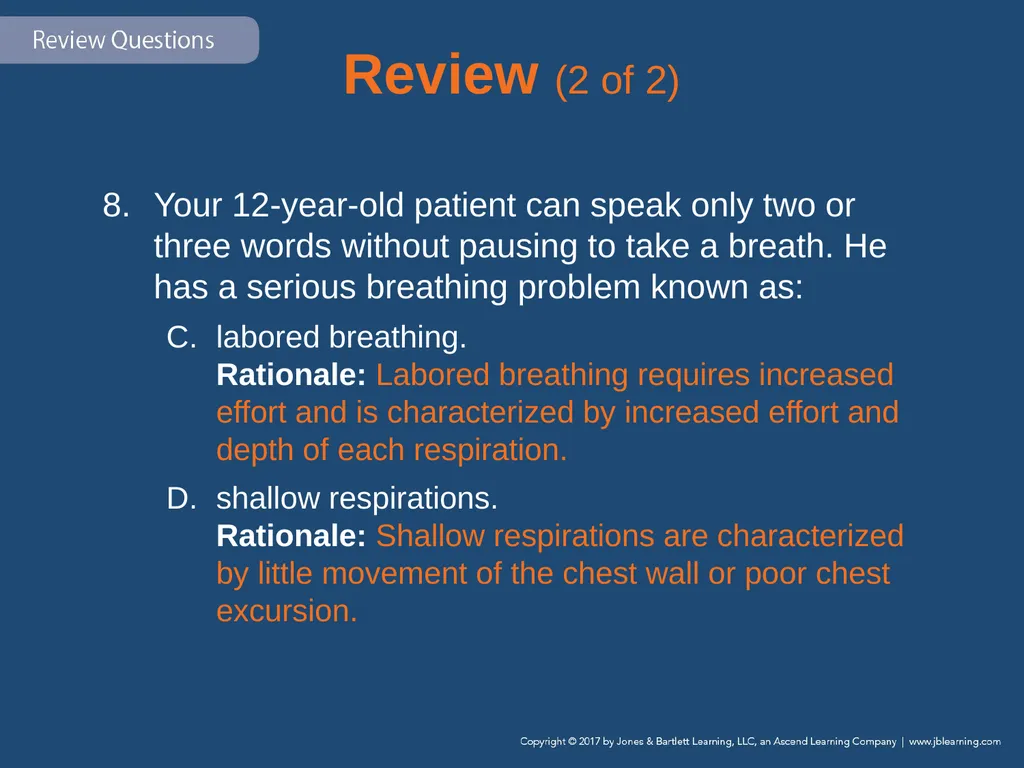
Review (2 of 2) Your 12-year-old patient can speak only two or three words without pausing to take a breath. He has a serious breathing problem known as:
labored breathing. Rationale: Labored breathing requires increased effort and is characterized by increased effort and depth of each respiration.
shallow respirations. Rationale: Shallow respirations are characterized by little movement of the chest wall or poor chest excursion.<br>
labored breathing. Rationale: Labored breathing requires increased effort and is characterized by increased effort and depth of each respiration.
shallow respirations. Rationale: Shallow respirations are characterized by little movement of the chest wall or poor chest excursion.<br>
170
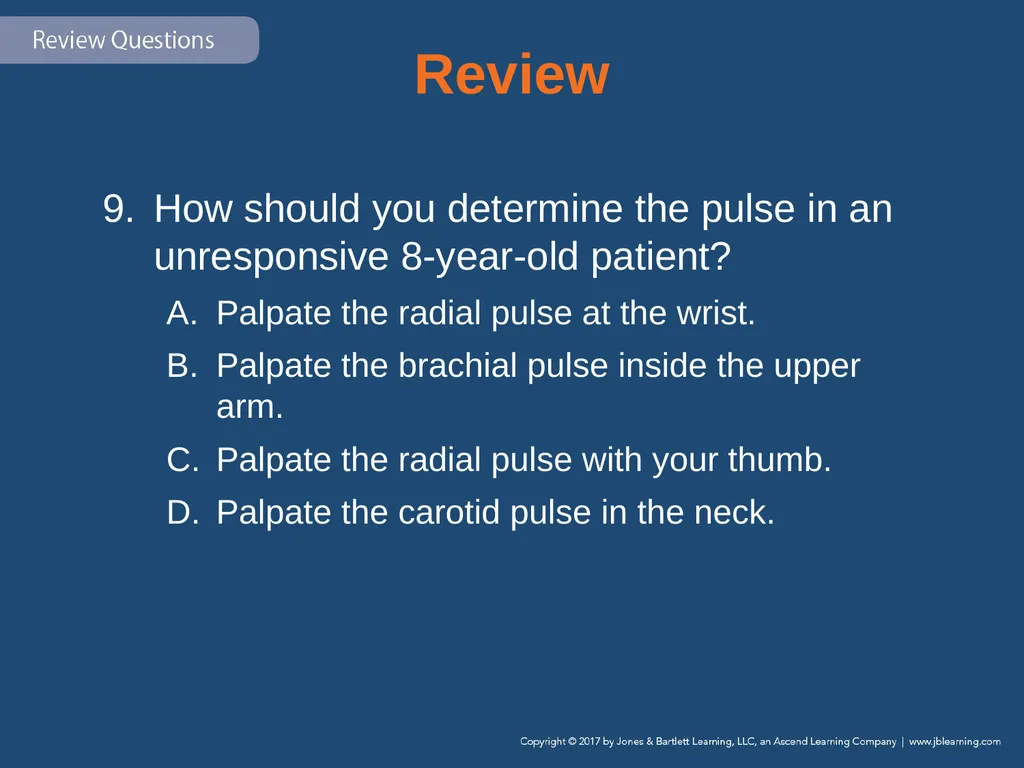
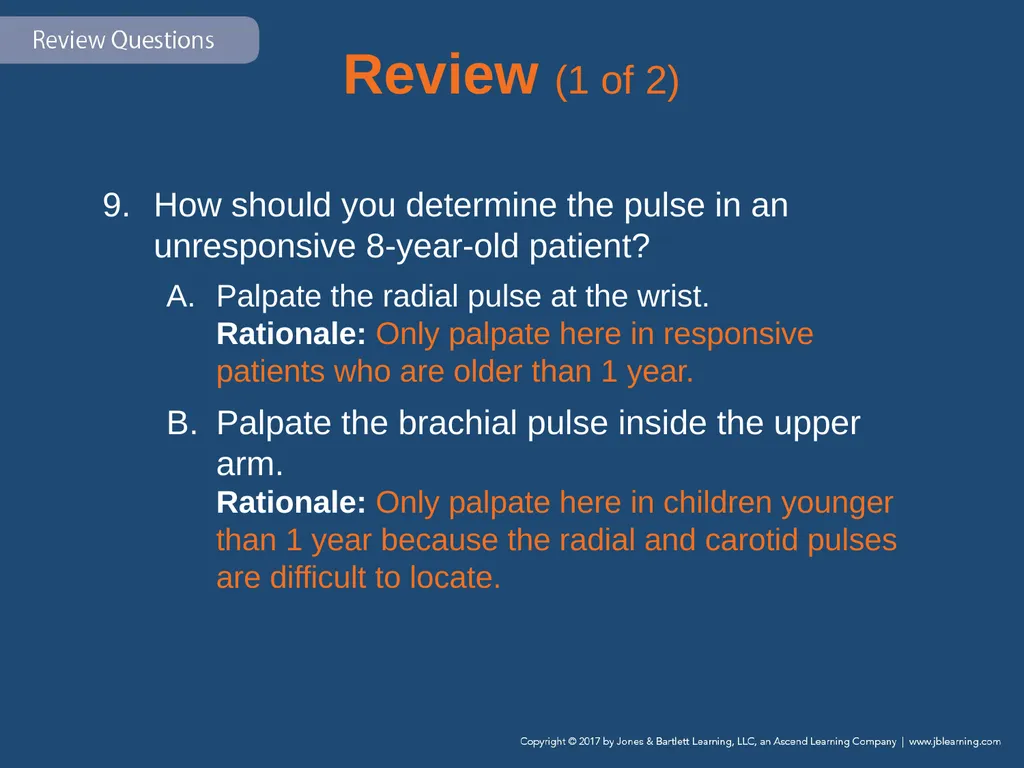
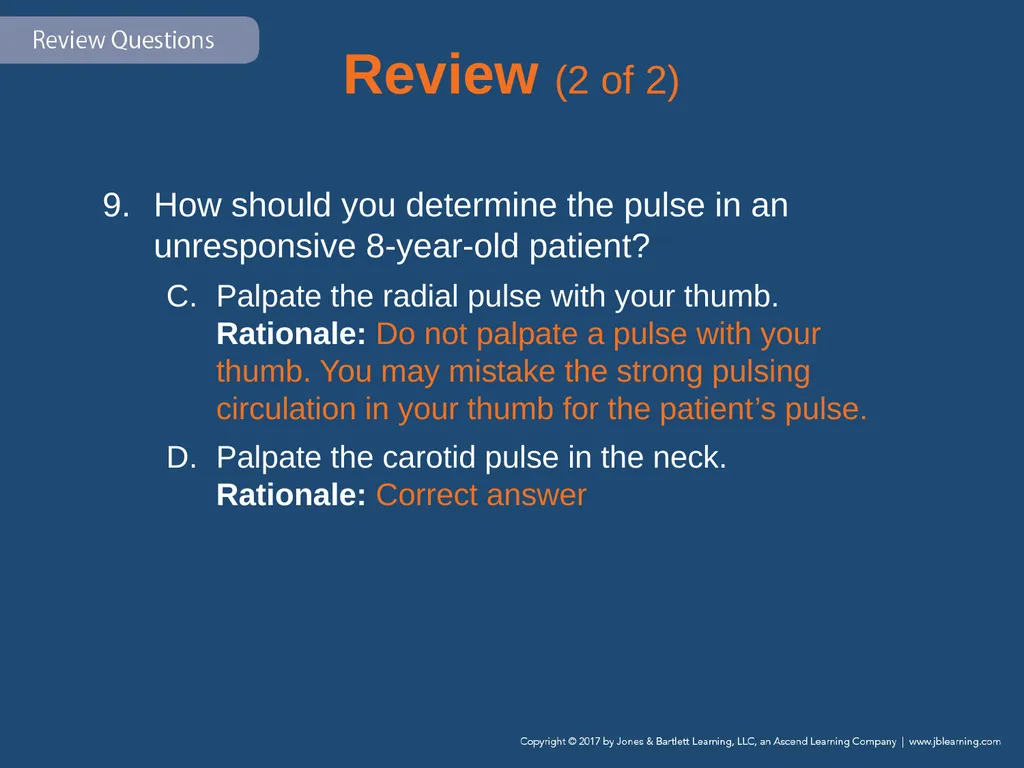
Review How should you determine the pulse in an unresponsive 8-year-old patient?
Palpate the radial pulse at the wrist.
Palpate the brachial pulse inside the upper arm.
Palpate the radial pulse with your thumb.
Palpate the carotid pulse in the neck.<br>
Palpate the radial pulse at the wrist.
Palpate the brachial pulse inside the upper arm.
Palpate the radial pulse with your thumb.
Palpate the carotid pulse in the neck.<br>
171
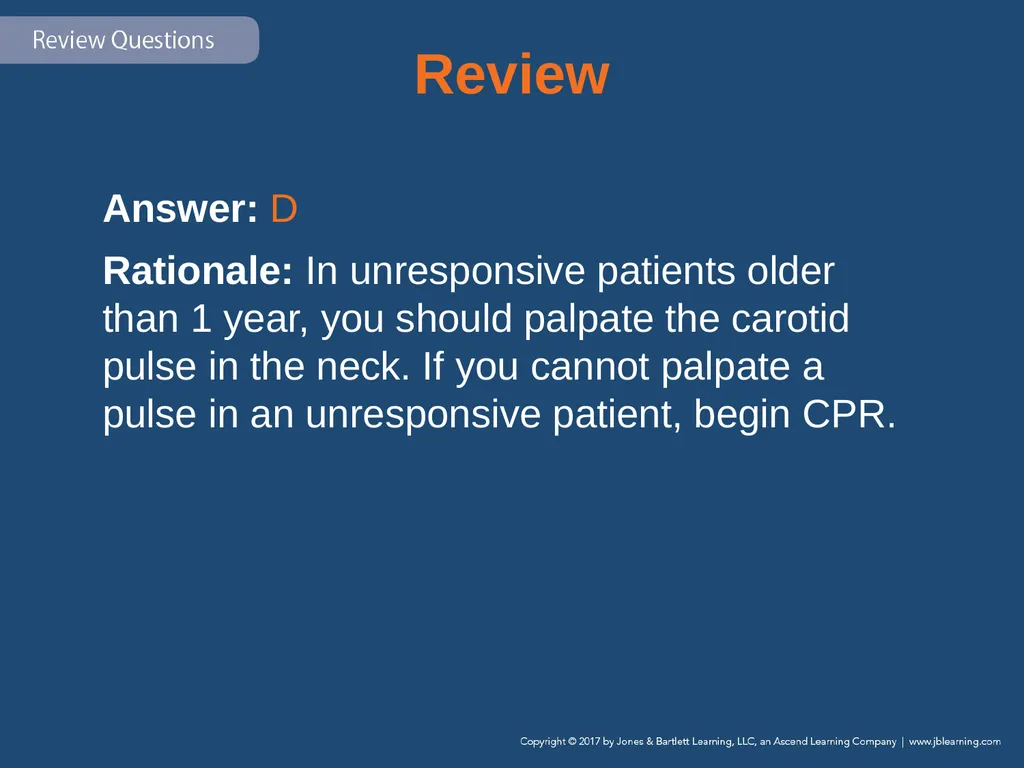
Review Answer: D
Rationale: In unresponsive patients older than 1 year, you should palpate the carotid pulse in the neck. If you cannot palpate a pulse in an unresponsive patient, begin CPR.<br>
Rationale: In unresponsive patients older than 1 year, you should palpate the carotid pulse in the neck. If you cannot palpate a pulse in an unresponsive patient, begin CPR.<br>
172
Review (1 of 2) How should you determine the pulse in an unresponsive 8-year-old patient?
Palpate the radial pulse at the wrist. Rationale: Only palpate here in responsive patients who are older than 1 year.
Palpate the brachial pulse inside the upper arm. Rationale: Only palpate here in children younger than 1 year because the radial and carotid pulses are difficult to locate.<br>
Palpate the radial pulse at the wrist. Rationale: Only palpate here in responsive patients who are older than 1 year.
Palpate the brachial pulse inside the upper arm. Rationale: Only palpate here in children younger than 1 year because the radial and carotid pulses are difficult to locate.<br>
173
Review (2 of 2) How should you determine the pulse in an unresponsive 8-year-old patient?
Palpate the radial pulse with your thumb. Rationale: Do not palpate a pulse with your thumb. You may mistake the strong pulsing circulation in your thumb for the patient’s pulse.
Palpate the carotid pulse in the neck. Rationale: Correct answer<br>
Palpate the radial pulse with your thumb. Rationale: Do not palpate a pulse with your thumb. You may mistake the strong pulsing circulation in your thumb for the patient’s pulse.
Palpate the carotid pulse in the neck. Rationale: Correct answer<br>
174
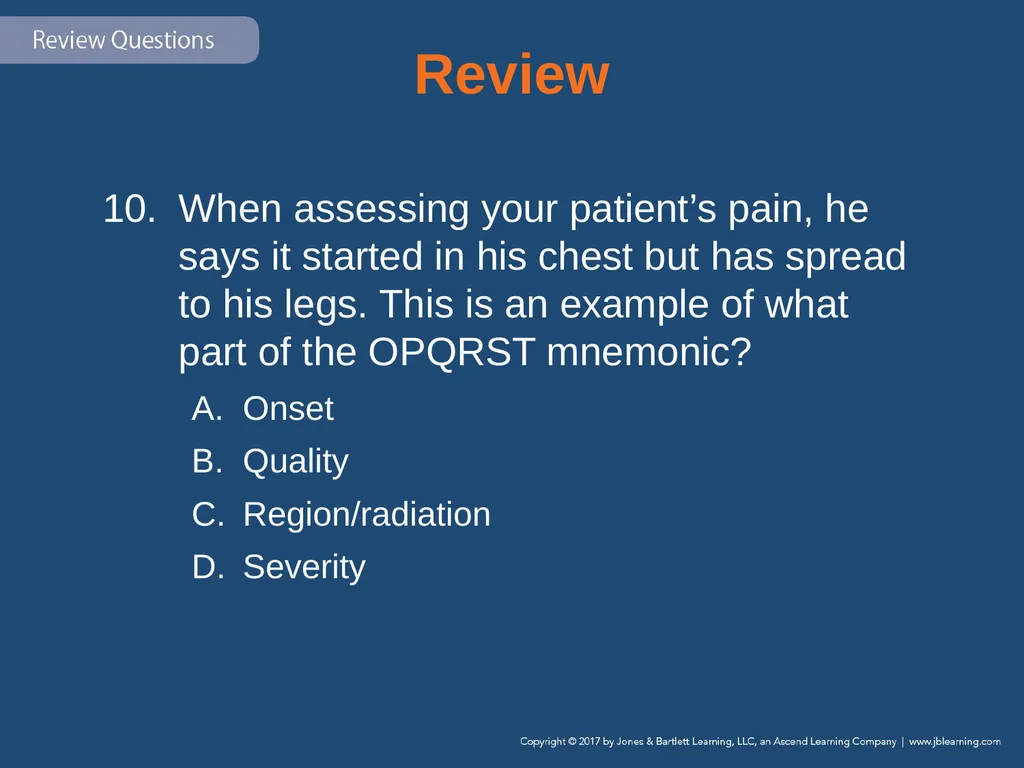
Review When assessing your patient’s pain, he says it started in his chest but has spread to his legs. This is an example of what part of the OPQRST mnemonic?
Onset
Quality
Region/radiation
Severity<br>
Onset
Quality
Region/radiation
Severity<br>
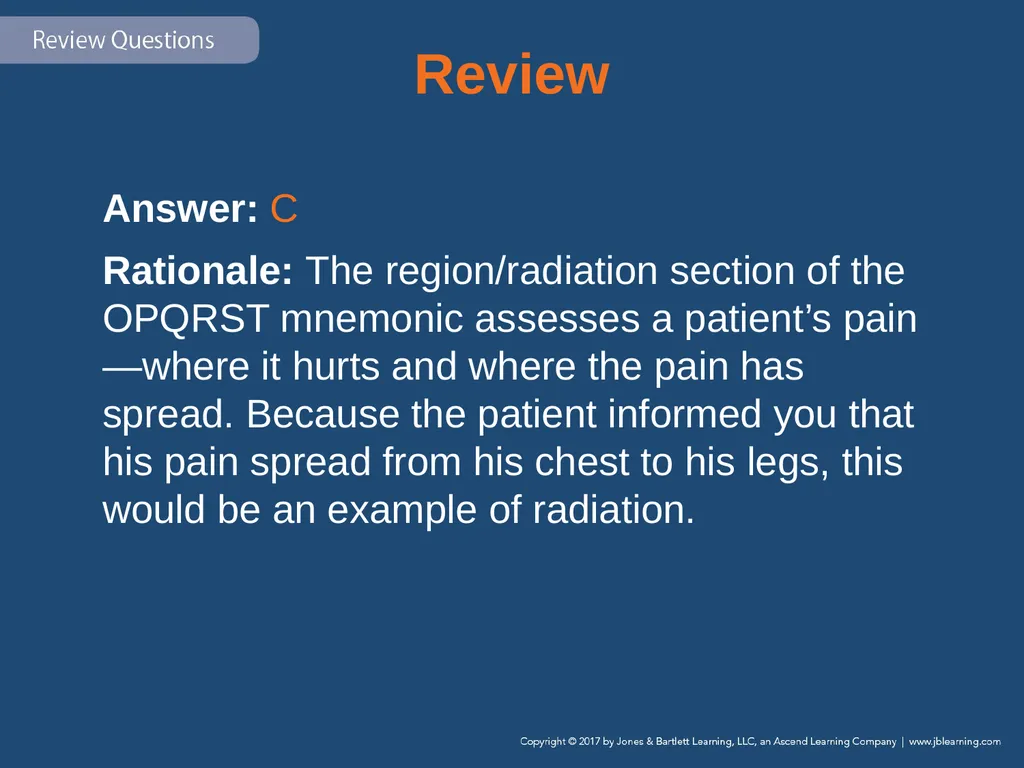
175
Review Answer: C
Rationale: The region/radiation section of the OPQRST mnemonic assesses a patient’s pain—where it hurts and where the pain has spread. Because the patient informed you that his pain spread from his chest to his legs, this would be an example of radiation.<br>
Rationale: The region/radiation section of the OPQRST mnemonic assesses a patient’s pain—where it hurts and where the pain has spread. Because the patient informed you that his pain spread from his chest to his legs, this would be an example of radiation.<br>
176
Review (1 of 2) When assessing your patient’s pain, he says it started in his chest but has spread to his legs. This is an example of what part of the OPQRST mnemonic?
Onset Rationale: This assesses the cause of the pain and when it began.
Quality Rationale: This assesses the patient’s description of the pain.<br>
Onset Rationale: This assesses the cause of the pain and when it began.
Quality Rationale: This assesses the patient’s description of the pain.<br>
177
Review (2 of 2) When assessing your patient’s pain, he says it started in his chest but has spread to his legs. This is an example of what part of the OPQRST mnemonic?
Region/radiation Rationale: Correct answer
Severity Rationale: This assesses the severity of the patient’s pain.<br>
Region/radiation Rationale: Correct answer
Severity Rationale: This assesses the severity of the patient’s pain.<br>