
Lash Lift & Tint Training Manual Introduction

Description: Lash Lift Tint Training Manual Introduction Welcome to Creative Touchs online training course for eyelash lift and tint. This treatment is highly sought after, completed within 60 minutes and profitable choice for a complete beginner or
Related Topics
Download Presentation
"Lash Lift & Tint Training Manual Introduction" is the property of its rightful owner. Permission is granted to download and print the materials on this website for personal, non-commercial use only, and to display it on your personal computer provided you do not modify the materials and that you retain all copyright notices contained in the materials. By downloading content from our website, you accept the terms of this agreement.
Presentation Transcript
slide1. Lash Lift & Tint
Training Manual<br>
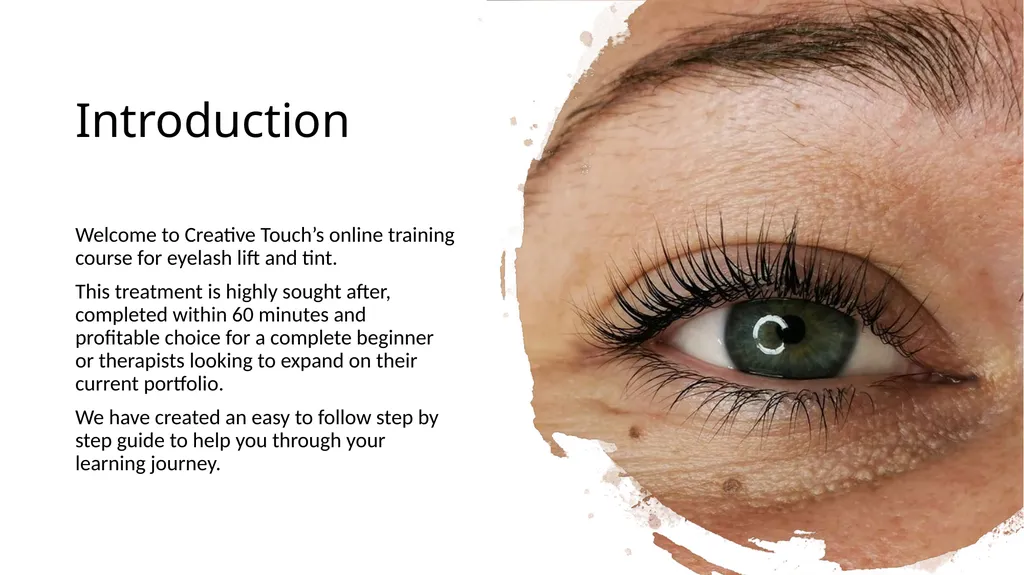
slide2. Introduction Welcome to Creative Touch’s online training course for eyelash lift and tint.
This treatment is highly sought after, completed within 60 minutes and profitable choice for a complete beginner or therapists looking to expand on their current portfolio.
We have created an easy to follow step by step guide to help you through your learning journey.<br>
slide3. What Is A Lash Lift And Tint A Lash lift and tint is an extremely popular lash service for anyone wanting to enhance their natural lash.
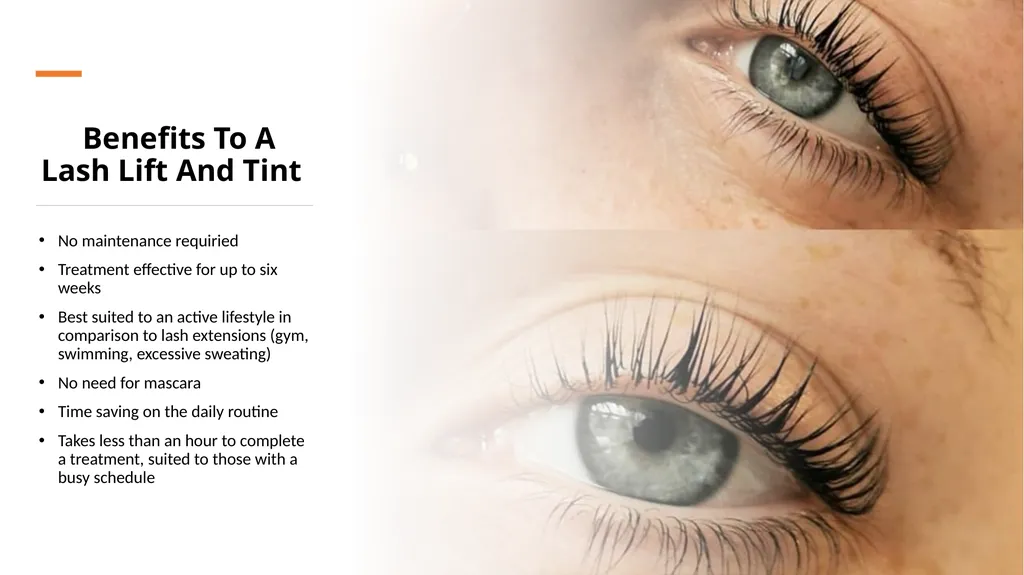
The purpose of a lash lift is to create definition with the natural lashes by lifting the lash into a deeper curl creating the illusion they then look darker, thicker and longer, this leaves the eyes looking much brighter with a pop like finish.
Lash lifting was originally made on perming rods both fiddly and not accurate but in recent times new silicone pads replace the old perming rods making the treatment much easier and more effective.
The service is expected to take approximately 45minutes and shows an instant effect before and after pictures are a perfect way to show your client how effective the treatment is for them.
Lashes of all lengths can be lifted even the smallest of lashes can be placed onto the correct size shield and have impressive results.
Although commonly used together lash lift can be completed without a tinting service. The lift will not be any less effective, but the overall effect of the treatment will not seem as dramatic if the lashes are not made richer in colour.
It is the usual practice to tint the lashes using blue/ black tint as is gives a glossy more light reflective finish, black and at times dark brown can also be popular choice for tinting of the lashes. Colour selection should be done during the consultation stage of your service.<br>
slide4. Benefits To A Lash Lift And Tint No maintenance requiried
Treatment effective for up to six weeks
Best suited to an active lifestyle in comparison to lash extensions (gym, swimming, excessive sweating)
No need for mascara
Time saving on the daily routine
Takes less than an hour to complete a treatment, suited to those with a busy schedule<br>
slide5. Patch Testing When performing a service it is imperative that a patch test is taken out before hand, you are testing for sensitivity and allergies within the product to reduce the risk of adverse reactions.
A patch test should be carried out on your client a minimum of 24 hours before treatment commences. During patch testing it’s a good idea to advise your client to come in on their treatment day with no eye makeup on.
A patch test must be done for each lift system you use, so if you change brands or products change within the brand you use a new patch test will be requiried.
To perform a patch test keep one sachet open but tapped sealed when not in use of your perming lotion (sachet 1) for patch testing this can be kept open for 4 weeks at a time before disposing. Firstly clean the patch test area which will be behind the ear and on the wrist, using either an alcohol wipe or cosmetic pad and cleanser. Once the area is clean place a small amount of your product onto a micro stick and apply to the skin behind one ear then the opposite wrist. Once complete you will then put a small amount of tint onto the opposite ear and wrist. Explain to your client to not wash the testing area for at least two hours and talk them through things to look out for. By testing on both sides of the body and in separate areas you are insuring that you are checking every possibility of reducing the risk of a reaction.
Signs to make your client look out for in the event of a reaction could include hive like symptoms, burning, itching, soreness or irritation. If any of these occur the treatment should not go ahead. Although as a therapist we make every effort to reduce the risk of reaction on a treatment via the use of patch tests this does not stop them from occurring at any point.
PATCH TEST VIDEO FOUND IN THE PRATICAL DEMONSTRATION<br>
slide6. Client Consultation Keeping informed records of your client’s treatments, basic information and outcomes is an important part of any facial treatment.
The things to consider within your records will be:
Name of procedure, signed to agree the procedure has been explained, correctly priced, suitable and not contraindicated in any way, expectations discussed, possible side effects, possible allergies, general medical questionnaire, age and before and after photos.
Age of completing the service will be set by your insurance provider, it will usually be set at a range of 16-18. We recommend for professional standards that you do not provide this service on anyone under the age of sixteen years.
Failure to complete client record cards will void your insurance.
All record keeping should comply with GPDR data protection.
Client consultation template available with this training.<br>
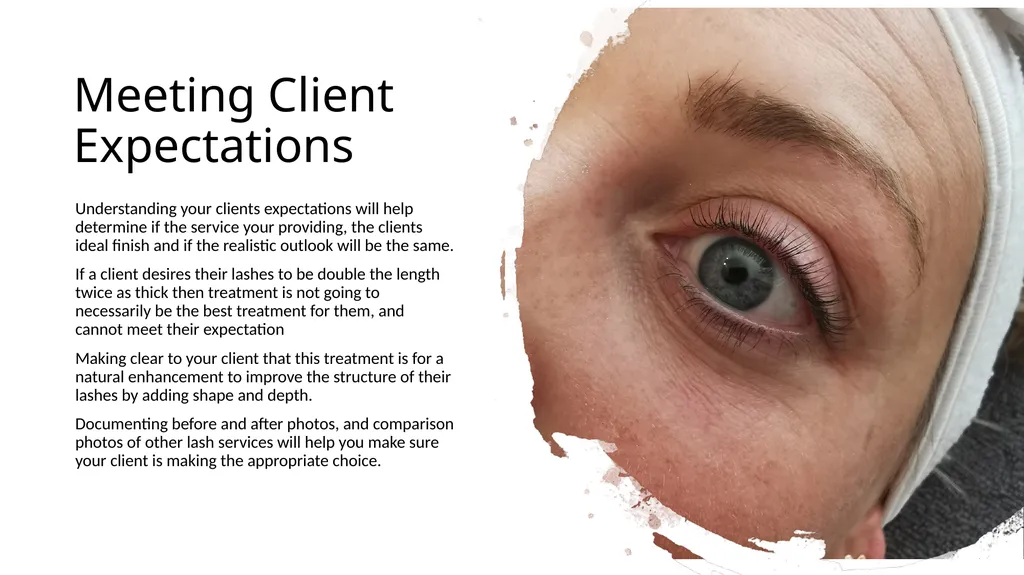
slide7. Meeting Client Expectations Understanding your clients expectations will help determine if the service your providing, the clients ideal finish and if the realistic outlook will be the same.
If a client desires their lashes to be double the length twice as thick then treatment is not going to necessarily be the best treatment for them, and cannot meet their expectation
Making clear to your client that this treatment is for a natural enhancement to improve the structure of their lashes by adding shape and depth.
Documenting before and after photos, and comparison photos of other lash services will help you make sure your client is making the appropriate choice.<br>
slide8. Insurance As a professional therapist setting high industry standards is a must. Keeping your records up to date following guidelines set out by your insurance provider and keeping your insurance up to date are absolute basics all should follow.
There are hundreds of brokers and insurance firms in the UK that you can obtain suitable public and professional liability insurance policy from many starting at less than £100 a year. This should be in place before working on the public and charging for your services.
Insurance providers can be found in the notes section at the end of your manual.
Age of suitability of service is set out by your insurance provider always check their guidelines before offering services, from our professional opinion we advise service is not carried out on anyone under the age of 16 years.<br>
slide9. Health And Safety Creating a safe working environment for both you and your client are equally important. Working in a safe and hygienic setting allows both you and the client to enjoy the experience and reduce any risks that may occur.
Washing hands before and after each client will reduce the risk of cross contamination. This should involve a thorough cleanse taking approximately 30 seconds using an antibacterial soap and warm running water. Once thoroughly cleaned dry with disposable paper towels.
Sanitising gel are an effective use of keeping the hands clean and again should be used before each treatment. They will prevent the growth of microorganisms and should be used onto the hands of both you and the client if relevant.
Salon hygiene should always be considered in the form of a clean working environment. Fresh towels and couch roll for each treatment, do not eat or drink in your working space. Keep working surfaces sanitised with no loose cables or wires exposed causing potential hazards.
Disinfectant is used for the destruction of most living organisms and is suitable for the cleansing of walls, floors, work surfaces doors and non metal work tools. Disinfectant should be made up fresh prior to use. They usually require watering down always follow the manufacturers guidelines to ensure safe use.
General waste should be disposed of in suitable container and not be mixed with any form of clinical or home waste.
Clothing should be work appropriate such as a tunic or uniform. Washed daily and changed if contaminated with foreign matter.
Keep long hair tied back, nails short and tidy and consider your personal hygiene and smoking habits.<br>
slide10. Personal Presentation To keep professional standards, you need to consider your own professional appearance. How you present yourself in front of the client will have a reflection on how they perceive the service to go.
Personal appearance will include clean uniform, suitable footwear, clean teeth, perfume and good personal hygiene, clean hands. If you’re a smoker consider a face mask or mouth wash as you will be working within someone's personal space they may be put off by the smell over them.
Keep jewellery to discreet nothing dangling or that could catch on your client and keep hair tied back.<br>
slide11. Working Environment There are two main factors to creating the correct working environment, making sure you are prepared and secondly that your client is prepared.
Having your client fully remove all mascara and eye makeup using oil free make up remover before the service reduces potential time off the service.
Having your client visit the bathroom before treatment commencing to make sure they are comfortable during treatment stops potential mid way complications of wanting to stop.
Having a comfortable treatment environment adds to the overall experience, creating a warm inviting and relaxing space will allow the client to have an all round experience that they will hopefully share and recommend to others.
Its important your client is aware the treatment will be done entirely with their eyes shut so will be unable to answer phones move around or have small children unattended.
Studio Set Up
Working in the correct environment will help you produce the most successful results. Good lighting is so important if you do not work in a well lit room a ring light or Glamcore will provide great lighting for clear sight in such a small and often fiddly working area.
A beauty couch at the correct height for you is important constant leaning or adjusting yourself unnecessarily can often lead to a bad back whilst lashing. If you are doing mobile treatments taking a portable couch with you will be a must.
Saddle seats are also highly recommended to keep good posture and are hight adjusted to accommodate each service.<br>
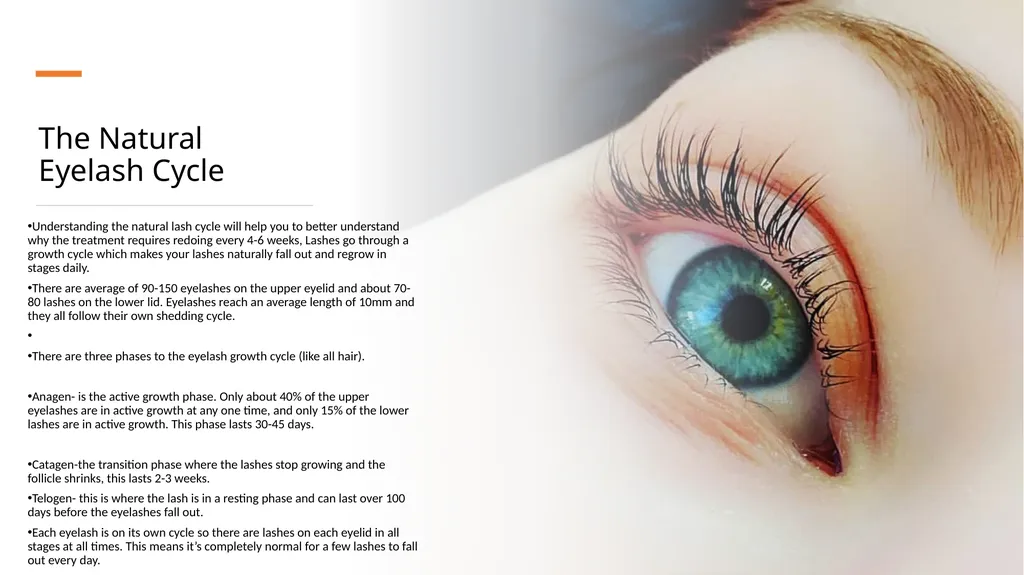
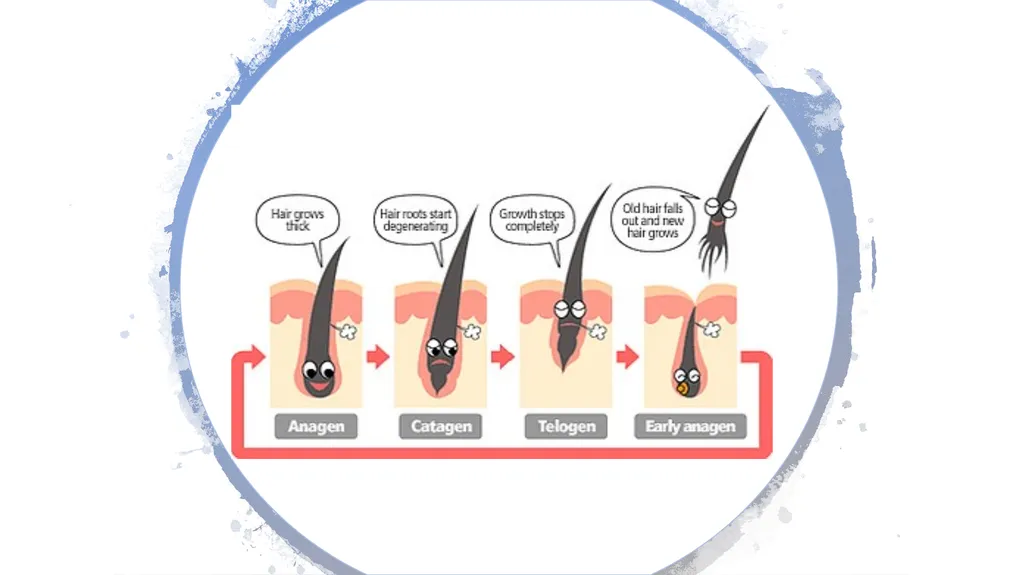
slide12. The Natural Eyelash Cycle Understanding the natural lash cycle will help you to better understand why the treatment requires redoing every 4-6 weeks, Lashes go through a growth cycle which makes your lashes naturally fall out and regrow in stages daily.
There are average of 90-150 eyelashes on the upper eyelid and about 70-80 lashes on the lower lid. Eyelashes reach an average length of 10mm and they all follow their own shedding cycle.
There are three phases to the eyelash growth cycle (like all hair).
Anagen- is the active growth phase. Only about 40% of the upper eyelashes are in active growth at any one time, and only 15% of the lower lashes are in active growth. This phase lasts 30-45 days.
Catagen-the transition phase where the lashes stop growing and the follicle shrinks, this lasts 2-3 weeks.
Telogen- this is where the lash is in a resting phase and can last over 100 days before the eyelashes fall out.
Each eyelash is on its own cycle so there are lashes on each eyelid in all stages at all times. This means it’s completely normal for a few lashes to fall out every day.<br>
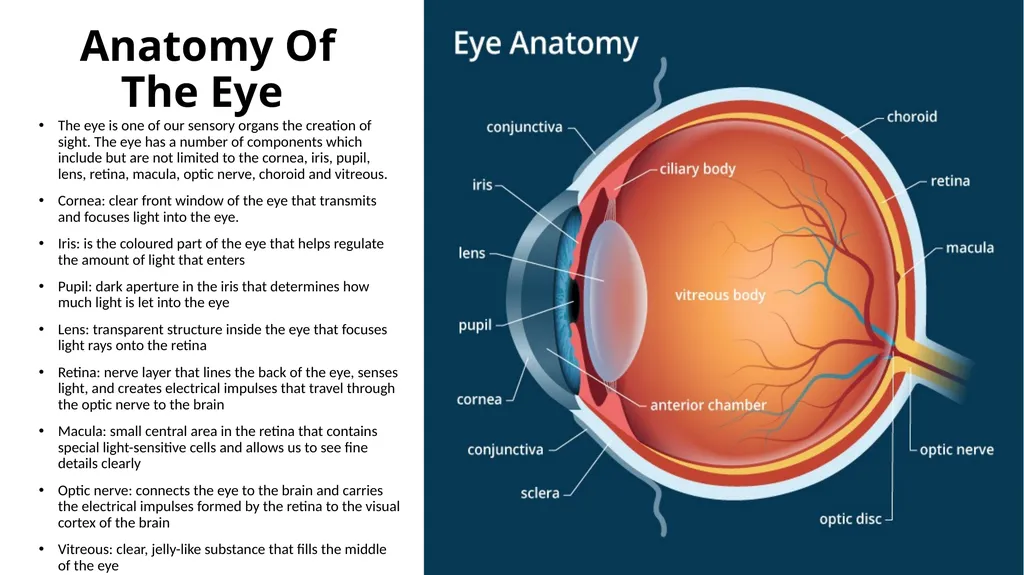
slide14. Anatomy Of The Eye The eye is one of our sensory organs the creation of sight. The eye has a number of components which include but are not limited to the cornea, iris, pupil, lens, retina, macula, optic nerve, choroid and vitreous.
Cornea: clear front window of the eye that transmits and focuses light into the eye.
Iris: is the coloured part of the eye that helps regulate the amount of light that enters
Pupil: dark aperture in the iris that determines how much light is let into the eye
Lens: transparent structure inside the eye that focuses light rays onto the retina
Retina: nerve layer that lines the back of the eye, senses light, and creates electrical impulses that travel through the optic nerve to the brain
Macula: small central area in the retina that contains special light-sensitive cells and allows us to see fine details clearly
Optic nerve: connects the eye to the brain and carries the electrical impulses formed by the retina to the visual cortex of the brain
Vitreous: clear, jelly-like substance that fills the middle of the eye<br>
slide15. Contraindications There are many things that can affect, change or stop a lash treatment taking place as a lash technician it’s your responsibility to assess your client and identify and potential issues.
Reaction to patch test – any reaction such as irritation or redness would mean the treatment should not go ahead but may consider patch testing with another glue
Weak eyelashes – if the natural lashes are damaged or weak this will mean a weak foundation for application meaning they could increase damage or not last as long
Allergies to tape or lash shields – this should be checking and identified in the client consultation form
Cuts or abrasions – May be open and can become exposed to infection
Scar tissue to the area – avoid if less than 3 months healed to avoid irritation
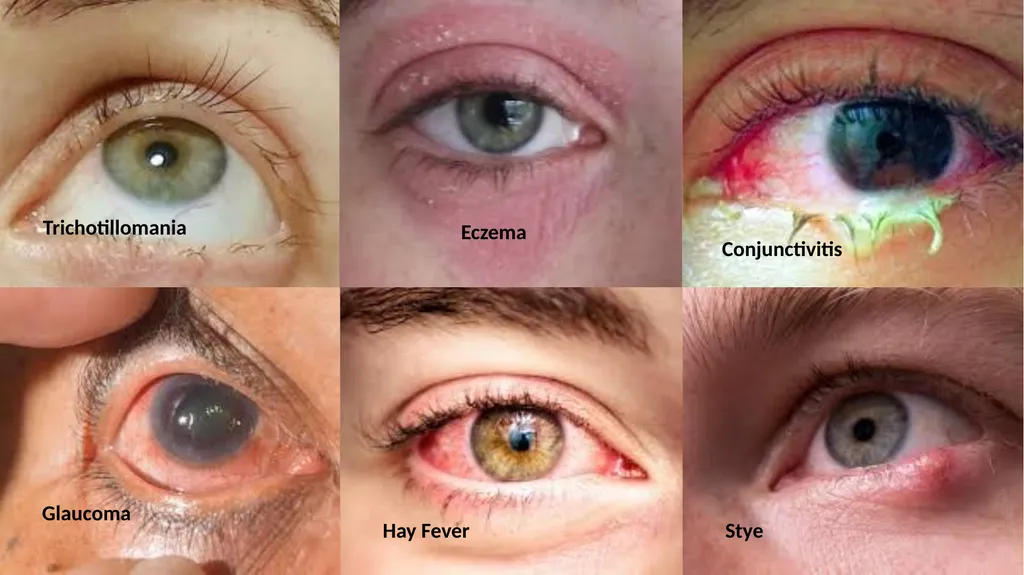
Stye - also known as a hordeolum, is a bacterial infection of an oil gland in the eyelid.
Keratitis is a condition in which the eye's cornea, the clear dome on the front surface of the eye, becomes inflamed. The condition is often marked by moderate to intense pain and usually involves any of the following symptoms: pain, impaired eyesight, photophobia (light sensitivity), red eye and a 'gritty' sensation.
Dry eye syndrome – lack of moisture can cause itching irritation or inflammation
Conjunctivitis or other contagious infections – not to do lashes until completed treatment and clear of infection for at least 14 days
Eczema, Dermatitis or Psoriasis – within the treatment are can become aggravated would avoid doing treatment
Eye surgery within 3 months
Trichotillomania- is a hair pulling disorder which effects about 2/3% of the population lashes are generally in bad condition and weak so may be too damaged to have a treatment
Glaucoma - is a condition that damages your eye's optic nerve.
Hay fever- lashes would not be recommended during flare ups
Contact lenses should be removed prior to treatment<br>
slide16. Trichotillomania Eczema Conjunctivitis Glaucoma Hay Fever Stye<br>
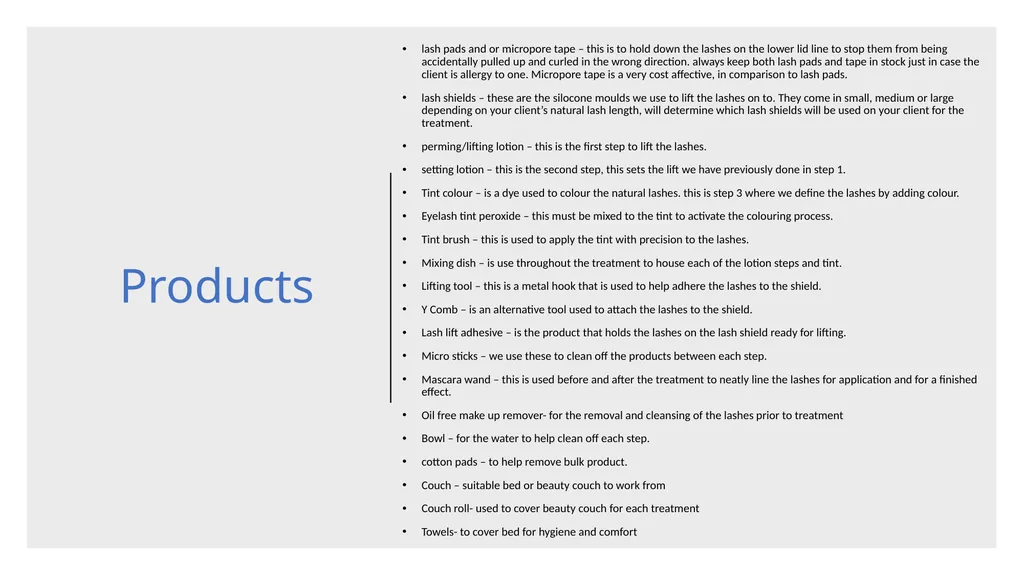
slide17. Products lash pads and or micropore tape – this is to hold down the lashes on the lower lid line to stop them from being accidentally pulled up and curled in the wrong direction. always keep both lash pads and tape in stock just in case the client is allergy to one. Micropore tape is a very cost affective, in comparison to lash pads.
lash shields – these are the silocone moulds we use to lift the lashes on to. They come in small, medium or large depending on your client’s natural lash length, will determine which lash shields will be used on your client for the treatment.
perming/lifting lotion – this is the first step to lift the lashes.
setting lotion – this is the second step, this sets the lift we have previously done in step 1.
Tint colour – is a dye used to colour the natural lashes. this is step 3 where we define the lashes by adding colour.
Eyelash tint peroxide – this must be mixed to the tint to activate the colouring process.
Tint brush – this is used to apply the tint with precision to the lashes.
Mixing dish – is use throughout the treatment to house each of the lotion steps and tint.
Lifting tool – this is a metal hook that is used to help adhere the lashes to the shield.
Y Comb – is an alternative tool used to attach the lashes to the shield.
Lash lift adhesive – is the product that holds the lashes on the lash shield ready for lifting.
Micro sticks – we use these to clean off the products between each step.
Mascara wand – this is used before and after the treatment to neatly line the lashes for application and for a finished effect.
Oil free make up remover- for the removal and cleansing of the lashes prior to treatment
Bowl – for the water to help clean off each step.
cotton pads – to help remove bulk product.
Couch – suitable bed or beauty couch to work from
Couch roll- used to cover beauty couch for each treatment
Towels- to cover bed for hygiene and comfort<br>
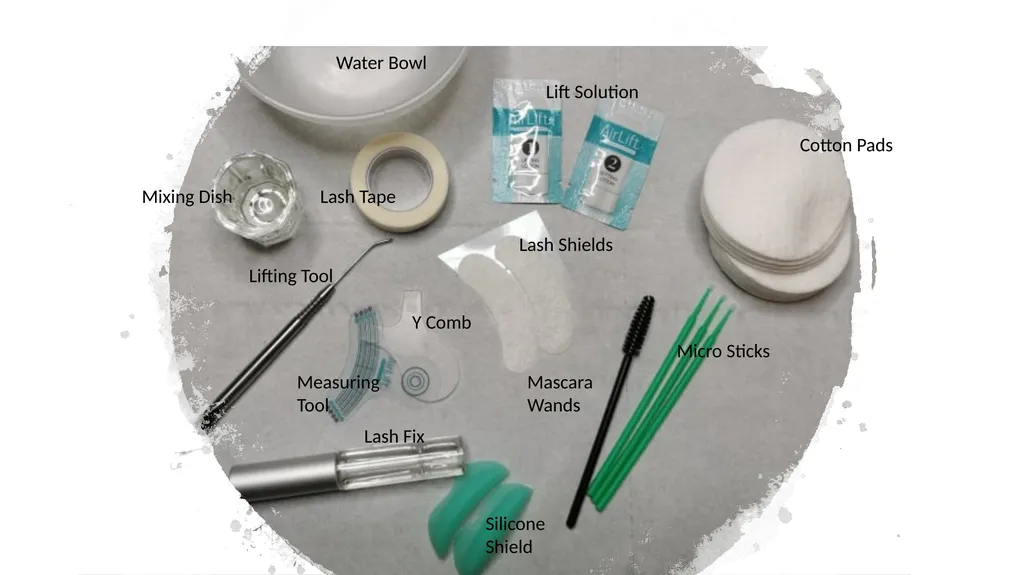
slide18. Cotton Pads Lift Solution Water Bowl Lash Tape Lash Shields Micro Sticks Mascara Wands Silicone Shield Lash Fix Lifting Tool Mixing Dish Y Comb Measuring Tool<br>
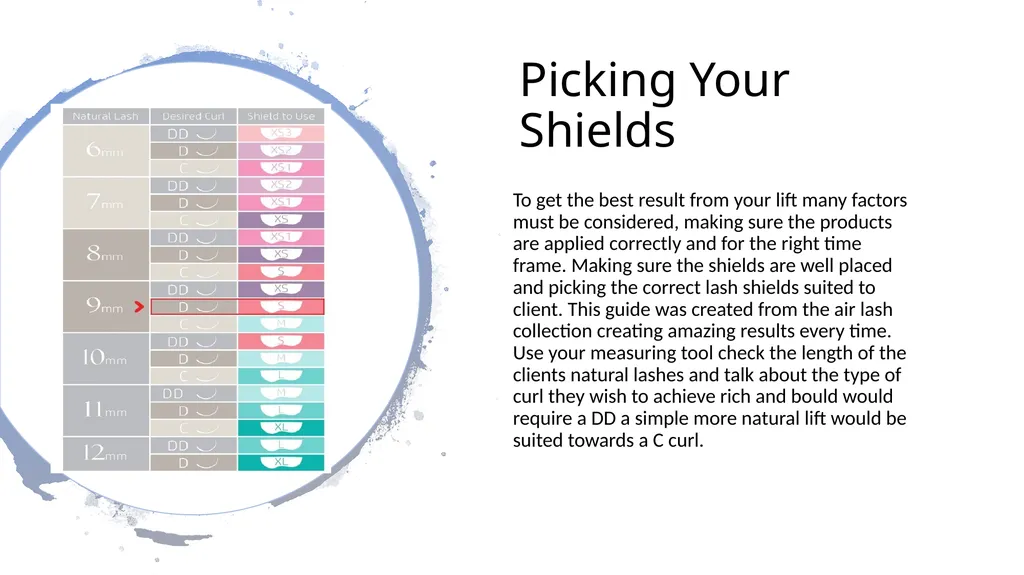
slide19. Picking Your Shields To get the best result from your lift many factors must be considered, making sure the products are applied correctly and for the right time frame. Making sure the shields are well placed and picking the correct lash shields suited to client. This guide was created from the air lash collection creating amazing results every time. Use your measuring tool check the length of the clients natural lashes and talk about the type of curl they wish to achieve rich and bould would require a DD a simple more natural lift would be suited towards a C curl.<br>
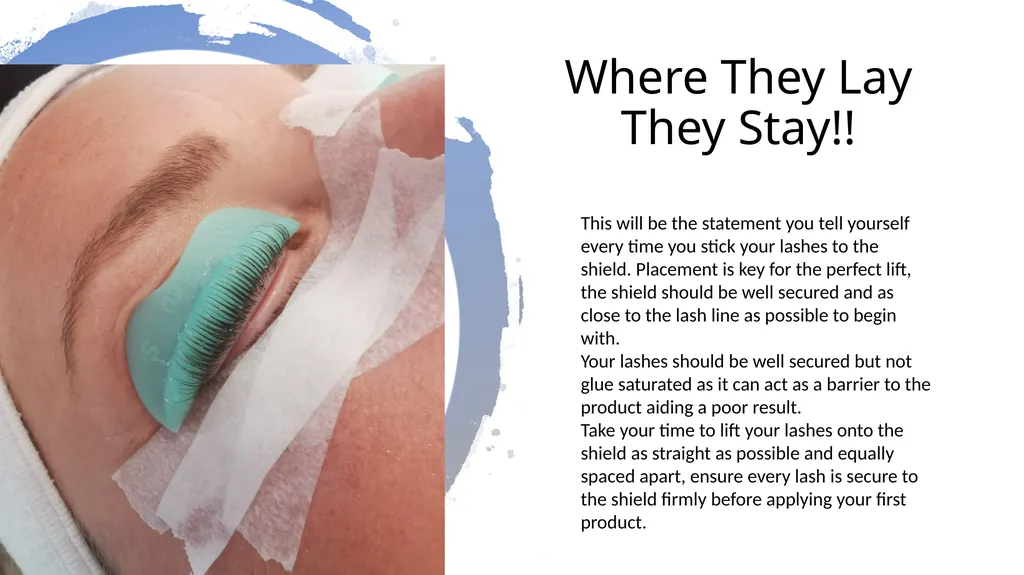
slide20. Where They Lay They Stay!! This will be the statement you tell yourself every time you stick your lashes to the shield. Placement is key for the perfect lift, the shield should be well secured and as close to the lash line as possible to begin with.
Your lashes should be well secured but not glue saturated as it can act as a barrier to the product aiding a poor result.
Take your time to lift your lashes onto the shield as straight as possible and equally spaced apart, ensure every lash is secure to the shield firmly before applying your first product.<br>
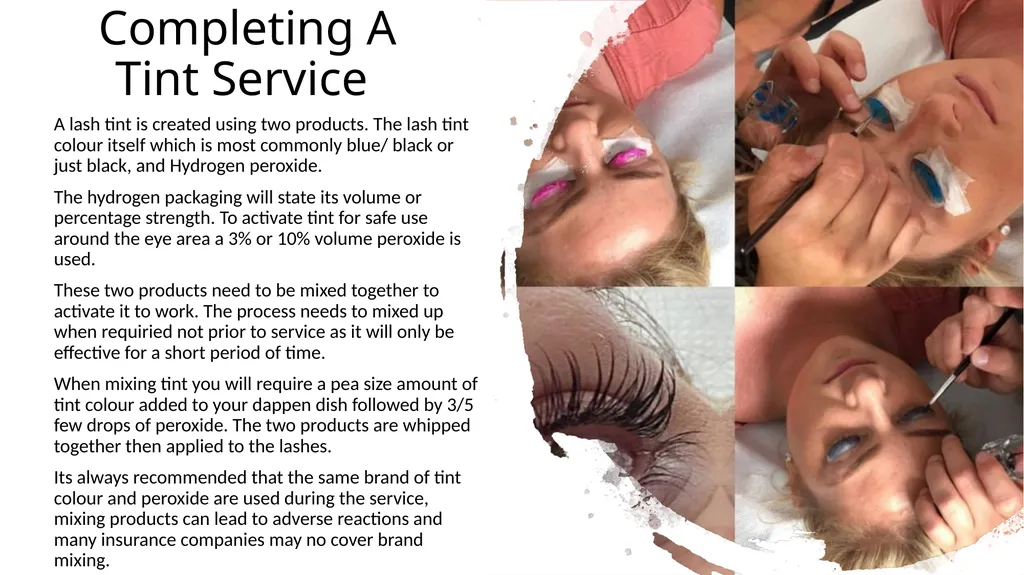
slide21. Completing A Tint Service A lash tint is created using two products. The lash tint colour itself which is most commonly blue/ black or just black, and Hydrogen peroxide.
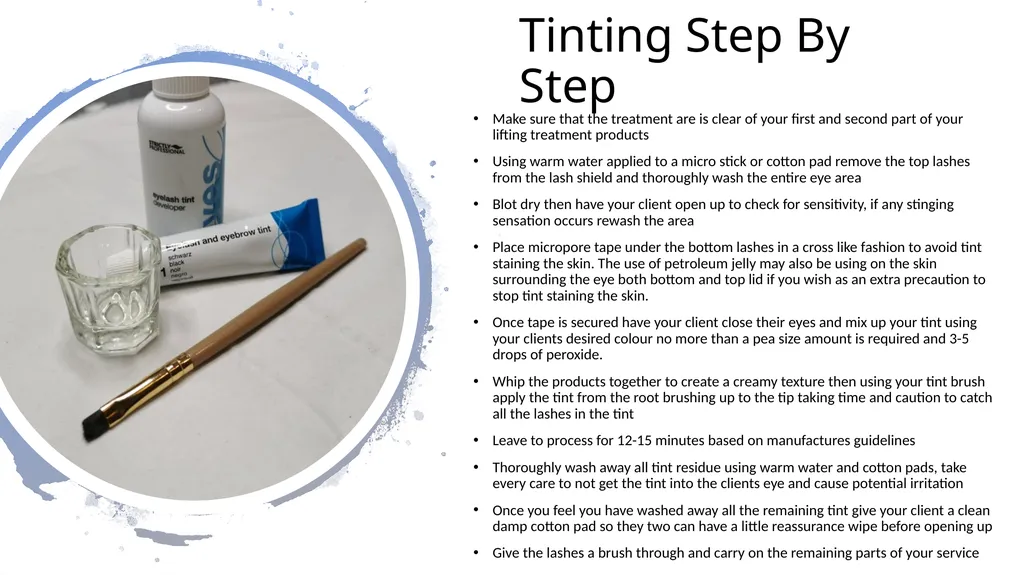
The hydrogen packaging will state its volume or percentage strength. To activate tint for safe use around the eye area a 3% or 10% volume peroxide is used.
These two products need to be mixed together to activate it to work. The process needs to mixed up when requiried not prior to service as it will only be effective for a short period of time.
When mixing tint you will require a pea size amount of tint colour added to your dappen dish followed by 3/5 few drops of peroxide. The two products are whipped together then applied to the lashes.
Its always recommended that the same brand of tint colour and peroxide are used during the service, mixing products can lead to adverse reactions and many insurance companies may no cover brand mixing.<br>
slide22. Tinting Step By Step Make sure that the treatment are is clear of your first and second part of your lifting treatment products
Using warm water applied to a micro stick or cotton pad remove the top lashes from the lash shield and thoroughly wash the entire eye area
Blot dry then have your client open up to check for sensitivity, if any stinging sensation occurs rewash the area
Place micropore tape under the bottom lashes in a cross like fashion to avoid tint staining the skin. The use of petroleum jelly may also be using on the skin surrounding the eye both bottom and top lid if you wish as an extra precaution to stop tint staining the skin.
Once tape is secured have your client close their eyes and mix up your tint using your clients desired colour no more than a pea size amount is required and 3-5 drops of peroxide.
Whip the products together to create a creamy texture then using your tint brush apply the tint from the root brushing up to the tip taking time and caution to catch all the lashes in the tint
Leave to process for 12-15 minutes based on manufactures guidelines
Thoroughly wash away all tint residue using warm water and cotton pads, take every care to not get the tint into the clients eye and cause potential irritation
Once you feel you have washed away all the remaining tint give your client a clean damp cotton pad so they two can have a little reassurance wipe before opening up
Give the lashes a brush through and carry on the remaining parts of your service<br>
slide23. Application Process Thoroughly cleanse the eyes using a form of oil free wash or protein wipes, ensure the lashes are free of debris and blotted dry before next steps
Using your under eye lash shields or micropore tape secure the bottom lashes down, not too close to the lash line to avoid eye watering.
Assess the size of the natural lash and select the shield size best suited. Make sure you check you have a left and a right silicone shield.
Apply fixing gel to the back of the shield apply the shield as close to the lash line as possible to not cause a ledge or misshaped finish.
Apply the fixing gel to the silicone shield and blot across the lashes, allow 10 seconds for the fixing gel to become tacky then start pulling the lash from the root to the tip as straight as possible up the shield until all are firmly secure.
Once fully secure, open your sachet 1 and using a micro stick blot a small amount of product all along the lash line from as close to the root without contact to the skin up to 2/3 of the natural lash avoiding the tips as to not cause them to become burnt from processing. Leave on for the recommended time for the quality of the lash.
Once processed, remove the bulk of the product from the lashes and using a damp cotton bud or micro stick try to remove the rest before applying sachet 2 again leaving to process for the correct time frame and avoiding the tips of the natural lashes.
Again wipe away fully and begin removal of the lashes from the lash shield, this is done using a damp cotton bud. Using the tip of the bud detach the lashes by breaking down the remaining lash fixing glue and taking the shields away from the eyes. Make sure the eyes are fully washed so there is no discomfort or stinging upon opening.
Do your lash tinting at this point following the steps already laid out.
Once the tint is completed apply lash nourishing lotion to rehydrate the lash and avoid them becoming brittle.
Brush through your clients lashes thoroughly, photograph for your records and advertising if you have permission to share.
Show your client their beautiful new lashes and arrange their next appointment.<br>
slide24. Product Disposal During your service you will usually be generous and mix up too much tint and become to realise there's often enough product in your sachets to complete two full lash services.
Tint once mixed starts to activate this eventually stops and becomes less effective so cannot be kept for further treatments, because the brush is repeatedly dipped in the tint there is also the risk of cross contamination therefor all left over products will need to be discarded of.
Lifting and setting solution can be left open for use within 24 hours after that the product is deemed less effective and can often create poor results when used. If you have multiple clients in for the service on the same day pop half the sachet into a dappen dish and apply with a disposable micro stick. This stops cross contamination and allows you to use the other half of the product for your next client creating a larger profit margin on your services.<br>
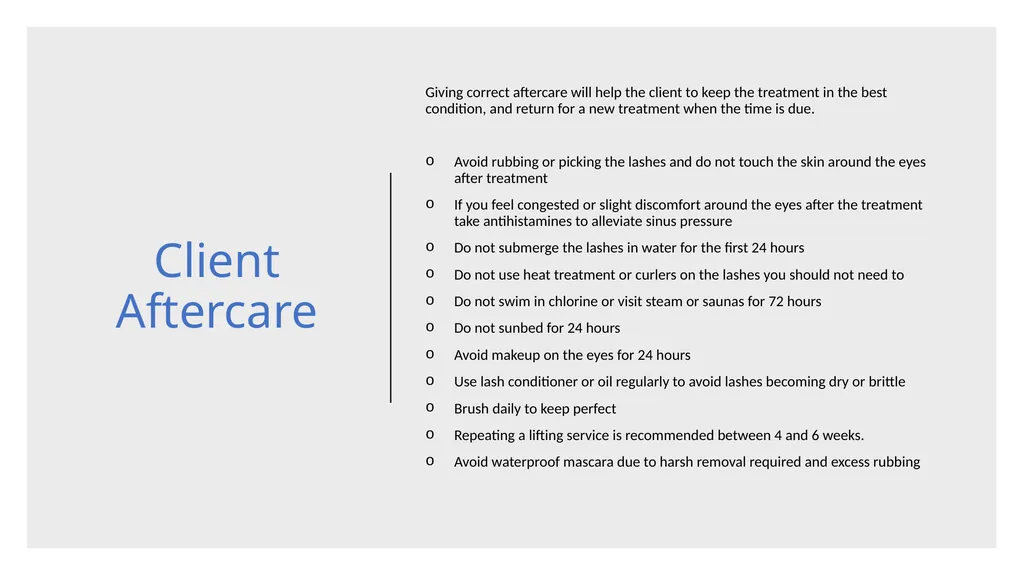
slide25. Client Aftercare Giving correct aftercare will help the client to keep the treatment in the best condition, and return for a new treatment when the time is due.
Avoid rubbing or picking the lashes and do not touch the skin around the eyes after treatment
If you feel congested or slight discomfort around the eyes after the treatment take antihistamines to alleviate sinus pressure
Do not submerge the lashes in water for the first 24 hours
Do not use heat treatment or curlers on the lashes you should not need to
Do not swim in chlorine or visit steam or saunas for 72 hours
Do not sunbed for 24 hours
Avoid makeup on the eyes for 24 hours
Use lash conditioner or oil regularly to avoid lashes becoming dry or brittle
Brush daily to keep perfect
Repeating a lifting service is recommended between 4 and 6 weeks.
Avoid waterproof mascara due to harsh removal required and excess rubbing<br>
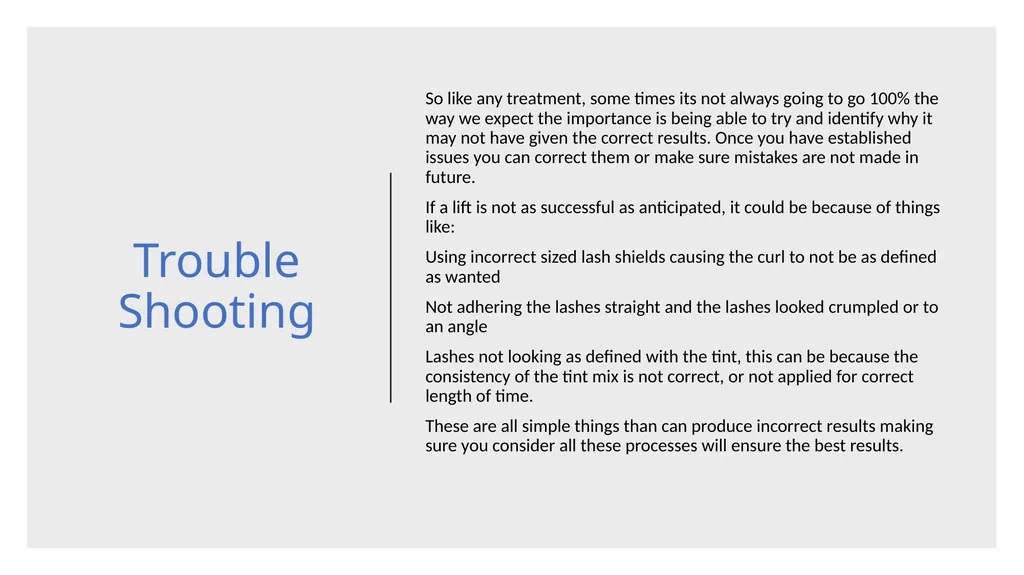
slide26. Trouble Shooting So like any treatment, some times its not always going to go 100% the way we expect the importance is being able to try and identify why it may not have given the correct results. Once you have established issues you can correct them or make sure mistakes are not made in future.
If a lift is not as successful as anticipated, it could be because of things like:
Using incorrect sized lash shields causing the curl to not be as defined as wanted
Not adhering the lashes straight and the lashes looked crumpled or to an angle
Lashes not looking as defined with the tint, this can be because the consistency of the tint mix is not correct, or not applied for correct length of time.
These are all simple things than can produce incorrect results making sure you consider all these processes will ensure the best results.<br>
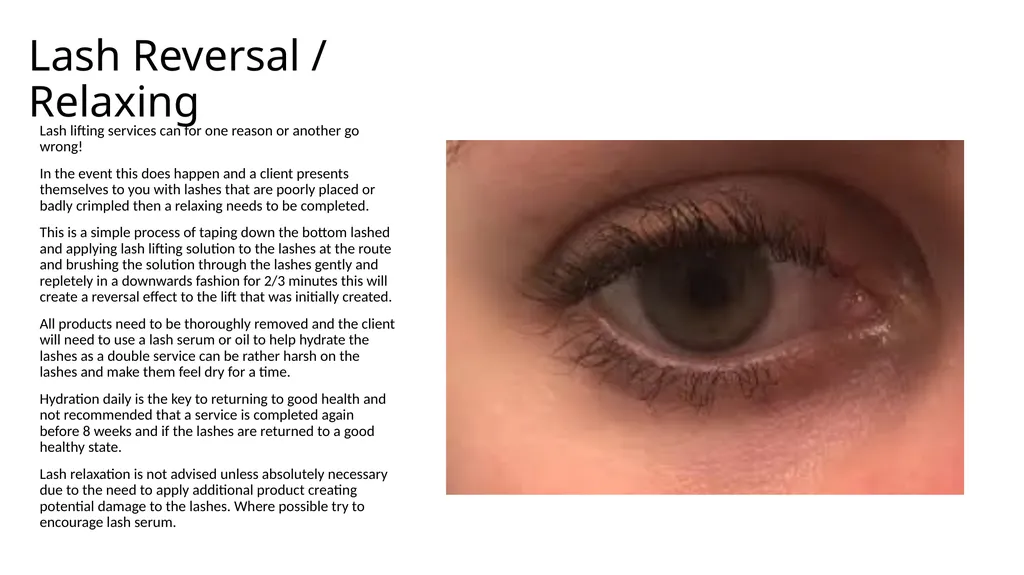
slide27. Lash Reversal / Relaxing Lash lifting services can for one reason or another go wrong!
In the event this does happen and a client presents themselves to you with lashes that are poorly placed or badly crimpled then a relaxing needs to be completed.
This is a simple process of taping down the bottom lashed and applying lash lifting solution to the lashes at the route and brushing the solution through the lashes gently and repletely in a downwards fashion for 2/3 minutes this will create a reversal effect to the lift that was initially created.
All products need to be thoroughly removed and the client will need to use a lash serum or oil to help hydrate the lashes as a double service can be rather harsh on the lashes and make them feel dry for a time.
Hydration daily is the key to returning to good health and not recommended that a service is completed again before 8 weeks and if the lashes are returned to a good healthy state.
Lash relaxation is not advised unless absolutely necessary due to the need to apply additional product creating potential damage to the lashes. Where possible try to encourage lash serum.<br>
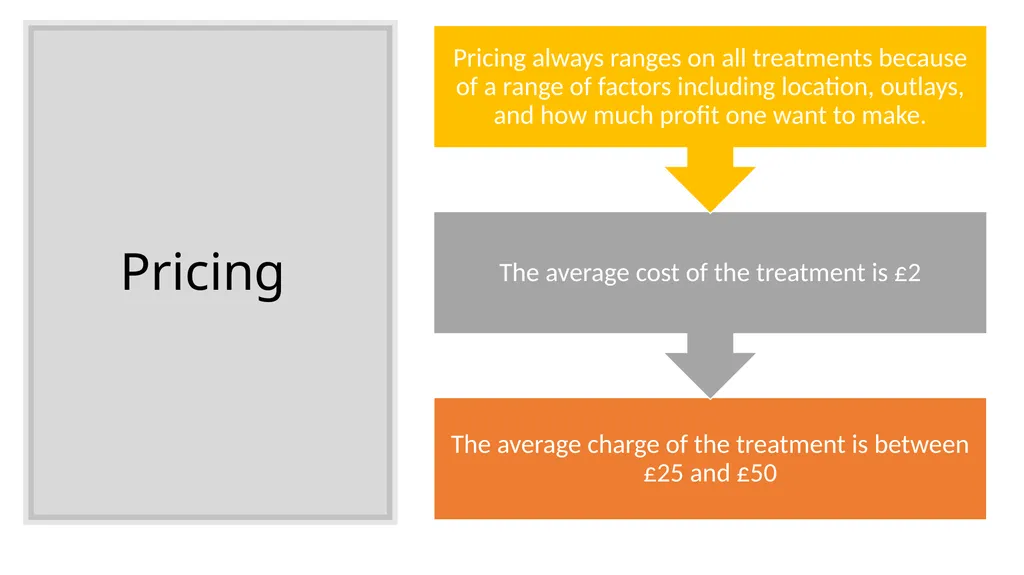
slide28. Pricing<br>
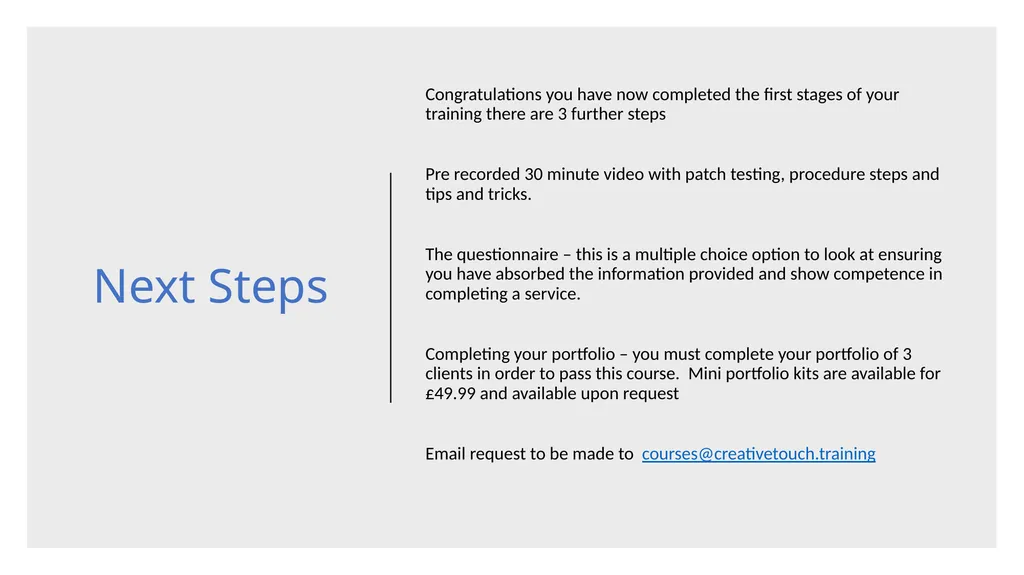
slide29. Next Steps Congratulations you have now completed the first stages of your training there are 3 further steps
Pre recorded 30 minute video with patch testing, procedure steps and tips and tricks.
The questionnaire – this is a multiple choice option to look at ensuring you have absorbed the information provided and show competence in completing a service.
Completing your portfolio – you must complete your portfolio of 3 clients in order to pass this course. Mini portfolio kits are available for £49.99 and available upon request
Email request to be made to courses@creativetouch.training<br>
slide30. How To Complete Your Portfolio So you have worked through the steps read all the tricks and watched all the videos, now its time to complete your portfolio
You must complete 3 services to send back as your portfolio pieces, these should be correctly photographed and with attached documents for client records. The next slide will have the process for correct photograph documenting.
Failure to complete all assignments will delay passing the course.
Client record cards for your portfolio can be found in the client record template section.
Full portfolio completion details are found in the portfolio section.<br>
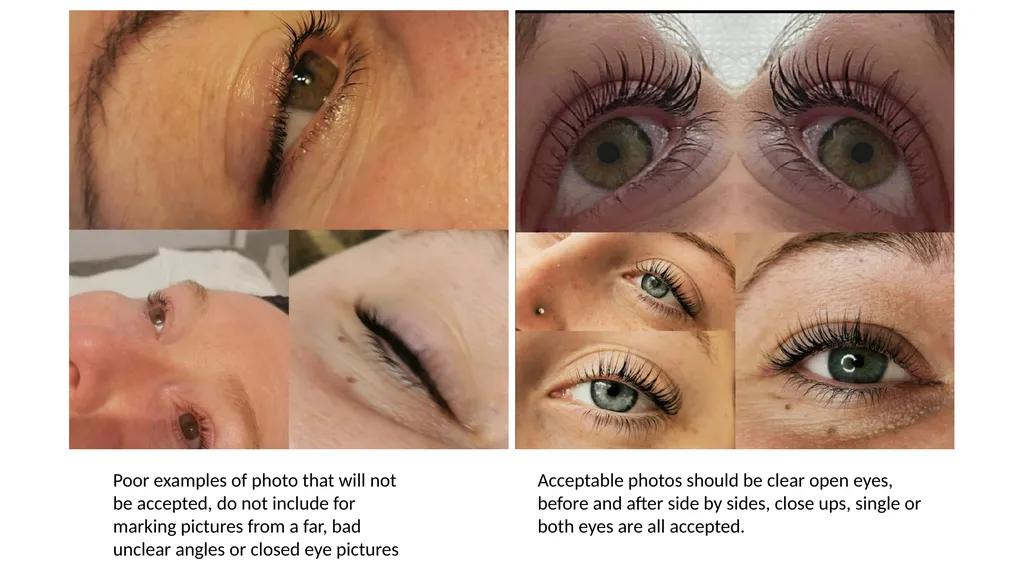
slide31. Poor examples of photo that will not be accepted, do not include for marking pictures from a far, bad unclear angles or closed eye pictures Acceptable photos should be clear open eyes, before and after side by sides, close ups, single or both eyes are all accepted.<br>
slide32. What To Do Next When you have completed all of your portfolio requirements its time to send off or marking
Sending your documents can be made via email to courses@creativetouch.training marking is done Mondays Wednesdays and Fridays and we aim to mark all portfolios within 3 working days. Incomplete portfolios will delay the process, if part portfolio is sent we will allow 14 days for remaining material to be added. If sending printed documents please send to
F.A.O Student Marking
Creative Touch Group
6 Sea Lane
Rustington
West Sussex
BN16 2RB
(please note these will not be returned)
For student related enquiries please email creativetouchtraining@outlook.com allow 48 for responses emails will not be responded to on weekends.
To contact us by phone please call 01903 369851 we cannot always guarantee questions can be answered on calls as an educator may not be available so please use this method as your last point of call.
Once you have received your pass your certificate will be sent via email within 24 hours. If you wish to receive an embossed paper certificate with the cpd code this will incur an additional charge of £9.99 and will be posted 1st class recorded. All pdf email certificates are free of charge.<br>
Training Manual<br>
slide2. Introduction Welcome to Creative Touch’s online training course for eyelash lift and tint.
This treatment is highly sought after, completed within 60 minutes and profitable choice for a complete beginner or therapists looking to expand on their current portfolio.
We have created an easy to follow step by step guide to help you through your learning journey.<br>
slide3. What Is A Lash Lift And Tint A Lash lift and tint is an extremely popular lash service for anyone wanting to enhance their natural lash.
The purpose of a lash lift is to create definition with the natural lashes by lifting the lash into a deeper curl creating the illusion they then look darker, thicker and longer, this leaves the eyes looking much brighter with a pop like finish.
Lash lifting was originally made on perming rods both fiddly and not accurate but in recent times new silicone pads replace the old perming rods making the treatment much easier and more effective.
The service is expected to take approximately 45minutes and shows an instant effect before and after pictures are a perfect way to show your client how effective the treatment is for them.
Lashes of all lengths can be lifted even the smallest of lashes can be placed onto the correct size shield and have impressive results.
Although commonly used together lash lift can be completed without a tinting service. The lift will not be any less effective, but the overall effect of the treatment will not seem as dramatic if the lashes are not made richer in colour.
It is the usual practice to tint the lashes using blue/ black tint as is gives a glossy more light reflective finish, black and at times dark brown can also be popular choice for tinting of the lashes. Colour selection should be done during the consultation stage of your service.<br>
slide4. Benefits To A Lash Lift And Tint No maintenance requiried
Treatment effective for up to six weeks
Best suited to an active lifestyle in comparison to lash extensions (gym, swimming, excessive sweating)
No need for mascara
Time saving on the daily routine
Takes less than an hour to complete a treatment, suited to those with a busy schedule<br>
slide5. Patch Testing When performing a service it is imperative that a patch test is taken out before hand, you are testing for sensitivity and allergies within the product to reduce the risk of adverse reactions.
A patch test should be carried out on your client a minimum of 24 hours before treatment commences. During patch testing it’s a good idea to advise your client to come in on their treatment day with no eye makeup on.
A patch test must be done for each lift system you use, so if you change brands or products change within the brand you use a new patch test will be requiried.
To perform a patch test keep one sachet open but tapped sealed when not in use of your perming lotion (sachet 1) for patch testing this can be kept open for 4 weeks at a time before disposing. Firstly clean the patch test area which will be behind the ear and on the wrist, using either an alcohol wipe or cosmetic pad and cleanser. Once the area is clean place a small amount of your product onto a micro stick and apply to the skin behind one ear then the opposite wrist. Once complete you will then put a small amount of tint onto the opposite ear and wrist. Explain to your client to not wash the testing area for at least two hours and talk them through things to look out for. By testing on both sides of the body and in separate areas you are insuring that you are checking every possibility of reducing the risk of a reaction.
Signs to make your client look out for in the event of a reaction could include hive like symptoms, burning, itching, soreness or irritation. If any of these occur the treatment should not go ahead. Although as a therapist we make every effort to reduce the risk of reaction on a treatment via the use of patch tests this does not stop them from occurring at any point.
PATCH TEST VIDEO FOUND IN THE PRATICAL DEMONSTRATION<br>
slide6. Client Consultation Keeping informed records of your client’s treatments, basic information and outcomes is an important part of any facial treatment.
The things to consider within your records will be:
Name of procedure, signed to agree the procedure has been explained, correctly priced, suitable and not contraindicated in any way, expectations discussed, possible side effects, possible allergies, general medical questionnaire, age and before and after photos.
Age of completing the service will be set by your insurance provider, it will usually be set at a range of 16-18. We recommend for professional standards that you do not provide this service on anyone under the age of sixteen years.
Failure to complete client record cards will void your insurance.
All record keeping should comply with GPDR data protection.
Client consultation template available with this training.<br>
slide7. Meeting Client Expectations Understanding your clients expectations will help determine if the service your providing, the clients ideal finish and if the realistic outlook will be the same.
If a client desires their lashes to be double the length twice as thick then treatment is not going to necessarily be the best treatment for them, and cannot meet their expectation
Making clear to your client that this treatment is for a natural enhancement to improve the structure of their lashes by adding shape and depth.
Documenting before and after photos, and comparison photos of other lash services will help you make sure your client is making the appropriate choice.<br>
slide8. Insurance As a professional therapist setting high industry standards is a must. Keeping your records up to date following guidelines set out by your insurance provider and keeping your insurance up to date are absolute basics all should follow.
There are hundreds of brokers and insurance firms in the UK that you can obtain suitable public and professional liability insurance policy from many starting at less than £100 a year. This should be in place before working on the public and charging for your services.
Insurance providers can be found in the notes section at the end of your manual.
Age of suitability of service is set out by your insurance provider always check their guidelines before offering services, from our professional opinion we advise service is not carried out on anyone under the age of 16 years.<br>
slide9. Health And Safety Creating a safe working environment for both you and your client are equally important. Working in a safe and hygienic setting allows both you and the client to enjoy the experience and reduce any risks that may occur.
Washing hands before and after each client will reduce the risk of cross contamination. This should involve a thorough cleanse taking approximately 30 seconds using an antibacterial soap and warm running water. Once thoroughly cleaned dry with disposable paper towels.
Sanitising gel are an effective use of keeping the hands clean and again should be used before each treatment. They will prevent the growth of microorganisms and should be used onto the hands of both you and the client if relevant.
Salon hygiene should always be considered in the form of a clean working environment. Fresh towels and couch roll for each treatment, do not eat or drink in your working space. Keep working surfaces sanitised with no loose cables or wires exposed causing potential hazards.
Disinfectant is used for the destruction of most living organisms and is suitable for the cleansing of walls, floors, work surfaces doors and non metal work tools. Disinfectant should be made up fresh prior to use. They usually require watering down always follow the manufacturers guidelines to ensure safe use.
General waste should be disposed of in suitable container and not be mixed with any form of clinical or home waste.
Clothing should be work appropriate such as a tunic or uniform. Washed daily and changed if contaminated with foreign matter.
Keep long hair tied back, nails short and tidy and consider your personal hygiene and smoking habits.<br>
slide10. Personal Presentation To keep professional standards, you need to consider your own professional appearance. How you present yourself in front of the client will have a reflection on how they perceive the service to go.
Personal appearance will include clean uniform, suitable footwear, clean teeth, perfume and good personal hygiene, clean hands. If you’re a smoker consider a face mask or mouth wash as you will be working within someone's personal space they may be put off by the smell over them.
Keep jewellery to discreet nothing dangling or that could catch on your client and keep hair tied back.<br>
slide11. Working Environment There are two main factors to creating the correct working environment, making sure you are prepared and secondly that your client is prepared.
Having your client fully remove all mascara and eye makeup using oil free make up remover before the service reduces potential time off the service.
Having your client visit the bathroom before treatment commencing to make sure they are comfortable during treatment stops potential mid way complications of wanting to stop.
Having a comfortable treatment environment adds to the overall experience, creating a warm inviting and relaxing space will allow the client to have an all round experience that they will hopefully share and recommend to others.
Its important your client is aware the treatment will be done entirely with their eyes shut so will be unable to answer phones move around or have small children unattended.
Studio Set Up
Working in the correct environment will help you produce the most successful results. Good lighting is so important if you do not work in a well lit room a ring light or Glamcore will provide great lighting for clear sight in such a small and often fiddly working area.
A beauty couch at the correct height for you is important constant leaning or adjusting yourself unnecessarily can often lead to a bad back whilst lashing. If you are doing mobile treatments taking a portable couch with you will be a must.
Saddle seats are also highly recommended to keep good posture and are hight adjusted to accommodate each service.<br>
slide12. The Natural Eyelash Cycle Understanding the natural lash cycle will help you to better understand why the treatment requires redoing every 4-6 weeks, Lashes go through a growth cycle which makes your lashes naturally fall out and regrow in stages daily.
There are average of 90-150 eyelashes on the upper eyelid and about 70-80 lashes on the lower lid. Eyelashes reach an average length of 10mm and they all follow their own shedding cycle.
There are three phases to the eyelash growth cycle (like all hair).
Anagen- is the active growth phase. Only about 40% of the upper eyelashes are in active growth at any one time, and only 15% of the lower lashes are in active growth. This phase lasts 30-45 days.
Catagen-the transition phase where the lashes stop growing and the follicle shrinks, this lasts 2-3 weeks.
Telogen- this is where the lash is in a resting phase and can last over 100 days before the eyelashes fall out.
Each eyelash is on its own cycle so there are lashes on each eyelid in all stages at all times. This means it’s completely normal for a few lashes to fall out every day.<br>
slide14. Anatomy Of The Eye The eye is one of our sensory organs the creation of sight. The eye has a number of components which include but are not limited to the cornea, iris, pupil, lens, retina, macula, optic nerve, choroid and vitreous.
Cornea: clear front window of the eye that transmits and focuses light into the eye.
Iris: is the coloured part of the eye that helps regulate the amount of light that enters
Pupil: dark aperture in the iris that determines how much light is let into the eye
Lens: transparent structure inside the eye that focuses light rays onto the retina
Retina: nerve layer that lines the back of the eye, senses light, and creates electrical impulses that travel through the optic nerve to the brain
Macula: small central area in the retina that contains special light-sensitive cells and allows us to see fine details clearly
Optic nerve: connects the eye to the brain and carries the electrical impulses formed by the retina to the visual cortex of the brain
Vitreous: clear, jelly-like substance that fills the middle of the eye<br>
slide15. Contraindications There are many things that can affect, change or stop a lash treatment taking place as a lash technician it’s your responsibility to assess your client and identify and potential issues.
Reaction to patch test – any reaction such as irritation or redness would mean the treatment should not go ahead but may consider patch testing with another glue
Weak eyelashes – if the natural lashes are damaged or weak this will mean a weak foundation for application meaning they could increase damage or not last as long
Allergies to tape or lash shields – this should be checking and identified in the client consultation form
Cuts or abrasions – May be open and can become exposed to infection
Scar tissue to the area – avoid if less than 3 months healed to avoid irritation
Stye - also known as a hordeolum, is a bacterial infection of an oil gland in the eyelid.
Keratitis is a condition in which the eye's cornea, the clear dome on the front surface of the eye, becomes inflamed. The condition is often marked by moderate to intense pain and usually involves any of the following symptoms: pain, impaired eyesight, photophobia (light sensitivity), red eye and a 'gritty' sensation.
Dry eye syndrome – lack of moisture can cause itching irritation or inflammation
Conjunctivitis or other contagious infections – not to do lashes until completed treatment and clear of infection for at least 14 days
Eczema, Dermatitis or Psoriasis – within the treatment are can become aggravated would avoid doing treatment
Eye surgery within 3 months
Trichotillomania- is a hair pulling disorder which effects about 2/3% of the population lashes are generally in bad condition and weak so may be too damaged to have a treatment
Glaucoma - is a condition that damages your eye's optic nerve.
Hay fever- lashes would not be recommended during flare ups
Contact lenses should be removed prior to treatment<br>
slide16. Trichotillomania Eczema Conjunctivitis Glaucoma Hay Fever Stye<br>
slide17. Products lash pads and or micropore tape – this is to hold down the lashes on the lower lid line to stop them from being accidentally pulled up and curled in the wrong direction. always keep both lash pads and tape in stock just in case the client is allergy to one. Micropore tape is a very cost affective, in comparison to lash pads.
lash shields – these are the silocone moulds we use to lift the lashes on to. They come in small, medium or large depending on your client’s natural lash length, will determine which lash shields will be used on your client for the treatment.
perming/lifting lotion – this is the first step to lift the lashes.
setting lotion – this is the second step, this sets the lift we have previously done in step 1.
Tint colour – is a dye used to colour the natural lashes. this is step 3 where we define the lashes by adding colour.
Eyelash tint peroxide – this must be mixed to the tint to activate the colouring process.
Tint brush – this is used to apply the tint with precision to the lashes.
Mixing dish – is use throughout the treatment to house each of the lotion steps and tint.
Lifting tool – this is a metal hook that is used to help adhere the lashes to the shield.
Y Comb – is an alternative tool used to attach the lashes to the shield.
Lash lift adhesive – is the product that holds the lashes on the lash shield ready for lifting.
Micro sticks – we use these to clean off the products between each step.
Mascara wand – this is used before and after the treatment to neatly line the lashes for application and for a finished effect.
Oil free make up remover- for the removal and cleansing of the lashes prior to treatment
Bowl – for the water to help clean off each step.
cotton pads – to help remove bulk product.
Couch – suitable bed or beauty couch to work from
Couch roll- used to cover beauty couch for each treatment
Towels- to cover bed for hygiene and comfort<br>
slide18. Cotton Pads Lift Solution Water Bowl Lash Tape Lash Shields Micro Sticks Mascara Wands Silicone Shield Lash Fix Lifting Tool Mixing Dish Y Comb Measuring Tool<br>
slide19. Picking Your Shields To get the best result from your lift many factors must be considered, making sure the products are applied correctly and for the right time frame. Making sure the shields are well placed and picking the correct lash shields suited to client. This guide was created from the air lash collection creating amazing results every time. Use your measuring tool check the length of the clients natural lashes and talk about the type of curl they wish to achieve rich and bould would require a DD a simple more natural lift would be suited towards a C curl.<br>
slide20. Where They Lay They Stay!! This will be the statement you tell yourself every time you stick your lashes to the shield. Placement is key for the perfect lift, the shield should be well secured and as close to the lash line as possible to begin with.
Your lashes should be well secured but not glue saturated as it can act as a barrier to the product aiding a poor result.
Take your time to lift your lashes onto the shield as straight as possible and equally spaced apart, ensure every lash is secure to the shield firmly before applying your first product.<br>
slide21. Completing A Tint Service A lash tint is created using two products. The lash tint colour itself which is most commonly blue/ black or just black, and Hydrogen peroxide.
The hydrogen packaging will state its volume or percentage strength. To activate tint for safe use around the eye area a 3% or 10% volume peroxide is used.
These two products need to be mixed together to activate it to work. The process needs to mixed up when requiried not prior to service as it will only be effective for a short period of time.
When mixing tint you will require a pea size amount of tint colour added to your dappen dish followed by 3/5 few drops of peroxide. The two products are whipped together then applied to the lashes.
Its always recommended that the same brand of tint colour and peroxide are used during the service, mixing products can lead to adverse reactions and many insurance companies may no cover brand mixing.<br>
slide22. Tinting Step By Step Make sure that the treatment are is clear of your first and second part of your lifting treatment products
Using warm water applied to a micro stick or cotton pad remove the top lashes from the lash shield and thoroughly wash the entire eye area
Blot dry then have your client open up to check for sensitivity, if any stinging sensation occurs rewash the area
Place micropore tape under the bottom lashes in a cross like fashion to avoid tint staining the skin. The use of petroleum jelly may also be using on the skin surrounding the eye both bottom and top lid if you wish as an extra precaution to stop tint staining the skin.
Once tape is secured have your client close their eyes and mix up your tint using your clients desired colour no more than a pea size amount is required and 3-5 drops of peroxide.
Whip the products together to create a creamy texture then using your tint brush apply the tint from the root brushing up to the tip taking time and caution to catch all the lashes in the tint
Leave to process for 12-15 minutes based on manufactures guidelines
Thoroughly wash away all tint residue using warm water and cotton pads, take every care to not get the tint into the clients eye and cause potential irritation
Once you feel you have washed away all the remaining tint give your client a clean damp cotton pad so they two can have a little reassurance wipe before opening up
Give the lashes a brush through and carry on the remaining parts of your service<br>
slide23. Application Process Thoroughly cleanse the eyes using a form of oil free wash or protein wipes, ensure the lashes are free of debris and blotted dry before next steps
Using your under eye lash shields or micropore tape secure the bottom lashes down, not too close to the lash line to avoid eye watering.
Assess the size of the natural lash and select the shield size best suited. Make sure you check you have a left and a right silicone shield.
Apply fixing gel to the back of the shield apply the shield as close to the lash line as possible to not cause a ledge or misshaped finish.
Apply the fixing gel to the silicone shield and blot across the lashes, allow 10 seconds for the fixing gel to become tacky then start pulling the lash from the root to the tip as straight as possible up the shield until all are firmly secure.
Once fully secure, open your sachet 1 and using a micro stick blot a small amount of product all along the lash line from as close to the root without contact to the skin up to 2/3 of the natural lash avoiding the tips as to not cause them to become burnt from processing. Leave on for the recommended time for the quality of the lash.
Once processed, remove the bulk of the product from the lashes and using a damp cotton bud or micro stick try to remove the rest before applying sachet 2 again leaving to process for the correct time frame and avoiding the tips of the natural lashes.
Again wipe away fully and begin removal of the lashes from the lash shield, this is done using a damp cotton bud. Using the tip of the bud detach the lashes by breaking down the remaining lash fixing glue and taking the shields away from the eyes. Make sure the eyes are fully washed so there is no discomfort or stinging upon opening.
Do your lash tinting at this point following the steps already laid out.
Once the tint is completed apply lash nourishing lotion to rehydrate the lash and avoid them becoming brittle.
Brush through your clients lashes thoroughly, photograph for your records and advertising if you have permission to share.
Show your client their beautiful new lashes and arrange their next appointment.<br>
slide24. Product Disposal During your service you will usually be generous and mix up too much tint and become to realise there's often enough product in your sachets to complete two full lash services.
Tint once mixed starts to activate this eventually stops and becomes less effective so cannot be kept for further treatments, because the brush is repeatedly dipped in the tint there is also the risk of cross contamination therefor all left over products will need to be discarded of.
Lifting and setting solution can be left open for use within 24 hours after that the product is deemed less effective and can often create poor results when used. If you have multiple clients in for the service on the same day pop half the sachet into a dappen dish and apply with a disposable micro stick. This stops cross contamination and allows you to use the other half of the product for your next client creating a larger profit margin on your services.<br>
slide25. Client Aftercare Giving correct aftercare will help the client to keep the treatment in the best condition, and return for a new treatment when the time is due.
Avoid rubbing or picking the lashes and do not touch the skin around the eyes after treatment
If you feel congested or slight discomfort around the eyes after the treatment take antihistamines to alleviate sinus pressure
Do not submerge the lashes in water for the first 24 hours
Do not use heat treatment or curlers on the lashes you should not need to
Do not swim in chlorine or visit steam or saunas for 72 hours
Do not sunbed for 24 hours
Avoid makeup on the eyes for 24 hours
Use lash conditioner or oil regularly to avoid lashes becoming dry or brittle
Brush daily to keep perfect
Repeating a lifting service is recommended between 4 and 6 weeks.
Avoid waterproof mascara due to harsh removal required and excess rubbing<br>
slide26. Trouble Shooting So like any treatment, some times its not always going to go 100% the way we expect the importance is being able to try and identify why it may not have given the correct results. Once you have established issues you can correct them or make sure mistakes are not made in future.
If a lift is not as successful as anticipated, it could be because of things like:
Using incorrect sized lash shields causing the curl to not be as defined as wanted
Not adhering the lashes straight and the lashes looked crumpled or to an angle
Lashes not looking as defined with the tint, this can be because the consistency of the tint mix is not correct, or not applied for correct length of time.
These are all simple things than can produce incorrect results making sure you consider all these processes will ensure the best results.<br>
slide27. Lash Reversal / Relaxing Lash lifting services can for one reason or another go wrong!
In the event this does happen and a client presents themselves to you with lashes that are poorly placed or badly crimpled then a relaxing needs to be completed.
This is a simple process of taping down the bottom lashed and applying lash lifting solution to the lashes at the route and brushing the solution through the lashes gently and repletely in a downwards fashion for 2/3 minutes this will create a reversal effect to the lift that was initially created.
All products need to be thoroughly removed and the client will need to use a lash serum or oil to help hydrate the lashes as a double service can be rather harsh on the lashes and make them feel dry for a time.
Hydration daily is the key to returning to good health and not recommended that a service is completed again before 8 weeks and if the lashes are returned to a good healthy state.
Lash relaxation is not advised unless absolutely necessary due to the need to apply additional product creating potential damage to the lashes. Where possible try to encourage lash serum.<br>
slide28. Pricing<br>
slide29. Next Steps Congratulations you have now completed the first stages of your training there are 3 further steps
Pre recorded 30 minute video with patch testing, procedure steps and tips and tricks.
The questionnaire – this is a multiple choice option to look at ensuring you have absorbed the information provided and show competence in completing a service.
Completing your portfolio – you must complete your portfolio of 3 clients in order to pass this course. Mini portfolio kits are available for £49.99 and available upon request
Email request to be made to courses@creativetouch.training<br>
slide30. How To Complete Your Portfolio So you have worked through the steps read all the tricks and watched all the videos, now its time to complete your portfolio
You must complete 3 services to send back as your portfolio pieces, these should be correctly photographed and with attached documents for client records. The next slide will have the process for correct photograph documenting.
Failure to complete all assignments will delay passing the course.
Client record cards for your portfolio can be found in the client record template section.
Full portfolio completion details are found in the portfolio section.<br>
slide31. Poor examples of photo that will not be accepted, do not include for marking pictures from a far, bad unclear angles or closed eye pictures Acceptable photos should be clear open eyes, before and after side by sides, close ups, single or both eyes are all accepted.<br>
slide32. What To Do Next When you have completed all of your portfolio requirements its time to send off or marking
Sending your documents can be made via email to courses@creativetouch.training marking is done Mondays Wednesdays and Fridays and we aim to mark all portfolios within 3 working days. Incomplete portfolios will delay the process, if part portfolio is sent we will allow 14 days for remaining material to be added. If sending printed documents please send to
F.A.O Student Marking
Creative Touch Group
6 Sea Lane
Rustington
West Sussex
BN16 2RB
(please note these will not be returned)
For student related enquiries please email creativetouchtraining@outlook.com allow 48 for responses emails will not be responded to on weekends.
To contact us by phone please call 01903 369851 we cannot always guarantee questions can be answered on calls as an educator may not be available so please use this method as your last point of call.
Once you have received your pass your certificate will be sent via email within 24 hours. If you wish to receive an embossed paper certificate with the cpd code this will incur an additional charge of £9.99 and will be posted 1st class recorded. All pdf email certificates are free of charge.<br>