
MODULE 7 Crop Establishment Objectives By the end
NS
Published · 99 slides · 0 views
1 / 1














Description
MODULE 7 Crop Establishment Objectives By the end of the module, the participants are expected to : Understand the methods of seedbed preparation and seedling management Understand the importance of attaining sufficient quantity of healthy
Related Topics
Share
Embed code
Download this presentation From Below
"MODULE 7 Crop Establishment Objectives By the end" is the property of its rightful owner. Permission is granted to download and print the materials on this website for personal, non-commercial use only, and to display it on your personal computer provided you do not modify the materials and that you retain all copyright notices contained in the materials. By downloading content from our website, you accept the terms of this agreement.
Presentation Transcript
01
MODULE 7 Crop Establishment<br>
02
Objectives By the end of the module, the participants are expected to :
Understand the methods of seedbed preparation and seedling management
Understand the importance of attaining sufficient quantity of healthy seedlings
Know the importance of practicing synchronous planting
Explain the methods in crop establishment
Understand the importance of using machines in crop establishment<br>
Understand the methods of seedbed preparation and seedling management
Understand the importance of attaining sufficient quantity of healthy seedlings
Know the importance of practicing synchronous planting
Explain the methods in crop establishment
Understand the importance of using machines in crop establishment<br>
03
Content Outline Lesson 1. Variety and Seed
Selection
Lesson 2. Seed Treatment
Lesson 3. Crop Establishment
Lesson 4. Synchronous Planting
and Fallow Period
Lesson 5. Use of Farm Machinery in Crop Establishment<br>
Selection
Lesson 2. Seed Treatment
Lesson 3. Crop Establishment
Lesson 4. Synchronous Planting
and Fallow Period
Lesson 5. Use of Farm Machinery in Crop Establishment<br>
04
Ground Rules<br>
05
LESSON 1:
VARIETY AND SEED SELECTION<br>
06
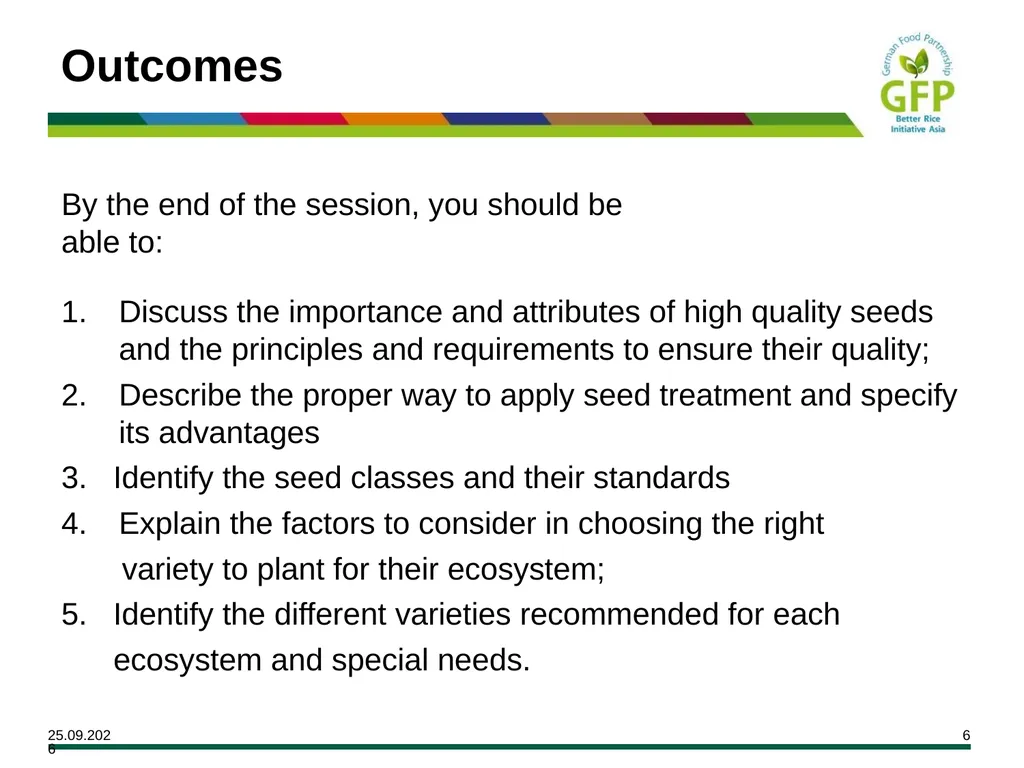
Outcomes By the end of the session, you should be
able to:
Discuss the importance and attributes of high quality seeds and the principles and requirements to ensure their quality;
Describe the proper way to apply seed treatment and specify its advantages
3. Identify the seed classes and their standards
Explain the factors to consider in choosing the right
variety to plant for their ecosystem;
5. Identify the different varieties recommended for each
ecosystem and special needs.<br>
able to:
Discuss the importance and attributes of high quality seeds and the principles and requirements to ensure their quality;
Describe the proper way to apply seed treatment and specify its advantages
3. Identify the seed classes and their standards
Explain the factors to consider in choosing the right
variety to plant for their ecosystem;
5. Identify the different varieties recommended for each
ecosystem and special needs.<br>
07
Structure Explanation
Activities
Insight Sharing<br>
Activities
Insight Sharing<br>
08
high quality seed (+ good production practices)
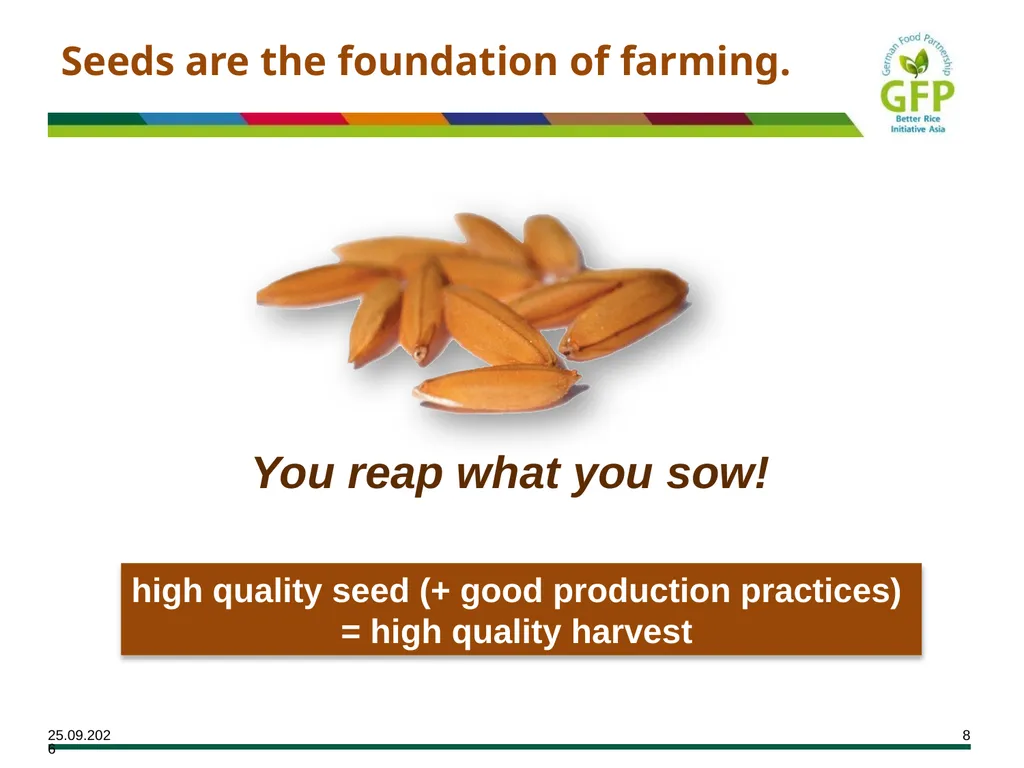
= high quality harvest Seeds are the foundation of farming.<br>
09
High Quality Seeds: High quality seeds are relatively:
pure
free from weed seeds, seed-borne pests & diseases
full & uniform in size
viable (at least 85% germination rate)<br>
pure
free from weed seeds, seed-borne pests & diseases
full & uniform in size
viable (at least 85% germination rate)<br>
10
Hybrids vs Inbreds Inbred varieties
self-pollination
maintains its genetic make-up from generation to generation.
Farmers can re-use harvested seeds
i.e. IR64, PSB Rc 28, PSB Rc 82, NSIC Rc 122 Hybrid Varieties
cross-pollination
maintains its genetic make-up for only one generation
Farmers must use new seeds
i.e. Arize-Bigante, Mestiso, SL8, Rizalina, BioSeed 401<br>
self-pollination
maintains its genetic make-up from generation to generation.
Farmers can re-use harvested seeds
i.e. IR64, PSB Rc 28, PSB Rc 82, NSIC Rc 122 Hybrid Varieties
cross-pollination
maintains its genetic make-up for only one generation
Farmers must use new seeds
i.e. Arize-Bigante, Mestiso, SL8, Rizalina, BioSeed 401<br>
11
BREEDER seeds are produced by PhilRice from uniform panicles (nucleus seeds). FOUNDATION seeds are grown by PhilRice & SeedNet from breeder seeds. REGISTERED seeds are grown by SeedNet & selected seed growers from foundation seeds. CERTIFIED seeds are grown by seed growers from registered seeds. These are sold to farmers. Inbred Seed Classes:<br>
12
Why use recommended varieties Recommended varieties are adapted to local conditions:
appropriate to the environment
resistant to insects pests, diseases, & abiotic stresses (e.g. drought, flood) in the locality
have produced relatively stable & high yield in adaptability trials
acceptable to farmers & demanded by the local market<br>
appropriate to the environment
resistant to insects pests, diseases, & abiotic stresses (e.g. drought, flood) in the locality
have produced relatively stable & high yield in adaptability trials
acceptable to farmers & demanded by the local market<br>
13
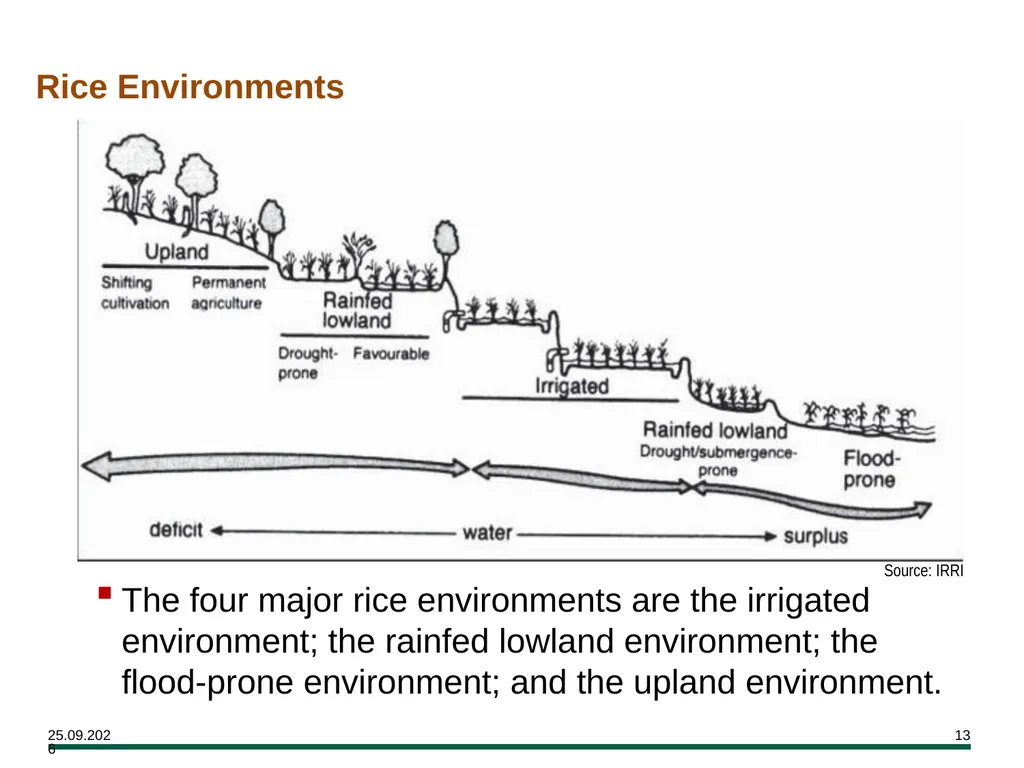
Rice Environments The four major rice environments are the irrigated environment; the rainfed lowland environment; the flood-prone environment; and the upland environment. Source: IRRI<br>
14
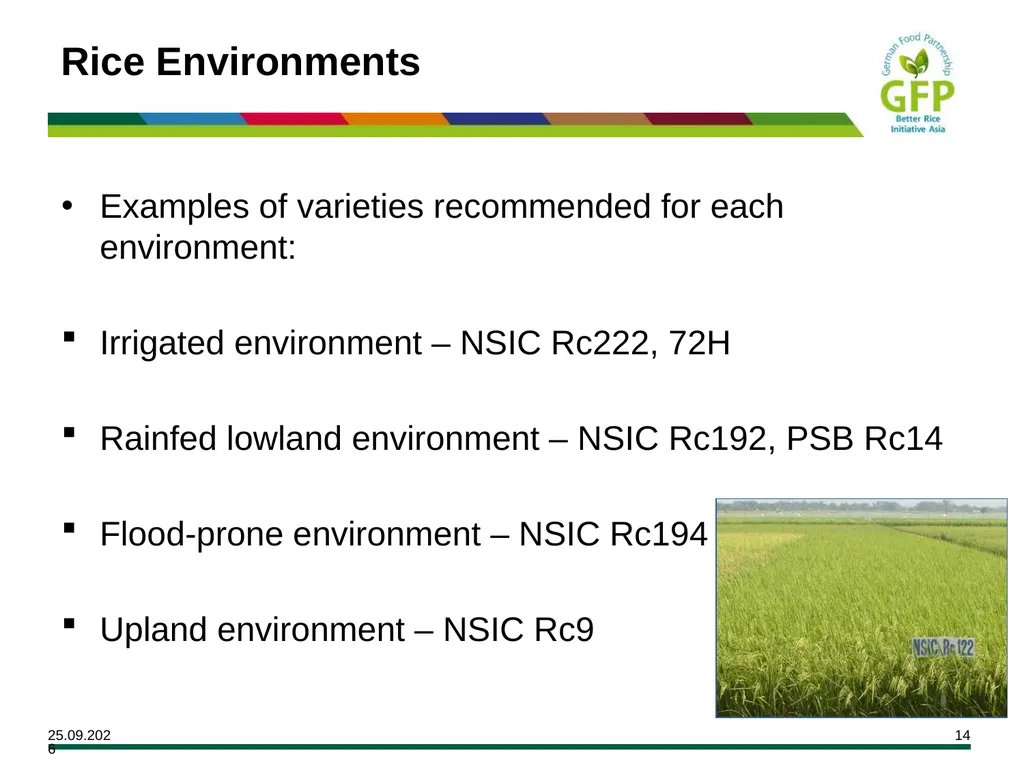
Rice Environments Examples of varieties recommended for each environment:
Irrigated environment – NSIC Rc222, 72H
Rainfed lowland environment – NSIC Rc192, PSB Rc14
Flood-prone environment – NSIC Rc194
Upland environment – NSIC Rc9<br>
Irrigated environment – NSIC Rc222, 72H
Rainfed lowland environment – NSIC Rc192, PSB Rc14
Flood-prone environment – NSIC Rc194
Upland environment – NSIC Rc9<br>
15
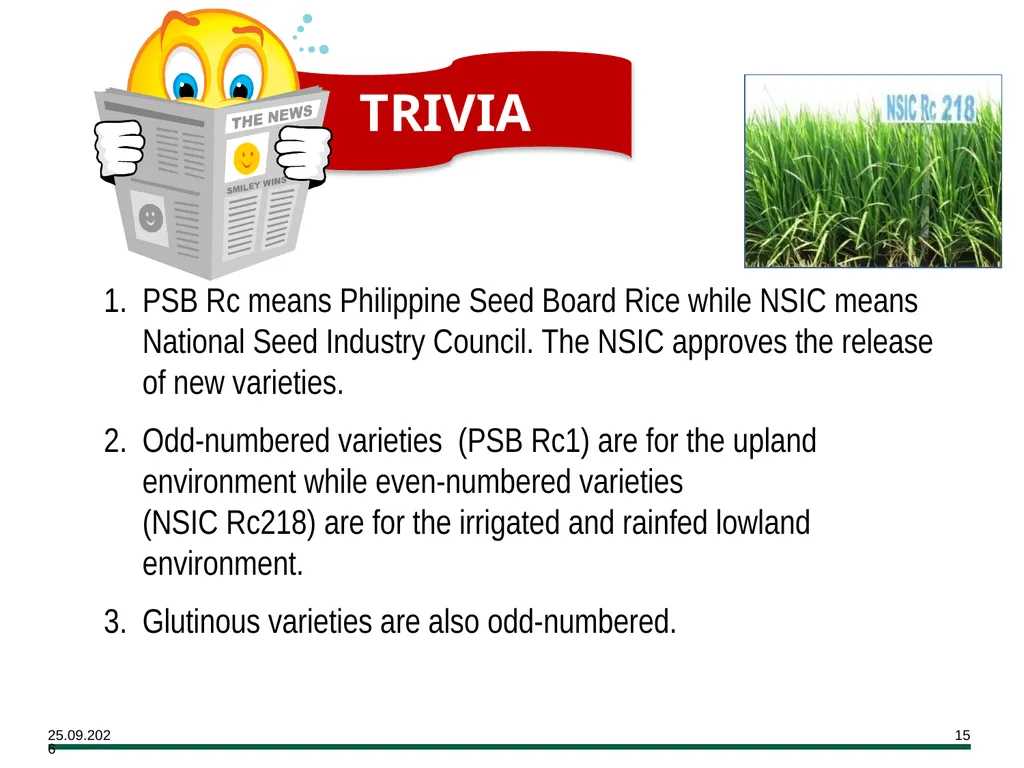
PSB Rc means Philippine Seed Board Rice while NSIC means National Seed Industry Council. The NSIC approves the release of new varieties.
Odd-numbered varieties (PSB Rc1) are for the upland environment while even-numbered varieties (NSIC Rc218) are for the irrigated and rainfed lowland environment.
Glutinous varieties are also odd-numbered. TRIVIA<br>
Odd-numbered varieties (PSB Rc1) are for the upland environment while even-numbered varieties (NSIC Rc218) are for the irrigated and rainfed lowland environment.
Glutinous varieties are also odd-numbered. TRIVIA<br>
16
TRIVIA 4. Lowland rice varieties are named after rivers (Pagsanjan, PSB Rc10) while upland rice varieties are named after mountains (Apo, NSIC Rc9)
5. Popular names of rice varieties are as follows: Irrigated – Tubigan
Upland varieties – Katihan
Rainfed - Sahod-ulan
Cool-elevated - Cordillera Saline-prone - Salinas
Glutinous - Malagkit
Aromatic- Mabango
Flood-prone – Submarino
Tungro-resistant - Matatag<br>
5. Popular names of rice varieties are as follows: Irrigated – Tubigan
Upland varieties – Katihan
Rainfed - Sahod-ulan
Cool-elevated - Cordillera Saline-prone - Salinas
Glutinous - Malagkit
Aromatic- Mabango
Flood-prone – Submarino
Tungro-resistant - Matatag<br>
17
LESSON 2:
SEED TREATMENT<br>
18
Outcomes By the end of the session, you should be
able to:
Name the benefits of seed treatment
Explain the proper way to treat seeds<br>
able to:
Name the benefits of seed treatment
Explain the proper way to treat seeds<br>
19
Structure Explanation
Activities
Insight Sharing<br>
Activities
Insight Sharing<br>
20
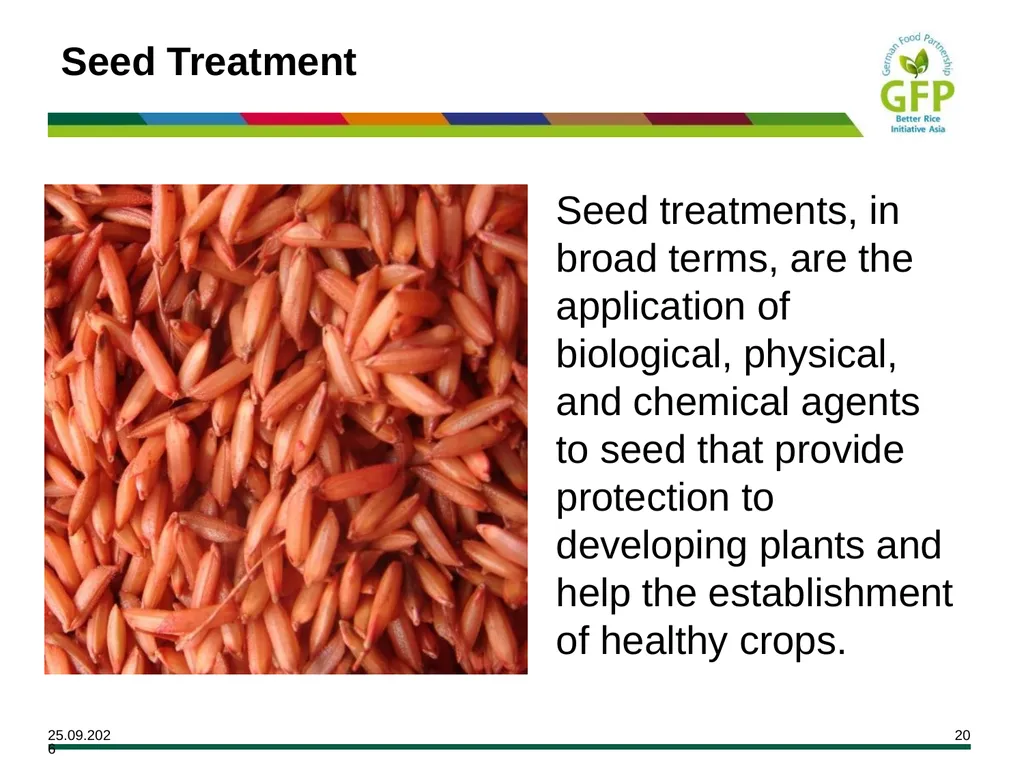
Seed Treatment Seed treatments, in broad terms, are the application of biological, physical, and chemical agents to seed that provide protection to developing plants and help the establishment of healthy crops.<br>
21
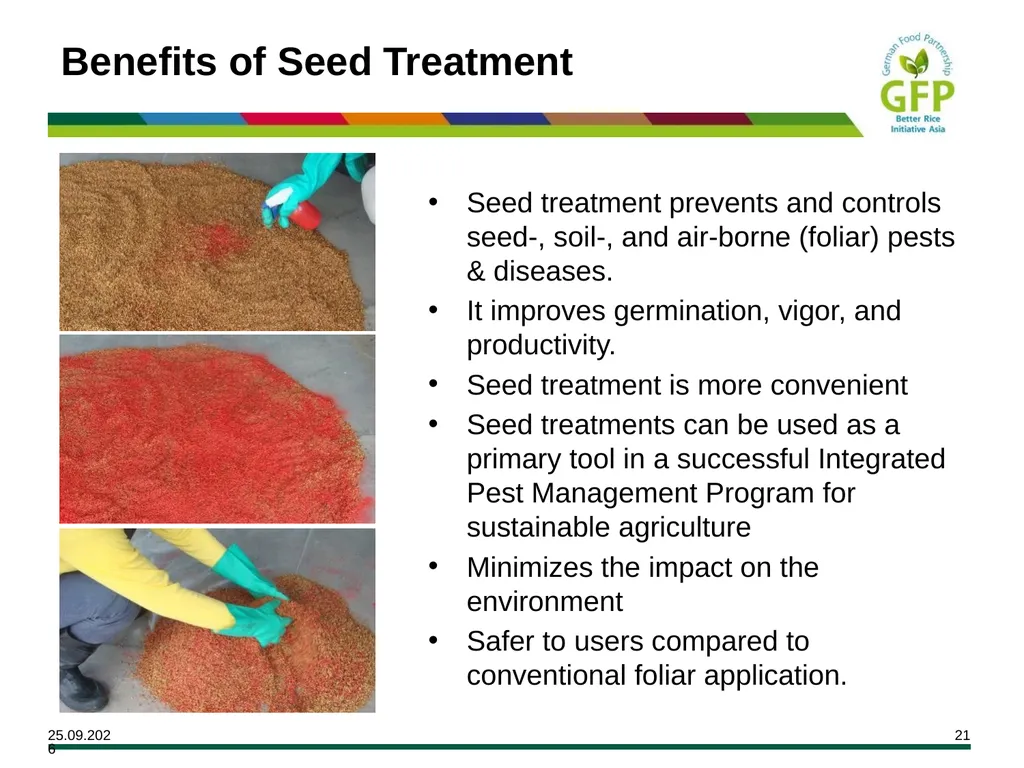
Benefits of Seed Treatment Seed treatment prevents and controls seed-, soil-, and air-borne (foliar) pests & diseases.
It improves germination, vigor, and productivity.
Seed treatment is more convenient
Seed treatments can be used as a primary tool in a successful Integrated Pest Management Program for sustainable agriculture
Minimizes the impact on the environment
Safer to users compared to conventional foliar application.<br>
It improves germination, vigor, and productivity.
Seed treatment is more convenient
Seed treatments can be used as a primary tool in a successful Integrated Pest Management Program for sustainable agriculture
Minimizes the impact on the environment
Safer to users compared to conventional foliar application.<br>
22
Types of Seed Treatment Seed dressing:
most common method of seed treatment.
The seed is dressed with either a dry formulation or wet treated with a slurry or liquid formulation.
Dressings can be applied at both farm and industries.
Seed coating:
A special binder is used with a formulation to enhance adherence to the seed.
Coating requires advanced treatment technology, by the industry.
Seed pelleting:
The most sophisticated Seed Treatment Technology, resulting in changing physical shape of a seed to enhance pelletibility and handling.
Pelleting requires specialized application machinery and techniques and is the most expensive application.<br>
most common method of seed treatment.
The seed is dressed with either a dry formulation or wet treated with a slurry or liquid formulation.
Dressings can be applied at both farm and industries.
Seed coating:
A special binder is used with a formulation to enhance adherence to the seed.
Coating requires advanced treatment technology, by the industry.
Seed pelleting:
The most sophisticated Seed Treatment Technology, resulting in changing physical shape of a seed to enhance pelletibility and handling.
Pelleting requires specialized application machinery and techniques and is the most expensive application.<br>
23
LESSON 3:
CROP ESTABLISHMENT<br>
24
Outcomes By the end of the session, you should be
able to:
Describe the two main methods of rice crop establishment;
Determine the more appropriate method of establishment for a particular situation;
Describe the methods of seedling management and seed bed preparation;
Determine the most the appropriate methods of seedling management for a particular situation; and
Discuss the importance of attaining sufficient quantity of healthy seedlings.<br>
able to:
Describe the two main methods of rice crop establishment;
Determine the more appropriate method of establishment for a particular situation;
Describe the methods of seedling management and seed bed preparation;
Determine the most the appropriate methods of seedling management for a particular situation; and
Discuss the importance of attaining sufficient quantity of healthy seedlings.<br>
25
Structure Explanation
Activities
Insight Sharing<br>
Activities
Insight Sharing<br>
26
ANSWER THE FOLLOWING: How do you define/describe direct seeding (or transplanting)?
When or under what conditions should a farmer practice direct seeding (or transplanting)?
What are the main benefits/advantages of using your method?
What are the main drawbacks/disadvantages of using your method?<br>
When or under what conditions should a farmer practice direct seeding (or transplanting)?
What are the main benefits/advantages of using your method?
What are the main drawbacks/disadvantages of using your method?<br>
27
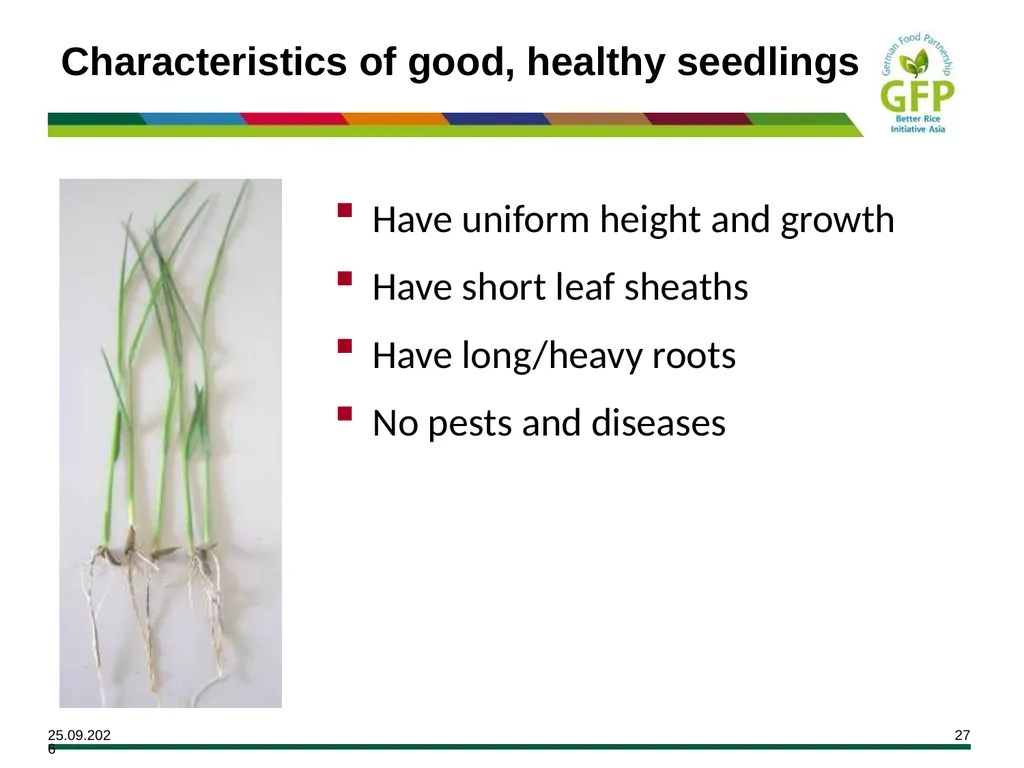
Have uniform height and growth
Have short leaf sheaths
Have long/heavy roots
No pests and diseases Characteristics of good, healthy seedlings<br>
Have short leaf sheaths
Have long/heavy roots
No pests and diseases Characteristics of good, healthy seedlings<br>
28
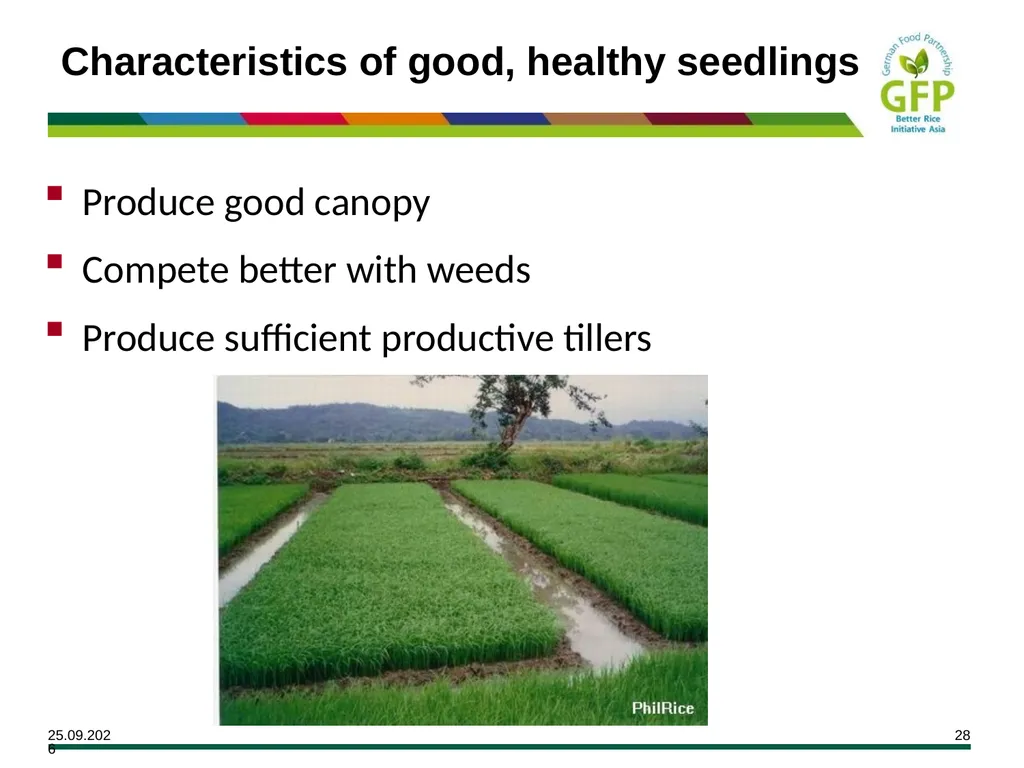
Produce good canopy
Compete better with weeds
Produce sufficient productive tillers Characteristics of good, healthy seedlings<br>
Compete better with weeds
Produce sufficient productive tillers Characteristics of good, healthy seedlings<br>
29
Recommended Seeding Rate Transplanted rice (TPR)
20 to 40 kg/ha for inbred
15 to 20 kg/ha for Hybrid
Direct Seeding (Wet or dry)
40 kg seeds/ha – 150 plants/m2 *
80 kg seeds/ha – 300 plants/m2 * * 15 DAS<br>
20 to 40 kg/ha for inbred
15 to 20 kg/ha for Hybrid
Direct Seeding (Wet or dry)
40 kg seeds/ha – 150 plants/m2 *
80 kg seeds/ha – 300 plants/m2 * * 15 DAS<br>
30
transplanting<br>
31
Transplanting : Critical Factors Proper nursery management
Careful handling of young seedlings for fast revival and early growth after TP
Shallow transplanting at 1-2 cm depth
Optimum plant-to-plant spacing
Optimum number of seedlings<br>
Careful handling of young seedlings for fast revival and early growth after TP
Shallow transplanting at 1-2 cm depth
Optimum plant-to-plant spacing
Optimum number of seedlings<br>
32
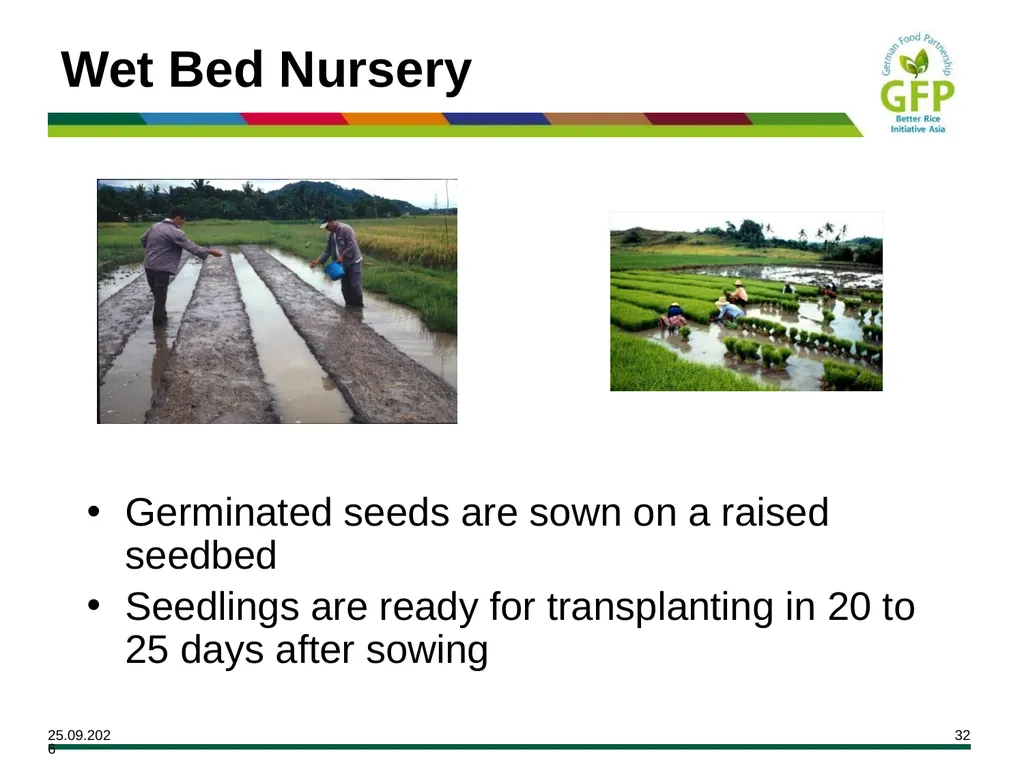
Wet Bed Nursery Germinated seeds are sown on a raised seedbed
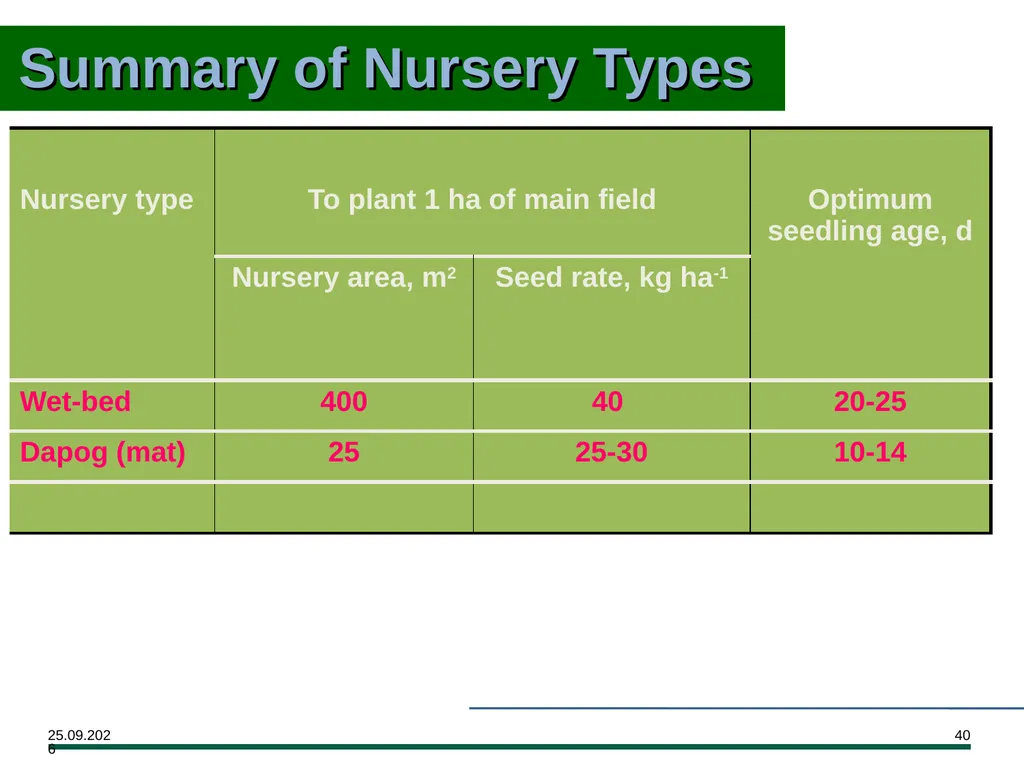
Seedlings are ready for transplanting in 20 to 25 days after sowing<br>
Seedlings are ready for transplanting in 20 to 25 days after sowing<br>
33
Wet-bed nursery Required seed & seedbed area: 40 kg seed & 400 m2 seedbed area for TP one ha of main field
Start of seedbed preparation: 2 weeks before sowing time
Pre-germination of seeds: 2 days before sowing: 24-36 hr soaking & 24-36 hr incubation
Water the seedbed: 2-3 DAS and then maintain a water level of 1-2 cm, depending on the height of seedlings
Seedlings are ready for TP from 20-25 DAS<br>
Start of seedbed preparation: 2 weeks before sowing time
Pre-germination of seeds: 2 days before sowing: 24-36 hr soaking & 24-36 hr incubation
Water the seedbed: 2-3 DAS and then maintain a water level of 1-2 cm, depending on the height of seedlings
Seedlings are ready for TP from 20-25 DAS<br>
34
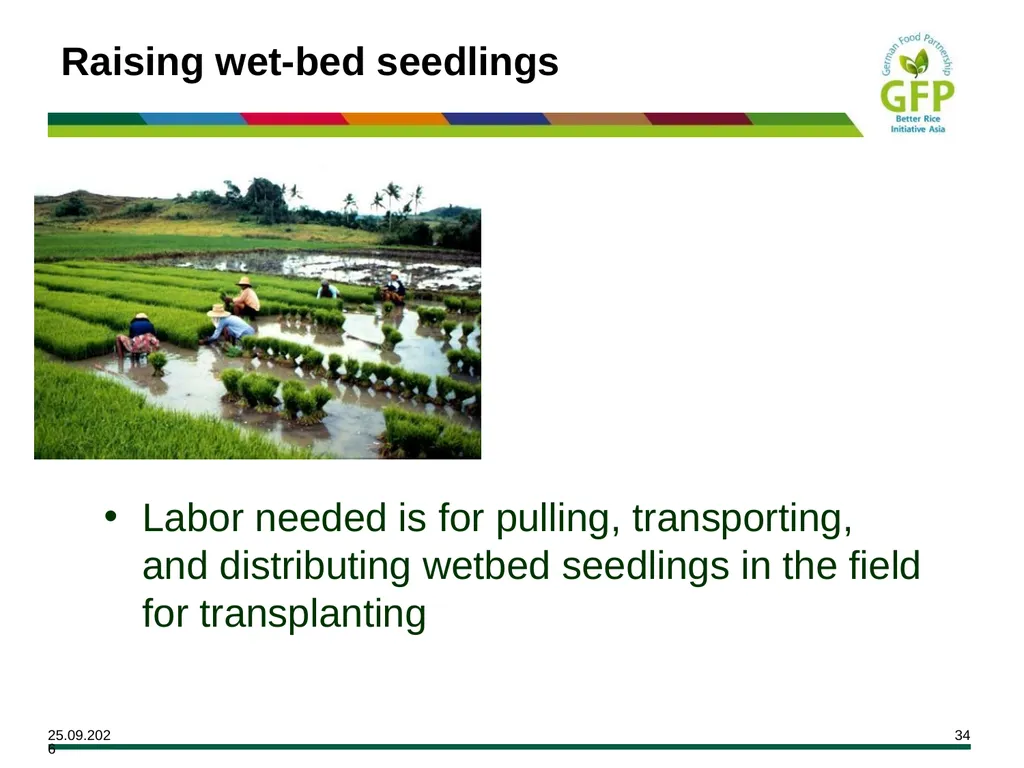
Raising wet-bed seedlings Labor needed is for pulling, transporting, and distributing wetbed seedlings in the field for transplanting<br>
35
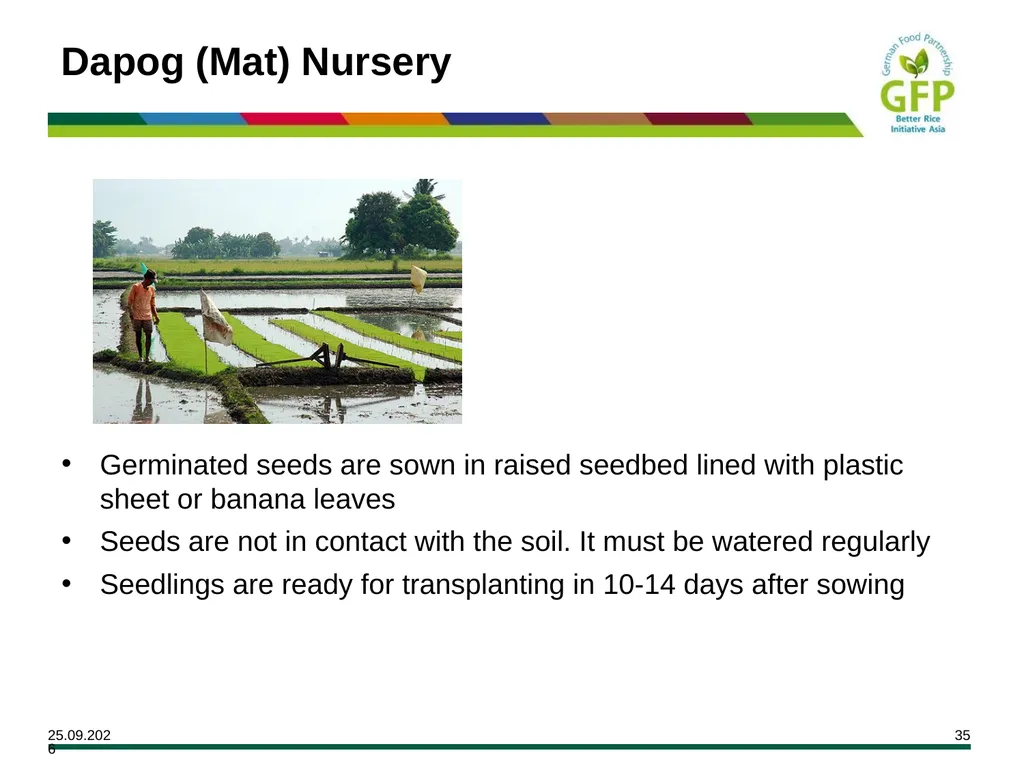
Dapog (Mat) Nursery Germinated seeds are sown in raised seedbed lined with plastic sheet or banana leaves
Seeds are not in contact with the soil. It must be watered regularly
Seedlings are ready for transplanting in 10-14 days after sowing<br>
Seeds are not in contact with the soil. It must be watered regularly
Seedlings are ready for transplanting in 10-14 days after sowing<br>
36
Dapog (Mat) Nursery Less labor need
Shorter period of raising seedlings
Easy transport of seedling-mats to main field
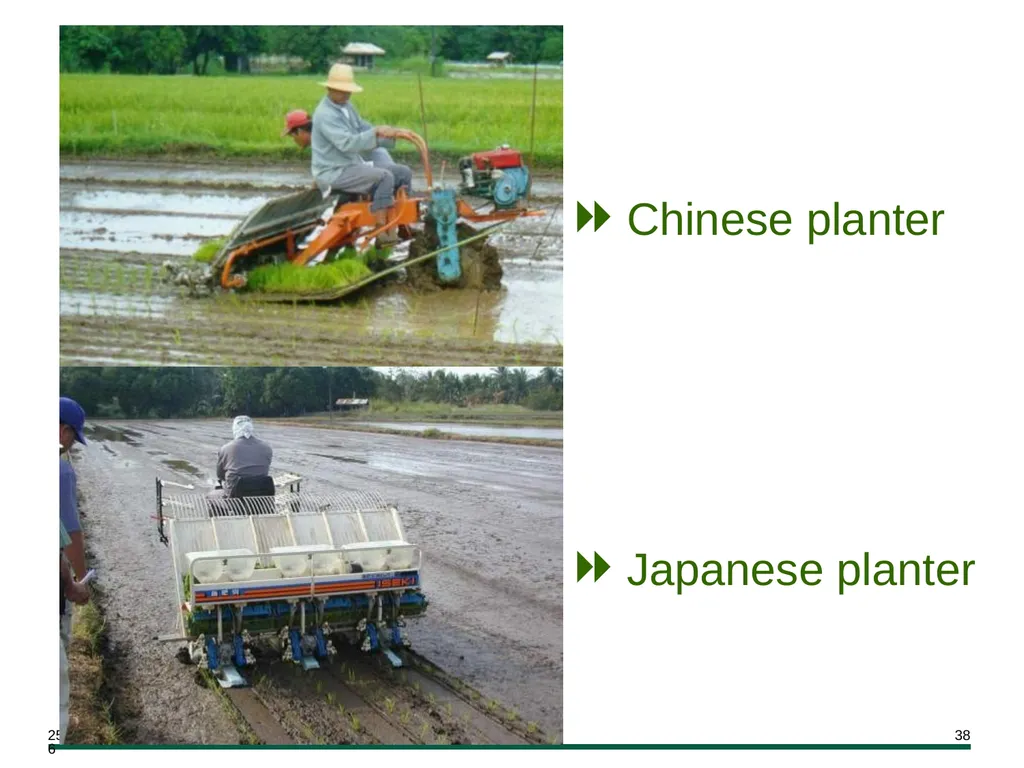
Preferred for mechanical transplanting
Select a level area near the household and/or a water source<br>
Shorter period of raising seedlings
Easy transport of seedling-mats to main field
Preferred for mechanical transplanting
Select a level area near the household and/or a water source<br>
37
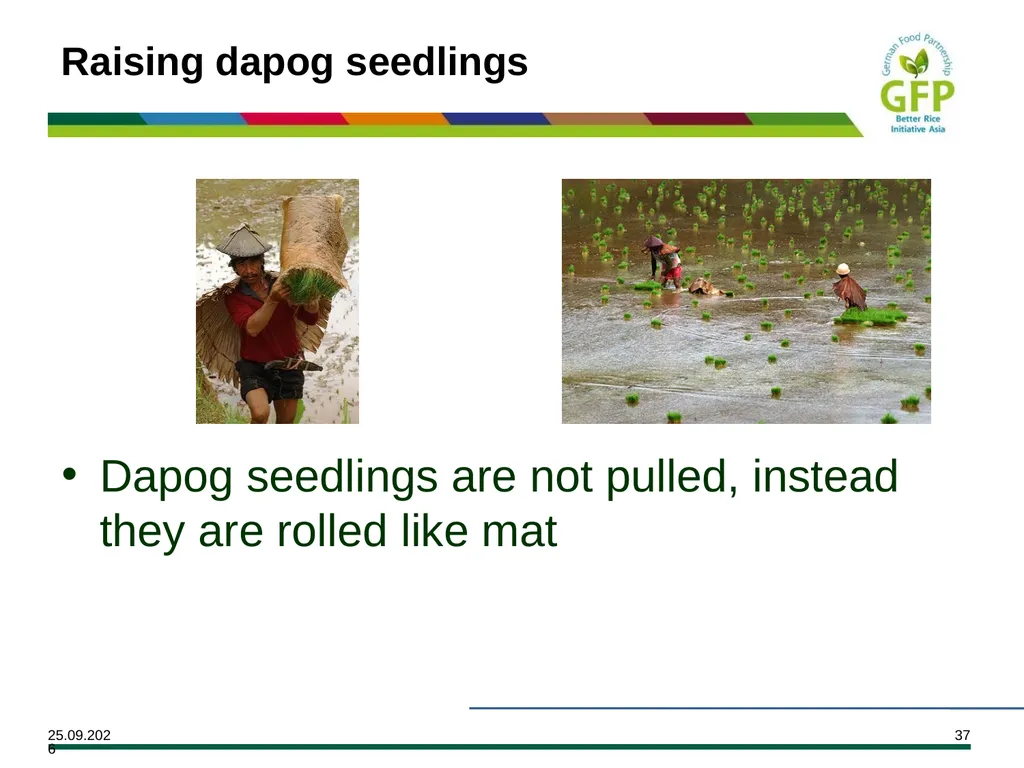
Raising dapog seedlings Dapog seedlings are not pulled, instead they are rolled like mat<br>
38
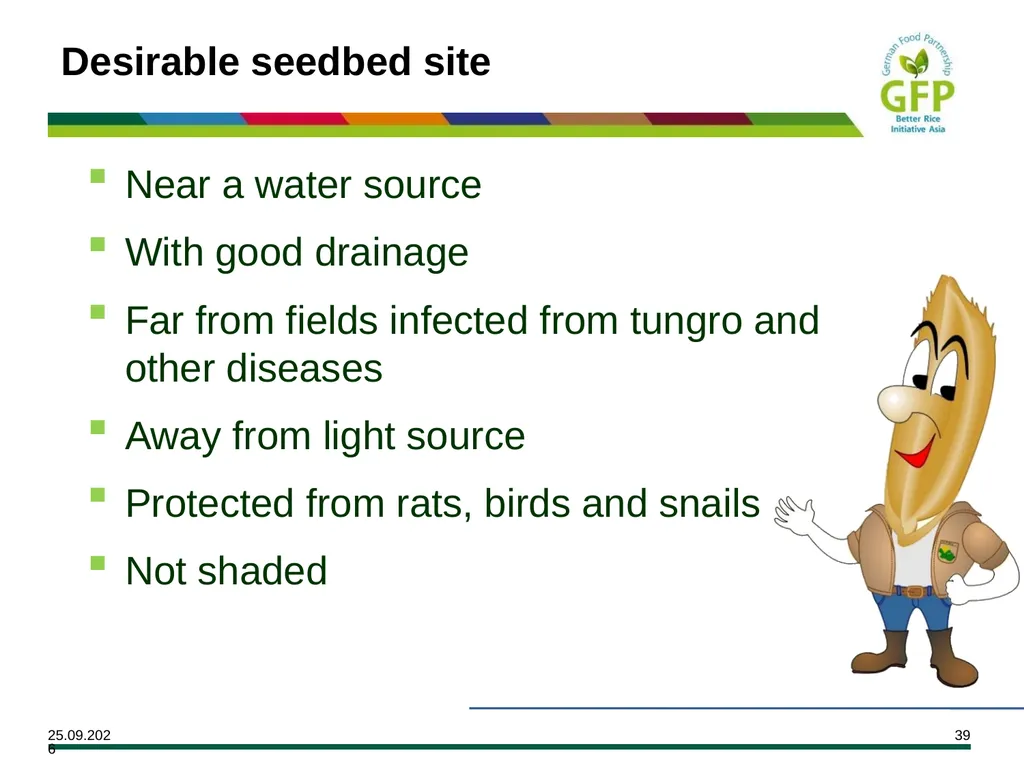
Near a water source
With good drainage
Far from fields infected from tungro and other diseases
Away from light source
Protected from rats, birds and snails
Not shaded Desirable seedbed site<br>
With good drainage
Far from fields infected from tungro and other diseases
Away from light source
Protected from rats, birds and snails
Not shaded Desirable seedbed site<br>
39
Summary of Nursery Types<br>
40
Soil is soft and loose
Weeds and other plant residues thoroughly incorporated and decomposed
Well drained
Level Desirable characteristics of the seedbed<br>
Weeds and other plant residues thoroughly incorporated and decomposed
Well drained
Level Desirable characteristics of the seedbed<br>
41
Seed Preparation<br>
42
Wash seeds before and after soaking
Soak seeds in clean water for 12-24 hours
Change soaking water every 5-6 hours Soaking<br>
Soak seeds in clean water for 12-24 hours
Change soaking water every 5-6 hours Soaking<br>
43
Incubate seeds at 30oC for 24-36 hours or until the root emerges
Keep seeds moist and aerated Incubation<br>
Keep seeds moist and aerated Incubation<br>
44
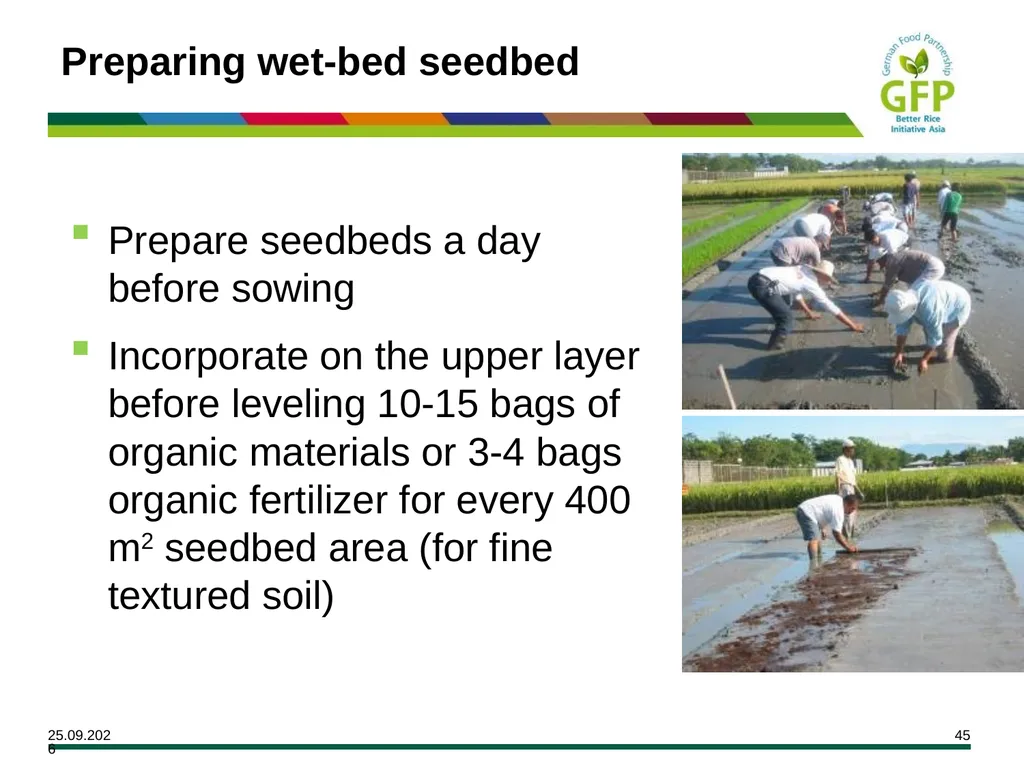
Prepare seedbeds a day before sowing
Incorporate on the upper layer before leveling 10-15 bags of organic materials or 3-4 bags organic fertilizer for every 400 m2 seedbed area (for fine textured soil) Preparing wet-bed seedbed<br>
Incorporate on the upper layer before leveling 10-15 bags of organic materials or 3-4 bags organic fertilizer for every 400 m2 seedbed area (for fine textured soil) Preparing wet-bed seedbed<br>
45
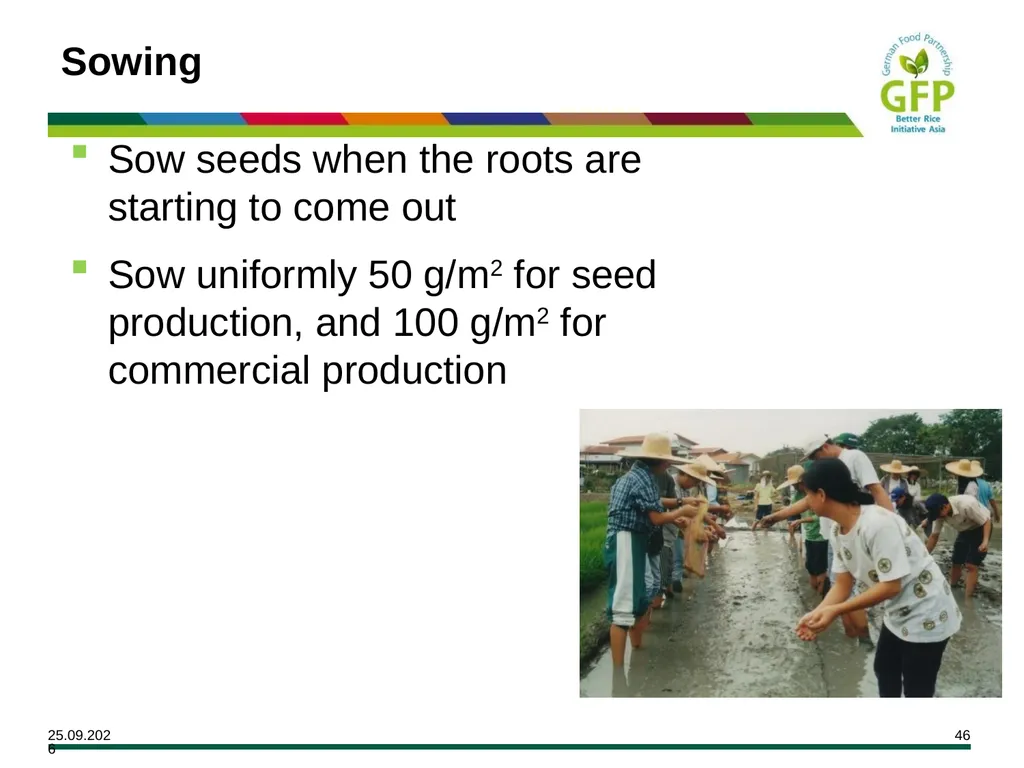
Sow seeds when the roots are starting to come out
Sow uniformly 50 g/m2 for seed production, and 100 g/m2 for commercial production Sowing<br>
Sow uniformly 50 g/m2 for seed production, and 100 g/m2 for commercial production Sowing<br>
46
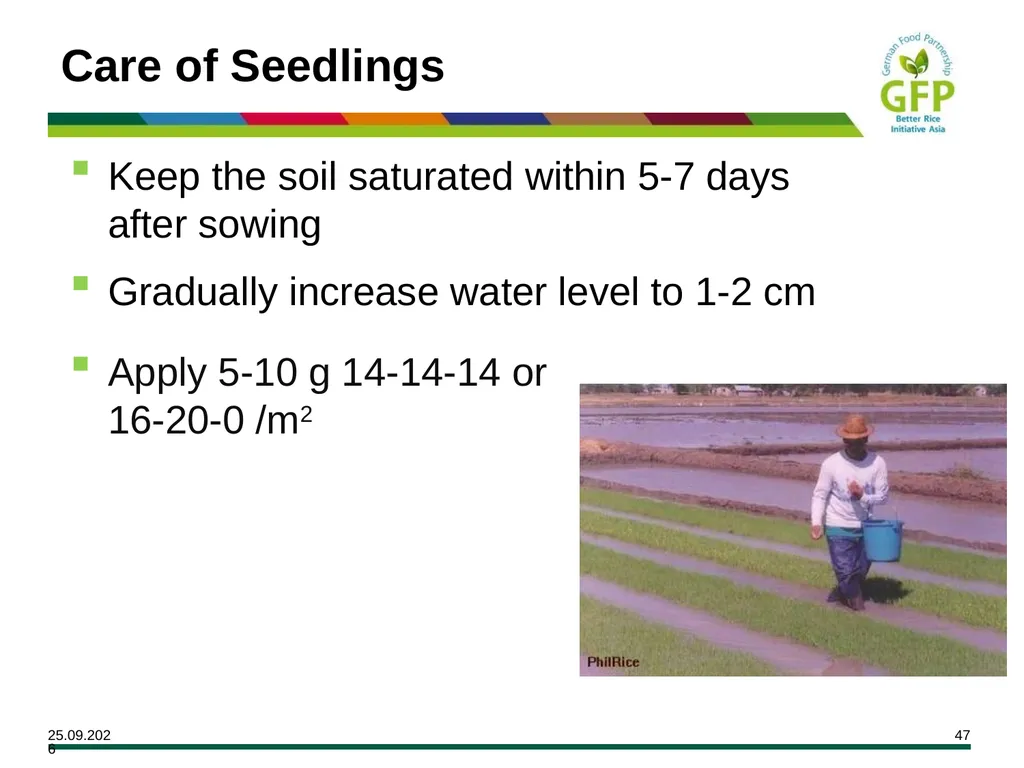
Keep the soil saturated within 5-7 days after sowing
Gradually increase water level to 1-2 cm Apply 5-10 g 14-14-14 or 16-20-0 /m2 Care of Seedlings<br>
Gradually increase water level to 1-2 cm Apply 5-10 g 14-14-14 or 16-20-0 /m2 Care of Seedlings<br>
47
Transplant 20-25 day old seedlings 2-3 cm deep
Use proper hill spacing
Use 1-2 seedlings/hill for F1 cultivation/seed production or 2-3 seedlings/hill for commercial production
Replant within 7 DAT Crop Establishment: Transplanting<br>
Use proper hill spacing
Use 1-2 seedlings/hill for F1 cultivation/seed production or 2-3 seedlings/hill for commercial production
Replant within 7 DAT Crop Establishment: Transplanting<br>
48
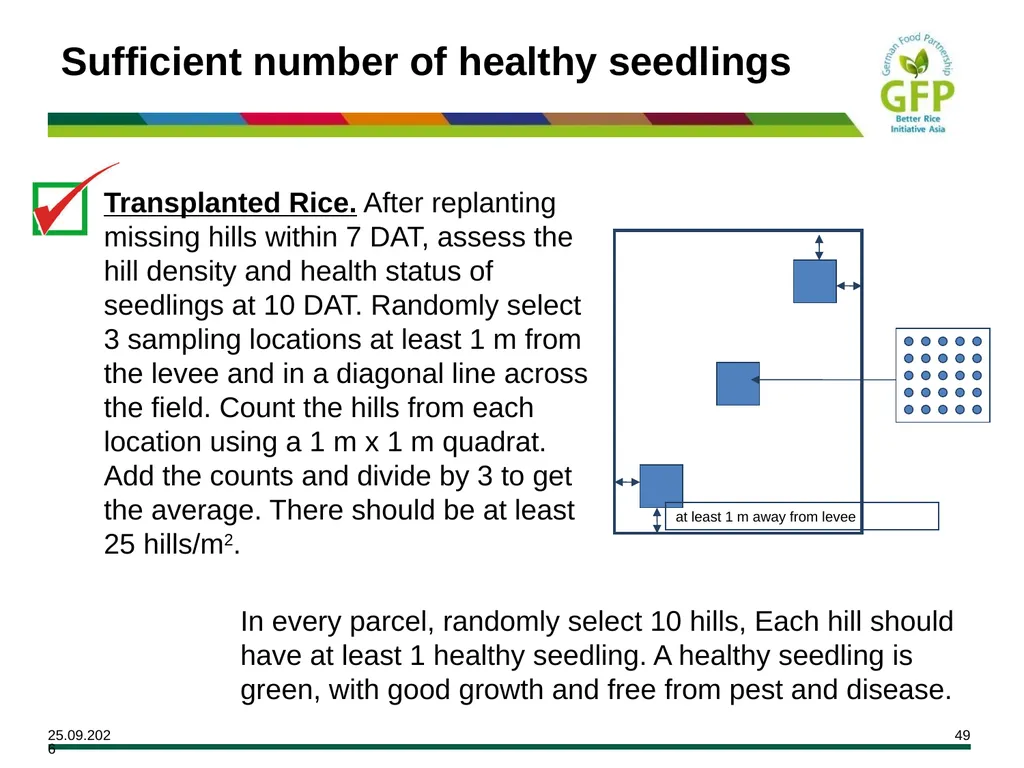
Transplanted Rice. After replanting missing hills within 7 DAT, assess the hill density and health status of seedlings at 10 DAT. Randomly select 3 sampling locations at least 1 m from the levee and in a diagonal line across the field. Count the hills from each location using a 1 m x 1 m quadrat. Add the counts and divide by 3 to get the average. There should be at least 25 hills/m2. at least 1 m away from levee In every parcel, randomly select 10 hills, Each hill should have at least 1 healthy seedling. A healthy seedling is green, with good growth and free from pest and disease. Sufficient number of healthy seedlings<br>
49
DIRECT SEEDING<br>
50
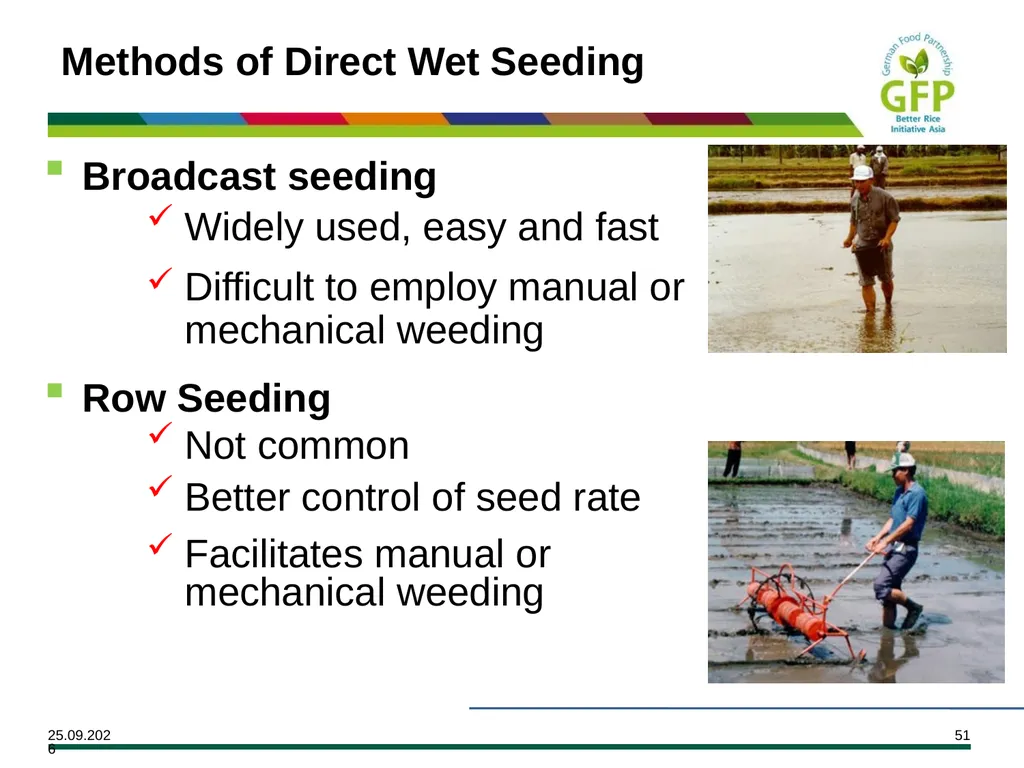
Broadcast seeding
Widely used, easy and fast
Difficult to employ manual or mechanical weeding
Row Seeding
Not common
Better control of seed rate
Facilitates manual or mechanical weeding Methods of Direct Wet Seeding<br>
Widely used, easy and fast
Difficult to employ manual or mechanical weeding
Row Seeding
Not common
Better control of seed rate
Facilitates manual or mechanical weeding Methods of Direct Wet Seeding<br>
51
Direct Seeding : Benefits Faster and easier crop establishment
Less labor need (1-2 vs. 20-25 md for TP)
Earlier crop maturity by 7-10 days
More efficient water use & higher tolerance to water stress
Reduced cost: US$ 60-80 per ha<br>
Less labor need (1-2 vs. 20-25 md for TP)
Earlier crop maturity by 7-10 days
More efficient water use & higher tolerance to water stress
Reduced cost: US$ 60-80 per ha<br>
52
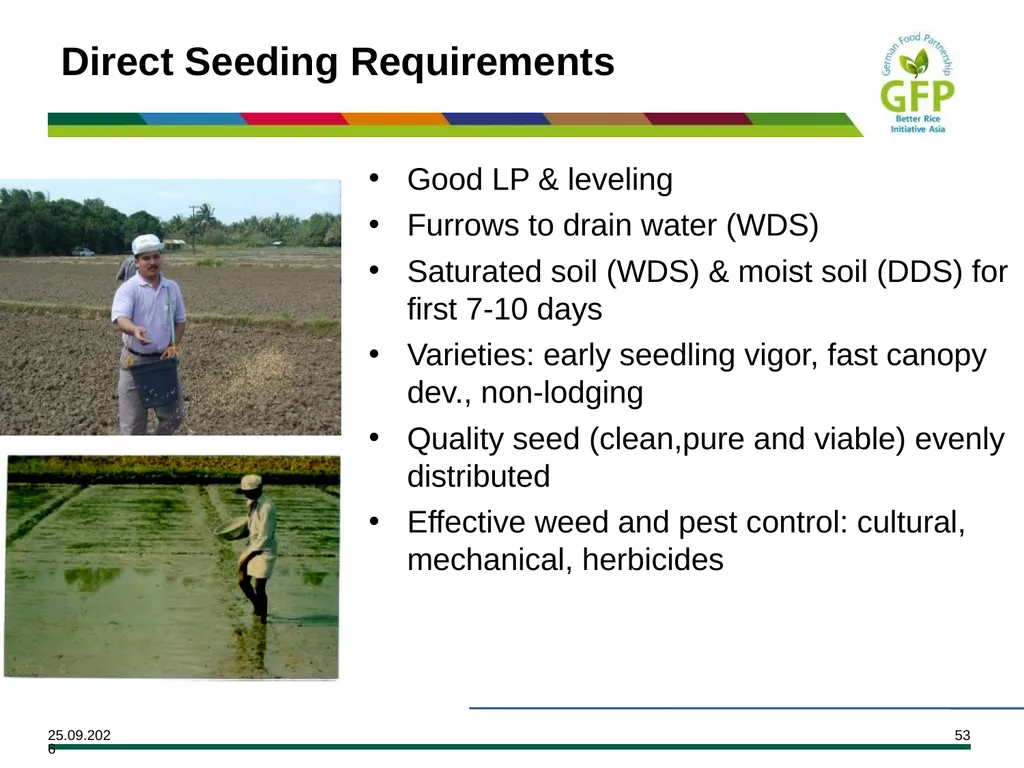
Direct Seeding Requirements Good LP & leveling
Furrows to drain water (WDS)
Saturated soil (WDS) & moist soil (DDS) for first 7-10 days
Varieties: early seedling vigor, fast canopy dev., non-lodging
Quality seed (clean,pure and viable) evenly distributed
Effective weed and pest control: cultural, mechanical, herbicides<br>
Furrows to drain water (WDS)
Saturated soil (WDS) & moist soil (DDS) for first 7-10 days
Varieties: early seedling vigor, fast canopy dev., non-lodging
Quality seed (clean,pure and viable) evenly distributed
Effective weed and pest control: cultural, mechanical, herbicides<br>
53
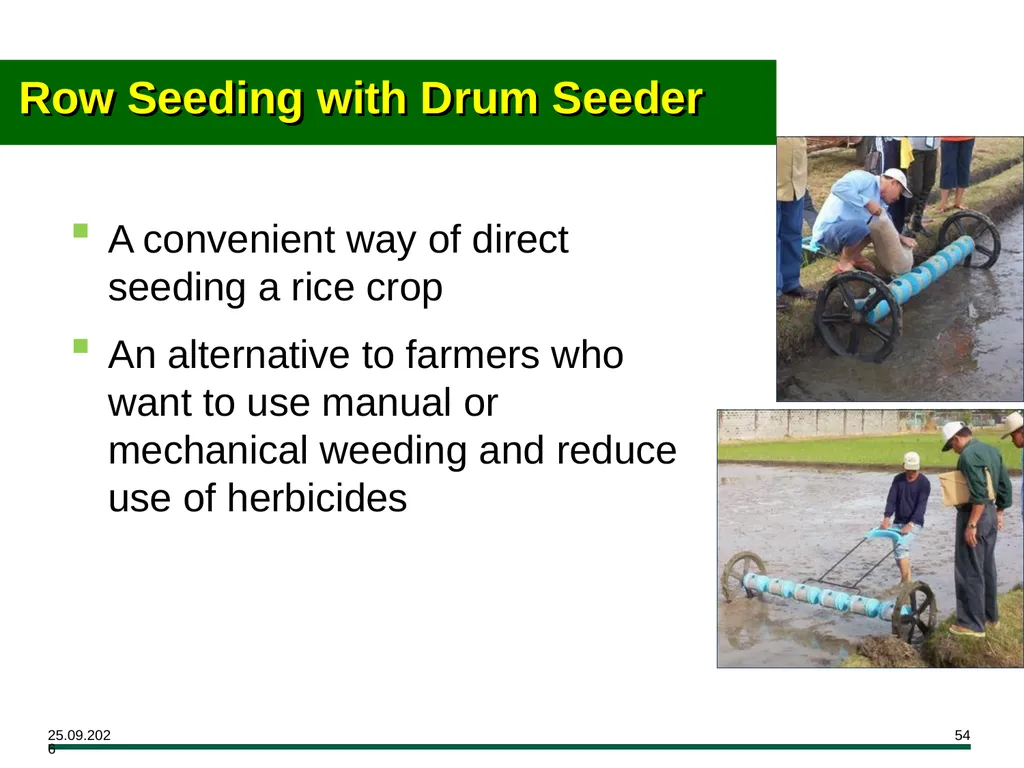
Row Seeding with Drum Seeder A convenient way of direct seeding a rice crop
An alternative to farmers who want to use manual or mechanical weeding and reduce use of herbicides<br>
An alternative to farmers who want to use manual or mechanical weeding and reduce use of herbicides<br>
54
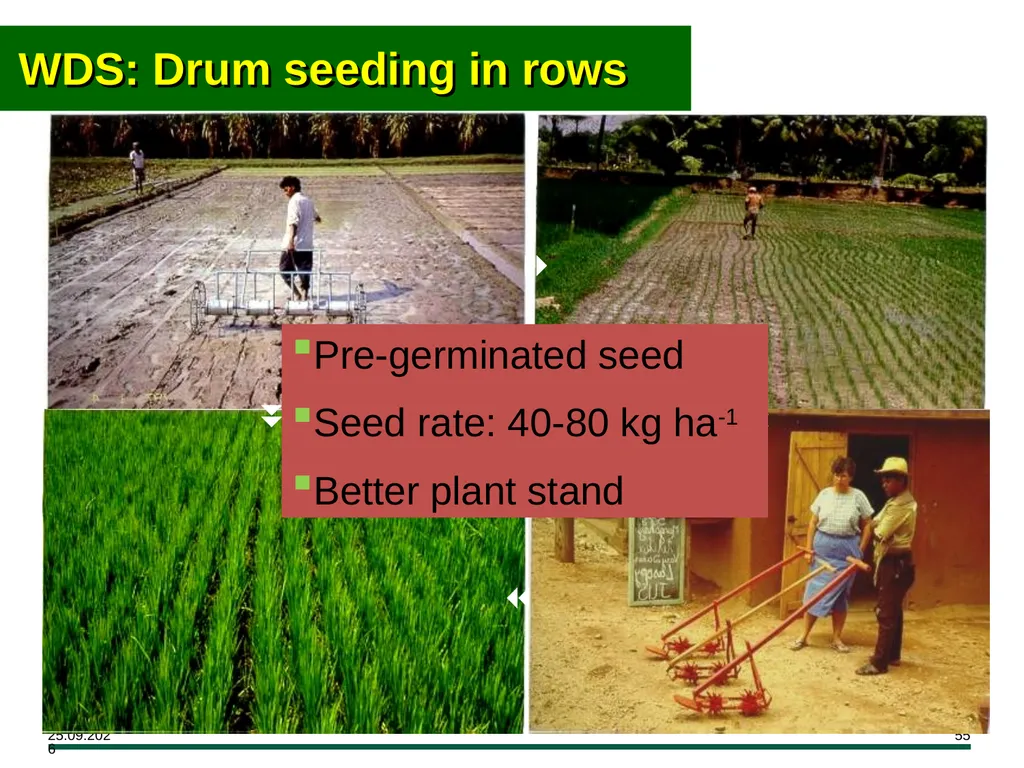
Pre-germinated seed
Seed rate: 40-80 kg ha-1
Better plant stand WDS: Drum seeding in rows<br>
Seed rate: 40-80 kg ha-1
Better plant stand WDS: Drum seeding in rows<br>
55
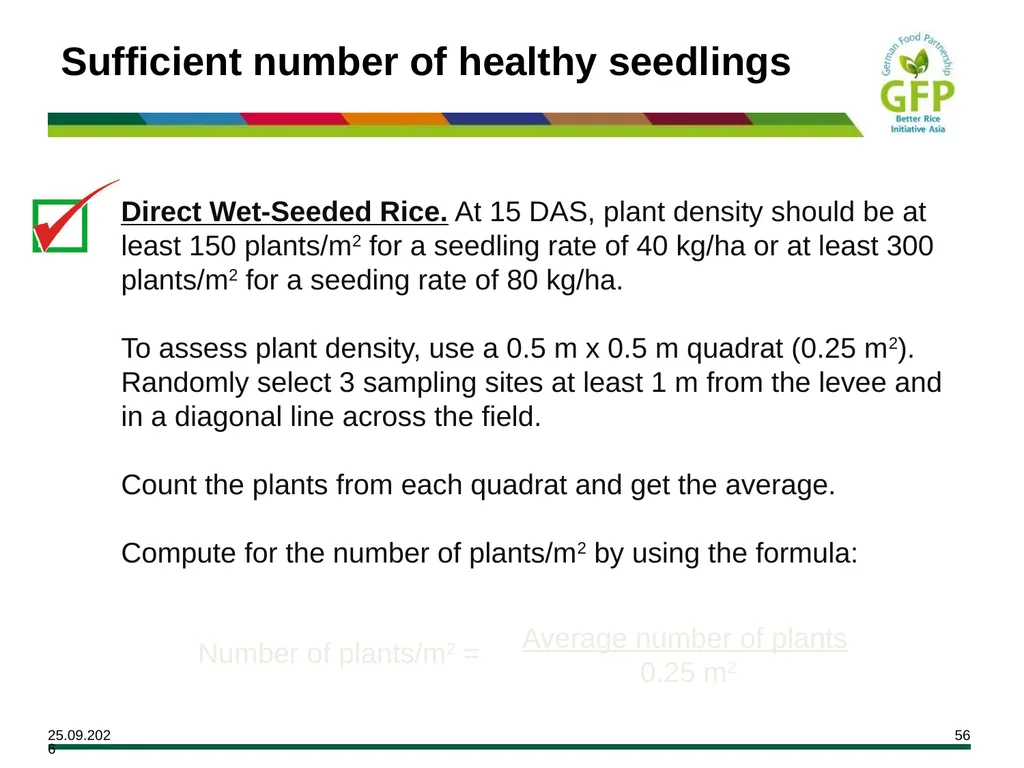
Direct Wet-Seeded Rice. At 15 DAS, plant density should be at least 150 plants/m2 for a seedling rate of 40 kg/ha or at least 300 plants/m2 for a seeding rate of 80 kg/ha.
To assess plant density, use a 0.5 m x 0.5 m quadrat (0.25 m2). Randomly select 3 sampling sites at least 1 m from the levee and in a diagonal line across the field.
Count the plants from each quadrat and get the average.
Compute for the number of plants/m2 by using the formula: Average number of plants
0.25 m2 Number of plants/m2 = Sufficient number of healthy seedlings<br>
To assess plant density, use a 0.5 m x 0.5 m quadrat (0.25 m2). Randomly select 3 sampling sites at least 1 m from the levee and in a diagonal line across the field.
Count the plants from each quadrat and get the average.
Compute for the number of plants/m2 by using the formula: Average number of plants
0.25 m2 Number of plants/m2 = Sufficient number of healthy seedlings<br>
56
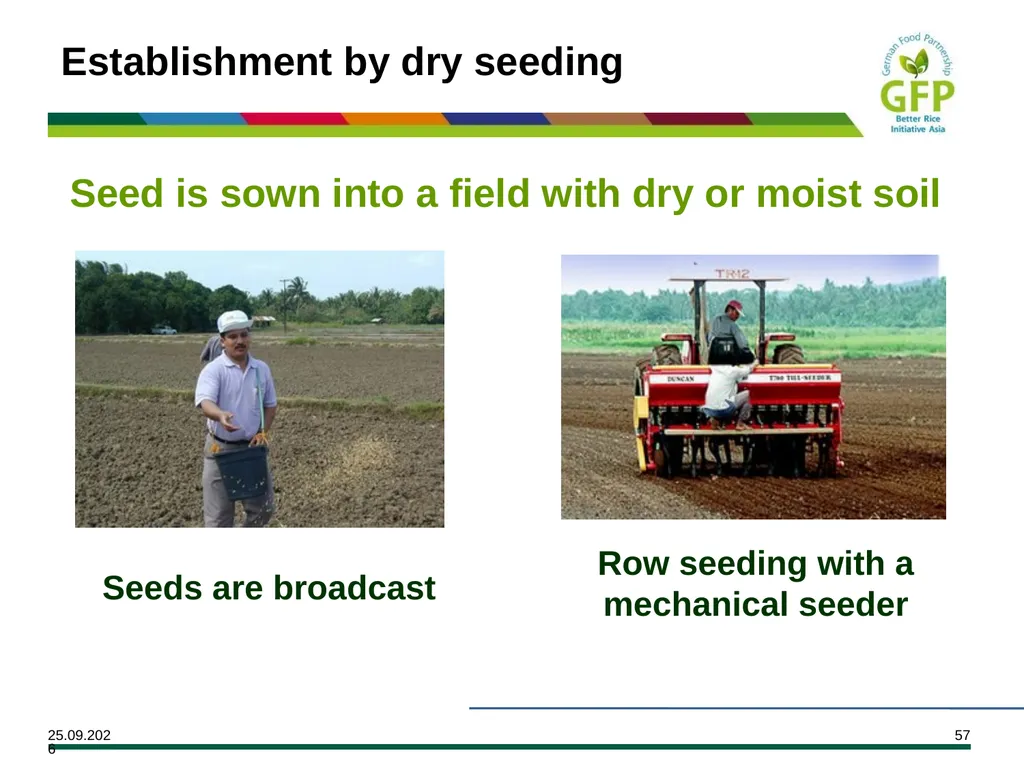
Seeds are broadcast Row seeding with a mechanical seeder Seed is sown into a field with dry or moist soil Establishment by dry seeding<br>
57
LESSON 4:
SYNCHRONOUS PLANTING AND FALLOW PERIOD<br>
58
Outcomes By the end of the session, you should be
able to:
Discuss the importance of practicing synchronous planting;
Explain the proper practice of allowing at least 30 days of fallow period after harvest;
Explain the significance of following the local planting calendar<br>
able to:
Discuss the importance of practicing synchronous planting;
Explain the proper practice of allowing at least 30 days of fallow period after harvest;
Explain the significance of following the local planting calendar<br>
59
Structure Explanation
Activities
Insight Sharing<br>
Activities
Insight Sharing<br>
60
Synchronous Planting<br>
61
Synchronous<br>
62
If this is a field in Brgy. Iya-iya, and each box represents a lot owned by a different farmer.
Can you say the farmers in Brgy. Iya-iya practice synchronous planting? Why or why not?<br>
Can you say the farmers in Brgy. Iya-iya practice synchronous planting? Why or why not?<br>
63
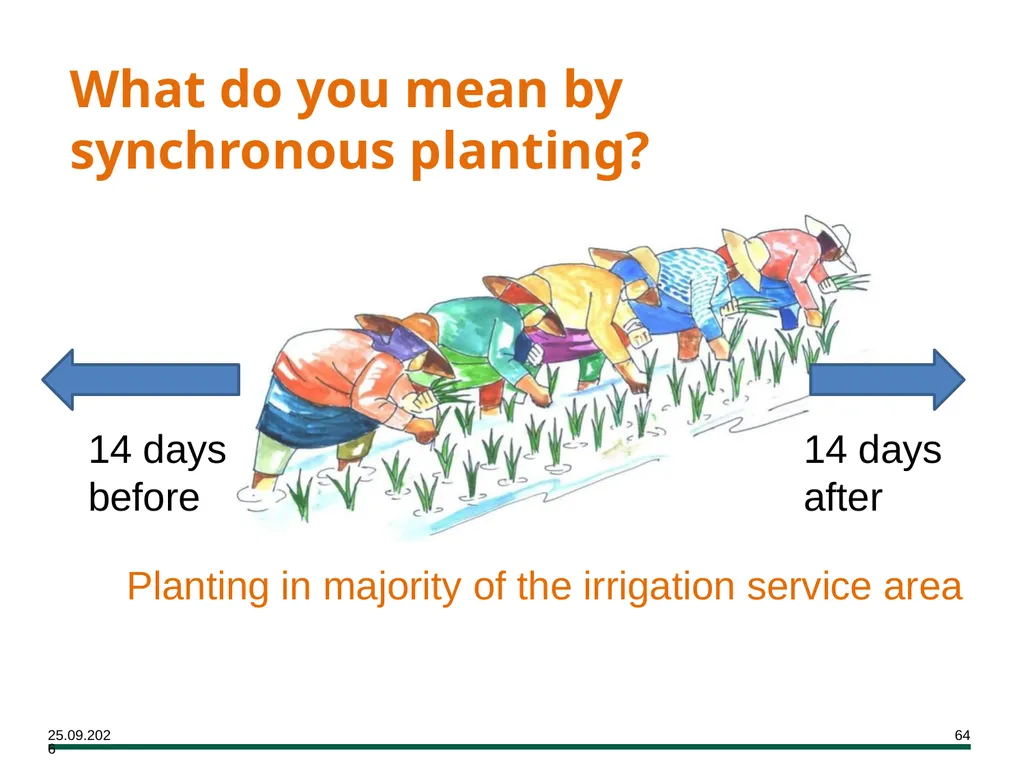
What do you mean by synchronous planting? Planting in majority of the irrigation service area 14 days
before 14 days after<br>
before 14 days after<br>
64
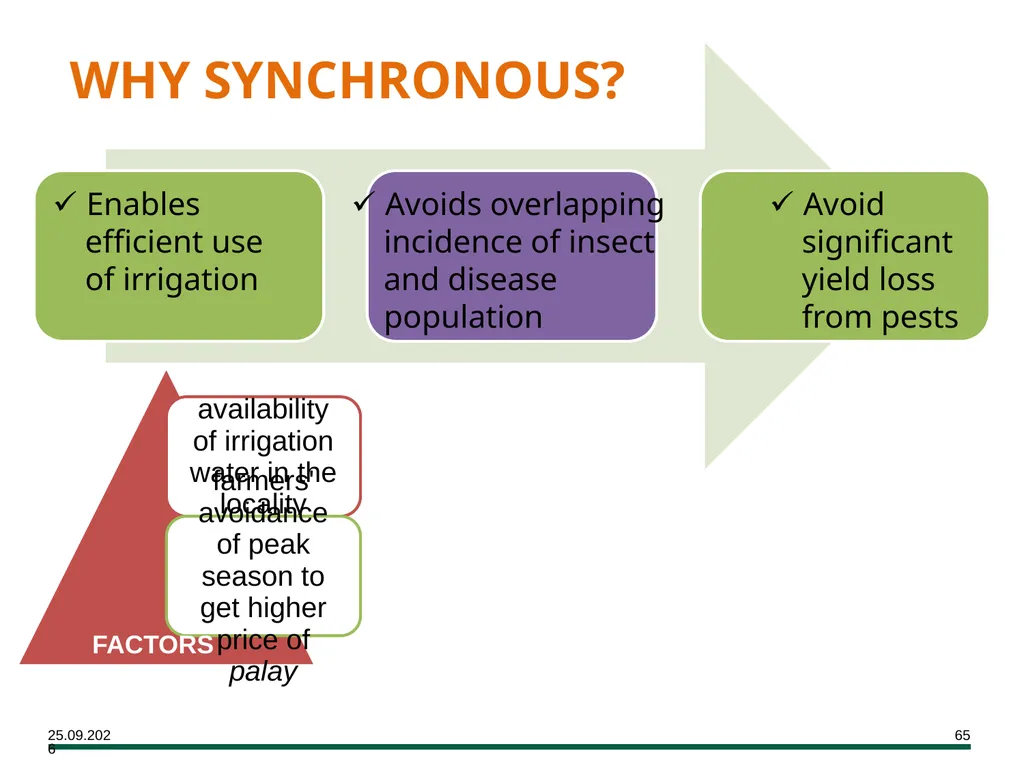
WHY SYNCHRONOUS? Enables efficient use
of irrigation Avoids overlapping incidence of insect and disease population Avoid significant yield loss from pests FACTORS<br>
65
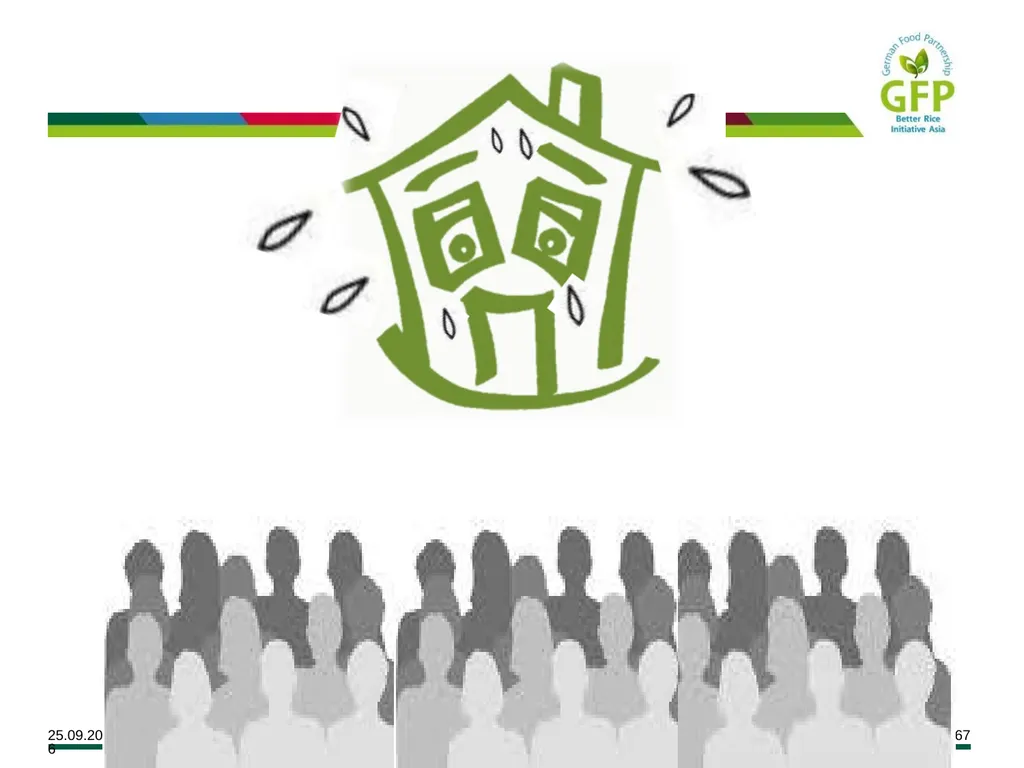
Imagine the Santos family of Brgy. Iya-iya preparing a feast for all residents to celebrate the wedding of their
youngest daughter. What do you think will happen?<br>
66
Now, imagine Brgy. Iya-iya celebrating their barrio fiesta and all houses prepared a banquet for the visitors. Can you imagine the difference?<br>
67
The Barrio Fiesta Analogy
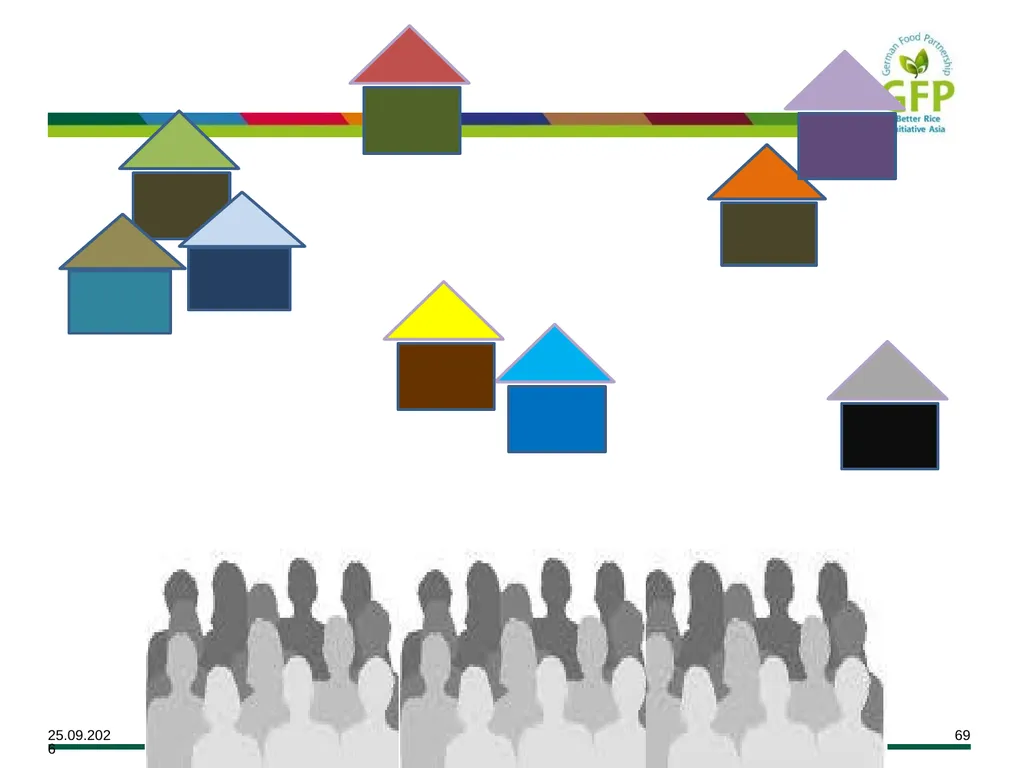
What if? Insect pests = = Rice fields More houses means more rice fields as food source. Thus, insect pests and their damage will not be concentrated in one field only.<br>
What if? Insect pests = = Rice fields More houses means more rice fields as food source. Thus, insect pests and their damage will not be concentrated in one field only.<br>
68
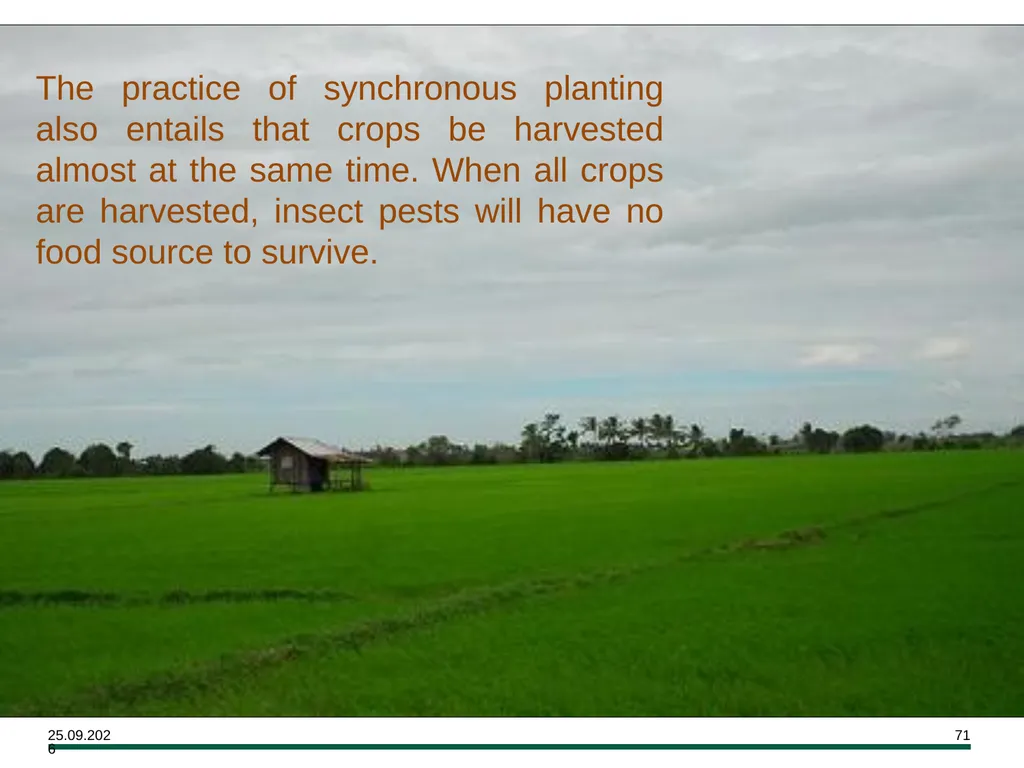
The practice of synchronous planting also entails that crops be harvested almost at the same time. When all crops are harvested, insect pests will have no food source to survive.<br>
69
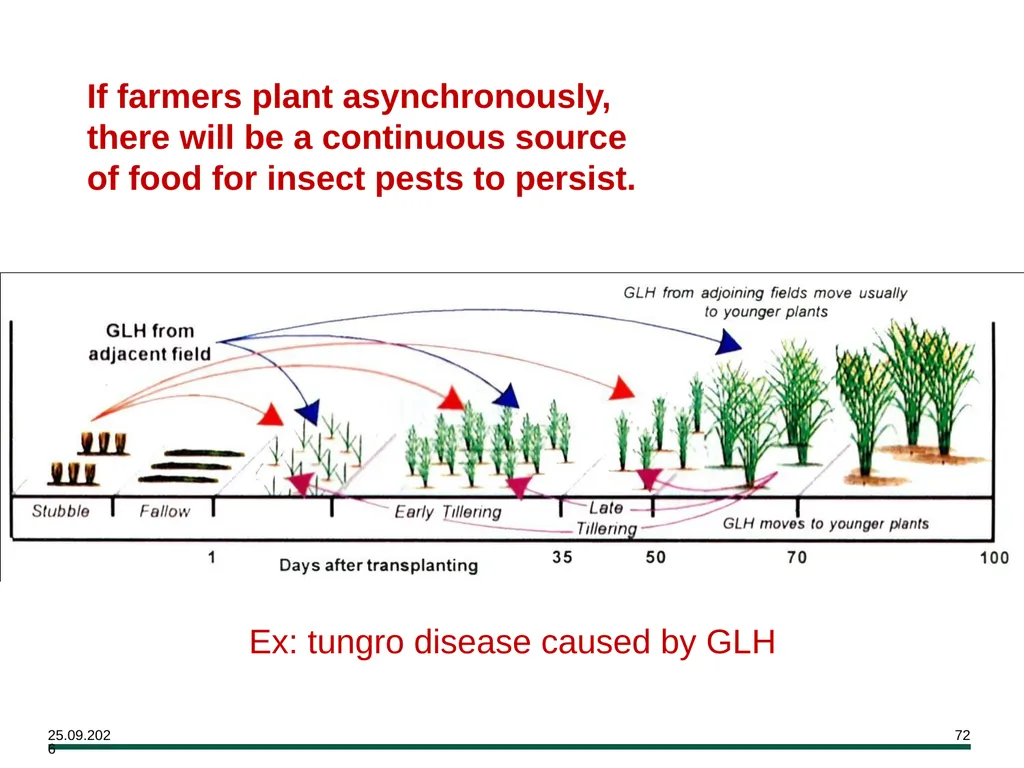
If farmers plant asynchronously, there will be a continuous source of food for insect pests to persist. Ex: tungro disease caused by GLH<br>
70
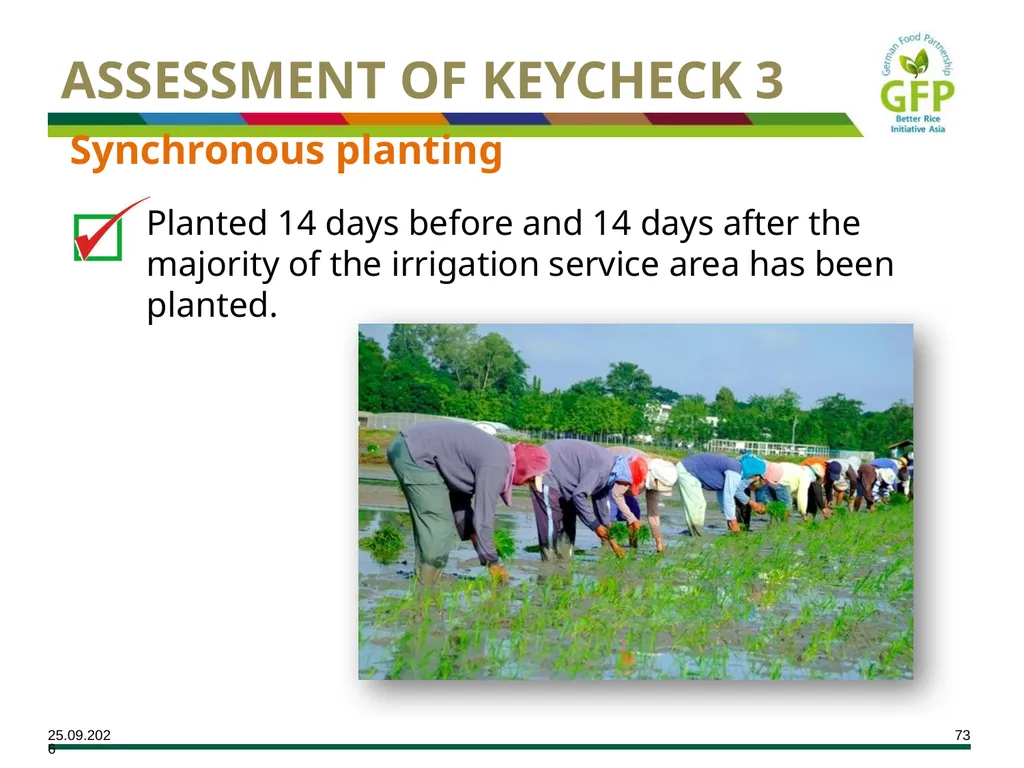
ASSESSMENT OF KEYCHECK 3 Synchronous planting Planted 14 days before and 14 days after the majority of the irrigation service area has been planted.<br>
71
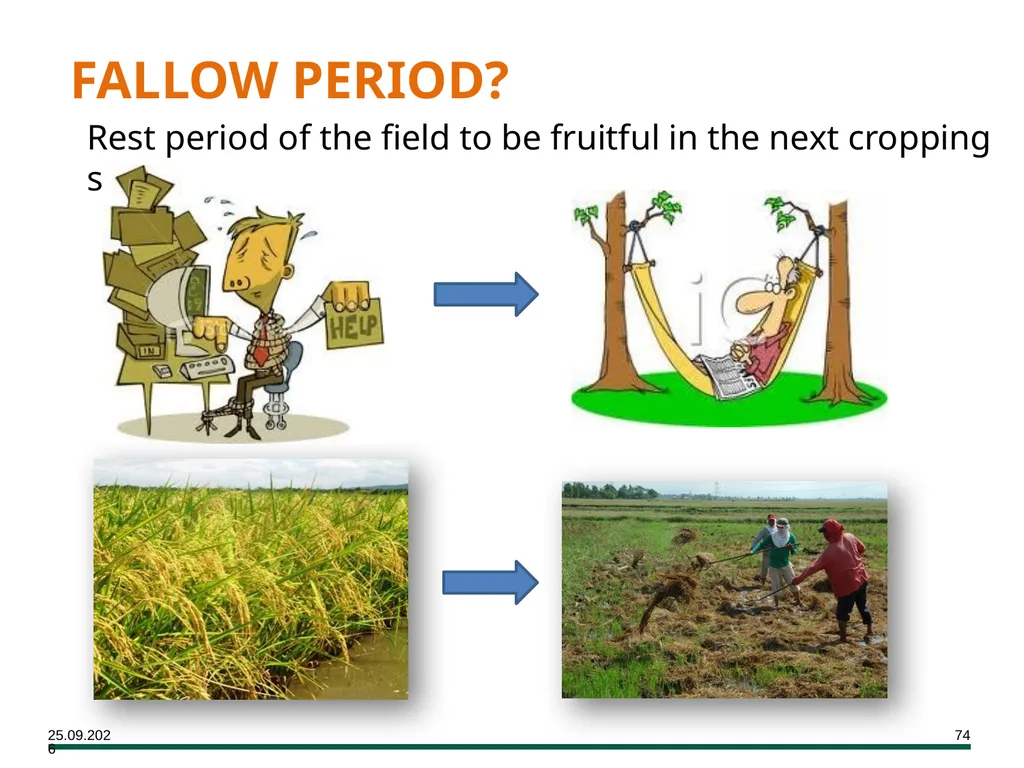
FALLOW PERIOD? FACTORS Rest period of the field to be fruitful in the next cropping season<br>
72
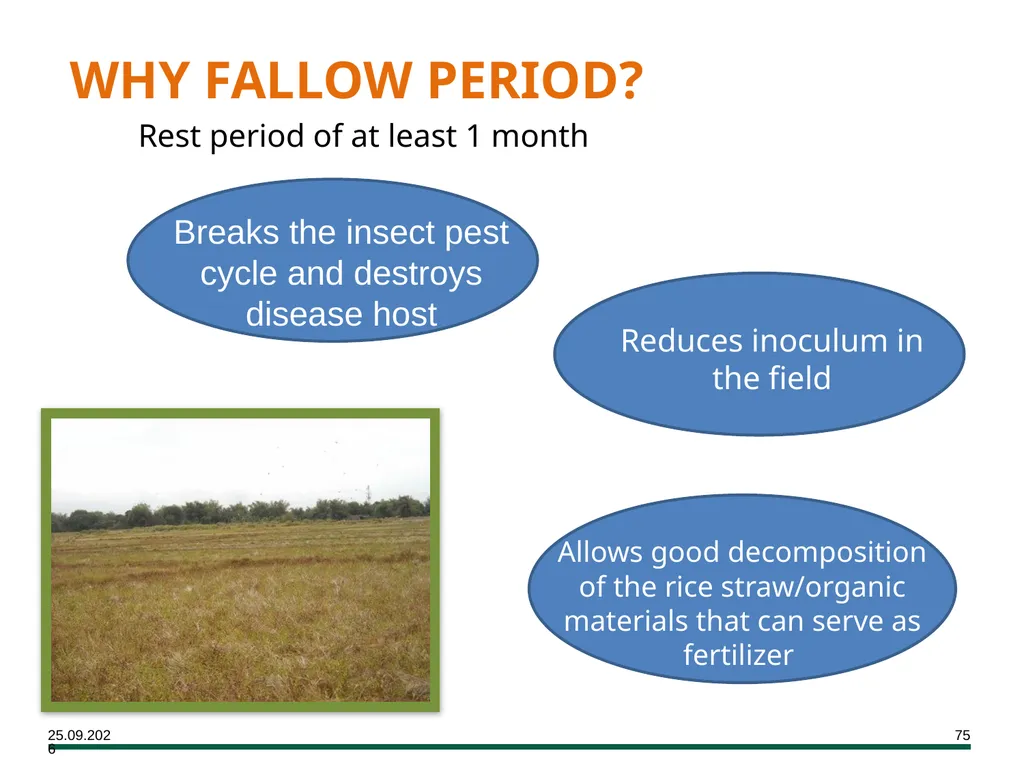
WHY FALLOW PERIOD? Rest period of at least 1 month<br>
73
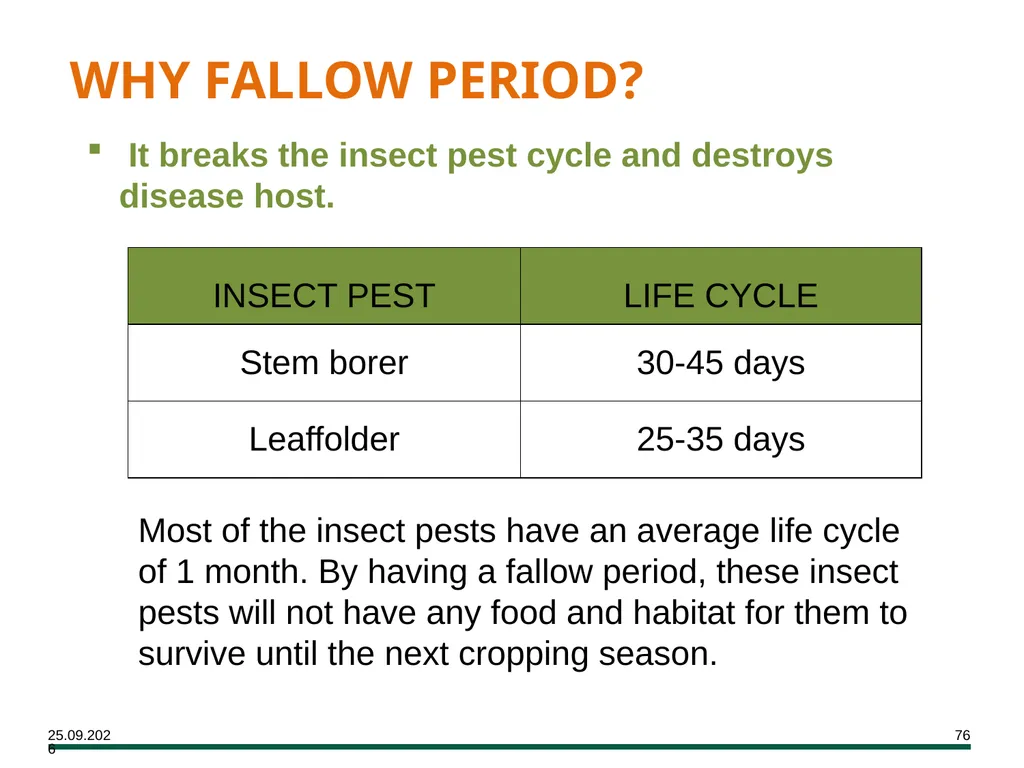
It breaks the insect pest cycle and destroys disease host. WHY FALLOW PERIOD? Most of the insect pests have an average life cycle of 1 month. By having a fallow period, these insect pests will not have any food and habitat for them to survive until the next cropping season.<br>
74
It reduces inoculum in the field. WHY FALLOW PERIOD? By leaving field idle, the source of diseases that developed during the previous cropping season will have died by the start of the next season. It allows good decomposition of the rice straw/organic materials that can serve as fertilizer.<br>
75
Do farmers usually practice fallow period? Why or why not? ? ? ?<br>
76
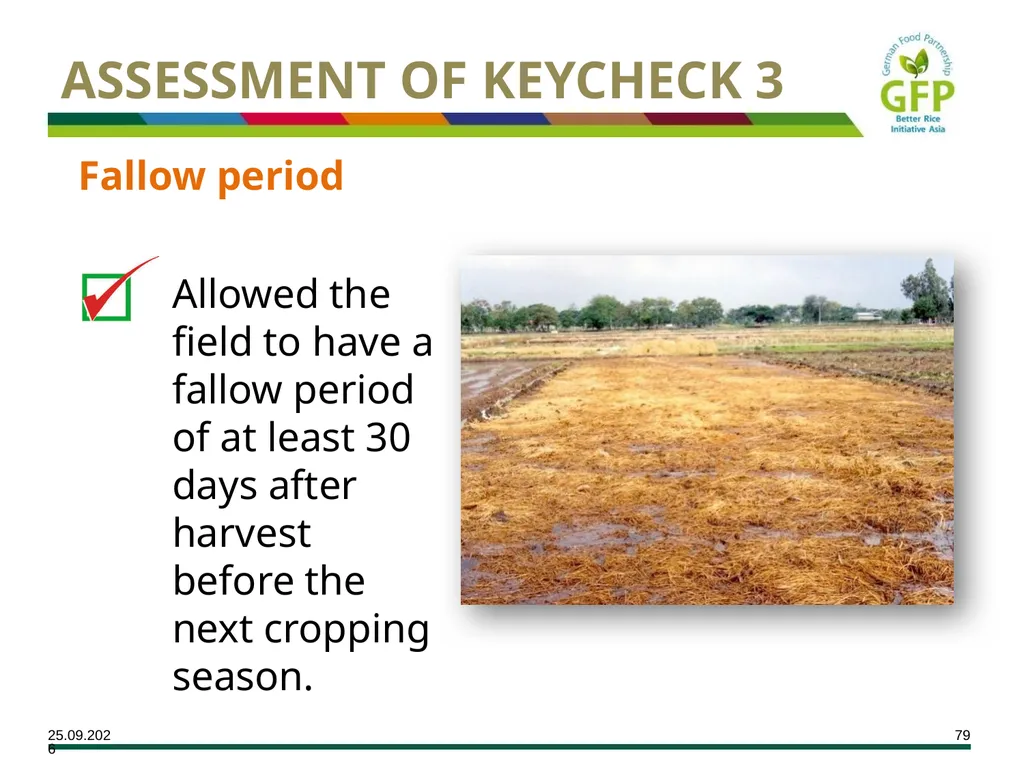
ASSESSMENT OF KEYCHECK 3 Fallow period Allowed the field to have a fallow period of at least 30 days after harvest before the next cropping season.<br>
77
Make it a habit! After a fallow period of at least one month, plant synchronously!<br>
78
Objectives (revisited) By the end of the module, you are expected to :
Identify the methods of seedling management and seedbed preparation and choose the most the appropriate for farmers’ needs
Explain the importance of attaining sufficient quantity of healthy seedlings
Discuss the importance of practicing synchronous planting
Explain the methods in crop establishment<br>
Identify the methods of seedling management and seedbed preparation and choose the most the appropriate for farmers’ needs
Explain the importance of attaining sufficient quantity of healthy seedlings
Discuss the importance of practicing synchronous planting
Explain the methods in crop establishment<br>
79
LESSON 5:
MECHANIZATION FOR CROP ESTABLISHMENT<br>
80
Outcomes At the end of the lesson, participants should be able to:
Introduce the drum seeder and mechanical rice transplanter;
Enumerate the advantages of using a drum seeder and mechanical rice transplanter over having to perform direct seeding and transplanting manually.<br>
Introduce the drum seeder and mechanical rice transplanter;
Enumerate the advantages of using a drum seeder and mechanical rice transplanter over having to perform direct seeding and transplanting manually.<br>
81
Structure Explanation
Activities<br>
Activities<br>
82
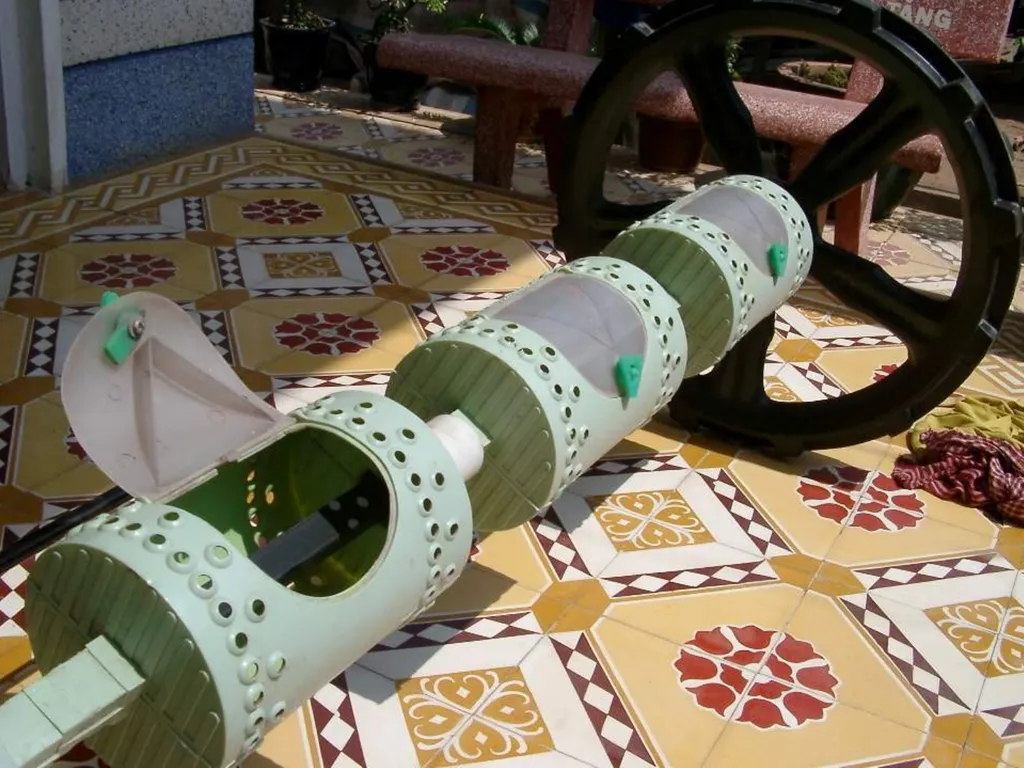
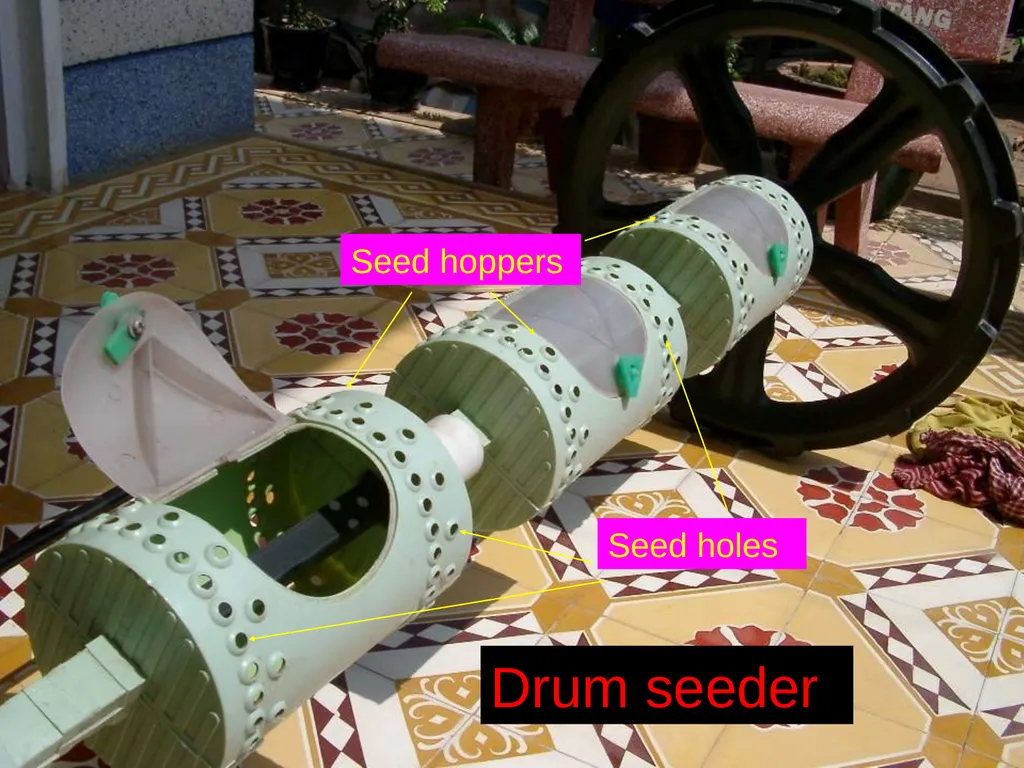
Drum seeding Drum seeders are used for fast planting. It operates best on a well-leveled, smooth, and wet seedbed. However, seeders may be clogged if the soil is sticky or if the machine is poorly designed.<br>
83
Drum seeder Seed hoppers Seed holes<br>
84
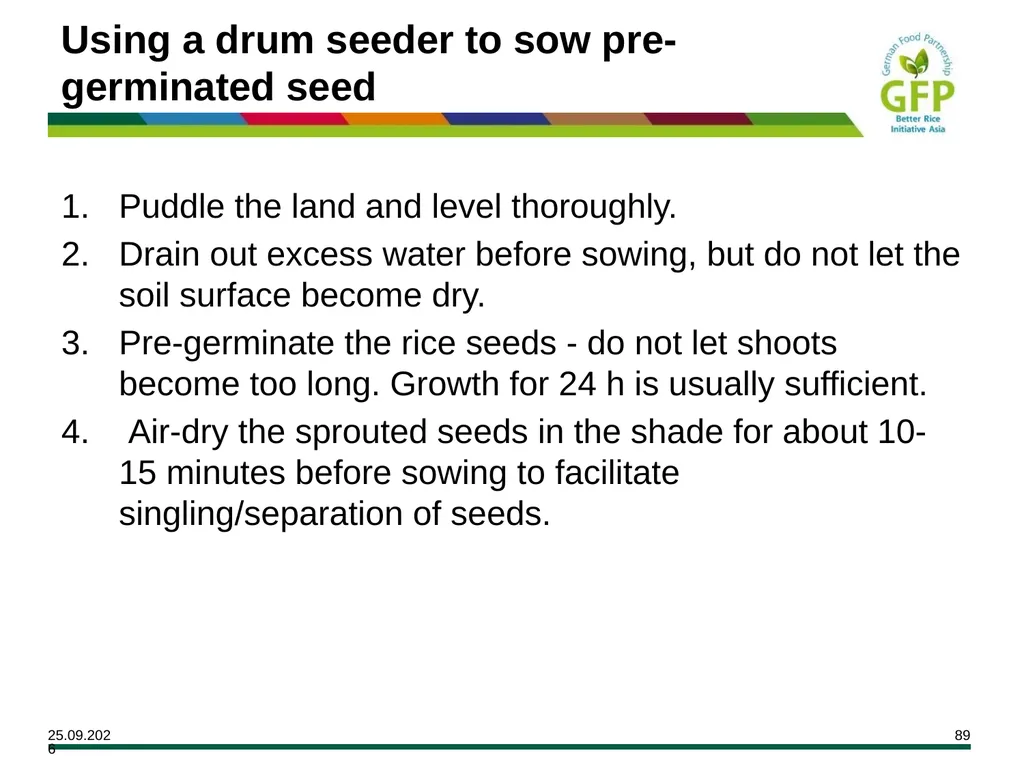
Using a drum seeder to sow pre-germinated seed Puddle the land and level thoroughly.
Drain out excess water before sowing, but do not let the soil surface become dry.
Pre-germinate the rice seeds - do not let shoots become too long. Growth for 24 h is usually sufficient.
Air-dry the sprouted seeds in the shade for about 10-15 minutes before sowing to facilitate singling/separation of seeds.<br>
Drain out excess water before sowing, but do not let the soil surface become dry.
Pre-germinate the rice seeds - do not let shoots become too long. Growth for 24 h is usually sufficient.
Air-dry the sprouted seeds in the shade for about 10-15 minutes before sowing to facilitate singling/separation of seeds.<br>
85
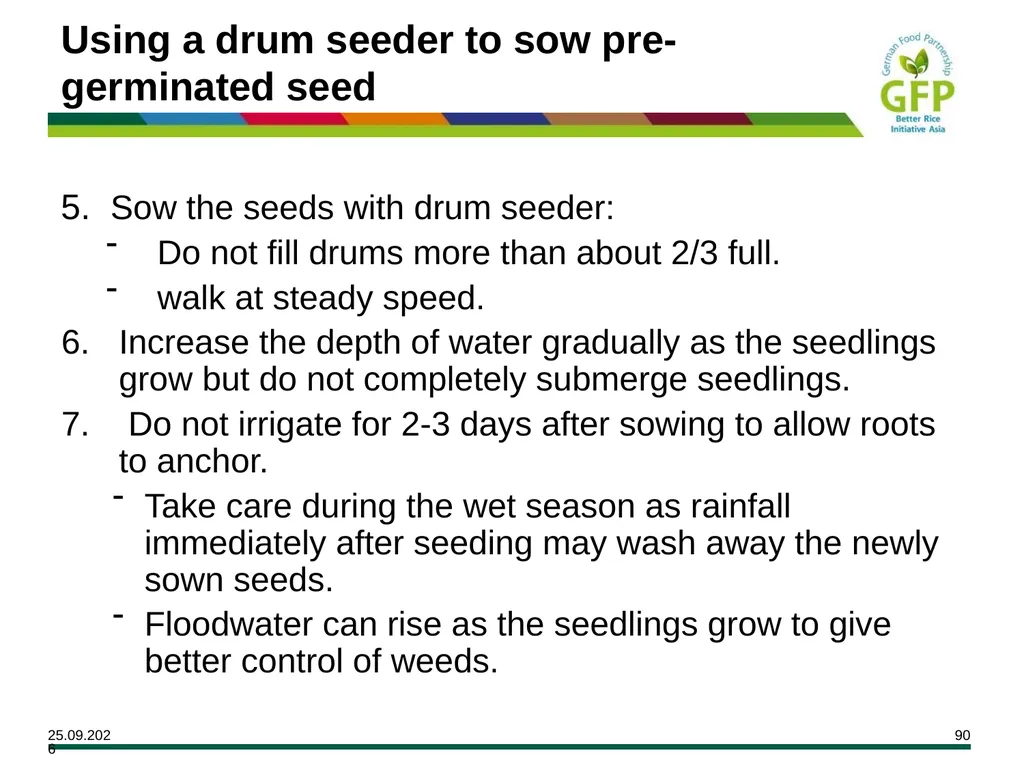
Using a drum seeder to sow pre-germinated seed 5. Sow the seeds with drum seeder:
Do not fill drums more than about 2/3 full.
walk at steady speed.
Increase the depth of water gradually as the seedlings grow but do not completely submerge seedlings.
Do not irrigate for 2-3 days after sowing to allow roots to anchor.
Take care during the wet season as rainfall immediately after seeding may wash away the newly sown seeds.
Floodwater can rise as the seedlings grow to give better control of weeds.<br>
Do not fill drums more than about 2/3 full.
walk at steady speed.
Increase the depth of water gradually as the seedlings grow but do not completely submerge seedlings.
Do not irrigate for 2-3 days after sowing to allow roots to anchor.
Take care during the wet season as rainfall immediately after seeding may wash away the newly sown seeds.
Floodwater can rise as the seedlings grow to give better control of weeds.<br>
86
VIDEO<br>
87
What is Machine Transplanting of Rice? Machine transplanting involves planting young rice seedlings into puddled soil by machine.<br>
88
Why Machine Transplant Rice? Machine transplanting requires considerably less time and labor than manual transplanting (1-2 ha/person/day versus 0.07 ha/person/day).<br>
89
Advantages: Machine transplanting Fast and efficient (1-2 ha/d), uses less labor and ensures timely planting.
Reduces stress, work load, and health risks.
Ensures uniform spacing and plant density.
Seedlings recover fast, tiller vigorously, and mature uniformly<br>
Reduces stress, work load, and health risks.
Ensures uniform spacing and plant density.
Seedlings recover fast, tiller vigorously, and mature uniformly<br>
90
How to Transplant Rice by Machine? Raise seedlings in special mat nurseries or in seedling trays. Use 18-25 kg of good seed per 100 m2 of nursery for each ha.
Seedlings will be ready for transplanting in 12-15 days after seeding (DAS).
Ensure that fields are well puddled and leveled.
Drain fields and allow mud to settle for 1-2 days after the final puddling.
The subsurface soil layers need to be hard enough to support the transplanting machine.
The soil is ready when a small “V” mark made in the puddled soil with a stick holds its shape. At this moisture level, the soil can hold the seedlings upright.
Soil should not be so dry that it sticks to and interferes with planting parts or wheels of the transplanter.
Load the seedling mats on the machine and transplant the seedlings at the selected machine setting.<br>
Seedlings will be ready for transplanting in 12-15 days after seeding (DAS).
Ensure that fields are well puddled and leveled.
Drain fields and allow mud to settle for 1-2 days after the final puddling.
The subsurface soil layers need to be hard enough to support the transplanting machine.
The soil is ready when a small “V” mark made in the puddled soil with a stick holds its shape. At this moisture level, the soil can hold the seedlings upright.
Soil should not be so dry that it sticks to and interferes with planting parts or wheels of the transplanter.
Load the seedling mats on the machine and transplant the seedlings at the selected machine setting.<br>
91
Limitations: Seedlings must be planted while still young, and so mechanical transplanting is best suited for irrigated areas only.
Special nursery management is needed (mat nursery or seedling trays).
Good land preparation, leveling and water management are required.
Fields need good access for machine transport and field entry.
Transplanting machines are expensive; so poor farmers cannot afford them (contract hiring of transplanters is available in some countries).
Problems in poorly prepared and leveled land, or with poorly designed machines.
Good training is needed to operate the machine properly.<br>
Special nursery management is needed (mat nursery or seedling trays).
Good land preparation, leveling and water management are required.
Fields need good access for machine transport and field entry.
Transplanting machines are expensive; so poor farmers cannot afford them (contract hiring of transplanters is available in some countries).
Problems in poorly prepared and leveled land, or with poorly designed machines.
Good training is needed to operate the machine properly.<br>
92
Concluding Remarks<br>
93
Objectives By the end of the module, the participants are expected to :
Understand the methods of seedbed preparation and seedling management
Understand the importance of attaining sufficient quantity of healthy seedlings
Know the importance of practicing synchronous planting
Explain the methods in crop establishment
Understand the importance of using machines in crop establishment<br>
Understand the methods of seedbed preparation and seedling management
Understand the importance of attaining sufficient quantity of healthy seedlings
Know the importance of practicing synchronous planting
Explain the methods in crop establishment
Understand the importance of using machines in crop establishment<br>
94
Best wishes in
your future
training endeavors!<br>
your future
training endeavors!<br>