
Paleontology Field Journal Resource by Nick
CS
Published · 28 slides · 0 views

1 / 1





Description
Paleontology Field Journal Resource by Nick VanAcker Use your Paleontology Field Journal to answer questions, make observations, and sketch specimens. Remember, just like real paleontologists, your hypothesis and experiment will be based on
Related Topics
Share
Embed code
Download this presentation From Below
"Paleontology Field Journal Resource by Nick" is the property of its rightful owner. Permission is granted to download and print the materials on this website for personal, non-commercial use only, and to display it on your personal computer provided you do not modify the materials and that you retain all copyright notices contained in the materials. By downloading content from our website, you accept the terms of this agreement.
Presentation Transcript
01
Paleontology
Field Journal Resource by Nick VanAcker<br>
Field Journal Resource by Nick VanAcker<br>
02
Use your Paleontology Field Journal to answer questions,
make observations, and sketch specimens. Remember, just like real paleontologists, your hypothesis and experiment will be based on evidence - so be sure to take good notes! Note pages for writing and drawing are available at the back of this handout. The Fossil Record
Before any hypotheses are made about how sauropods digested their food, we first need to look at some hard evidence. This evidence is hard, literally. It’s fossilized rock!
Examine Sauropod Teeth
To develop a sauropod digestive tract, we first have to figure out what the sauropod is digesting! The best way to do that with fossils is by examining the teeth. Paleontologists are lucky here - teeth are one part of the body that fossilize quickly. While there are around 30 species of sauropod, there are two main styles of teeth that are common across the whole group.<br>
make observations, and sketch specimens. Remember, just like real paleontologists, your hypothesis and experiment will be based on evidence - so be sure to take good notes! Note pages for writing and drawing are available at the back of this handout. The Fossil Record
Before any hypotheses are made about how sauropods digested their food, we first need to look at some hard evidence. This evidence is hard, literally. It’s fossilized rock!
Examine Sauropod Teeth
To develop a sauropod digestive tract, we first have to figure out what the sauropod is digesting! The best way to do that with fossils is by examining the teeth. Paleontologists are lucky here - teeth are one part of the body that fossilize quickly. While there are around 30 species of sauropod, there are two main styles of teeth that are common across the whole group.<br>
03
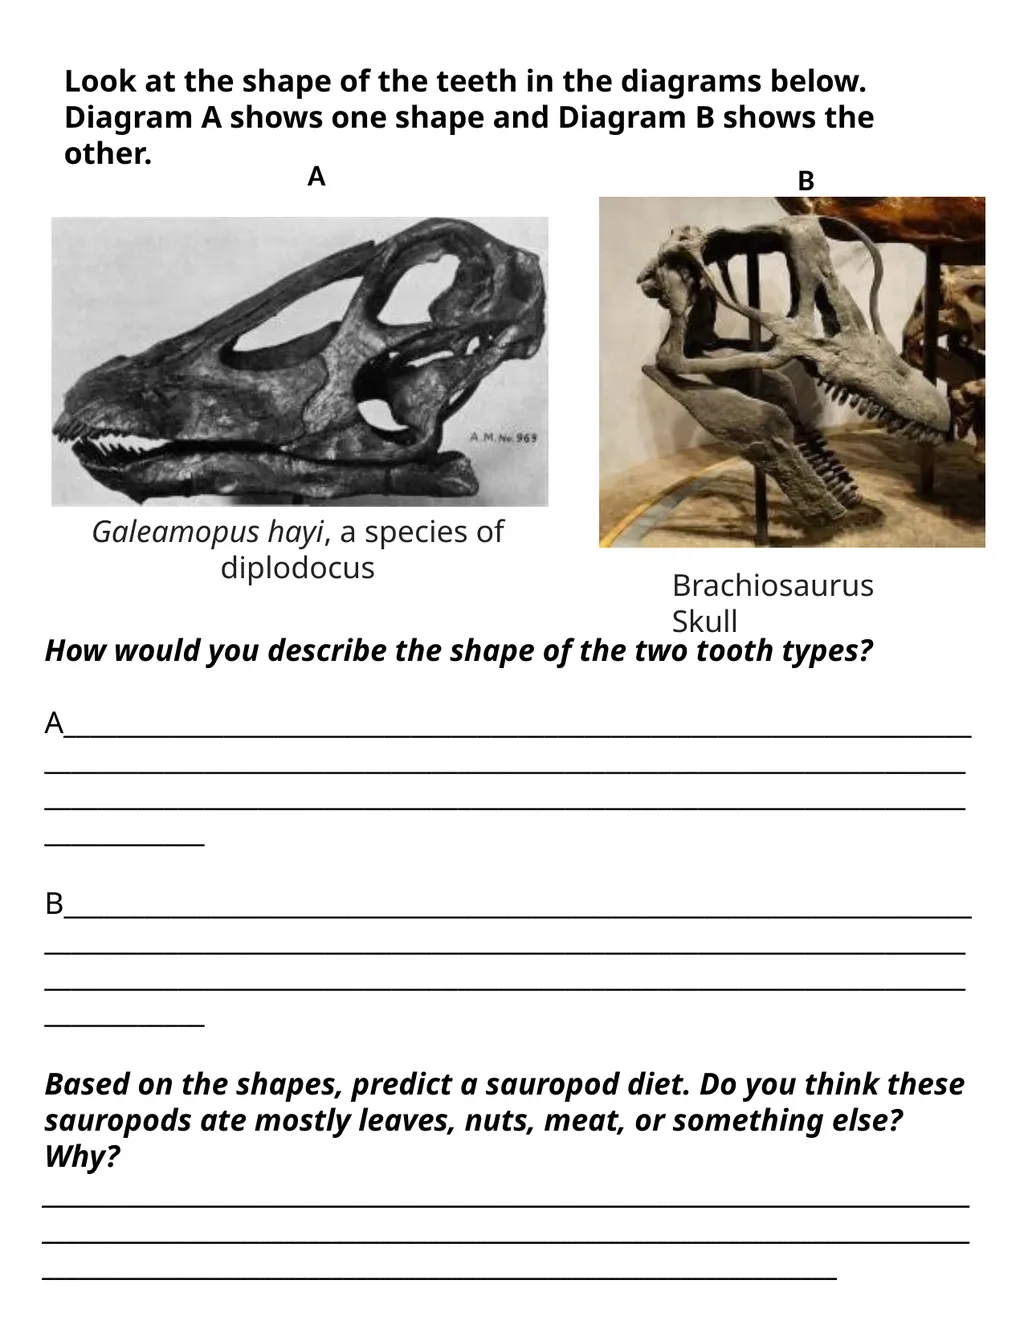
Look at the shape of the teeth in the diagrams below.
Diagram A shows one shape and Diagram B shows the other. Galeamopus hayi, a species of diplodocus A Brachiosaurus Skull B How would you describe the shape of the two tooth types?
A__________________________________________________________________________________________________________________________________________________________________________________________________________________________
B__________________________________________________________________________________________________________________________________________________________________________________________________________________________
Based on the shapes, predict a sauropod diet. Do you think these sauropods ate mostly leaves, nuts, meat, or something else? Why?
____________________________________________________________________________________________________________________________________________________________________________________________________________________________<br>
Diagram A shows one shape and Diagram B shows the other. Galeamopus hayi, a species of diplodocus A Brachiosaurus Skull B How would you describe the shape of the two tooth types?
A__________________________________________________________________________________________________________________________________________________________________________________________________________________________
B__________________________________________________________________________________________________________________________________________________________________________________________________________________________
Based on the shapes, predict a sauropod diet. Do you think these sauropods ate mostly leaves, nuts, meat, or something else? Why?
____________________________________________________________________________________________________________________________________________________________________________________________________________________________<br>
04
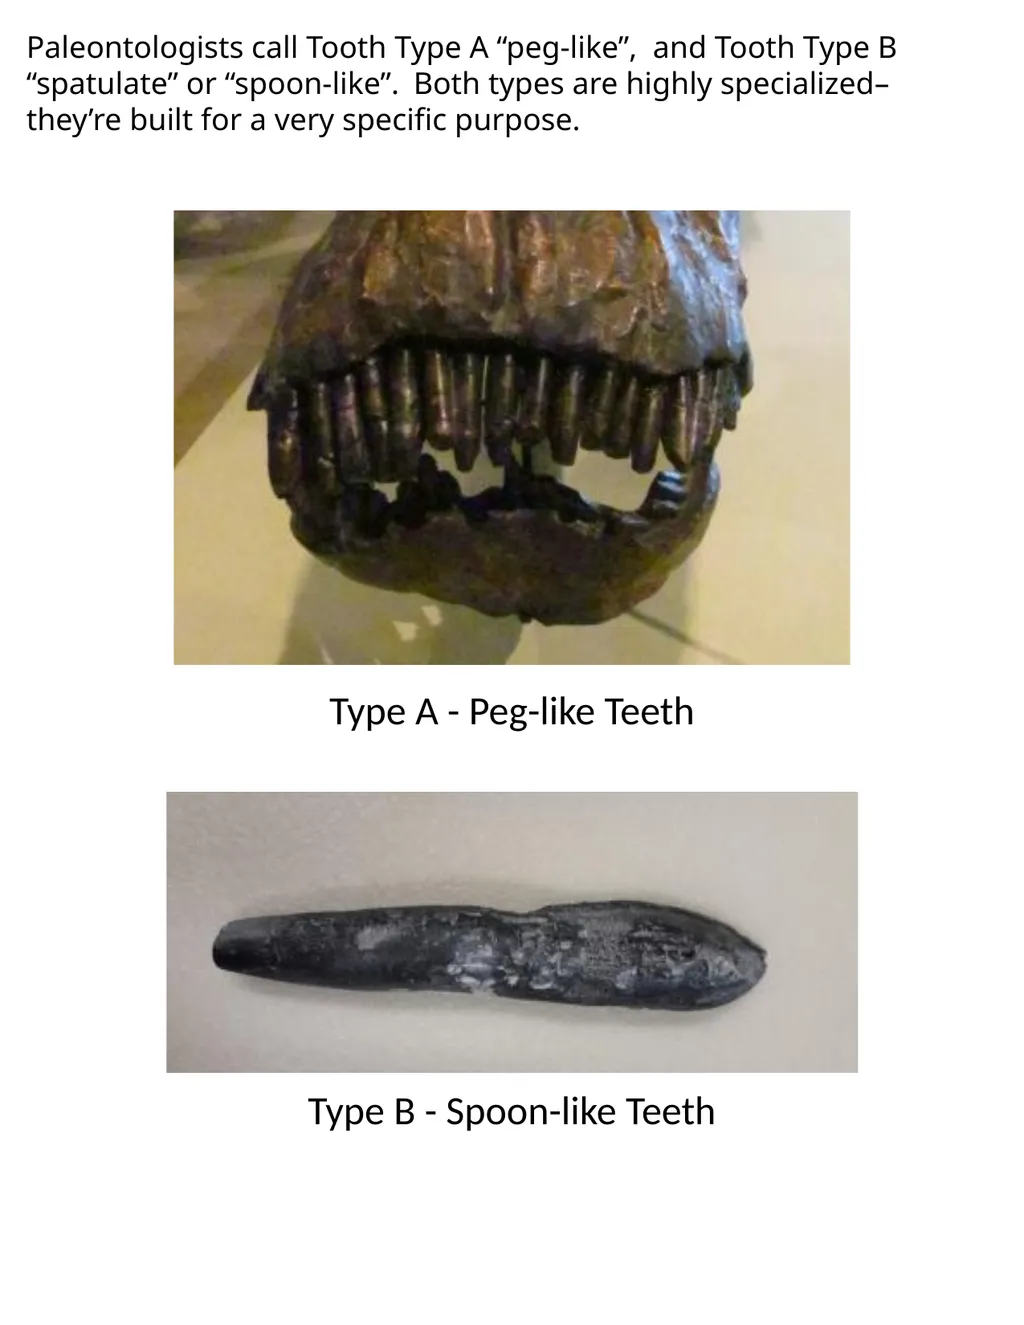
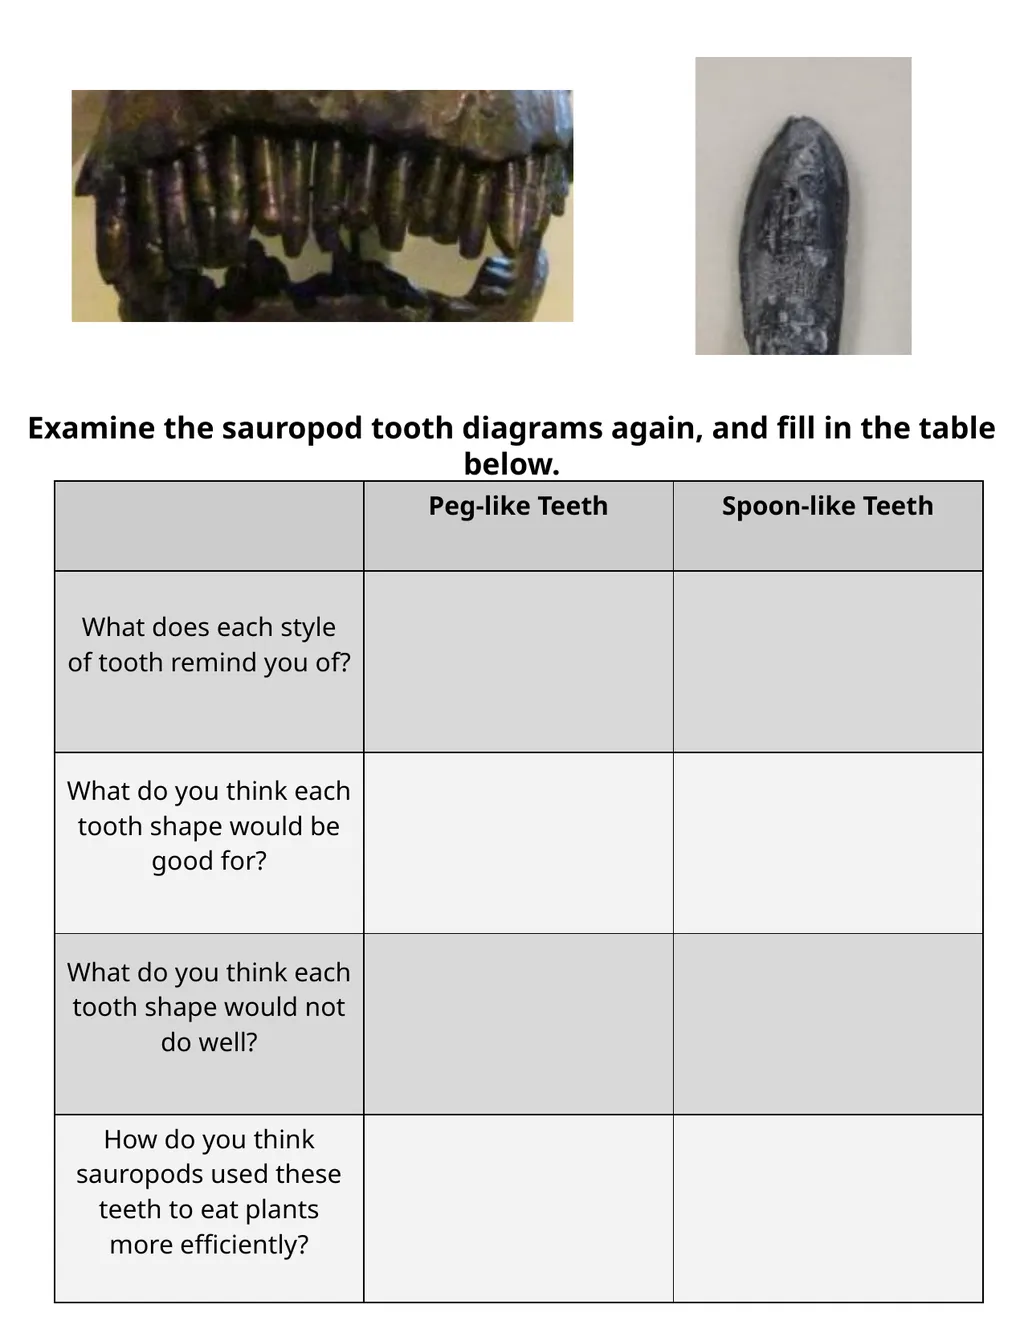
Paleontologists call Tooth Type A “peg-like”, and Tooth Type B “spatulate” or “spoon-like”. Both types are highly specialized–they’re built for a very specific purpose. Type A - Peg-like Teeth Type B - Spoon-like Teeth<br>
05
Examine the sauropod tooth diagrams again, and fill in the table below.<br>
06
Activity 2:
Modern Animals<br>
Modern Animals<br>
07
Use your Paleontology Field Journal to answer questions,
make observations, and sketch specimens. Remember, just like real paleontologists, your hypothesis and experiment will be based on evidence, so be sure to take good notes! Though we know how human digestive systems work, the digestive system of a sauropod would have looked slightly different for one primary reason - sauropods eat only plants! All plants contain a compound called cellulose in their cell walls that is very difficult to digest. Most herbivores use a mix of mechanical digestion, physically breaking down their food with chewing or grinding, and chemical digestion, using chemicals, like the acid in their stomachs, to break the food down further..
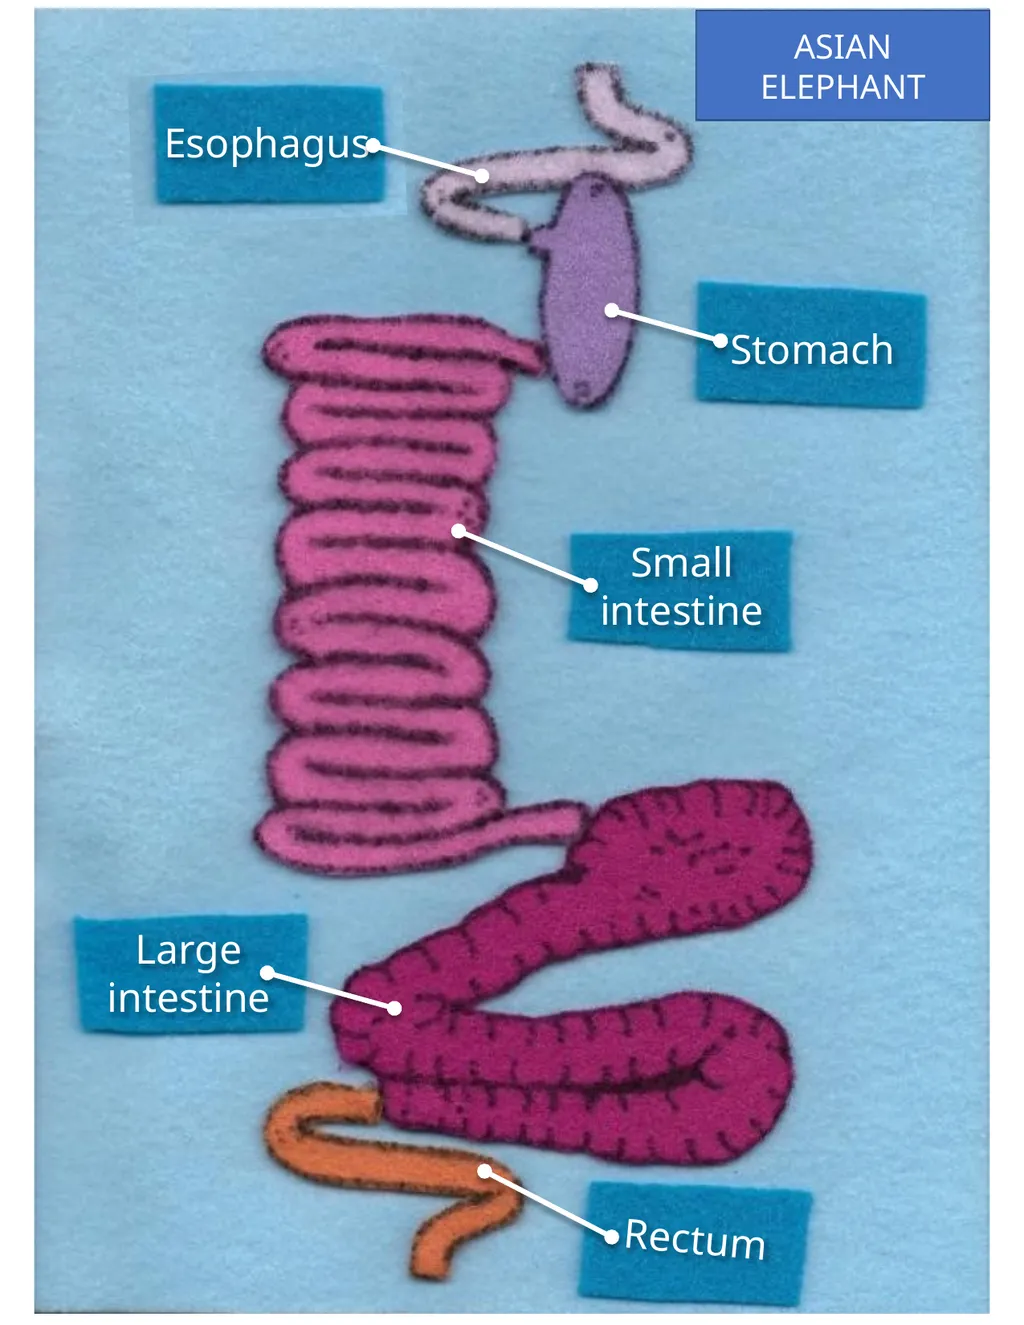
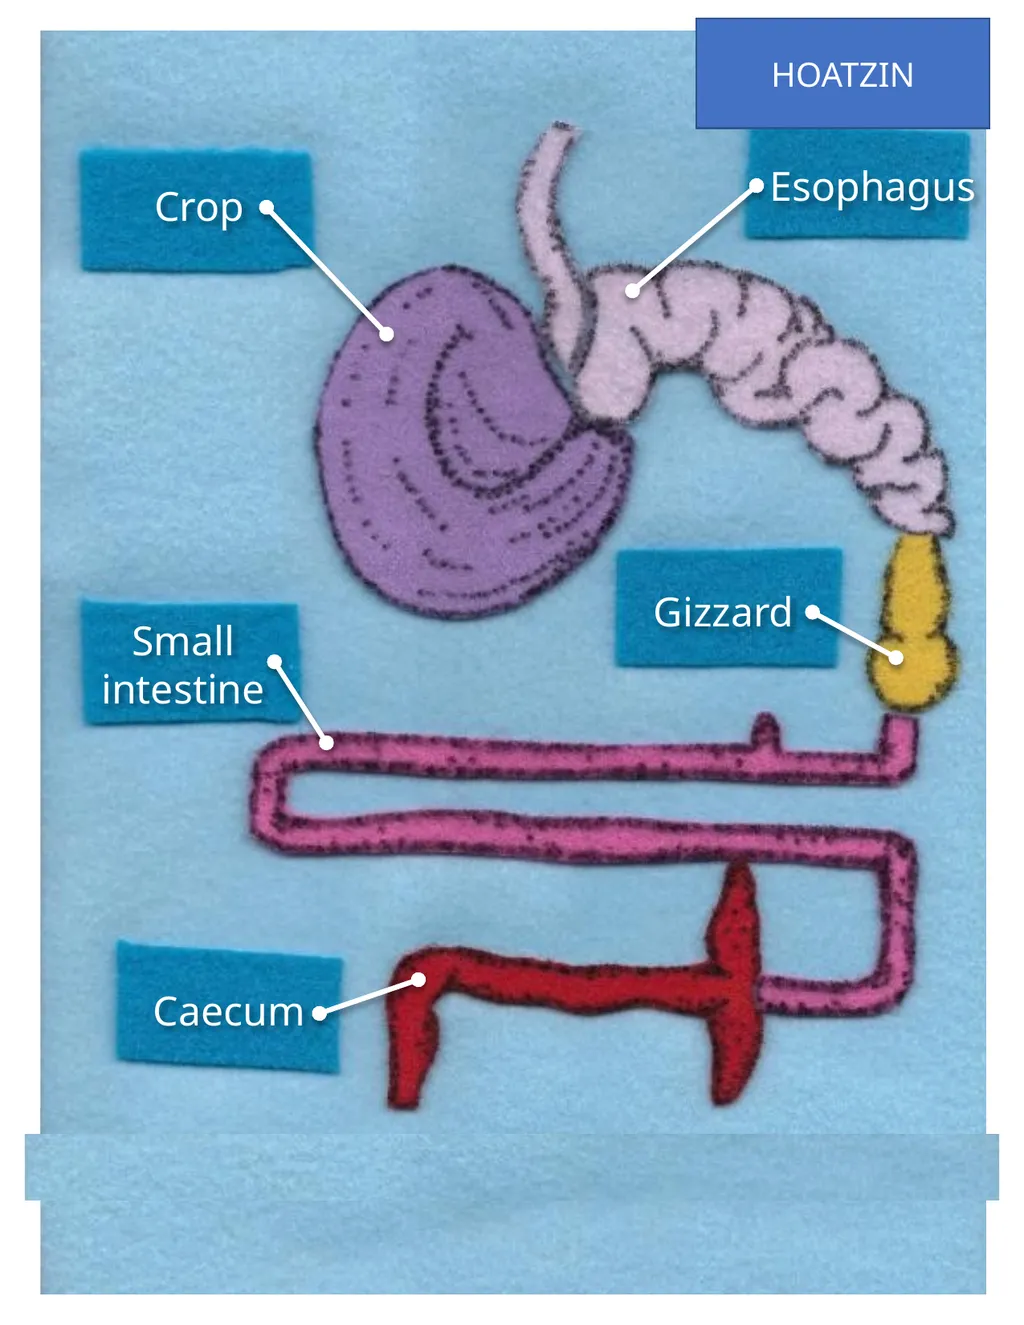
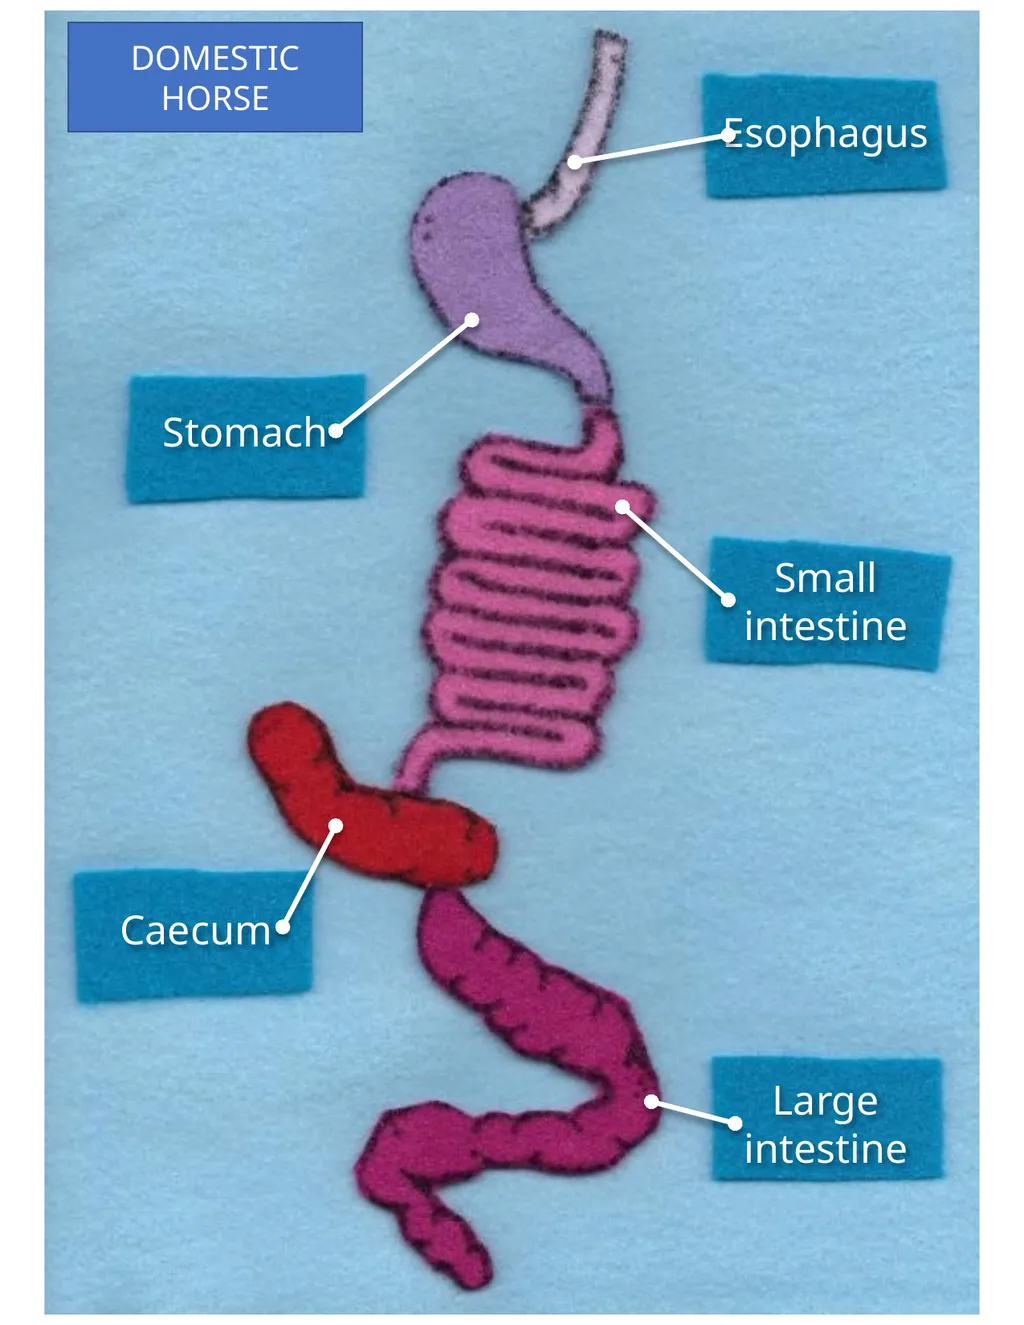
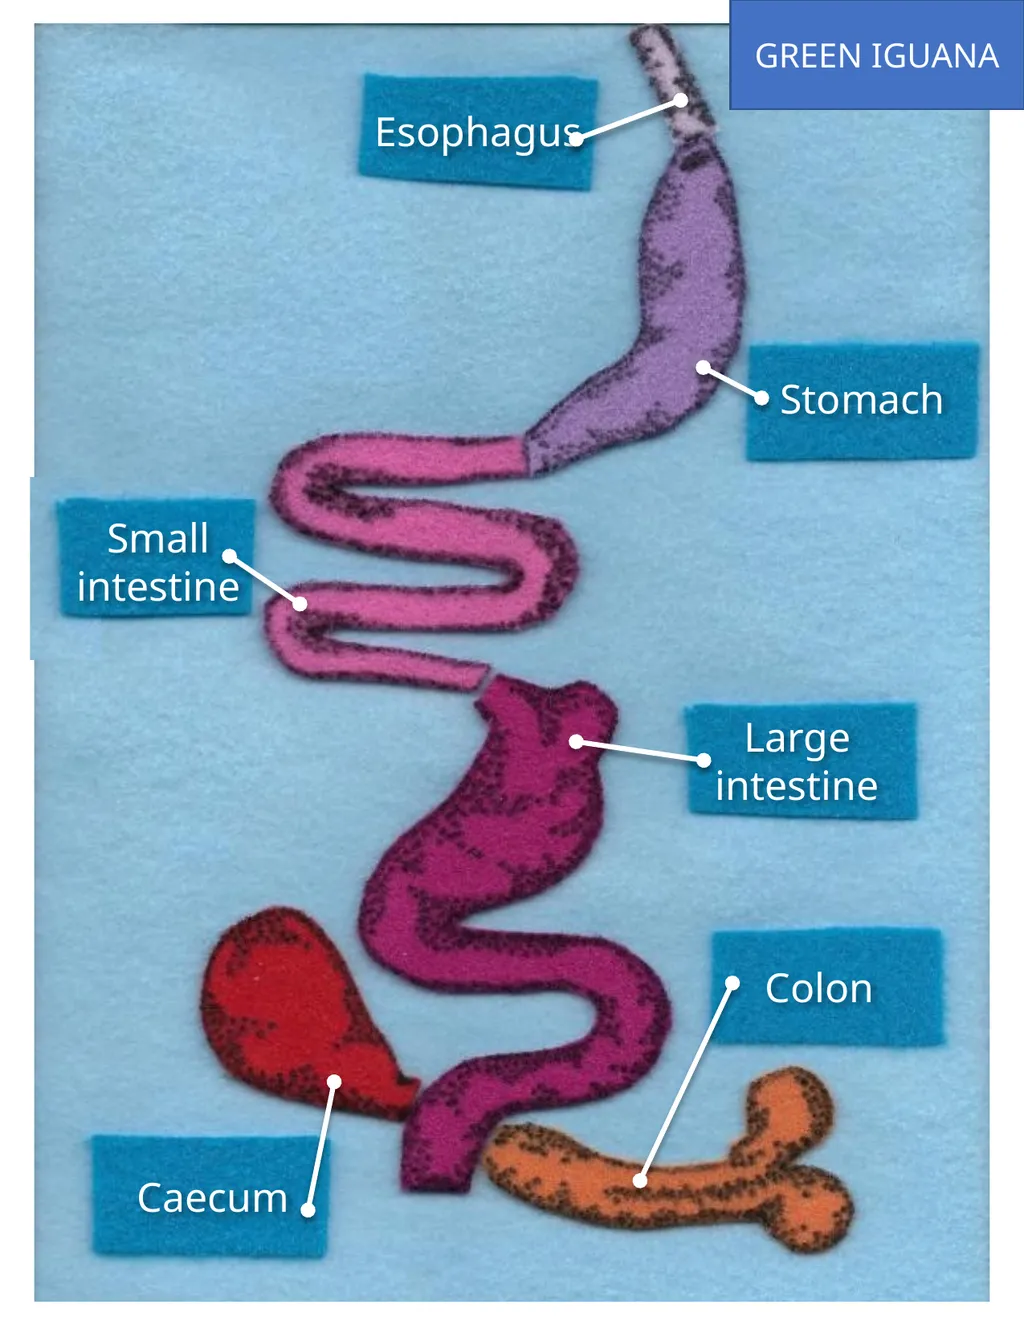
But stomach acid and chewing alone aren’t enough to digest cellulose. To help break down food, all herbivores have a stage in their digestion called fermentation, where specialized gut bacteria break the cellulose into usable parts for an herbivore to absorb. There are two different types of this fermentation, foregut fermentation, which occurs before food enters the stomach, and hindgut fermentation, which occurs after (or behind) the stomach. Fermentation takes a long time, so the area where it takes place tends to be big, in the form of organs that are either very large, very long, or very complicated.
Foregut fermentation is good for animals using mechanical digestion to break down food, like teeth in goats, for example. Some birds use an organ called a gizzard (or gastric mill) for mechanical digestion instead of teeth. They swallow small rocks (called gastroliths) and use them to grind food instead. The plants are broken down initially by this mechanical digestion, fermented, and then regurgitated and broken down again. In mammals, this process is sometimes called “chewing cud”.
Hindgut fermentation is good for animals that don’t use a type of mechanical digestion to break down their food. Once it passes the stomach, it stays in their digestive tract until it’s entirely broken down.<br>
make observations, and sketch specimens. Remember, just like real paleontologists, your hypothesis and experiment will be based on evidence, so be sure to take good notes! Though we know how human digestive systems work, the digestive system of a sauropod would have looked slightly different for one primary reason - sauropods eat only plants! All plants contain a compound called cellulose in their cell walls that is very difficult to digest. Most herbivores use a mix of mechanical digestion, physically breaking down their food with chewing or grinding, and chemical digestion, using chemicals, like the acid in their stomachs, to break the food down further..
But stomach acid and chewing alone aren’t enough to digest cellulose. To help break down food, all herbivores have a stage in their digestion called fermentation, where specialized gut bacteria break the cellulose into usable parts for an herbivore to absorb. There are two different types of this fermentation, foregut fermentation, which occurs before food enters the stomach, and hindgut fermentation, which occurs after (or behind) the stomach. Fermentation takes a long time, so the area where it takes place tends to be big, in the form of organs that are either very large, very long, or very complicated.
Foregut fermentation is good for animals using mechanical digestion to break down food, like teeth in goats, for example. Some birds use an organ called a gizzard (or gastric mill) for mechanical digestion instead of teeth. They swallow small rocks (called gastroliths) and use them to grind food instead. The plants are broken down initially by this mechanical digestion, fermented, and then regurgitated and broken down again. In mammals, this process is sometimes called “chewing cud”.
Hindgut fermentation is good for animals that don’t use a type of mechanical digestion to break down their food. Once it passes the stomach, it stays in their digestive tract until it’s entirely broken down.<br>
08
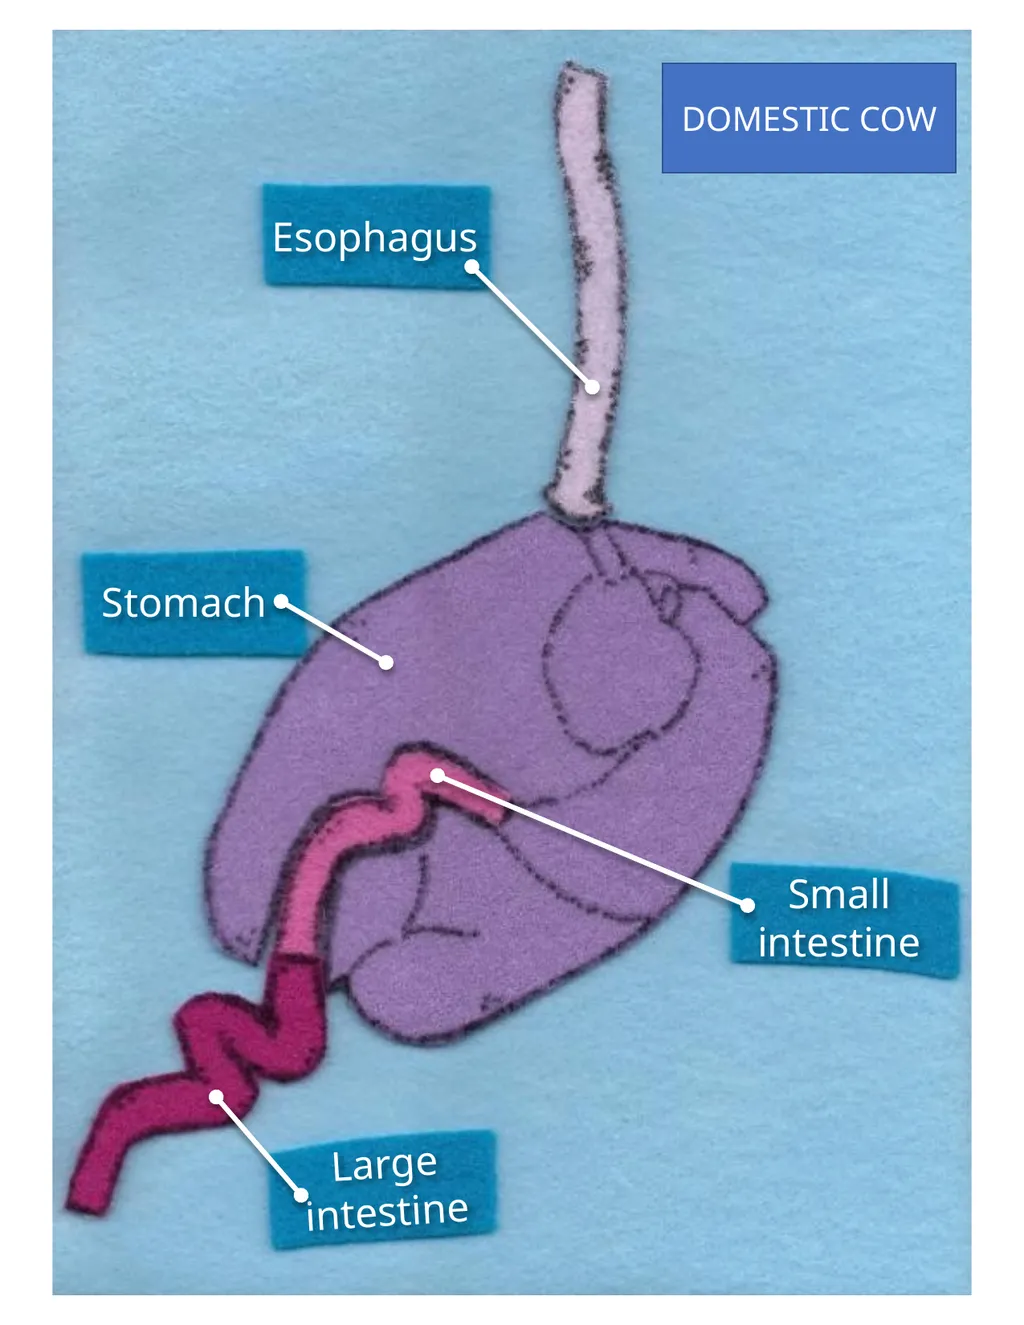
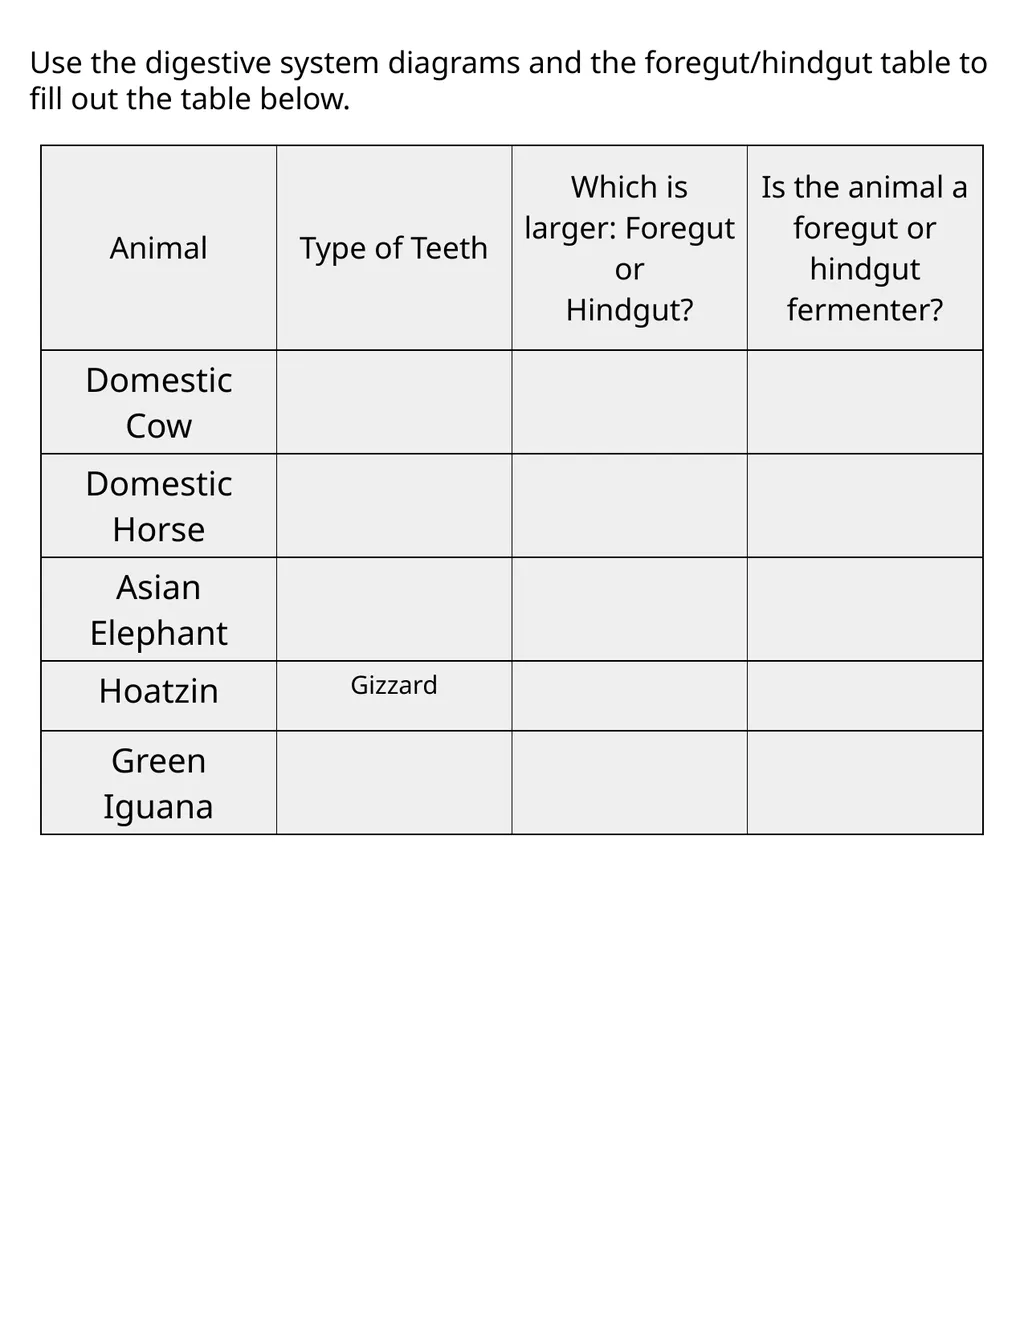
Esophagus Stomach Small intestine Large intestine DOMESTIC COW<br>
09
Esophagus Stomach Small intestine Large intestine Rectum ASIAN ELEPHANT<br>
10
Esophagus Esophagus Crop Gizzard Small intestine Caecum HOATZIN<br>
11
Esophagus Esophagus Stomach Small intestine Caecum Large intestine DOMESTIC HORSE<br>
12
Esophagus Esophagus Stomach Large intestine Colon Caecum Small intestine GREEN IGUANA<br>
13
Use the digestive system diagrams and the foregut/hindgut table to fill out the table below.<br>
14
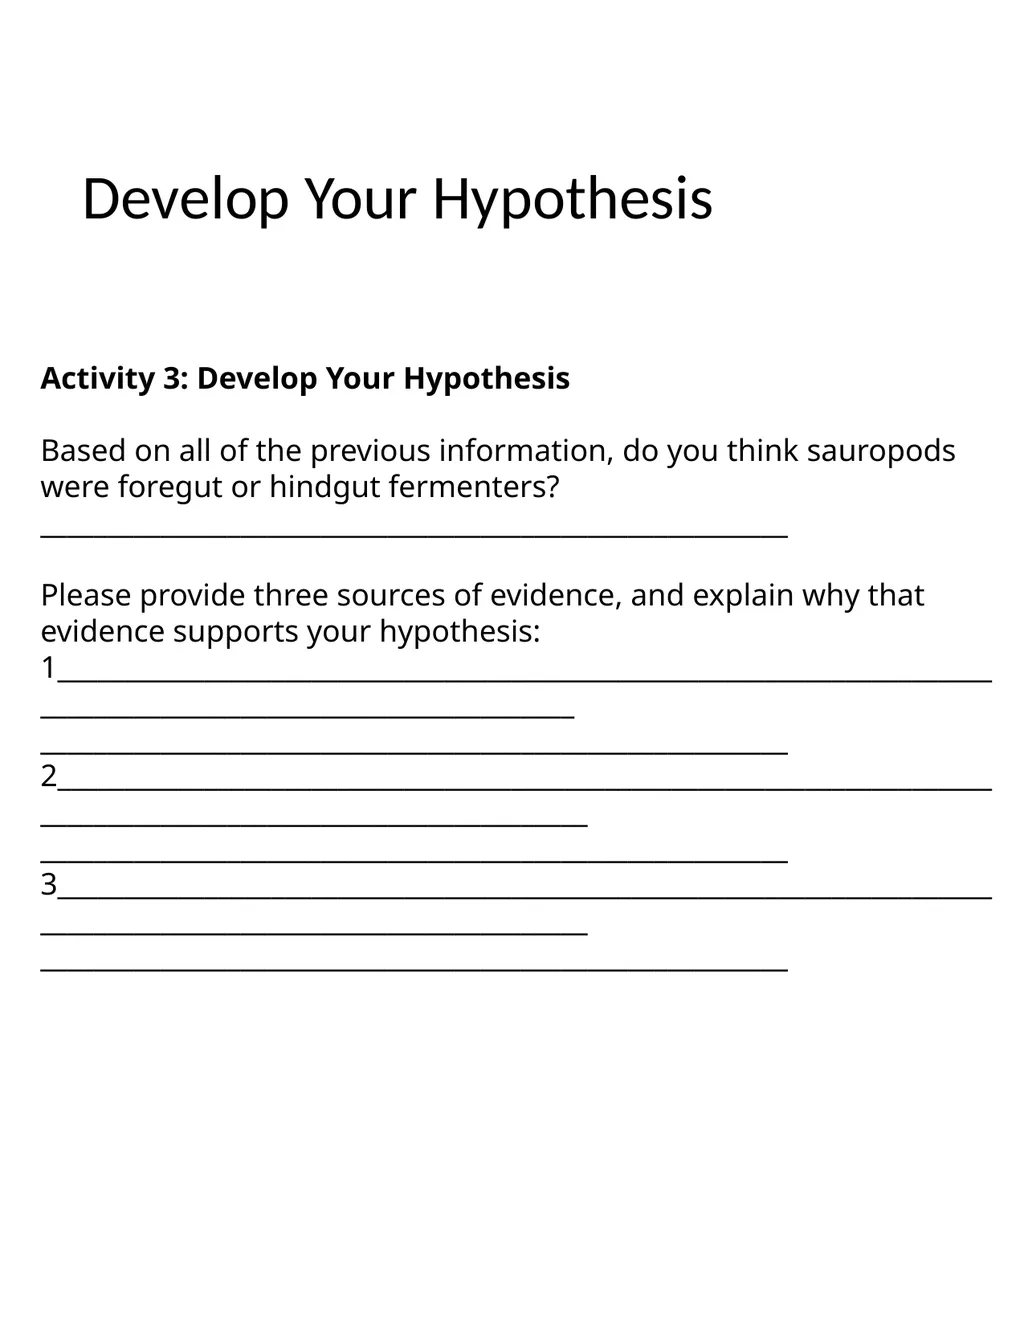
Develop Your Hypothesis Activity 3: Develop Your Hypothesis
Based on all of the previous information, do you think sauropods were foregut or hindgut fermenters?
________________________________________________________
Please provide three sources of evidence, and explain why that evidence supports your hypothesis:
1______________________________________________________________________________________________________________
________________________________________________________
2_______________________________________________________________________________________________________________
________________________________________________________
3_______________________________________________________________________________________________________________
________________________________________________________<br>
________________________________________________________
Please provide three sources of evidence, and explain why that evidence supports your hypothesis:
1______________________________________________________________________________________________________________
________________________________________________________
2_______________________________________________________________________________________________________________
________________________________________________________
3_______________________________________________________________________________________________________________
________________________________________________________<br>
15
Activity 3:
Digestion Model<br>
Digestion Model<br>
16
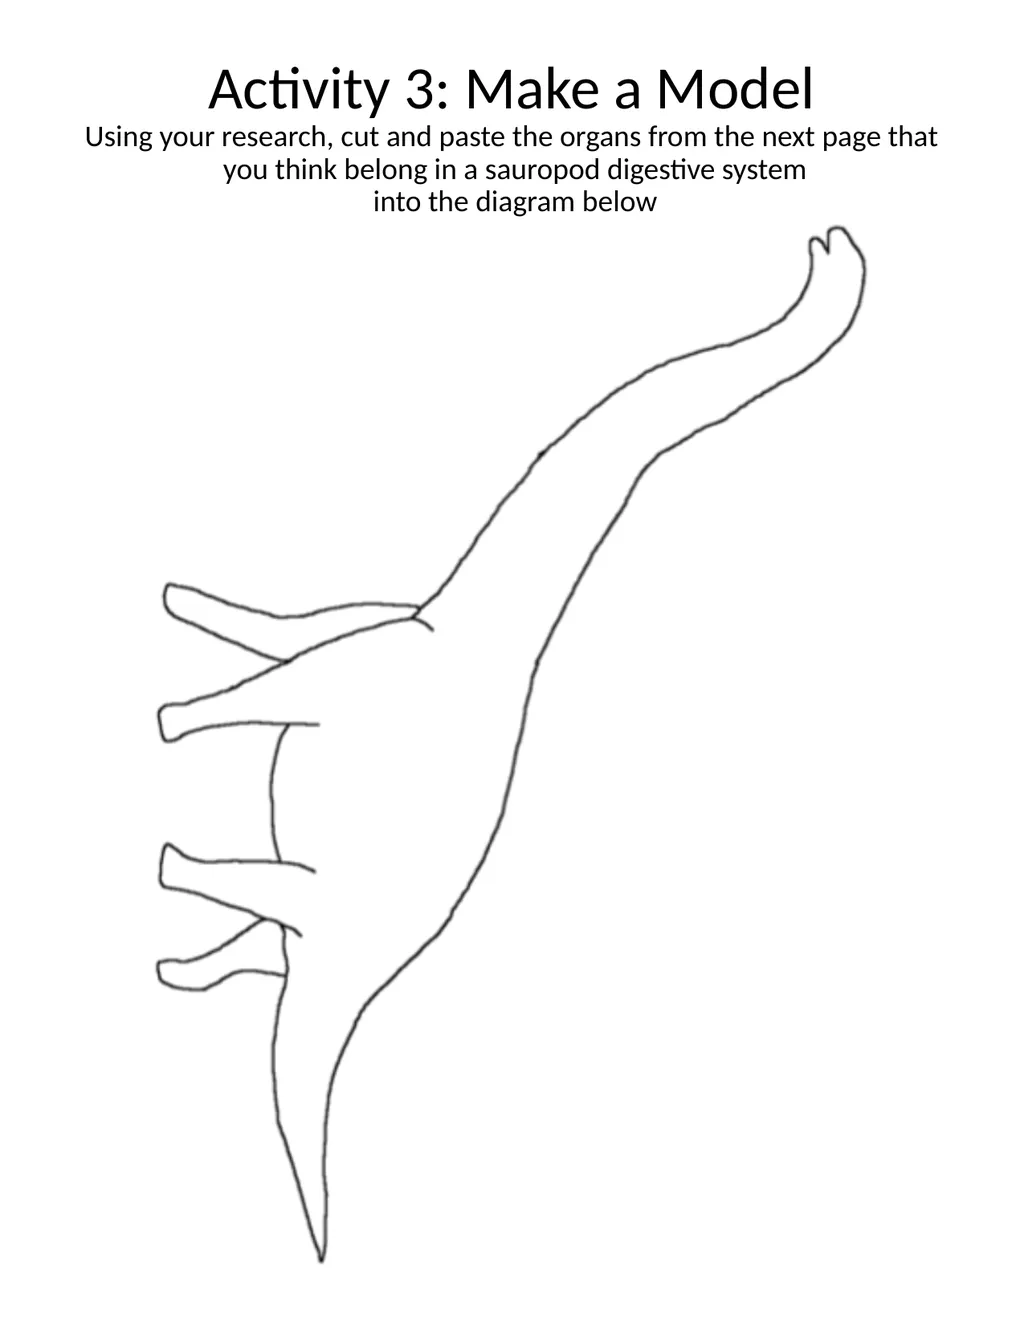
Activity 3: Make a Model
Using your research, cut and paste the organs from the next page that you think belong in a sauropod digestive system into the diagram below<br>
Using your research, cut and paste the organs from the next page that you think belong in a sauropod digestive system into the diagram below<br>
17
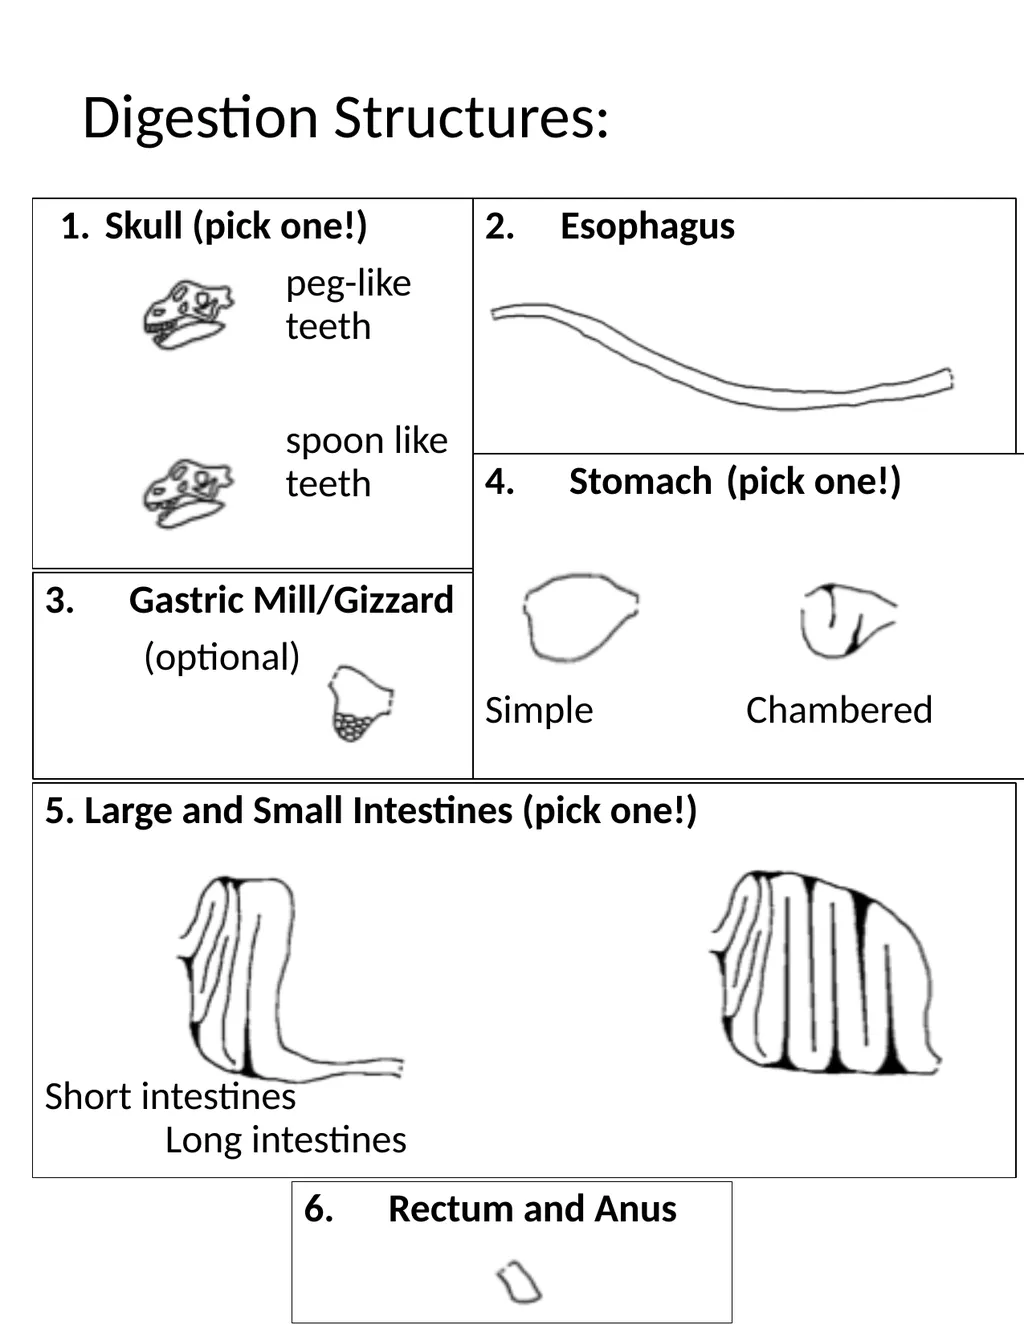
Digestion Structures: Skull (pick one!)
peg-like teeth
spoon like teeth 2. Esophagus 5. Large and Small Intestines (pick one!)
Short intestines Long intestines 3. Gastric Mill/Gizzard
(optional) 4. Stomach (pick one!)
Simple Chambered 6. Rectum and Anus<br>
peg-like teeth
spoon like teeth 2. Esophagus 5. Large and Small Intestines (pick one!)
Short intestines Long intestines 3. Gastric Mill/Gizzard
(optional) 4. Stomach (pick one!)
Simple Chambered 6. Rectum and Anus<br>
18
List your choices for each part of the digestive system below, and explain your reasoning behind each choice. 1.____________________________________________________________________________________________________________________________________________________________________________________________
2.___________________________________________________________________________________________________________________________________________________________________________________________________________________________________________________________
3.___________________________________________________________________________________________________________________________________________________________________________________________________________________________________________________________
4.____________________________________________________________________________________________________________________________________________________________________________________________________________________________________________________________________________<br>
2.___________________________________________________________________________________________________________________________________________________________________________________________________________________________________________________________
3.___________________________________________________________________________________________________________________________________________________________________________________________________________________________________________________________
4.____________________________________________________________________________________________________________________________________________________________________________________________________________________________________________________________________________<br>
19
Activity 4:
Digestion Lab<br>
Digestion Lab<br>
20
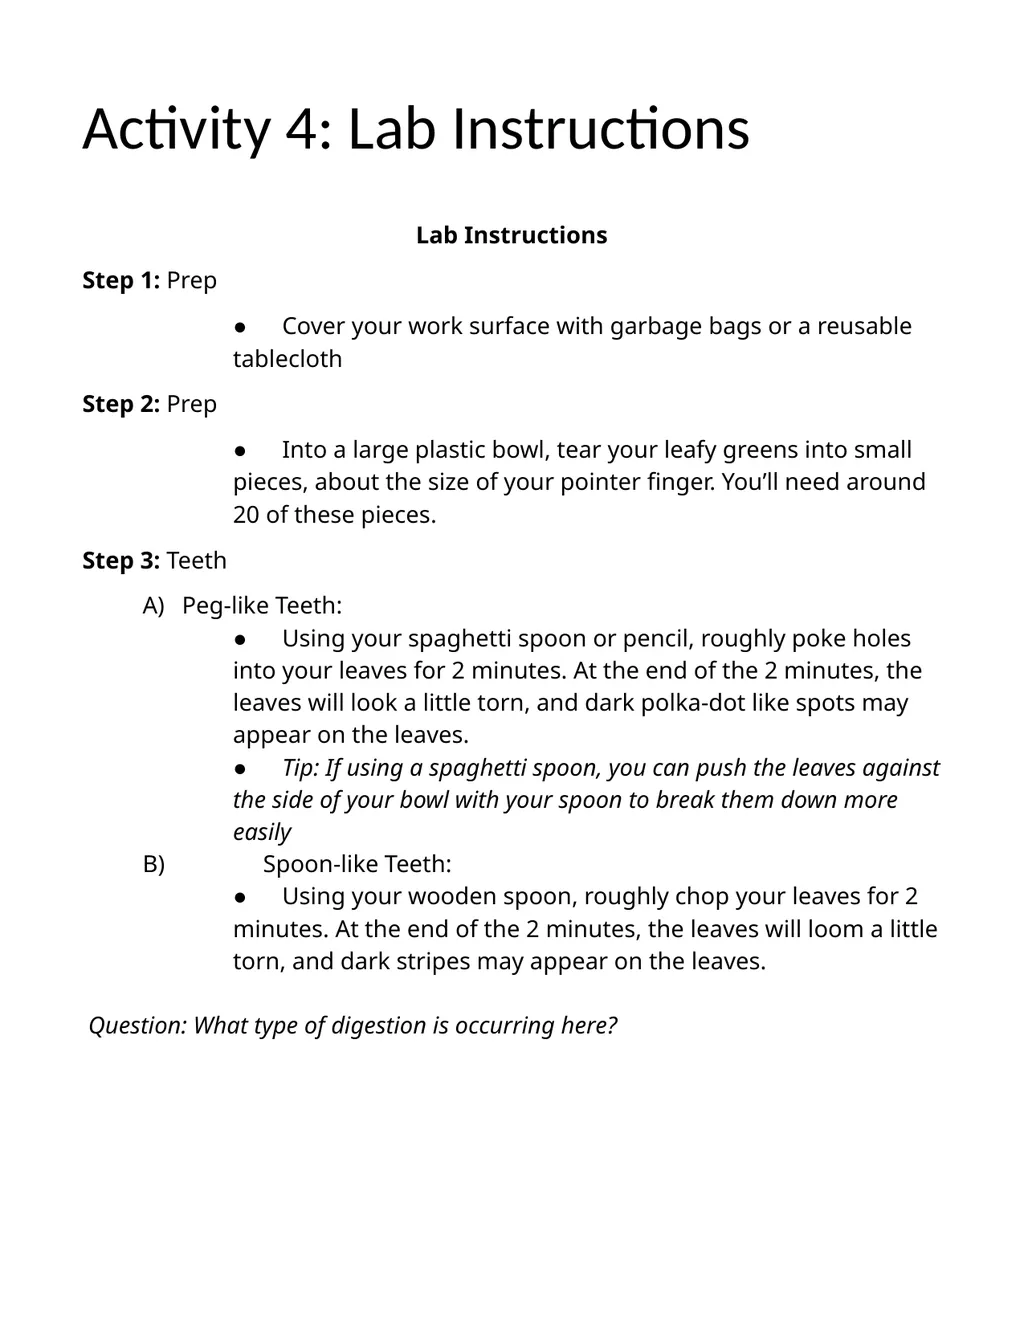
Activity 4: Lab Instructions Lab Instructions
Step 1: Prep
● Cover your work surface with garbage bags or a reusable tablecloth
Step 2: Prep
● Into a large plastic bowl, tear your leafy greens into small pieces, about the size of your pointer finger. You’ll need around 20 of these pieces.
Step 3: Teeth
A) Peg-like Teeth:
● Using your spaghetti spoon or pencil, roughly poke holes into your leaves for 2 minutes. At the end of the 2 minutes, the leaves will look a little torn, and dark polka-dot like spots may appear on the leaves.
● Tip: If using a spaghetti spoon, you can push the leaves against the side of your bowl with your spoon to break them down more easily
B) Spoon-like Teeth:
● Using your wooden spoon, roughly chop your leaves for 2 minutes. At the end of the 2 minutes, the leaves will loom a little torn, and dark stripes may appear on the leaves.
Question: What type of digestion is occurring here?<br>
Step 1: Prep
● Cover your work surface with garbage bags or a reusable tablecloth
Step 2: Prep
● Into a large plastic bowl, tear your leafy greens into small pieces, about the size of your pointer finger. You’ll need around 20 of these pieces.
Step 3: Teeth
A) Peg-like Teeth:
● Using your spaghetti spoon or pencil, roughly poke holes into your leaves for 2 minutes. At the end of the 2 minutes, the leaves will look a little torn, and dark polka-dot like spots may appear on the leaves.
● Tip: If using a spaghetti spoon, you can push the leaves against the side of your bowl with your spoon to break them down more easily
B) Spoon-like Teeth:
● Using your wooden spoon, roughly chop your leaves for 2 minutes. At the end of the 2 minutes, the leaves will loom a little torn, and dark stripes may appear on the leaves.
Question: What type of digestion is occurring here?<br>
21
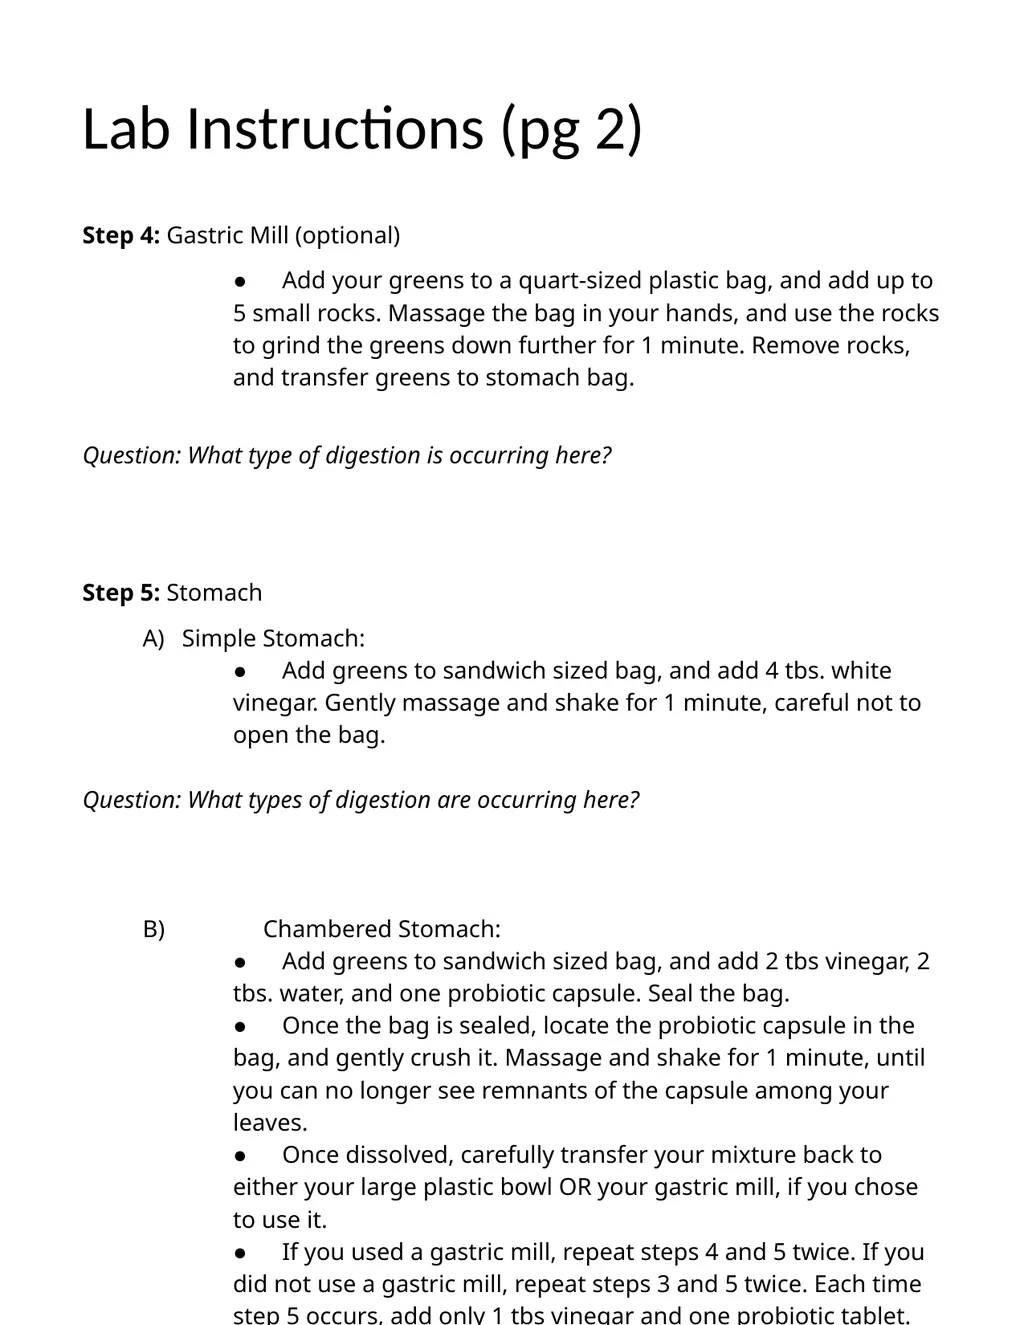
Lab Instructions (pg 2) Step 4: Gastric Mill (optional)
● Add your greens to a quart-sized plastic bag, and add up to 5 small rocks. Massage the bag in your hands, and use the rocks to grind the greens down further for 1 minute. Remove rocks, and transfer greens to stomach bag.
Question: What type of digestion is occurring here?
Step 5: Stomach
A) Simple Stomach:
● Add greens to sandwich sized bag, and add 4 tbs. white vinegar. Gently massage and shake for 1 minute, careful not to open the bag.
Question: What types of digestion are occurring here?
B) Chambered Stomach:
● Add greens to sandwich sized bag, and add 2 tbs vinegar, 2 tbs. water, and one probiotic capsule. Seal the bag.
● Once the bag is sealed, locate the probiotic capsule in the bag, and gently crush it. Massage and shake for 1 minute, until you can no longer see remnants of the capsule among your leaves.
● Once dissolved, carefully transfer your mixture back to either your large plastic bowl OR your gastric mill, if you chose to use it.
● If you used a gastric mill, repeat steps 4 and 5 twice. If you did not use a gastric mill, repeat steps 3 and 5 twice. Each time step 5 occurs, add only 1 tbs vinegar and one probiotic tablet.<br>
● Add your greens to a quart-sized plastic bag, and add up to 5 small rocks. Massage the bag in your hands, and use the rocks to grind the greens down further for 1 minute. Remove rocks, and transfer greens to stomach bag.
Question: What type of digestion is occurring here?
Step 5: Stomach
A) Simple Stomach:
● Add greens to sandwich sized bag, and add 4 tbs. white vinegar. Gently massage and shake for 1 minute, careful not to open the bag.
Question: What types of digestion are occurring here?
B) Chambered Stomach:
● Add greens to sandwich sized bag, and add 2 tbs vinegar, 2 tbs. water, and one probiotic capsule. Seal the bag.
● Once the bag is sealed, locate the probiotic capsule in the bag, and gently crush it. Massage and shake for 1 minute, until you can no longer see remnants of the capsule among your leaves.
● Once dissolved, carefully transfer your mixture back to either your large plastic bowl OR your gastric mill, if you chose to use it.
● If you used a gastric mill, repeat steps 4 and 5 twice. If you did not use a gastric mill, repeat steps 3 and 5 twice. Each time step 5 occurs, add only 1 tbs vinegar and one probiotic tablet.<br>
22
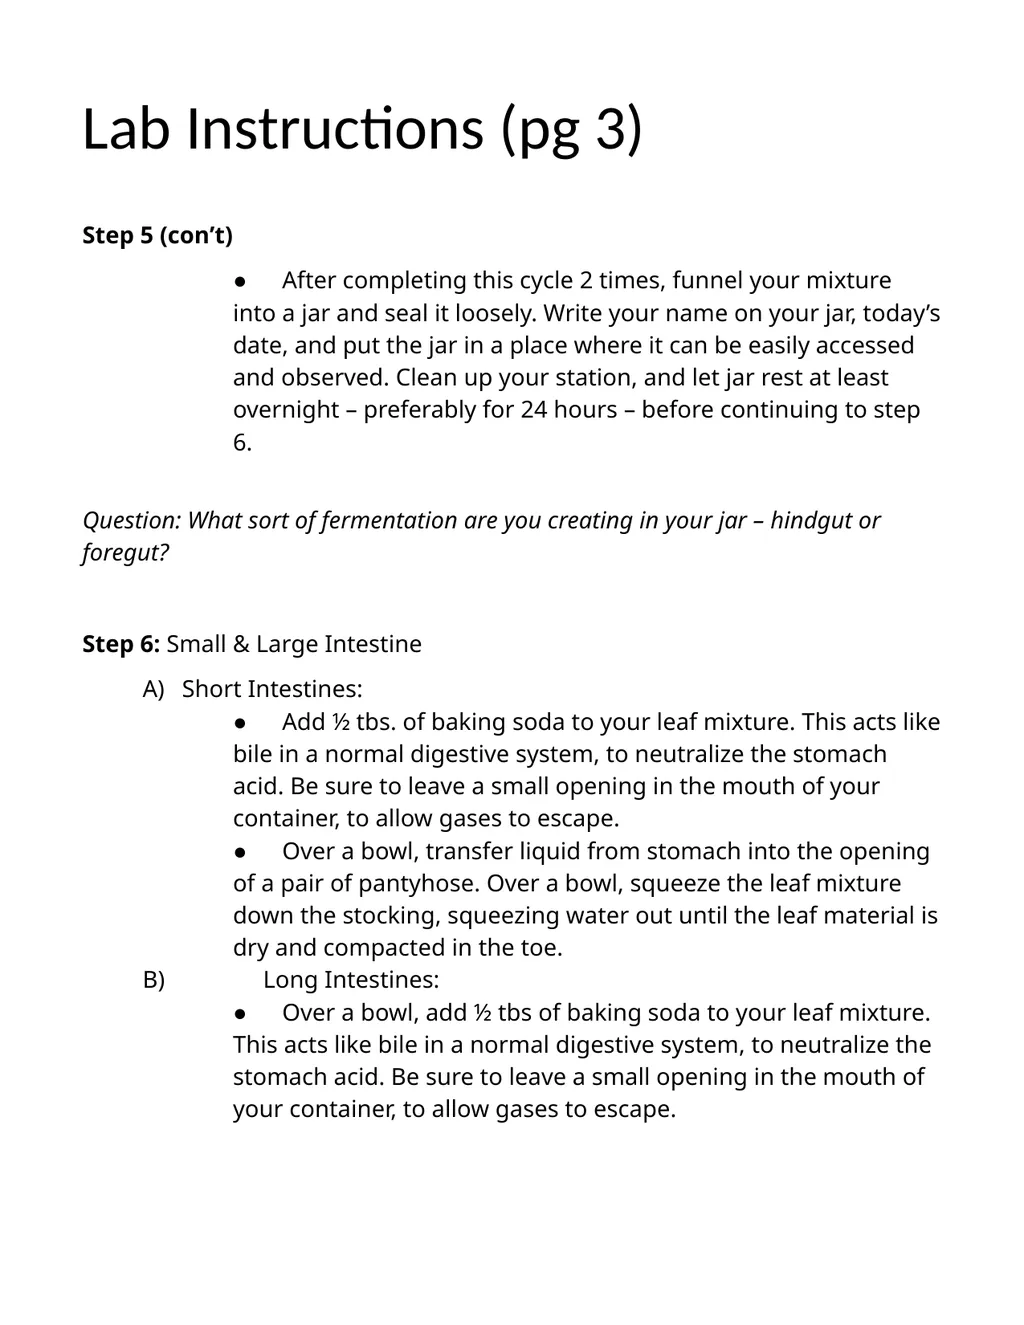
Lab Instructions (pg 3) Step 5 (con’t)
● After completing this cycle 2 times, funnel your mixture into a jar and seal it loosely. Write your name on your jar, today’s date, and put the jar in a place where it can be easily accessed and observed. Clean up your station, and let jar rest at least overnight – preferably for 24 hours – before continuing to step 6.
Question: What sort of fermentation are you creating in your jar – hindgut or foregut?
Step 6: Small & Large Intestine
A) Short Intestines:
● Add ½ tbs. of baking soda to your leaf mixture. This acts like bile in a normal digestive system, to neutralize the stomach acid. Be sure to leave a small opening in the mouth of your container, to allow gases to escape.
● Over a bowl, transfer liquid from stomach into the opening of a pair of pantyhose. Over a bowl, squeeze the leaf mixture down the stocking, squeezing water out until the leaf material is dry and compacted in the toe.
B) Long Intestines:
● Over a bowl, add ½ tbs of baking soda to your leaf mixture. This acts like bile in a normal digestive system, to neutralize the stomach acid. Be sure to leave a small opening in the mouth of your container, to allow gases to escape.<br>
● After completing this cycle 2 times, funnel your mixture into a jar and seal it loosely. Write your name on your jar, today’s date, and put the jar in a place where it can be easily accessed and observed. Clean up your station, and let jar rest at least overnight – preferably for 24 hours – before continuing to step 6.
Question: What sort of fermentation are you creating in your jar – hindgut or foregut?
Step 6: Small & Large Intestine
A) Short Intestines:
● Add ½ tbs. of baking soda to your leaf mixture. This acts like bile in a normal digestive system, to neutralize the stomach acid. Be sure to leave a small opening in the mouth of your container, to allow gases to escape.
● Over a bowl, transfer liquid from stomach into the opening of a pair of pantyhose. Over a bowl, squeeze the leaf mixture down the stocking, squeezing water out until the leaf material is dry and compacted in the toe.
B) Long Intestines:
● Over a bowl, add ½ tbs of baking soda to your leaf mixture. This acts like bile in a normal digestive system, to neutralize the stomach acid. Be sure to leave a small opening in the mouth of your container, to allow gases to escape.<br>
23
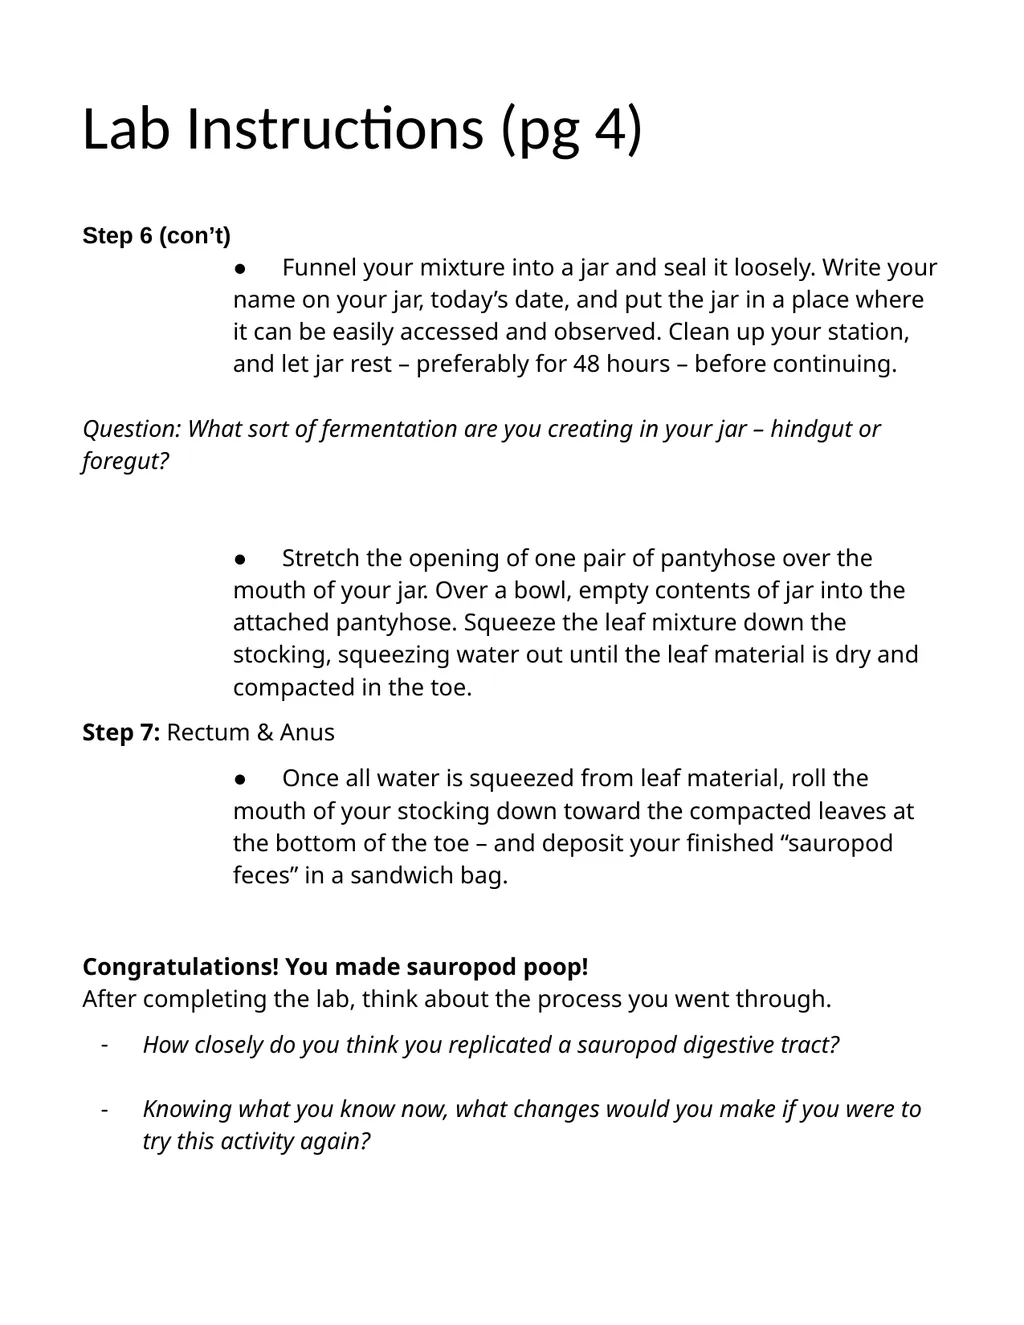
Lab Instructions (pg 4) Step 6 (con’t)
● Funnel your mixture into a jar and seal it loosely. Write your name on your jar, today’s date, and put the jar in a place where it can be easily accessed and observed. Clean up your station, and let jar rest – preferably for 48 hours – before continuing.
Question: What sort of fermentation are you creating in your jar – hindgut or foregut?
● Stretch the opening of one pair of pantyhose over the mouth of your jar. Over a bowl, empty contents of jar into the attached pantyhose. Squeeze the leaf mixture down the stocking, squeezing water out until the leaf material is dry and compacted in the toe.
Step 7: Rectum & Anus
● Once all water is squeezed from leaf material, roll the mouth of your stocking down toward the compacted leaves at the bottom of the toe – and deposit your finished “sauropod feces” in a sandwich bag.
Congratulations! You made sauropod poop! After completing the lab, think about the process you went through.
How closely do you think you replicated a sauropod digestive tract?
Knowing what you know now, what changes would you make if you were to try this activity again?<br>
● Funnel your mixture into a jar and seal it loosely. Write your name on your jar, today’s date, and put the jar in a place where it can be easily accessed and observed. Clean up your station, and let jar rest – preferably for 48 hours – before continuing.
Question: What sort of fermentation are you creating in your jar – hindgut or foregut?
● Stretch the opening of one pair of pantyhose over the mouth of your jar. Over a bowl, empty contents of jar into the attached pantyhose. Squeeze the leaf mixture down the stocking, squeezing water out until the leaf material is dry and compacted in the toe.
Step 7: Rectum & Anus
● Once all water is squeezed from leaf material, roll the mouth of your stocking down toward the compacted leaves at the bottom of the toe – and deposit your finished “sauropod feces” in a sandwich bag.
Congratulations! You made sauropod poop! After completing the lab, think about the process you went through.
How closely do you think you replicated a sauropod digestive tract?
Knowing what you know now, what changes would you make if you were to try this activity again?<br>
24
Notes<br>
25
Notes<br>
26
Notes<br>
27
Notes<br>
28
Notes<br>