
Patients With Special Challenges CHAPTER 46 Skill


Description: Patients With Special Challenges CHAPTER 46 Skill Drill 46-1 Cleaning a Tracheostomy Tube (1 of 3) 1. Wash your hands and apply a mask, goggles, and clean nonlatex gloves. Suctioning a home care patient is a clean procedure, not a sterile
Related Topics
Download Presentation
"Patients With Special Challenges CHAPTER 46 Skill" is the property of its rightful owner. Permission is granted to download and print the materials on this website for personal, non-commercial use only, and to display it on your personal computer provided you do not modify the materials and that you retain all copyright notices contained in the materials. By downloading content from our website, you accept the terms of this agreement.
Presentation Transcript
slide1. Patients With Special Challenges CHAPTER 46<br>
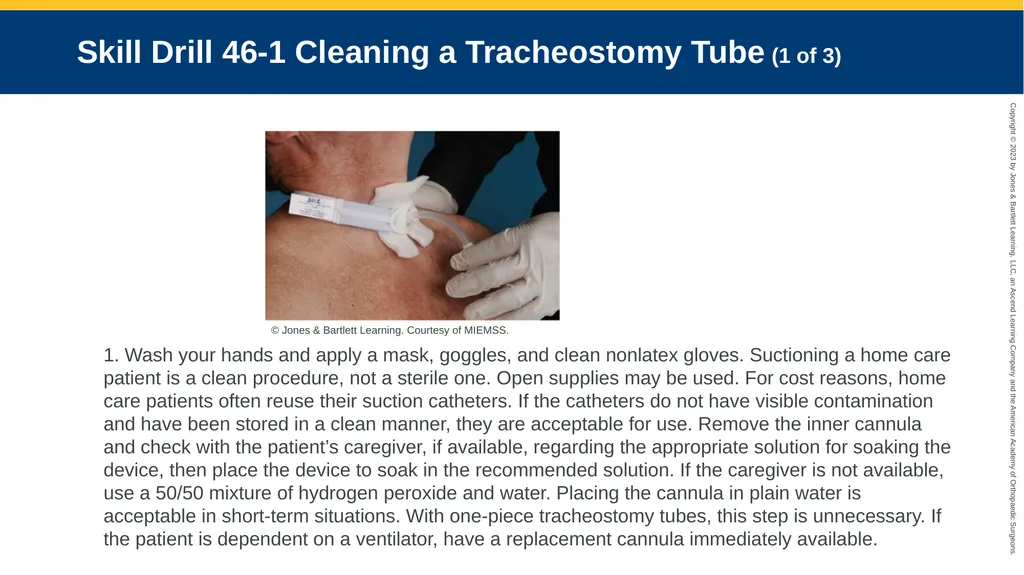
slide2. Skill Drill 46-1 Cleaning a Tracheostomy Tube (1 of 3) 1. Wash your hands and apply a mask, goggles, and clean nonlatex gloves. Suctioning a home care patient is a clean procedure, not a sterile one. Open supplies may be used. For cost reasons, home care patients often reuse their suction catheters. If the catheters do not have visible contamination and have been stored in a clean manner, they are acceptable for use. Remove the inner cannula and check with the patient’s caregiver, if available, regarding the appropriate solution for soaking the device, then place the device to soak in the recommended solution. If the caregiver is not available, use a 50/50 mixture of hydrogen peroxide and water. Placing the cannula in plain water is acceptable in short-term situations. With one-piece tracheostomy tubes, this step is unnecessary. If the patient is dependent on a ventilator, have a replacement cannula immediately available. © Jones & Bartlett Learning. Courtesy of MIEMSS.<br>
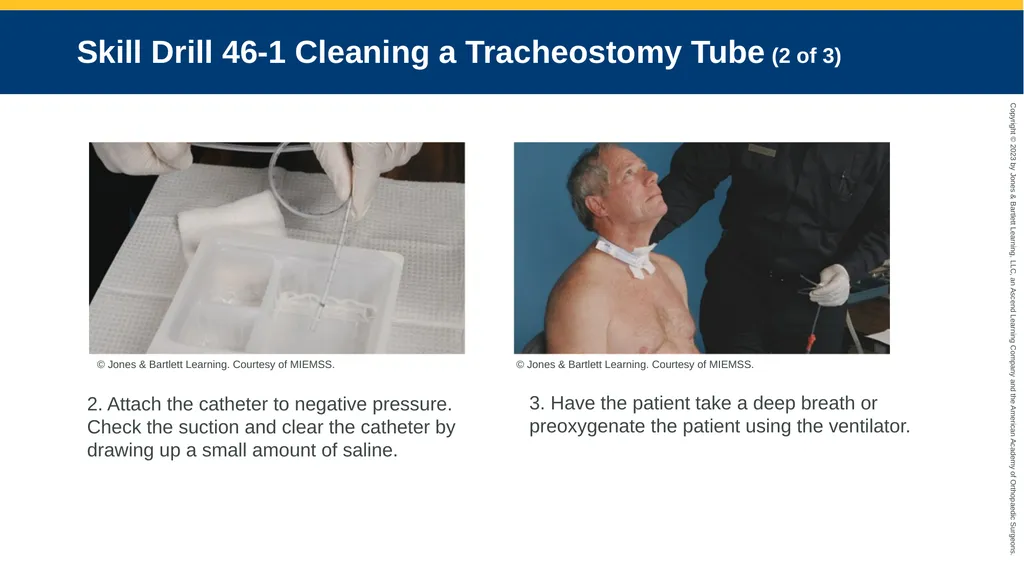
slide3. Skill Drill 46-1 Cleaning a Tracheostomy Tube (2 of 3) 2. Attach the catheter to negative pressure. Check the suction and clear the catheter by drawing up a small amount of saline. 3. Have the patient take a deep breath or preoxygenate the patient using the ventilator. © Jones & Bartlett Learning. Courtesy of MIEMSS. © Jones & Bartlett Learning. Courtesy of MIEMSS.<br>
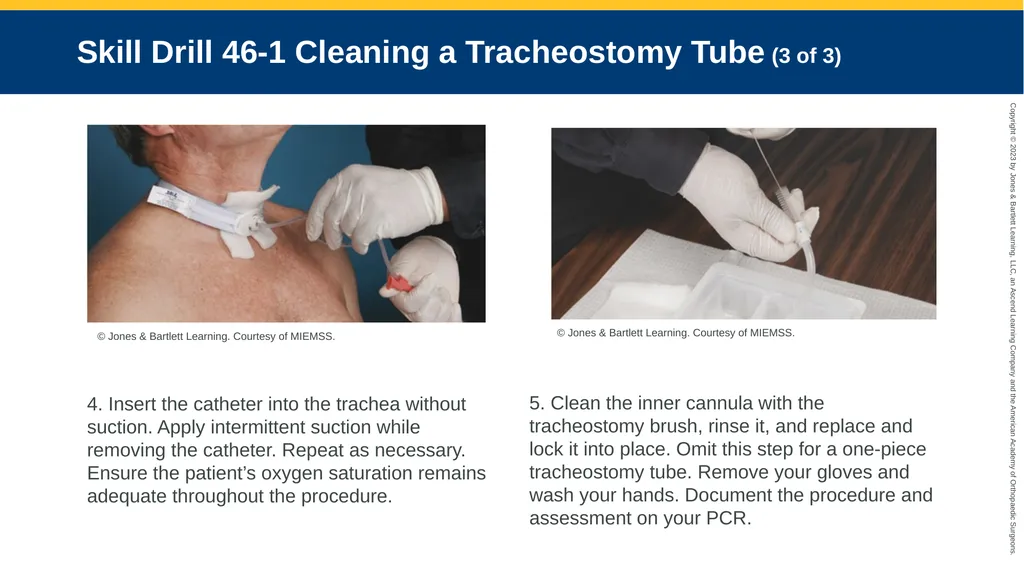
slide4. Skill Drill 46-1 Cleaning a Tracheostomy Tube (3 of 3) 4. Insert the catheter into the trachea without suction. Apply intermittent suction while removing the catheter. Repeat as necessary. Ensure the patient’s oxygen saturation remains adequate throughout the procedure. 5. Clean the inner cannula with the tracheostomy brush, rinse it, and replace and lock it into place. Omit this step for a one-piece tracheostomy tube. Remove your gloves and wash your hands. Document the procedure and assessment on your PCR. © Jones & Bartlett Learning. Courtesy of MIEMSS. © Jones & Bartlett Learning. Courtesy of MIEMSS.<br>
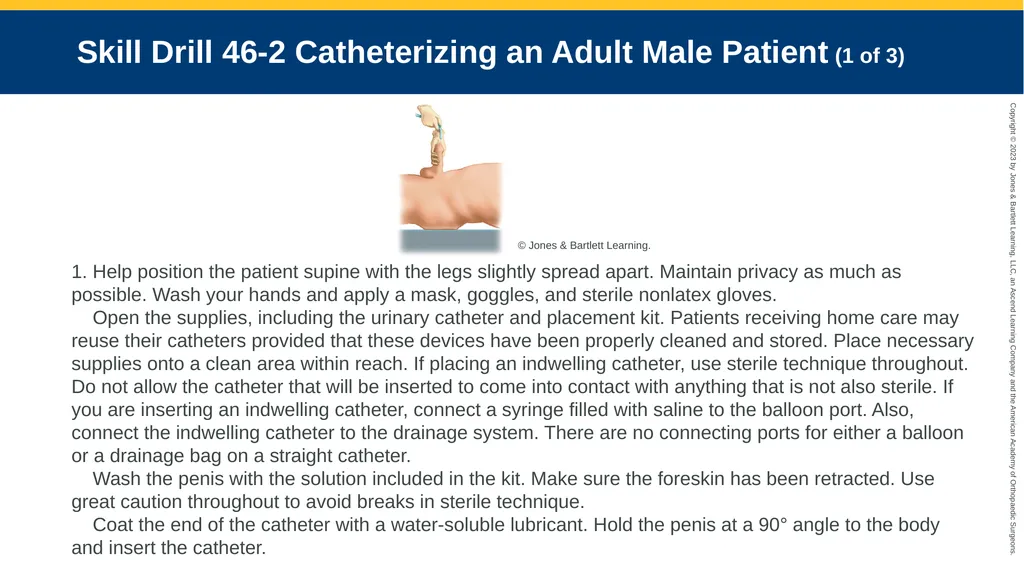
slide5. Skill Drill 46-2 Catheterizing an Adult Male Patient (1 of 3) 1. Help position the patient supine with the legs slightly spread apart. Maintain privacy as much as possible. Wash your hands and apply a mask, goggles, and sterile nonlatex gloves.
Open the supplies, including the urinary catheter and placement kit. Patients receiving home care may reuse their catheters provided that these devices have been properly cleaned and stored. Place necessary supplies onto a clean area within reach. If placing an indwelling catheter, use sterile technique throughout. Do not allow the catheter that will be inserted to come into contact with anything that is not also sterile. If you are inserting an indwelling catheter, connect a syringe filled with saline to the balloon port. Also, connect the indwelling catheter to the drainage system. There are no connecting ports for either a balloon or a drainage bag on a straight catheter.
Wash the penis with the solution included in the kit. Make sure the foreskin has been retracted. Use great caution throughout to avoid breaks in sterile technique.
Coat the end of the catheter with a water-soluble lubricant. Hold the penis at a 90° angle to the body and insert the catheter. © Jones & Bartlett Learning.<br>
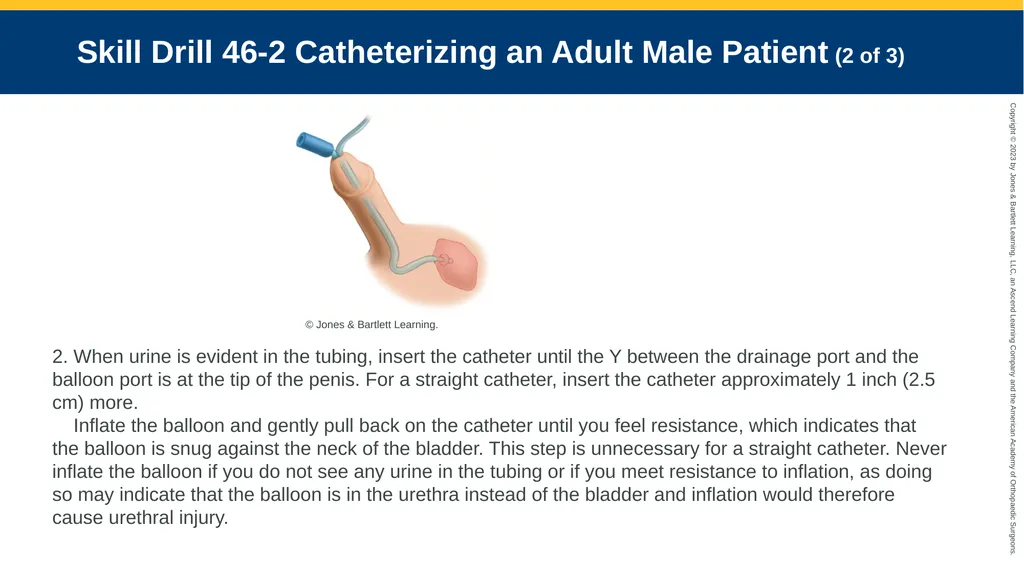
slide6. Skill Drill 46-2 Catheterizing an Adult Male Patient (2 of 3) 2. When urine is evident in the tubing, insert the catheter until the Y between the drainage port and the balloon port is at the tip of the penis. For a straight catheter, insert the catheter approximately 1 inch (2.5 cm) more.
Inflate the balloon and gently pull back on the catheter until you feel resistance, which indicates that the balloon is snug against the neck of the bladder. This step is unnecessary for a straight catheter. Never inflate the balloon if you do not see any urine in the tubing or if you meet resistance to inflation, as doing so may indicate that the balloon is in the urethra instead of the bladder and inflation would therefore cause urethral injury. © Jones & Bartlett Learning.<br>
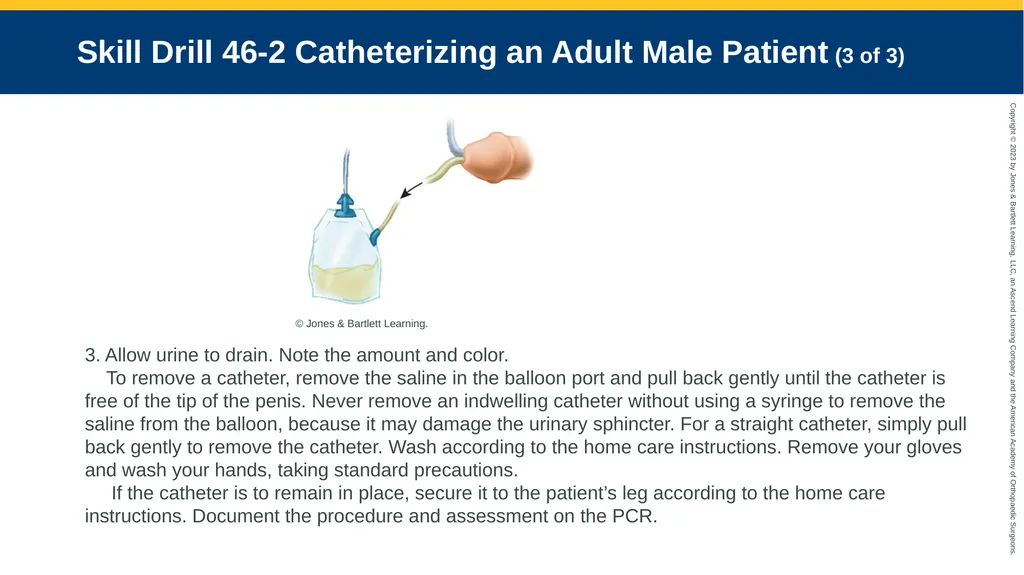
slide7. Skill Drill 46-2 Catheterizing an Adult Male Patient (3 of 3) 3. Allow urine to drain. Note the amount and color.
To remove a catheter, remove the saline in the balloon port and pull back gently until the catheter is free of the tip of the penis. Never remove an indwelling catheter without using a syringe to remove the saline from the balloon, because it may damage the urinary sphincter. For a straight catheter, simply pull back gently to remove the catheter. Wash according to the home care instructions. Remove your gloves and wash your hands, taking standard precautions.
If the catheter is to remain in place, secure it to the patient’s leg according to the home care instructions. Document the procedure and assessment on the PCR. © Jones & Bartlett Learning.<br>
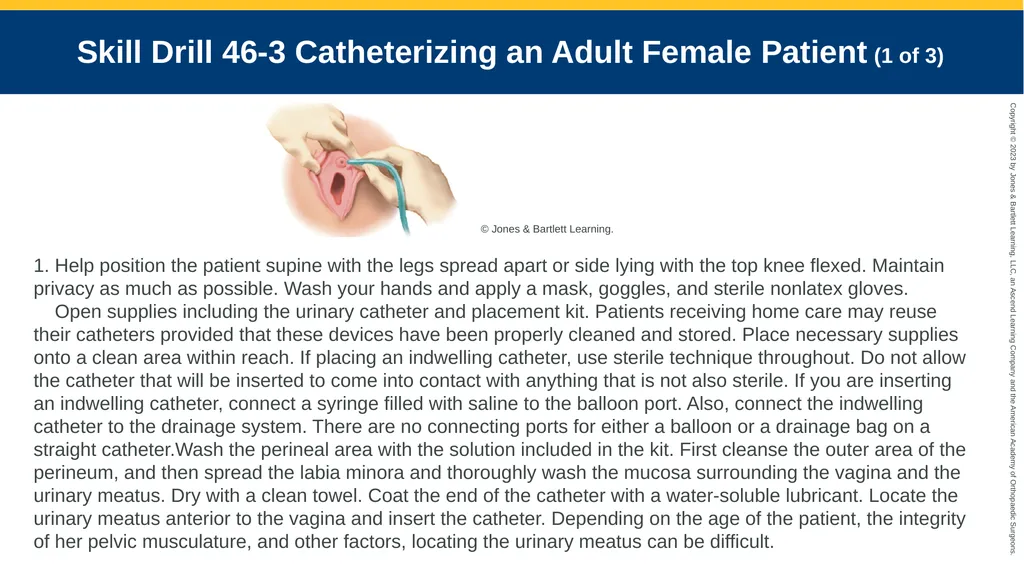
slide8. Skill Drill 46-3 Catheterizing an Adult Female Patient (1 of 3) 1. Help position the patient supine with the legs spread apart or side lying with the top knee flexed. Maintain privacy as much as possible. Wash your hands and apply a mask, goggles, and sterile nonlatex gloves.
Open supplies including the urinary catheter and placement kit. Patients receiving home care may reuse their catheters provided that these devices have been properly cleaned and stored. Place necessary supplies onto a clean area within reach. If placing an indwelling catheter, use sterile technique throughout. Do not allow the catheter that will be inserted to come into contact with anything that is not also sterile. If you are inserting an indwelling catheter, connect a syringe filled with saline to the balloon port. Also, connect the indwelling catheter to the drainage system. There are no connecting ports for either a balloon or a drainage bag on a straight catheter.Wash the perineal area with the solution included in the kit. First cleanse the outer area of the perineum, and then spread the labia minora and thoroughly wash the mucosa surrounding the vagina and the urinary meatus. Dry with a clean towel. Coat the end of the catheter with a water-soluble lubricant. Locate the urinary meatus anterior to the vagina and insert the catheter. Depending on the age of the patient, the integrity of her pelvic musculature, and other factors, locating the urinary meatus can be difficult. © Jones & Bartlett Learning.<br>
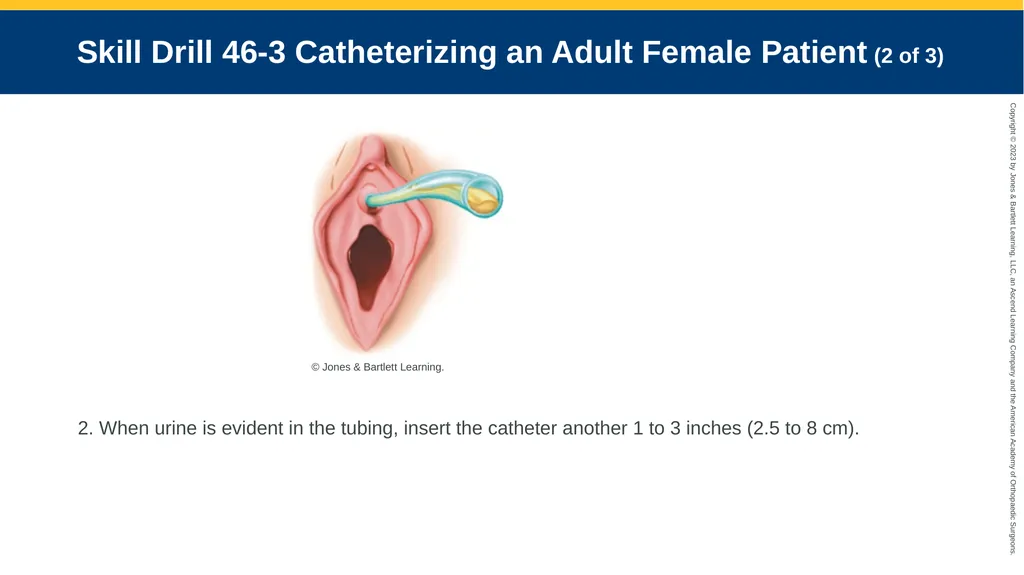
slide9. Skill Drill 46-3 Catheterizing an Adult Female Patient (2 of 3) 2. When urine is evident in the tubing, insert the catheter another 1 to 3 inches (2.5 to 8 cm). © Jones & Bartlett Learning.<br>
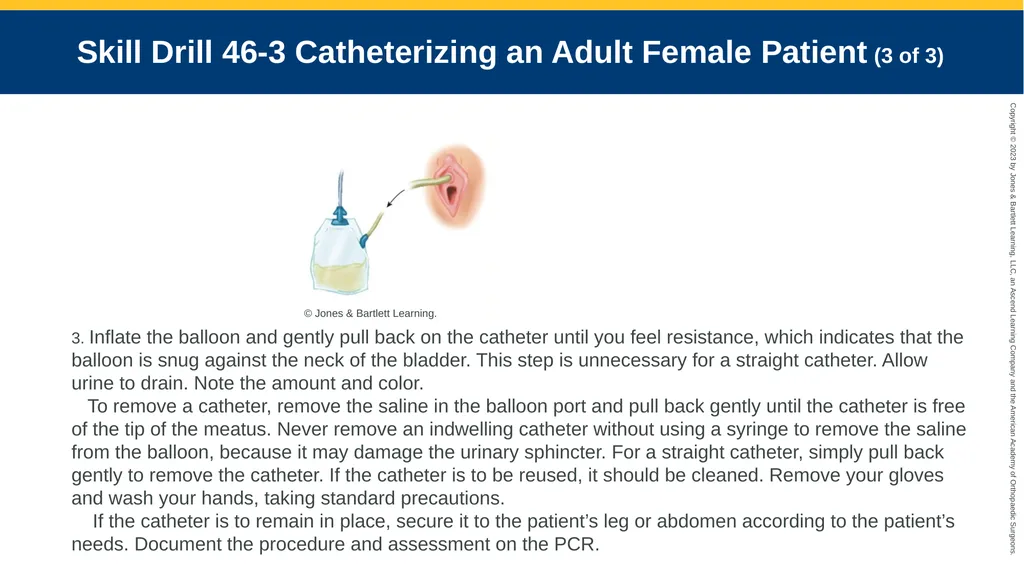
slide10. Skill Drill 46-3 Catheterizing an Adult Female Patient (3 of 3) 3. Inflate the balloon and gently pull back on the catheter until you feel resistance, which indicates that the balloon is snug against the neck of the bladder. This step is unnecessary for a straight catheter. Allow urine to drain. Note the amount and color.
To remove a catheter, remove the saline in the balloon port and pull back gently until the catheter is free of the tip of the meatus. Never remove an indwelling catheter without using a syringe to remove the saline from the balloon, because it may damage the urinary sphincter. For a straight catheter, simply pull back gently to remove the catheter. If the catheter is to be reused, it should be cleaned. Remove your gloves and wash your hands, taking standard precautions.
If the catheter is to remain in place, secure it to the patient’s leg or abdomen according to the patient’s needs. Document the procedure and assessment on the PCR. © Jones & Bartlett Learning. © Jones & Bartlett Learning.<br>
slide2. Skill Drill 46-1 Cleaning a Tracheostomy Tube (1 of 3) 1. Wash your hands and apply a mask, goggles, and clean nonlatex gloves. Suctioning a home care patient is a clean procedure, not a sterile one. Open supplies may be used. For cost reasons, home care patients often reuse their suction catheters. If the catheters do not have visible contamination and have been stored in a clean manner, they are acceptable for use. Remove the inner cannula and check with the patient’s caregiver, if available, regarding the appropriate solution for soaking the device, then place the device to soak in the recommended solution. If the caregiver is not available, use a 50/50 mixture of hydrogen peroxide and water. Placing the cannula in plain water is acceptable in short-term situations. With one-piece tracheostomy tubes, this step is unnecessary. If the patient is dependent on a ventilator, have a replacement cannula immediately available. © Jones & Bartlett Learning. Courtesy of MIEMSS.<br>
slide3. Skill Drill 46-1 Cleaning a Tracheostomy Tube (2 of 3) 2. Attach the catheter to negative pressure. Check the suction and clear the catheter by drawing up a small amount of saline. 3. Have the patient take a deep breath or preoxygenate the patient using the ventilator. © Jones & Bartlett Learning. Courtesy of MIEMSS. © Jones & Bartlett Learning. Courtesy of MIEMSS.<br>
slide4. Skill Drill 46-1 Cleaning a Tracheostomy Tube (3 of 3) 4. Insert the catheter into the trachea without suction. Apply intermittent suction while removing the catheter. Repeat as necessary. Ensure the patient’s oxygen saturation remains adequate throughout the procedure. 5. Clean the inner cannula with the tracheostomy brush, rinse it, and replace and lock it into place. Omit this step for a one-piece tracheostomy tube. Remove your gloves and wash your hands. Document the procedure and assessment on your PCR. © Jones & Bartlett Learning. Courtesy of MIEMSS. © Jones & Bartlett Learning. Courtesy of MIEMSS.<br>
slide5. Skill Drill 46-2 Catheterizing an Adult Male Patient (1 of 3) 1. Help position the patient supine with the legs slightly spread apart. Maintain privacy as much as possible. Wash your hands and apply a mask, goggles, and sterile nonlatex gloves.
Open the supplies, including the urinary catheter and placement kit. Patients receiving home care may reuse their catheters provided that these devices have been properly cleaned and stored. Place necessary supplies onto a clean area within reach. If placing an indwelling catheter, use sterile technique throughout. Do not allow the catheter that will be inserted to come into contact with anything that is not also sterile. If you are inserting an indwelling catheter, connect a syringe filled with saline to the balloon port. Also, connect the indwelling catheter to the drainage system. There are no connecting ports for either a balloon or a drainage bag on a straight catheter.
Wash the penis with the solution included in the kit. Make sure the foreskin has been retracted. Use great caution throughout to avoid breaks in sterile technique.
Coat the end of the catheter with a water-soluble lubricant. Hold the penis at a 90° angle to the body and insert the catheter. © Jones & Bartlett Learning.<br>
slide6. Skill Drill 46-2 Catheterizing an Adult Male Patient (2 of 3) 2. When urine is evident in the tubing, insert the catheter until the Y between the drainage port and the balloon port is at the tip of the penis. For a straight catheter, insert the catheter approximately 1 inch (2.5 cm) more.
Inflate the balloon and gently pull back on the catheter until you feel resistance, which indicates that the balloon is snug against the neck of the bladder. This step is unnecessary for a straight catheter. Never inflate the balloon if you do not see any urine in the tubing or if you meet resistance to inflation, as doing so may indicate that the balloon is in the urethra instead of the bladder and inflation would therefore cause urethral injury. © Jones & Bartlett Learning.<br>
slide7. Skill Drill 46-2 Catheterizing an Adult Male Patient (3 of 3) 3. Allow urine to drain. Note the amount and color.
To remove a catheter, remove the saline in the balloon port and pull back gently until the catheter is free of the tip of the penis. Never remove an indwelling catheter without using a syringe to remove the saline from the balloon, because it may damage the urinary sphincter. For a straight catheter, simply pull back gently to remove the catheter. Wash according to the home care instructions. Remove your gloves and wash your hands, taking standard precautions.
If the catheter is to remain in place, secure it to the patient’s leg according to the home care instructions. Document the procedure and assessment on the PCR. © Jones & Bartlett Learning.<br>
slide8. Skill Drill 46-3 Catheterizing an Adult Female Patient (1 of 3) 1. Help position the patient supine with the legs spread apart or side lying with the top knee flexed. Maintain privacy as much as possible. Wash your hands and apply a mask, goggles, and sterile nonlatex gloves.
Open supplies including the urinary catheter and placement kit. Patients receiving home care may reuse their catheters provided that these devices have been properly cleaned and stored. Place necessary supplies onto a clean area within reach. If placing an indwelling catheter, use sterile technique throughout. Do not allow the catheter that will be inserted to come into contact with anything that is not also sterile. If you are inserting an indwelling catheter, connect a syringe filled with saline to the balloon port. Also, connect the indwelling catheter to the drainage system. There are no connecting ports for either a balloon or a drainage bag on a straight catheter.Wash the perineal area with the solution included in the kit. First cleanse the outer area of the perineum, and then spread the labia minora and thoroughly wash the mucosa surrounding the vagina and the urinary meatus. Dry with a clean towel. Coat the end of the catheter with a water-soluble lubricant. Locate the urinary meatus anterior to the vagina and insert the catheter. Depending on the age of the patient, the integrity of her pelvic musculature, and other factors, locating the urinary meatus can be difficult. © Jones & Bartlett Learning.<br>
slide9. Skill Drill 46-3 Catheterizing an Adult Female Patient (2 of 3) 2. When urine is evident in the tubing, insert the catheter another 1 to 3 inches (2.5 to 8 cm). © Jones & Bartlett Learning.<br>
slide10. Skill Drill 46-3 Catheterizing an Adult Female Patient (3 of 3) 3. Inflate the balloon and gently pull back on the catheter until you feel resistance, which indicates that the balloon is snug against the neck of the bladder. This step is unnecessary for a straight catheter. Allow urine to drain. Note the amount and color.
To remove a catheter, remove the saline in the balloon port and pull back gently until the catheter is free of the tip of the meatus. Never remove an indwelling catheter without using a syringe to remove the saline from the balloon, because it may damage the urinary sphincter. For a straight catheter, simply pull back gently to remove the catheter. If the catheter is to be reused, it should be cleaned. Remove your gloves and wash your hands, taking standard precautions.
If the catheter is to remain in place, secure it to the patient’s leg or abdomen according to the patient’s needs. Document the procedure and assessment on the PCR. © Jones & Bartlett Learning. © Jones & Bartlett Learning.<br>