04
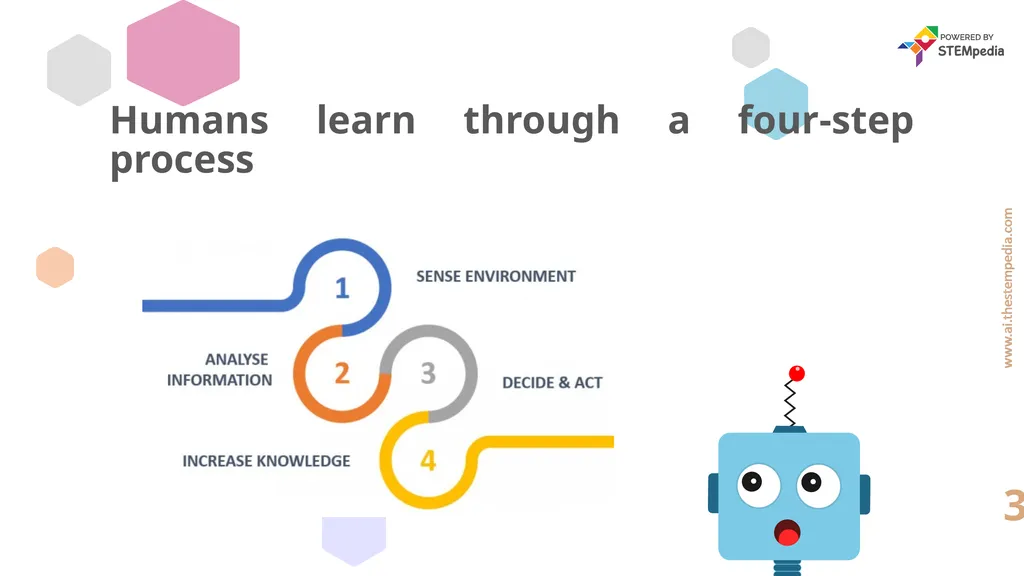
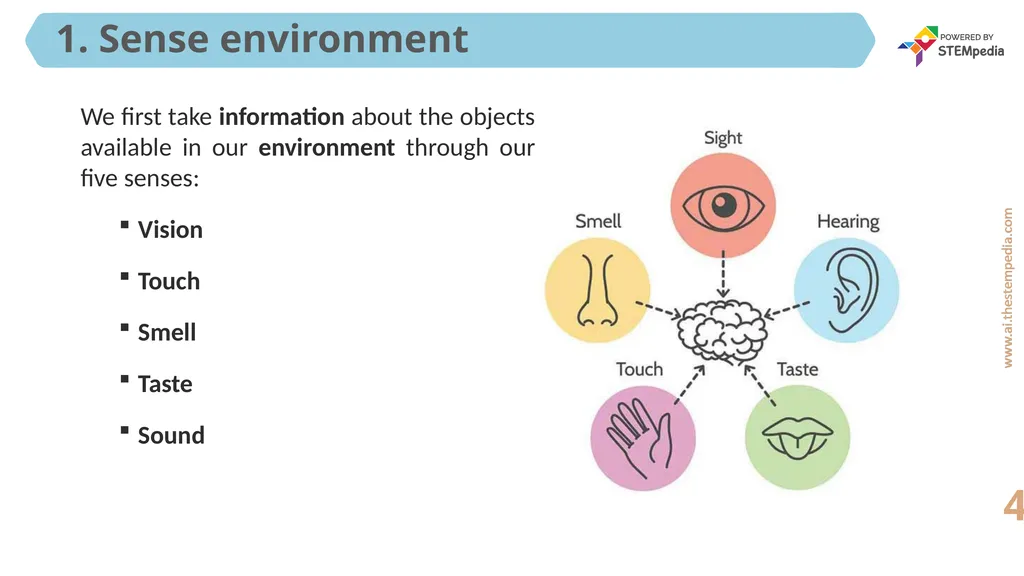
We first take information about the objects available in our environment through our five senses:
Vision
Touch
Smell
Taste
Sound 1. Sense environment 4<br>
05
Analyze information: The next step is to analyze the information gathered from our senses and using our previous knowledge, identity the objects e.g. a dog, a house, etc.
Decide & act: In this step, using the knowledge and information about the object, we decide what we want to do. E.g., if it is a cat we want to play with it, but if it is a tiger, we run!
Increase knowledge: Humans learn from the output of the last step. E.g., if you decide to play with the cat, but the cat scratched you, then you would register the particular cat as not friendly and increase your knowledge. Learning Process 5<br>
06
How Machines Learn 6<br>
07
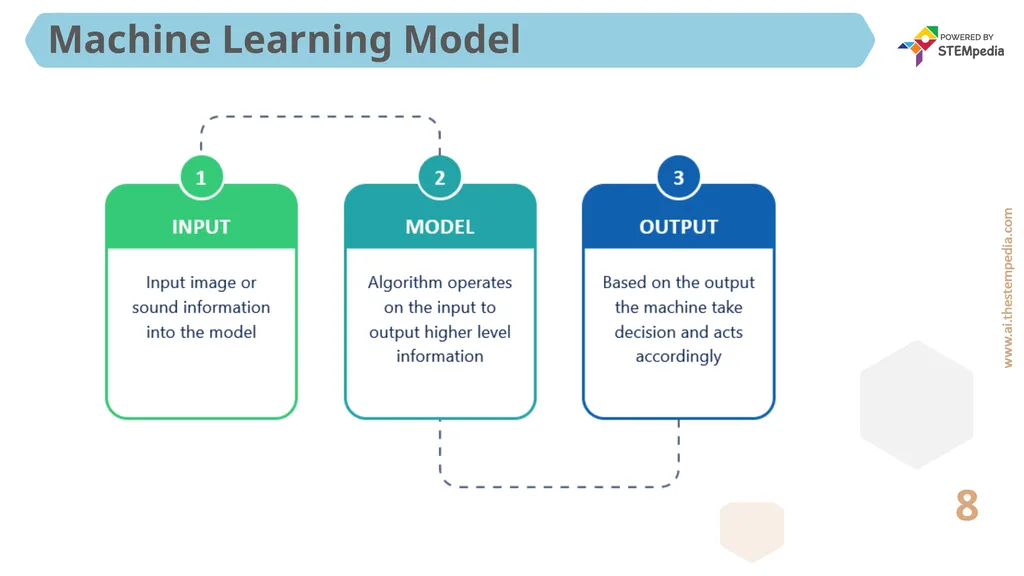
Machine learning is the process of machines learning how to act by themselves without any human intervention
It is basically getting a computer to perform a task without explicitly being programmed to do so Definition 7<br>
08
8 Machine Learning Model<br>
09
ML Environment is a part of PictoBlox that makes it fast and easy to create machine-learning models for your projects.
It does not require any coding making it perfect for beginners with no or little coding experience to learn machine learning. It is just like teachable machines.
You can train a computer to recognize your images, objects, poses, hand poses, audio, number, and text and export your model to PictoBlox. Introduction to ML Environment 9<br>
10
Types of Models You Can Make 10<br>
11
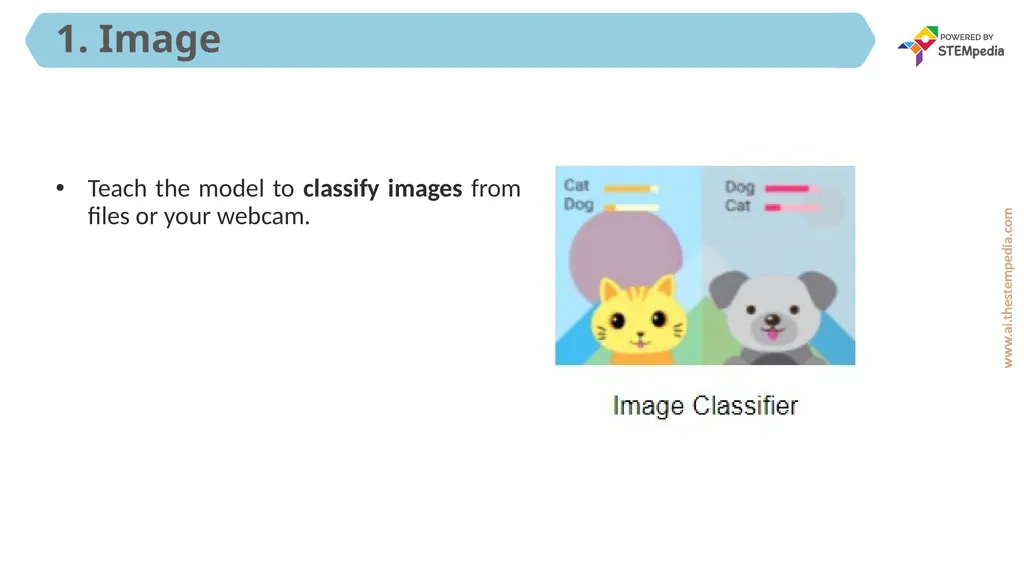
Teach the model to classify images from files or your webcam. 1. Image<br>
12
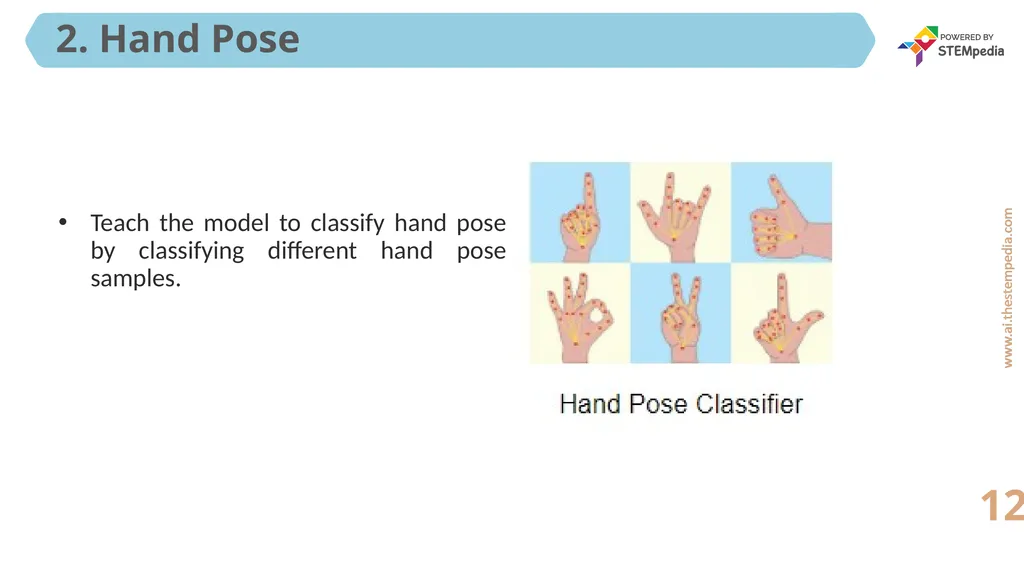
Teach the model to classify hand pose by classifying different hand pose samples. 2. Hand Pose 12<br>
13
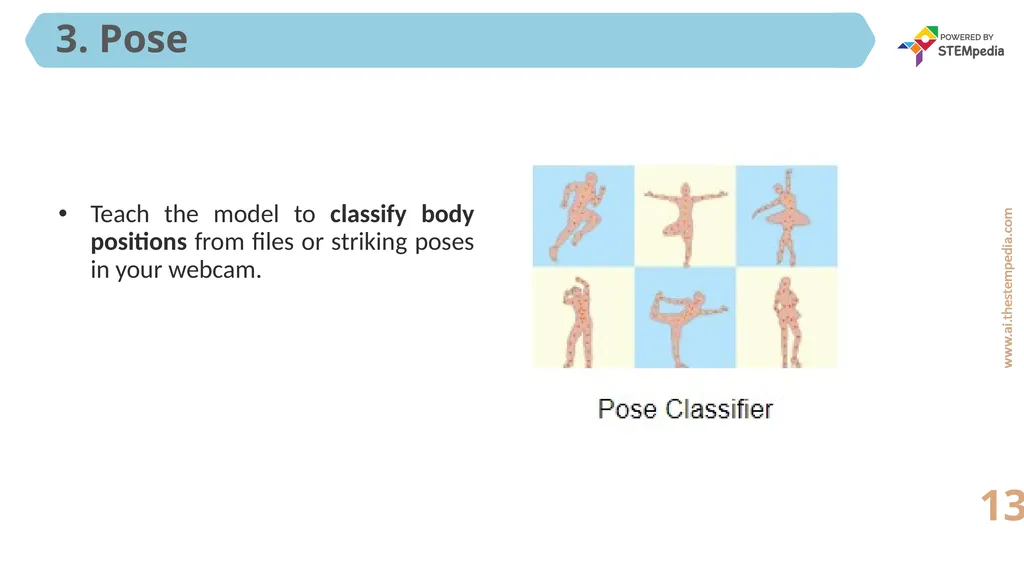
Teach the model to classify body positions from files or striking poses in your webcam. 3. Pose 13<br>
14
Cat vs Dog: Training Data for ML 14<br>
15
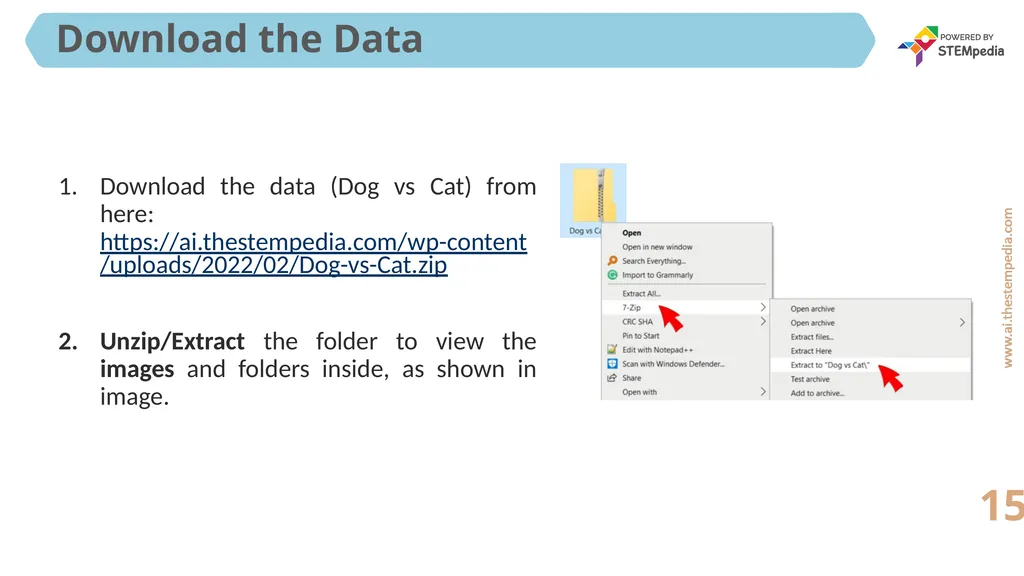
Download the data (Dog vs Cat) from here: https://ai.thestempedia.com/wp-content/uploads/2022/02/Dog-vs-Cat.zip
Unzip/Extract the folder to view the images and folders inside, as shown in image. Download the Data 15<br>
16
The folder has the following folders inside it:
Training Data: This folder contains two folders for training the model:
Cats: 10 images of Cat
Dogs: 10 images of Dogs
Testing Data: This folder contains 10 images (5 images each of the cat and dog). We will use this in our PictoBlox project to make the classifier. Contents of the folders 16<br>
17
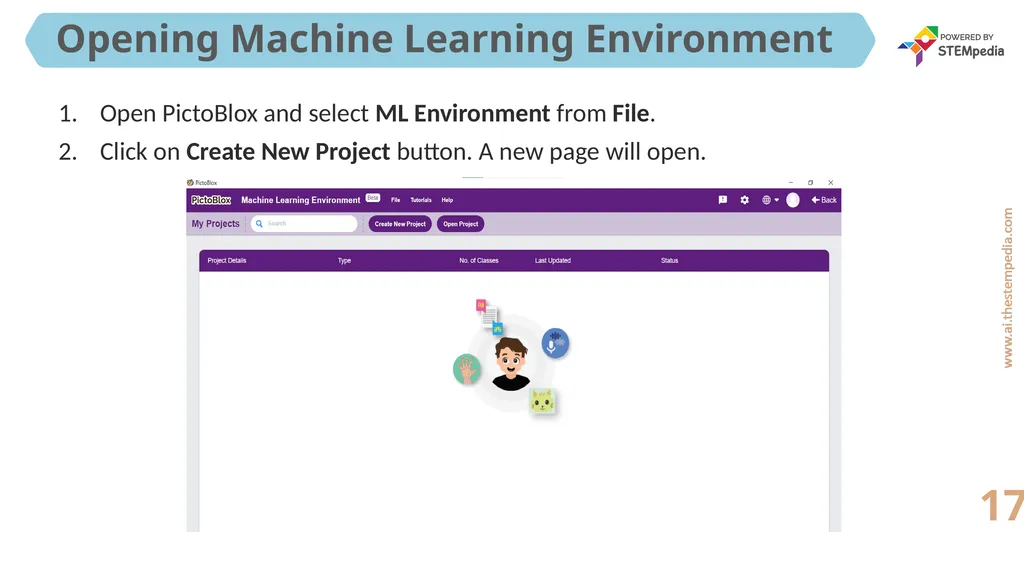
Open PictoBlox and select ML Environment from File.
Click on Create New Project button. A new page will open. Opening Machine Learning Environment 17<br>
18
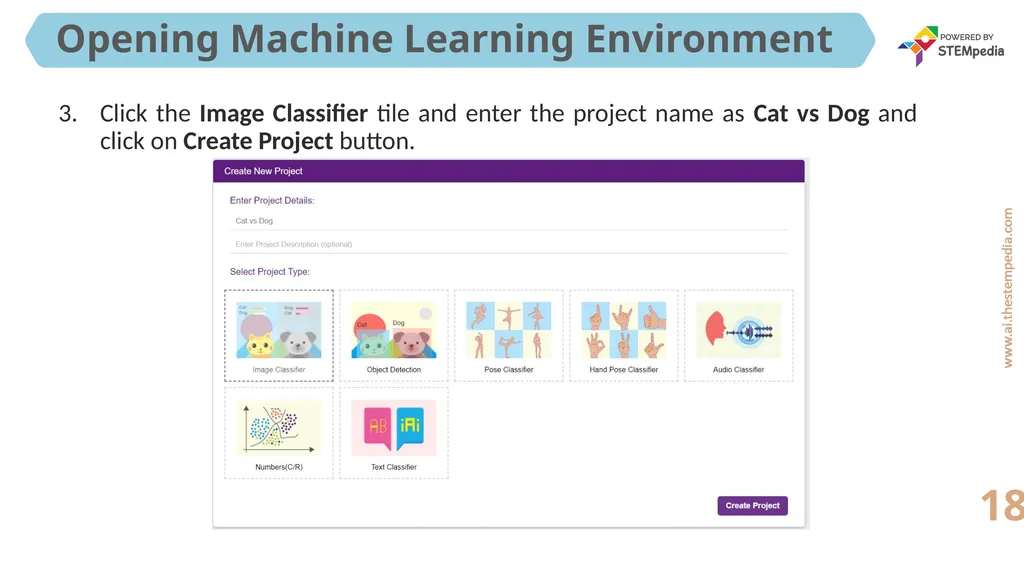
Click the Image Classifier tile and enter the project name as Cat vs Dog and click on Create Project button. Opening Machine Learning Environment 18<br>
19
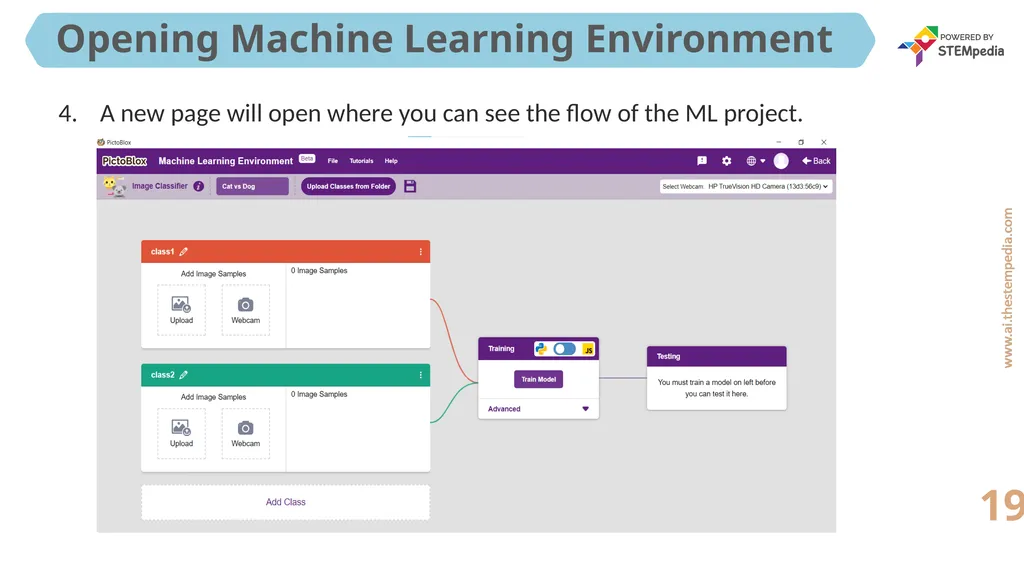
Opening Machine Learning Environment 19 A new page will open where you can see the flow of the ML project.<br>
20
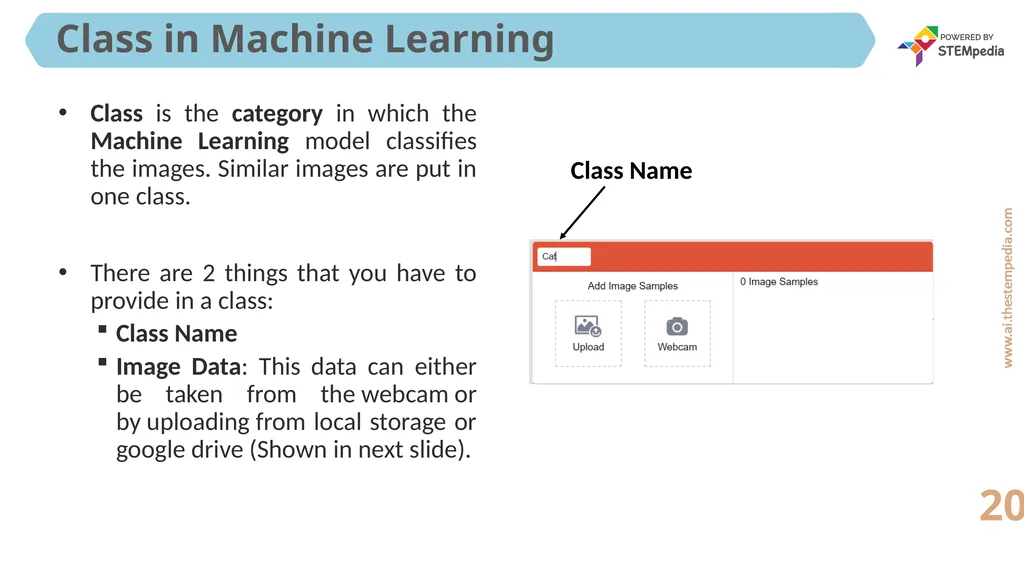
Class is the category in which the Machine Learning model classifies the images. Similar images are put in one class.
There are 2 things that you have to provide in a class:
Class Name
Image Data: This data can either be taken from the webcam or by uploading from local storage or google drive (Shown in next slide). Class in Machine Learning 20 Class Name<br>
21
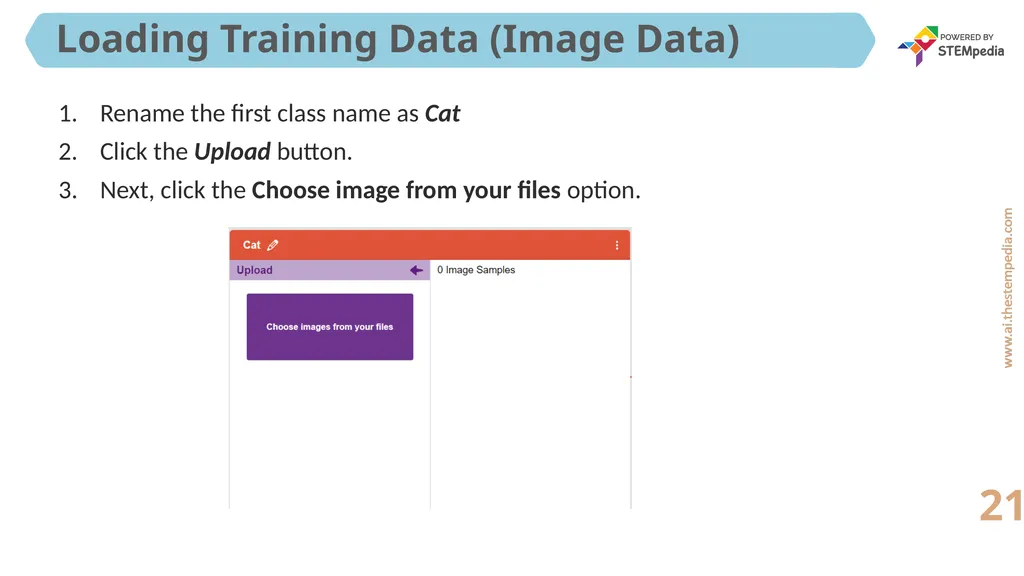
Rename the first class name as Cat
Click the Upload button.
Next, click the Choose image from your files option. Loading Training Data (Image Data) 21 STEP 1,2<br>
22
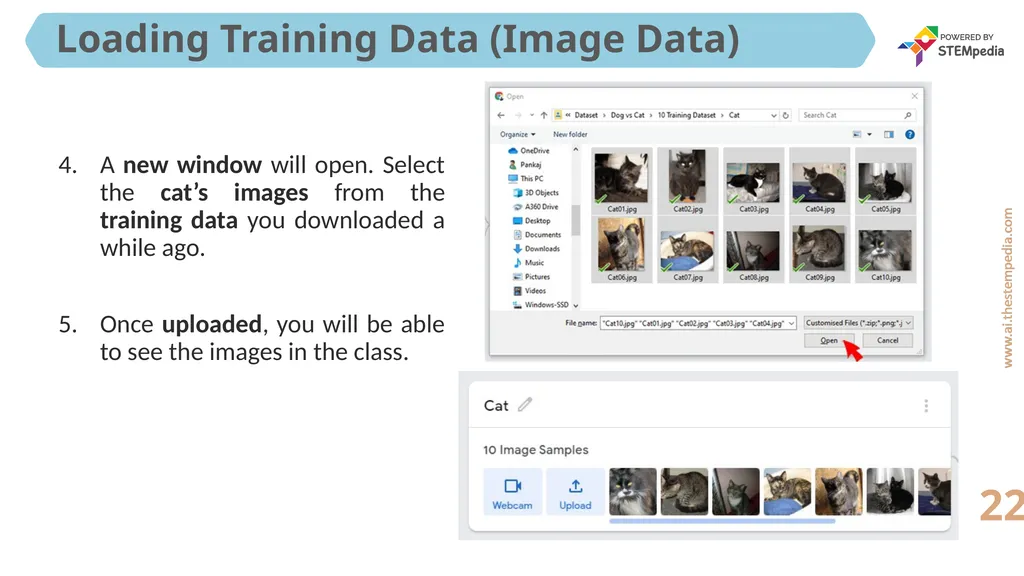
A new window will open. Select the cat’s images from the training data you downloaded a while ago.
Once uploaded, you will be able to see the images in the class. Loading Training Data (Image Data) 22<br>
23
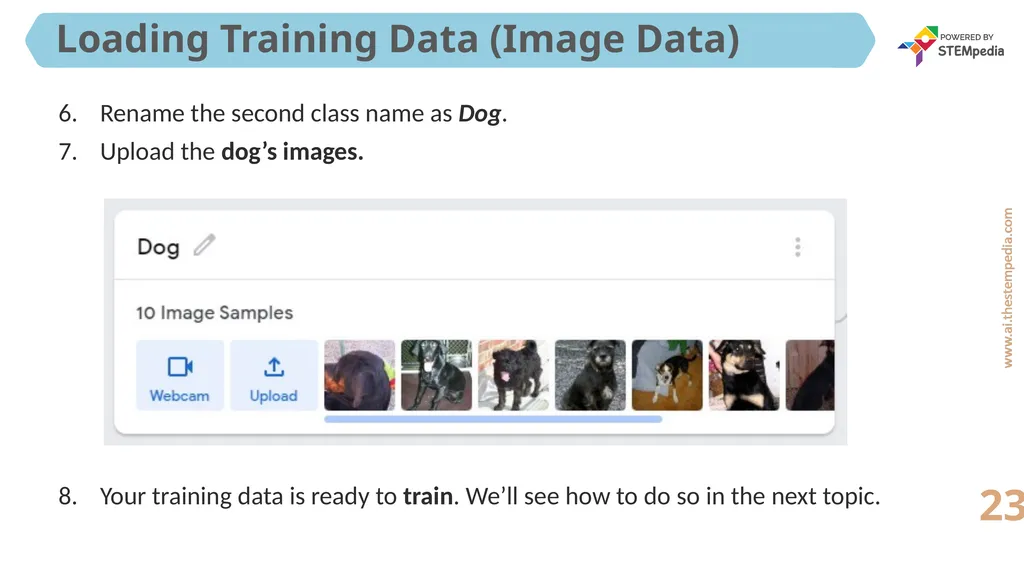
Rename the second class name as Dog.
Upload the dog’s images.
Your training data is ready to train. We’ll see how to do so in the next topic. Loading Training Data (Image Data) 23<br>
24
Cat vs Dog: Training the Model 24<br>
25
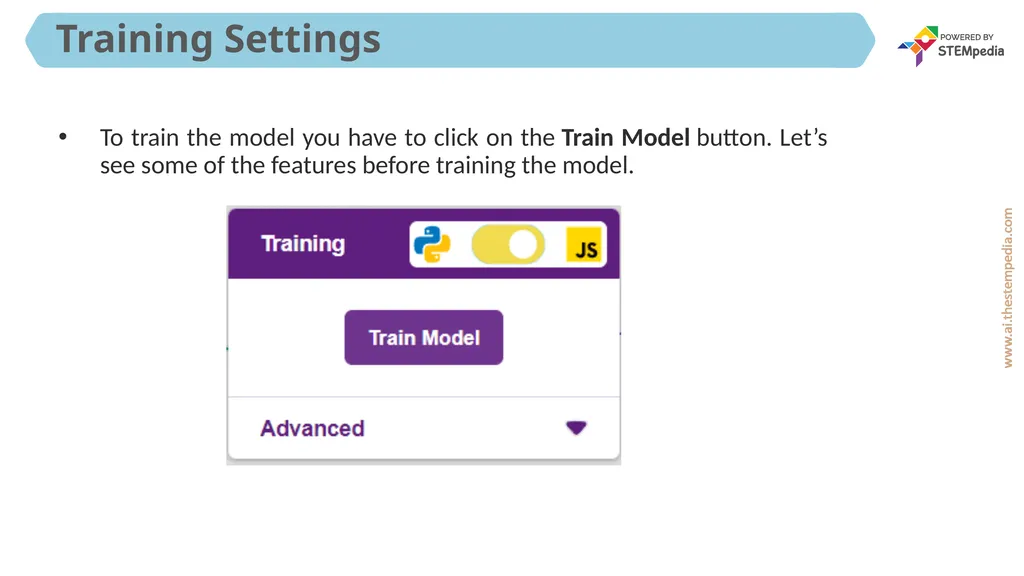
To train the model you have to click on the Train Model button. Let’s see some of the features before training the model. Training Settings<br>
26
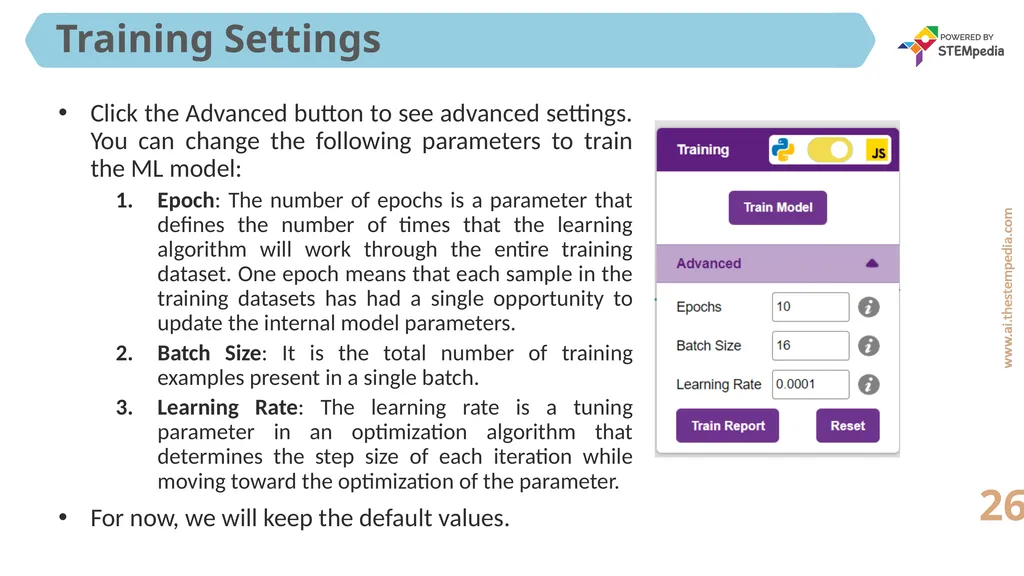
26 Click the Advanced button to see advanced settings. You can change the following parameters to train the ML model:
Epoch: The number of epochs is a parameter that defines the number of times that the learning algorithm will work through the entire training dataset. One epoch means that each sample in the training datasets has had a single opportunity to update the internal model parameters.
Batch Size: It is the total number of training examples present in a single batch.
Learning Rate: The learning rate is a tuning parameter in an optimization algorithm that determines the step size of each iteration while moving toward the optimization of the parameter.
For now, we will keep the default values. Training Settings<br>
27
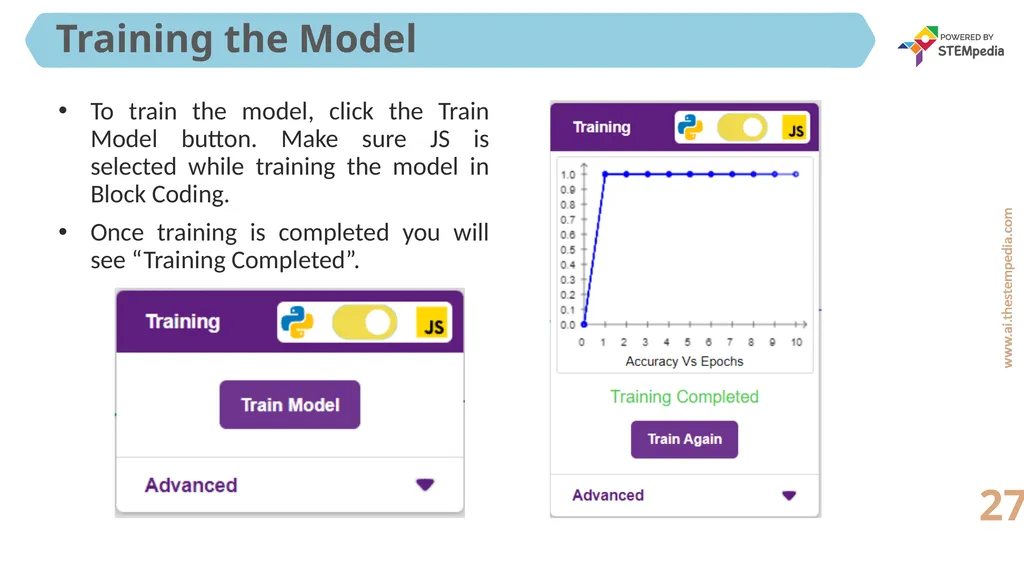
To train the model, click the Train Model button. Make sure JS is selected while training the model in Block Coding.
Once training is completed you will see “Training Completed”. Training the Model 27<br>
28
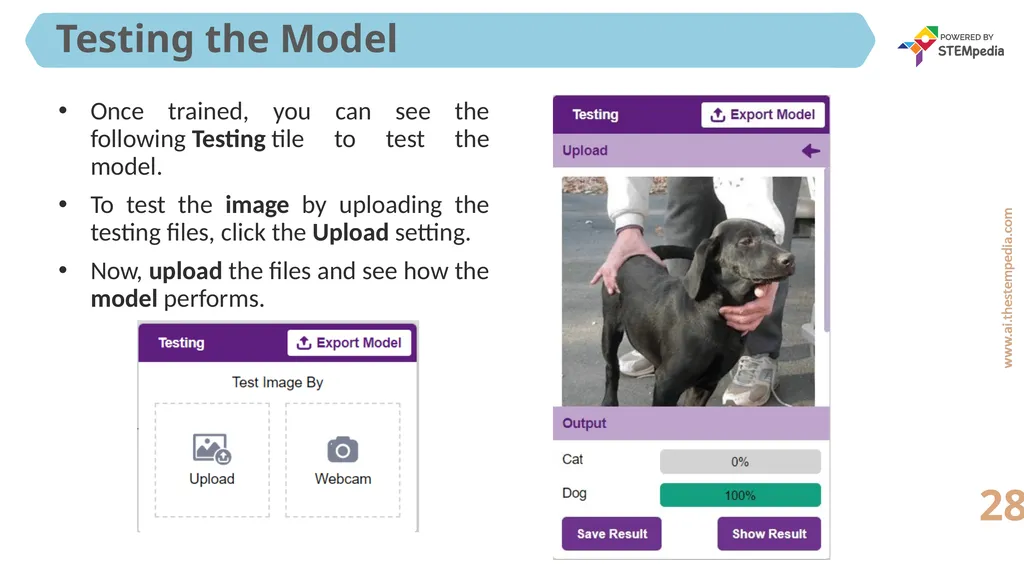
Once trained, you can see the following Testing tile to test the model.
To test the image by uploading the testing files, click the Upload setting.
Now, upload the files and see how the model performs. Testing the Model 28<br>
29
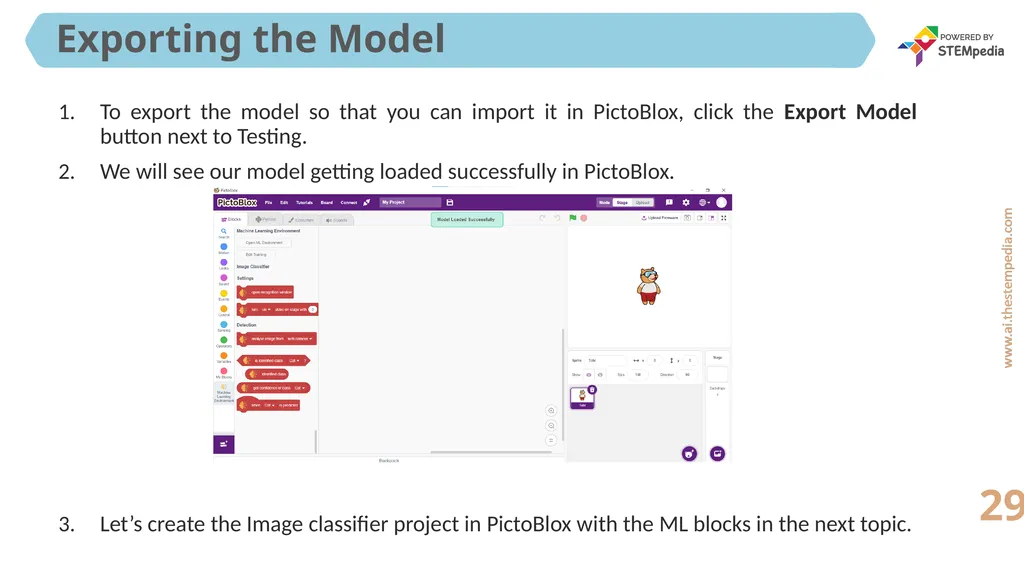
To export the model so that you can import it in PictoBlox, click the Export Model button next to Testing.
We will see our model getting loaded successfully in PictoBlox.
Let’s create the Image classifier project in PictoBlox with the ML blocks in the next topic. Exporting the Model 29<br>