
This Photo by Unknown Author is licensed under CC

Description: This Photo by Unknown Author is licensed under CC BY CSI Unit Training Materials T. Tomm Updated 2023 https:sciencespot.net Teacher Notes: The student digital slides for this unit are included with the file available at
Related Topics
Download Presentation
"This Photo by Unknown Author is licensed under CC" is the property of its rightful owner. Permission is granted to download and print the materials on this website for personal, non-commercial use only, and to display it on your personal computer provided you do not modify the materials and that you retain all copyright notices contained in the materials. By downloading content from our website, you accept the terms of this agreement.
Presentation Transcript
slide1. This Photo by Unknown Author is licensed under CC BY CSI Unit Training Materials T. Tomm Updated 2023
https://sciencespot.net Teacher Notes:
The student digital slides for this unit are included with the file available at https://docs.google.com/presentation/d/1cK42rhAWr0iTKZ2TPXZvFgH3nvMom8tL-sgAa8PLXM0/edit?usp=sharing
IMPORTANT: Make a copy of the student notebook before you assign it on your LMS. It is view-only and I am not able to approve access for your students.
The digital notebook (with all the slides for the digital lessons and activities) is available at https://docs.google.com/presentation/d/14eIEiGacRXMsDyuUxiEsSM2m4YOAtIlfmD4O4YsLdPI/edit?usp=sharing. It is set up for standard paper (8.5x11) in landscape mode for easier printing when needed. Paper versions are available for this unit on my Forensic Science page at https://sciencespot.net/Pages/classforsci.html
A DRAFT of the general outline of the digital lessons (with corresponding slide #s for the student notebook) is available at https://docs.google.com/document/d/15wxjmL-uHQPXDKOxmZXtU_gxy9dphEuyC1P4jzP-9mA/edit?usp=sharing . It is based on 44-minute class periods with 7th & 8th grade students.
Preview presentations before using with your classes as many slides have animations and links you will need to use.
I do Science Starters at the beginning of each class period. A collection of starters for Forensics is available on my lessons plans page at https://sciencespot.net/Pages/classforsci.html .<br>
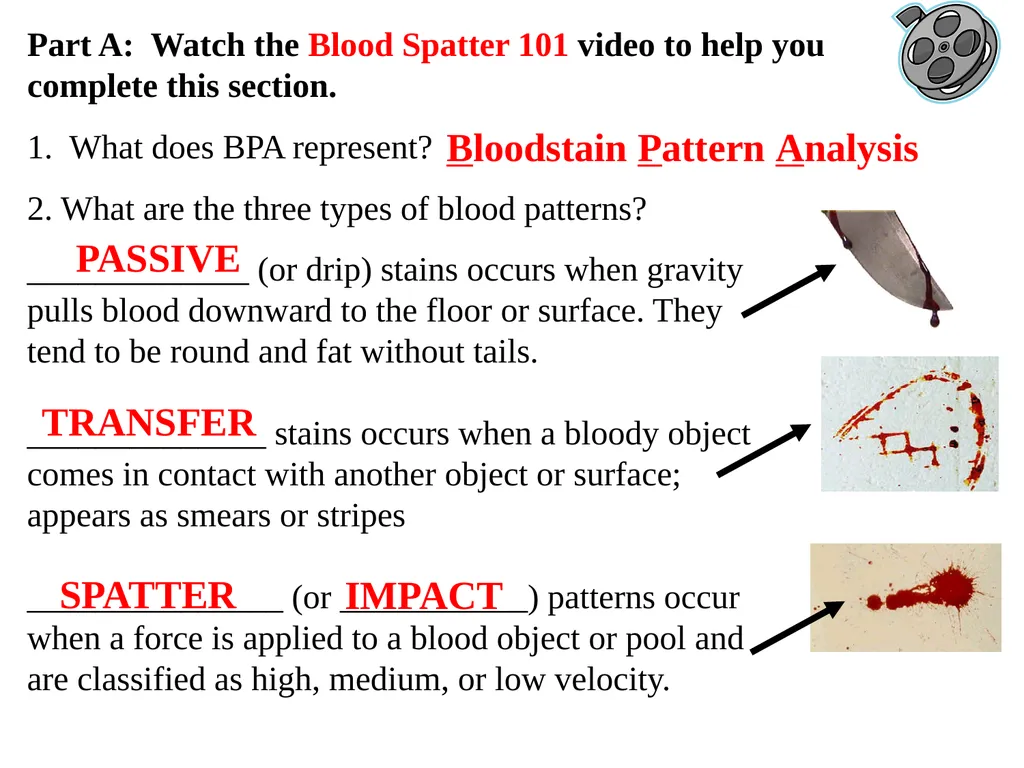
slide2. Part A: Watch the Blood Spatter 101 video to help you complete this section.
1. What does BPA represent?
2. What are the three types of blood patterns? _____________ (or drip) stains occurs when gravity pulls blood downward to the floor or surface. They tend to be round and fat without tails.
______________ stains occurs when a bloody object comes in contact with another object or surface; appears as smears or stripes
_______________ (or ___________) patterns occur when a force is applied to a blood object or pool and are classified as high, medium, or low velocity. Bloodstain Pattern Analysis PASSIVE TRANSFER IMPACT Video 1
Blood Spatter 101 SPATTER<br>
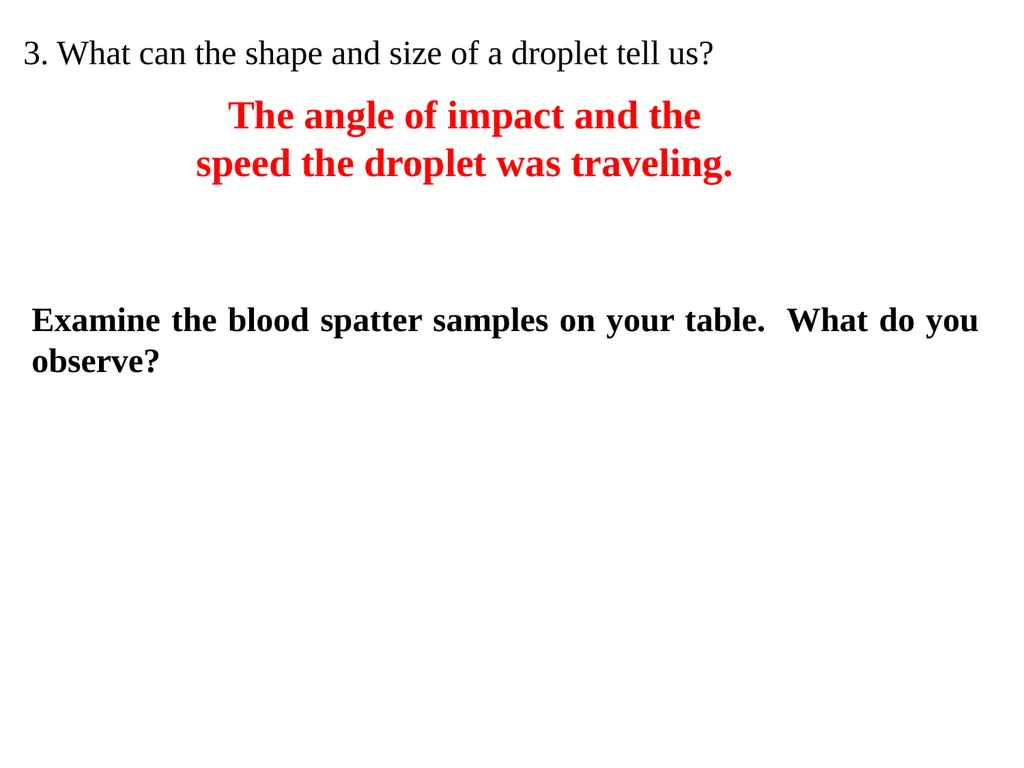
slide3. 3. What can the shape and size of a droplet tell us? The angle of impact and the speed the droplet was traveling. Examine the blood spatter samples on your table. What do you observe? I made several sample pages of blood spatter based on the four labs in this lesson. I laminated the pages & places several on each table.<br>
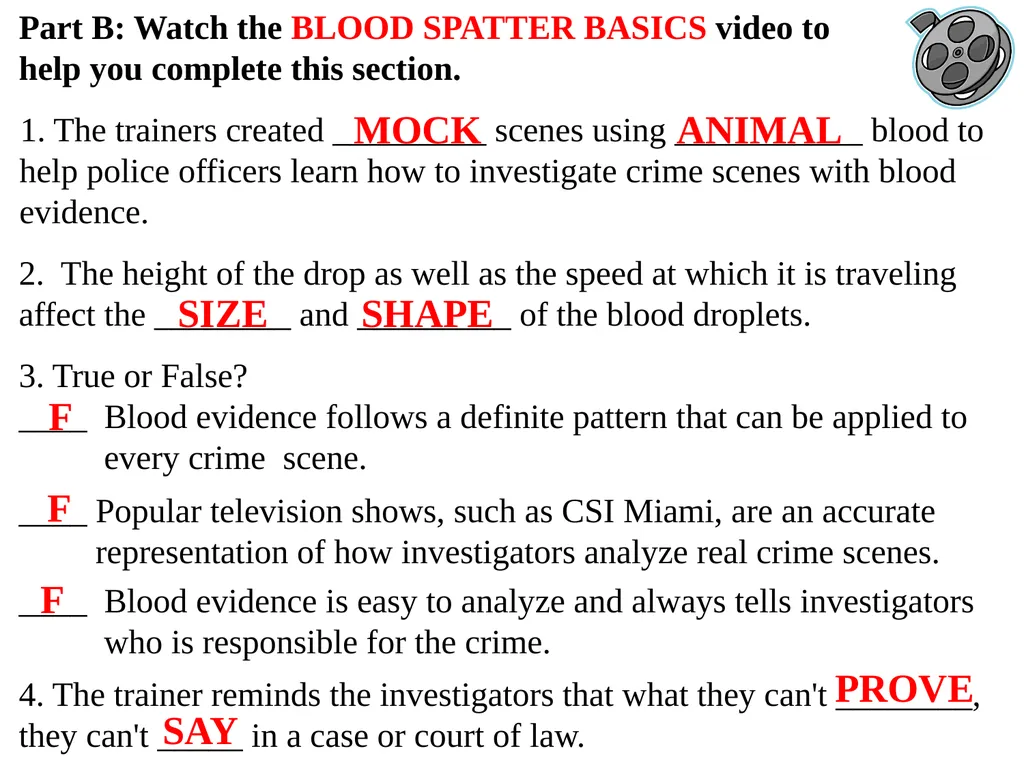
slide4. Part B: Watch the BLOOD SPATTER BASICS video to help you complete this section.
1. The trainers created _________ scenes using ___________ blood to help police officers learn how to investigate crime scenes with blood evidence.
2. The height of the drop as well as the speed at which it is traveling affect the ________ and _________ of the blood droplets.
3. True or False?
____ Blood evidence follows a definite pattern that can be applied to every crime scene.
____ Popular television shows, such as CSI Miami, are an accurate representation of how investigators analyze real crime scenes.
____ Blood evidence is easy to analyze and always tells investigators who is responsible for the crime.
4. The trainer reminds the investigators that what they can't ________, they can't _____ in a case or court of law. MOCK ANIMAL SIZE SHAPE F F F PROVE SAY Video 2
Blood Spatter Basics<br>
slide5. Part C: What else can an investigator learn from the analysis of a blood spatter?
TYPE OF INJURY- Blunt force, sharp force, gunshot, etc.
WEAPON - Type and velocity
WOUNDS – Number of blows or the order in which they were inflicted
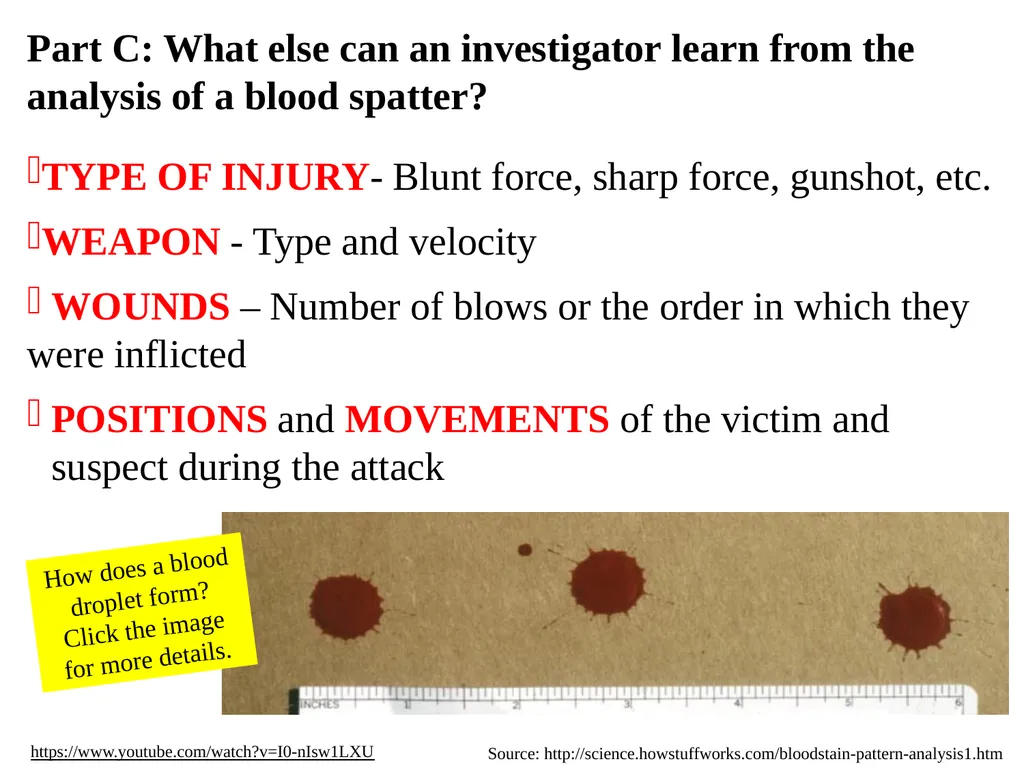
POSITIONS and MOVEMENTS of the victim and suspect during the attack Source: http://science.howstuffworks.com/bloodstain-pattern-analysis1.htm https://www.youtube.com/watch?v=I0-nIsw1LXU How does a blood droplet form? Click the image for more details.<br>
slide6. Light Source
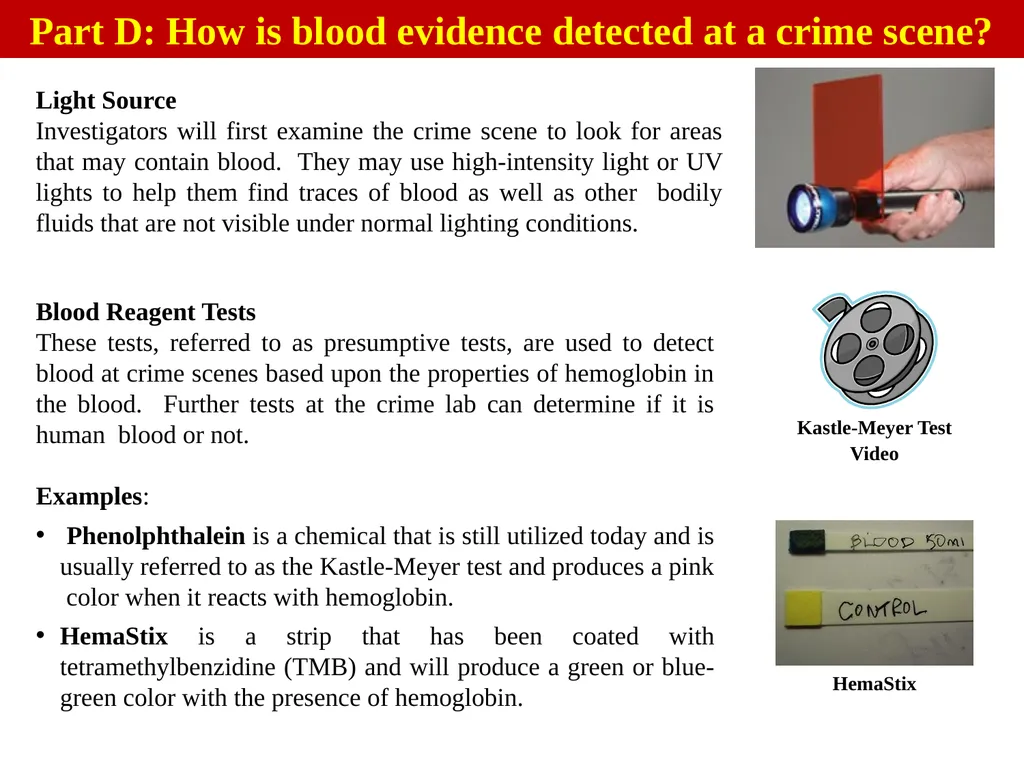
Investigators will first examine the crime scene to look for areas that may contain blood. They may use high-intensity light or UV lights to help them find traces of blood as well as other bodily fluids that are not visible under normal lighting conditions. Part D: How is blood evidence detected at a crime scene? Blood Reagent Tests
These tests, referred to as presumptive tests, are used to detect blood at crime scenes based upon the properties of hemoglobin in the blood. Further tests at the crime lab can determine if it is human blood or not.
Examples:
Phenolphthalein is a chemical that is still utilized today and is usually referred to as the Kastle-Meyer test and produces a pink color when it reacts with hemoglobin.
HemaStix is a strip that has been coated with tetramethylbenzidine (TMB) and will produce a green or blue-green color with the presence of hemoglobin. Kastle-Meyer Test
Video HemaStix<br>
slide7. Luminol
This chemical is used by crime scene investigators to locate traces of blood, even if it has been cleaned or removed.
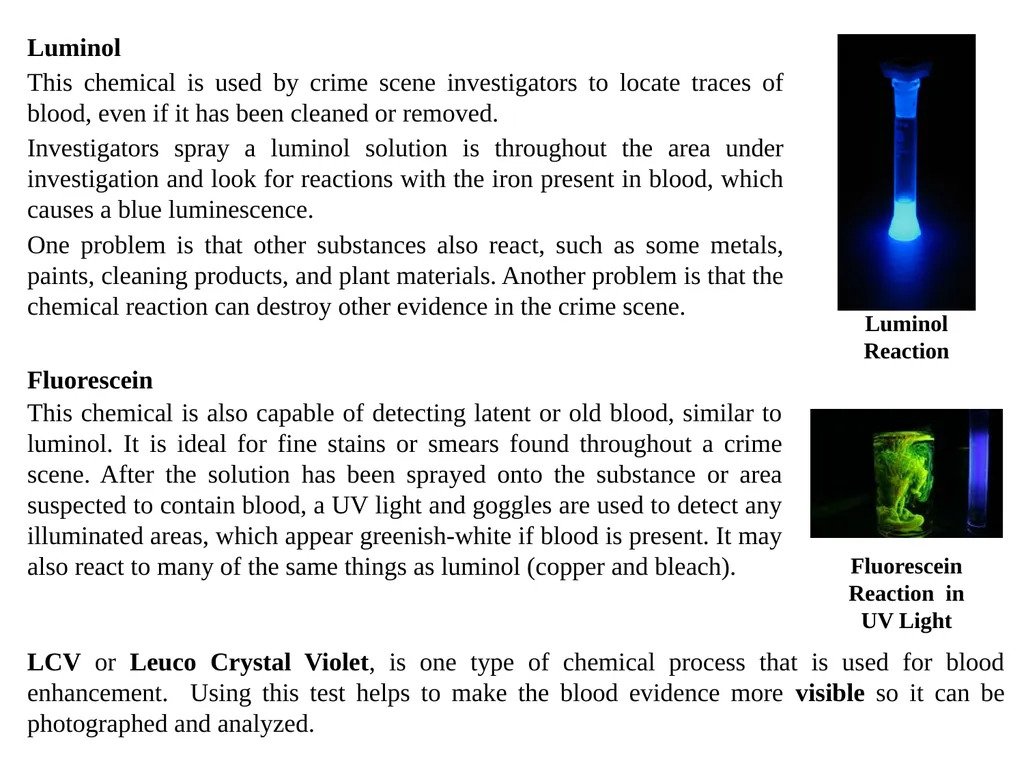
Investigators spray a luminol solution is throughout the area under investigation and look for reactions with the iron present in blood, which causes a blue luminescence.
One problem is that other substances also react, such as some metals, paints, cleaning products, and plant materials. Another problem is that the chemical reaction can destroy other evidence in the crime scene. LCV or Leuco Crystal Violet, is one type of chemical process that is used for blood enhancement. Using this test helps to make the blood evidence more visible so it can be photographed and analyzed. Fluorescein
This chemical is also capable of detecting latent or old blood, similar to luminol. It is ideal for fine stains or smears found throughout a crime scene. After the solution has been sprayed onto the substance or area suspected to contain blood, a UV light and goggles are used to detect any illuminated areas, which appear greenish-white if blood is present. It may also react to many of the same things as luminol (copper and bleach). Fluorescein Reaction in UV Light<br>
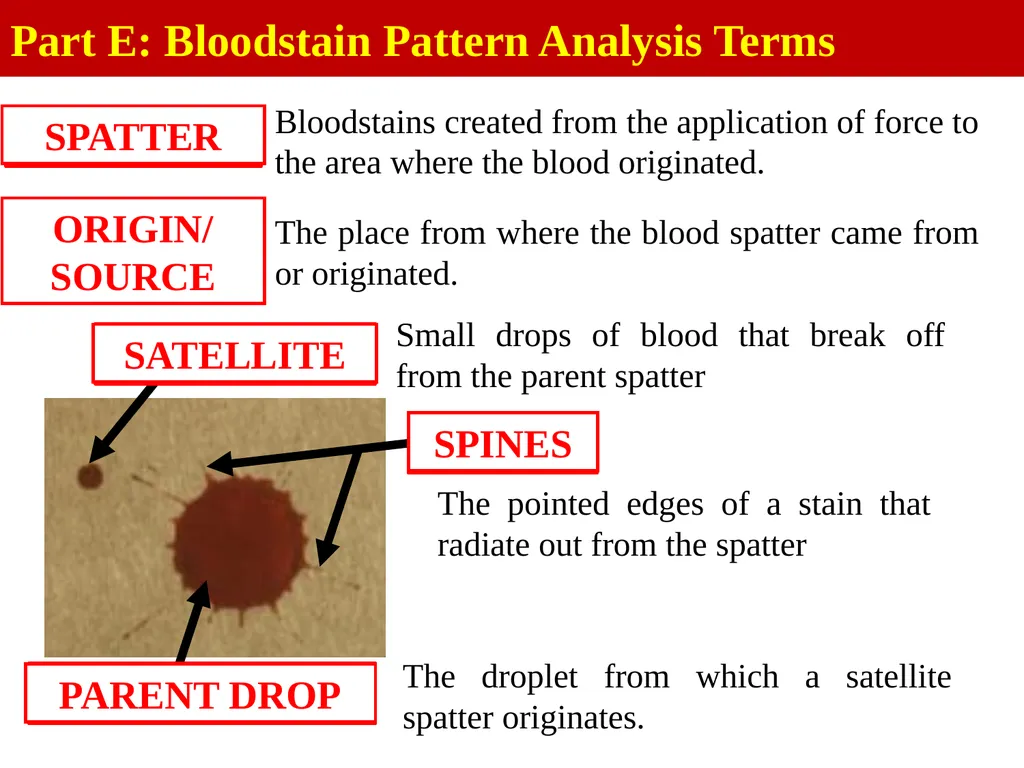
slide8. Part E: Bloodstain Pattern Analysis Terms Bloodstains created from the application of force to the area where the blood originated.
The place from where the blood spatter came from or originated. Small drops of blood that break off from the parent spatter The pointed edges of a stain that radiate out from the spatter The droplet from which a satellite spatter originates. SPATTER SATELLITE SPINES PARENT DROP ORIGIN/ SOURCE<br>
slide9. Part F: Blood Spatter Labs This can be messy! Be very careful to keep the blood on the paper and not on yourself, the table, or floor.
Hold you hand as steady as possible when making the drops. Brace your wrist against the meter stick to help you.
Get a pair of goggles and an apron. Sit quietly until we are ready to continue! If you make a mess or goof up a drop,
grab a paper towel and wipe it up immediately!<br>
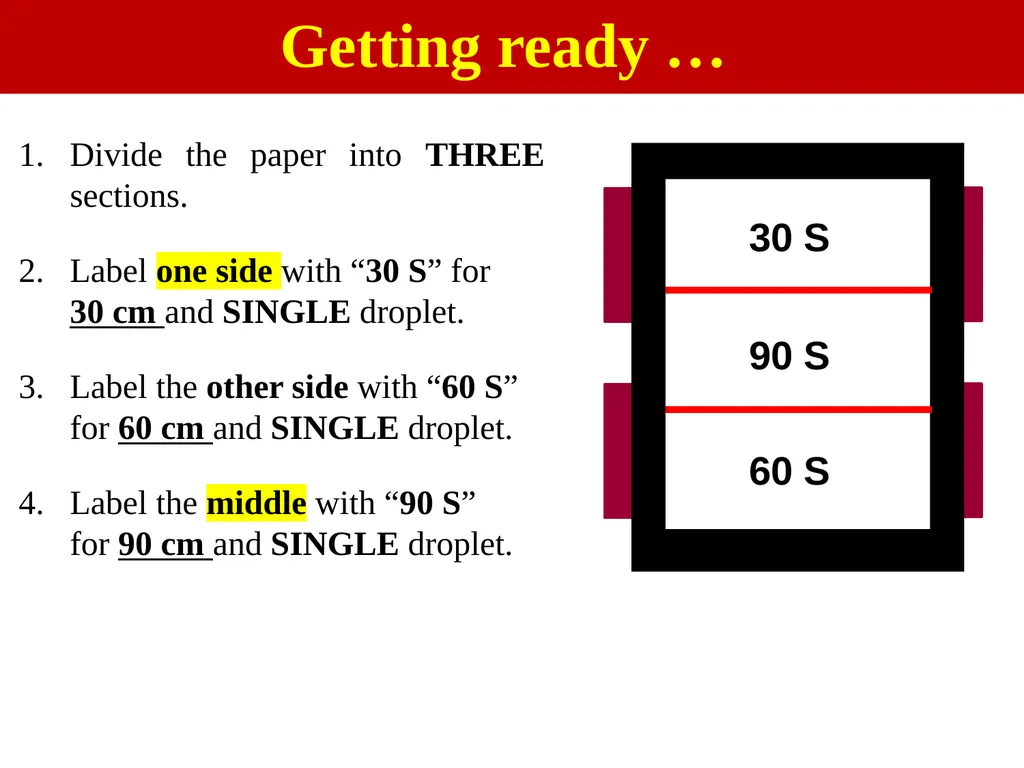
slide10. Divide the paper into THREE sections.
Label one side with “30 S” for 30 cm and SINGLE droplet.
Label the other side with “60 S” for 60 cm and SINGLE droplet.
Label the middle with “90 S” for 90 cm and SINGLE droplet. Getting ready … 30 S 90 S 60 S<br>
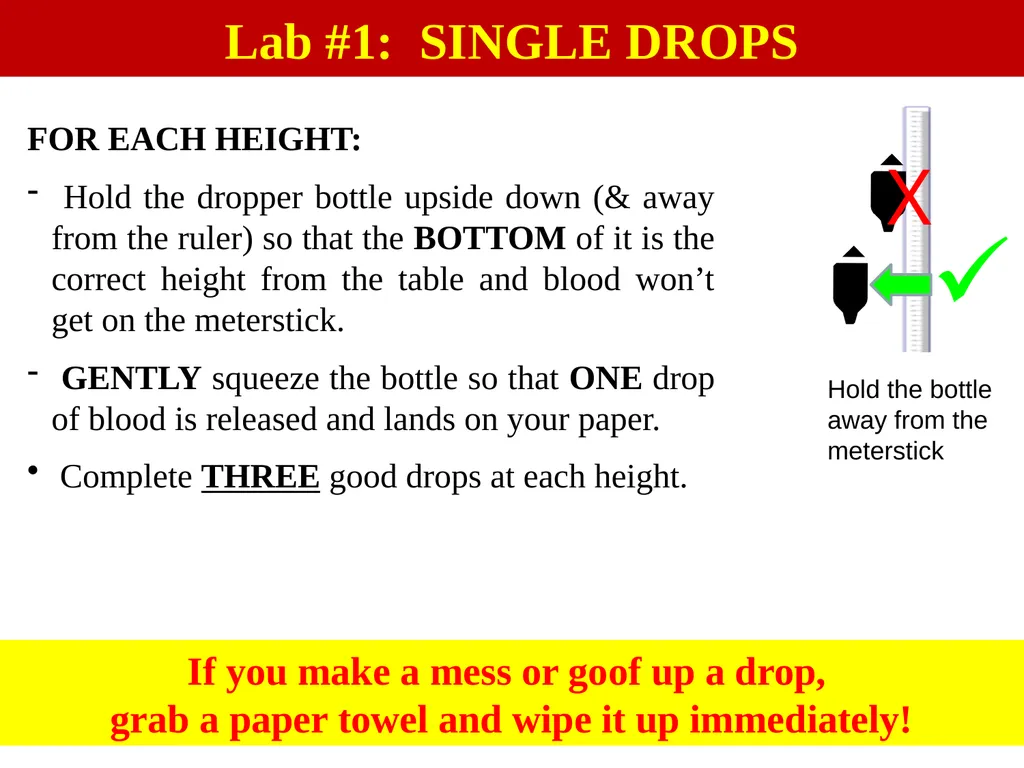
slide11. Lab #1: SINGLE DROPS FOR EACH HEIGHT:
Hold the dropper bottle upside down (& away from the ruler) so that the BOTTOM of it is the correct height from the table and blood won’t get on the meterstick.
GENTLY squeeze the bottle so that ONE drop of blood is released and lands on your paper.
Complete THREE good drops at each height. If you make a mess or goof up a drop,
grab a paper towel and wipe it up immediately!<br>
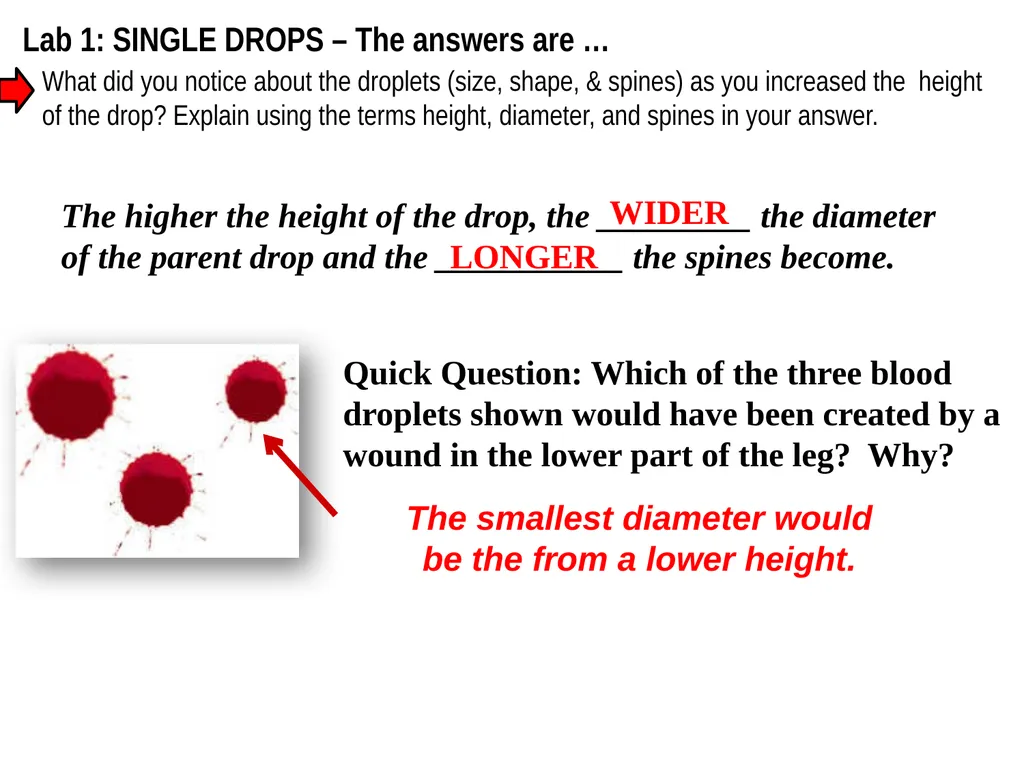
slide12. The higher the height of the drop, the _________ the diameter of the parent drop and the ___________ the spines become. WIDER LONGER The smallest diameter would be the from a lower height. Lab 1: SINGLE DROPS – The answers are …
What did you notice about the droplets (size, shape, & spines) as you increased the height of the drop? Explain using the terms height, diameter, and spines in your answer.<br>
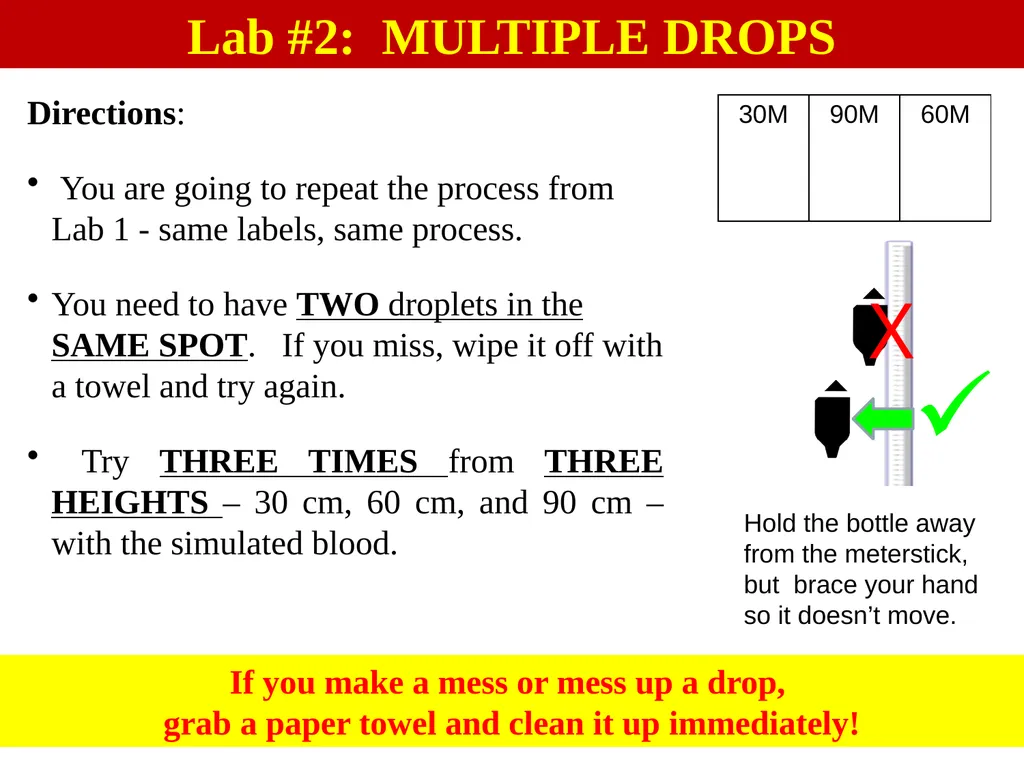
slide13. Lab #2: MULTIPLE DROPS Directions:
You are going to repeat the process from Lab 1 - same labels, same process.
You need to have TWO droplets in the SAME SPOT. If you miss, wipe it off with a towel and try again.
Try THREE TIMES from THREE HEIGHTS – 30 cm, 60 cm, and 90 cm – with the simulated blood. If you make a mess or mess up a drop,
grab a paper towel and clean it up immediately!<br>
slide14. DONE with Lab #2?
Fold up your blood spatter paper and throw away.
Put metersticks and blood on front counter
Wash your hands.
Answer the questions for Lab #2 before class tomorrow.<br>
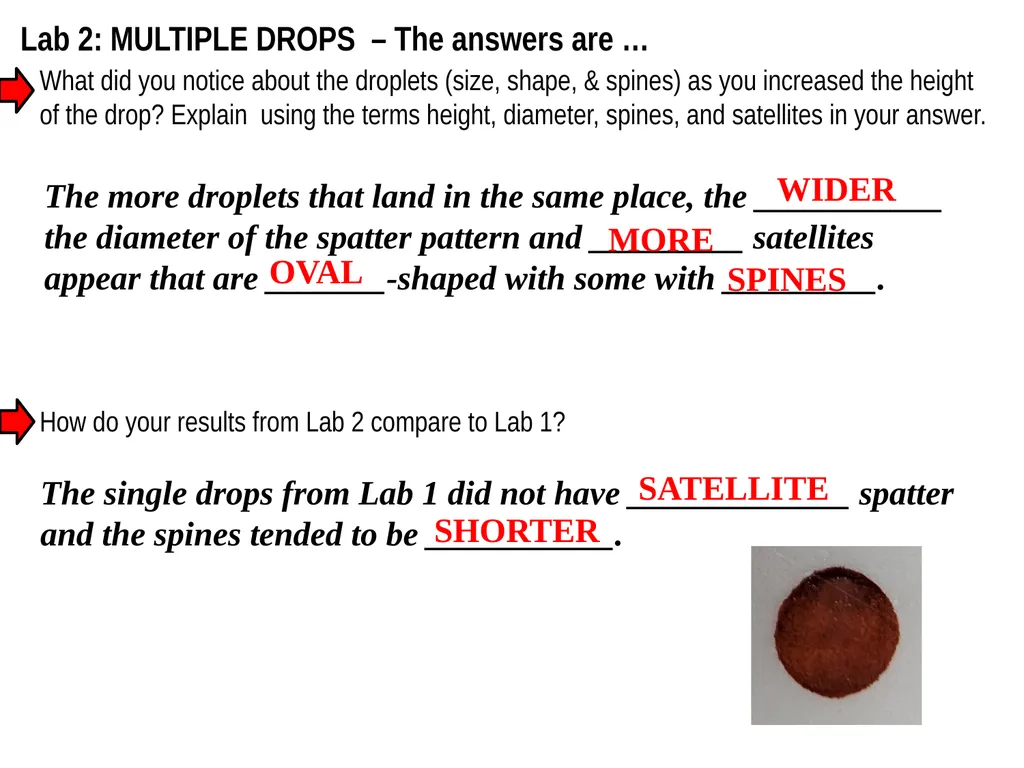
slide15. Lab 2: MULTIPLE DROPS – The answers are …
What did you notice about the droplets (size, shape, & spines) as you increased the height of the drop? Explain using the terms height, diameter, spines, and satellites in your answer.
How do your results from Lab 2 compare to Lab 1? The more droplets that land in the same place, the ___________ the diameter of the spatter pattern and _________ satellites appear that are _______-shaped with some with _________. MORE OVAL SPINES The single drops from Lab 1 did not have _____________ spatter and the spines tended to be ___________. SATELLITE SHORTER WIDER<br>
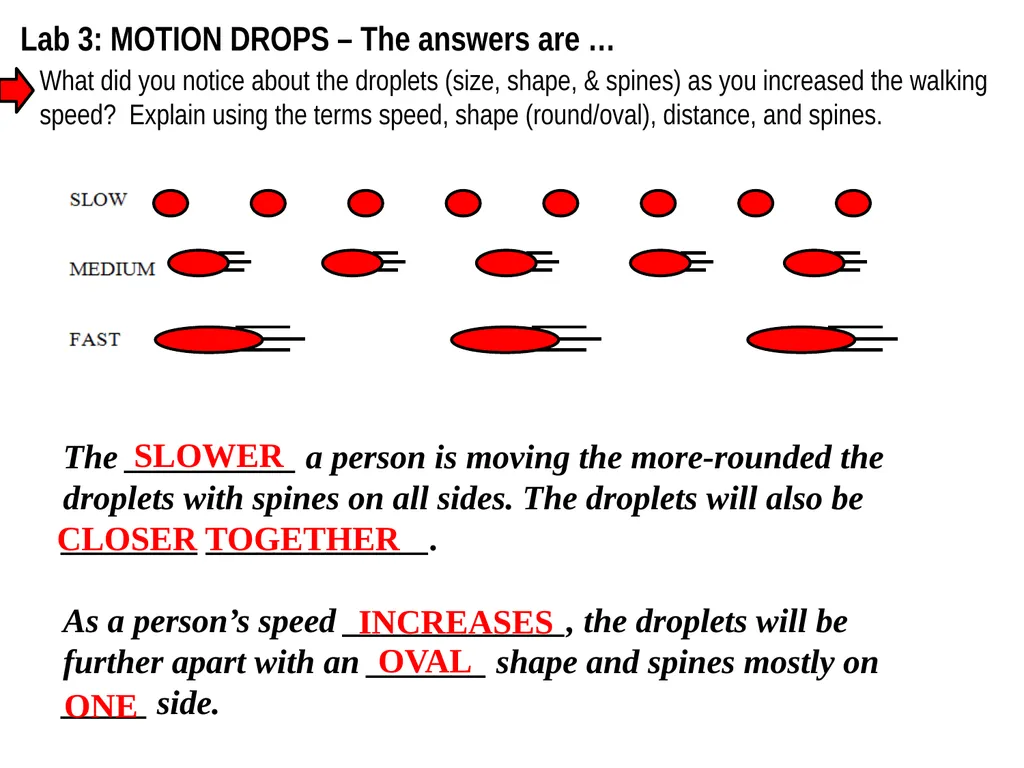
slide16. We are going to walk at different rates (slow, medium, and fast) along a strip of paper and observe the changes in the spatter.
Some of you will have a marker so you can help label the spatter.
Use S for slow, M for medium, and F for fast. Lab #3: MOTION DROPS Answer the questions for Lab #3 before class tomorrow.<br>
slide17. The __________ a person is moving the more-rounded the droplets with spines on all sides. The droplets will also be ________ _____________.
As a person’s speed _____________, the droplets will be further apart with an _______ shape and spines mostly on _____ side. SLOWER INCREASES OVAL ONE Lab 3: MOTION DROPS – The answers are …
What did you notice about the droplets (size, shape, & spines) as you increased the walking speed? Explain using the terms speed, shape (round/oval), distance, and spines. CLOSER TOGETHER<br>
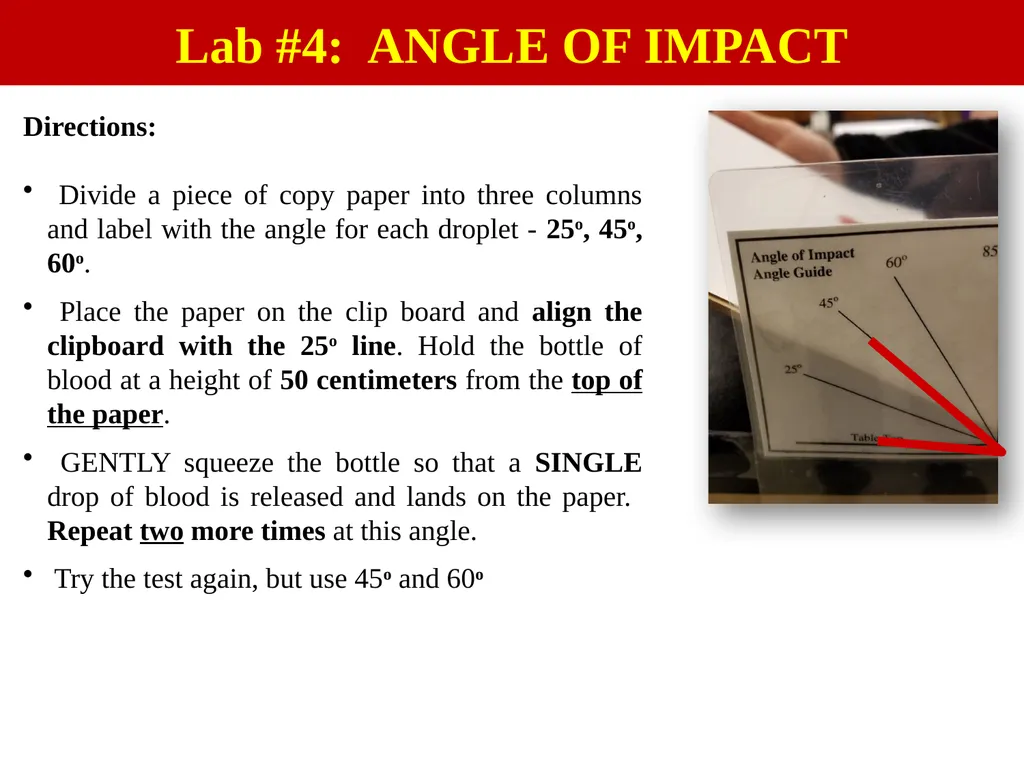
slide18. Directions:
Divide a piece of copy paper into three columns and label with the angle for each droplet - 25o, 45o, 60o.
Place the paper on the clip board and align the clipboard with the 25o line. Hold the bottle of blood at a height of 50 centimeters from the top of the paper.
GENTLY squeeze the bottle so that a SINGLE drop of blood is released and lands on the paper. Repeat two more times at this angle.
Try the test again, but use 45o and 60o Lab #4: ANGLE OF IMPACT<br>
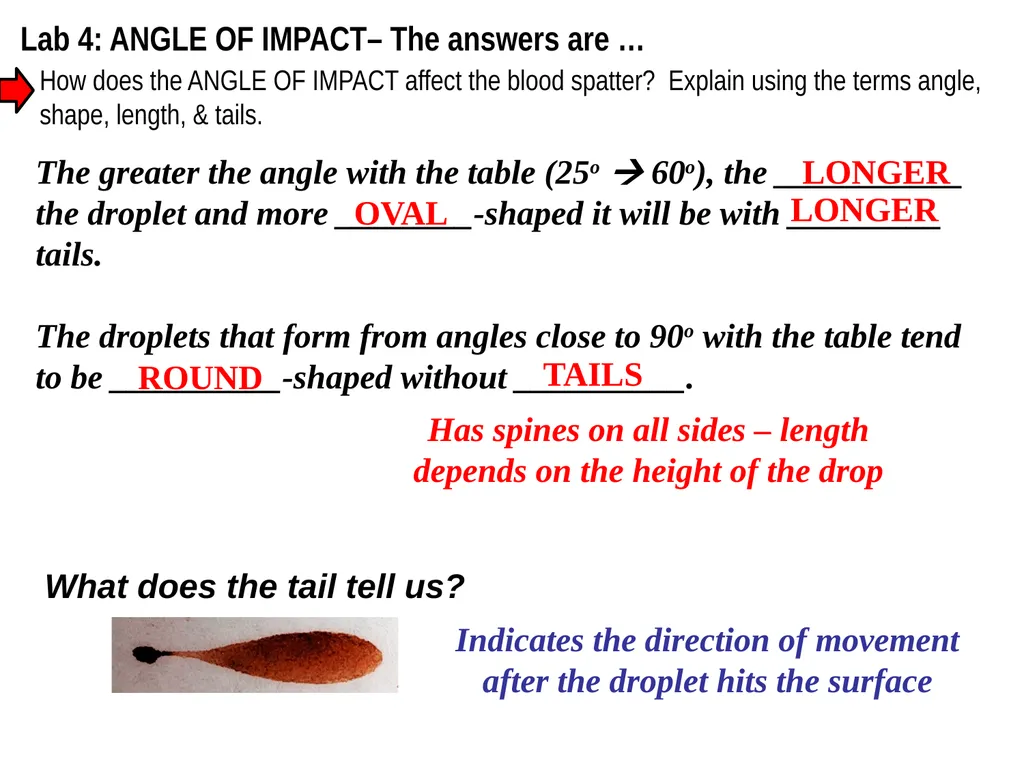
slide19. Lab 4: ANGLE OF IMPACT– The answers are …
How does the ANGLE OF IMPACT affect the blood spatter? Explain using the terms angle, shape, length, & tails. The greater the angle with the table (25o 60o), the ___________ the droplet and more ________-shaped it will be with _________ tails.
The droplets that form from angles close to 90o with the table tend to be __________-shaped without __________. LONGER OVAL LONGER ROUND TAILS Has spines on all sides – length depends on the height of the drop Indicates the direction of movement after the droplet hits the surface<br>
slide20. Remember the blood spatter samples on your table at the start of this lesson. Examine them again.
Are you able to explain how each of the patterns was likely created?
How did your observations change after completing the labs? I put the same sample pages from the start of the lesson on the table for students to observe again. They are usually able to explain the most likely cause/process that formed each one.<br>
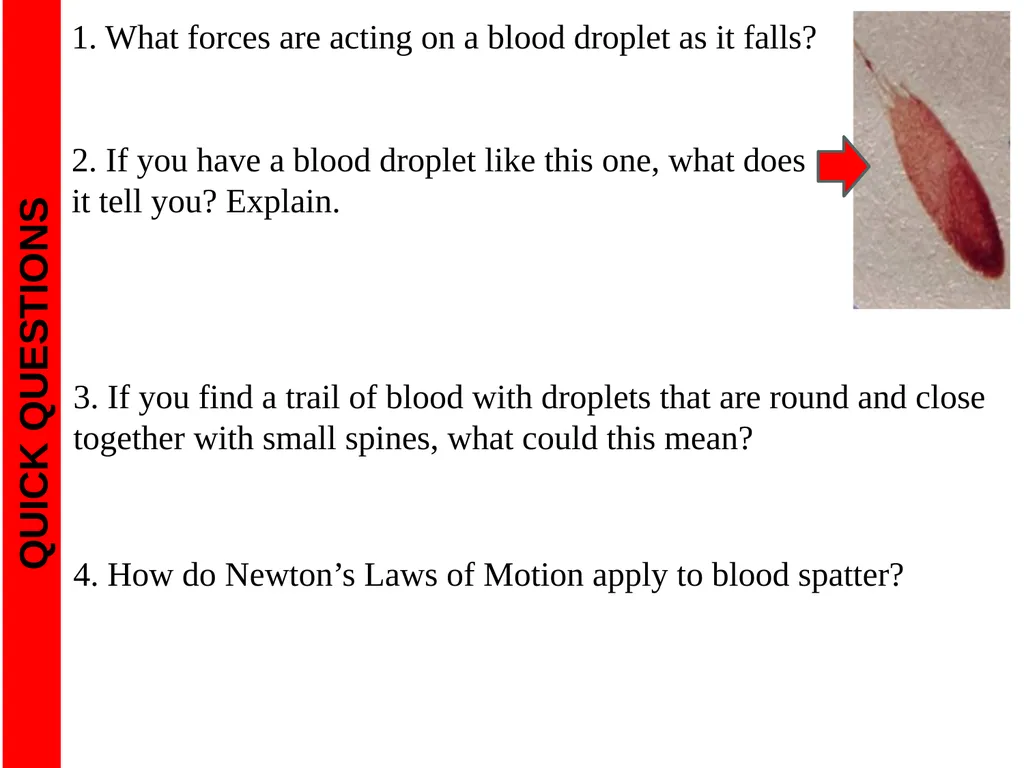
slide21. 3. If you find a trail of blood with droplets that are round and close together with small spines, what could this mean?
4. How do Newton’s Laws of Motion apply to blood spatter? Quick QUESTIONS These questions are listed to the right of the student slide from the spatter labs.<br>
https://sciencespot.net Teacher Notes:
The student digital slides for this unit are included with the file available at https://docs.google.com/presentation/d/1cK42rhAWr0iTKZ2TPXZvFgH3nvMom8tL-sgAa8PLXM0/edit?usp=sharing
IMPORTANT: Make a copy of the student notebook before you assign it on your LMS. It is view-only and I am not able to approve access for your students.
The digital notebook (with all the slides for the digital lessons and activities) is available at https://docs.google.com/presentation/d/14eIEiGacRXMsDyuUxiEsSM2m4YOAtIlfmD4O4YsLdPI/edit?usp=sharing. It is set up for standard paper (8.5x11) in landscape mode for easier printing when needed. Paper versions are available for this unit on my Forensic Science page at https://sciencespot.net/Pages/classforsci.html
A DRAFT of the general outline of the digital lessons (with corresponding slide #s for the student notebook) is available at https://docs.google.com/document/d/15wxjmL-uHQPXDKOxmZXtU_gxy9dphEuyC1P4jzP-9mA/edit?usp=sharing . It is based on 44-minute class periods with 7th & 8th grade students.
Preview presentations before using with your classes as many slides have animations and links you will need to use.
I do Science Starters at the beginning of each class period. A collection of starters for Forensics is available on my lessons plans page at https://sciencespot.net/Pages/classforsci.html .<br>
slide2. Part A: Watch the Blood Spatter 101 video to help you complete this section.
1. What does BPA represent?
2. What are the three types of blood patterns? _____________ (or drip) stains occurs when gravity pulls blood downward to the floor or surface. They tend to be round and fat without tails.
______________ stains occurs when a bloody object comes in contact with another object or surface; appears as smears or stripes
_______________ (or ___________) patterns occur when a force is applied to a blood object or pool and are classified as high, medium, or low velocity. Bloodstain Pattern Analysis PASSIVE TRANSFER IMPACT Video 1
Blood Spatter 101 SPATTER<br>
slide3. 3. What can the shape and size of a droplet tell us? The angle of impact and the speed the droplet was traveling. Examine the blood spatter samples on your table. What do you observe? I made several sample pages of blood spatter based on the four labs in this lesson. I laminated the pages & places several on each table.<br>
slide4. Part B: Watch the BLOOD SPATTER BASICS video to help you complete this section.
1. The trainers created _________ scenes using ___________ blood to help police officers learn how to investigate crime scenes with blood evidence.
2. The height of the drop as well as the speed at which it is traveling affect the ________ and _________ of the blood droplets.
3. True or False?
____ Blood evidence follows a definite pattern that can be applied to every crime scene.
____ Popular television shows, such as CSI Miami, are an accurate representation of how investigators analyze real crime scenes.
____ Blood evidence is easy to analyze and always tells investigators who is responsible for the crime.
4. The trainer reminds the investigators that what they can't ________, they can't _____ in a case or court of law. MOCK ANIMAL SIZE SHAPE F F F PROVE SAY Video 2
Blood Spatter Basics<br>
slide5. Part C: What else can an investigator learn from the analysis of a blood spatter?
TYPE OF INJURY- Blunt force, sharp force, gunshot, etc.
WEAPON - Type and velocity
WOUNDS – Number of blows or the order in which they were inflicted
POSITIONS and MOVEMENTS of the victim and suspect during the attack Source: http://science.howstuffworks.com/bloodstain-pattern-analysis1.htm https://www.youtube.com/watch?v=I0-nIsw1LXU How does a blood droplet form? Click the image for more details.<br>
slide6. Light Source
Investigators will first examine the crime scene to look for areas that may contain blood. They may use high-intensity light or UV lights to help them find traces of blood as well as other bodily fluids that are not visible under normal lighting conditions. Part D: How is blood evidence detected at a crime scene? Blood Reagent Tests
These tests, referred to as presumptive tests, are used to detect blood at crime scenes based upon the properties of hemoglobin in the blood. Further tests at the crime lab can determine if it is human blood or not.
Examples:
Phenolphthalein is a chemical that is still utilized today and is usually referred to as the Kastle-Meyer test and produces a pink color when it reacts with hemoglobin.
HemaStix is a strip that has been coated with tetramethylbenzidine (TMB) and will produce a green or blue-green color with the presence of hemoglobin. Kastle-Meyer Test
Video HemaStix<br>
slide7. Luminol
This chemical is used by crime scene investigators to locate traces of blood, even if it has been cleaned or removed.
Investigators spray a luminol solution is throughout the area under investigation and look for reactions with the iron present in blood, which causes a blue luminescence.
One problem is that other substances also react, such as some metals, paints, cleaning products, and plant materials. Another problem is that the chemical reaction can destroy other evidence in the crime scene. LCV or Leuco Crystal Violet, is one type of chemical process that is used for blood enhancement. Using this test helps to make the blood evidence more visible so it can be photographed and analyzed. Fluorescein
This chemical is also capable of detecting latent or old blood, similar to luminol. It is ideal for fine stains or smears found throughout a crime scene. After the solution has been sprayed onto the substance or area suspected to contain blood, a UV light and goggles are used to detect any illuminated areas, which appear greenish-white if blood is present. It may also react to many of the same things as luminol (copper and bleach). Fluorescein Reaction in UV Light<br>
slide8. Part E: Bloodstain Pattern Analysis Terms Bloodstains created from the application of force to the area where the blood originated.
The place from where the blood spatter came from or originated. Small drops of blood that break off from the parent spatter The pointed edges of a stain that radiate out from the spatter The droplet from which a satellite spatter originates. SPATTER SATELLITE SPINES PARENT DROP ORIGIN/ SOURCE<br>
slide9. Part F: Blood Spatter Labs This can be messy! Be very careful to keep the blood on the paper and not on yourself, the table, or floor.
Hold you hand as steady as possible when making the drops. Brace your wrist against the meter stick to help you.
Get a pair of goggles and an apron. Sit quietly until we are ready to continue! If you make a mess or goof up a drop,
grab a paper towel and wipe it up immediately!<br>
slide10. Divide the paper into THREE sections.
Label one side with “30 S” for 30 cm and SINGLE droplet.
Label the other side with “60 S” for 60 cm and SINGLE droplet.
Label the middle with “90 S” for 90 cm and SINGLE droplet. Getting ready … 30 S 90 S 60 S<br>
slide11. Lab #1: SINGLE DROPS FOR EACH HEIGHT:
Hold the dropper bottle upside down (& away from the ruler) so that the BOTTOM of it is the correct height from the table and blood won’t get on the meterstick.
GENTLY squeeze the bottle so that ONE drop of blood is released and lands on your paper.
Complete THREE good drops at each height. If you make a mess or goof up a drop,
grab a paper towel and wipe it up immediately!<br>
slide12. The higher the height of the drop, the _________ the diameter of the parent drop and the ___________ the spines become. WIDER LONGER The smallest diameter would be the from a lower height. Lab 1: SINGLE DROPS – The answers are …
What did you notice about the droplets (size, shape, & spines) as you increased the height of the drop? Explain using the terms height, diameter, and spines in your answer.<br>
slide13. Lab #2: MULTIPLE DROPS Directions:
You are going to repeat the process from Lab 1 - same labels, same process.
You need to have TWO droplets in the SAME SPOT. If you miss, wipe it off with a towel and try again.
Try THREE TIMES from THREE HEIGHTS – 30 cm, 60 cm, and 90 cm – with the simulated blood. If you make a mess or mess up a drop,
grab a paper towel and clean it up immediately!<br>
slide14. DONE with Lab #2?
Fold up your blood spatter paper and throw away.
Put metersticks and blood on front counter
Wash your hands.
Answer the questions for Lab #2 before class tomorrow.<br>
slide15. Lab 2: MULTIPLE DROPS – The answers are …
What did you notice about the droplets (size, shape, & spines) as you increased the height of the drop? Explain using the terms height, diameter, spines, and satellites in your answer.
How do your results from Lab 2 compare to Lab 1? The more droplets that land in the same place, the ___________ the diameter of the spatter pattern and _________ satellites appear that are _______-shaped with some with _________. MORE OVAL SPINES The single drops from Lab 1 did not have _____________ spatter and the spines tended to be ___________. SATELLITE SHORTER WIDER<br>
slide16. We are going to walk at different rates (slow, medium, and fast) along a strip of paper and observe the changes in the spatter.
Some of you will have a marker so you can help label the spatter.
Use S for slow, M for medium, and F for fast. Lab #3: MOTION DROPS Answer the questions for Lab #3 before class tomorrow.<br>
slide17. The __________ a person is moving the more-rounded the droplets with spines on all sides. The droplets will also be ________ _____________.
As a person’s speed _____________, the droplets will be further apart with an _______ shape and spines mostly on _____ side. SLOWER INCREASES OVAL ONE Lab 3: MOTION DROPS – The answers are …
What did you notice about the droplets (size, shape, & spines) as you increased the walking speed? Explain using the terms speed, shape (round/oval), distance, and spines. CLOSER TOGETHER<br>
slide18. Directions:
Divide a piece of copy paper into three columns and label with the angle for each droplet - 25o, 45o, 60o.
Place the paper on the clip board and align the clipboard with the 25o line. Hold the bottle of blood at a height of 50 centimeters from the top of the paper.
GENTLY squeeze the bottle so that a SINGLE drop of blood is released and lands on the paper. Repeat two more times at this angle.
Try the test again, but use 45o and 60o Lab #4: ANGLE OF IMPACT<br>
slide19. Lab 4: ANGLE OF IMPACT– The answers are …
How does the ANGLE OF IMPACT affect the blood spatter? Explain using the terms angle, shape, length, & tails. The greater the angle with the table (25o 60o), the ___________ the droplet and more ________-shaped it will be with _________ tails.
The droplets that form from angles close to 90o with the table tend to be __________-shaped without __________. LONGER OVAL LONGER ROUND TAILS Has spines on all sides – length depends on the height of the drop Indicates the direction of movement after the droplet hits the surface<br>
slide20. Remember the blood spatter samples on your table at the start of this lesson. Examine them again.
Are you able to explain how each of the patterns was likely created?
How did your observations change after completing the labs? I put the same sample pages from the start of the lesson on the table for students to observe again. They are usually able to explain the most likely cause/process that formed each one.<br>
slide21. 3. If you find a trail of blood with droplets that are round and close together with small spines, what could this mean?
4. How do Newton’s Laws of Motion apply to blood spatter? Quick QUESTIONS These questions are listed to the right of the student slide from the spatter labs.<br>