/
Abstract  Geometric Photo Abstract  Geometric Photo

Abstract Geometric Photo - PowerPoint Presentation

cheryl-pisano
cheryl-pisano . @cheryl-pisano
Follow
362 views
Uploaded On 2018-03-08

Abstract Geometric Photo - PPT Presentation

Collage The artwork well be creating in this tutorial has and retro collage vibe with snippets of a photograph being cut out and rearranged into perfectly symmetrical geometric shapes The final result will be an abstract piece of art with portions of the image cut out and recomposed into ID: 642624

paste geometric copy select geometric paste select copy tool selection design shapes lines cmd collage retro layer curves change

Share:

Link:

Embed:

Download Presentation from below link

Download Presentation The PPT/PDF document "Abstract Geometric Photo" is the property of its rightful owner. Permission is granted to download and print the materials on this web site for personal, non-commercial use only, and to display it on your personal computer provided you do not modify the materials and that you retain all copyright notices contained in the materials. By downloading content from our website, you accept the terms of this agreement.


Presentation Transcript

Slide1

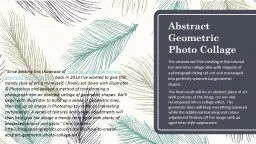
Abstract Geometric Photo Collage

The artwork we’ll be creating in this tutorial has and retro collage vibe with snippets of a photograph being cut out and rearranged into perfectly symmetrical geometric shapes.

The final result will be an abstract piece of art with portions of the image cut out and recomposed into a collage effect. The geometric lines will keep everything balanced while the additional texturing and colour adjustment finishes off the image with an aged retro style appearance.

“Since posting this showcase of

inspiring artwork combining geometry & photography

back in 2014 I’ve wanted to give this trendy style of art a try myself. I finally sat down with Illustrator & Photoshop and devised a method of transforming a photograph into an abstract collage of geometric shapes. We’ll begin with Illustrator to build up a series of geometric lines, then cut up an image in Photoshop to create an interesting composition. A series of textures and curves adjustments will then help give the design a trendy retro style with plenty of processed

colours

and grain.”

Chris Spooner

http://blog.spoongraphics.co.uk/tutorials/how-to-create-abstract-geometric-photo-collage-artSlide2
Slide3

We’ll begin in Adobe Illustrator to create a template for our geometric shapes. Create a new

document.

Then select the Ellipse tool. Remove the fill

colour

, but leave a black stroke then click on the artboard and enter 500px for both the Width and Height.Slide4

Hold the ALT key and drag out a duplicate of the small circle. Align it to fit perfectly into the remaining space of the larger circle outline.

Select the two small circles and press CMD+C to Copy, then CMD+F to Paste in Front. Hold Shift and rotate these shapes by 90°Slide5

Copy and paste a single circle, then use the Smart Guides to align this shape to the centre

of all the elements.Select the Polygon tool and click on the artboard to bring up the options window. Enter 250px and change the number of sides to 3 to form a triangle.Slide6

Select the Polygon tool and click on the artboard to bring up the options window. Enter 250px and change the number of sides to 3 to form a triangle.

Copy and paste a duplicate of the triangle, then rotate it by 180°. Use the Align panel to line this shape up to the bottom of the circle to form a 6 pointed star shape.Slide7

Select all (CMD+A) and copy all the shapes that form the geometric pattern. Paste the graphic into your Photoshop document on top of a

cool photograph. Press CMD+I to Invert the colours so the lines are white.

Activate the Magic Wand tool, then with the Lines layer highlighted, click to make a selection of the first geometric shape.Slide8

Highlight the Background photograph layer, then select the Marquee tool to allow the selection to be moved elsewhere in the document.

Copy and paste a selection of the Background in a random place, then move this segment back into place within the geometric lines.Slide9

Select the Lines layer again and make another Magic Wand selection, then swap to the Marquee tool and move the selection to a random area. Copy and paste this selection and move it back into place in the design.

Continue methodically working through the design to make new selections. Speed up your workflow by using the shortcuts W for the Magic Wand, M for the Marquee tool, CMD+C & CMD+V for Copy & Paste, and turn on Snapping from the View menu to easily piece the design together.Slide10

The design soon takes on a cool collage effect as pieces are randomly placed in unnatural positions, but the symmetry of the geometric shapes keeps the composition structured and balanced.

Let’s add some finishing touches to give the design an aged retro look. Paste a

Grungy Photo-Textures and change the blending mode to Screen to render the black areas transparent. Slide11

Dust & Scratches Textures

also help add distressed marks.

Paste in the image and change the blending mode to Screen

to composite and build up the texturing.

Add a new Curves Adjustment Layer at the top of the layer stack. We can tweak the curves to produce a retro style cross processed film effect. Change the dropdown menu to the Red

channel and tweak the curves to add more red in the shadows but less in the highlights. Give the Green and Blue curves the opposite values while using the live preview to achieve a cool

colour

cast.

Now,

Why not explore this technique further by creating a series of images using different geometric patterns?