/
Making Wire Rosaries Making Wire Rosaries

Making Wire Rosaries - PDF document

conchita-marotz
conchita-marotz . @conchita-marotz
Follow
410 views
Uploaded On 2015-10-14

Making Wire Rosaries - PPT Presentation

by The Rosary Shop To make a 5Decade rosary you will need 
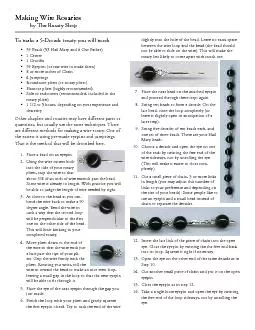
59 Beads 53 Hail Mary and 6 Our Father 1 Crucix00660069x 59 Eyepins or raw wire to make them 8 or more inches of Chain 4 Jumpring ID: 160284

The Rosary Shop To make

Share:

Link:

Embed:

Download Presentation from below link

Download Pdf The PPT/PDF document "Making Wire Rosaries" is the property of its rightful owner. Permission is granted to download and print the materials on this web site for personal, non-commercial use only, and to display it on your personal computer provided you do not modify the materials and that you retain all copyright notices contained in the materials. By downloading content from our website, you accept the terms of this agreement.


Presentation Transcript

Making Wire Rosaries by The Rosary Shop To make a 5-Decade rosary you will need: 59 Beads (53 Hail Mary and 6 Our Father) 1 Cruci�x 59 Eyepins (or raw wire to make them) 8 or more inches of Chain 4 Jumprings Roundnose pliers (or rosary pliers) Flatnose pliers (highly recommended) Side or endcutters (recommended, included in the rosary pliers) 1 1/2 to 5 hours, depending on your experience and Other chaplets and rosaries may have different parts or quantities, but usually use the same techniques. There are different methods for making a wire rosary. One of the easiest is using pre-made eyepins and jumprings. That is the method that will be described here. Place a bead on an eyepin. Using the wire cutters built into the side of your rosary pliers, snip the wire so that about 3/8 of an inch of wire extends past the bead. Some wire is already to length. With practice you will be able to judge the length of wire needed by sight. As close to the bead as you can, bend the wire back to make a 90 degree angle. Bend the wire in This will limit kinking in your completed rosary. Move pliers down to the end of the wire so that the wire ends just a hair past the tips of your pli ers. Grip the wire �rmly with the pliers. Rotating you wrist, roll the wire in toward the bead to make an nice even loop, leaving a small gap in the loop so that the next eyepin will be able to �t through it. Place the eye of the next eyepin through the gap you Finish the loop with your pliers and gently squeeze the �rst eyepin closed. Try to tuck the end of the wire slightly into the hole of the bead. Leave no extra space between the wire loop and the bead (the bead should not be able to slide on the wire). This will make the rosary less likely to come apart with much use. Place the next bead on the attached eyepin and proceed through these steps again. String ten beads to form a decade. On the leave it slightly open in anticipation of a String �ve decades of ten beads each, and one set of three beads. These are your Hail Mary beads. Choose a decade and open the eye on one of the ends by twisting the free end of the wire sideways, not by unrolling the eye. (This will make it easier to close com pletely.) Cut a small piece of chain, 3 or more links in length (you may adjust this number of links to your preference and depending on the size of your beads). Some people like to use an eyepin and a small bead instead of Insert the last link of the piece of chain into the open eye. Close the eyepin by twisting the the free end back into its loop. Squeeze it tight if necessary. Open the eye on the other end of the same decade as in Step 10. Cut another small piece of chain and put it on the open eyepin. Close the eyepin as in step 12. Take a single loose eyepin and open the eye by twisting the free end of the loop sideways, not by unrolling the eye. Place the eyepin on the other end of the chain that you Close the eyepin. String an Our Father bead on the loose eyepin and make a loop on the other end of it, as in Steps 2-3. Cut another small piece of chain and insert it in the gap in the eye you have just made. Close the eyepin as in Step 6. Attach another decade to the end of the chain that extends from the Our Father bead. Continue assembling your rosary in this order: chain, Our Father bead, chain, Hail Mary decade, etc. until you have strung all �ve decades with four Our Father beads between them. You should also attach a short piece of chain on either end of your rosary thus far. You will have a set of three Hail Mary beads left over. Find your center and orient it so that two holes are at Choose a jumpring and �nd its opening. (Split rings and bows are stronger alternatives to jumprings. The method for making bows is described in our catalog, free online.) Gripping it on either side of the opening with rosary pliers and �at nose pliers, bend the metal sideways in opposite directions to open it. Again, you do not want to unroll the jump ring or it will Hold one of the ends of the jumpring with your �at nose pliers and run your last chain the center over the other end. Grip one end of the jumpring with your rosary pliers and the other with your �at nose pli Follow Steps 25-28, attaching the other end of your rosary the center. Before you close the second jumpring, be sure there are no turns in your rosary chain from jumpring to jumpring. Using a jumpring as before, attach the bottom hole of the center to another short piece of chain. Find a loose eyepin and open the eye slightly to place it over the other end of the chain. Close the eyepin. String one Our Father bead on this eyepin. Make a loop on the other end of the eyepin. leaving a small gap in the loop. String another small piece of chain through the gap in the loop and close the loop. Find your three Hail Mary beads that you have already strung together. Open the last loop on one end, again bending the free wire sideways. Slip the chain over the opening and close the loop On the other end of the three Hail Mary beads, repeat these steps to attach another short piece of chain, an other Our Father bead, and a �nal short piece of chain. To attach the cruci�x, open the jumpring that is at tached to the cruci�x. If you there is not a jumpring on your cruci�x, use any jumpring. Slip it over the �nal Before closing the jumpring, hold your rosary up to be sure that the center and the cruci�x will both face the same direction. Close the jumpring on the cruci�x and you're done! You might want to go back through the links and make sure they are all fairly tight. With practice your loops will become even and you will pick up speed. Happy Rosary-Making!