PDF-Bitonal: simple two-tone black and white scans, suitable for typewritt
Author : danika-pritchard | Published Date : 2015-10-16
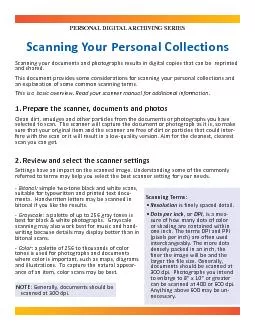
Scanning Your Personal Collections 1 Prepare the scanner documents and photosClean dirt smudges and other particles from the documents or photographs you have selected
Presentation Embed Code
Download Presentation
Download Presentation The PPT/PDF document "Bitonal: simple two-tone black and white..." is the property of its rightful owner. Permission is granted to download and print the materials on this website for personal, non-commercial use only, and to display it on your personal computer provided you do not modify the materials and that you retain all copyright notices contained in the materials. By downloading content from our website, you accept the terms of this agreement.
Bitonal: simple two-tone black and white scans, suitable for typewritt: Transcript
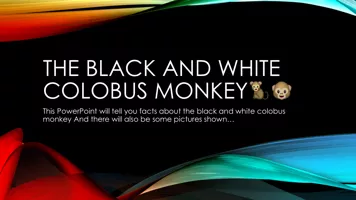
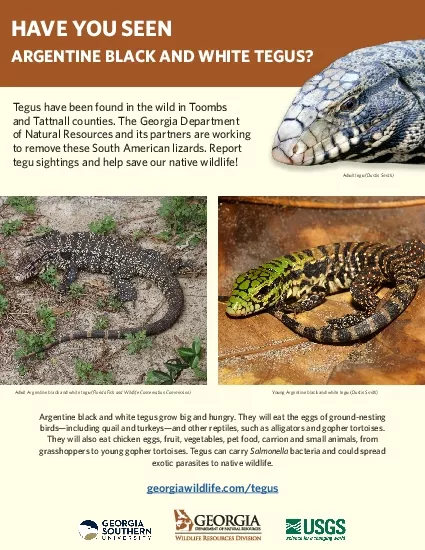
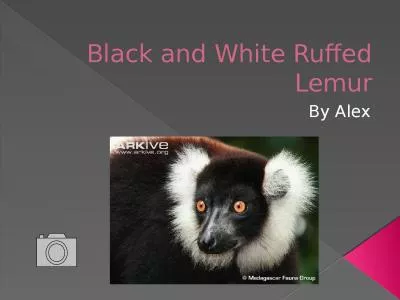
Scanning Your Personal Collections 1 Prepare the scanner documents and photosClean dirt smudges and other particles from the documents or photographs you have selected to scan The scanner will ca. They must be provided to a worker by an employer when the workers capacity for work has been reduced due to a work related injury What are suitable duties Suitable duties form part of a coordinated return to work approach They are arranged between Julie Palmer. Biomedical Visualisations and Society. To critically explore the social and political implications of biomedical imaging . To gain technical knowledge of visualisation . To foster collaboration and networking between early-career researchers . - . X-ray vision. http://www.bjwinslow.com/albums/medicalcharts/broken_arm_radius_and_ulna_x_ray_10.jpg. http://www.museumboerhaave.nl/AAcollection/AAJPEGS/M22/9955.jpg. http://www.uab.edu/surgonc/cases/GI/case2/ctscanof.htm. This . PowerPoint will tell you facts about the black and white colobus monkey And there will also be some pictures shown. …. Facts about the Black and White colobus monkey What is Mood?. How are Tone and Mood Effective in Writing?. WHAT IS MOOD?. Mood is the general atmosphere created by the author’s words. . It is the feeling the reader gets from reading those words. . What is the tone? Mood?. Tone and Mood. What is the tone? Mood?. Tone and Mood. What is the tone? Mood?. What is the tone? Mood?. What is the tone? Mood?. What is the tone? Mood?. What is the tone? Mood?. author’s attitude toward the writing . (his characters, the situation) and the readers. A work of writing can have more than one tone. An example of tone could be both serious and humorous. Tone is set by the setting, choice of vocabulary and other details. . Tone: The . writer’s . attitude towards the subject of the piece, the audience, and self. Also known as, the . way . feelings are expressed. . Conveyed through the use of:. Diction (the words that the author uses in his/her writing). Usually Shown through word choice (diction) and their viewpoint. Examples: formal, informal, serious, ironic, cheerful, nostalgic, sad, comic, angry, . gloomy, positive. Helps Establish the . mood. of the text, how the Reader should respond. Tone and Mood “Boy, watch your tone when speaking to me” Tone: The writer’s attitude towards the subject of the piece, the audience, and self. Also known as, the way feelings are expressed. Tone vs. Mood Tone Tone: The writer’s attitude towards the subject of the piece, the audience, and self. Also known as, the way feelings are expressed. Conveyed through the use of: Diction (the words that the author uses in his/her writing) An MRI Machine. I. Computerized Axial Tomography (CAT/CT). CT scanning adds . many X-ray . images with the aid of a computer to generate cross-sectional views of a patient's anatomy.. CT scans are performed to analyze the internal structures of various parts of the . birds151including quail and turkeys151and other reptiles such as alligators and gopher tortoisesThey will also eat chicken eggs fruit vegetables pet food carrion and small animals from grasshoppers to By . Alex. Habitat and Color. The Ruffed Lemur lives in the humid rainforests of Eastern Madagascar. The Black and White Ruffed Lemur has a black and white coat also known as a pelage with white . tuffed.
Download Document
Here is the link to download the presentation.
"Bitonal: simple two-tone black and white scans, suitable for typewritt"The content belongs to its owner. You may download and print it for personal use, without modification, and keep all copyright notices. By downloading, you agree to these terms.
Related Documents