/
* Same tool assembly suitable for all Toodles models * Same tool assembly suitable for all Toodles models

* Same tool assembly suitable for all Toodles models - PowerPoint Presentation

ellena-manuel
ellena-manuel . @ellena-manuel
Follow
384 views
Uploaded On 2017-09-19

* Same tool assembly suitable for all Toodles models - PPT Presentation

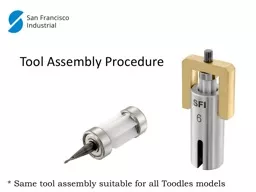
Tool Assembly Procedure Step 1 Insert the first bearing inside the assembly device direction does not matter Use the right assembly device per tool shank diameter 3 4 or 6 mm Cone Step 2 ID: 589018

step tool device assembly tool step assembly device insert toodle bridge cover bearing place holder front turbine direction press

Share:

Link:

Embed:

Download Presentation from below link

Download Presentation The PPT/PDF document "* Same tool assembly suitable for all To..." is the property of its rightful owner. Permission is granted to download and print the materials on this web site for personal, non-commercial use only, and to display it on your personal computer provided you do not modify the materials and that you retain all copyright notices contained in the materials. By downloading content from our website, you accept the terms of this agreement.


Presentation Transcript

Slide1

* Same tool assembly suitable for all Toodles models

Tool Assembly ProcedureSlide2

Step #1

Insert the first bearing inside the assembly device, direction does not matter.

Use the right assembly device

per tool shank diameter (3, 4 or 6 mm).Slide3

Cone

Step #2

Insert the turbine inside the assembly device.

Pay attention to the turbine direction; the big cone heads in first. Slide4

Step #3

Insert the second bearing

inside the assembly device.

The bearing direction does not matter. Slide5

Step #4

Insert the tool inside the bridge.

Use the right bridge

per tool shank diameter

(3

, 4 or 6 mm).Slide6

Step #5

Place the bridge with tool over the device, so the tool tip is placed in through the top bearing.Slide7

Step #6

U

sing a press or a vise, push the tool into the device and through the bearings and turbine.Slide8

Step #7

Pull the bridge up and away from

the

assembly device.Slide9

Step #8

Press the tool further into the device, leaving 5 mm maximum.

Use a press or a vise.Slide10

Step #9:

Carefully pull the tool assembly out of the device.Slide11

Step #10

Insert the tool assembly inside the Toodle housing.Slide12

Step #11Check that the O-Ring is inside the front cover.Slide13

Step #12

I

nsert the front cover over the tool and screw it onto the

Toodle housing.

Use

a 24 mm wrench to tighten the cover.

24 mm wrenchSlide14

Step #13

:

Place the Toodle into the tool holder. The Toodle front cover limits the axial position.

Use a sealed tool holder for 25 mm tools.Slide15

Step #14

:

Tighten tool holder after placing Toodle in place. Torque according manufacture

instructions.The Toodle is ready. Slide16

Complete Tool Assembly