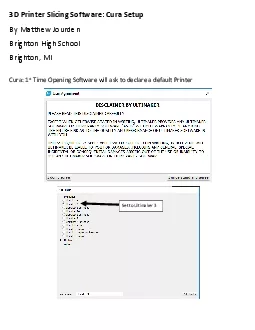
By Matthew JourdenBrighton High SchoolBrighton MICura 1stTime Opening Software will ask to declare a default PrinterSet to Ultimaker 3Click CancelPlate on Back tells user what printer is activeAdding ID: 879069
Download Pdf The PPT/PDF document "3D Printer Slicing Software Cura Setup" is the property of its rightful owner. Permission is granted to download and print the materials on this web site for personal, non-commercial use only, and to display it on your personal computer provided you do not modify the materials and that you retain all copyright notices contained in the materials. By downloading content from our website, you accept the terms of this agreement.
1 3D Printer Slicing Software: Cura Setup
3D Printer Slicing Software: Cura Setup By Matthew Jourden Brighton High School Brighton, MI Cura: 1 st Time Opening Software will ask to declare a default Printer Set to Ultimaker 3 Click Cancel Plate on Back tells user what printer is active Adding Printer 1. Settings Drop Down Menu Printer Add Printer 2. Select Other Scroll down to Wanhao Duplicator i3 (Flexible Filament Printer)
2 ; Select Add Printer Select Wanha
; Select Add Printer Select Wanhao Duplicator i3 3. Change Between Printers Select Settings Printers Choose the Desired Printer 4. Change Between Materials PLA : From Printer Settings (Right Hand Side of Screen) Select Material Generic PLA a. Layer Height = Draft (.2) or Fast (.3) b. Print Speed = 60 mm/s c. Wall Line = 2 (Shells/Wall Thickness) d. Wall Count = .8 mm (Total Thickness of Vertica
3 l Walls) NOTE: Wall Count Higher
l Walls) NOTE: Wall Count Higher Value = Stiffer Object e. Top Layer = .8 mm (Total Thickness Top Surfaces) f. Bottom Layer = .8 mm (Total ThicknessBottom Surfaces) g. Infill Density = Start at 10% to Start h. Build Plate Adhension = Skirt i. Raft = Depends on Part (Small Par ts (Caps , Bolts, Fastners ) No, Larger Part s (Larger than a 2 ” x 3 ” area) Yes j. Material: Enable Retraction UNCHECK Part Orientation k. Suppo
4 rt: Depends on Part T PU: See Tuto
rt: Depends on Part T PU: See Tutorial 3D Printer Slicing Software: Flexible Filament Import After Import From the Printer Settings (Right Hand Side of Screen) Select Material Sain Smart TPU Flexible Filament TPU Settings l. Layer Height = Normal .15 m. Print Speed = 25 mm/s n. Wall Line = 2 (Shells/Wall Thickness) o. Wall Count = .8 mm (Total Thickness of Vertical Walls) NOTE: Wall Count Higher
5 Value = Stiffer Object p. Top Layer
Value = Stiffer Object p. Top Layer = .8 mm (Total Thickness Top Surfaces) q. Bottom Layer = .8 mm (Total ThicknessBottom Surfaces) r. Infill Density = 8% (Max 15%) s. Build Plate Adhension = Skirt t. Raft = NO u. Material: Enable Retraction UNCHECK Part Orientation: Overhang/Supported Surfaces Limit as much as possible support will be hard to remove and Overhang areas typically droop more than PLA plastic because o f the flexible propertie