/
Spraying Step by step slide Spraying Step by step slide

Spraying Step by step slide - PowerPoint Presentation

pamella-moone
pamella-moone . @pamella-moone
Follow
372 views
Uploaded On 2018-10-27

Spraying Step by step slide - PPT Presentation

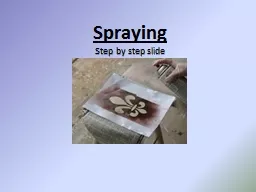
Step 1 Come up with a plan before starting to make spray paint stencils Determine what size stencil you need If the stencil is going to be large it is okay to include small details If the stencil is going to be small a simpler design should be used ID: 698178

image stencil flat step stencil image step flat surfaces good paper stencils areas material rounded painting surface film create

Share:

Link:

Embed:

Download Presentation from below link

Download Presentation The PPT/PDF document "Spraying Step by step slide" is the property of its rightful owner. Permission is granted to download and print the materials on this web site for personal, non-commercial use only, and to display it on your personal computer provided you do not modify the materials and that you retain all copyright notices contained in the materials. By downloading content from our website, you accept the terms of this agreement.


Presentation Transcript

Slide1

SprayingStep by step slideSlide2

Step 1Come up with a plan before starting to make spray paint stencils. •Determine what size stencil you need. If the stencil is going to be large, it is okay to include small details. If the stencil is going to be small, a simpler design should be used. •Know how many colours you want to include in the stencilled image. This will affect the amount of materials you need and how many stencils you need to create.Slide3

Step 2Draw a picture of the image you want to create a stencil from or find a picture or photograph online. Slide4

Step 3Create the final image with clean lines and good contrast. •If you are drawing your own image, clearly outline the areas of the image that will be cut out for the stencil. Remember that you need to define the edges and the details of your image, or the stencil will not portray your original drawing.

•If you are using a photograph or an online image, you need to use a software program that can adjust the contrast and brightness of your image so that you have defined dark and light areas.Slide5

Step 4Print out the final image on a regular piece of computer paper. It is a good idea to outline the areas that will be cut out for the stencil with a pencil or marker to ensure you have clean lines for your stencil.Slide6

Step 5Choose the type of stencil material you want to use. Cardboard or foam board are good for large, simple stencils on flat surfaces.Paper works for a single-use stencil on either flat or rounded surfaces.

Poster board holds up better than paper and can be used on flat or slightly rounded surfaces.

Plastic or clear acetate are good if creating reusable stencils for either flat or rounded surfaces.

Frisked film, which is a clear film with a slightly sticky backing, is good for flat and rounded surfaces.Slide7

Step 6Tape the paper with the stencil image to the stencil material. Alternately, attach it with spray adhesive or transfer the image to the stencil material using tracing paper. Slide8

Step 7Cut out the areas of your image where you want the paint to show using a utility knife. If the stencil will have more than one colour, create different stencils for each colour.Slide9

Step 8Attach the stencil to your painting surface with tape or by spraying adhesive on the back of the stencil, and then waiting 1 to 2 minutes before sticking it on the painting surface. If the stencil material is frisked film, simply remove the backing and stick it to the painting surface. Slide10

Step 9Finished