/
Table of Contents Table of Contents

Table of Contents - PDF document

pamella-moone
pamella-moone . @pamella-moone
Follow
370 views
Uploaded On 2016-03-11

Table of Contents - PPT Presentation

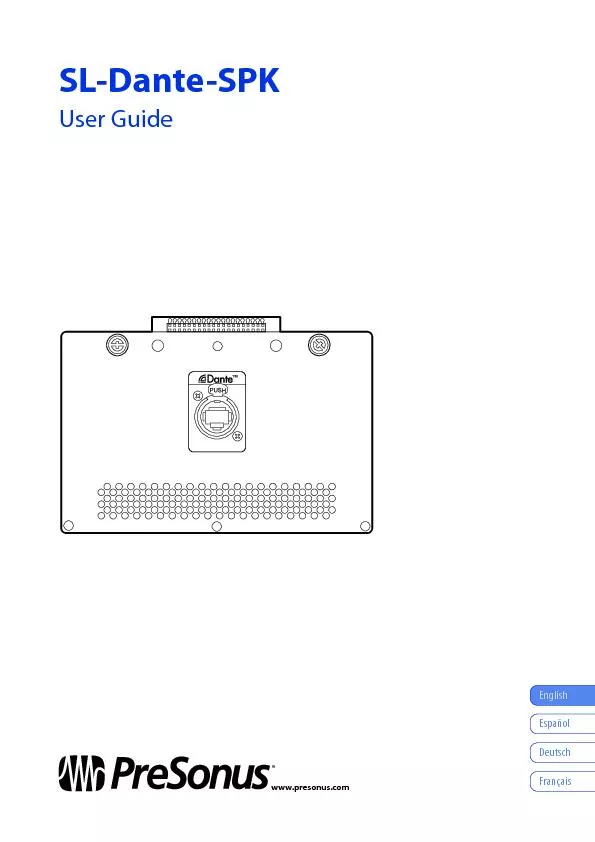
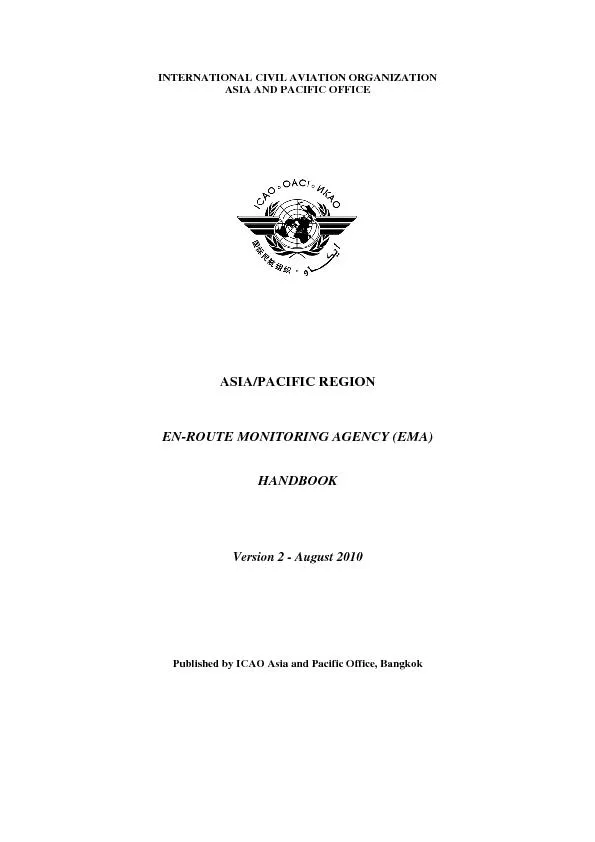
Introduction 1 11 About this Manual 1 12 Summary of Features 1 Networking Your StudioLive AI Loudspeaker 2 21 Step 1 Installing the SLDanteSPK 2 22 Step 2 Updating Your Loudspeaker Firmware 4 ID: 251068

Introduction 1 1.1 About this Manual 1 1.2 Summary Features 1 Networking

Share:

Link:

Embed:

Download Presentation from below link

Download Pdf The PPT/PDF document "Table of Contents" is the property of its rightful owner. Permission is granted to download and print the materials on this web site for personal, non-commercial use only, and to display it on your personal computer provided you do not modify the materials and that you retain all copyright notices contained in the materials. By downloading content from our website, you accept the terms of this agreement.


Presentation Transcript

Table of Contents Introduction 1 1.1 About this Manual 1 1.2 Summary of Features 1 Networking Your StudioLive AI Loudspeaker 2 2.1 Step 1: Installing the SL-Dante-SPK 2 2.2 Step 2: Updating Your Loudspeaker Firmware 4 2.3 Step 3: Selecting the Right Network Hardware 6 2.3.1 Adding a Wireless Router 6 2.3.2 Choosing the Right Cables 7 2.4 Step 4: Downloading Dante Controller 7 2.5 Step 5: Naming Your Loudspeakers 8 2.6 Step 6: Connecting Your Network 11 2.7 Step 7: Routing Audio 12 2.7.1 Yamaha CL- and QL-series Console Routing 14 SL Room Control 15 3.1 Input Modes 15 3.2 Dante Lock 15 Alternative Network Conguration 16 4.1 Analog Failover 16 4.2 Integrating an Analog Console 17 Frequently Asked Questions 18 1 Introduction About this Manual 1 Introduction Thank you for purchasing the SL-Dante-SPK option card for PreSonus ® StudioLive ™ AI- series Active Integration ™ loudspeakers. PreSonus StudioLive AI-series loudspeakers oer a wealth of system-control and performance-monitoring features that give you unprecedented control. The SL-Dante-SPK option card allows you add your StudioLive AI-series loudspeakers to any standard Dante ™ network. Dante does away with heavy, expensive analog or multicore cabling, replacing it with low-cost, easily available CAT5e, CAT6, or ber optic cable for a simple, lightweight, and economical solution. Dante integrates media and control for your entire system over a single, standard IP network. We encourage you to contact us with questions or comments regarding this product. PreSonus Audio Electronics, Inc., is committed to constant product improvement, and we value your suggestions highly. We believe the best way to achieve our goal of constant product improvement is by listening to the real experts: our valued customers. We appreciate the support you have shown us through the purchase of this product. Power User Tip: Please take a moment to register your SL-Dante-SPK option card and StudioLive AI-series loudspeaker at https://my.presonus.com, if you haven’t already done so. Your My PreSonus user account will provide the latest rmware, software, and documentation for all of your PreSonus products. 1.1 About this Manual This manual covers the functions and installation of the SL-Dante-SPK option card and provides instructions for conguring your StudioLive AI-series loudspeaker on a Dante network. Complete information about Dante networking and the Dante Controller application can be found at www.audinate.com. The features and functions of the three full-range StudioLive AI-series speaker models are the same with the SL-Dante-SPK option card. In most respects, the functions of the 18sAI are also the same. Whenever possible these features and functions will be described for the entire line. Unless preceded by “full-range,” the term “loudspeaker” will refer to both full-range models and the subwoofer. Thank you, once again, for buying our product. We are condent that you will enjoy your StudioLive AI speakers and the SL-Dante-SPK option card! 1.2 Summary of Features  Dante connectivity  2 Receive (Rx) channels  2 Transmit (Tx) channels  3 input modes:  Analog Only  Dante Only  Analog Failover  Compatible with any StudioLive AI-series loudspeaker  Compatible with SL Room Control software  Compatible with any Dante-enabled device (48 kHz operation required) 2 Networking Your StudioLive AI Loudspeaker Step 1: Installing the SL-Dante-SPK 2 Networking Your StudioLive AI Loudspeaker Your SL-Dante-SPK option card allows any StudioLive AI-series loudspeaker in which it’s installed to connect to a Dante network using an Ethernet cable. It is important to mention that once the SL-Dante-SPK option card is installed, you can no longer wirelessly control your loudspeaker using the USB Wi-Fi LAN adapter. All control must be done over Ethernet, even when not connected to a Dante network. 2.1 Step 1: Installing the SL-Dante-SPK 1. Using a Phillips screwdriver, remove the three screws in the bottom and the center screw in the top of the SL-Control-SPK option card that came installed in your loudspeaker. Retain these screws. 2. Loosen the two thumbscrews at the top of the SL-Control-SPK option card. 3. Gently pull the SL-Control-SPK card straight out and then slide down to remove it. 3 Networking Your StudioLive AI Loudspeaker Step 1: Installing the SL-Dante-SPK 4. Slide the SL-Dante-SPK option card into the slot and line up the screw holes. 5. Push the SL-Dante-SPK option card until it locks into the internal connector and tighten the thumbscrews. 6. Screw the four Phillips screws back in. 4 Networking Your StudioLive AI Loudspeaker Step 2: Updating Your Loudspeaker Firmware 2.2 Step 2: Updating Your Loudspeaker Firmware SL-Dante-SPK requires a rmware recovery for your StudioLive AI loudspeaker. The rmware is available from your My PreSonus account at https://my.presonus.com. Power User Tip: You must register your SL-Dante-SPK option card to ensure that you have the correct rmware in your account. 1. Log into your My PreSonus account. 2. Download the rmware recovery .zip archive for your loudspeaker. 3. Open your Downloads folder and locate the StudioLive rmware folder. 4. Depending on your system preferences, the .zip archive containing the rmware folder might not automatically decompress. To expand it, simply double-click it. 5. Open the rmware folder; you will nd four les inside: inivars.scr, recovery.scr, rootfs.img, and ulmage. 6. Connect a FAT32-formatted USB thumb drive to your computer. Power User Tip: Most small USB drives (16 GB or less) are already formatted correctly, so no formatting is required. If your loudspeaker does not detect your thumb drive, verify that the drive is formatted correctly. 7. Select all four of the rmware recovery les and either copy/paste or drag them to the root of your thumb drive. Eject your drive and disconnect it from your computer. 8. Label the drive with the model rmware you copied to it. NOTE: Each StudioLive AI loudspeaker model has its own rmware les. Installing the wrong model’s rmware on a loudspeaker will cause it to behave abnormally and may require a repair. For example, don’t install 315AI rmware on a 312AI. If you are upgrading rmware on multiple StudioLive AI-series models, we recommend that you label each thumb drive to ensure that the correct rmware is loaded onto each loudspeaker. 9. O Power o your StudioLive AI loudspeaker. 10. USB Drive Connect the USB thumb drive to the USB connection on your StudioLive AI loudspeaker. 5 Networking Your StudioLive AI Loudspeaker Step 2: Updating Your Loudspeaker Firmware 11. On Press and Holdany button Power on your StudioLive AI loudspeaker while holding down any button on its back panel. 12. 1 Louisiana2 Louisiana3 Louisiana4 Louisiana5 Louisiana Continue holding the button for 10 full seconds (1-Louisiana, 2-Louisiana, etc.). 13. The lights on the back panel of your StudioLive AI loudspeaker will cycle until the rmware update is complete. The rmware update takes approximately ve minutes. When the update is complete, your loudspeaker will reboot. Once the rmware update is complete, you can remove the thumb drive. You must update the rmware on every loudspeaker into which you are installing an SL-Dante-SPK. Power User Tip: It is highly recommended that you take note of both the SL-Dante-SPK’s and the loudspeaker’s serial number so you know which option card is in which speaker. You can manage this through registrations in your My PreSonus account. 6 Networking Your StudioLive AI Loudspeaker Step 3: Selecting the Right Network Hardware 2.3 Step 3: Selecting the Right Network Hardware While Dante is compatible with standard network hardware, there are a few basic requirements to keep in mind when choosing your network switch. The following recommendations are based on the needs of a high-channel-count system (more than 32 channels).  Non-blocking layer-2 gigabit switch with a packet-forwarding rate of 1.488 Mpps per port. For example, if you purchase an 8-port switch, the packet-forwarding rate would have to be 11.904 Mpps (1.488 Mpps x 8).  Energy Ecient Ethernet (EEE), also known as Green Ethernet or IEEE 802.3az, reduces power consumption when there isn’t much trac on the network. Unfortunately, this can lead to audio interruptions and can degrade clocking. If your switch provides this feature, make sure that you can and do disable it.  Managed switches are required if you plan to use SL Room Control with a wireless device, such as an iPad, to remote control your loudspeaker. Managed switches can also help you create a more stable Dante network if you have a complicated setup.  Most managed switches support Quality of Service (QoS). This allows you to choose Dante clock synchronization as the highest priority and audio data as the next-highest priority. This is especially important if you are transferring large amounts of data over your Dante network or if you are transferring non-Dante data over the same network.  If you are using multiple switches on your Dante network, we recommend using the same make and model to simplify setup and guarantee compatibility. 2.3.1 Adding a Wireless Router Dante audio and routing cannot travel over a wireless network. You can still wirelessly remote control your StudioLive AI-series loudspeakers over a Dante network using SL Room Control but you’ll have to do a little more setup. To connect a wireless router to your Dante network, you will need to purchase a managed switch and dive into its conguration settings. Select the port to which you’ve connected your wireless router and set Multicast Filtering to “On.” This will stop the ow of Dante trac to that port and allow it to be used for wireless remote control of your loudspeakers. Do not connect Dante devices to the ports on a wireless router. Please consult the documentation that came with your managed switch for instruction about enabling Multicast Filtering on a specic port. Because your loudspeakers are hardwired to the switch, no additional setup is required to remote control them with SL Room Control. Simply connect your device to the wireless router network and launch SL Room Control. Complete instructions for SL Room Control can be found in the SL Room Control User Guide, available at www.presonus.com/products/SL-Room-Control/downloads. NOTE: Installation of the SL-Dante-SPK option card disables the use of the USB Wi-Fi LAN adapter for StudioLive AI-series loudspeakers. All control must be done through the shared EtherCon connection on the option card. 7 Networking Your StudioLive AI Loudspeaker Step 4: Downloading Dante Controller 2.3.2 Choosing the Right Cables Be sure to use CAT5e or higher (CAT6 or CAT7) network cable. The CATE5e specication supports transmitting data up to 100 meters but cable and termination quality, as well as the environment in which the cable is used, can shorten this potential transmission distance. If you are making the connections yourself, it is important to note that if the cable is not properly terminated, it will not be capable of the maximum transmission distance. Power User Tip: CAT5e cable checkers can verify long-distance transmission performance. These tools are readily available through many electronics and online retailers. Another thing to keep in mind when selecting Ethernet cable is whether it is solid- or stranded-core. In a solid-core cable, each of the conductors is a single copper wire, which is a better t for installations and long cable runs (more than 70m). Stranded- core cables use multiple, thinner copper wires for each conductor, making them more exible and easier to handle. This makes stranded-core cable a better t for touring and shorter cable runs. To prevent electromagnetic interference, shielded twisted-pair (STP) cables are recommended. Unlike their unshielded cousins, STP cables have shielding that reduces noise. Like a balanced analog cable, STP cables have to be grounded, so you’ll need to use STP-compatible RJ45 or EtherCon connectors. 2.4 Step 4: Downloading Dante Controller To connect your Dante network, you will need a Mac or Windows computer with an Ethernet port and Audinate’s Dante Controller application. Dante Controller is a free software application that allows you to route audio and congure devices on a Dante network. Thanks to automatic device discovery, one- click signal routing, and user-editable device and channel labels, setting up a Dante network is relatively simple. Dante Controller also provides essential device status information and powerful real-time network monitoring, including device-level latency and clock stability stats, multicast bandwidth usage, and customized event logging, enabling you to identify and resolve network issues. You can also back up, restore, move, and reuse Dante network congurations using presets and can edit Dante routing congurations oine. The Dante Controller application and associated documentation are available at www.audinate.com/products/software/dante-controller. 8 Networking Your StudioLive AI Loudspeaker Step 5: Naming Your Loudspeakers 2.5 Step 5: Naming Your Loudspeakers When you connect your StudioLive AI loudspeakers to your Dante network for the rst time, they will be named “SL-AI-PA-” followed by a unique numeric identier (e.g. SL-AI-PA-0123a4). Taking a moment to give your speakers a custom name will save time later. 1. Turn on your StudioLive AI-series loudspeaker and connect it to your computer with an Ethernet cable. 2. Launch Dante Controller on your computer. 9 Networking Your StudioLive AI Loudspeaker Step 5: Naming Your Loudspeakers 3. You will see your loudspeaker on the Routing tab. 4. Open the Device view by double-clicking on the speaker name or by selecting Devic�eDevice View. 10 Networking Your StudioLive AI Loudspeaker Step 5: Naming Your Loudspeakers Click on the Device Cong tab and give your loudspeaker a descriptive name (FOH Left, Center Balcony, etc.). Power User Tip: Dante device names can be up to 31 characters and are not case sensitive (e.g., “Guitar wedge” and “guitar Wedge” are treated as the same label). Device names must start with a letter of the alphabet but numbers and hyphens may also be used. 5. Disconnect your loudspeaker and repeat Steps 1-4 with any loudspeaker you will be connecting to your Dante network. 11 Networking Your StudioLive AI Loudspeaker Step 6: Connecting Your Network 2.6 Step 6: Connecting Your Network The diagram below shows a standard Dante conguration with a wireless router for operating SL Room Control and other iOS remote apps. The wireless router is connected to a port on a managed switch that has Multicast Filtering enabled so that wireless SL Room Control data and Dante audio can be run on the same switch. Section 4 includes examples of alternative congurations, such as using the analog inputs as a redundant connection or using StudioLive AI-series loudspeakers as the intermediary for a mixing console that does not have Dante capability. \t\r \b­­€\f \t\tƒ„\tƒ„\t€\r†‡\r…\t€\r†‡\r…\tˆ\r‰‡…\tˆ\r‰‡… Š‹‹„Œ\tŒ‚Œ‚‹ŒŽ\t \rŽ‚\r‡‘ ’“… Ž\r\r  \r 12 Networking Your StudioLive AI Loudspeaker Step 7: Routing Audio 2.7 Step 7: Routing Audio Before you start routing audio to your Dante network, there are a few terms with which you should become familiar:  Device: A device means a Dante-enabled device (e.g., your StudioLive AI-series loudspeaker with the SL-Dante-SPK option installed).  Transmit (Tx) channel: As its name suggests, a Transmit channel transmits audio from the audio hardware to the network.  The SL-Dante-SPK provides two Transmit channels for your loudspeaker when it is in Analog Input mode only: - Full-range loudspeakers: Both channels will send the same summed signal of the mic and line inputs. - 18sAI subwoofers: Transmit Channel 1 will send the signal from Analog Input 1. Transmit Channel 2 will send the signal from Analog Input 2.  While Transmit channels for your loudspeakers are always available, they will only contain an audio signal when the analog inputs on your loudspeaker are active (Analog Input mode only).  Receive (Rx) channel: A Receive channel receives audio from the network and sends it to the audio hardware.  The SL-Dante-SPK provides two Receive channels for your loudspeaker: - Full-range loudspeakers: To prevent phasing issues, only Channel 1 is sent to the DSP. Channel 2 is ignored. - 18sAI subwoofers: Both Receive channels are sent to the DSP, where they are summed. If you are having phasing issues, verify that you haven’t routed the same audio source to both Receive channels.  Flow: Dante audio routing creates ows. Each ow carries several channels of audio from a transmitter to one or more receivers. Unicast routing creates ows to single receivers. Multicast routing creates ows that can be received by multiple receivers. Multicast ows are assigned IDs, enabling them to be identied in Dante Controller.  Unicast routing: Unicast ows are point-to-point from a single transmitter to a single receiver. Unicast ows typically have room for four channels of audio.  Multicast routing: Multicast ows are one-to-many from a single transmitter to any number of receivers. Use Dante Controller to choose which channels are to be multicast. Unlike unicast routing, multicast ows consume network bandwidth even if there are no receivers but do not require additional bandwidth to add more receivers.  Subscription: A subscription congures a Receive channel to receive audio from a transmit channel on another Dante device.  Subscription status: For a Receive channel, subscription status indicates whether it is subscribed, whether it is receiving unicast or multicast audio, whether the subscription is okay, or whether an error has occurred. Now that you’re acquainted with a few Dante networking terms, let’s route some audio. Note: The complete Dante Controller User Guide is available from www.audinate.com/resources/technical-documentation . Power User Tip: Dante supports devices using dierent samples rates on the same network; however, you can only route audio to and from devices with the same sample rate. StudioLive AI-series loudspeakers with SL-Dante-SPK option cards only operate at 48 kHz on a Dante network. Any device you’d like to route audio to or from your loudspeakers must also be set to 48 kHz. Connect all devices on your Dante network to your switch. If you are conguring a very large Dante network, you may want to consider adding a few components at a time, making the necessary routing, and then moving on to the next section. For example, you may wish to hook up your FOH system, then your monitor system, etc. 13 Networking Your StudioLive AI Loudspeaker Step 7: Routing Audio Once you have connected all your devices, launch Dante Controller. 1. On the Routing tab, you will see all your connected devices. Click on the “+” next to each device to view its Transmit or Receive channels. 2. Patch a Transmit channel from your mixer to the rst Receive channel (RxChan 0) of your loudspeaker. 3. Continue patching Transmit channels from your mixer to the rest of the loudspeakers on your network. 14 Networking Your StudioLive AI Loudspeaker Step 7: Routing Audio 2.7.1 Yamaha CL- and QL-series Console Routing Yamaha CL- and QL-series consoles feature integrated Dante routing. When using these consoles, you have the option not to use the Dante Controller application to route audio. This section is a brief tutorial on using Yamaha CL-series consoles’ onboard routing features with StudioLive AI-series loudspeakers. Complete information about the onboard Dante routing features can be found in CL- and QL-series consoles’ product documentation. 1. After connecting both your Yamaha console and your loudspeakers to your Dante network, select Setup from the CL-series console’s onscreen menu. 2. Select WORD CLOCK / SLOT and choose Dante 48 kHz as the Master Clock. DANTE48kDANTE44.1k 3. From the main Setup menu, select “This Console” in the Dante Patch Bay section and “24” in the Bit section. 24 32 THISCONSOLE DANTECONTROLLER DANTE PATCH BY 4. Select Device Mount to open the Dante Setup menu. DEVICE MOUNTSETUP --- 5. Select any empty slot in the Dante Setup menu, then select the Device List tab. ----#1 6. Select your loudspeaker from the Device List. Repeat Steps 5 and 6 for every loudspeaker on your network. 312AI-LEFT312AI-RIGHT18sAI SUBDEVICE LIST You are now ready to route audio using the I/O Device routing menu. More information about routing audio and troubleshooting Dante networks can be found at www.yamahaproaudio.com . 15 SL Room Control Input Modes 3 SL Room Control Once a StudioLive AI-series loudspeaker has the SL-Dante-SPK option installed, Input Mode switching and Dante network detection will be available in SL Room Control. 3.1 Input Modes Dante-enabled StudioLive AI-series loudspeakers are provided with three input modes:  Dante Only: This mode disables the analog inputs on your loudspeaker whether or not it is on the Dante network.  Analog Only: This mode disables the Dante Receive channels to your loudspeaker whether or not it is connected to a Dante network. When a Dante network is available, the Analog Inputs on your loudspeaker can be sent through your loudspeaker’s Transmit channels.  Full-range: Because the analog inputs on StudioLive AI-series full-range loudspeakers are summed before the analog-to-digital converters, both Transmit channels will both carry the same summed signal of the mic and line inputs.  18sAI: Unlike the full-range models, the analog inputs on the StudioLive 18sAI subwoofer are summed in the DSP engine. So each input has its own Transmit channel (i.e., Transmit Channel 1 will carry the signal from analog Input 1, and Transmit Channel 2 will carry the signal from analog Input 2).  Analog Failover: The SL-Dante-SPK does not support network redundancy over Dante. However, by enabling Analog Failover, you can use the analog connections on your loudspeakers as backup. When no Dante sync is detected for one second, your loudspeaker will automatically switch to the analog inputs. This is the default setting for your loudspeaker. Input modes can be selected from the Speaker Edit page of SL Room Control. Simply click or tap on the Input mode and select the desired mode. You can select a dierent Input mode for each Dante-enabled loudspeaker on the network. 3.2 Dante Lock The Dante lock indicator is visible both on the Speaker Edit and Monitor pages. This indicator allows you to easily see whether your loudspeaker is connected to and communicating with your Dante network. When the Dante network is available, the Dante Lock indicator will illuminate white. If no Dante network connection is detected, the Dante Lock indicator will illuminate red. 16 Alternative Network Conguration Analog Failover 16 4 Alternative Network Conguration 4.1 Analog Failover \r\f\n\t\b\r\r\r\n\t\b\r\f\t\r\t \n    ­ ­€­ €€ ­‚ ƒ \r\r„ 17 Alternative Network Conguration Integrating an Analog Console 4.2 Integrating an Analog Console \r\f \n\t\b\r\r\r\r   ­\b\f \n  ­ \f \b\f€ ‚\b\r\b\f€ ‚\b\r\b\f\f\r\b\f\f\r ƒ„€\rƒ„€\r  … †  ­ \f‡­\b  ­ \f\f\bƒ\f­ˆ­\f­\b\n  ƒ­\b‚\b\f‰„\f\b‰\r 18 Frequently Asked Questions Monitor Station V2 Owner’s Manual 5 Frequently Asked Questions Can I connect a Dante device directly to my computer? Yes. Simply connect your Dante-enabled devices to an Ethernet switch, using CAT5e or CAT6 Ethernet cable, then connect your computer to the same switch. If you have only one Dante-enabled device to connect to your computer, you can eliminate the switch and simply connect the two with a CAT5e or CAT6 Ethernet cable. What type of Ethernet cable is recommended for Dante? As most Dante devices support gigabit Ethernet, CAT5e or CAT6 cable is recommended. For purely 100 Mbps networks, CAT5 may be used. Does Dante work with ber optic network cable? Yes. Because Dante works with standards-based networking technology, using ber is simple. Use a switch that supports ber connections to send Dante data over a ber optic cable. Ethernet is not copper- or ber-based; it is independent of the cabling medium. Many organizations will have ber already in place from other projects, and this can simply be reused on a Dante network. Is it possible to make direct connections between Dante-enabled equipment? Yes. Once routes are established with Dante Controller, a simple network of two Dante devices will work in a stand-alone fashion. Can Dante devices be daisy-chained? In most cases the answer is “no.” Dante devices are connected via a network switch, which most often means a “star” topology: All devices are connected to a single central point, which minimizes the number of “hops” through which data must pass. This also avoids the scenario in which the failure of one device causes the entire chain to break. NOTE: The secondary port found on some Dante devices is not to be used for daisy chaining; this is for Dante redundancy only. Please check your device’s documentation. Can Dante operate over a Wi-Fi network? No. While possible in principle, the practical limitations of current wireless technology (802.11a/b/g/n) render reliable performance unachievable. For this reason Dante software such as Virtual Soundcard will not recognize wireless connections for audio data. Wireless access points for non-Dante trac (device control, etc.) can be congured using managed switches. Does Dante require any special network infrastructure? No, special network infrastructure is not required. Since Dante is based upon universally accepted networking standards, Dante-enabled devices can be connected using inexpensive o-the-shelf Ethernet switches and cabling. Does Dante require a dedicated network infrastructure? No, a dedicated network infrastructure is not required. Dante-enabled devices can happily coexist with other equipment making use of the network, such as general- purpose computers sending and receiving email and other data. Can you mix control data and audio on the same network? Yes, audio can be sent over the same network as control information and even unrelated data trac. 19 Frequently Asked Questions SL-Dante-SPK User Guide Does Dante require special switches? No. However, we strongly recommend that gigabit switches be used due to the clear advantages in performance and scalability. What is the minimum requirement for switches in a Dante network? All Ethernet switches are capable of working with Dante. However, please be aware that there are some features on some kinds of switches that will allow you to build larger and more reliable Dante networks. While gigabit switches are recommended, 100 Mbps switches may be used in limited scenarios.  For channel counts of 32 or more, gigabit switches are essential. QoS is required when using Dante in networks that have 100 Mbps devices. QoS is also recommended for gigabit switches on networks that share data with services other than Dante.  For lower channel counts ()ch may be used as long as it supports proper QoS, and QoS is active. The use of 100 Mbps switches without QoS is not recommended or supported. What features are important when purchasing a switch? Dante makes use of standard Voice over IP (VoIP) Quality of Service (QoS) switch features, to prioritize clock sync and audio trac over other network trac. VoIP QoS features are available in a variety of inexpensive and enterprise Ethernet switches. Any switches with the following features should be appropriate for use with Dante:  Gigabit ports for inter-switch connections  Quality of Service (QoS) with four queues  Diserv (DSCP) QoS, with strict priority  A managed switch is also recommended, to provide detailed information about the operation of each network link: port speed, error counters, bandwidth used, etc. Can I use switches with EEE (Energy Ecient Ethernet or Green Ethernet) in my Dante network? Short answer: No. Long answer: EEE (Energy Ecient Ethernet) is a technology that reduces switch power consumption during periods of low network trac. It is also sometimes known as Green Ethernet and IEEE802.3az.Although power management should be negotiated automatically in switches that support EEE, it is a relatively new technology, and some switches do not perform the negotiation properly. This may cause EEE to be enabled in Dante networks when it is not appropriate, resulting in poor synchronization performance and occasional dropouts. Therefore we strongly recommend that: 1. If you use managed switches, ensure that they allow EEE to be disabled. Make sure that EEE is disabled on all ports used for real-time Dante trac. 2. If you use unmanaged switches, do not use Ethernet switches that support the EEE function because you cannot disable EEE operation in these switches. What is Quality of Service (QoS)? Quality of Service (QoS) is a feature of managed switches, which ensures that certain types of network packets (e.g. clock sync and audio packets) get preferential treatment and are “moved to the front of the line” ahead of other trac. This is achieved by attaching a priority number to each packet, which is then used by the switches to ensure that high priority packets get processed before lower priority packets. 20 Frequently Asked Questions SL-Dante-SPK User Guide When do I need to use QoS in a Dante network? QoS is required when using Dante in networks that have 100 Mbps devices and is optional in networks with gigabit devices. We recommend that QoS be enabled in all Dante networks in order to ensure proper operation under all possible conditions. How does Dante manage QoS? Dante uses standard Voice over IP (VoIP) Quality of Service (QoS) switch features to prioritize clock sync and audio trac over other network trac. QoS is available in many inexpensive and enterprise Ethernet switches. Any switch that supports Diserv (DSCP) QoS with strict priority and four queues and has gigabit ports for inter-switch connections should be appropriate for use with Dante. How does Dante use DSCP / Diserv priority values when conguring QoS? Switches prioritize packets using what are called DSCP/Diserv values. Although Dante packet priority values have been chosen to make it simple to congure QoS with many switches, some switches require special conguration to recognize and prioritize specic DSCP values. The table below shows how Dante uses various Diserv Code Points (DSCP) packet priority values: Priority Usage DSCP Label Hex Decimal Binary High Time critical PTP events CS7 0x38 56 111000 Medium Audio, PTP EF 0x2E 46 101110 Low (reserved) CS1 0x08 8 001000 None Other trac BestEort 0x00 0 000000 © 2014 PreSonus Audio Electronics, Inc. All Rights Reserved. AudioBox, CoActual, DigiMax, Eris, FireStudio, Nimbit, PreSonus, QMix, Ri to Release, Sceptre, StudioLive, and XMAX are trademarks or registered trademarks of PreSonus Audio Electronics, Inc. Capture, Impact, Mixverb Presence, RedLightDist, SampleOne, Studio One, and Tricomp are trademarks or registered trademarks of PreSonus Software Ltd. Mac and Mac OS are registered trademarks of Apple, Inc., in the U.S. and other countries. Windows is a registered trademark of Microsoft, Inc., in the U.S. and other countries. Temporal EQ and TQ are trademarks of Fulcrum Acoustic. Other product names mentioned herein may be trademarks of their respective companies. All specications subject to change without notice...except the recipe, which is a classic. Part# 820-NRG0044-A 18011 Grand Bay Ct.  Baton Rouge, Louisiana 70809 USA 1-225-216-7887 www.presonus.com ® SL-Dante-SPK User Guide SL-Dante-SPK User Guide SL-Dante-SPK User Guide English Français Español Deutsch www.presonus.com ®