PDF-Integrated Sensor Suite with FanAspirated Radiation Sh
Author : tatiana-dople | Published Date : 2015-05-01
FanAspirated ISS Addendum Overview This addendum provides additional information specific to the installatio n and use of ISS models containing the fanaspirated
Presentation Embed Code
Download Presentation
Download Presentation The PPT/PDF document "Integrated Sensor Suite with FanAspirate..." is the property of its rightful owner. Permission is granted to download and print the materials on this website for personal, non-commercial use only, and to display it on your personal computer provided you do not modify the materials and that you retain all copyright notices contained in the materials. By downloading content from our website, you accept the terms of this agreement.
Integrated Sensor Suite with FanAspirated Radiation Sh: Transcript
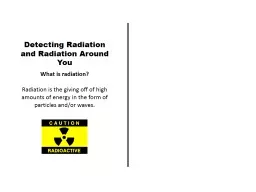
FanAspirated ISS Addendum Overview This addendum provides additional information specific to the installatio n and use of ISS models containing the fanaspirated radiation shield It is intended to be used in conjunction with the Inte grated Sensor Su. 6 in 20 in User Manual SPMU290 April 2013 BOOSTXLSENSHUB Sensor Hub BoosterPack The Sensor Hub Booster Pack BOOSTXLSENSHUB is lowcost extension board for the Tiva Series TM4C LaunchPad EKTM4C123GXL evaluation platform for ARM Cortex M4Fbased microcon Tracy Whitman. Objectives. Describe CALM Suite. Describe Hardware. List, Describe, and Evaluate software. Describe and review the information system. Describe advantages and disadvantages. Examine related ethical/legal issues. Yves Brennwald / Stephan Elster. Juni. , 2013. What does it mean for you?. SAP HANA Appliance – New Focus. Network. Storage. Operating. System. Database. Applications (SAP). Traditional approach: strong separation of concerns. PRESENTED BY:. SAURAV SINGH. OVERVIEW. INTRODUCTION. WINS SYSTEM ARCHITECTURE. WINS NODE ARCHITECTURE. WINS MICRO SENSORS. DISTRIBUTED SENSOR AT BORDER. WINS DIGITAL SIGNAL PROCESSING. CHARACTERSTIC & APPLICATION. Face-to-Face . Courses. Rose . McCleary. Leigh Collins . Sam Jenkins. California State University Bakersfield. Learning Objectives. Compare an integrated learning model with concurrent face-to-face courses. By . Carl Tenenbaum. David Haynes. Philip Pham . Rachel Wakim. History of Driver Safety. 1930s- Seat Belt first introduced. 1949- Safety Cage and Padded Dashboard. 1966- National Transportation Safety Board. transmitted. absorbed. reflected. 1. transmission. Radiation passes through atmosphere unimpeded.. Shortwave and longwave “windows” . 2. absorption. Energy is transferred to absorber; absorber emits energy. Harding . University Flying Bison 2010 USLI Team. Team Official. Project Progress Manager. Safety Officer. Edmond Wilson. Cortney, Mgr.. Edmond Wilson. Airframe. Motor. Science Payload. Avionics. Launch Operations. 2. RADSAGA Training Workshop – March 2018. Presented by Arijit Karmakar. Doctoral Student. KU Leuven, ADVISE Group. 3. RADSAGA Training Workshop – March 2018. Project Deliverable & Milestones Lists:. What is radiation?. Radiation is the giving off of high amounts of energy in the form of particles and/or waves.. The Electroscope. The Geiger Counter. Disposal of Radioactive Wastes. Radiation in Household Products. hd/4/13 WHG-PC.com Cervical Incompetence Cervical incompetence is defined as a condition where the longwave is calculated by combining the output of two longwave sensors. Net shortwave is calculated separately by combining the output of two shortwave sensors. This model includes two shortwave and R Fig. 1. System diagram of the sensor instrumentation SoC brought to you by CORE View metadata, citation and similar papers at core.ac.uk provided by Lirias � Jens Verbeeck, et al., A MGy R •. Radiation biology . is the study of the action of ionizing radiation on living organisms . •The action is very complex, involving physics, chemistry, and biology . –Different types of ionizing radiation .
Download Document
Here is the link to download the presentation.
"Integrated Sensor Suite with FanAspirated Radiation Sh"The content belongs to its owner. You may download and print it for personal use, without modification, and keep all copyright notices. By downloading, you agree to these terms.
Related Documents