Chapter 38 Instrument Care and Sharpening Learning Objectives Describe benefits of using sharp instruments Describe consequences of using dull instruments Demonstrate technique for sharpening procedures Explain how to preserve optimal
"Chapter 38 Instrument Care and Sharpening Learning" is the property of its rightful owner. Permission is granted to
download and print the materials on this website for personal, non-commercial use only, and to display it
on your personal computer provided you do not modify the materials and that you retain all copyright
notices contained in the materials. By downloading content from our website, you accept the terms of this
agreement.
Presentation Transcript
01
Chapter 38 Instrument Care and Sharpening<br>
02
Learning Objectives Describe benefits of using sharp instruments
Describe consequences of using dull instruments
Demonstrate technique for sharpening procedures
Explain how to preserve optimal instrument design when sharpening 2<br>
03
Instrument Sharpening Benefits from Use of Sharp Manual Instruments
Consequences of Using Dull Manual Instruments 3<br>
04
Instrument Sharpening con’t Dynamics of Sharpening
Cutting Edge
Sharpening Stone Surface
Types of Sharpening Devices
Stones
Power-Driven or Mechanical Sharpening Devices 4<br>
05
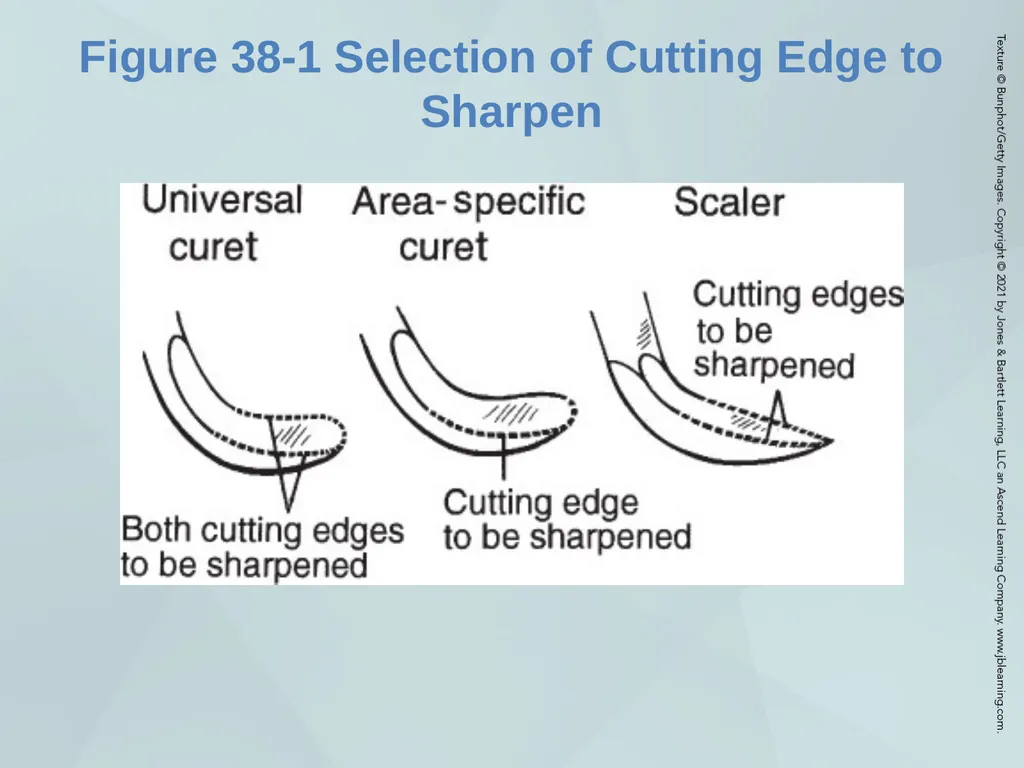
Figure 38-1 Selection of Cutting Edge to Sharpen 5<br>
06
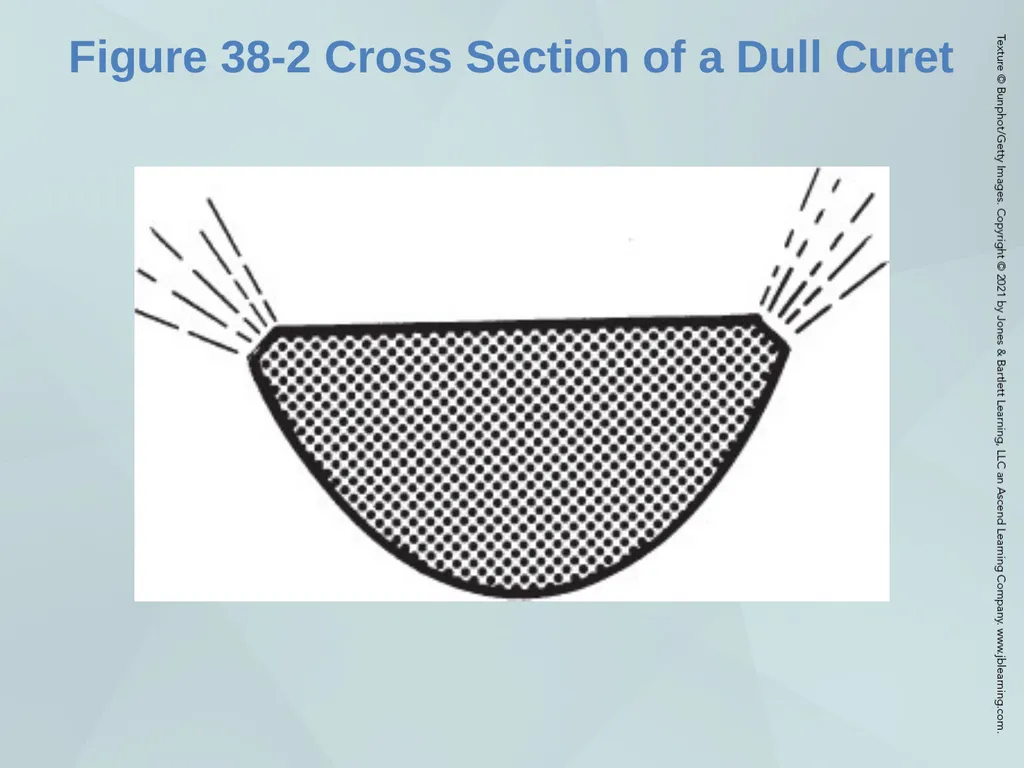
Figure 38-2 Cross Section of a Dull Curet 6<br>
07
Basic Sharpening Principles Sterilization of the Sharpening Stone
Instrument Handling
Preparation of Stone for Sharpening
Dry Stone
Water on Stone
Lubricated Stone 7<br>
08
Basic Sharpening Principles con’t Sharpening Overview
Objectives
When to Sharpen
Angulation
Maintain Control
Care of Sharpening Stone 8<br>
09
Basic Sharpening Principles con’t Tests for Instrument Sharpness
Visual or Glare Test
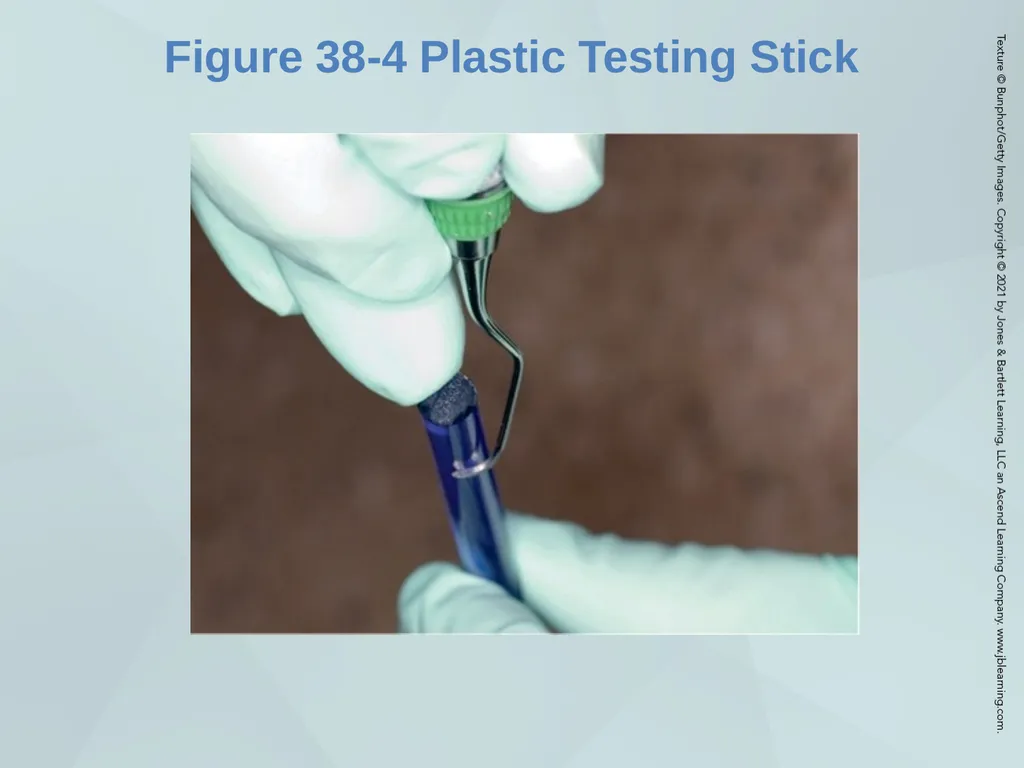
Plastic Testing Stick
Confirming Sharpness Using the Plastic Testing Stick
Evaluation of Technique 9<br>
10
Figure 38-4 Plastic Testing Stick 10<br>
11
Basic Sharpening Principles con’t After Sharpening
Finishing the Instrument
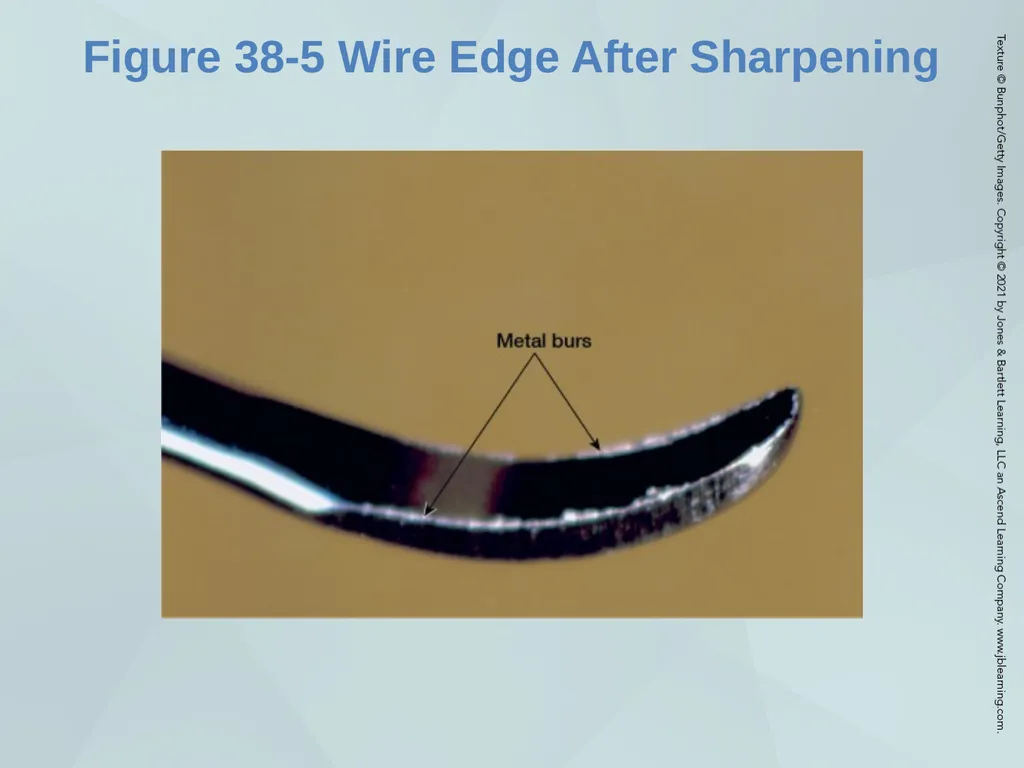
How the Wire Edge is Produced
Removal of Wire Edge
Instrument Wear 11<br>
12
Figure 38-5 Wire Edge After Sharpening 12<br>
13
Sharpening Curets and Scalers Technique Objectives
Selection of Cutting Edges to Sharpen
Scalers/Sickles
Curets: Universal
Curets: Area Specific 13<br>
14
Moving Flat Stone: Stationary Instrument Examine the Cutting Edge to Be Sharpened
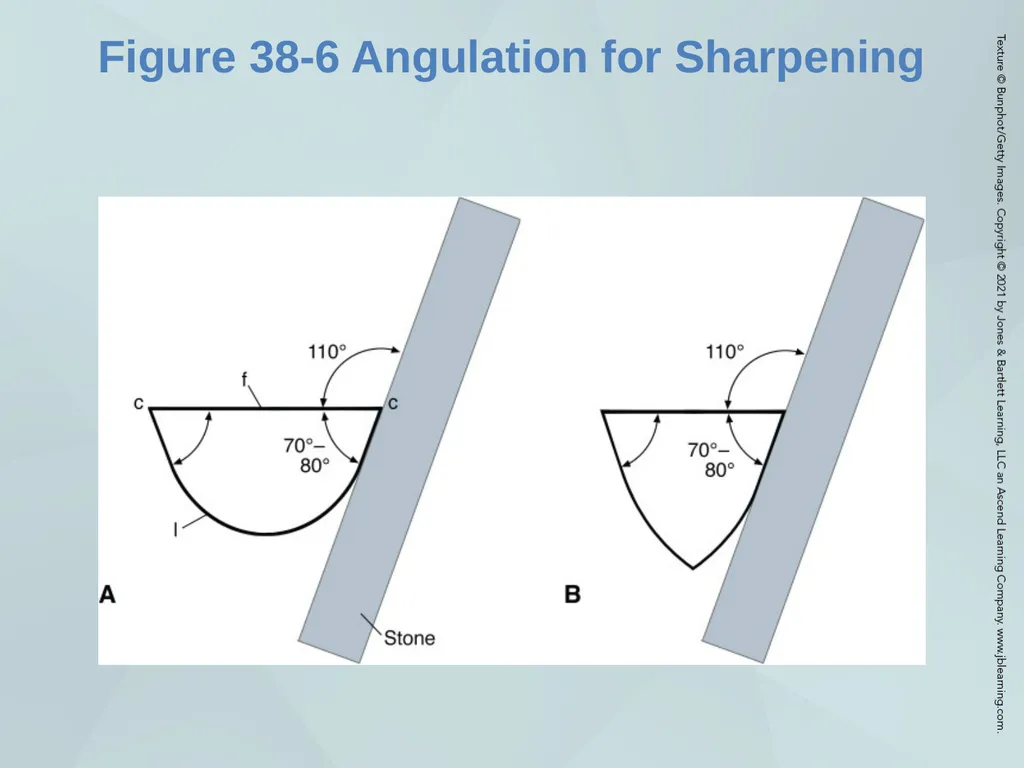
Review the Angulation to Be Restored at the Dull Cutting Edge
Stabilize and Position the Instrument 14<br>
15
Figure 38-6 Angulation for Sharpening 15<br>
16
Moving Flat Stone: Stationary Instrument con’t Apply the Sharpening Stone
Activate the Sharpening Stone
Steps One and Two
Step Three: The Toe of a Curet
Test for Sharpness 16<br>
17
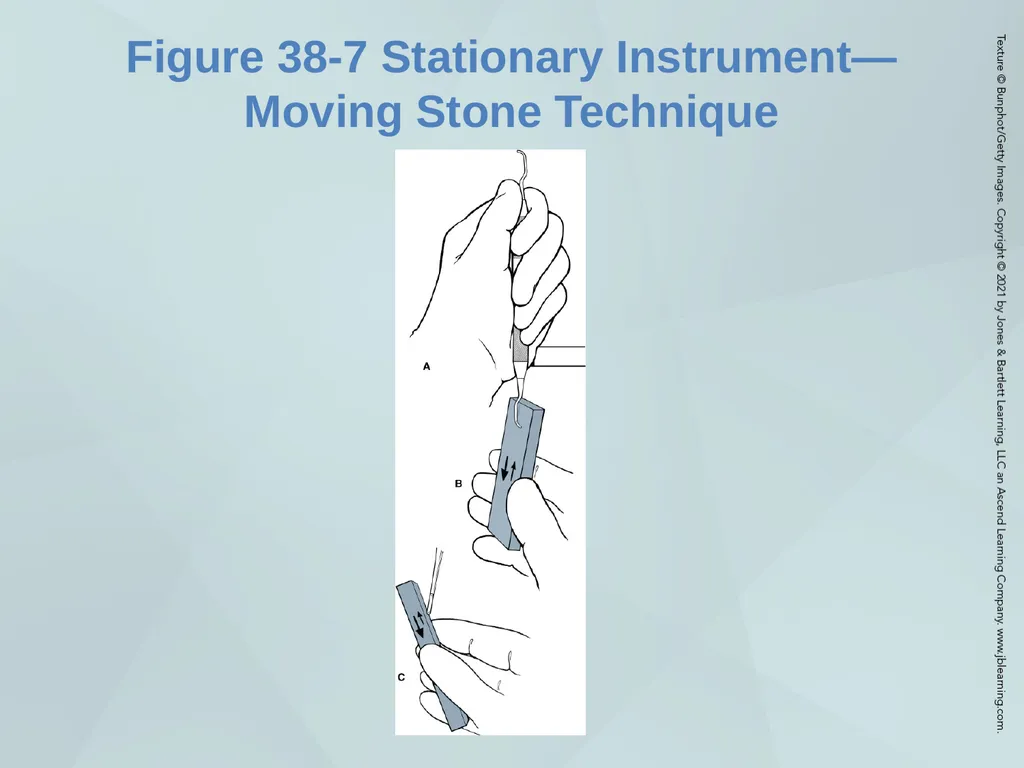
Figure 38-7 Stationary Instrument—Moving Stone Technique 17<br>
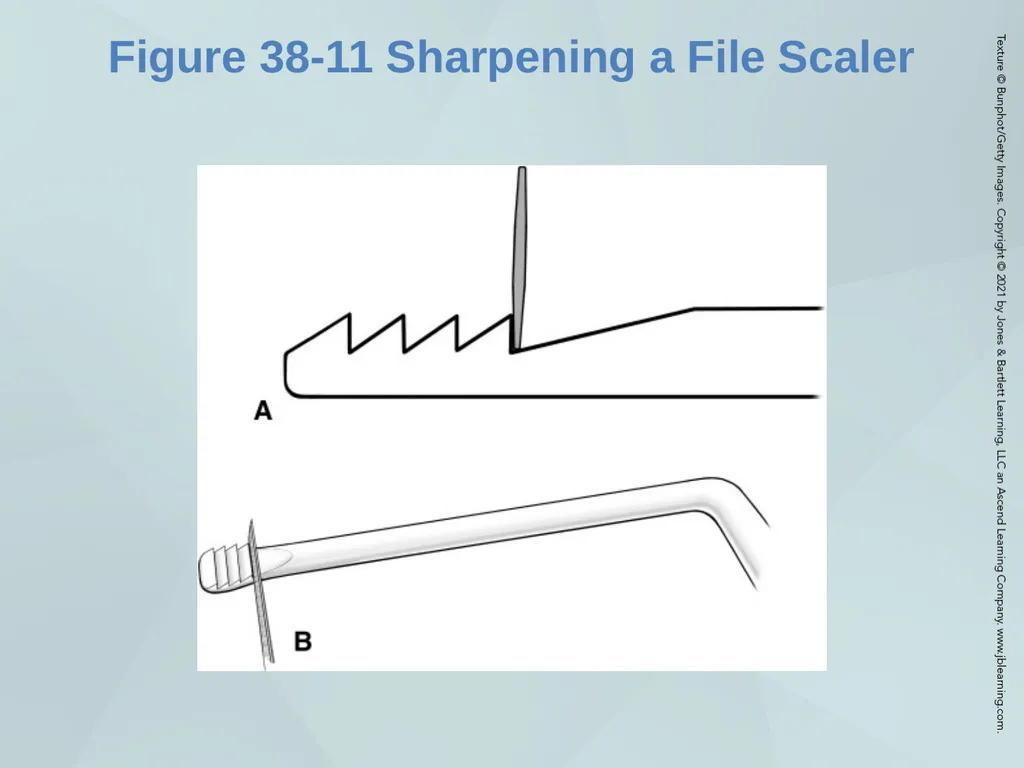
Sharpening the File Scaler Surface to Be Ground
Sharpening Procedure 19<br>
20
Figure 38-11 Sharpening a File Scaler 20<br>
21
Care of Sharpening Equipment Flat Sharpening Stone
Prepare for Sterilization
Stain Removal
Storage
Care of the Tanged File
Manufacturer’s Directions 21<br>
22
Documentation Note burnished calculus 22<br>
23
Factors to Teach the Patient Benefits of using finely sharpened instrument for calculus removal
Harmful effects of using dull instruments 23<br>