"Chapter 6 Patient Hookup Procedures Chapter" is the property of its rightful owner. Permission is granted to
download and print the materials on this website for personal, non-commercial use only, and to display it
on your personal computer provided you do not modify the materials and that you retain all copyright
notices contained in the materials. By downloading content from our website, you accept the terms of this
agreement.
Presentation Transcript
01
Chapter 6
Patient Hookup Procedures<br>
02
Chapter Outline International 10/20 System
Electrode Placement for Sleep Studies
Electrode Application
Impedance Checks
Helpful Strategies for Sleep Technologists<br>
03
Learning Objectives Understand the importance of the international 10/20 system.
Learn the EEG measurements for sleep studies and full EEG montages.
Learn the electrode sites for the face and body.
Learn how to properly apply electrodes for optimal recording.<br>
04
International 10/20 System The international 10/20 system is a standardized and universally recognized system to locate electroencephalogram (EEG) electrode location sites.
Named for using 10% and 20% of the lateral and frontal head measurements to find locations for: F3, F4, C3, C4, O1, O2
M1 and M2 are used as reference electrodes.
Cz, Fz, and/or Fpz may be used as grounds or main reference sites.<br>
05
Electrode Placement for Sleep Studies Electrooculogram (EOG) records eye movements
E1 – left eye lead
Placed 1 cm out from the outer canthus of the left eye and 1 cm down
E2 – right eye lead
Placed 1 cm out from the outer canthus of the right eye and 1 cm up
* Requires skin prep<br>
06
Electrode Placement for Sleep Studies Figure 6-19 EOG placement.<br>
07
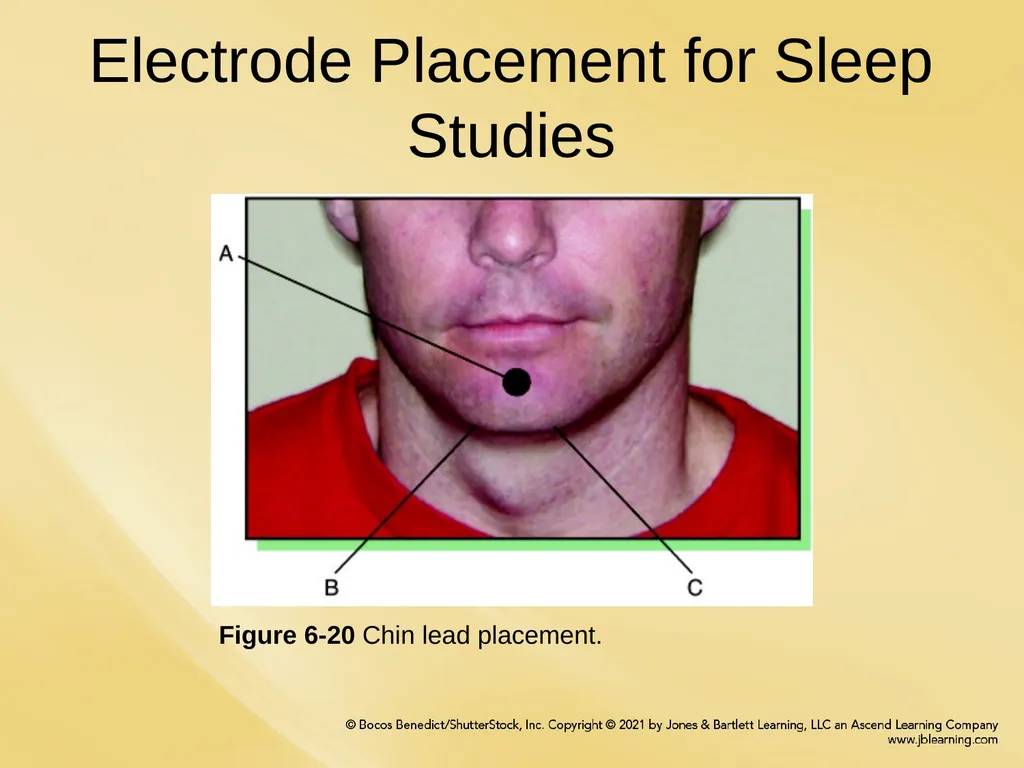
Electrode Placement for Sleep Studies Electromyogram (EMG) records muscle (myo) activity
Three leads are placed on the chin (two are active and referenced to each other; the third acts as a backup)
EMG 1 is placed in the middle of the chin, 1 cm above the inferior edge of the mandible
EMG 2 and 3 are placed 2 cm below the inferior edge of the mandible
EMG 2 should be placed 2 cm to the left of the midline
EMG 3 should be placed 2 cm to the right of the midline
* Requires skin prep<br>
08
Electrode Placement for Sleep Studies Figure 6-20 Chin lead placement.<br>
09
Electrode Placement for Sleep Studies Airflow sensors placed directly in front of the nose and mouth to detect nasal and oral airflow
Thermal device
Pressure transducer<br>
10
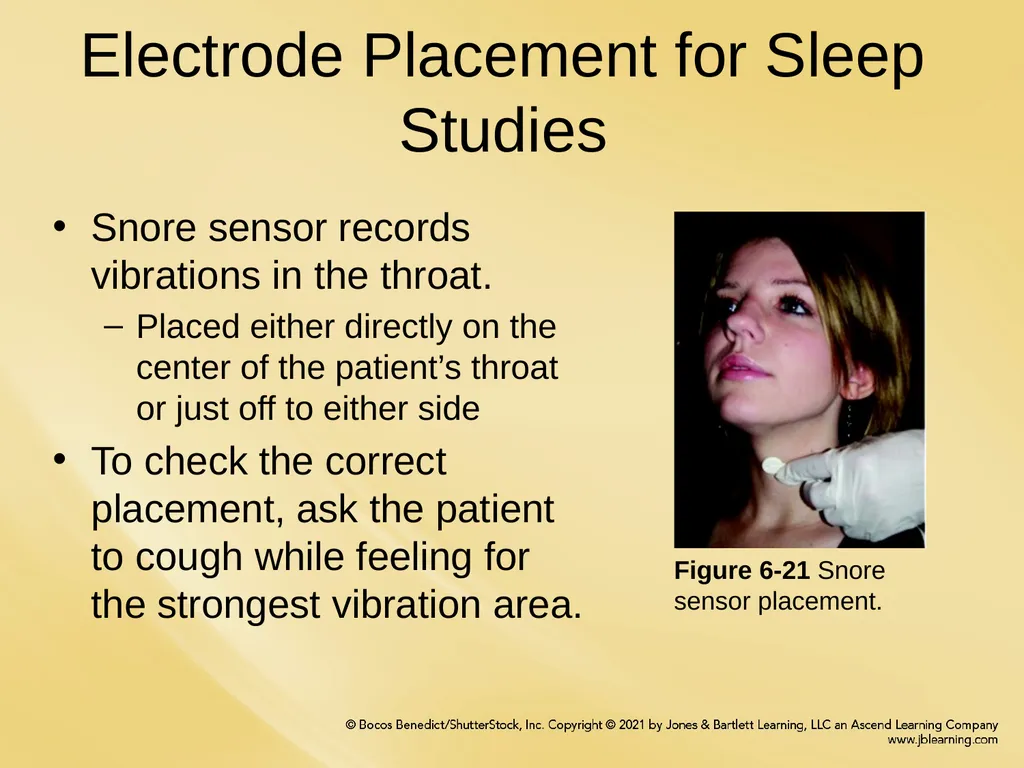
Electrode Placement for Sleep Studies Snore sensor records vibrations in the throat.
Placed either directly on the center of the patient’s throat or just off to either side
To check the correct placement, ask the patient to cough while feeling for the strongest vibration area. Figure 6-21 Snore sensor placement.<br>
11
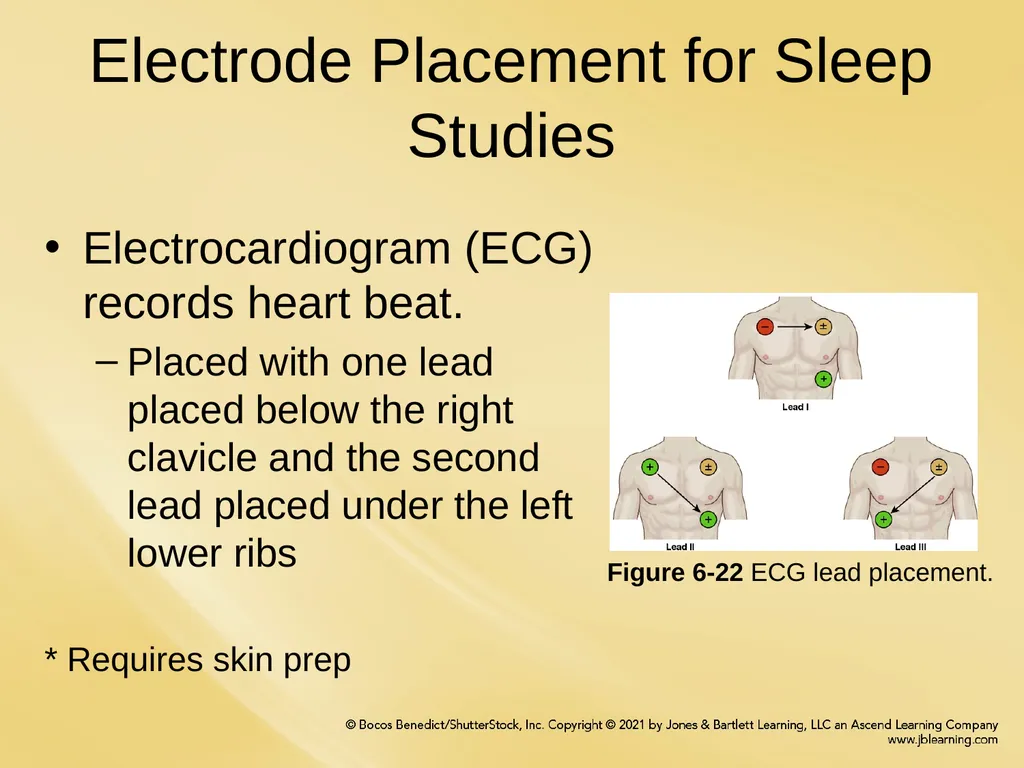
Electrocardiogram (ECG) records heart beat.
Placed with one lead placed below the right clavicle and the second lead placed under the left lower ribs
* Requires skin prep Electrode Placement for Sleep Studies Figure 6-22 ECG lead placement.<br>
12
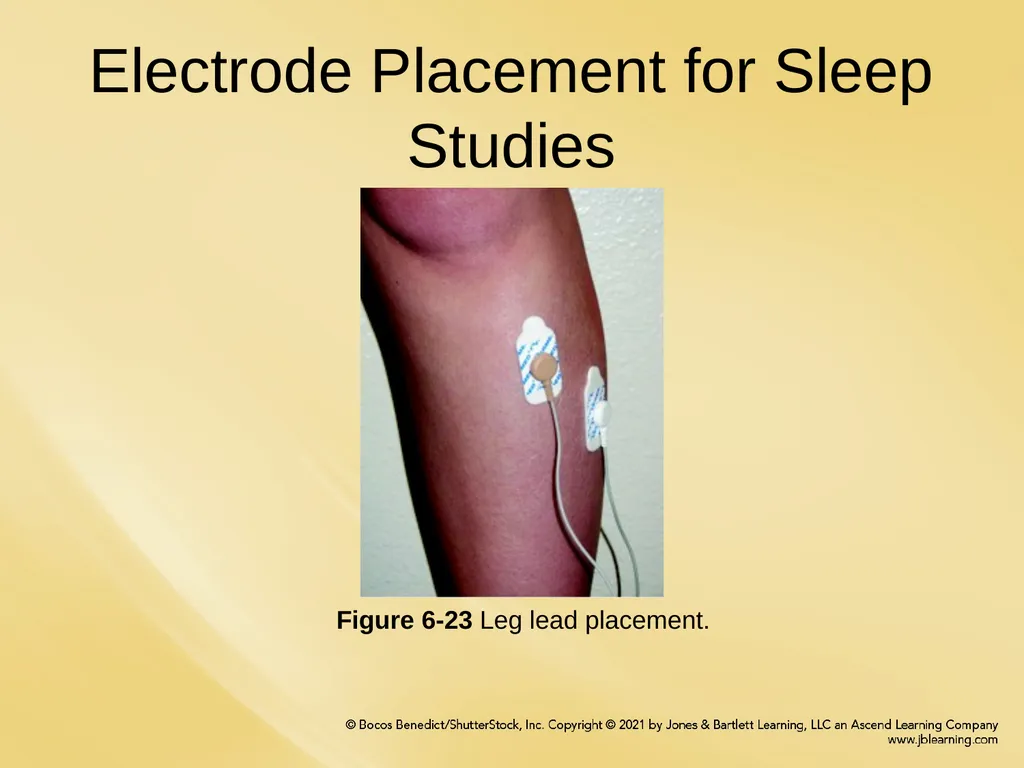
Electrode Placement for Sleep Studies Leg EMG records muscle movements from the anterior tibialis muscle
RAT (right anterior tibialis)
LAT (left anterior tibialis)
Two electrodes placed on each leg at least 2 cm apart
Verify placement on the anterior tibialis muscle by asking the patient to point and flex their feet while feeling for muscle movement.
* Requires skin prep<br>
13
Electrode Placement for Sleep Studies Figure 6-23 Leg lead placement.<br>
14
Respiratory effort belts
Record the rise and fall of the chest and abdomen (respiratory effort)
Thorax – placed under the armpits
Abdomen – placed below the ribs Electrode Placement for Sleep Studies Figure 6-24 Respiratory belt placement.<br>
15
Oximeter records the amount of oxygen saturation in the blood.
The reading can be inhibited by fingernail polish.
Can be placed on any finger except thumb.
For alternate placements the probe can be placed on a toe or ear lobe. Electrode Placement for Sleep Studies<br>
16
Electrode Application *Skin preparation is critical for good quality signals.
All EEG/EOG/EMG sites need to be prepped with alcohol and/or skin prep solution to remove debris from surface of the skin.
Cup (disc) electrodes are filled with conductive paste and adhered to skin with:
EEG cream and gauze (scalp, surfaces with hair)
Tape (hairless surfaces)
Snap lead electrodes can be also be used on hairless surfaces.<br>
17
Impedance Checks Impedance is a measure of electrical resistance.
Impedance checks should be performed at the beginning and end of the study.
Impedance values must be below 5,000 ohms.
Electrodes with impedances higher than 5,000 ohms should be removed, the site cleaned, and the electrode reapplied or replaced.
Additional impedance checks may be performed as needed or according to lab protocol.<br>
18
Helpful Strategies Prepare before the patient arrives. Reviewing the physician order and laying out the equipment will help the hookup process.
Create an organized system and stick to it. For example, start at the head and work down.
Take time to prep the skin surface. This will improve adherence to skin surface, produce better quality signals, and reduce the likelihood of having to disrupt the patient during the night to fix electrodes.
Stay organized. To avoid tangles and make electrode access easier, gather and tie wires back and away.<br>