04
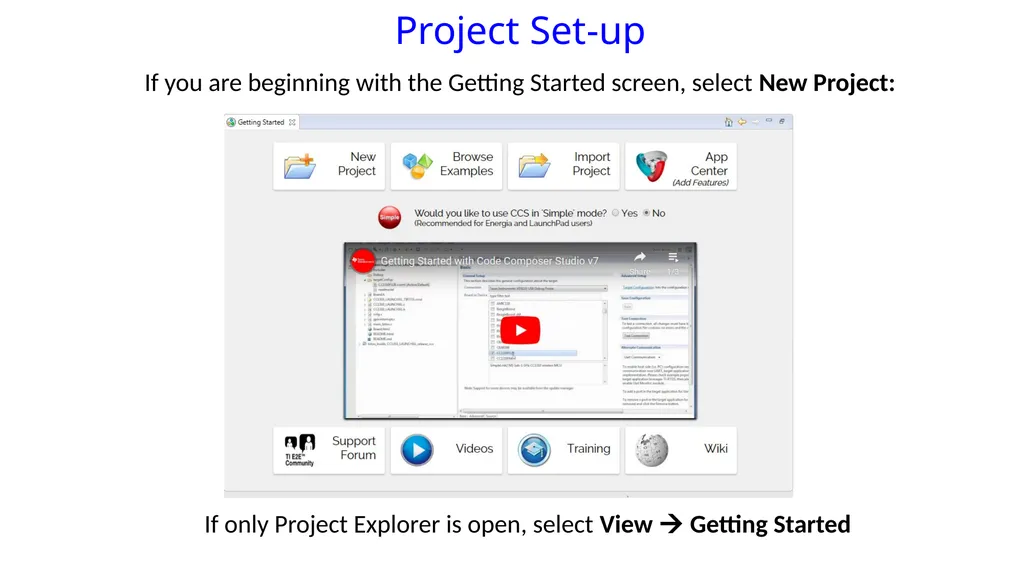
Project Set-up If you are beginning with the Getting Started screen, select New Project: If only Project Explorer is open, select View Getting Started<br>
05
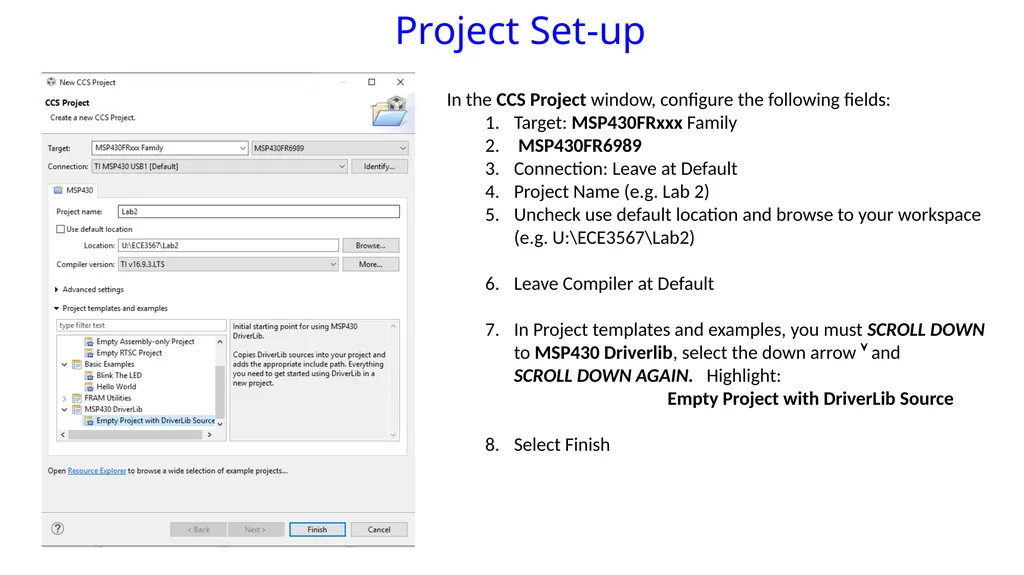
Project Set-up In the CCS Project window, configure the following fields:
Target: MSP430FRxxx Family
MSP430FR6989
Connection: Leave at Default
Project Name (e.g. Lab 2)
Uncheck use default location and browse to your workspace�(e.g. U:\ECE3567\Lab2)�
Leave Compiler at Default�
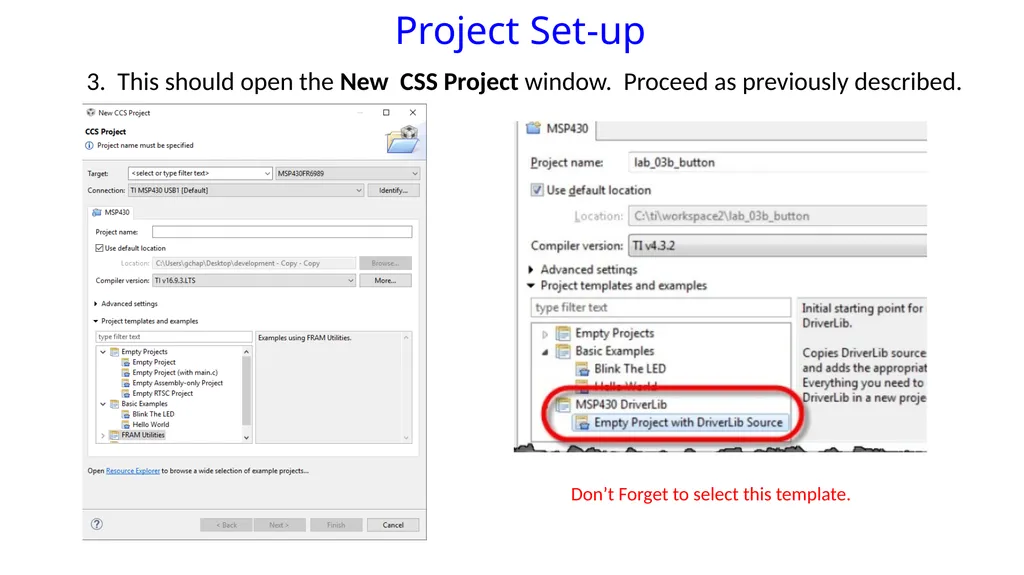
In Project templates and examples, you must SCROLL DOWN�to MSP430 Driverlib, select the down arrow and �SCROLL DOWN AGAIN. Highlight:� Empty Project with DriverLib Source�
Select Finish<br>
06
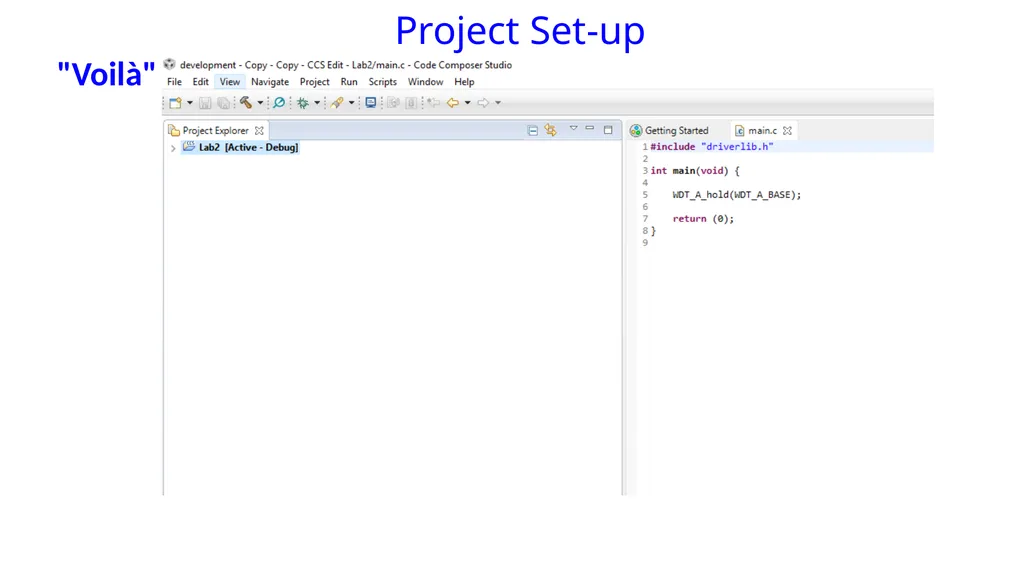
Project Set-up "Voilà"<br>
07
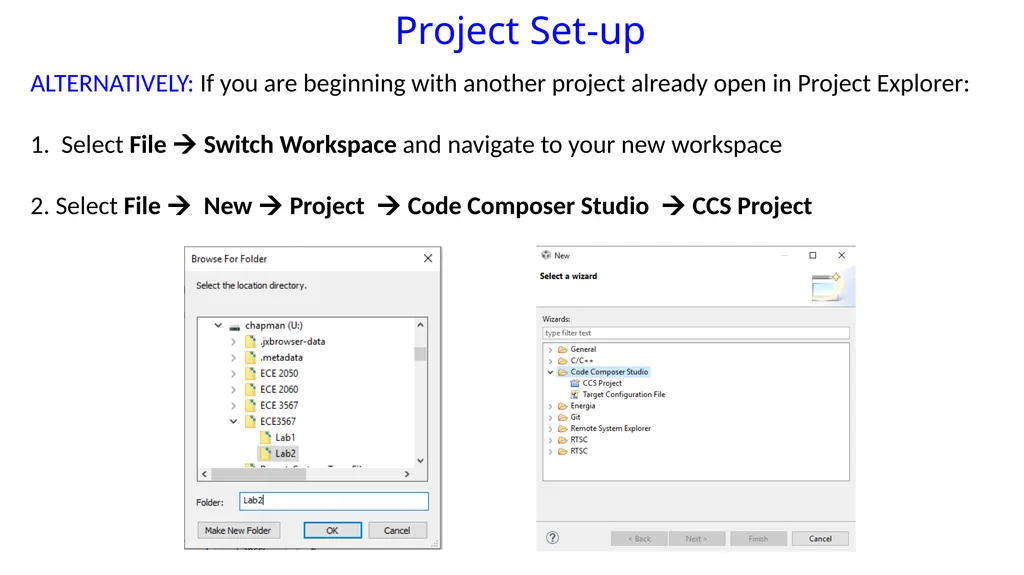
Project Set-up ALTERNATIVELY: If you are beginning with another project already open in Project Explorer:�
1. Select File Switch Workspace and navigate to your new workspace�
2. Select File New Project Code Composer Studio CCS Project<br>
08
Project Set-up 3. This should open the New CSS Project window. Proceed as previously described. Don’t Forget to select this template.<br>
09
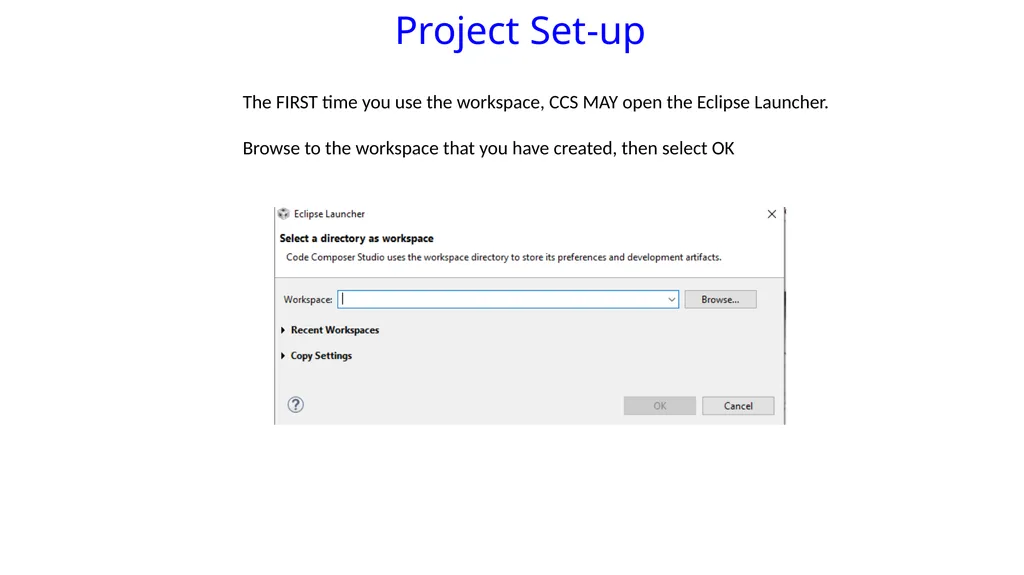
Project Set-up The FIRST time you use the workspace, CCS MAY open the Eclipse Launcher.��Browse to the workspace that you have created, then select OK<br>
10
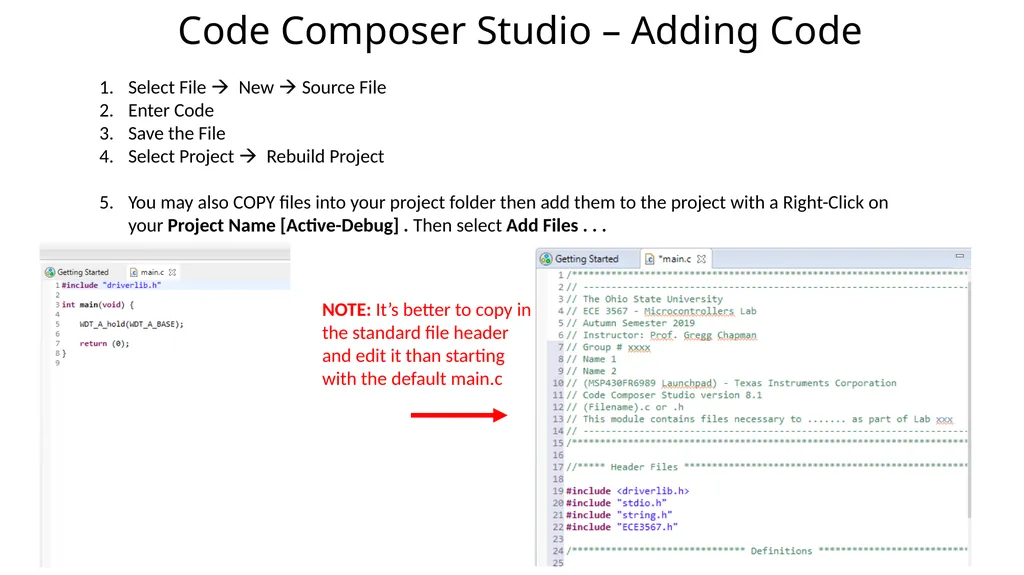
Code Composer Studio – Adding Code Select File New Source File
Enter Code
Save the File
Select Project Rebuild Project�
You may also COPY files into your project folder then add them to the project with a Right-Click on your Project Name [Active-Debug] . Then select Add Files . . . NOTE: It’s better to copy in the standard file header and edit it than starting with the default main.c<br>
11
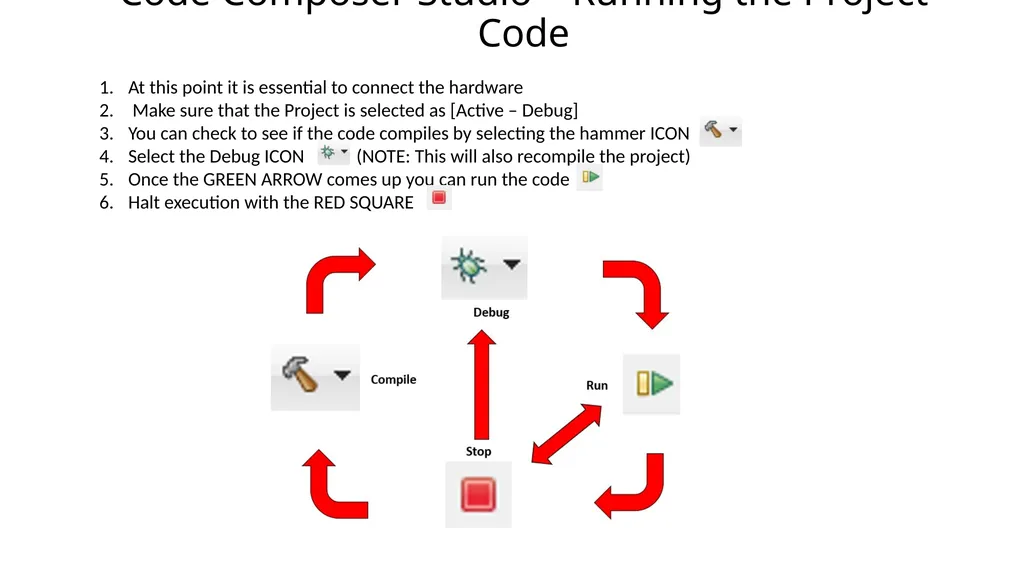
Code Composer Studio – Running the Project Code<br>
12
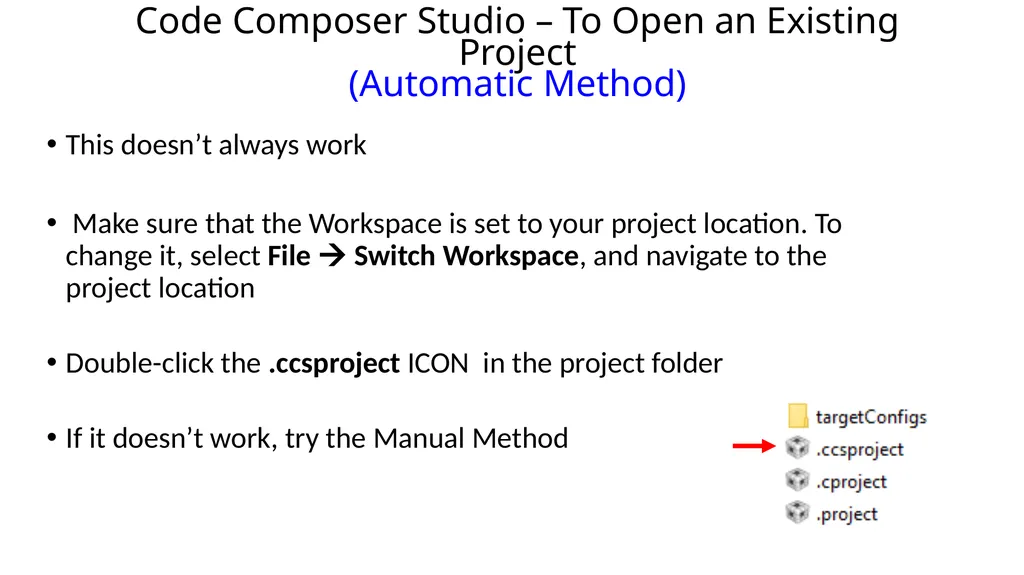
Code Composer Studio – To Open an Existing Project�(Automatic Method) This doesn’t always work�
Make sure that the Workspace is set to your project location. To change it, select File Switch Workspace, and navigate to the project location�
Double-click the .ccsproject ICON in the project folder�
If it doesn’t work, try the Manual Method<br>
13
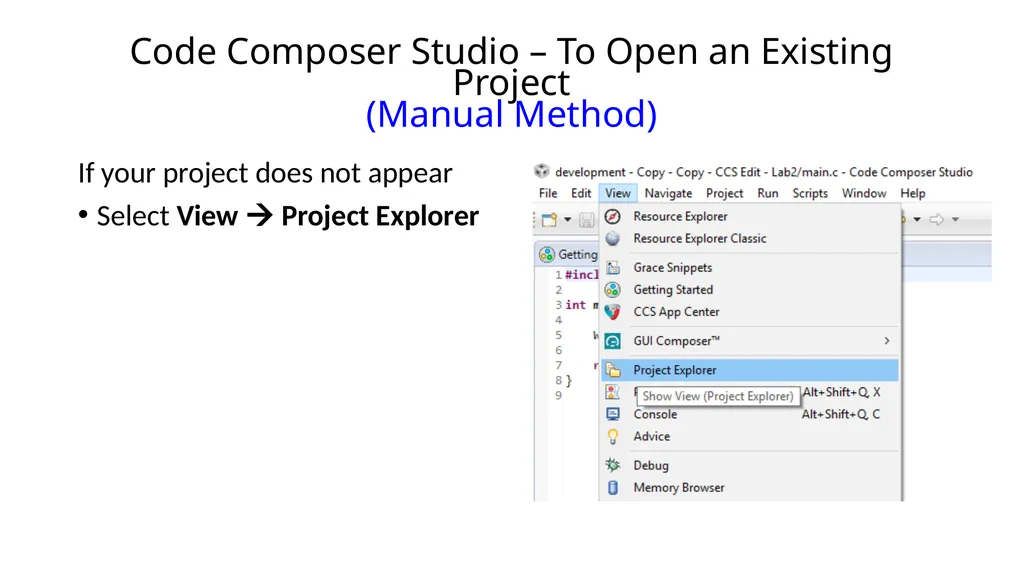
Code Composer Studio – To Open an Existing Project�(Manual Method) If your project does not appear
Select View Project Explorer<br>
14
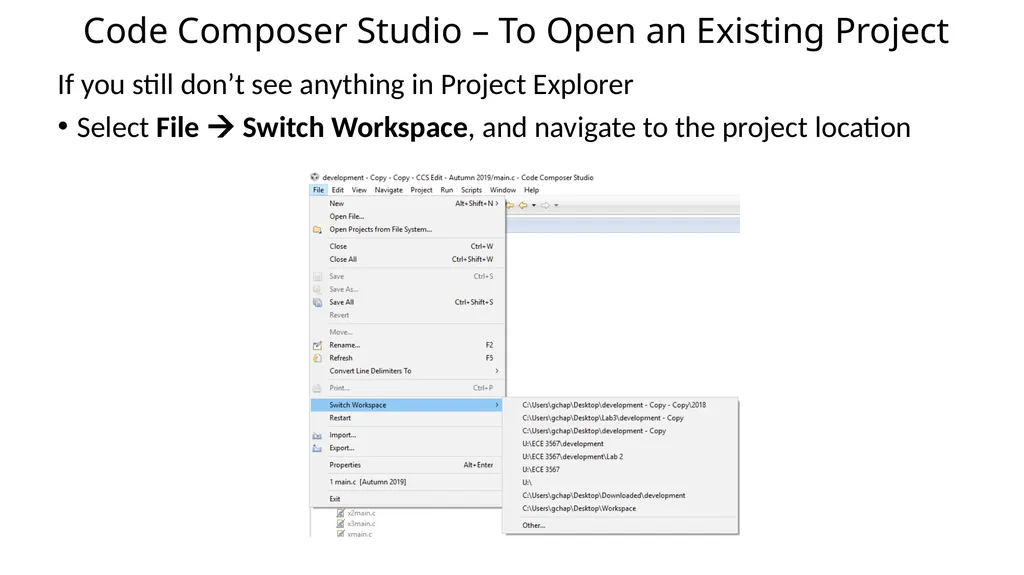
Code Composer Studio – To Open an Existing Project If you still don’t see anything in Project Explorer
Select File Switch Workspace, and navigate to the project location<br>
15
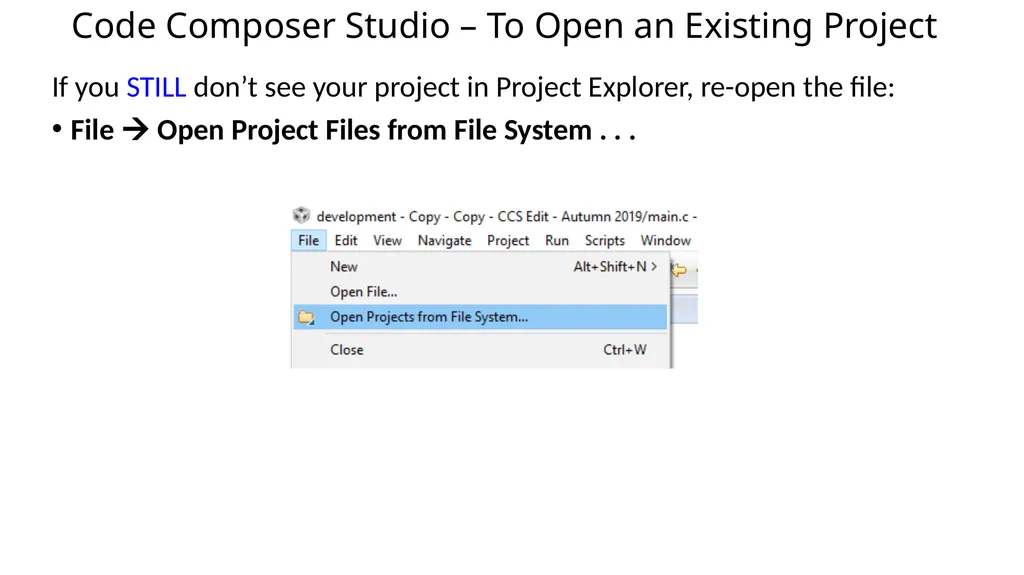
Code Composer Studio – To Open an Existing Project If you STILL don’t see your project in Project Explorer, re-open the file:
File Open Project Files from File System . . .<br>
16
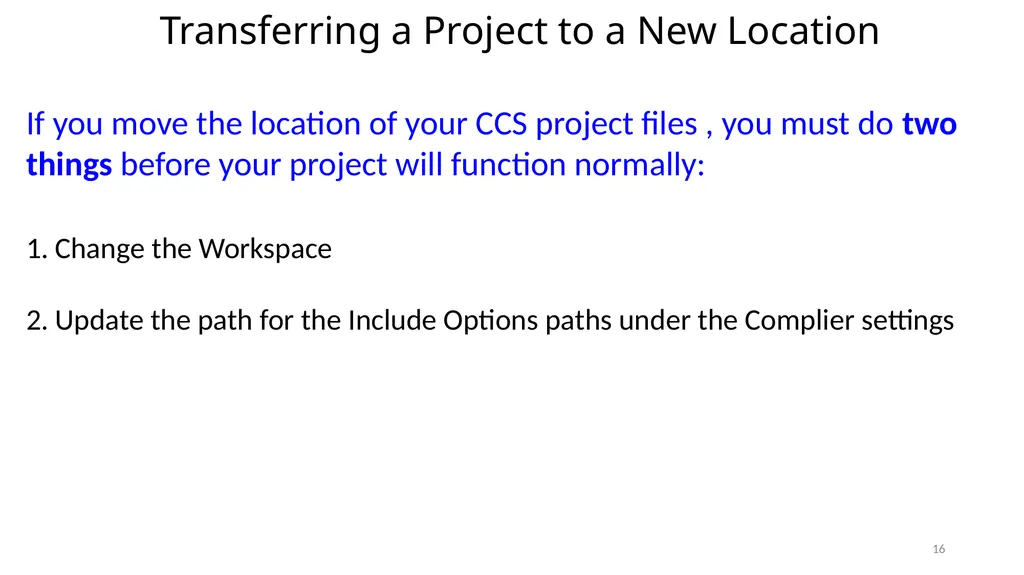
Transferring a Project to a New Location If you move the location of your CCS project files , you must do two things before your project will function normally:��
Change the Workspace�
Update the path for the Include Options paths under the Complier settings 16<br>
17
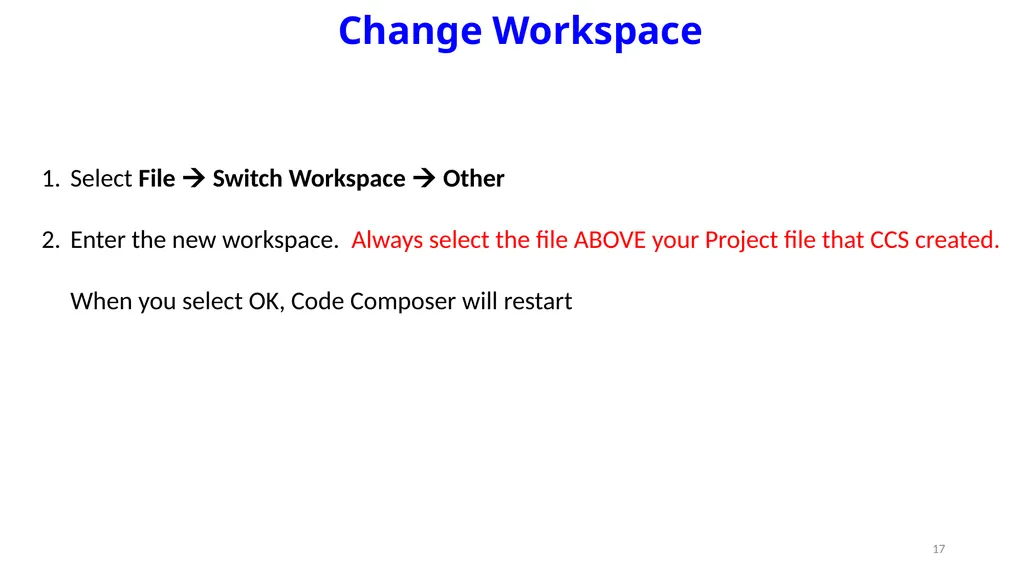
Change Workspace Select File Switch Workspace Other
Enter the new workspace. Always select the file ABOVE your Project file that CCS created.��When you select OK, Code Composer will restart 17<br>
18
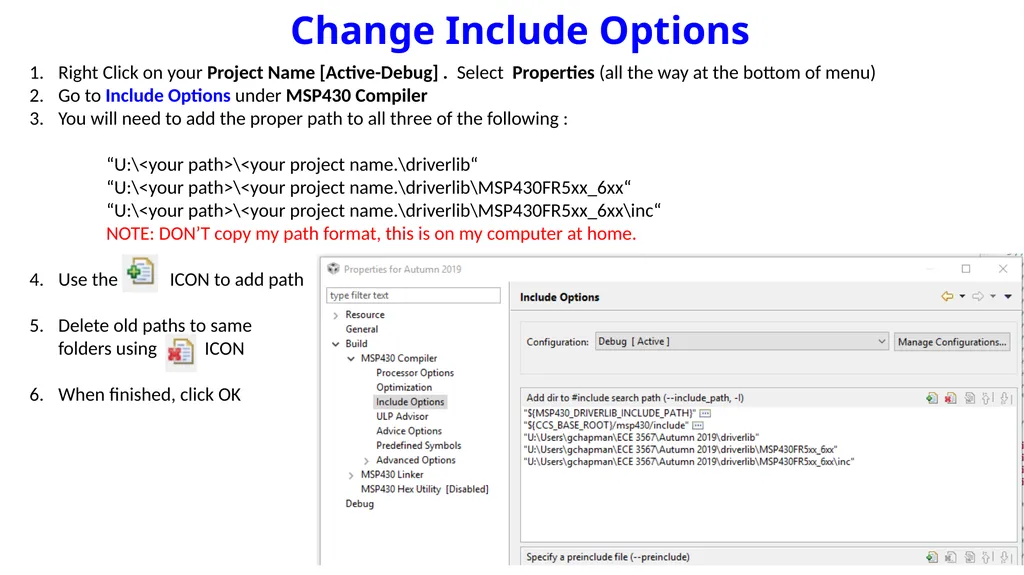
Change Include Options 18<br>
19
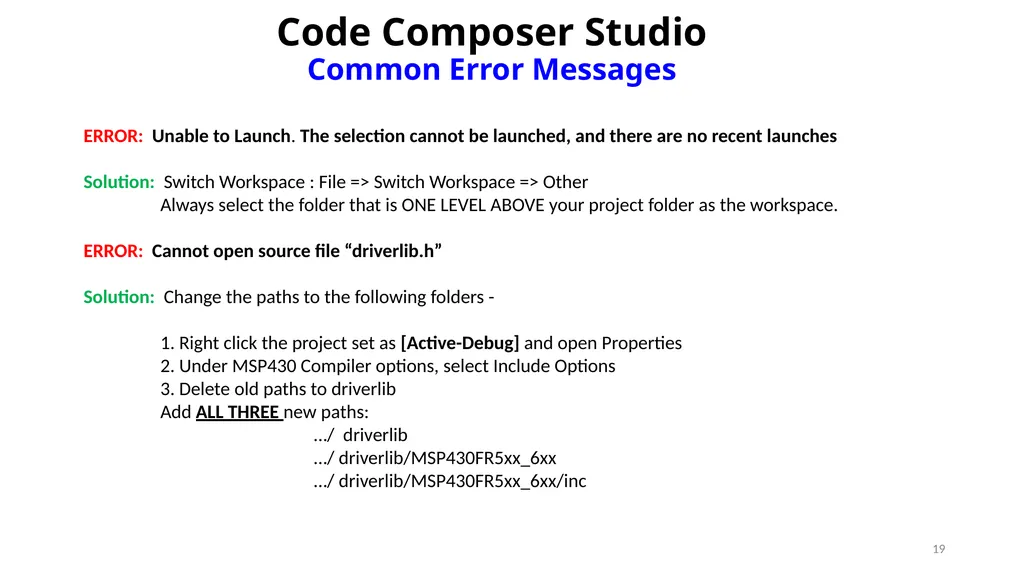
Code Composer Studio�Common Error Messages ERROR: Unable to Launch. The selection cannot be launched, and there are no recent launches��Solution: Switch Workspace : File => Switch Workspace => Other
Always select the folder that is ONE LEVEL ABOVE your project folder as the workspace.
ERROR: Cannot open source file “driverlib.h”��Solution: Change the paths to the following folders -
1. Right click the project set as [Active-Debug] and open Properties
2. Under MSP430 Compiler options, select Include Options
3. Delete old paths to driverlib
Add ALL THREE new paths:� …/ driverlib
…/ driverlib/MSP430FR5xx_6xx
…/ driverlib/MSP430FR5xx_6xx/inc 19<br>
20
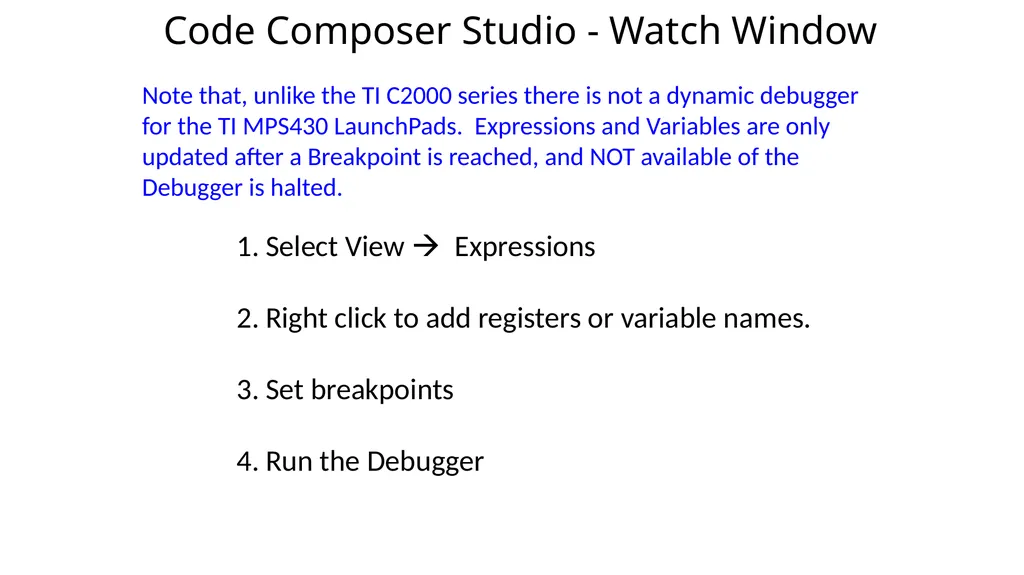
Code Composer Studio - Watch Window Select View Expressions�
Right click to add registers or variable names.�
Set breakpoints�
Run the Debugger Note that, unlike the TI C2000 series there is not a dynamic debugger for the TI MPS430 LaunchPads. Expressions and Variables are only updated after a Breakpoint is reached, and NOT available of the Debugger is halted.<br>
21
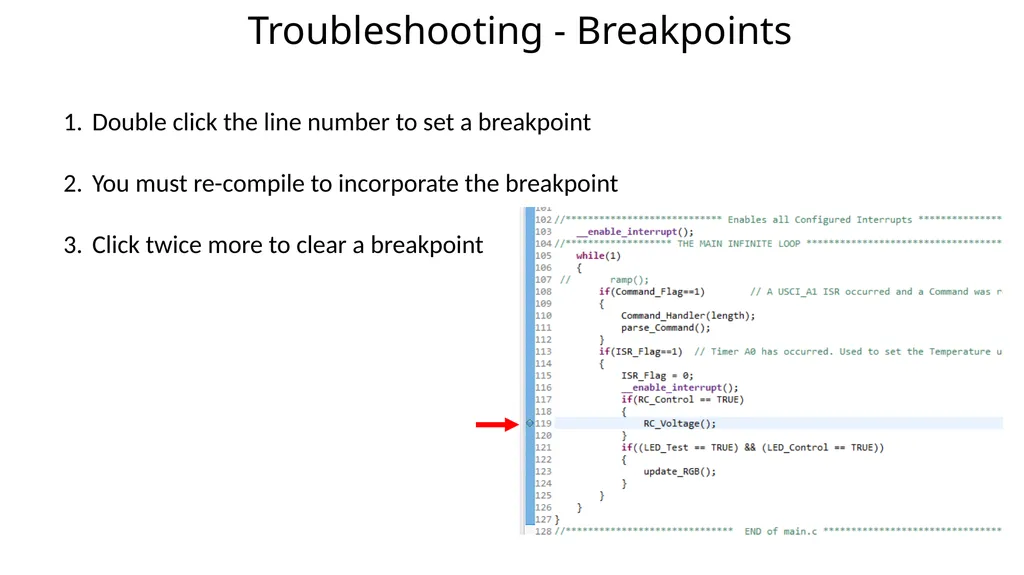
Troubleshooting - Breakpoints Double click the line number to set a breakpoint�
You must re-compile to incorporate the breakpoint�
Click twice more to clear a breakpoint<br>
22
Serial Communications via UARTs�Setting up the Terminal Window<br>
23
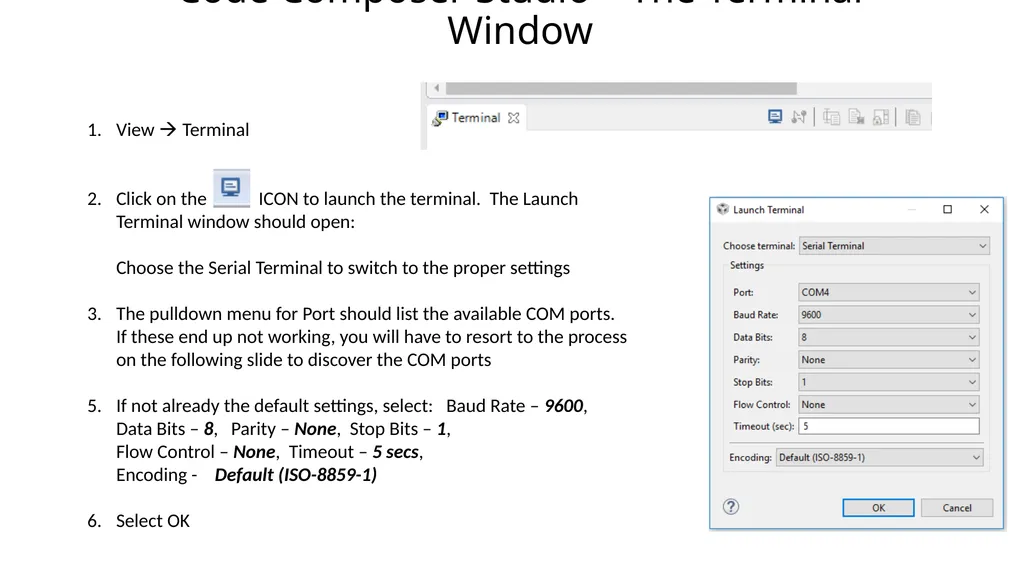
Code Composer Studio – The Terminal Window<br>
24
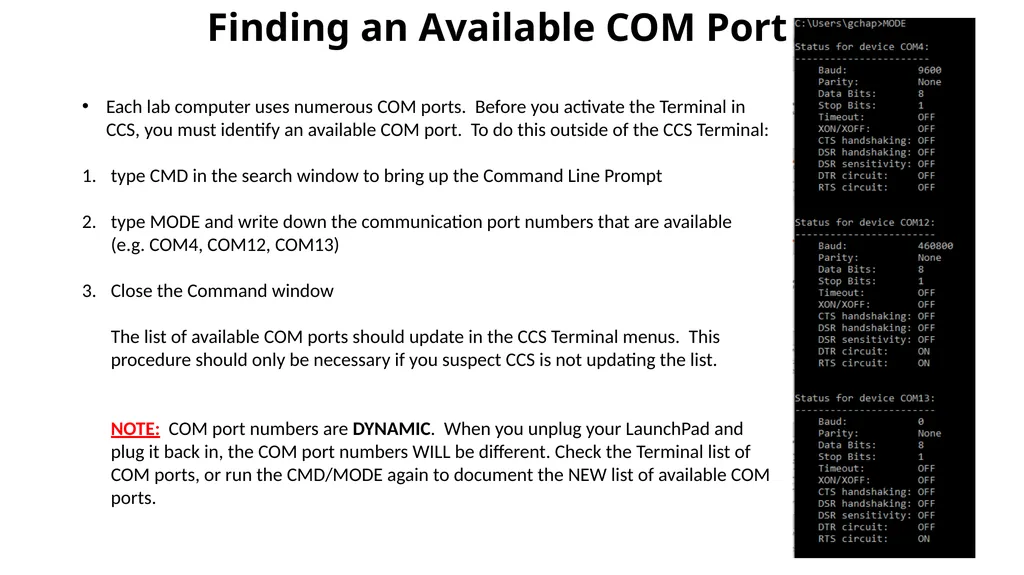
Finding an Available COM Port Each lab computer uses numerous COM ports. Before you activate the Terminal in CCS, you must identify an available COM port. To do this outside of the CCS Terminal:�
type CMD in the search window to bring up the Command Line Prompt�
type MODE and write down the communication port numbers that are available �(e.g. COM4, COM12, COM13)�
Close the Command window��The list of available COM ports should update in the CCS Terminal menus. This procedure should only be necessary if you suspect CCS is not updating the list.���NOTE: COM port numbers are DYNAMIC. When you unplug your LaunchPad and plug it back in, the COM port numbers WILL be different. Check the Terminal list of COM ports, or run the CMD/MODE again to document the NEW list of available COM ports.<br>
25
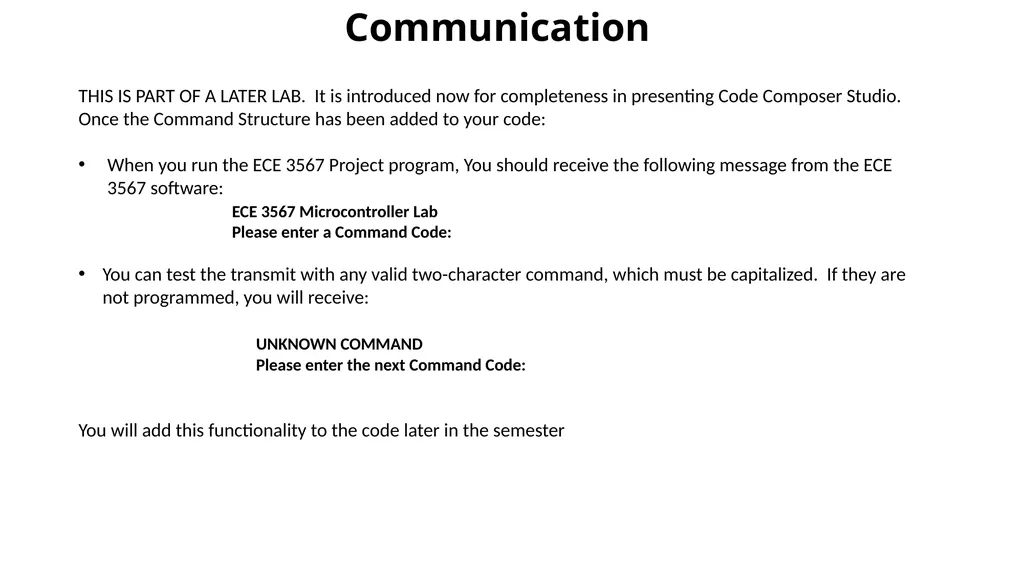
Communication THIS IS PART OF A LATER LAB. It is introduced now for completeness in presenting Code Composer Studio.�Once the Command Structure has been added to your code:�
When you run the ECE 3567 Project program, You should receive the following message from the ECE 3567 software:
ECE 3567 Microcontroller Lab
Please enter a Command Code:�
You can test the transmit with any valid two-character command, which must be capitalized. If they are not programmed, you will receive:�� UNKNOWN COMMAND� Please enter the next Command Code:�
You will add this functionality to the code later in the semester<br>
26
Introduction to Lab 1�September 17th<br>
27
Lab 1 – Blinking LEDs Goals:
1) Learn to set-up a new Project in Code Composer Studio�
2) Lear to code, compile and run a project in Code Composer Studio�
3) Gain experience with the Bitwise C operators to control external hardware.�
4) Learn how to re-configure your project when the code is moved to a different path.<br>
28
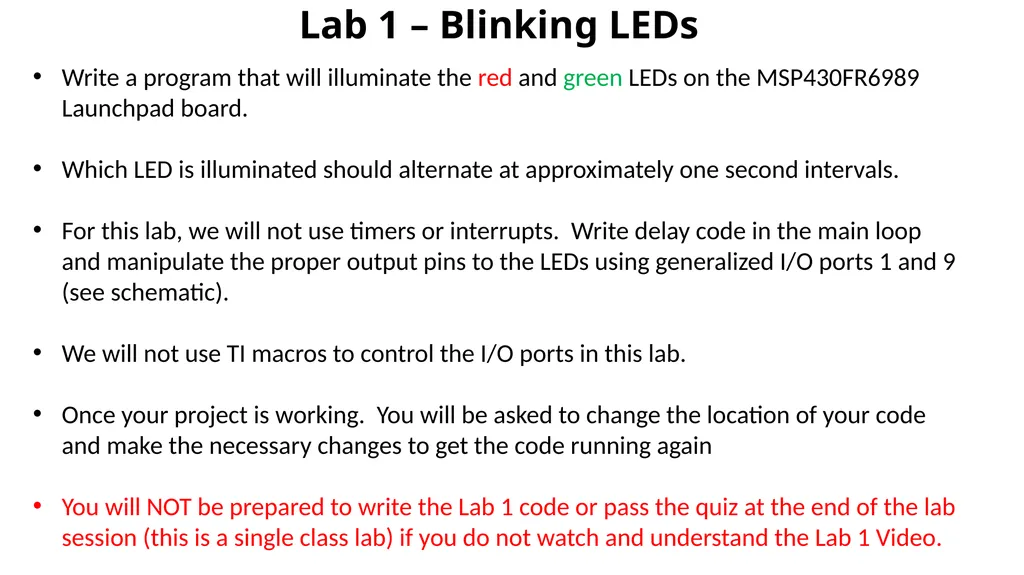
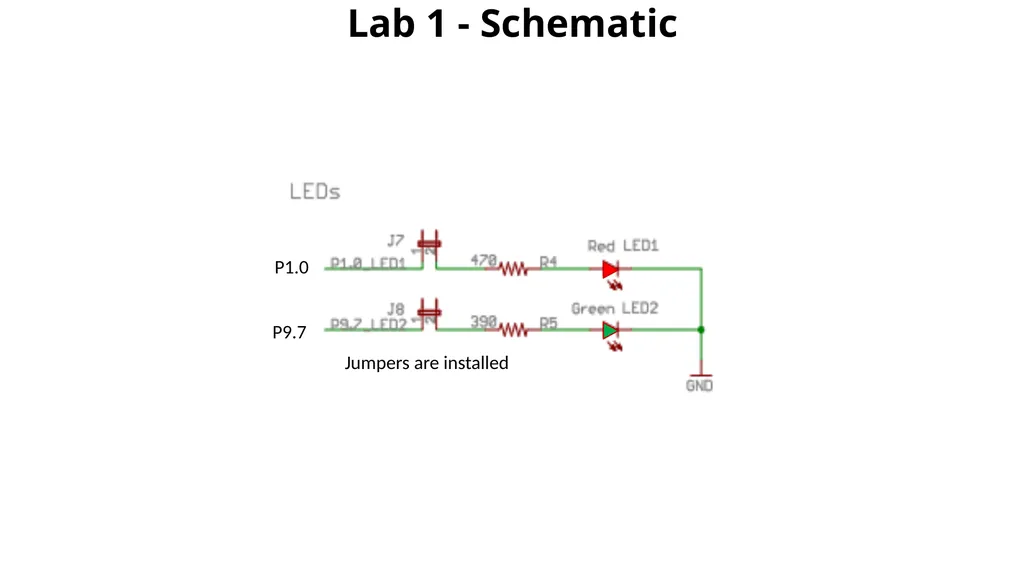
Lab 1 – Blinking LEDs Write a program that will illuminate the red and green LEDs on the MSP430FR6989 Launchpad board.
Which LED is illuminated should alternate at approximately one second intervals. �
For this lab, we will not use timers or interrupts. Write delay code in the main loop and manipulate the proper output pins to the LEDs using generalized I/O ports 1 and 9 (see schematic).�
We will not use TI macros to control the I/O ports in this lab.�
Once your project is working. You will be asked to change the location of your code and make the necessary changes to get the code running again�
You will NOT be prepared to write the Lab 1 code or pass the quiz at the end of the lab session (this is a single class lab) if you do not watch and understand the Lab 1 Video.<br>